
Set your “Junction Party” - you’re given a choice who you want to experience this dream and suffer the gains from it - and note that you may only have Laguna (who is set to Squall) and Kiros available. This will occur if you picked up Timber Maniacs #9 (in the Shumi Village) before this dream, otherwise, if you neglected this magazine, Ward will also be around. Ultimately it doesn’t make a huge difference either way, but it may affect your ability to gain some spells for a third character (Ward’s junction) in the short-term.
Assign what characters you wish, then the dream will commence, with Laguna whining about being forced into menial labor to make some quick - and sorely needed - funds. Forced to be an actor… the poor thing. Afterwards Laguna will don his knightly attire, meet his co stars, and Kiros will be roped into the production as well - cast as the dragon, of all things. Unfortunately for Laguna, something else decides it has better claim to the role than Kiros, and when the cliche fantasy scenario stops being a fantasy you’ll be compelled to take part in a mini-game.
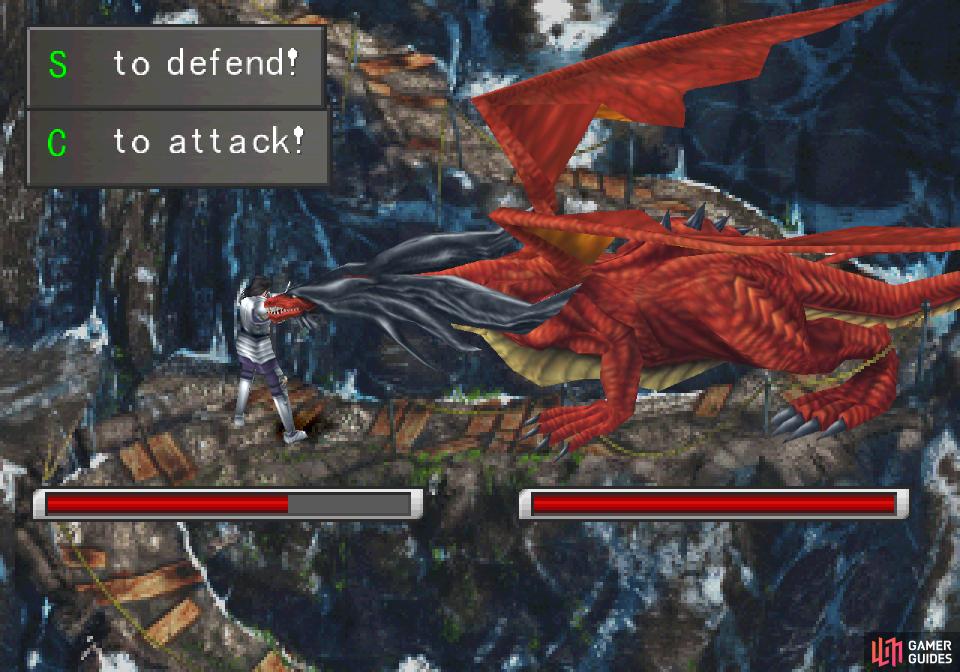
This is much like Squall’s fisticuffs duel with the paratrooper in Galbadia Garden, although much simplified, and if you fail, you can attempt it again immediately. There are only two commands, block ([Talk] button - Square by default) and attack ([Walk/Cancel] button - Circle by default). There’s a rather large delay for either action, so none of this is twitch-reflexes, it’s all just guessing correctly which to do at any given time - one may even say some practice/experience plays a role.
You’ll almost always want to start out with a block (just hold the [Talk] button and hope you block before the dragon attacks), and after blocking you can usually get away with two sword swipes (just mash [Walk/Cancel] repeatedly). Repeat until you’re victorious, and if you’re in doubt, block and wait out the dragon’s attack. The dragon, for its part, has two attacks, a long, rearing back affair and a quick lunge that can happen out of seemingly nowhere. It’ll take the dragon three hits to defeat Laguna (in which case, merely try again) while it’ll take Laguna… quite a few more hits to defeat the dragon, but on the same token, the dragon can’t block.
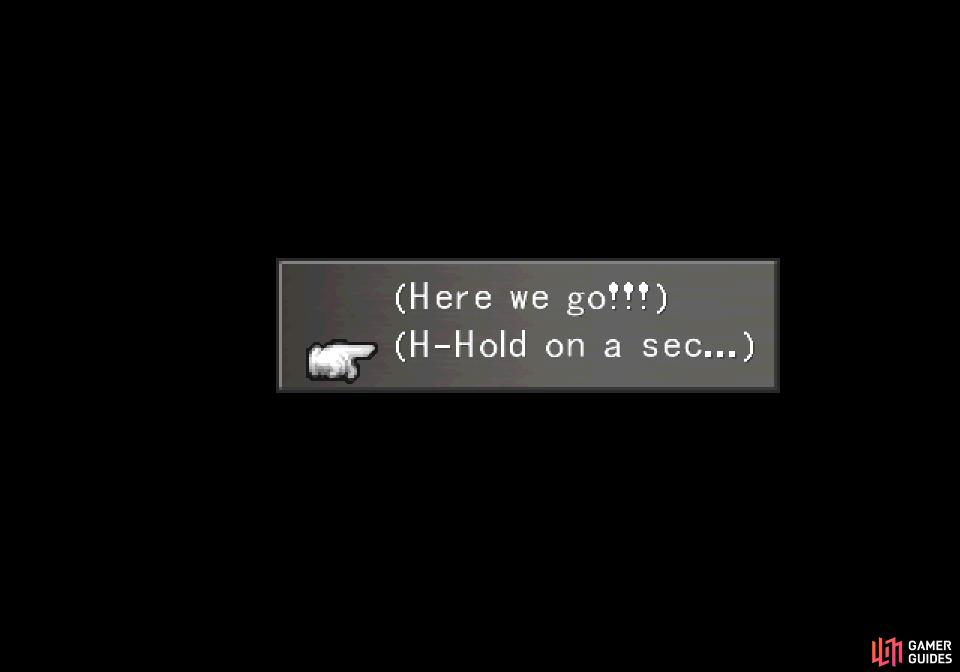
Pick the dialogue option “H-Hold on a sec…” and you’ll get a chance to change your junctions.
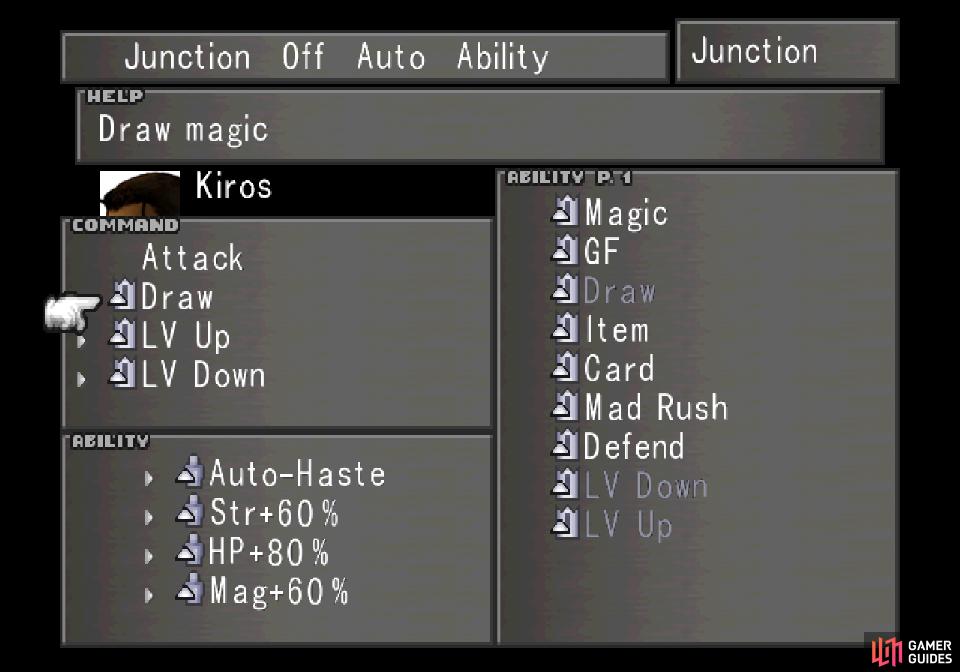
Take advantage of this opportunity to set yourself up for the upcoming fight.
Once you’ve defeated - or rather, momentarily deterred - the dragon, Squall will run off, shortly thereafter joined by his companion(s). When given a choice, pick the option H-Hold on a sec… and the dragon will kindly give you time to retreat, use a Save Point, and adjust your junctions. Despite the “Junction Party” option at the beginning, this really just set who was going to gain XP during this dream, it didn’t equip any junctions, so you’ll need to do that yourself.
Don’t just prepare for a fight - a great opportunity to score some spells lies before you, although the opponent can be a bit rough, and some preparations are in order both to ensure you have access to said spells (especially if you’re a low-level party) and to ensure you don’t get too much XP from the encounter (if that’s still an issue for you. To do this you’ll need to make use of the Tonberry GF - make sure whatever character has Tonberry junctioned has the LV Up and LV Down commands equipped (keep the Draw command as well). While you’re at it, make sure your entire party has a high fire and wind resistance (preferably at least immunity). Simply put, you’re going to want to make sure you can manipulate a foe’s level so you can draw some potent spells, and you’re going to want to be able to shrug off or absorb fire and wind damage. Having Leviathan’s Recover ability active, ensuring your Mag-J is as high as possible, and perhaps having the Card command (to eliminate XP gains outright) also might be a good idea.
When you’re ready, exit back to the right and confront this overgrown salamander! All flippancy aside, however, you’re up against a Ruby Dragon, one of the legit strongest normal monsters in the game.
| Ruby Dragon | |
|---|---|
| Lv: | 1-100 |
| HP: (Lv10) | 6,075 |
| HP: (Lv35) | 23,856 |
| HP: (Lv45) | 32,106 |
| HP: (Lv100) | 89,100 |
| Weaknesses: | Ice (150% damage), Holy (150% damage) |
| Resistances: | Fire (Absorb), Wind (Absorb) |
| Status Resistances: | Immune to Berserk, Confuse, Darkness, Death, Doom, Float, Haste, Poison, Regen, Silence, Stop, Zombie; Card 0% – Drain 0% – Eject 20% – Lv Down 0% – Lv Up 0% – Petrify 80% – Reflect 0% – Sleep 80% – Slow 50% – Slow-Petrify 60% – The End 0% – |
| EXP: | 210 - 4,170 |
| AP: | 14 |
| Draw: (lv1-34) | Aero, Fira |
| Draw: (lv35-44) | Aero, Demi, Firaga |
| Draw: (lv45+) | Firaga, Flare, Meteor, Reflect |
| Mug: (lv1-34) | Inferno Fang x1-2 |
| Mug: (lv35-44) | Inferno Fang x2-3 |
| Mug: (lv45+) | Inferno Fang x4-5 |
| Drop: (lv1-34) | Inferno Fang x1-2, Fury Fragment x2, Star Fragment |
| Drop: (lv35-44) | Inferno Fang x2, Fury Fragment x2, Star Fragment, Energy Crystal |
| Drop: (lv45+) | Fury Fragment x2-4, Energy Crystal x2 |
First off, note that the Ruby Dragon shirks the normal progression for monsters, which usually sees critters reach different spell stocks and mug and drop plateaus at levels 1-19, 20-29 and 30-100. The Ruby Dragon, on the other hand, has a low-level state that runs between levels 1-34, a mid-level state between levels 35-44 before finally reaching its best stats at levels 45-100. If you’re playing a low-level game, or if you’re just not grinding and playing somewhat normally, you’re probably not level 45+, and you really, really want this Ruby Dragon to be. At level 45+ the Ruby Dragon will have Flare and Meteor spells you can draw, which are very, very good spells, indeed.
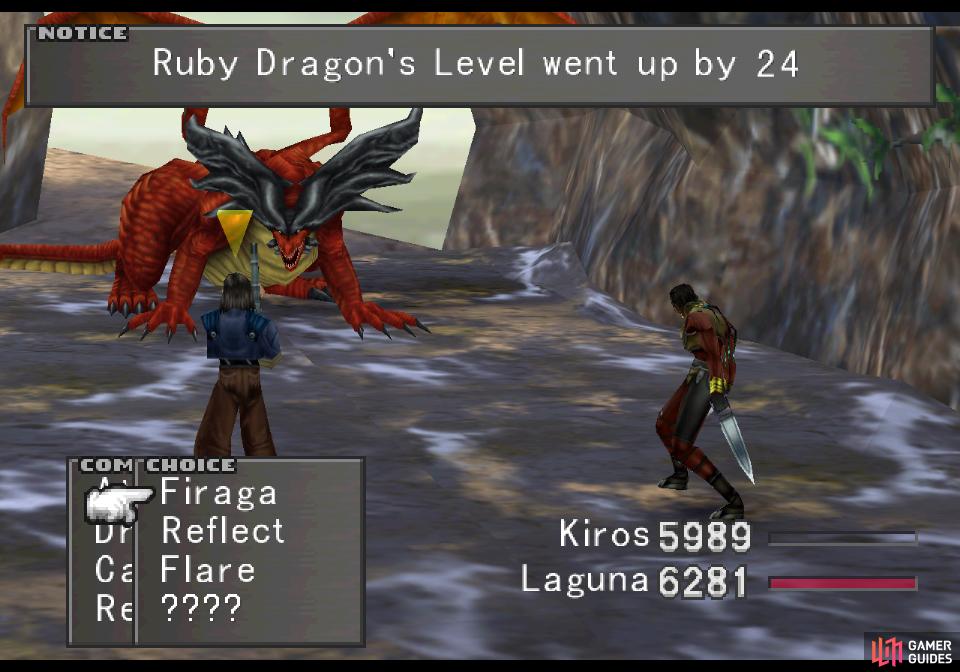
If you’re not a high enough level, Tonberry can help out with its LV Up ability, which will, of course, increase the Ruby Dragon’s level. Do this until it has the Flare and Meteor spells available to draw, but be wary, as the Ruby Dragon’s other stats will get a boost from having its level increased. That said, the Ruby Dragon will generally stick to three attacks, provided you do nothing but draw spells from it - Aero, Fira and standard claw attack. If your resistances are good, the spells shouldn’t trouble you whatever their potency, but at higher levels, their melee damage can increase dramatically (we saw an increase from around 150~ damage at level 10~ to over 800~ at level 45~). If you have good spells junctioned to your HP-J, you could easily have 3,000-4,000 HP at this point in time (6,000 - 7,000 with HP+80% equipped), regardless of your level, and with Leviathan’s Recovery ability you can easily keep everybody fully healed despite the worst the Ruby Dragon can do.
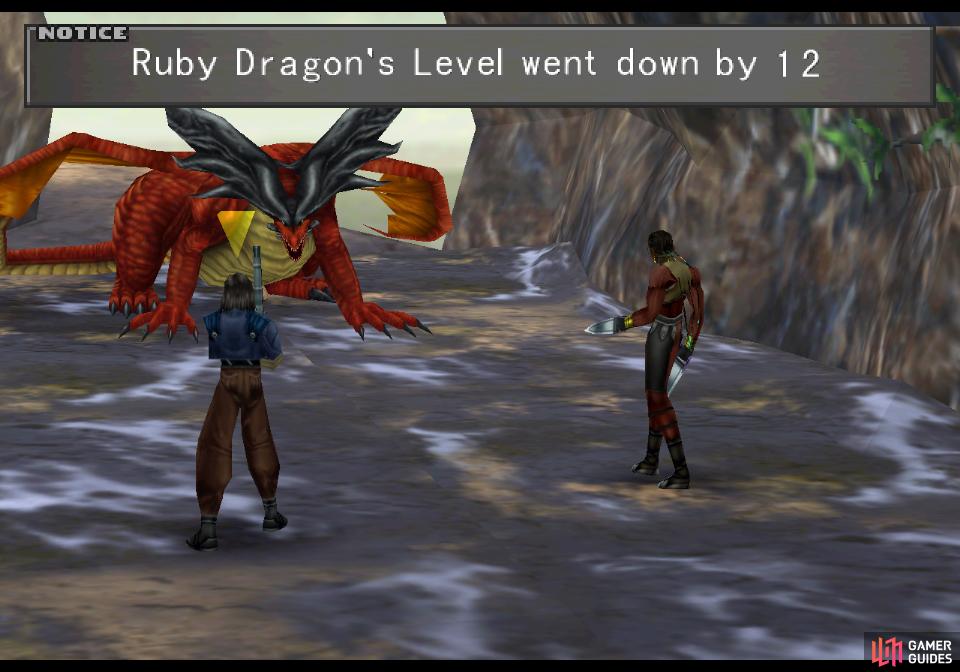
When you’ve drawn what magic you can from the Ruby Dragon, use LV Down to weaken it
As a low level Ruby Dragon won’t give much XP.
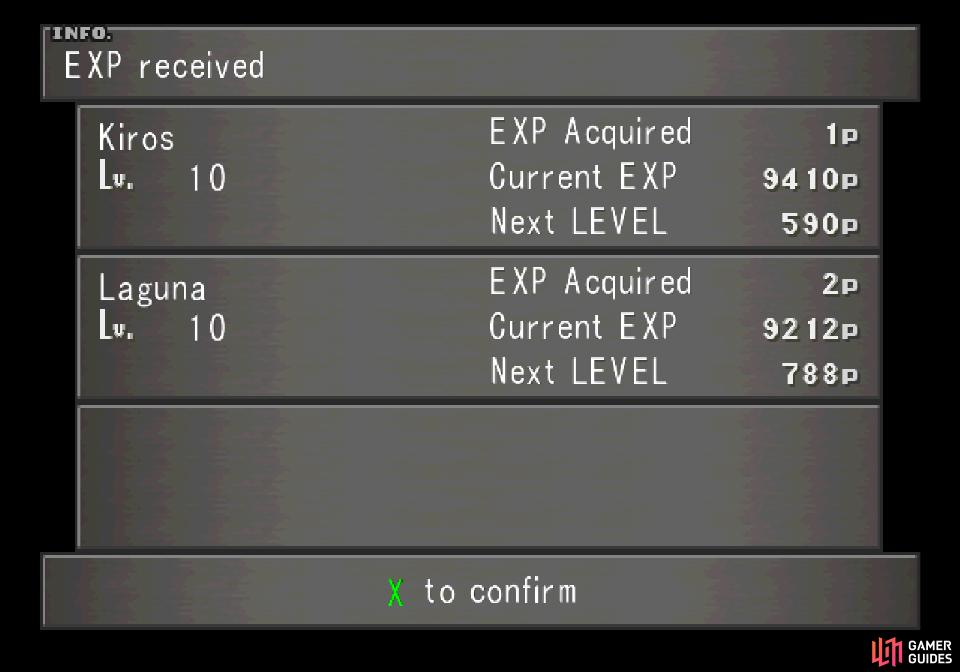
So, boost Ruby Dragon’s level via LV Up until you see the spells you want in its draw list, then set about drawing Flare and Meteor from the Ruby Dragon, using Recovery to heal wounded characters. Once you’re stocked up, use LV Down on the Ruby Dragon until it’s down to the lowest level possible then finish it off with melee attacks. You’ll get some XP, but it’ll be a pittance - 1 - 2 XP isn’t likely to harm anybody.
After you defeat the Ruby Dragon, endure some chatter and eventually Squall will decide to seek out Ellone, but to do that he’ll need to have another chat with Matron.
No Comments