
If you haven’t done so already, make your way back to Balamb Garden and shortly beyond the entrance Quistis will give you yet another tutorial, this time explaining how GFs gain experience and level up, AP and learn abilities, and compatibility. All of this was discussed earlier, so suffer through Quistis’s explanations and she’ll finish by telling you to “change into your uniform and assemble at the 1F Lobby”.
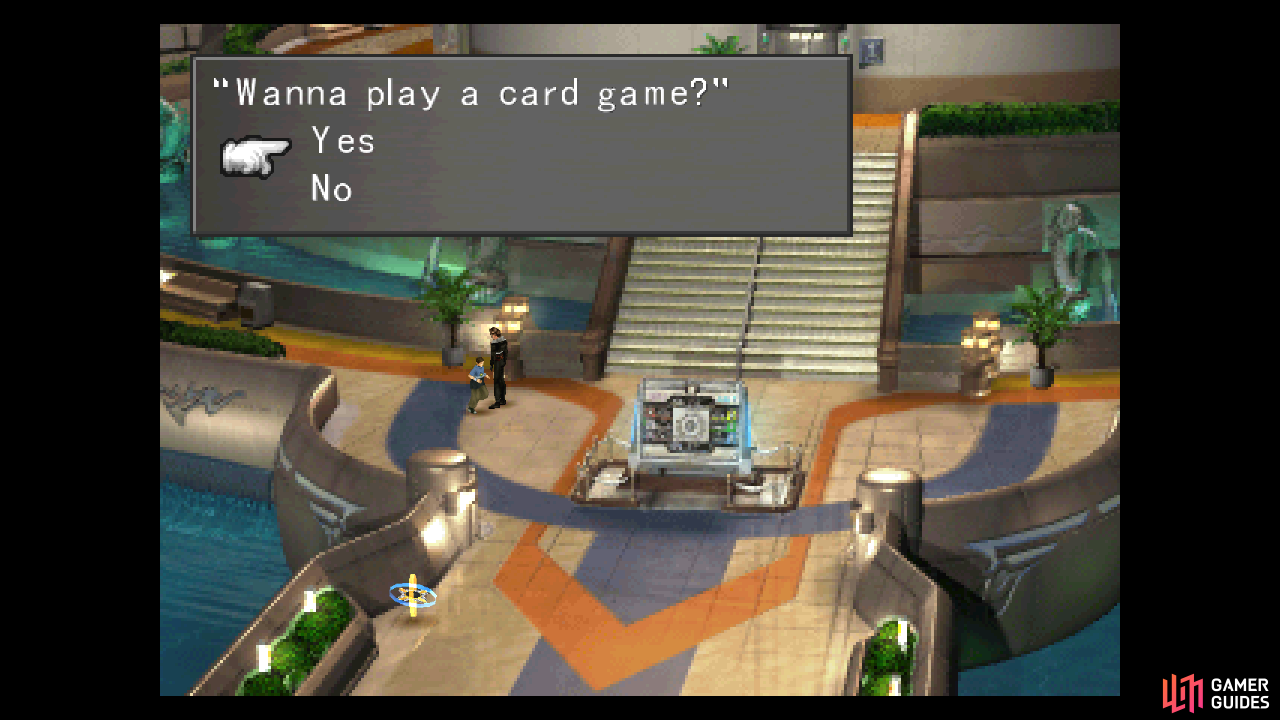
What this should say to you, however, is “you have free time until you bother getting changed”, and in this free time you can finally get around to playing Triple Triad, if you so desire. While Triple Triad is arguably one of the best minigames in Final Fantasy and enjoyable enough in its own right, there are practical reasons to play Triple Triad. When you win a game of Triple Triad you’ll acquire one of your opponent’s cards, and cards can be turned into items with the Card Mod ability, and items can be turned into magic via the Mag-RF abilities. You may have already had a taste of how much more powerful this can make your characters with the Water spells you may have acquired from the Fastitocalon-Fs earlier, but some of the new spells you can acquire are in another league entirely… and so is the corresponding power boost you’ll get for junctioning them.
That sales pitch aside, even if you don’t care to accumulate cards so you can convert them to magic, everybody should play a minimal level of Triple Triad sufficient to acquire a decent deck, including two rare cards which can be won in Balamb Garden. This will enable you to play Triple Triad as you play through the game and travel across the world, gaining rare cards as you go. You can always decide to go acquire common cards later if you’ve a limited appetite for Triple Triad now, but rare cards can be more time-sensitive and should be sought at the earliest opportunity.
If you still can’t be bothered, despite many enticements, skip ahead to the SeeD Field Exam section of the guide.
Triple Triad - Basic Rules
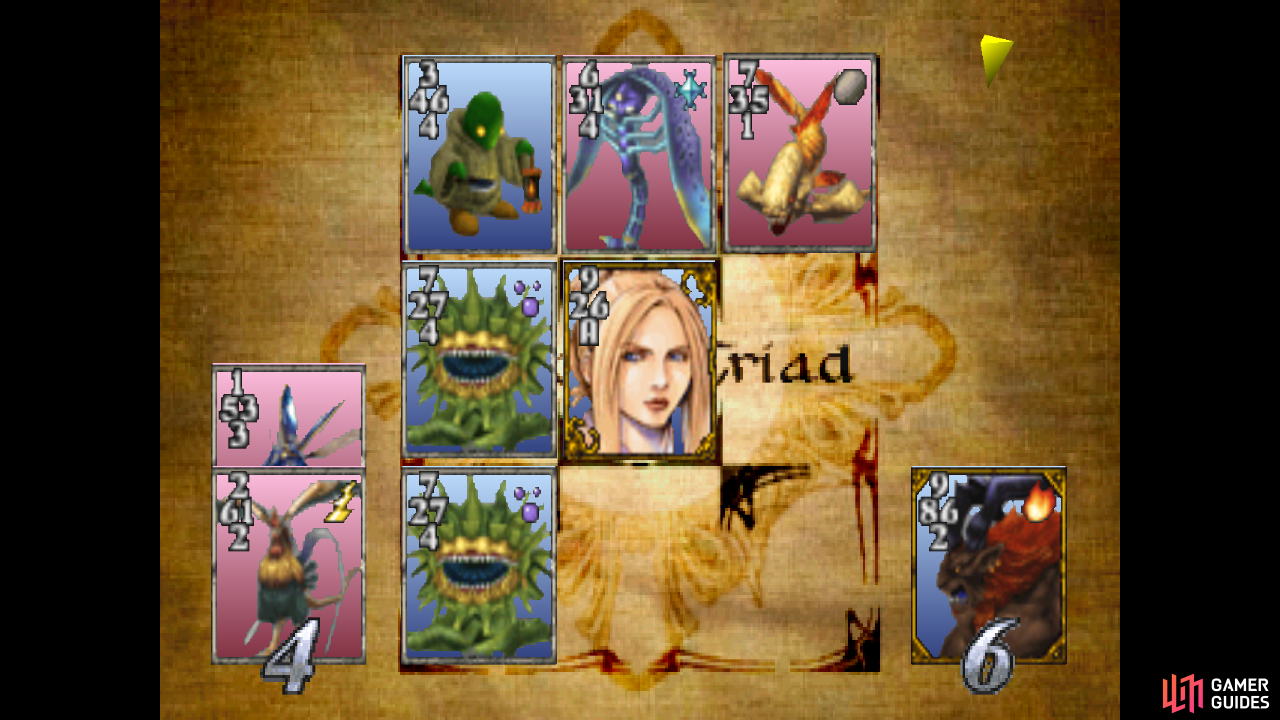
Unfortunately your deck is in such a poor state that you’ll probably need to build it up in stages. A bunch of Level 1 Monster Cards does not a winning deck make, even with Ifrit, but it’ll have to do for now. Before that, however, you’ll need to know how to play the game. The base game is fairly simple: each player gets a hand of five cards (right now you can pick your hand, but this may not always be the case), one player is randomly chosen to go first, and then players place their cards on a 3x3 grid. The game ends when all nine spots on the grid are filled, and the player in possession of the most cards wins.
Each card has numbers on each side indicating the card’s strength. When a card is placed adjacent to another card, the card that was placed checks the number on the adjacent side against the number(s) on the side(s) of adjacent card(s) already on the board, and if its number(s) are higher, the adjacent card(s) are flipped, changing ownership. For example, the Gayla card has the following numbers: left (4), up (2), right (1) down (4), while the Geezard has: left (5), up (1), right (4), down (1). If the Geezard is played to the right of the Geezard, the Geezard’s left (5) side will be played adjacent to the Gayla’s right (1) side. Since 5 is greater than 1, the Gayla would be flipped, changing ownership. On the other hand, if the Geezard is played to the left of the Gayla, its right side (4) will be adjacent to the Gayla’s left side (4), which is not higher. Hence, neither card would be flipped. Likewise if the Gayla was played above or below the Geezard, it’s up (2) and down (4) numbers exceed the Geezard’s (1), which would flip it.
A card can typically only flip another card when it is played, so you don’t need to worry about placing the weak edge of a card against the strong side of an already played card. Indeed, protecting your weak fronts with the edge of the board or with other cards is an effective way to protect them. The goal, then, is to place cards in ways that leave their weaker sides protected and their stronger sides exposed, making them less likely to get captured, while also attempting to capture enemy cards. A card can be flipped repeatedly in the same game, so long as its side numbers are overcome by newly placed adjacent cards. Cards captured during the game do not permanently change owners (well… unless a certain rule is in play…) but the side that wins a bout will get to pick one (or more - but for now, just one) card in the enemy’s hand and add it to their collection. Obviously you’ll want to win games and claim enemy cards without losing your own… and you especially don’t want to lose your rare cards, so some save/loading is recommended, especially at the start.
The rules right now are fairly simple, and with a little chicanery we’ll make sure they stay that way, but that’s a matter for another day. For now the only rules in play are the “Open” rule and the “Trade Rule: One” rule, which stipulates that you can see each other’s hands and the winner gets to claim one card from the loser’s hand. Again, different regions have different rules, and playing with different rules can cause those rules to spread. Generally the more complicated the game is, the less it favors you, as you can accumulate a host of rare cards far exceeding the decks of any other player. This allows you to simply brute-force your way to victory in most matches, and that’s largely how things currently stand in Balamb Garden.
Triple Triad - Manipulating Trade Rules
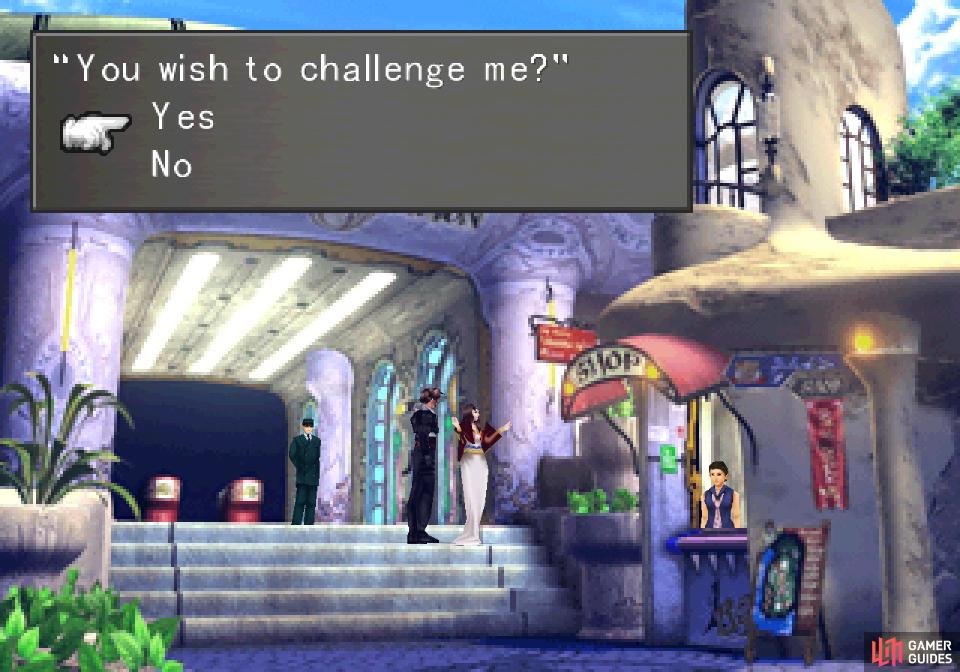
You can potentially speed the card collecting process up significantly if you’re willing to go a bit out of your way. Leave Balamb Garden and follow the road to Balamb (stay on the road to avoid random encounters and flee from fights if necessary if you wish to avoid gaining EXP). From where you enter Balamb head down past the gas station, then down (towards the camera) to the left to reach the train station and talk to a woman - the self-proclaimed Queen of Cards - on some steps in front of the train station.
Challenge her to a game of cards and note the trade rule - you don’t need to actually play a game with her. If the rule is “Diff” exit out of the match before starting, then attempt to play cards with another character; the train conductor standing nearby atop the stairs is a good choice, being nearby and all. If he’s playing with the “Diff” rule, congrats, you’ve spread the “Diff” rule. If not, repeat the process with the Queen of Cards until another player (again, ideally the train conductor) is using the “Diff” rule. You do not want to spread the “All” or “Direct” rules, as the former devolves into “Direct” and the latter causes only cards directly captured during play (both yours and your opponent’s) to change ownership after the match.
Once you’ve made sure the train conductor is using the “Diff” rules, return to Balamb Garden and play with people there as normal. They should have the “Diff” rule in play for a random amount of games, but will eventually devolve back to the “One” rule. At this point in the game, each time you play cards, the “One” rule has a random chance of being re-established in Balamb, so don’t expect this rule change to last forever.
With the “Diff” rule in play, the wider the margin of victory, the more cards you’ll win. A 6-4 victory will earn you two cards, a 7-3 victory will earn you four cards, and an 8-2 victory or better will get you all the opponent’s cards. While there’s likely not more than one or two cards you’ll really want each hand, it does speed the process up immensely.
(1 of 3) While your starting deck is pretty weak, Ifrit can give you enough of an advantage to gain some better cards
Building a Winning Deck
Right now you’re on the wrong side of the “brute force” equation, as nearly every other player will have cards that exceed your own. Some luck and skillful play will be required to pull out a victory at first, but it’s just a numbers game that’s bound to come down in your favor eventually… provided you practice a bit of save/loading and have a child’s grasp of numbers, that is.
Make your way to the part of the Balamb Garden - Hall area with the Save Point, save your game, then exit the screen to the right. Your first foe should be seated on a bench in the circular hallway just before the library, near the screen transition to the Save Point screen. He has around a 50% chance to spawn, so if you don’t see him sitting there, just run back to the Save Point screen and return. When he’s there, approach him and challenge him to a game of cards (press Square by default) and he’ll admit to being a new player… although his definition of “new player” still means he’s got up to Level 3 Monster Cards. They must be buying booster packs somewhere!
The guy on the bench can play a variety of Level 1, 2 and 3 Monster Cards, and while the low-end isn’t much better than what you’ve got, some of his cards are obviously superior. That said, Ifrit is better than anything he can play, and if you can keep from losing a card early by playing conservatively, playing Ifrit in any position that covers his weak bottom number is a very strong move. The cards he - and most card players - will play are rather random, so he might not throw in any good cards, or he might have a hand full of Level 3 Monster Cards. It’s all luck, so some trial and error is, unfortunately, a necessary evil when it comes to Triple Triad.
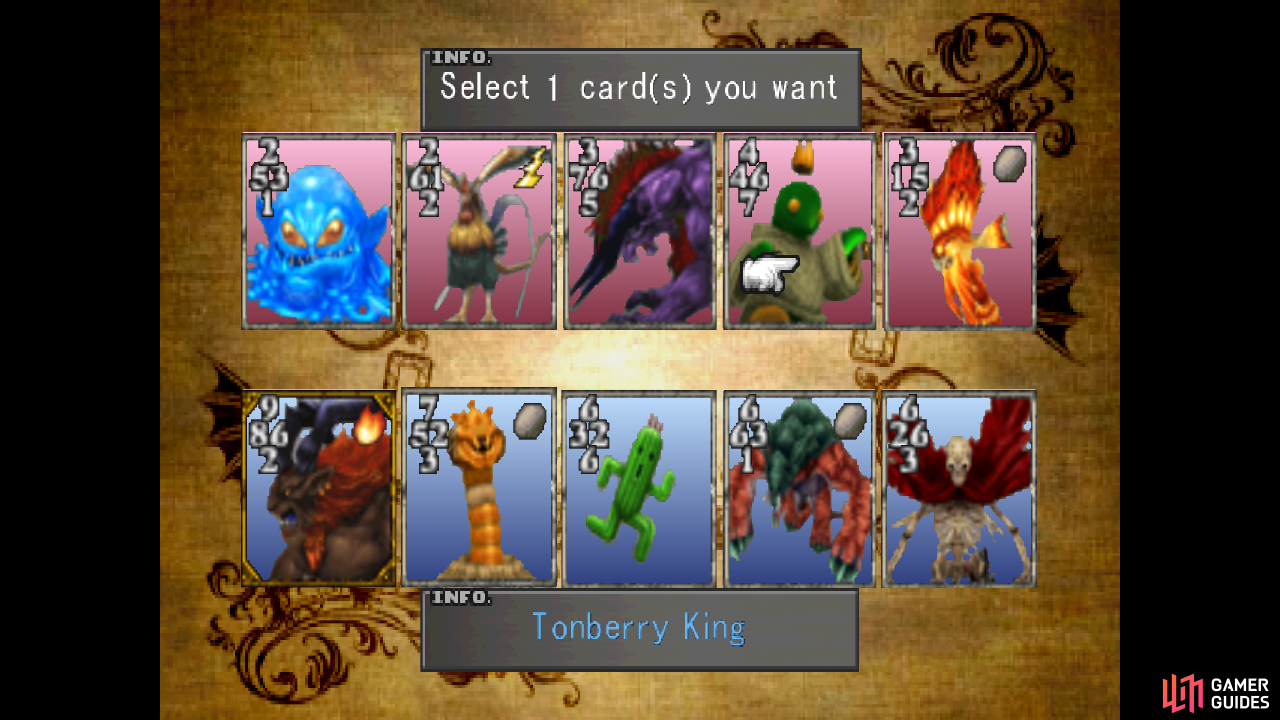
With some luck and perseverance you should be able to beat him, and as you win and claim some of his better cards, the easier subsequent victories will be. Just save after every win and if you lose Ifrit (he will take it from you if you lose) reload and try again. Some good cards to grab include the Abyss Worm, Armadodo, Cactuar, Fastitocalon, and Forbidden. Assemble a hand consisting of these cards and Ifrit and you’ll be ready to move on to the next challenge.


After building up your deck some, start playing the gatekeeper
he’s got better cards, harder to beat, but worth more if you win
Return to the Save Point and from there head down to the Balamb Garden gate, where your next opponent should be… none other than the gatekeeper himself! His cards also vary considerably in quality, including selections from Level 1 - 5, and this huge gap in card quality can make for a somewhat uneven difficulty. Some games will be trivial, as he’ll play nothing but Level 1 -2 cards, but if he stocks up a hand full of Level 4 - 5 cards… well the difficulty increases considerably. Some of his better cards include the Elnoyle, Behemoth, Elastoid, Chimera, Tonberry King, Ruby Dragon, Wedge, Biggs and especially the Malboro… basically any Level 5 Monster Card that can present a front of 6s and 7s is going to be worth picking up.
Challenge the blue shirt-wearing kid running around the hallway
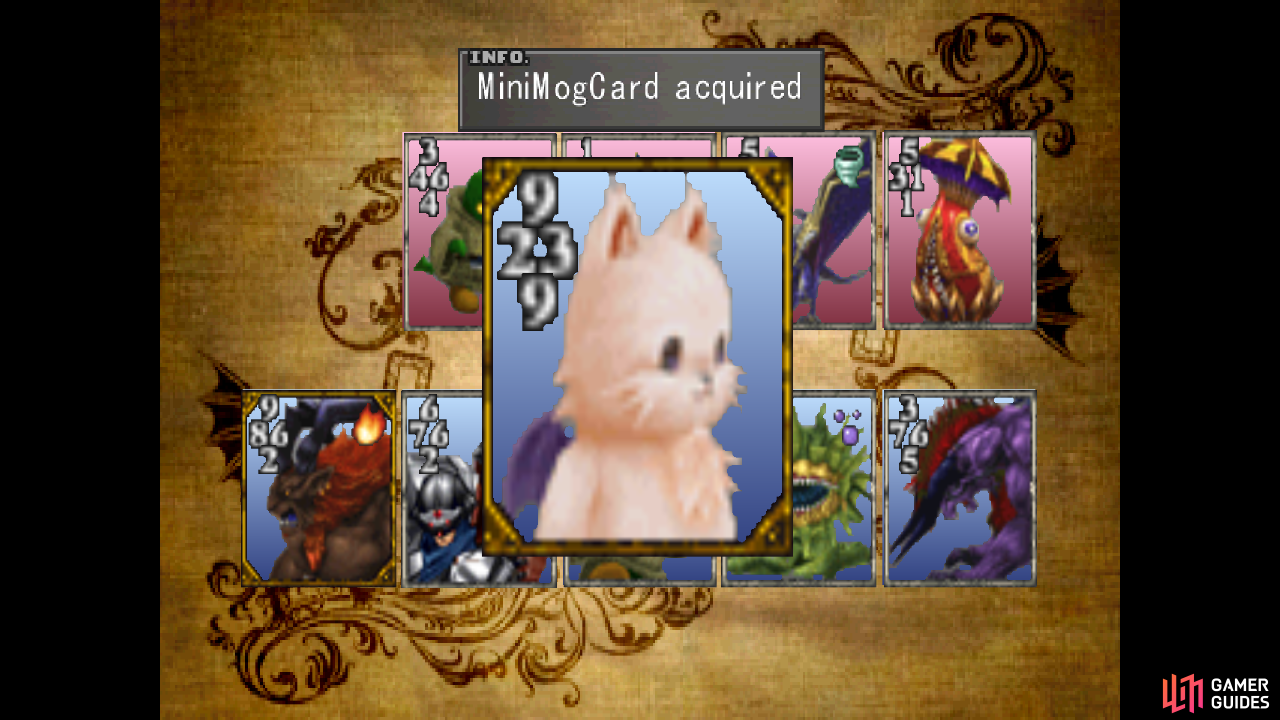
and defeat him to win his MiniMog card
If you can score some Level 5 Monster Cards, you’ll be in good shape… good enough shape to chase a rare card, in fact. Go back to the Save Point screen and note a kid in a blue shirt that sometimes runs along the top of the hall. To catch him, exit to the screen to the right and return, then head left until you run into him. If you can interact with him, he’ll play cards with you, and while the majority of his cards aren’t much better than the guy on the bench you won your first Level 3 Monster Cards from, he does possess the rare MiniMog card. Like most players, the cards he’ll play are random, and he may not play MiniMog on your first attempt. Just keep playing him until he does, and if you win, nab it and add it to your collection. It’s also worth noting that while his rare card is stronger than average, most of his cards aren’t as strong as the gatekeeper’s can be, so if you want a break from the gatekeeper or he’s giving you trouble, try to nab MiniMog from this kid.
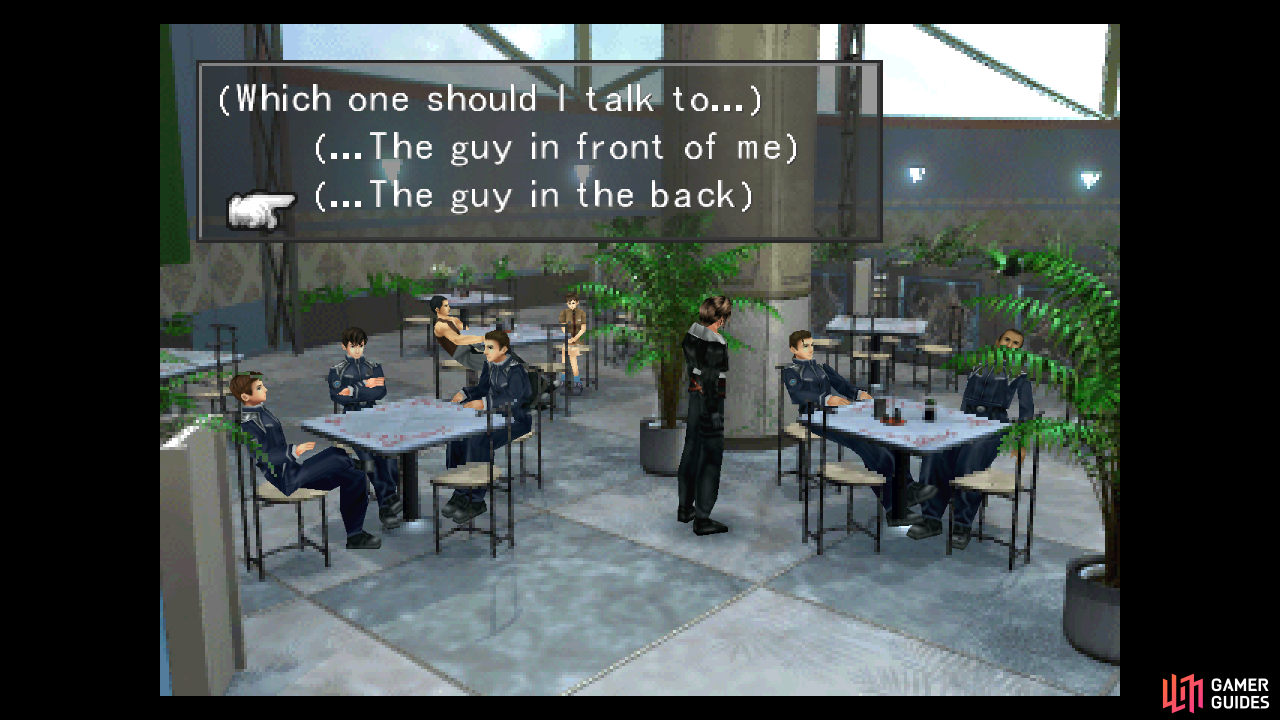
Play the Trepe Groupie sitting in the back
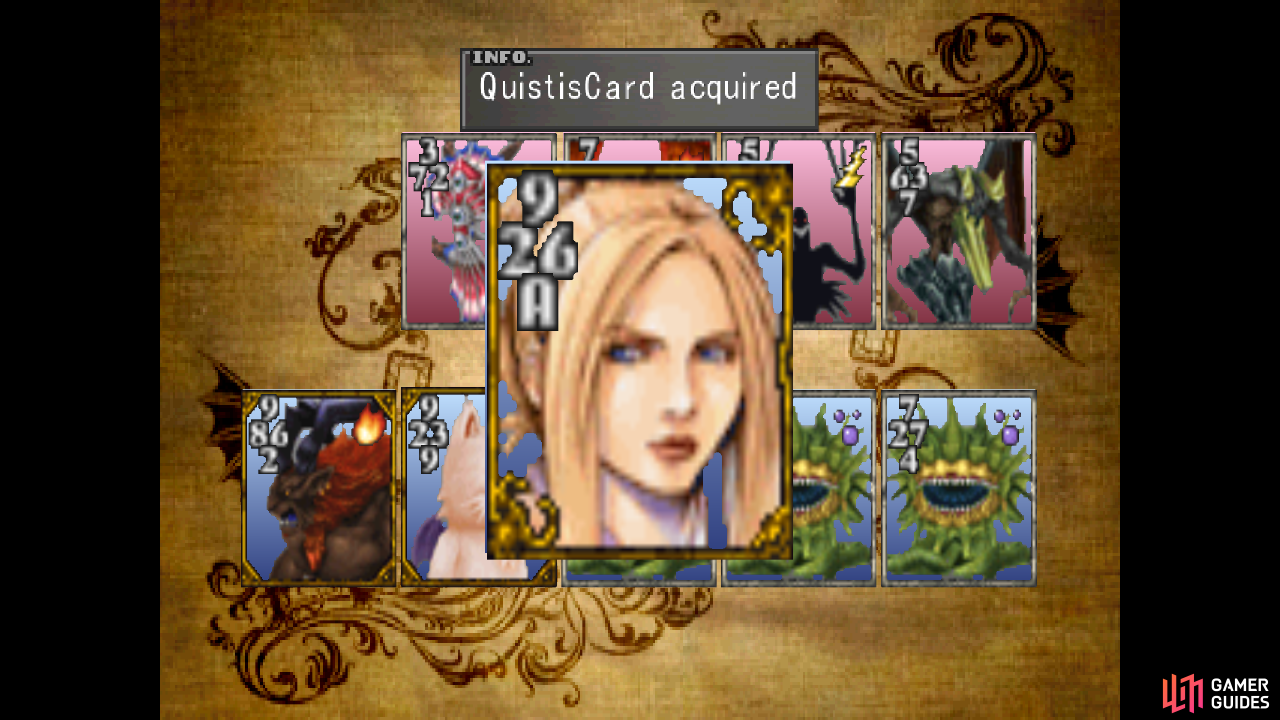
and win his excellent Quistis card
Once you’re done with the gatekeeper and the running kid and have two rare cards and a variety of Level 5 Monster Cards to fill out your hand, it’s time to go after the best card you can currently get your hands on. Make your way to the cafeteria and approach a table with two male students sitting at it. Attempt to play cards with one and you’ll be prompted to choose; pick “..The guy in the back“ and challenge Trepe Groupie #1 to a game of cards. He’ll typically play Level 2 - 5 cards, but the real prize is the Quistis card he possesses. Again, he won’t always play it, but keep at it until he does, defeat him, then claim the Quistis card for your own.
Once you possess Ifrit, MiniMog, Quistis, and an assortment of Level 5 Monster Cards, you should be the undisputed master of Balamb Garden’s card players… at least the ones who will play you now. That being the case, you’re in a good position to either stop and move on to other things if you’re sick of cards, or to really make some serious gains via Card Mod. If the former, skip ahead to The Field Exam, while if you want to score some magics you have no business possessing yet, continue reading the section below, “Card Mod Gains in Balamb Garden”.
Card Mod Gains in Balamb Garden
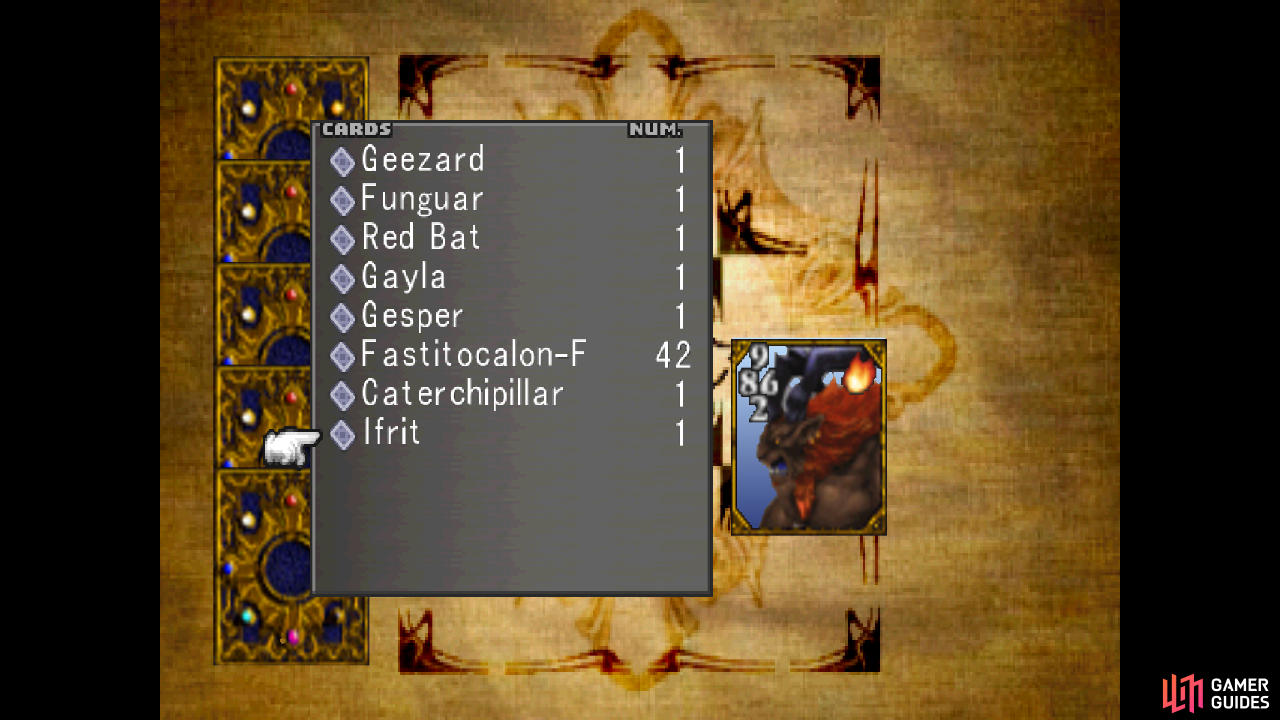
If you assembled the deck the previous section was devoted to, nobody in Balamb Garden should be able to challenge you… not with these rules or at this time, anyways. That said, this section won’t be about winning - that should be a given - but about harvesting choice cards that can be used for various purposes. There are two goals you can strive for here: acquiring cards that can be turned into items, which can be further processed into spells, and getting the odd item via Card Mod that might be useful later. Say, an item that Quistis can consume to teach her new Blue Magic, or components you’ll need to create new weapons. The magic will be prioritized, since it’s something you can immediately put to use, while the latter options are there… mostly because sometimes your opponents will just play junk and you’ll have to choose the least useless of their cards.
While most of the opponents you played previously can field useful cards, you should seek out a new player for the best selection. Head to the library and on the library’s first screen find a man standing near a bookshelf. Vague description aside, it’s the only male character on this screen, so he shouldn’t be hard to find. He’ll generally play Level 1 - 5 cards, including a few cards you may not have seen before, like the Blitz and Hexadragon. Below is a list of cards that can be turned into items that can then be converted to powerful magics which you should look out for:
| Card | Card Mod Items | Magics Acquired | Ability |
|---|---|---|---|
| Abyss Worm | 1 = Windmill x1 | 1 = Tornado x20 | T Mag-RF |
| Ruby Dragon | 10 = Inferno Fang x1 | 1 = Flare x20 | F Mag-RF |
| Snow Lion | 1 = North Wind x1 | 1 = Blizzaga x20 | I Mag-RF |
| Blitz | 1 = Dynamo Stone x1 | 1 = Thundaga x20 | T Mag-RF |
| Hexadragon | 3 = 1 Red Fang x1 | 1 = Firaga x20 | F Mag-RF |
| Imp | 1 = Wizard Stone x1 | 1 = -aga Magic x5 | any Mag-RF |
| Thrustaevis | 1 = Shear Feather x1 | 1 = Aero x20 | T Mag-RF |
| Vysage | 1 = Wizard Stone x1 | 1 = -aga Magic x5 | any Mag-RF |
The cards you’ll want to shoot for are listed preferentially, so if you get a choice between a card lower on the list or one higher on the list, you’ll probably want to take one higher. The best spell you can get here is Flare, but since it takes ten Ruby Dragon cards to refine into one Inferno Fang which in turn refines into twenty Flare spells… well, that’s just a silly amount of grinding that probably isn’t worth your time.
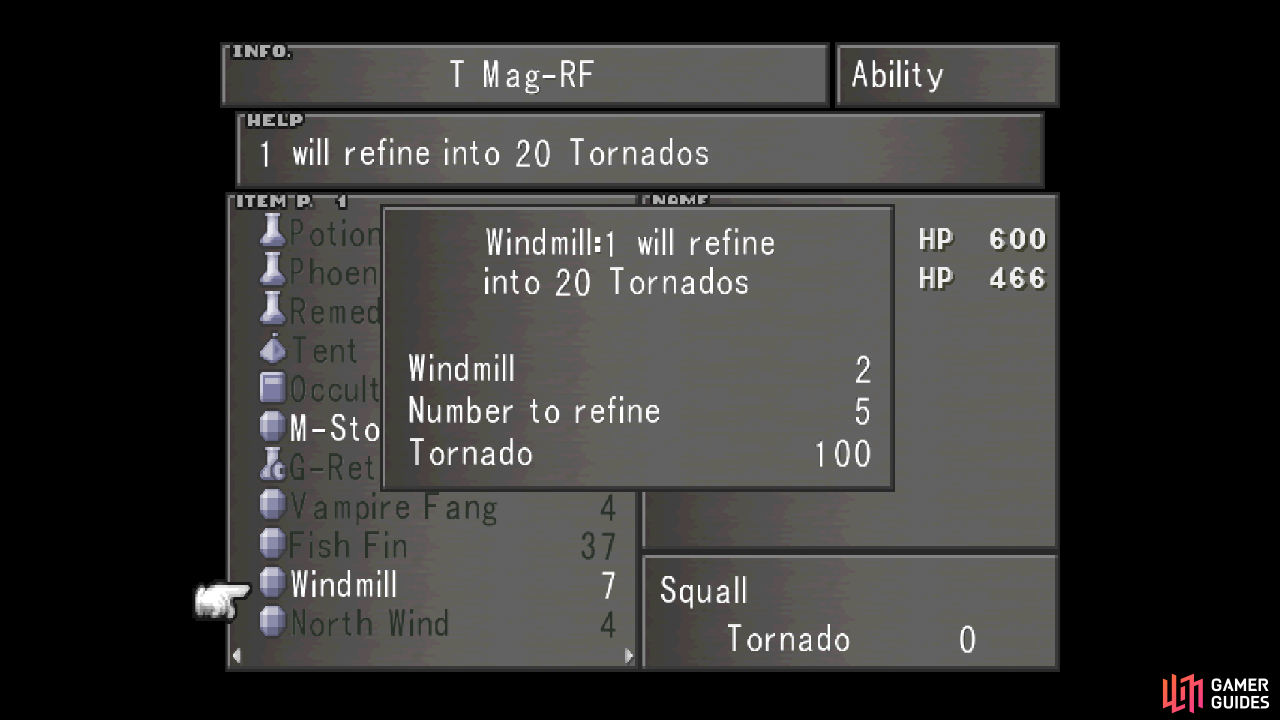
You can turn Blitz cards into Windmills, and Windmills into Tornado magic
which is in another league than even Water magic
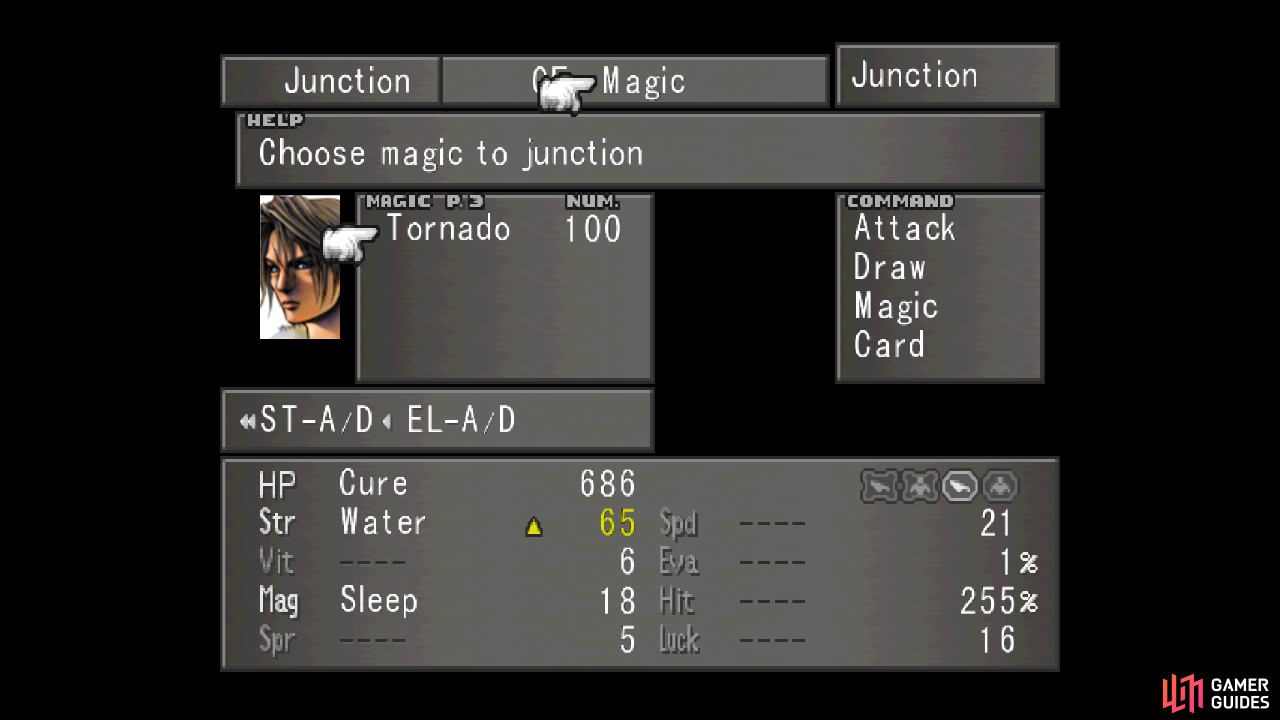
The big winner here is the Tornado spell, which can be obtained by refining one Abyss Worm card into a Windmill, then using the T Mag-RF ability to turn that into twenty Tornado spells. Somewhat higher than even the -aga spells, Tornado junctions incredibly well into Strength, Magic and HP. Junction it to Strength and you’ll get a character with over 60 Strength, which is nearly twice as high as what a junctioned Water spell would get you. It’s frankly overkill at this point in time, and considering how common Abyss Worm is played and how many Tornado spells you can get from each one it’s really easy to recommend you get at least one stock of 100 Tornados. Ideally you’ll get three, however, one for each party member you can have at any given time.
After that you have all the -aga spells, the highest-tier of the basic element spells: Blizzaga, Firaga and Thundaga. They’re not as powerful as Tornado, but you’ve got more than one stat to boost, so having stocks of these is a fine secondary objective. That said, they’re paradoxically not any easier to acquire than Tornado. You can acquire Blizzaga by using Card Mod to turn a Snow Lion card to a North Wind, and refining that into twenty Blizzaga spells via the I Mag-RF ability. You can use Card Mod to turn a Blitz card into a Dynamo Stone, which can be refined into twenty Thundaga spells via the T Mag-RF ability. Finally, Firaga is harder to obtain, as it takes three Hexadragon cards to Card Mod into one Red Fang, which in turn can be refined into twenty Firaga spells via F Mag-RF. As a tertiary objective, the Imp and Vysage cards can both be turned into a Wizard Stone, which can be refined into any -aga spell. It’s not a great rate of return, but if there’s nothing else to grab…
A good goal to set it to acquire three stacks of Tornado spells… or rather, the materials to make three stacks. 300 Tornado spells will require fifteen Windmills, or fifteen Abyss Worm cards, which isn’t too much work, all things considered. Secondarily, getting at least three stacks of any -aga spells would be useful to boost stats like Magic or HP. This will probably happen on its own, as you’ll have no choice but to acquire cards like Snow Lion, Blitz, Hexadragon, Imp and Vysage as you shoot for Abyss Worms.
Some cards can be refined into useful items that Quistis can use
to teach herself new Blue Magic abilities
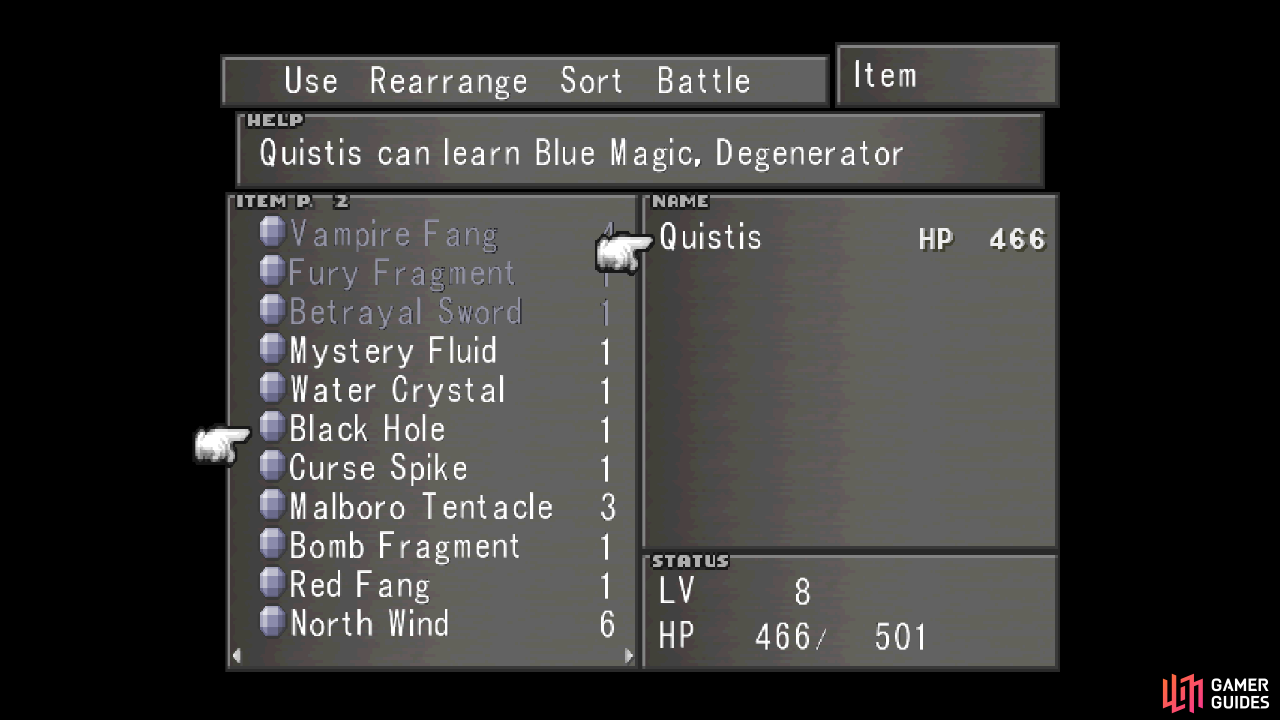
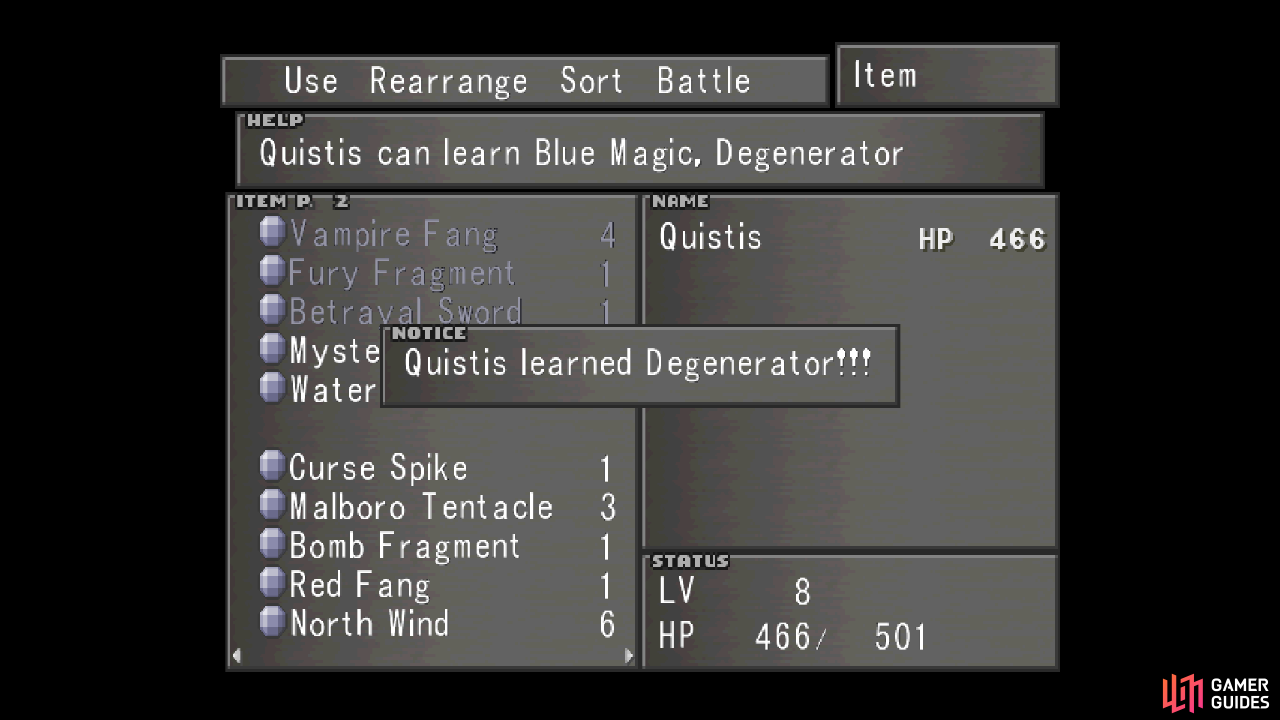
With the magic covered, let’s go over some cards that might not contribute much to your magic stores, but may help out on a longer-term basis. Again, this isn’t to say you should hunt these cards down specifically, but if you have nothing better to grab, it’ll help you make informed choices. Quistis’s limit break (a special attack that she can occasionally perform when she’s at low health) is Blue Magic, which allows her to use a variety of different abilities. She starts out with the Laser Eye ability and to acquire more she’ll need to consume (perhaps not literally, but who knows?) items… some of which can be created via Card Mod. A list of the cards, the items they can be turned into, and the Blue Magic you can learn from them follows:
| Card | Card Mod Items | Blue Magic Learned |
|---|---|---|
| Behemoth | 10 = Barrier x1 | Mighty Guard |
| Caterchipillar | 1 = Spider Web x1 | Ultra Waves |
| Creeps | 1 = Coral Fragment x1 | Electrocute |
| Fastitocalon | 1 = Water Crystal x1 | Aqua Breath |
| Gayla | 1 = Mystery Fluid x1 | Acid |
| Gesper | 1 = Black Hole x1 | Degenerator |
| Malboro | 4 = Malboro Tentacle x1 | Bad Breath |
| Ruby Dragon | 10 = Inferno Fang x1 | Fire Breath |
| SAM08G | 1 = Running Fire x1 | Gatling Gun |
| Tri-Face | 1 = Curse Spike x1 | LV?Death |
While some of these are of dubious value (do you really want to waste twenty Flare spells to learn Fire Breath?), Mighty Guard is a great buff that can potentially apply Protect, Shell, Haste, Regen, Float and Aura while Bad Breath can inflict numerous status effects (Berserk, Blind, Confuse, Death, Doom, Petrify, Poison, Silence, Sleep, Slow, Slow Petrify, Stop, Vit 0 and Zombie) on all enemies. Most of the other Blue Magic abilities are direct-damaging dealing attacks, but Degenerator outright kills most foes save bosses and a foe odd normal enemies like the Cactuar, Grat, Lefty, Righty, Tonberry and Vysage.
Finally, some cards can be turned into items that are useful for crafting weapons. This is at best a tertiary goal, and you should really only bother with some of these if there’s just nothing else to pick, card-wise. You won’t be crafting weapons terribly soon, and you won’t need large numbers of most of these ingredients (save the Screw, Sharp Spike and Steel Pipe, which are common weapon ingredients) but if you can grab a few cards now, you might save yourself some hassle later. This isn’t meant as a comprehensive list, and overly-common items that you might not need in great numbers may be omitted.
| Card | Card Mod Items |
|---|---|
| Adamantoise | 3 = Turtle Shell x1 |
| Armadodo | 1 = Dino Bone x1 |
| Belhelmel | 1 = Saw Blade x1 |
| Blitz | 1 = Dynamo Stone x1 |
| Blue Dragon | 4 = Fury Fragment x1 |
| Bomb | 1 = Bomb Fragment x1 |
| Caterchipillar | 1 = Spider Web x1 |
| Death Claw | 1 = Sharp Spike x1 |
| Elastoid | 1 = Steel Pipe x1 |
| Elnoyle | 10 = Energy Crystal x1 |
| Geezard | 1 = Screws x5 |
| Grand Mantis | 1 = Sharp Spike x1 |
| Iron Giant | 3 = Star Fragment x1 |
| Malboro | 4 = Malboro Tentacle x1 |
| Mesmerize | 1 = Mesmerize Blade x1 |
| Ochu | 1 = Ochu Tentacle x1 |
| Tonberry | 1 = Chef’s Knife x1 |
| Thrustaevis | 1 = Shear Feather x1 |
| Wendigo | 1 = Steel Orb x1 |
Card Mod and Rare Cards
Time to address the giant pink elephant in the room - rare cards, like Ifrit, MiniMog and Quistis can be turned into items via Card Mod just like common cards. You might be reasonably averse to doing this given the fact that they’re not easy to get back, and because of the potency they offer in Triple Triad. You’re right to be concerned in these regards, and while tempting, there are some cards that are just better off remaining cards for playing purposes rather than being turned into items via Card Mod.
First, to allay a fear you may have - any rare card you Card Mod earlier can eventually be won back later… much, much later. Like, end of the game later. And even then, only if you complete an optional questline before the end of disc 3. At the very least, then, these cards won’t be at your disposal for quite a long time. Still, they can be won back, so even hardcore collectors out there need not be averse to using Card Mod on rare cards provided the return is worth losing said card for a while. To that end, this guide will evaluate each new rare card you find to judge whether it’s worth keeping or more suited to Card Mod.
First up, the three rare cards you have. Ifrit turns into three Elem Atks, an item which can be used to teach a GF the Elem-Atk-J ability. Not remotely worth it, since the first three GFs you get - Shiva, Quezacotl and Ifrit - can all learn this, giving each character that junctions them the Elem-Atk-J ability. Plus, Ifrit is a splendid card to play for the foreseeable future.
Next up is MiniMog, which refines into Pet Houses x100, an item which “restores HP to all GF”. Again, not remotely worth it, as GFs can be healed by simply wandering around and revived from KO with easily obtainable G-Returners. Also, GFs shouldn’t be such a vital component of your offense that you have to spam them constantly to the point where they’d frequently be in danger. Most importantly, you’ll need MiniMog for an upcoming quest, so you’ll need to keep it for the near futre at the very least.
Finally there’s Quistis, which refines into three Samantha Soul items, which can be used to teach a GF the “SumMag+40%” ability, boosting its damage by a considerable 40%. It should be noted, in case you were curious, that these abilities stack, so a GF with SumMag+10%, SumMag+20%, SumMag+30% and SumMag+40% will gain a 100% damage boost from these abilities. That said, it’s hard to imagine a party that really needs to use their GFs in a primary damage-dealing role that would make the skills necessary, especially considering how easy it is to to acquire Strength-boosting magics like Tornado with Card Mod. Why bother boosting early-game GF damage when junctioning 100 Tornando spells to Strength will allow you to do comparable damage with less fuss? Plus, Quistis is a pretty solid card, one you might want to hang onto for a while. At the very least you can keep Quistis until it’s not longer a useful card to play, Card Mod it, then acquire it later. Especially if you can use those Samantha Souls on more potent GFs…
It’s also worth noting that you can later use the Time Mag-RF ability to turn a Samantha Soul into 60 Triple spells, so the Quistis card will score you a total of 180 Triples. That’s enough for one full stock and another character to have a decent supply, as well. This is somewhat tempting, at Triple is an even better junction into Strength than spells like Tornado, Flare, Quake and Holy, and junctions into Magic better than Pain - the aforementioned spells otherwise being some of the best early-game junctioning spells which you can soon acquire. Whether losing Quistis as a playing card in return for such combat gains is a toss-up, but we chose to just keep the card.
Whew. That should be enough information on what you can do with Card Mod for now and a good bit into the future, too. You don’t have to do this all at once - for now, just focus on getting a nice stock of Tornado and -aga spells, and if you do more, great. If not, you can always refer back to this section if you decide to add to your card collection later. There are plenty of opportunities to play cards, so there’s no need to get bogged down with one massive grinding session now if you don’t feel up to it.
When you have, say, three stacks of Tornado and preferably three stacks of any -aga spells, you should be well ahead of the curve and more than capable to deal with any immediate threats you may come across. That being the case, it’s time for the Field Exam…
No Comments