
Before heading inside of the stronghold, look on the northeastern side on the overworld for a chest (930 gold coins). Upon arriving at the stronghold, there will be a ramp in the northeastern section that leads down into the pit, but a guard will stop you. If you’ve done everything above, then the Captain, Autonymus and the friendly Automaton will come to disable the horde waiting for you at the entrance. Once they’ve done that, head down the ramp and get inside of the stronghold.
This is a fairly short dungeon and it doesn’t really have many rooms available, so it won’t take long to get through it. There’s nothing you can do in the first room, so go to the northeast corner and step on the contraption there, which is an an elevator. On this floor, take the elevator in the northwest corner to go back to an isolated section of the first floor, where there’s two chests waiting for you. One contains 250 gold coins , while the other is actually a monster in diguise, a Cannibox.
Return to the previous floor and go all the way to the south, where you’ll find another elevator, only this one doesn’t seem to work. Talk to the Automaton nearby to unlock it, then take it to find two more chests ( Iron Shield and Seed of Strength ). It’s a good idea to equip the Iron Shield on the Hero, as it reduces damage from fire and ice-based attacks. Back on the second floor, use the elevator in the middle to go to the main part of the third floor, where all you need to do is talk with the two Automatons at the north end. This will trigger a battle and after you win, you can head north to the next area. Before doing anything else, pick up the Red Fragment (and 100 gold coins from the pot) on the eastern side of the room, then go into the middle to encounter the next boss fight!
BOSS - Tinpot Dictator
Prior to engaging with the monster behind the Automaton attacks, he will send three of them after you. Defeat them and the boss will now fight you. Overall, the Tinpot Dictator is a fairly easy boss that is only complicated because he will keep summoning Automatons during the battle. The boss only has physical attacks to use on the party, dealing around 11-12 damage to a single character. Since you should know what the Automatons do at this point, ignore them and concentrate on the boss until he goes down, then clean up any remaining enemies.
BOSS - Slaughtomaton
Well, things got a little tougher for you, as this is the true boss of this place. The boss can use the flashing skill, which has a chance to Dazzle your party members, meaning they will have a tougher time to hit with their physical attacks. He can also use Magic Barrier, which gives him more resistance to magical spells. There is also a fire breath attack that will hit all of your party members, but it only does around 5-10 damage.
By far, the boss’ two most dangerous attacks are its normal physical one, which can hit for around 25-30 damage to a single character, and its attack where it throws caution to the wind, something it says before unleashing a devastating physical attack that deals around 45-50 damage to a single character. One of the bigger problems comes with the fact that the boss can sometimes resist Maribel’s Sap, so you will need to continually cast it until it happens to land. Other than that, the fight is pretty much to heal when necessary and attack until it goes down.
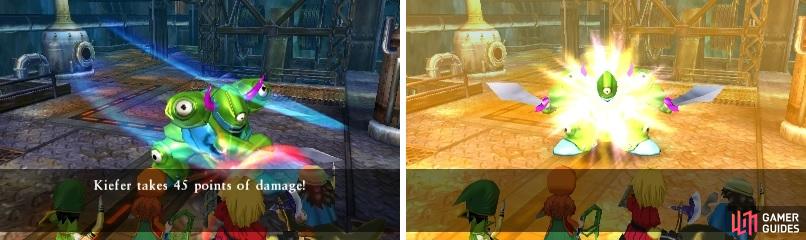
Slaughtomaton’s one attack inflicts massive damage (left). It can also blind characters by inflicting Dazzle (right).
You have saved the land of Faraday from robotic doom, so exit the dungeon and head back to the castle. Speak with the king in the throne room and he’ll give you a Poison Moth Knife as a reward for helping out the kingdom. There is one more thing you can get from the castle, which is another reward of 1200 gold coins from Wallop in the officers’ mess. That’s all you can do here now, so run back to the portal and take it to get back to the present era.
No Comments