
Before doing anything else, head to the southern tip of the area with the dungeon and open the chest on the overworld for a Yggdrasil Leaf . Enter the dungeon and you’ll see that Hadid is standing near the entrance, so approach him for a cutscene. After Hadid runs into the dungeon, you are left talking to the maiden outside, when some Oinkubuses approach, triggering a fight. They’re not too difficult, but they do have quite a lot of health.
After defeating them, the maiden will completely fill your HP and MP, and you are free to head inside the dungeon. Note that you can speak with this maiden anytime you need to heal your party. Go inside the dungeon and you’ll find that there are four pedestals, a big stone monument and some rooms that you can’t access because the doors are magically sealed. There’s also some stairs right next to the entrance, so start by taking those to some kind of jail area. Although you won’t find anything of value, there is a lone pot down here that is actually an Urnexpected.
Once you’ve thoroughly explored the basement, head back to the first floor and check out the stone monument. While standing next to it, go into your inventory and use the Seal of the Sands to open the door in the southwest corner. Stand on the switch in that room to make the statue appear on one of the pedestals, as well as open the door to the small room in the northeast. Do the same thing in this room to unlock the southeastern room, which will unlock the northwestern one. After hitting all four of the switches, the door blocking the stairs in the north will finally unlock.
Break the two pots before ascending the stairs to grab a Seed of Strength and Seed of Resilience . On the next floor, there will be a short scene and then you will be able to move. South of where you start are two paths that are riddled with spikes; walking on these will deplete your HP. Ignore those for now and take the northern set of stairs. This will lead you to the locked room you couldn’t access near the spikes, which has a switch that will deactivate them.
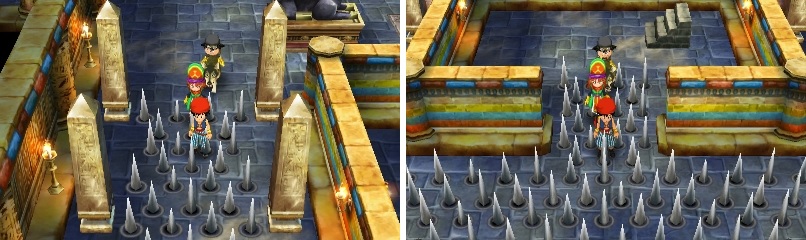
Avoid the spikes until you hit the button the will make them retreat into the ground.
After doing that, you can exit the room via the door and head south, past where the spikes were to find another set of stairs. You will happen upon a quick scene with Hadid and Queen Fertiti, with Hadid running off again. Speak with Fertiti to learn of two rubies that can be removed to possibly rid the land of its plague, as well as her giving you a Black Key that was dropped by one of the monsters (she also heals you). Head to the eastern side of the room and read the plaque there, which says that “true royalty never chooses the path least painful to itself.”
Basically, you want to follow the path that damages you, as the normal floor is false and will make your characters fall through to the floor below. In the top left corner of the room, you will find a chest that’s actually a Cannibox, and to the east of that will be the stairs. The room in the middle houses four treasure chests, which will get you an Agility Ring , 350 gold coins , a Mini Medal (#33) , and another encounter with a Cannibox.
On the next floor, you will find a pot in the northeast corner, which is actually an Urnexpected, as well as a chest on the path in between the two sets of stairs on the map ( Silver Cuirass ). The stairs in the southwest lead to a dead end, so ignore them and head to the door in the southern part of the map. This will lead you to a small outside area, where you can find a door leading to the isolated set of stairs in the previous room. You will find the Oinkubus from an earlier scene there, triggering a battle. Defeat it and follow the linear path to the top of the dungeon, where you’ll encounter the next boss.
BOSS - Setesh the Punisher
Setesh, depending on what you’ve been doing up to this point, shouldn’t be too bad of a boss. He knows Sap, which only targets one person, and he can also swing his weapon fiercely, dealing physical damage to a single character. You might want to defend on the following turn if you see Setesh save his strength, in case he pulls off his most devastating attack, one where he goes crazy and attacks a single person for upwards of 80+ damage.
As usual, the standard rules of fighting bosses apply in this situation, with you starting out the battle by applying Buff to all of your characters and then using Sap twice to reduce the boss’ defenses. You will especially want to keep Buff on at all times, since the boss uses Sap and your defenses might not be up to snuff if you chose a Vocation with lower defense. If you do have someone with Priest leveled up enough (other than the Hero) to have learned Midheal, then you might be using that on both that character and the Hero to outheal his damage.
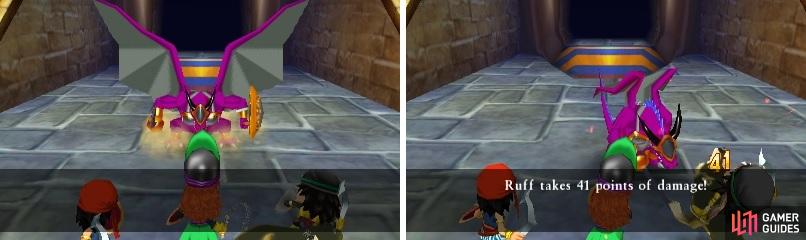
Setesh can increase his offensive power by saving his strength (left). Even when defending, his one attack deals a lot of damage (right).
After the battle is over, remove the ruby when prompted and some scenes will occur, with you appearing on the Bank of the Nihil. Approach the downed Hadid and check on him to initiate another scene, with your party returning to the village at the end of it all. Feel free to go to the balcony and speak with the Queen, then go downstairs and speak with Hadid, who mentions that you are free to take the items from the storehouse. This is that locked room you couldn’t enter in the area where the women from the village were hiding in bags.
Pick up the Yellow Fragment and open the chest to find a Leather Whip , then exit the village. Return to the Temple Palace and speak with the archaeologist there, who will give you a Care Package to give to the guard back at the Dig Site in the present. That’s your cue to return to the present now.
No Comments