
Upon appearing in the Sunken Citadel, you will see some pillars in front of you, as well as some doorways on the map, which lead to some rooms. Ignore the pillars and start by exploring the rooms, beginning with the southwestern one. You will see some poison in the room, as well as some ghosts. You can talk to them to get some insight on the place and Gracos. Return to the main room and go to the southeastern one, where a ghost is blocking the way to the chest. Speak to him and say yes to make him get out of the way, then loot the chest for a Mini Medal (#48) .
Back in the main room, go to the northeast section and you’ll see another doorway. Before going in there, go behind the structure and you’ll find a chest at the end of the path there, containing another Mini Medal (#49) . Enter that room and break the pot for a Seed of Agility , then feel free to talk to the ghosts to learn even more about Gracos. There is one more doorway you can go through in the main room, which is in the northwest corner. Ignore the path going north, as it leads to a dead end, and use the stairs to appear north of the main room.
Follow the path here going west until you come to another doorway, so enter it to appear in the previous room, but in a blocked out section. Open the chest to find a Mimic, which is a more powerful version of the Cannibox. After defeating it, return to just outside of the doorway you used to enter the room and go underneath the walkway to another door, which leads to a dead end. However, talking to the ghost here will reveal that the central pillar back in the beginning is housing a little secret. Go back to the beginning and interact with the middle pillar to reveal a secret set of stairs.
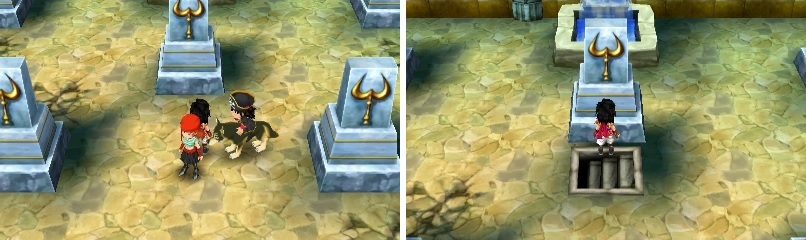
The central pillar at the start of the dungeon, when moved, will reveal some stairs.
Down the stairs, you will find some kind of jail area and in the left of the two cells will be both a ghost and a pot with a Walking Corpse Heart . Climb the stairs at the north end to appear back in the northern area of the first section of the map. Head straight north and smash the pots for a Mini Medal (#50) , as well as two Frighturns, which are stronger Urnexpected. Continue east and go north when you can to find a small room with an elderly ghost and some pots; one of those pots contains a Moonwort Bulb . Now, exit and go to the northeast corner to find a doorway into the next area.
Follow the path until you come to a big room with a statue of Gracos at the northern end. Descend the stairs to come into a weird room. If you venture south, you will find a shiny red button, which when pressed, will raise some bridges and lower some others. After pushing the first switch, go west twice, south once and west once more to reach the stairs in the bottom left. This will lead to the chest you saw on the ledge earlier, which contains a Rippled Rapier . Return to the bridge switch room and go east, north, east, north and west to reach the upper left. You will come to a second bridge switch room, which is a little trickier.
At the beginning, go east and hit the switch, then continue east, south and cross the bridge going west to a small island with a chest ( Yggdrasil Leaf ). Hit the switch there and go south to the next one, which allows you to find another chest across the next bridge going west ( Seed of Life ). After hitting the button on that same one with the previous chest, you should be able to get back to the island just south of the stairs you used to come down here. Hit the switch, then go north, east and south to reach the stairs going down. This will bring you to the throne room, where you’ll come face to face with Gracos!
BOSS - Gracos
Before actually fighting you himself, Gracos sends three Sunken Spirits after you. You shouldn’t have too much trouble with them, as using group/all attacks will quickly make short work of them. After this little warm-up, Old Man Riffer comes to join in the fun against Gracos himself, not before healing your party. Gracos can be a very challenging boss, as he hits hard and can attack twice per round. While the old man can heal you, do not rely on him to do that, as you have no control over his actions.
His normal attack can deal around 50 damage and if you see him attack maniacally, he will hit everyone in the party for around 40-45 damage. Jolly Rager hits everyone to deal around 20-30 damage and his cold breath is one of his most devastating skills, doing around 50-60 damage to each person. Gracos can also spew some mist that can envenomate a single character, which might be a bad thing if you haven’t learned Squelch or have Antidotal Herbs on hand, as they might be losing a good 20 or more HP per turn.
As one of the tougher bosses you have faced up to this point, you will want to know what works and doesn’t. Gracos is immune to Sap, so you can’t lower his defense (same with Helm Splitter), and he’s also immune to water attacks; anything else is free game. When the battle starts, begin with using Buff on your characters to increase their defense and always keep a lookout on their health, especially should they happen to be in a vocation that lowers it. While not necessary, having Midheal on all three characters will come in very hand; two also works if you have someone using the Staff of Salvation.

Cold breath is Gracos’ most dangerous move (left). He can envenomate a single character with his poison breath (right).
After the long and hard battle is over, you will be back in Highendreigh Tower with the old man. Despite the fragment radar going off, you can’t get it yet, so follow the man’s advice and leave the tower. Take the teleportal at the bottom and before you go, the old man tosses you a Green Fragment . Back at Wetlock, there is one more thing you can do before finishing up in the past. Behind the tall building in the northwest corner of the town are some stairs leading down to a raft. Get on this raft and move down the western side of the town until you enter some storehouse.
Talk to the guard to have him unlock the door, then go and loot the Green Fragment and Mermaid Moon from the chest. If you remember, there was one more door that you couldn’t access in the tunnel connecting Hardlypool to Spilton-on-Sea’s area. The two chests in there contain a Berserker Heart and a Captain’s Coat . You already know that the former is needed in order to change into that Monster Vocation. Make your way back to the teleporter to return to the Shrine of Mysteries.
No Comments