
Go through the green door and step onto the portal to be transported to the top of the Sanctum of the Cirrus. Open the door ahead of you (will still open without the Ultimate Key) and speak with the man with the orange cape near the top to trigger a battle. After vanquishing the Biting Batboon, make your way to the main hallway of the Sanctum, using the rooms with the rotating walls to get to the lower levels. Enter the room in the back and go into the southwestern room for a short scene, then exit the Sanctum altogether and make the trek to Aeolus Vale.
Approach the mayor’s house to be introduced to the person who has been hiding all this time, Serafina. Now, go inside her house and speak with the mayor, agreeing to escort her to Ventus Tower. Before leaving, check the cupboards for a Silver Tiara , then break the pots in the kitchen for 7 gold coins . There is a man blocking the doorway next to the church, so talk with him to make him move. Exit Aeolus Vale from this side and head for the southeastern tip of the continent to find Ventus Tower. Speak with the guard at the front door to be allowed inside.
Ventus Tower
| Enemies |
|---|
| Blighted Bloater, Bone Baron, Conkerer, Conkjurer, Conkuistador, Corpse Corporal, Decayurion, Draguar, High Djinks, Rashaverak, Sting Slime, Terracotta Warrior, Weighvern |
At the beginning of this dungeon, go east and follow the path around to the west side, where you can go down a short flight of stairs to find a chest ( Mini Medal #100 ). The stairs to the next floor are in the northeast corner. Head into the first side room to find another chest, containing a Miracle Sword , then use the stairs in the northwest corner to ascend to the next floor. There are multiple stairs on this floor, but only two are accessible. The ones in the southeast lead to an isolated room, where you can go outside and break a pot to acquire an Edged Boomerang .
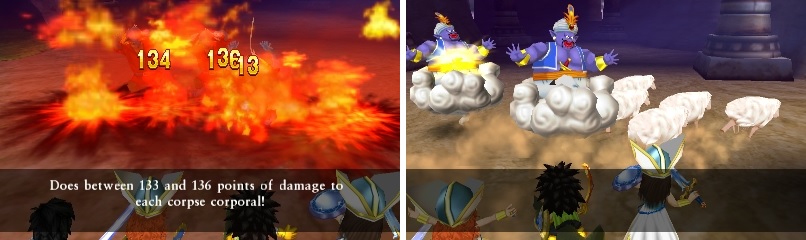
Use attacks that hit all enemies, such as Scorch (left) and Lambpede (right).
Return to the previous floor and take the northeastern stairs now. Continue ascending the tower until you take some stairs on the south end of a room. In the southeast corner of this room will be a chest with a Mercury’s Bandana and in the southwest corner is a Frighturn. In the northeast corner are two chests, one of which is a Mimic and the other has 1200 gold coins . Drop down into the hole and open the chests just north of you for a Seed of Resilience and Seed of Agility , then climb the stairs. Keep going until you’re confronted by two stairs; take the northwestern one and the rest of the way to the very top (ignore the first statue) will be easy. After the scene is over, you’ll be whisked away to a new area.
This place is called Villa Priores and it is a predecessor to the next dungeon, which is set up similarly. Make your way to the inn and break the barrel inside for a Mini Medal (#101) . Head east one spot and enter the house here, breaking the pots outside of the room for a Seed of Agility . Speak with the man on the floor in the side room to be asked a favor; he wants you to break all of the pots. Do that and speak with him again to find out he’s the Praetor. He’ll hand over the Multipleximus Key and as you try to leave, the Aeolus Globe . The latter item will allow you to reach Villa Priores whenever you are in the Aeolus Vale region. Go north and enter the small building, stepping on the portal to get to the Multipleximus Maximus.
Multipleximus Maximus
| Enemies |
|---|
| Bone Baron, Cerberwretch, Draguar, Gold Fryling, Hellstalker, Rashaverak, Weighvern |
One of the first things that should be noted is that this dungeon can be very confusing, especially if you explore on your own and end up getting lost. The second thing you will notice is that enemies are random encounters, similar to when you’re out at sea. On the first screen, go north twice to reach the teleporter to the next area. The second area is definitely more complicated than the first, so start off by going to the eastern side of the pillar with the portal on it. Go south once and start heading southeast, but once again, don’t drop off.
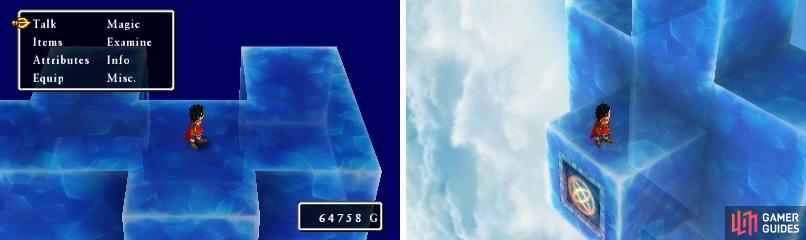
The Multipleximus Maximus is definitely the most confusing dungeon in the game.
Go south and follow the path southeast again, but this time, go north. Go northeast and then north, and southeast a little bit before going south once more. Move northeast to find three little “cliffs,” standing on the first one you come across and going east once. Fall through the hole and move north once to reach the teleporter. The third area of this dungeon consists of three islands and now there are chests to deal with here. Start off by going east once and opening the chest for a Shimmering Dress .
Return to the beginning and go west once, stopping at the north end of the path here. Move east once and you’ll be able to reach the chest to the north, grabbing another Mini Medal (#102) . Head south to the hole, but don’t fall through it from this side, opting to go to the other side of the hole and falling through from there. As soon as you land, go south once and follow the path north, to the left of the two paths there. Go west once to grab the chest ( Agility Ring ), then go west twice more, falling down the hole.
On the third island in the third overall area, go to the end of the path and head north once. Go southwest a bit into the big area and head south twice to reach the teleporter. You have come to the final area of the Multipleximus Maximus, thank the Almighty. It is also a very easy area, as you just need to go south three times, open the chest to find nothing, then attempt to leave to encounter the next boss.
BOSS - Macho Picchu
Macho Picchu can be a pain, simply because of one move, his desperation attack. This move can deal upwards of 250 damage to a single character, so some that might not have that much health will be one-shotted, and there’s nothing you can do to prevent this. His regular attack deals 55+ damage, while his butt stomp can deal 80+ to a single character. He also has Sword Dance, which deals 50-60 damage with each hit, but all four hits are random. Considering all of Macho Picchu’s attacks are physical, using Kabuff here is a very good idea, although it won’t save you from his desperation attack. The battle isn’t very hard, as long as he doesn’t do the desperation attack often.
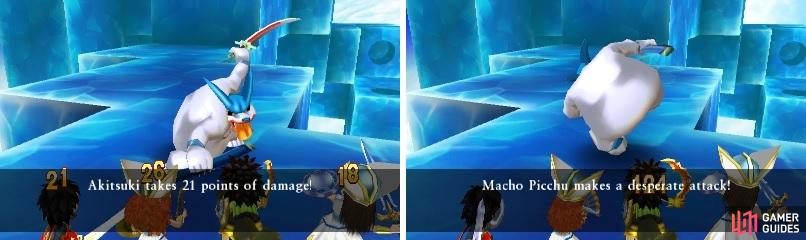
Sword Dance hits four random targets (left). Macho Picchu’s desperation attack can deal huge damage if you don’t defend (right).
You’ll receive the Cirrus Surplice after the battle and the statue ahead is replaced by a teleporter, bringing you back to Villa Priores. Return to the Praetor’s house, break all of the pots and speak with him to receive a Hermes’ Hat . This item, when used, will let you cast Zoom, although 1 MP is hardly a burden on you at this point. Leave his house and use the Aeolus Globe to return to the entrance of the Ventus Tower. Run all the way back to the Sanctum and ascend to where the statue is located, inspecting it to receive the Air Amulet. That’s two of the Spirits down, so return to the Shrine of Mysteries and take the yellow door now.
No Comments