
The story for this section of the game is a bit longer than usual, with both Frobisher and the Automaton Stronghold having no part in it, so you will want to be visiting those places first. Before diving into any one place, you will notice that the bridge in the northern section of the island is repaired, but there’s nothing of any value over in that area, save for a building called the Pool of Piety (no items to be found).
So, enter the Automaton Stronghold first to find a lone fortune teller outside of the entrance. She isn’t important, so go inside and you will find that there are no enemies at all, so you’re free to explore. All of the treasures are in the same spots, so go down the first elevator and take the northwestern one to grab the first two chests, one of which is a Cannibox (the other contains a Seed of Strength ).
Take the southern elevator to find two more chests, one containing a Mini Medal (#9) and the other housing nothing at all. In the former boss’ room, the chest will contain some Iron Claws and the vase is really another type of mimic, the Urnexpected. You will likely need to use Maribel’s Sap to be able to do any kind of damage to it. Once you’re finished, exit the dungeon and go to Frobisher to start the looting there.
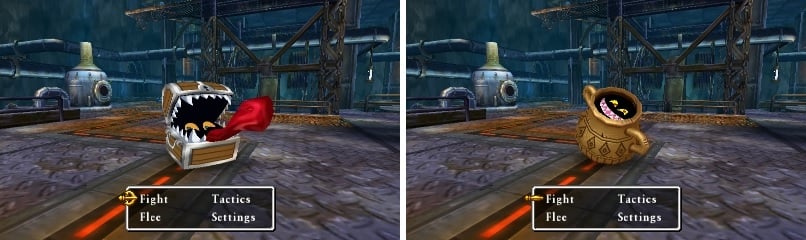
Mimics can be found in a lot of places, including the known treasure chests (left), as well as pots (right).
There’s a barrel in the item shop that has 3 gold coins , and the door in the northern part of the town contains a chest that has 210 gold coins . There’s another door on the western side of town that you can enter, with a bunch of breakables and a chest. One of them is another Urnexpected, while another contains 21 gold coins ; the chest contains a Mini Medal (#10) . Feel free to save or do some shopping, should you have the coin and need anything.
To start off the storyline in this area, go to Faraday Castle and head into the room on the right to find some Scale Armor in one of the cupboards. Now, head to the throne room for a scene, then check the drawer in the room to the right for a Noble Garb , a notable improvement for Kiefer. Talk to the king for another scene, with him and his men heading westward to the former Autonymus’ place. Before you leave to head there yourself, check out the rest of the castle for more goodies.
Out on the castle wall, take the northwestern stairs and check the barrel in the kitchen area for another Mini Medal (#11) . Now, journey to the eastern side of this floor and open the dungeon door, then go downstairs to find a Green Fragment , 5 gold coins and a Medicinal Herb . Back up on the castle wall, the southeastern tower has a vase with 8 gold coins and the southwestern one has a barrel with 2 gold coins .
To continue with the story portion, from the throne room, head downstairs to view another scene, then talk to the man who was left behind before going out west. As you make your way there, you might see some tall grass to the north, as well as a treasure chest in that tall grass ( Seed of Resilience ). At the Institute of Automatry, check the smaller building for a Red Fragment and then go into the main building to view a short scene with a familiar robot in the western room. When you can move, check the drawer in that room for a Hairband and leave the house for another scene.
Back at the castle, there will be another scene at the throne room, with Ambrose being thrown into the dungeon. You should know where this is, so pay him a visit and he asks you to retrieve a globular pistotron from Frobisher for him. His granddaughter can be found inside of the item shop and upon talking to her, she says the item you’re looking for is located underneath a barrel near the stream. This barrel is located downstairs from the church and through the door that leads to the small isolated area. Break the barrel and hit the A button where it was to get the item in question.
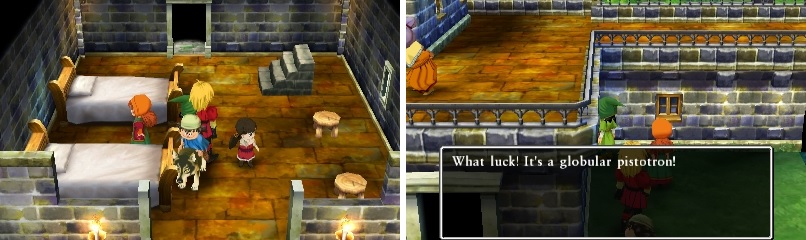
Ambrose’s granddaughter (left) and the location of the globular pistotron (right).
Return to Ambrose in the castle and with a little change in appearance, he will join your party. The lab in question is the door to the right when you first enter the castle grounds from the overworld. This will set off a chain of events that will eventually have you back at the Institute out west. Once you regain control of your characters, head back to Frobisher and talk to Ambrose in the item shop, then his granddaughter to get a Red Fragment .
With the events at the present version of Faraday done, there is one more thing you can do in this era before delving to the next area at the Shrine of Mysteries. Zoom to The Haven and find the female NPC with the white bonnet and orangish-colored dress. She’ll give you a hint as to the location of the next immigrant, which is in Emberdale. Inside the small building near the church will be a chef that you can send to The Haven, and talking to him there (inside of the Download Bar) will net you the Demon’s Dome traveller’s tablet.
No Comments