
Thankfully, this scenario is fairly short, so from the teleportal, ignore the town to the north for now and enter the area to the south. There will be some heavy fog and you will notice a person to your south. Approach him and some Sharpshooters will attack, so quickly make short work of them (they have quite a lot of HP). You can’t exit south, so go back to the teleportal and head north to the village of Vogograd.
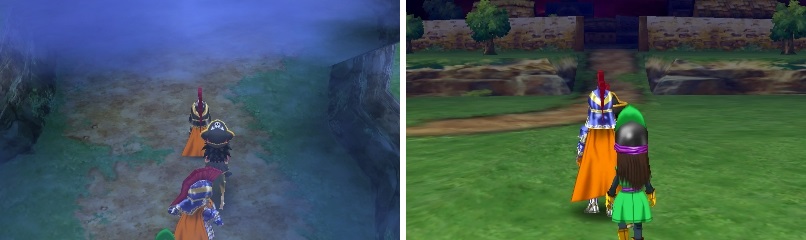
The thick mist blocks your way south (left), so just head to the village (right) to continue.
Upon entering the town, speak with the man by the entrance and choose the first option, then head to the big building in the northeast, which happens to be the village elder’s house. When asked if you’ll help, agree to it and feel free to speak with everyone in the village if you want. Before you do that, go into the northeastern room on the first floor of the elder’s house to find a Mini Medal (#75) in one of the barrels. Once you’re good, go to the northwestern part of the village and approach the little boy there for a quick scene.
Enter the little house just south of the graveyard for a little scene with Luka, who mentions the golden statue on the table. Inspect the very same statue, then head back to the chief’s house. Speak with the chief to initiate a scene, then talk with everyone in the room, saving Luka for last. Follow Luka to the other room and speak with him there, then talk to the chief once more to be presented with a choice, although all things lead to the same end. Once you say yes after his offer to let you rest, the elder will ask you to accompany him to the church.
Say no and he will ask if you’re thinking of siding with the beast. Choose yes and he will ask you whether you’re going to help or not again. Say you are siding with the beast and he will order you to be locked up until after the operation is over. Inside of the shed, approach the door and answer yes to being good to get out. Luka will come to you and join your party, so head on over to the graveyard for a scene, after which, you will be tossed to Mount Gora. If you agree to go to the graveyard to help with the situation, head on over there and after a scene, Luka will ask you some questions. You have to say yes, otherwise he will continually ask the same thing, which will end up with you being sent to Mount Gora.
Mount Gora
| Enemies |
|---|
| Berserker, Frizzard, Galumph, Magic Marionette, Mucho Macho, Pink Panzer, Purrestidigitator, Pustule, Scargoyle, Smacker |
Well, you’ve been “imprisoned” here and you need to find a way to escape, so take the first hill to find a chest on the west side, which is actually a Mimic. Now, enter the cave and move to the center of this first area to find a chest with a Seed of Strength in it. Journey to the eastern side and take that exit there to appear back outside. There’s nothing in the immediate area, so climb the mountain until you come across another cave. Go through this cave and to come out of the other side, where you’ll find a chest on a ledge containing an Enclosure Plan .
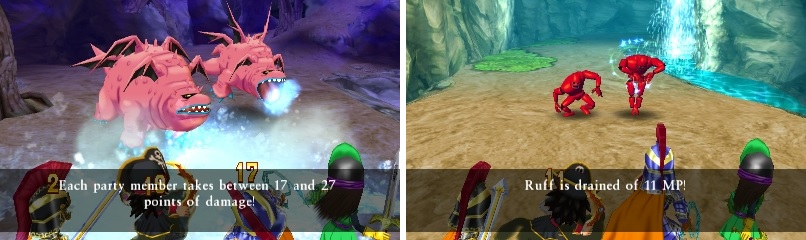
The Galumph’s cold breath can put a hurting on your party (left). Magic Marionettes can steal your MP (right).
Continue your ascent until you come across another cave, so head inside. At the first fork, go east to find a chest at the dead end ( Mini Medal #76 ), then double back to the split and go west to end up back outside once more. As soon as you appear outside, take the ramp right next to you down and into another cave. Go to the northern end of the room, where the one little dead end that leads you south has a chest ( Meaty Treat ). That’s all that’s in this cave, so continue west and then south to find the exit.
Inside of the next cave, take the northern path at the split to reach another chest, containing 650 gold coins . Continue east to some stairs that will lead you back outside, where you can keep going to the summit of the mountain. At the top, you will encounter a priest and some other monsters, who appear to be the source of the fog that’s plaguing the land. Speak with the priest to encounter your next boss.
BOSS - Gasputin
Gasputin is not too difficult of a boss, despite him being able to act twice per turn. His physical attack does around 45-50 damage to a single target and he can spew a poison mist that might envenomate a single party member. He can also heal himself with Midheal (~75 HP) and has Fizzle, which can lock your party members from using spells should it hit.
There is no way to prevent Fizzle from happening, so you’ll want to quickly defeat Gasputin. Since he can only really do damage with his physical attacks and envenomating characters, both of which can only hit one character at a time, so healing shouldn’t be a huge priority. Oomph can play a big part in whittling down the boss’ health, with such skills as Sword Dance or Knuckle Sandwich (the latter with Oomph and Muster/Focus Strength will do some big damage if it hits) helping.
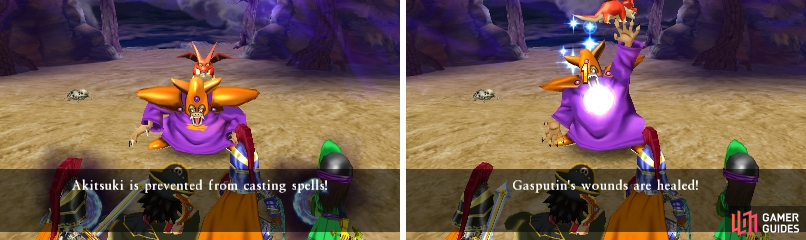
Not only can Gasputin prevent you from casting spells (left), he can also heal himself (right).
With Gasputin now gone, the other monsters will flee and the fog will finally be lifted. You’ll automatically head back to town, so go towards the center for a scene. After it’s over, break the nearby pots for a Seed of Magic, then head on over to the elder’s house. There will be another short scene inside, then you can go back towards the church for one more scene. Escort the priest to the village’s entrance for another scene, then you will finally get some rest. The next day, head back to the church to find a letter on the table. That’s all she wrote here for Vogograd, so leave the village and go east, past Mount Gora, and towards the eastern tip, where you will find a chest with a Notso Macho Heart inside. The southern path on the overworld leads to the Al-Balad region, but nothing is new there, so take the teleportal back to the present.
No Comments