
There is only one pedestal remaining at the Shrine of Mysteries, which is a blue one. Once you arrive in the new land, go east across the bridge and you’ll find chest with a Prayer Ring in it to the north. Head back to the teleportal and head north this time, going inside the town that’s on your map. Enter the building and take the stairs to the left, going east on the second floor to find a door behind the priest. There will be a hooded figure at the end here, so speak with him to receive an ominous message.
Return to the main hallway with the one guard and go north this time, heading into the main portion of the town. The second floor of the inn has a Captain’s Coat in one of the cupboards, while you can find a Mini Medal (#82) in a barrel next to the southeastern house. Head into the inn and go downstairs to the bar, speaking with the man with the mask to learn that the innkeeper is at the church. Remember where the priest was located on the second floor by the main gate guard? The innkeeper is the younger of the two ladies sitting down in front of him, so speak with her and she will tell you to get permission from the king.
So, it’s back to the city proper and straight north into the big building. The king will be to your right, so speak to the minister in front of him and you will be granted permission to stay at the inn. Head on over there, speak to the innkeeper and then go upstairs, inspecting the bed to rest. Upon being woken up, go outside for a short scene, then head on up to the castle. You can now go up to the second floor, where you can snatch a Pirate’s Hat from one of the cupboards. Look at the lady sleeping on the bed, then try to go upstairs. After that, exit via the southern door and talk to the minstrel standing on the balcony for a scene.
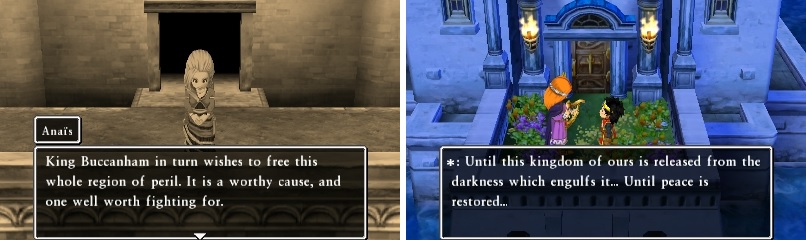
Sit back and enjoy the sad tale of Buccanham.
Once the long scene is over with, return to the inn to rest until the next day. The king wishes an audience with you, but there’s something you can do before that. Leave the inn and enter the house to the east of the inn, breaking the pots next to the bookshelf. Push the bookshelf after to gain access to the door, which will lead to the dock where you can pick up a Mysterious Fragment . The weapons shop is also open and while you will likely be able to upgrade to better weapons for Ruff and the Hero, it’s best to hold off on a weapon for the Hero, unless you have a lot of money.
Alright, speak with the king and say no whenever you are asked if you wish to hear everything again. Your next destination is the Den of the Dwarves, which is located to the east of Buccanham. You’ll have to go north around the mountains to reach it; ignore the tower on the north end for now, as you’ll be coming back to it later.
Den of the Dwarves
| Enemies |
|---|
| Axecutioner, Conkerer, Conkuisitor, Conkuistador, Direlog, Goodybag, Gyrogre, Healium Balloon |
First and foremost, Goodybags drop a lot of gold when defeated, but they also have access to Whack, which can instantly kill a single character, so be careful. There’s nothing in the first room here, so just follow the path north and around until you reach a ladder. On the second floor, go east at the first split to reach a chest that has a Mini Medal (#83) in it, then follow the other path to another ladder. Follow the path here to a first set of stairs, so take them to reach a room with a monster in it.
It doesn’t matter which answer you choose, as it will leave immediately afterwards. Break the pots for a Yggdrasil Dew , then open the two chests (requires Magic Key) for an Enclosure Plan and Pillager’s Helmet . Return to the previous floor and continue southwest until you find another set of stairs. These will take you to Dinky Dell, the home of the Dwarves, who are not so happy to see you. Go down the stairs and through the doorway, speaking to the dwarf here to be let passed by the Foreman.
Speak with him and he tells you where to find the Glowmoss. Exit this room and speak with the dwarf blocking the passage in the northeast, then use the ladder to go down another floor. In the northwest corner is a chest with a Seed of Strength , and the ladder to the next area is in the southwest corner. On the south end of this floor will be the next boss.
BOSS - Mossferatu
Mossferatu comes with two seahorses, Quayhorse and Wharfhorse, both of whom are quite annoying. Quayhorse can use Midheal to tend to the wounds of his comrades, while Wharfhouse can use Burning Breath, which has a chance to inflict paralysis. Their physical attacks aren’t very powerful, so you have nothing to worry about there. Luckily, they don’t have a lot of health, so they can be killed relatively easily with your own attacks.
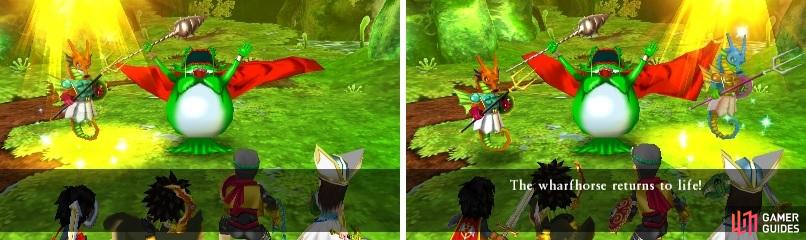
Mossferatu can use Kazing to revive his partners in crime.
As for Mossferatu, he has the venomous breath that can envenomate someone, as well as an ice breath attack that hits in the 40s on everyone. By this time in the game, you should have access to Insulatle to reduce this, so it’s not too much of a problem. Also, his physical attack hits somewhere in the 40s-50s range, so apply Buff/Kabuff to reduce this. By far, his most annoying skill isn’t an offensive one, but it’s Kazing, which he can use to bring his friends back to life, one a time of course.
Surprisingly, Counting Sheep (Shepherd class) works on both the Quayhorse and Mossferatu, so if you have that, use it to put them to sleep for a turn or two. Attacks that hit all enemies or strong ones like Knuckle Sandwich (combined with Oomph and/or Muster/Focus Strength) will likely one-shot or do severe damage to the two horses. It’s not a particularly hard battle, but it can be annoying if the big boss keeps reviving his cronies.
After the battle is over, grab some Glowmoss from the wall and return to Buccanham (the dwarves have nothing new to say, but have warmed up to you a little bit). Head into the town portion for a scene, then you’ll end up resting at the castle. Upon waking up, the king will tell you about the sinister black flame atop the Beacon and that a substance known as prism dew will extinguish it. If this sounds familiar, then you realize you should have some in your inventory if you’ve been following this guide.
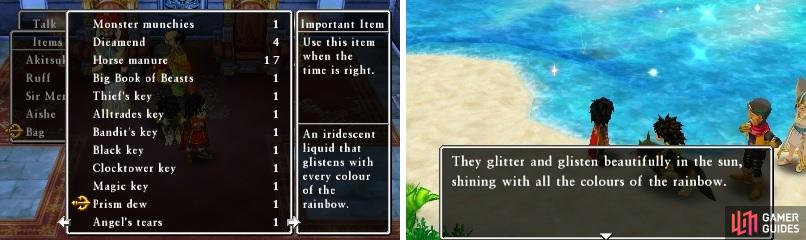
You might already have some Prism Dew (left). If not, you need to journey to the Rainbow Cove to get some (right).
You got some right after finishing up the past events in Grondal, but if you didn’t happen to have gotten it, then you need to return to the present. At the Shrine of Mysteries, go to the eastern side and take the teleportal that’s through the blue door to get to Rainbow Cove. Take the northern of the two paths going east and inspect the waters there to get some Prism Dew. With that in hand, you can go back to Buccanham in the past and head for The Beacon, which is north of the town.
No Comments