
Choose the green pillar and pick the southeastern pedestal, placing your tablet fragments there to be transported to the Aeolus Vale region. As soon as you can move, go to the end of the very big piece of land to your southeast to find a chest with a Flametang Boomerang . Return to the portal and go north, through the area divider, where you can find the town of Aeolus Vale to the north. If you can’t tell by the map, Aeolus Vale is a cliffside town that is split into western and eastern sections.
Use the stairs to arrive in the village proper and you should see the inn on the south side of the western section. Ignore the inn right now and climb the ramp to spot some barrels/pots outside of the building there; break the barrels for an Enclosure Plan for Monster Meadows. Head inside that building, which happens to be the Praetor’s house, for a scene, then check the cupboards for a Mini Medal (#70) . Speak with the Praetor and agree to help him retrieve the Sacred Stone from the Sanctum of the Cirrus.
Enter the inn and go behind the counter to find a chest (requires Magic Key), which has 210 gold coins in it. That’s all you can do on this side of Aeolus Vale, so go down to the ground level and cross the bridge to the other side. As you climb this side, there will be a scene that plays out with the Praetor’s daughter, Fidelia. After it’s over, go into the only building on this side and climb the stairs to find the shops. Enter the armor shop to find three chests, one of which is empty; one requires the Magic Key ( Pot Lid ) and another contains 20 gold coins .
The chest inside of the weapon shop has a Boomerang , and you will find 3 gold coins inside of the pots near the stairs, with the chest containing a Meaty Treat . Climb the nearby stairs and continue going up until you reach the top of the eastern cliff, where you can exit back to the overworld. Run north and when you see the path going southeast, take it to the end to find a chest ( Ruby of Protection ). Continue north and enter the small Custodians’ Camp. Inspect the well to fight a Well Wisher, then go down it to find a Seed of Resilience in one of the cupboards. As you get close to the northern building, you see a Cirrus land and go inside, so follow her and speak to the man. Once you’re finished, exit the camp and continue north to the Sullied Sanctum.
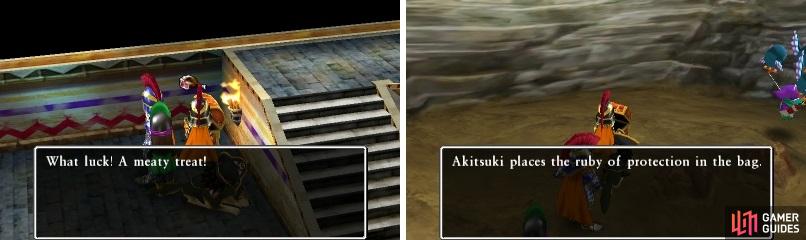
The Meaty Treat is useful for taming enemies for Monster Meadows (left). The Ruby of Protection is useful if someone needs a little extra defense (right).
Sullied Sanctum
| Enemies |
|---|
| Bag Snatcher, Claw Breaker, Dragon Slime, Half Hog, Toxic Zombie |
As soon as you enter the dungeon, climb the stairs ahead of you to find a chest at the top ( Magic Water ). You now have two paths ahead of you, so take the western of the two to run into a chest off to your left ( Mini Medal #71 ). Keep going north until you find the doorway that leads into the next area. Here, you should see some stairs off to your left on the map, so head on over there and use them to reach a room with two chests. The right one contains a Lightning Staff , while the left one is really a Mimic.
Return to the previous room and go north, being careful not to fall off the ledge here. Make your way to the stairs on the right and take them down, where you’ll spot a chest right as you enter; open it for a Yggdrasil Leaf . Ignore the big room to the north and return to the previous floor, taking the doorway to the north. You’ll appear in a pitch black room, with a statue straight north of your position. Go straight north and inspect it to see that it will rotate. Basically, what you need to do in this room is inspect each statue as you come across them and then go straight in the opposite direction in which they are facing. As an example, the first one will face to the left after inspecting it, so you will head to the right. If you happen to fall down, you will land in the big room from earlier and will need to restart this room from the beginning. Once you reach the end of the room, enter the doorway and go to the center of the room to confront the next boss.
BOSS - Vaipur
This boss can be a pain in the butt, as some of his moves can do some major damage to not only a single character, but to the entire party. Wind Sickle can deal upwards of 100+ damage to a single character, while Kaswoosh can deal upwards of 80-90 damage to the entire party. Vaipur can trample your party, dealing around 40 or so damage to the party, as well as a normal physical attack for about 30-40 damage and a desperate attack for around 65-70 damage.
If you still have Magic Barrier, using it in this battle can reduce some of the damage if the boss decides to spam Kaswoosh. However, it doesn’t protect from Wind Sickles, so you will have to just deal with the aftermath of that attack. Vaipur is susceptible to Sap, so use that if you have access to it to help your physical attackers deal more damage. Multiheal is also a huge help here, especially to offset the damage done by Kaswoosh.

Vaipur can deal some serious wind-elemental damage to your party.
After finishing off the boss, the doors at the north end of the room will open. Exit back to the overworld and go north to the Sanctum of the Cirrus. Although you might want to return to town to rest, you will get an opportunity to do so shortly, so just press on for now.
No Comments