
| Enemies |
|---|
| Abyss Diver, Barbatos, Beastly Priest, Bird of Terrordise, Bomboulder, Carbuncle, Croaked King, Damned Well, Div, Drakulard, Freezing Wingwyrm, Fright Knight, Gnumesis, Grotwyrm, Hellstalker, Knight Shift, Live Lava, Major Headache, Merderer, Metal Heavy, Metal Slime S, Octophant, Perilwinkle, Prism Peacock, Seasaur, Shelligator, Tetsudogre, Togre, Vis Mager |
To get inside the Cathedral of Blight, you’ll need to board the Skystone and fly into the Cathedral to land on top. Do not fall into the hole here, but fall off the ledge to the north and enter the door to the west (default camera). Go down two flights of stairs and you’ll find a big hole in the basement; drop down this hole. There is only one path to go here, so take the stairs and look to the west to find a chest, which contains a Mini Medal (#103) . North of the stairs is another chest, containing something called a Ra’s Mirror .
You probably saw a ladder to the south of the stairs, so take it and walk across the damage tiles to get to the stairs to the north (can use Safe Passage to avoid damage). In the next room, press the orange switch nearby to open some doors on the south end, which will lead to the outside. This allows you to enter/exit the Cathedral of Blight without having to go to the roof. If you head out onto the overworld, you can find a chest nearby with a Beastly Priest Heart inside of it.
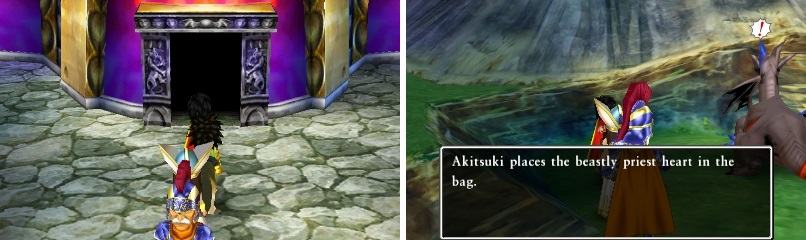
Opening the front door (left) will make it easy to enter/exit the Cathedral. Don’t forget to pick up the monster heart on the overworld (right).
Back inside, head downstairs and then once more to find a chest that is actually a Pandora’s Box enemy. This thing can be nasty, as it knows Thwack (chance to instant-KO the entire party), can drain your MP and its critical attack can deal upwards of 200 damage to a single member, plus you don’t get anything for defeating it (unless you want its entry in the bestiary). Return to the previous floor and take the stairs in the center, then go to the northeast corner to find a chest with a Mini Medal (#104) .
To continue, go south and take the stairs, where you’ll end up in a room full of teleporters. After the first one, use the bottom one to end up next to a chest, which contains a Life Ring . Return to the previous platform and take the top teleporter this time, then the left one to find two more chests ( 1250 gold coins and Yggdrasil Leaf ). Go back one teleporter and take the right one, then continue until you wind up in the northwest corner. Use the northwestern teleporter, then the northeastern one on the right side in the next group, which will allow you to reach the stairs in the middle.
Keep following the path until you come to a split. Go left first and mash the A button towards the northeast corner of the room (don’t forget Safe Passage to avoid damage) to find a Mini Medal (#105) . Enter the other doorway in the previous room and make your way to the southeast corner for a chest ( Shield of Shame ; it’s cursed). You’ll find the exit in the northwest corner and you’ll eventually come upon some large eggs. Each one you break will trigger a battle against a single enemy. Break enough to get the chest in the northwest corner, containing an Enclosure Plan , then continue breaking more to get to the exit in the northeast.
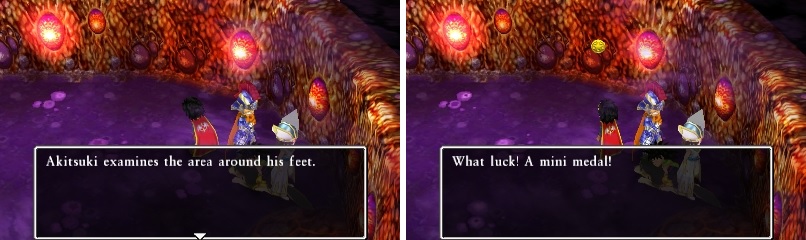
The hidden Mini Medal can be a little tough to find, but look in the spot shown in the screenshot.
As you go north, you will eventually reach a dead end, where there will be a pool in front of you and some thing blocking a door on the right side. Approach the pool and you see a prompt saying that now might be the right time to call upon the Great Spirits’ aid. Basically, using one of the amulets here will transport you to another area and upon reaching the end, you will enter a teleportal and be ready to fight the final boss. However, each path contains some nice treasure for you to snatch, so upon collecting the treasure, use Evac to leave and get back down to the pool to use another amulet. There is no specific order you need to do, but considering the Air Amulet is the most annoying, choose that one first.
Whirlwind Way (Air)
You’ll be whisked away by some strong wind and be brought to an area that looks similar to the Multipleximus Maximus. Remember that all directions given have the camera at its default position. From where you land, go south twice and then west once. Here, you should be able to see a chest to the southeast if you rotate the camera a bit. Return it to its default position, go to the southeastern platform and head west once to get to the chest ( Aeras Shield ). To get to the teleportal at the end, go east once from the chest, onto the other platform next to the one with the chest (there’s a hole in this one).
Go east and fall through the hole, then south once to reach the teleportal. In the next room, just follow the path to the next teleporter, where you’ll be back in the confusing part of the dungeon. From where you begin, go north once then to the west side of this part. At that point, you will want to go north and up all the way to the dead end. Head east once, then continue northwest, going west once at the end. In the big area, all you need to do is move east/west twice to get to the pink teleporter, bringing you to the final boss. If you are looking to get everything, though, just use Evac and return to the pool to use another amulet.
Whitewater Cave (Water)
Choose the Water Amulet next and you’ll appear in a new area. There’s nothing in the first room, so just head north and exit to the next area. Here, follow the path on the western side to get on the raised ground, which you can get to the stairs on the eastern side of the room. Take those stairs, as well as the ones to the west in the next room, to get to the Mysterious Fragment you saw a little bit ago. Return to the previous spot and take the stairs to the south. You’ll arrive in a room with the pink teleporter, as well as a waterfall. Go behind the waterfall to find a chest with an Okeanos Sword . Evac to the beginning of the dungeon.
Chasm of Chaos (Earth)
The walls in this area are fake and by simply walking into them, they will crumble. The middle two paths lead to a dead end, so follow the western path until you come around to the east and find some stairs. Take them down and ignore the first split, going north until you come to another split. Here, you will want to go east to find two chests, containing a Mini Medal (#106) and Gaia Armor . That’s all in this area, so Evac one last time.
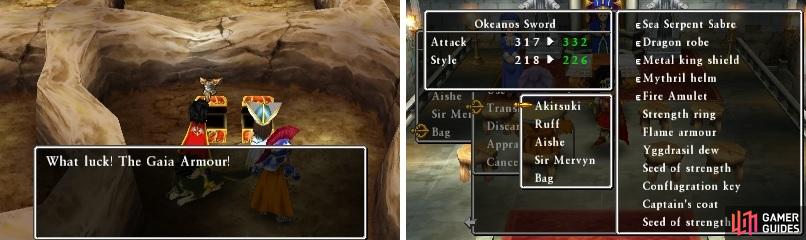
You can find some nice (and unique) equipment by doing the four Great Spirit areas.
Hellfire Hollow (Fire)
This area is pretty huge and might look like a maze, as there are a ton of different paths to take. From where you begin, start by going east and then go south until you come to a chest, containing a Pyros Helm . After grabbing that, go all the way west and then north, following this long path that could be riddled with Birds of Terrordise (a very strong enemy), until you come to some stairs on the far south end. The rest of the path is linear and will bring you straight to the pink teleporter.
As soon as you step on any of the pink teleporters, your party will be completely healed and you’ll be transported to the final area. Walk north and get ready for the rematch against the Demon King!
BOSS - Orgodemir
Unlike your first encounter with the Demon King, he has a total of four forms this time. For his first form, he can give a vicious flick with his tail to deal around 110-120 damage to a single target; this can be reduced with Buff/Kabuff. He also has a fire or ice breath that he can use, hitting the entire party for around 100 damage. His normal attack seems to do around 80-90 damage. Using support spells such as Insulatle, Magic Barrier and Kabuff will make this form pretty easy.
His second form will be a true test, as he will resort to using Kaboom to deal a good 60+ damage to your party, as well as Wind Sickles to deal a good 130+ to a single target. In addition, he can use Kafrizzle to do around 80-90 to a single character. His worst move, however, is when he tosses some searing flames at your party, as this can do upwards of 150+ to the entire team. He can toss two orbs at you, similar to the the first encounter, dealing 100+ damage with each hit and even put a single character to sleep (use Tingle to counteract this). Apply the same buffs as before to deal with this form, breaking out Multiheal whenever he does the searing flames attack and reapply them should he used Disruptive Wave.
Orgodemir still has access to Disruptive Wave in his third form, so you’ll want to reapply your buffs should he use this. He can summon searing hot magma from the floor, which only does about 20-30 damage to your party. Orgodemir can grab someone with his talons, dealing upwards of 200 damage to that person, as well as let out a roar that deals 120-130 damage to the party. His normal attack does around 90-100 damage to a single person, and he can also envenomate a single party member. He certainly likes Disruptive Wave in this form for some reason.
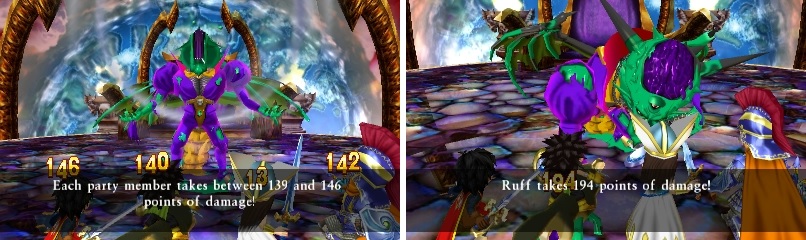
Orgodemir certainly doesn’t pull any punches as a last boss.
It is finally time to put Orgodemir down for the count, as this is his fourth, and final, form. As per the last forms, he can still use Disruptive Wave, so you’ll need to reapply your buffs when he uses it. You will see him summon some enemies during this form, an Orglob and an Orgon. He also has a magic attack where he throws a big purple orb into the ground, dealing around 180-200 damage to the party. He also has access to fire and ice breath attacks, dealing around 80 and 100 damage to the entire party, respectively. You will also find him wrapping his tail around a character, doing about 120-130 damage to that person. He also has access to Magic Barrier and can trample your party for about 40-50 damage.
Orglob is very annoying, as it will continually try to lick someone’s face, giving them goosebumps and causing them to lose a turn. Orgon can do a fire breath attack, doing around 40 damage to the party, so that enemy can be more of a threat than Orglob, since more damage could spell death, especially if Orgodemir uses the purple orb attack. Keep attacking him with your strongest attacks, keeping a careful eye on your MP, and he will eventually go down.
Peaceful Ending
With the Demon King being done once and for all, you’ll be transported to the Divine Shrine. Enter the building for a short scene, then go downstairs and talk to the guy there. Once you’re done there, go outside and speak to the guy on the left, saying yes to get carried off to a multitude of locations. At each place, you only need to talk to the important person/people before you can leave and be whisked off to the next location.
When you finally reach Estard, the first thing you should do is go into the well to find a Mysterious Fragment on the ground. Go to the castle after that and once you regain control, go downstairs to receive two Pilchard Sandwiches when you try to leave. The merchant by the Mayor will give you a Pilchard Pie , so take it and speak with your father on the boat. Go below deck, break the barrels, talk to Maribel, then with the chef. When you’re finished, go above deck and sit back, as the ending will now occur.
No Comments