
Sail to the present day island with El Ciclo and go towards the bridge. Literally right next to the bridge, on the overworld, is a chest with a Seed of Magic in it. Enter the bridge area and go into the well, where you can get both some Scholar’s Specs and a Mini Medal (#43) from the cupboards. Enter the building on the right to find a Pretty Betsy from one of the breakables. You can’t do anything in the western building, since the guy there won’t sell you anything, unless you’re in the style rankings (will get to that shortly).
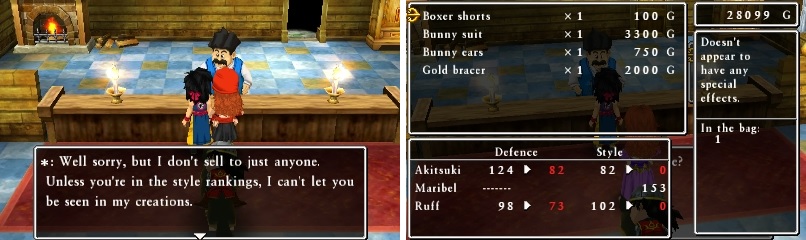
The one shop in El Ciclo won’t sell to you unless you’re on the leaderboard for the Style contest.
Exit the bridge area and go to the town of El Ciclo, entering from the western side. One of the barrels next to the building in the southwest contains 5 gold coins . Enter that house and speak with the man upstairs to learn that he is curious as to who Antonia’s mother really was. Go downstairs and break the pots to get two Medicinal Herbs and a Holy Water , then pick up the Green Fragment on the ground. Also, if you check out the one bookshelf, you can reread the letter from Antonia’s mother again, with the option to take it with you. Give it to the man upstairs and he’ll reward you with a Seed of Wisdom .
Check out the weapon/armor shops if you please, then head on over to the southeast portion of the town. The lone barrel just north of the church has a Chimaera Wing inside, so grab it and head to the inn. Downstairs in the inn, you will find a Trailblazing Bandana in the drawer and in the westernmost room upstairs will be a Pretty Betsy in the cupboard. If you enter the pub from the back door, you will find another Pretty Betsy in one of the barrels there. In the clock tower, there’s nothing majorly important, but if you speak to the lady at the very top, you will find out that she can be sent to The Haven, so go ahead and do that.
The big house next to the clock tower belongs to Mr. Bulgio, who you might have heard of earlier and will come into play in a bit. The only thing to be found in it is a Garish Garb in the drawer upstairs. With all of the exploration done, it’s time to move on to the meat of this town, the whole ranking thing that pertains to some stats. You can find out more about this by visiting the building just north of the church. The Excellence Grading Organization, or EGO, basically grades one of your characters on three categories, Strength, Wisdom and Style. You can register a character to each of the three contests, and there are special prizes for both males and females.
El Monumento de Pomposo
Once you’ve tinkered with the EGO Contests, exit El Ciclo and head on over to the large tower in the east, which was once Pomposo’s studio in the past. Talking with the NPC at the entrance will reveal that the place is riddled with monsters, so expect a good deal of battling to take place while you explore it. Enter the place and feel free to talk to the NPCs inside, although they don’t say much that you can’t figure out on your own. You should see some damaging floor tiles towards the right side of the floor, so walk over them and open the chest on the other end for a Bow Tie .
Head on through the door on the right and you should see a switch on the floor in the corner, as well as another one in the left corner. Hit both of these to open up the door in between to grant access to the next floor, where you’ll find conveyors on either side of the area. Go down the eastern side, where you’ll find two pots, one of which contains a Seed of Resilience . On the western side, you will want to stand on the second column from the left on the conveyor to avoid falling to the first floor, as that’s the only spot where there’s floor that continues south.
Stand at the spot before the left conveyor (left) and you won’t fall down the holes in the floor at the end of it (right).
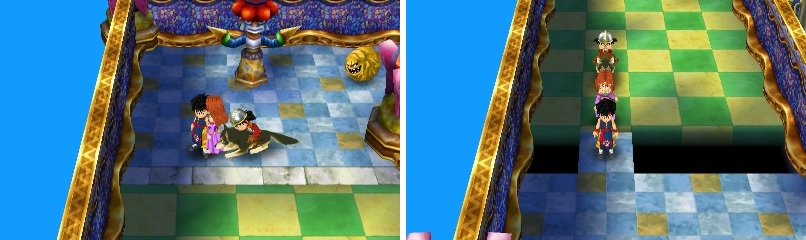
Ignore the doorway to the south, as it leads to a dead end, so continue to the north and you’ll get into a fight with two Prancing Pillars. They are pretty easy, but they can siphon MP from a single character with their Weird Dance. Continue east and south to fight another pair of Prancing Pillars, then take the doorway to enter the middle area. Drop down the hole and onto the floating turtle, stepping on the switch to raise the turtle to a new area.
There will be a stone slab south of where you start in this new area, which says “to quell the dragon’s blazing might, give the beast the gift of sight.” Basically, there are dragon heads that are spitting out fire in this area and you need to insert something into their eye sockets to stop it. Luckily, just north of the stone slab is a dragon head that is not spewing fire, so go up to the red gem to take it, then insert it in the dragon’s head to the east. Go north and hit the switch to open a gate, then open the chest nearby for a Silk Tuxedo .
Remove the gem again and venture to the northern section of the map to find another dragon’s head. Insert the gem and then exit via the doorway to your west. In the next area, you will be faced with an annoying puzzle. There are four statues and four switches, with each switch making three of the statues rotate 90 degrees. If you don’t know how to do this quickly, it’s possible to be stuck for a good while. The easiest way to do this would be to hit each switch once (no order), then hit the NE and SE switches to make them all face the center.
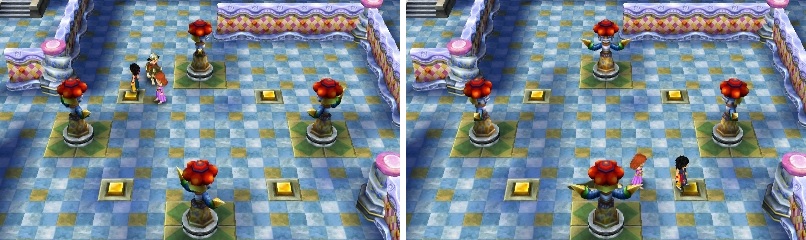
The statue switch puzzle can be one of the more annoying puzzles, especially if you randomly hit the switches.
This will open the gate in the southeast, allowing you to get to the doorway. Climb the outside stairs to the top of the tower and flip the lever to drain the water, then drop down into the hole. It’s time for one final “puzzle,” which is really just you having to find four switches to step on to open the path to the treasure room. One is behind the stone slab in the northwest, a second past the damage tiles in the northeast, a third through the doorway in the water and the last one is revealed to be underneath the middle statue that will disappear. You will gain entry to the treasure room, so grab the Yellow and Green Fragments , as well as a Mini Medal (#44) and Seed of Wisdom from the chests. You can quickly reach the bottom of the tower by taking the doorway in the southeast, then dropping off the balconies. It’s time to return to the Shrine of Mysteries…
No Comments