
To reach the door in question, head back into the Dungeon of Descent and in the first area, go to the northeastern exit. There will be a short scene there and as it turns out, you’re thrown into another boss battle!
BOSS - Gobbler
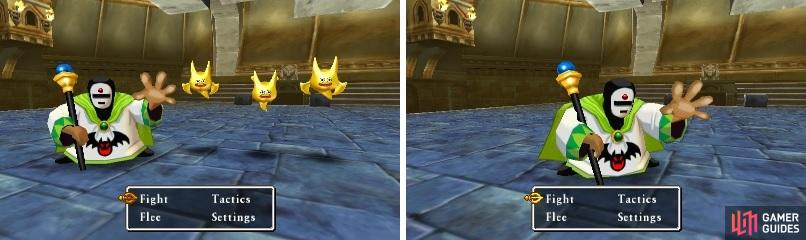
You should never think a boss is easy in this game, but seeing as you don’t have access to your abilities still, then you want to treat this one properly. He has access to Bang, which you know hits everyone for around 20 damage, as well as Kasap, lowering everyone’s defenses. His physical attack will do around 15-20 damage without Kasap, so expect a little bit more when you have your defense lowered. If you use the Salvation Stone from the beginning of the fight, you really shouldn’t have any trouble with this boss.
After the battle is over, open the door above you and follow the winding path to the next area. When you get to the big room with a lot of different dead ends, go to the southeast corner to find some barrels, one of which contains 15 gold coins . In the bottom left corner, you will find more breakables, containing a Medicinal Herb , an Antidotal Herb and an Urnexpected. As you go north, you will want to take the second eastern path from the top to find two chests ( Seed of Resilience and Mini Medal #26 ).
Head to the next floor and you should see an altar of some kind, which is what Jacqueline was talking about earlier. If you stand on this, you will receive all of your spells and abilities back, so make sure you do this, as you can actually leave without doing this. Continue on and you will come to a big room with a bunch of doors. As you will come to see, some doors are only one-way, so if you pass through the wrong ones, you will have to pick another door to go back to the previous room.
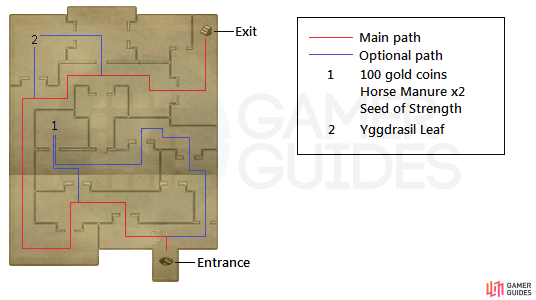
A map on how to get through the room with all of the doors, as well as the optional treasures in the same room.
From where you start, take the upper left door in the first and second rooms, then enter the one with a bunch of pots ( 100 gold coins , Horse Manure x2 , Seed of Strength , and an Urnexpected). Leave to the previous room and go through the upper right door, then go down to the lower right to go back to the entrance of this entire area. Take the first upper left door, then the lower left one to reach the long hallway on the western side of the map.
Enter the northwestern room to find a lone chest, containing a Yggdrasil Leaf . Now, go east one room, south one more and then east to the stairs in the upper right corner. You will come to an area with a crazy-looking layout, so start by going up the first stairs near you to find two chests ( Kitty Shield and Seed of Agility ), then go north and west to see a long, covered hallway. Enter it and continue north, then west and north again, following the path to some more stairs and another covered section.
Here, just go north until you hit a wall, then west to some stairs in the opening. Climb these stairs and then head straight north to find another chest, containing 350 gold coins . Continue to the west and you’ll come to some stairs that lead to another covered section. As soon as you descend the stairs, go straight north and then east to one last chest in this area ( 200 gold coins ), and west after that to eventually find the stairs that’ll lead to the Alltrades Arena.
Allblades Arena
Feel free to rest at the inn to the north and check out the equipment shop, as there is likely some new gear you can use to boost your characters’ stats. Enter the main building to find a church right there, as well as four pots next to the lady ( 50 gold coins and an Antidotal Herb ). Enter the room in the north to find a Scale Armour in the cupboard, then enter the room next to it to view a scene. Back in the main lobby, use the exit in the southwest to come to an area with a lone pot, containing a Medicinal Herb .
After viewing the scene with Nava in the northern room, go towards the church to view another scene. Zev will run off on his own, but not very far, so you’ll find him to the south of where you saw him and Eustace talking. Speak with him and he will join your party, but there’s quite a tough portion of the game coming up. You should have three Yggdrasil Leaves from scouring the dungeons before this, so it’s a good idea to put one in each of your characters’ inventory. The rest of the slots should be filled with healing items, just in case you need them as back up in the upcoming battles.
Whenever you feel you are ready, speak with the Clawcerer at the desk just north of the church to hear the rules. In order to get out of this place, you will need to win six battles in the arena, with no breathing room in between bouts. Each fight will be a four-on-four match. Every enemy team will consist of a strong enemy and three normal enemies that you’ve already fought up to this point (with one exception). You should always take out the lesser enemies first before concentrating on the big one.
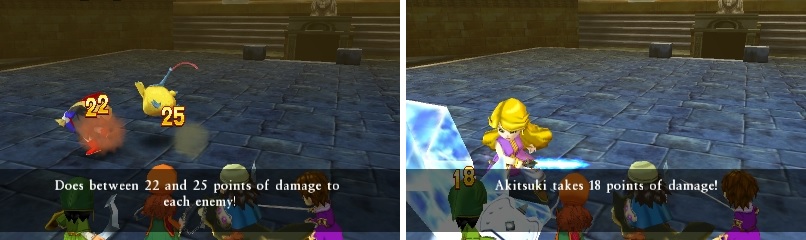
Take out the little guys (left) before you concentrate on the boss of each arena battle (right).
Battle 1: Numpton and Drake Slime x3
Numpton knows spells like Fuddle, which can confuse a single party member if it connects, making them act on their own, even attacking your own party. In addition, he knows Sizz, which hits all members for around 10-15 damage. He also has the annoying Dazzle spell, meaning your party members will be blind. Fizzle will prevent you from using spells for a few turns, which is why it’s good to have healing items on your characters.
Battle 2: Bronson and Serial Quiller x3
This can be an annoying fight, as the Serial Quillers do around 10 damage with their normal attacks, they will likely go before your party and they can also Dazzle your characters. Bronson is mainly a physical enemy, with an attack that hits all characters for around 15-20 damage and a normal attack that does about 20 damage. He also knows Kabuff which increases defense for a group of enemies (it can only go on him or the three Quillers, not both).
Battle 3: Hans and Muddy Hand x3
Hans is a bit stronger than the previous two fights, as his physical attack hits for around 25 damage, as does Swoosh (it hits everyone). He can also do a stronger physical attack that does 25-30 damage to a single target. One of the more annoying skills he has access to is Snooze, which can put your entire party to sleep.
Battle 4: Wyatt and Kisser x3
First of all, Wyatt can possibly perform two actions per each of his turns, so you will want to start preemptively healing from the beginning to counteract this. His physical attack deals around 20 damage, and he has a Roundhouse Kick that can deal around 10-15 damage to the entire party. By far, his most damaging attack is when he summons wind sickles against a single character, as this can deal upwards of 60+ damage.
Battle 5: Bagley and Tongue Fu Master x3
Take out the Tongue Fu Masters as soon as you can, to avoid them making a character waste his/her turn with their lick move, plus they are capable of summoning more into the battle. As for Bagley, his normal attack doesn’t do much (around 15 damage) and can inflict sleep on someone (seems rare), but he can throw rocks at your party, dealing around 20-25 damage.
Battle 6: Nava and Slime Knight x3
As the last battle in this gauntlet, this is definitely the toughest. Nava gets two actions per turn and she can dish out a lot of damage. Crackle does a good amount of damage to your party, dealing 35-40 damage. She also has Crack, dealing 10-15 damage to a single target, and Kacrackle Slash does around the same amount, too. Her normal attack does around 25 damage.
Before you concentrate on Nava, quickly take out the Slime Knights, as they know Heal and could use it on her. Once you do that, make sure your characters are healthy before they start attacking. You can also use Sap with Maribel to reduce Nava’s defenses, as this can make the battle go quicker. Zev will likely be an enormous help throughout the fight, as he could increase someone’s defense, heal or even get a crit on Nava.
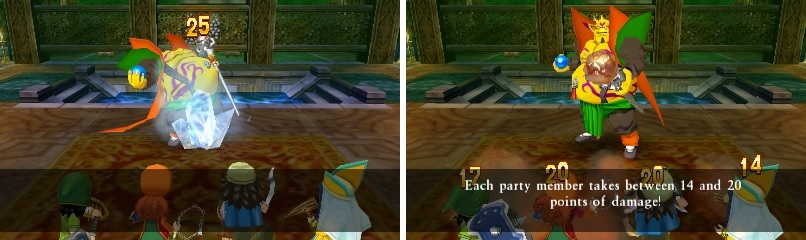
Zev is a huge help in the arena battles (left). Nava can be one of the more challenging battles in the game so far (right).
The battle is now over and you will be escorted out of the arena, although Zev rushes back in to help his sister. This will start a riot in the arena and although it’s completely optional, you can return to see a bunch of fighting. There are various monsters you can talk with to start an one-on-one battle, although all but one of them are ones you’ve already fought and you gain nothing from doing so. Note that you can go back to the equipment shop, inn and church if you wish to use those services before continue into Alltrades Abbey proper.
Right before you go up the stairs in the room where Zev escapes, High Priestess Jacqueline stops you and joins your party. Head up the stairs to enter familiar territory, but you still can’t grab anything yet, so continue to the next floor, where you’ll find the false priest dispose of someone. Approach the priest and get ready for a boss battle!
BOSS - Cardinal Sin
You are in for a world of hurt, as this is definitely a challenging boss and Cardinal Sin is able to attack twice per each of his turns. Flame Slash hits one character for around 25-30 damage and he also knows Bang, dealing around 20 damage to the entire party. His normal attack deals around 15-20 damage to a single character, but his most devastating move is when he throws his orbs, as this can hit two characters or a single character twice. Each of these orbs can hit for 70+ damage, so if one character gets both of them, that character will die.
Start the battle off by having the Hero cast Buff on everyone (except Jacqueline), as well as Maribel using Sap twice on the Cardinal, knowing that he can resist Sap somewhat. Buff should limit the amount of damage the boss can do with his physical attack and Flame Slash, although his magical ones will still do their full damage. High Priestess Jacqueline will definitely help out by either attacking physically or using Crackle. She can also do Midheal, but hopefully you won’t need her help with healing.
You have Jacqueline to help you out in this battle (left). Bang is one of his more devastating attacks (right).
Alltrades Abbey is now free from the monsters’ iron grip and you will be free to explore it once you regain control. When you do, check the drawer right next to the beds for a Leather Hat . Exit the inn to view a little scene, then feel free to talk to Eustace, as well as Zev, who is at the weapon shop. Go down a floor and to the northwest corner to view another scene between Nava and Zev, then there will be yet one more in front of the stairs leading to Jacqueline in the middle of this area.
Before you talk to Jacqueline, it’s time to explore Alltrades and grab all of the stuff you couldn’t before, since the doors were locked. In the northwestern room, there will be 50 gold coins one of the breakables, while the northeastern room has two chests ( Prayer Ring and 130 gold coins ). Enter the room beneath the northeast one and take the other door there to come to a small path that hurts you when you walk on it; there’s a Yellow Fragment at the end, as well as a chest with a Seed of Life .
The room underneath the northwestern one has a chest with a Seed of Strength , and the dangerous path has two more chests ( Seed of Magic and Mini Medal #27 ). That is all of the goodies you can get here, so pay a visit to Jacqueline once more and you will find out you will be able to change your Vocations with her! There are 10 beginner human vocations and you have access to all of them, so be sure to look in the Vocations section of the guide for more details on each one.
Some of the more obvious choices for Vocations would be to start with something like Warrior for the Hero, Priest for Maribel and either Thief, Sailor or Shepherd for Ruff. If you’re under level 20, you can go to the Slimetree Forest tablet (one gotten from Carey for bringing Phlegmrique to The Haven). You will only encounter Slimes there, so they will give very low experience and it will be very hard to level past the cap (which is level 20). Before leaving to return to the present, go back to Pilgrim’s Perdition and pick up the Yellow Fragment at the bank, as well as the chest next to it ( Seed of Strength ).
No Comments