
Return to the portal in the past to get back to the present day era, where you’ll notice that there’s two new islands to explore. For now, head to the southeastern of the two islands and enter the town of La Bravoure. Inspect the well on the southern side of the map to find out that it’s a Well Wisher enemy! You fought one similar to this in Precipice Pass, but you might have a little more trouble with this one. It knows Kasnooze, hits like a truck (somewhere around 45-50 damage with its normal attack) and Frizzle can deal upwards of 60+ damage.
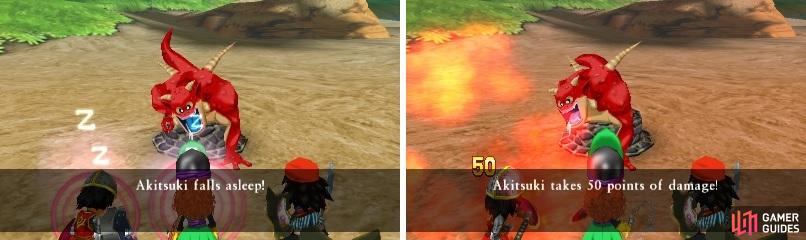
The Well Wisher can put your characters to sleep (left), as well as deal major damage with Frizzle (right).
Enter the well and you can find a Yellow Fragment on a little “island” inside of it. Exit the well now and go inside of the pub for a scene, then check out the rest of the town. The item shop sells a nice shield that you can equip to both the Hero and Maribel, so buy two of them if you have the money. Enter the building attached to the item shop to find 6 gold coins in one of the barrels on the first floor and 7 gold coins in a pot on the second floor.
Inside of the inn, on the ground floor, you will find a Captain’s Coat in one of the cupboards. The last building to enter is the one in the northwest corner of the town, where you’ll find some Wayfarer’s Clothes in the cupboard. Talk to Honore and follow him out of the house, to some secret stairs in the southwest corner of the town. He will bring you to that one area in the well you couldn’t reach, where he’ll give you a Flying Carpet. You will be able to use this on the overworld to reach some inaccessible areas, but before you leave this room, loot all of the nice treasure ( Holy Water and Medicinal Herb in the breakables; Healslime Heart , Dieamend and Mini Medal #28 in the chests).
Back on the overworld map, attempt to use the Flying Carpet to find out it doesn’t work, so go back into town and talk to Honore again, who will take it from you. As you exit his house, Colette will stop you and ask you to go and check on Honore, who should be back at the treasury. Talk to him after the scene, then return to Colette to learn the truth. In order to get the real magic carpet from her, you need to bring her the Mermaid Moon, which you won’t be able to get until later in the game, so ignore it for now and leave La Bravoure.
Sail on over to the other island, which is where you will find Alltrades Abbey. Before you do anything else, go into Pilgrim’s Rest and into the well to find the lovely casino once more. While there isn’t anything new from the token exchange place, the Lucky Panel game has a bunch of new stuff available, so it’s a good idea to play it a bit to get some shiny, new equipment. Once you have sufficiently had your fill, exit the casino and head into the main building here.
Some of the chests here require the Thief’s Key, which you should have bought back in Pilgrim’s Perdition in the past. The chest behind the counter at the north end of the room has an Iron Mask in it. One of the pots behind the item shop has a Seed of Resilience , while the chest has a Holy Water . In the pub downstairs, you will find 3 gold coins in one of the barrels. Head towards the main abbey now and go to the floor with all of the shops and inn; the drawer in the inn will have a Silk Robe inside.
Go down two floors and you will come to the room that was filled with a bunch of treasure in the past. As you can see from your fragment radar, it is going off pretty big, meaning there is a tablet fragment here. The Yellow Fragment is in the upper right room, along with 5 gold coins in one of the breakables. In the upper left room, you will find a Mini Medal (#29) in one of the pots, and that’s about all you will find at the abbey.
Exit the abbey and move to where Pilgrim’s Perdition was located, which is now ruins. There’s nothing here in terms of items, but there is a priest laying on the ground in the middle of the area. Take a look at him and as you walk away, you will get thrown into a battle!
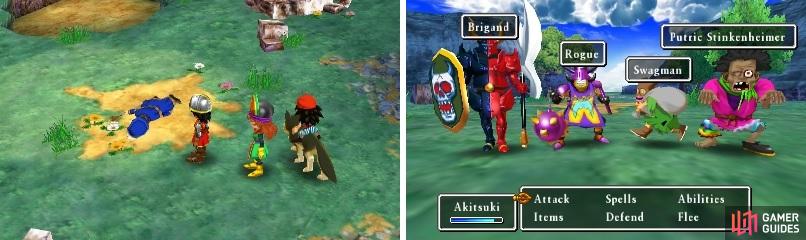
Check on the priest laying on the ground (left), only to get thrown into a four-enemy battle (right).
BOSS - Putric and Thieves
This can be a difficult battle, as you’re deal with a total of four enemies. Of the four, Swagman is probably the most annoying, as he has an attack that can inflict confusion, plus he can throw rocks, damaging the entire party for around 20-25 damage. The Brigand mainly uses physical attacks, but can also increase the strength of his next attack, as well as dazzle your party by blinding them with a bright light.
The Rogue knows Sizzle (hits all party members) and can do physical attacks. Putric has a variety of attacks in his disposal, include two physical ones, a poison breath attack and a dance that drains a single character of some MP. This battle is purely one of controlling the enemy, so if you still have your Edged Boomerangs on the Hero and Ruff, they will provide a lot more damage than single-target weapons. Fall back to the Hero healing if needed, but Maribel should go full healing straight from the beginning of the battle.
After the battle is over, the thieves will run back to their hideout, which is the cave to the west of the ruins. Quickly follow them (go through the poison to get there faster) and if you were fast enough, you will find out their password by eavesdropping. Go up to the guard and answer “Get lost” to get inside, where you can get some goodies. The cupboard north of the main entrance has some Plain Clothes , while you can get some Horse Manure from a barrel just outside the northernmost room. There’s a Bandit’s Key in the cupboard in the northern room, allowing you to get inside the locked room, which will net you a Mini Medal (#30) , an Iron Shield and an Iron Lance .
Talk to the NPC in the northern room and say yes to fight him, The Mighty Pip. He’s a fairly easy battle, despite being able to attack twice per each of his turns (not always). He knows the Boom spell, which does hit pretty hard, and his physical attacks aren’t too powerful. Despite the strongly named Blade of Ultimate Power, he can’t use it and the move will always blow up in his face. For defeating him, he will hand over a Yellow Fragment , which should be the last one you need for now, so head on over to The Haven to do some sidequesting.
The Havens Residents
There are a few residents for The Haven that were missed, with the last one gotten being the one in Emberdale. Before you journey out there, return to The Haven and make sure you got the Mini Medal that can be found in the Download Bar, as it will be replaced shortly. Onward to the resident, Zoom to Faraday Castle and run to Frobisher, where you’ll find that the big guy in the inn can be sent.
The next one is in La Bravoure, inside of the inn (the guard-looking NPC who is speaking like a Slime). The last one will require you to Zoom over to Alltrades Abbey, then run to Pilgrim’s Rest. Enter the casino and go all the south to the bar, where you’ll find that the lady on the left side is looking for somewhere to shine, so send her to The Haven. Zoom over to the place and you will find it has been upgraded, if you’ve gotten all seven residents so far.
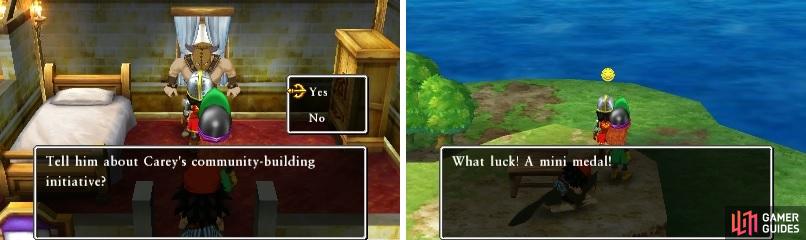
You can now recruit enough residents (left) to upgrade The Haven to its second level, allowing you to get some more loot (right).
The house on the northern end has a Leather Dress and Garish Garb in the cupboards, while you can find a Mini Medal (#31) in one of the pots in the northeast corner. The other house has a Shellmet in one of the cupboards, and you can find one more Mini Medal (#32) in one of the barrels in the Download Bar. Also, don’t forget to speak with the residents you just brought to the place, as they will each give you a Traveller’s Tablet.
No Comments