
If you have trouble locating Shimmering Island, go to Esto Gaza on the Lost Continent and fly south of it until you see some weird thing inside of a large crater. There will be a brief scene on the airship, where you have the option to either keep moving forward or pull back. To continue with the story, you need to keep moving forward, so pick that option to be treated to an actual cutscene that’ll drop you off on Terra.
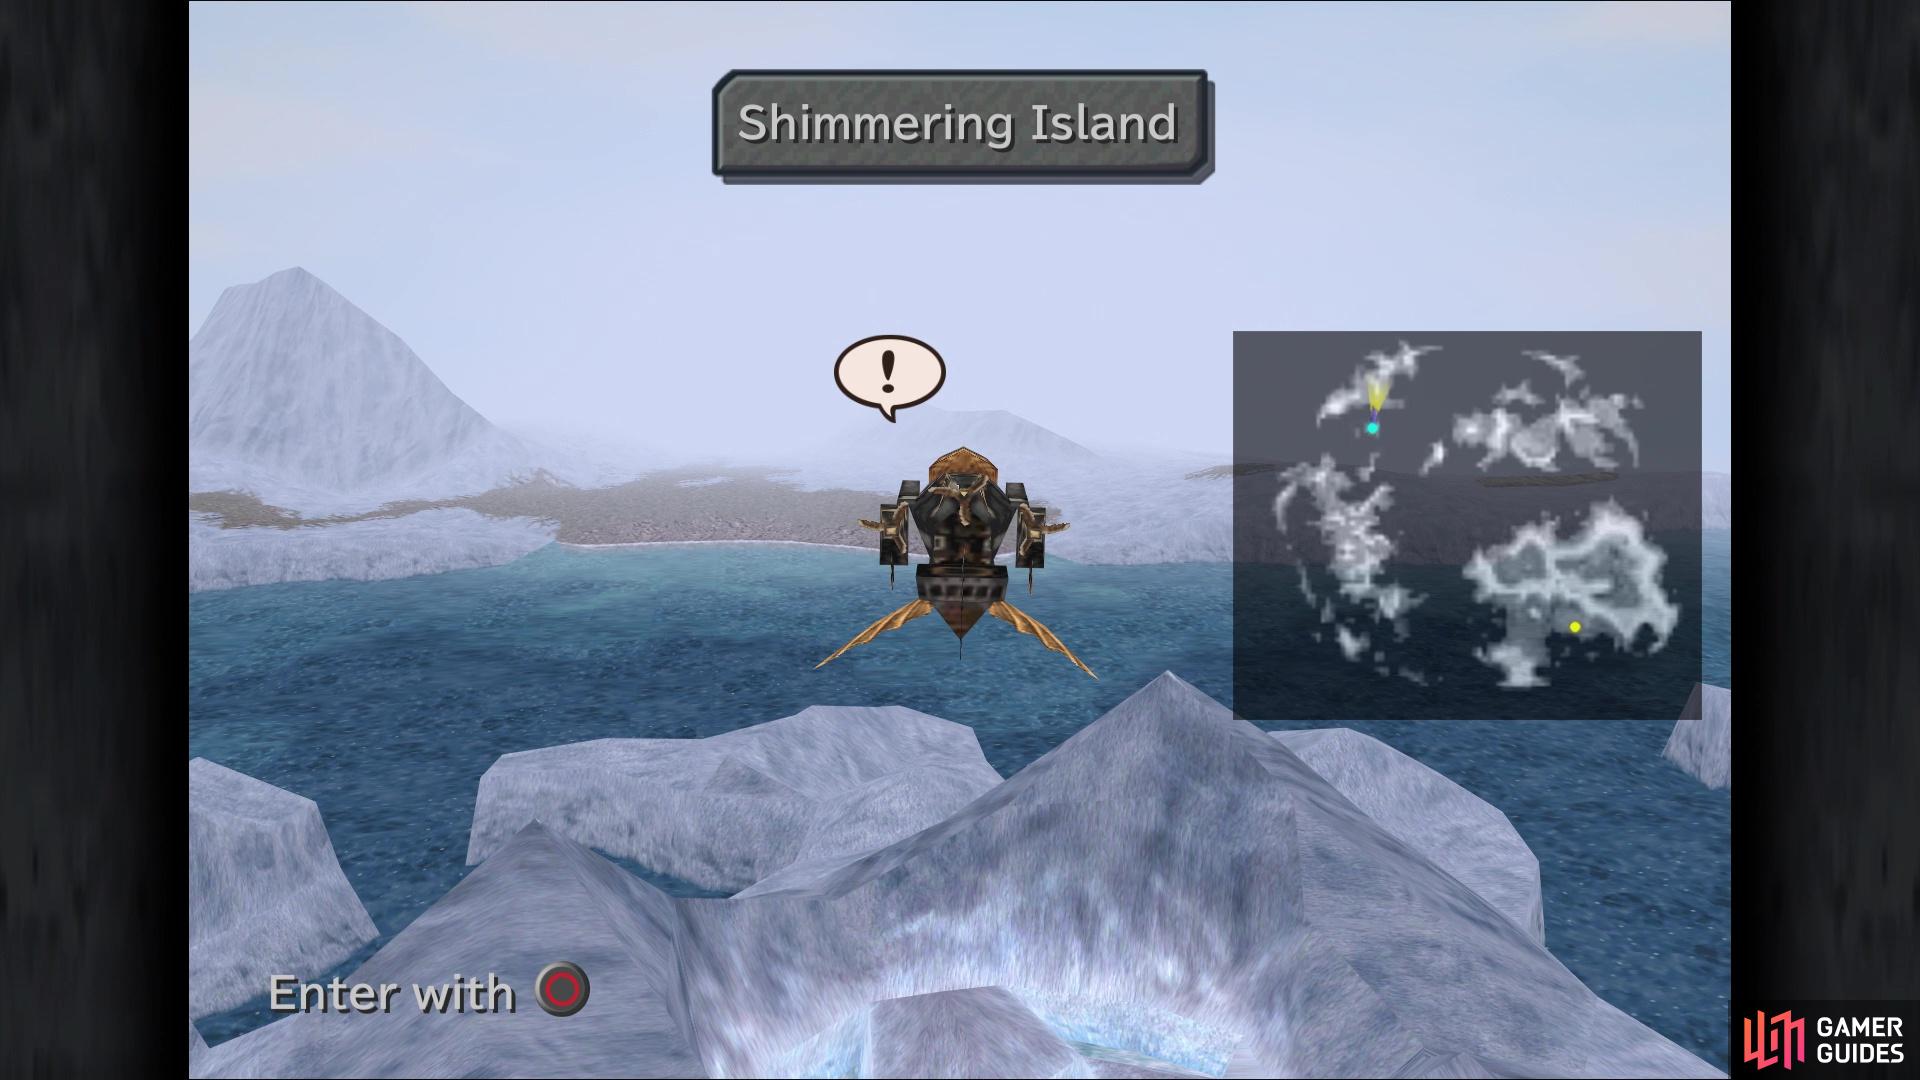
You can find the Shimmering Island just south of Esto Gaza
Terra
One of the first things you will see is an old man (who is actually Garland, if you remember from earlier). After a short conversation with Zidane, Garland disappears and you will be able to pick your party for this place, with Zidane the only one being forced on you. When you’re ready, begin exploring the place by taking the exit in the bottom right. A mysterious girl will be in front of you, but don’t go chasing after her just yet. Instead, take the stairs leading downwards and jump across the gaps to reach the one platform with a chest, which contains a Coronet.
Continue north from the previous chest, heading to the next screen and at the dead end, open the chest for a Dragon Wrist. Return to where you saw that girl before and go north. On the next screen, open the chest to your left for an Elixir and continue chasing after the girl. When you reach a screen with some webs on the right side, use those to climb down two levels and open the chest for a Remedy. Go back up one level and on the left side, there is a small gap you can jump over, so do that now.
There will be a chest hidden behind the wall here, which yields a Mythril Racket. Climb down the nearby web and yank open the chest for a Demon’s Vest, then keep going after the girl, until she urges you to set forth across a bridge. On this next screen, you should be able to spot a chest on the left side of the screen. To get this, climb the stairs in front of you, then hug the left wall here. There is a secret passage that heads away from the screen and down to the chest below, where you will receive a Minerva’s Plate. Climb the remaining stairs on the main path to watch a scene, then you’ll be in a new area.
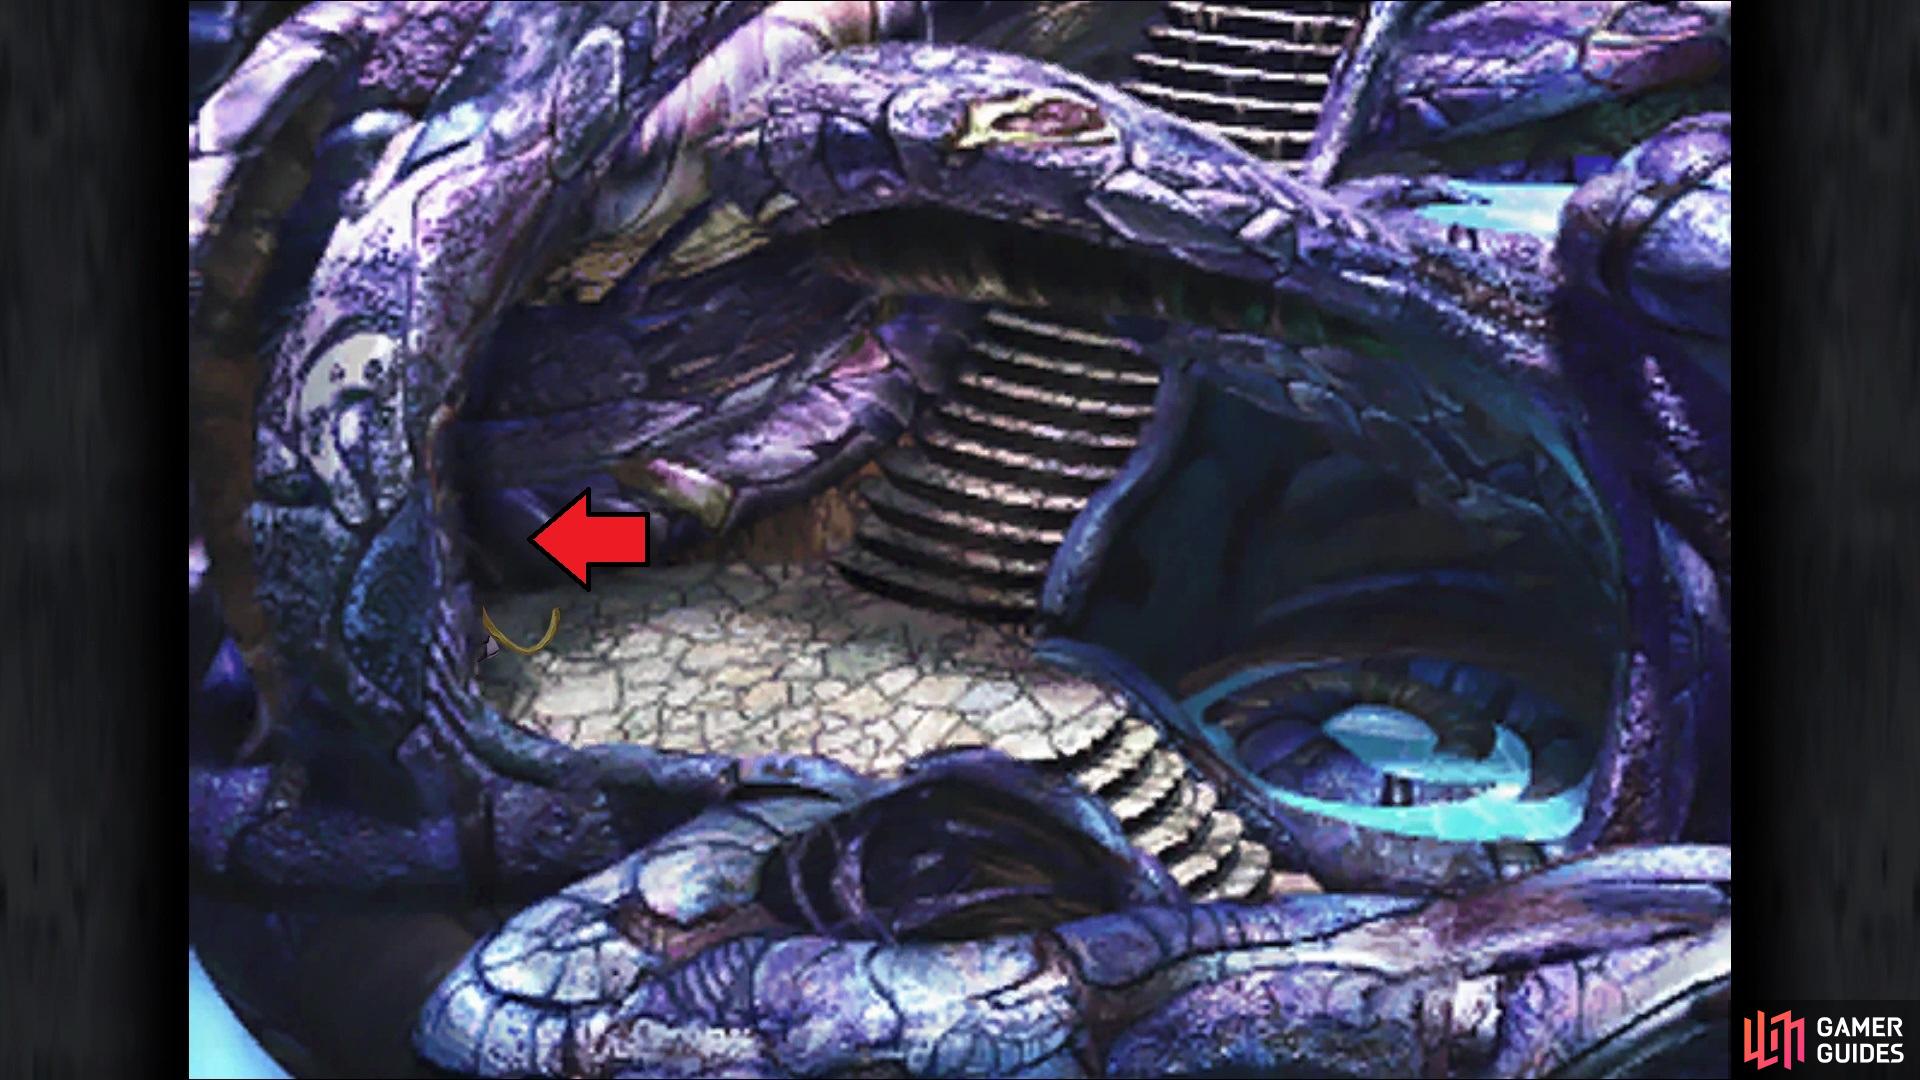
There is a secret passage located here

leading down to the chest with the Minerva’s Plate
Bran Bal
First and foremost, if you were using Steiner and/or Dagger, then they will be out of commission for this area, so you’ll have to replace them. When you regain control, descend the staircase on the left and at the bottom of them, there is a path above them that leads underneath. At the end of this path, you will be able to hit the button to hop over to a floating piece that has a chest, which contains a Flash Hat. Head back to the main path and enter the first building on the left for a quick scene or two, then you’ll be back in control of Zidane.
Go back inside the building he just exited and open the chest in the back for an Elixir. Back outside, enter the northern building and go down the stairs on the right side. Although a little hard to see, there is a hole in the foreground, which has an item in front of it (Elixir). Head back upstairs and enter the building on the right, opening the chest there for a Wing Edge. Check out the moving basket in the back of the same room to free Moorock the moogle. Pick the Mognet option to receive a letter from Moorock to Mozme, plus he also has a shop with some new equipment.
Purchase whatever you want, knowing that you only have Zidane right now in your immediate party. Exit the room and re-enter to see that Stiltzkin has mysteriously appeared, so purchase the item set from him for 2,222 Gil to obtain a Diamond, Ether and Elixir. Exit the building and head back to the left side of the “lake,” locating the little bit of “land” that you can stand on the northern shore here. When you find the right place, you see that there’s an icon, letting you loot a pair of Angel Earrings.
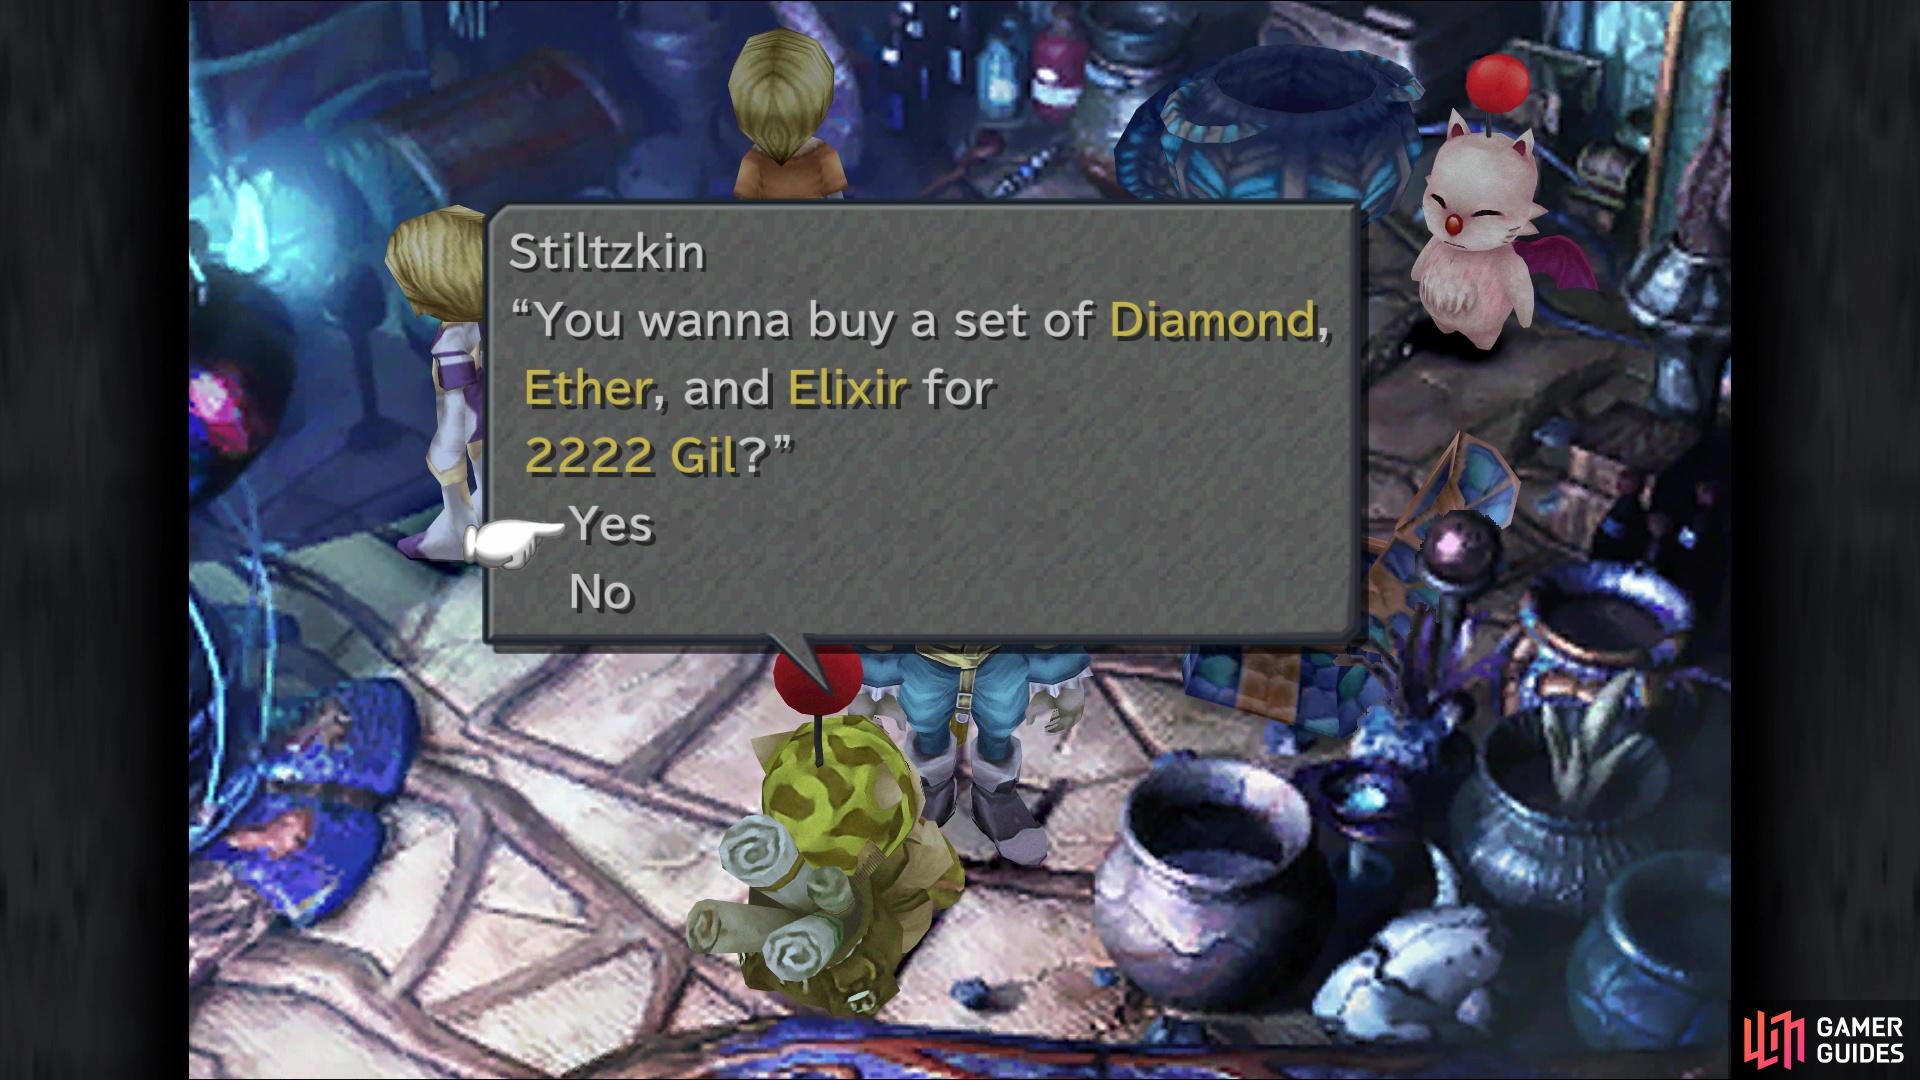
Re-enter this building to find Stiltzkin

You can obtain a pair of Angel Earrings in this spot here
That sums up the exploration bit of Bran Bal, so let’s carry on with the main story once more. Head back into the northern building on the left side and head downstairs. Try to talk to the one female NPC you’ve been chasing all this time (she’s at the front of the room), which strikes up a conversation between you and her. Go back up the stairs for more dialog, then you will be put back into control of Eiko. As soon as you take control, you can trigger an ATE called Place to Call Home.
Exit the inn to see another ATE available, called Where the Heart Is. Next up is another ATE that you can get by heading to the right screen, called Came into this World. The last ATE in Bran Bal is located inside of the north building, where the NPCs are gathered around the crystal-like object, and it’s called The Truth. With those out of the way, you need to hunt down the party members that talked to Zidane during the ATEs. You should see Quina in the same room as the final ATE, so talk to him/her. Vivi will be on the right screen of the main outside area, and Amarant will be by the two sets of stairs near the entrance.
Upon getting Quina, Vivi and Amarant, equip them with gear and when ready, walk through the green light by Amarant. When you see that female NPC from earlier, speak with her and the game will bring you to Pandemonium.
No Comments