
This is finally it, the last area of the game, so when you’re ready, move through the doorway at the top of the room where you fought Lich. There’s a little section in space, where it looks like the game is moving Zidane, but you actually have to move him yourself; just hold up the entire time. Note that you can still encounter enemies here, with one potential encounter being a Behemoth. If you’ve never actually fought one before or used the cheaper method (Odin) with Dagger at the weapon shop in Treno, then they counter physical attacks with Meteor. Back to the main point, when you reach the light at the end, you will be transported to the Crystal World.
Crystal World
This place is linear, so you don’t have to worry about any diverging paths and there’s also no treasure at all. The Crystal World also has new encounters, so you won’t be fighting any of the normal monsters from Memoria here. However, the normal encounters are crystal versions of the four main bosses from Memoria, but they have less health and are much more susceptible to status ailments. Lich remains the exact same, in terms of abilities, as does Maliris, although she doesn’t have the Raining Swords attack upon defeat. Kraken and Tiamat, however, have a little change in their abilities.
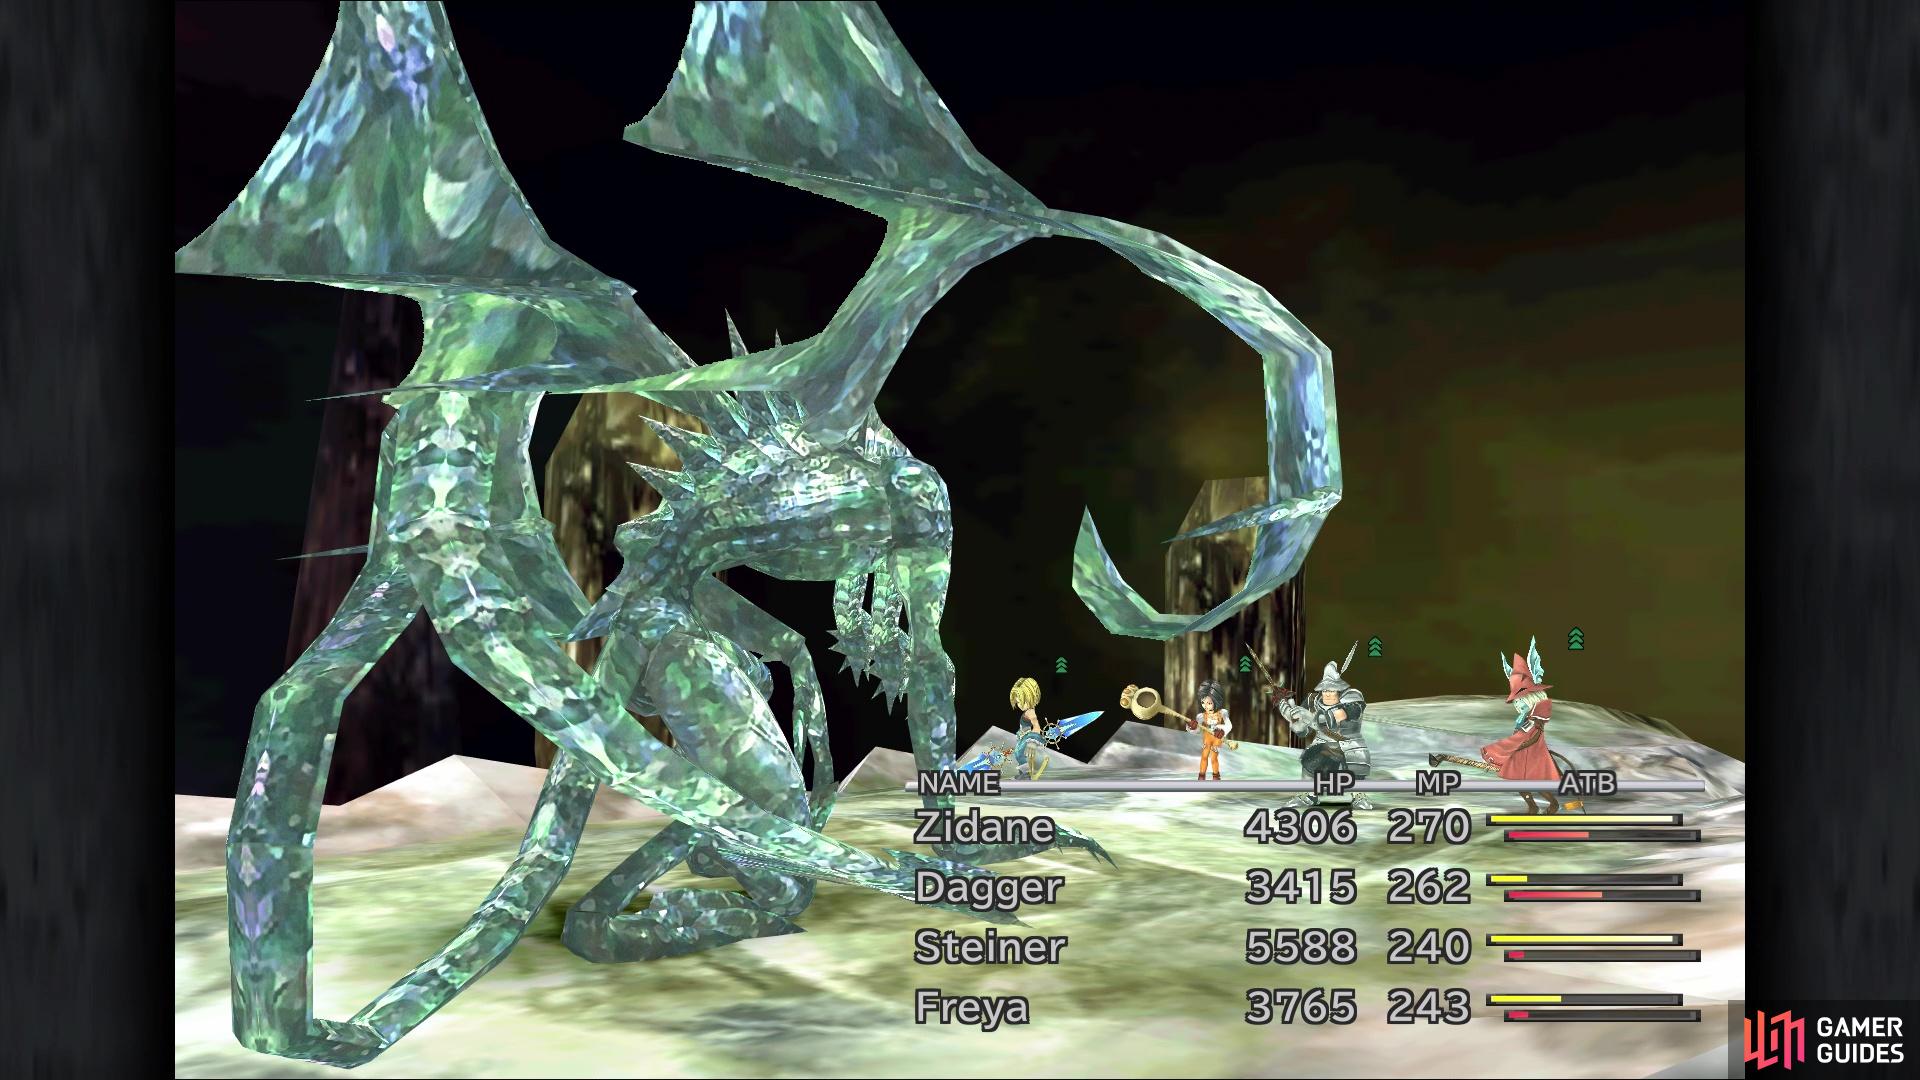
The regular enemies in Crystal World are the bosses from Memoria
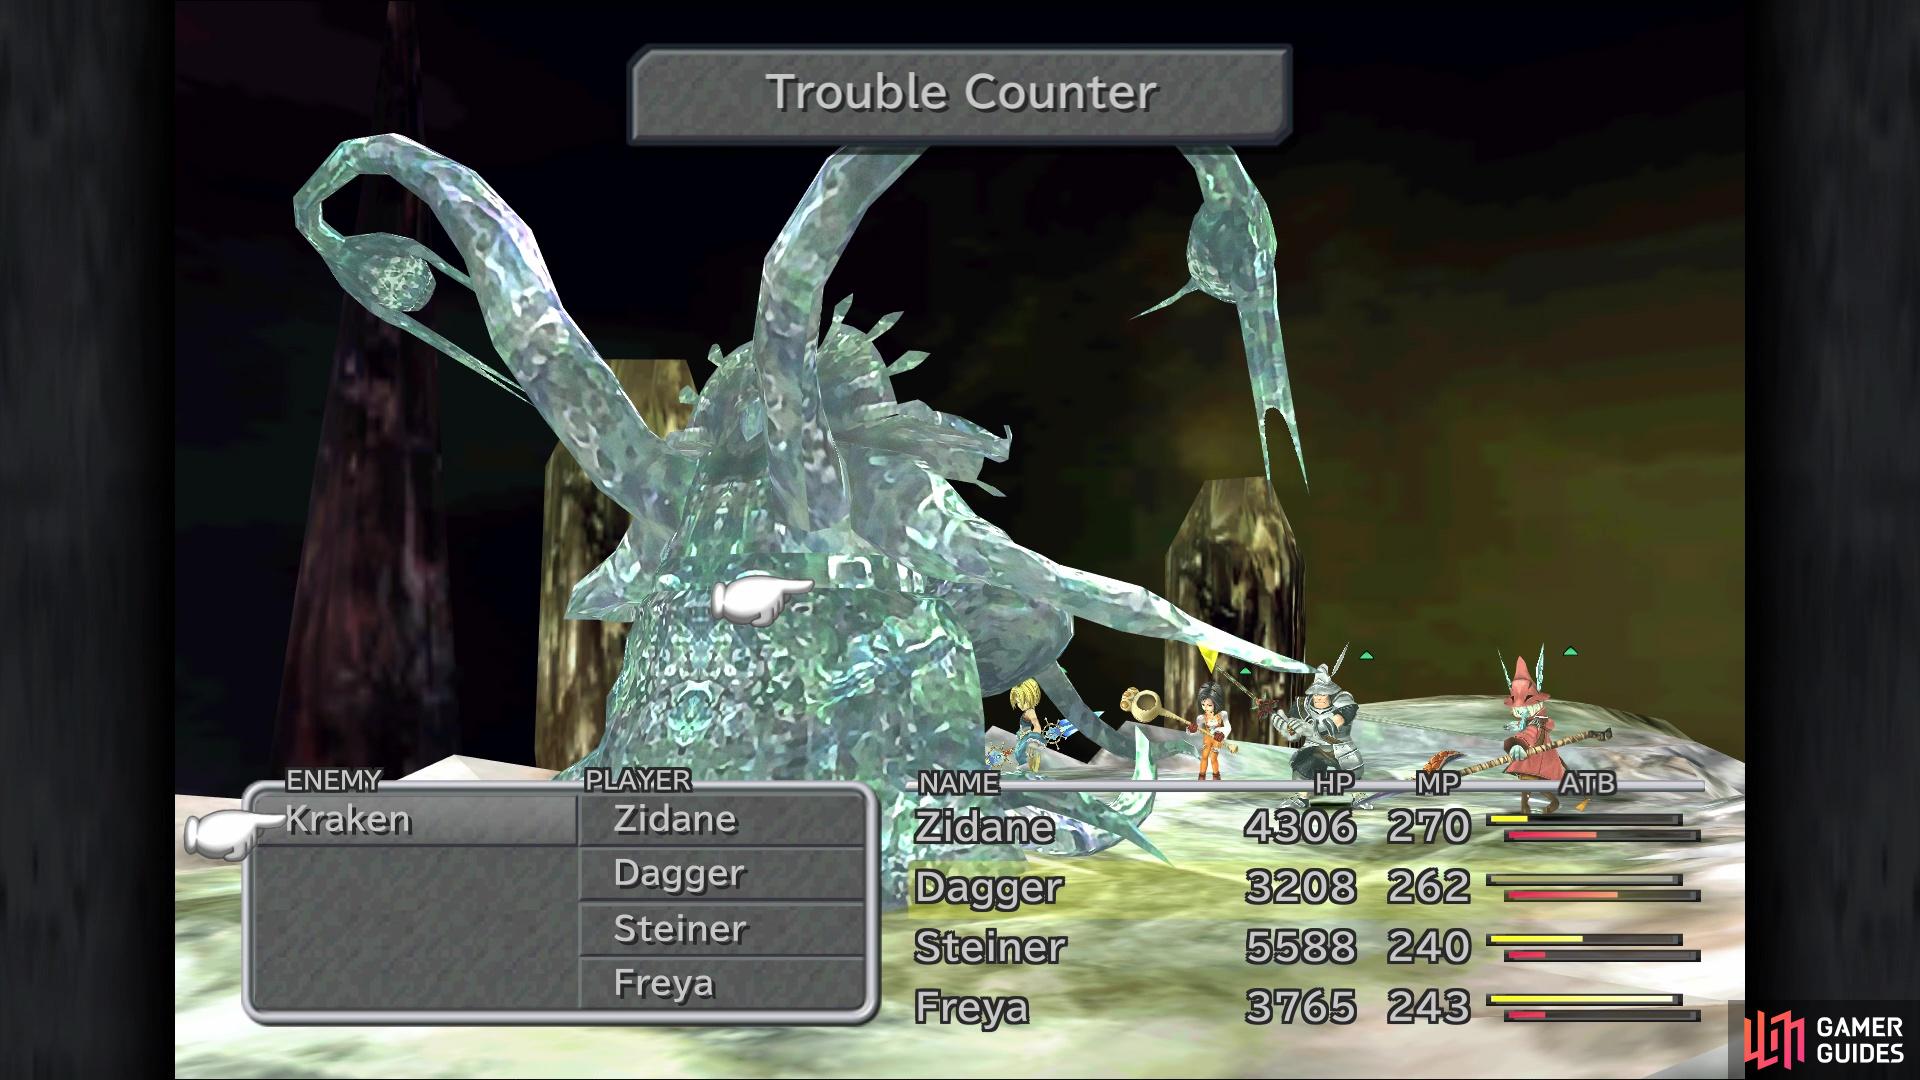
Kraken will have a new move called Trouble Counter
Kraken won’t has his tentacles like in the normal boss fight, plus he replaces Leg with Trouble Counter. The only difference with Tiamat is that he won’t use Float and Snort, so you don’t have to worry about having a character permanently removed from battle. None of these “rematches” with the bosses will give any experience, though, so you’re not going to gain any levels in the Crystal World. However, all of them do yield 7 AP, so if you’re still looking to learn some abilities, this can be a great place to do it.
As previously said, the path in Crystal World is linear, so you’re not going to have any distractions or get lost. When you reach the save point, you will see a new option there, to teleport back to the beginning of Memoria. This is a one way trip, though, so if you decide to use it, you’ll have to run all the way back to this spot. Walk into the little portal by the save point, then it’s time to prepare a bit for the upcoming boss fight. The only thing you really need is protection against wind, which is easy enough if you have Ribbons. You also need to make sure none of your levels are divisible by five. Step forward for a scene and a boss fight.
BOSS - Deathguise
Despite what you may think, this is not the actual point of no return yet, but don’t let Deathguise fool you, as he can definitely deliver some punishment. At the beginning of the fight, Deathguise will always use Meteor, which does random damage, but if it rolls high, you may be in a world of hurt. If you survive, then you should know that Deathguise has two different forms it can take, an open form and a closed form. In its open form, Deathguise will use its physical attacks, and while closed, the boss will use its magical attacks. The good thing about this is that Deathguise will take a turn to actually do Open or Close as an actual ability.
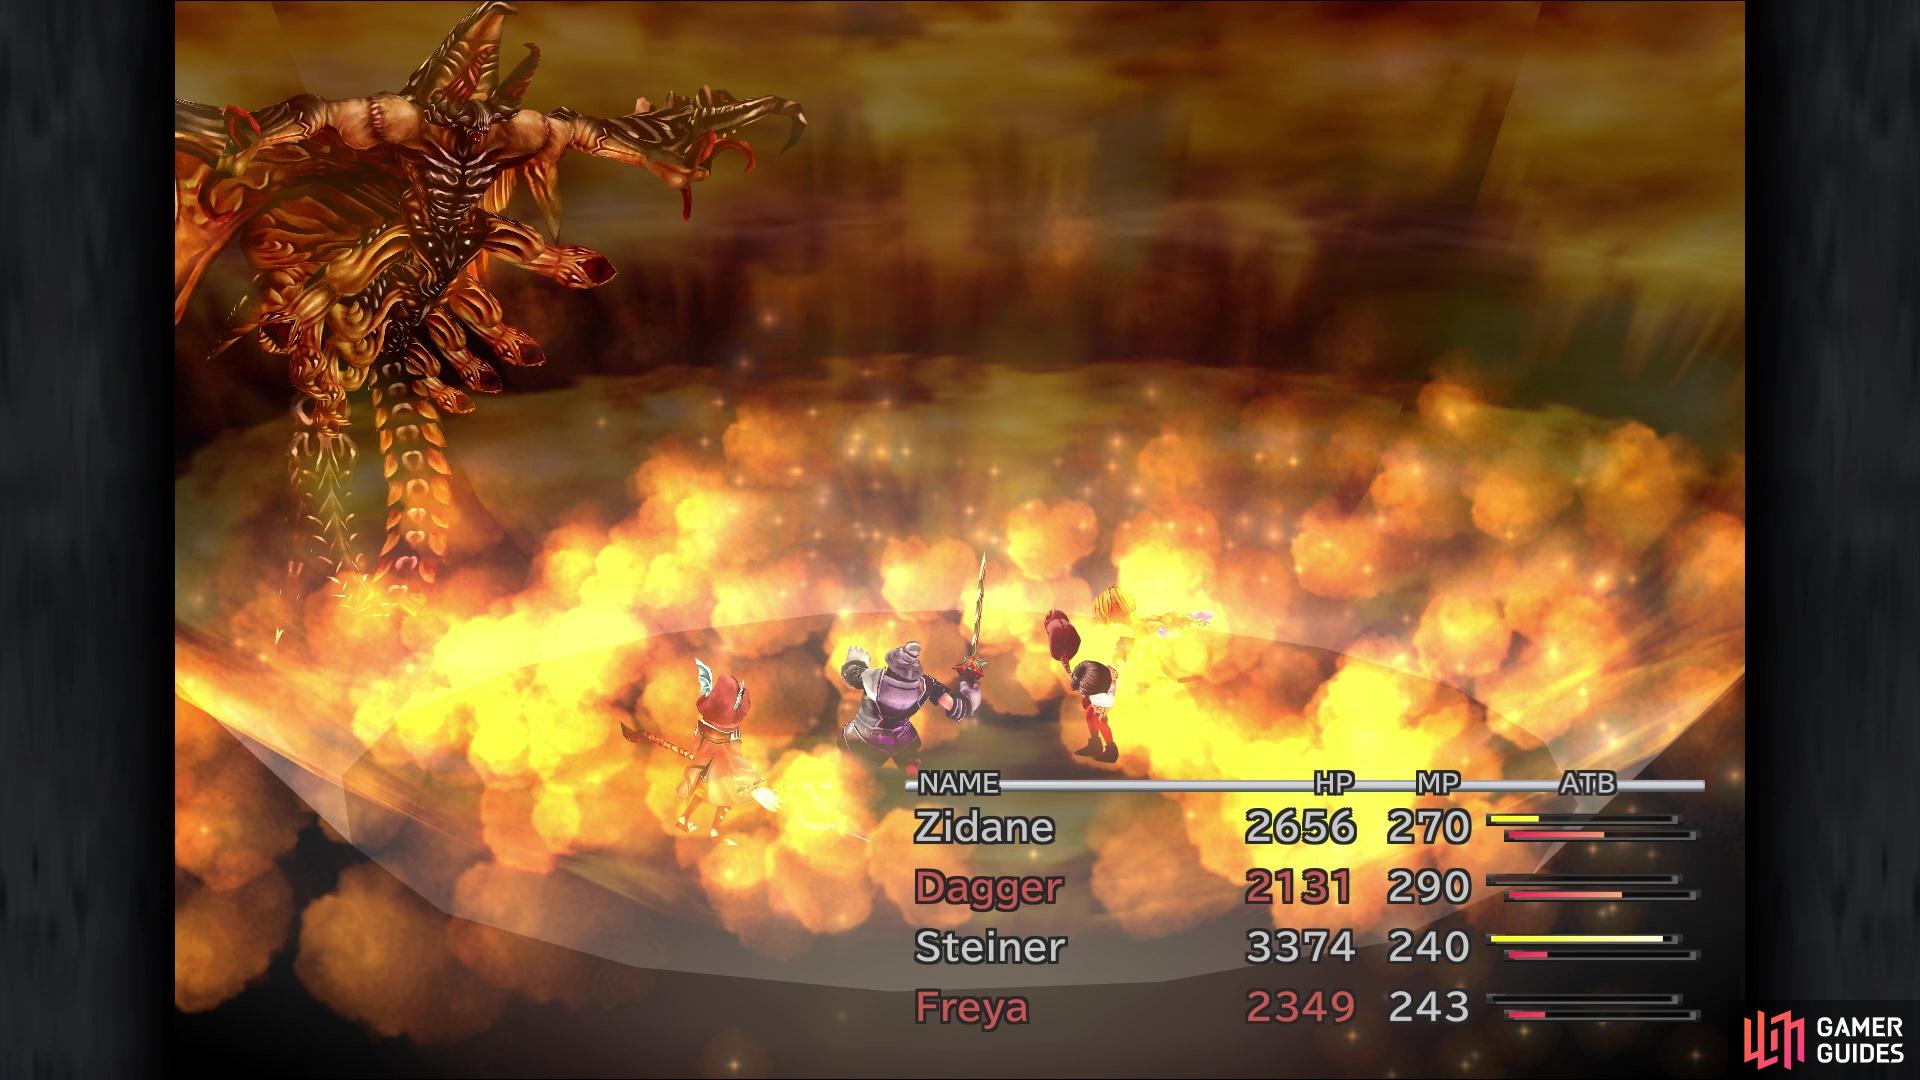
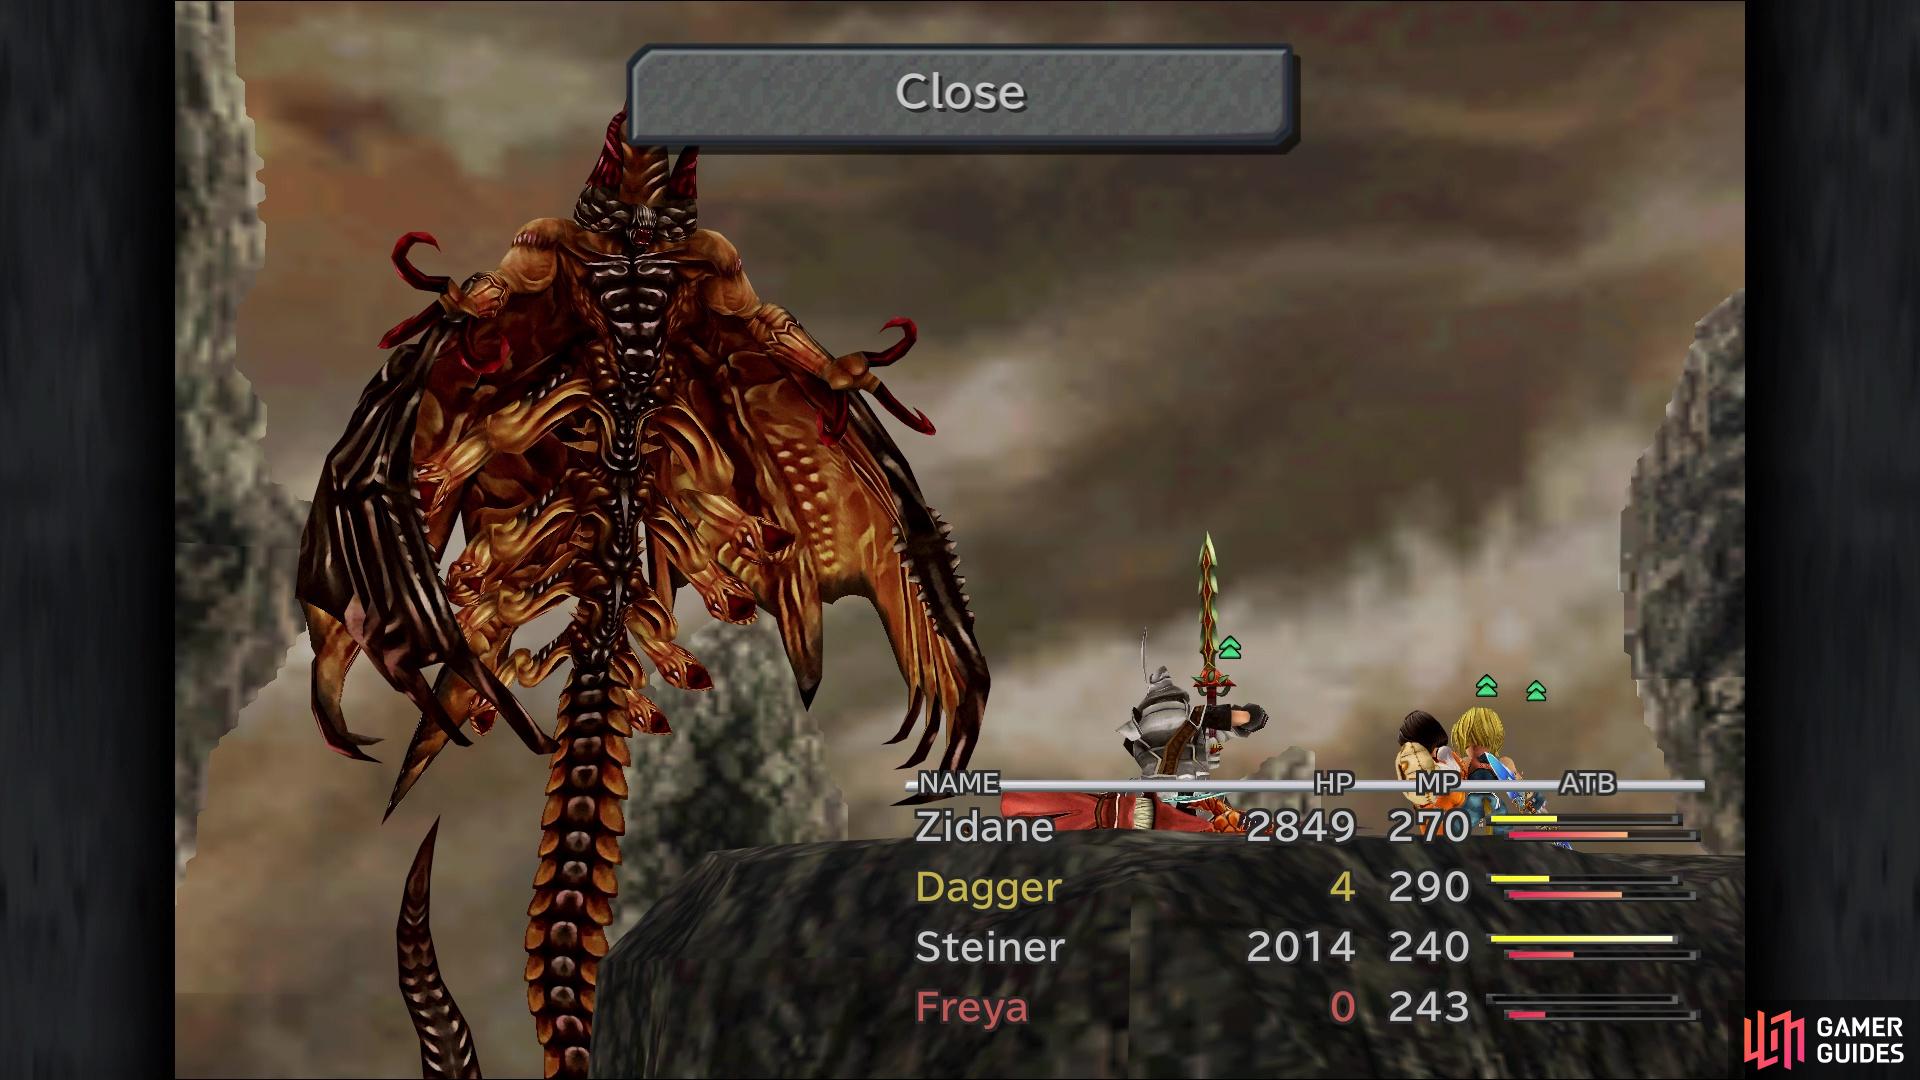
The Meteor opening attack can potentially kill off some characters
When Deathguise closes its wings, it will begin using magical attacks
As previously mentioned, when the wings are open, Deathguise will use physical attacks, of which it only has two. Demon’s Claw is a single target physical attack, while Spin will hit the entire party. There’s nothing else attached to these, so you could use Protect to help minimize their damage. When Deathguise closes his wings, it will resort to magical attacks. The moves it will use are LV5 Death, Death and Twister. The first one is easily avoidable by having your levels right and Twister can be negated with Ribbons, but if Death hits, then one of your characters will be KO’ed.
Despite using Twister, Deathguise actually takes more damage than usual against wind, as well as against ice. It is also vulnerable to both sleep and slow, with the former being important if you have access to it. For example, you could put Deathguise to sleep and pelt it with spells, since those don’t wake up sleeping targets. By far, the biggest problem with Deathguise is that opening Meteor attack, as it can make it hard to recover if more than one character is dropped. If you wish to steal any goodies, Deathguise has an Elixir, Black Belt and some Duel Claws.
Upon defeating Deathguise, heeding the warning above, you can head back to the save point and rest/save your game. Also, if you want to do any other content, then feel free to go and do that now. When you’re ready, approach Kuja and get ready for another boss battle.
BOSS - Trance Kuja
Trance Kuja isn’t a fight you really prepare for, other than making sure your magic defense is high. There’s literally nothing else you can do to protect yourself against his spells, so you either deal with them or come back again, should you be defeated. While you can steal from him, there isn’t really any need to, since his items are nothing special. Trance Kuja has upgraded in terms of spells he uses compared to the last battle, although he still has Flare Star. You might see this during the battle, but will likely see it more often, as he can use it as a counter when his health is low. If you don’t remember, you can’t mitigate the damage at all, since it’s based on your characters’ levels (in this case, level times 35).
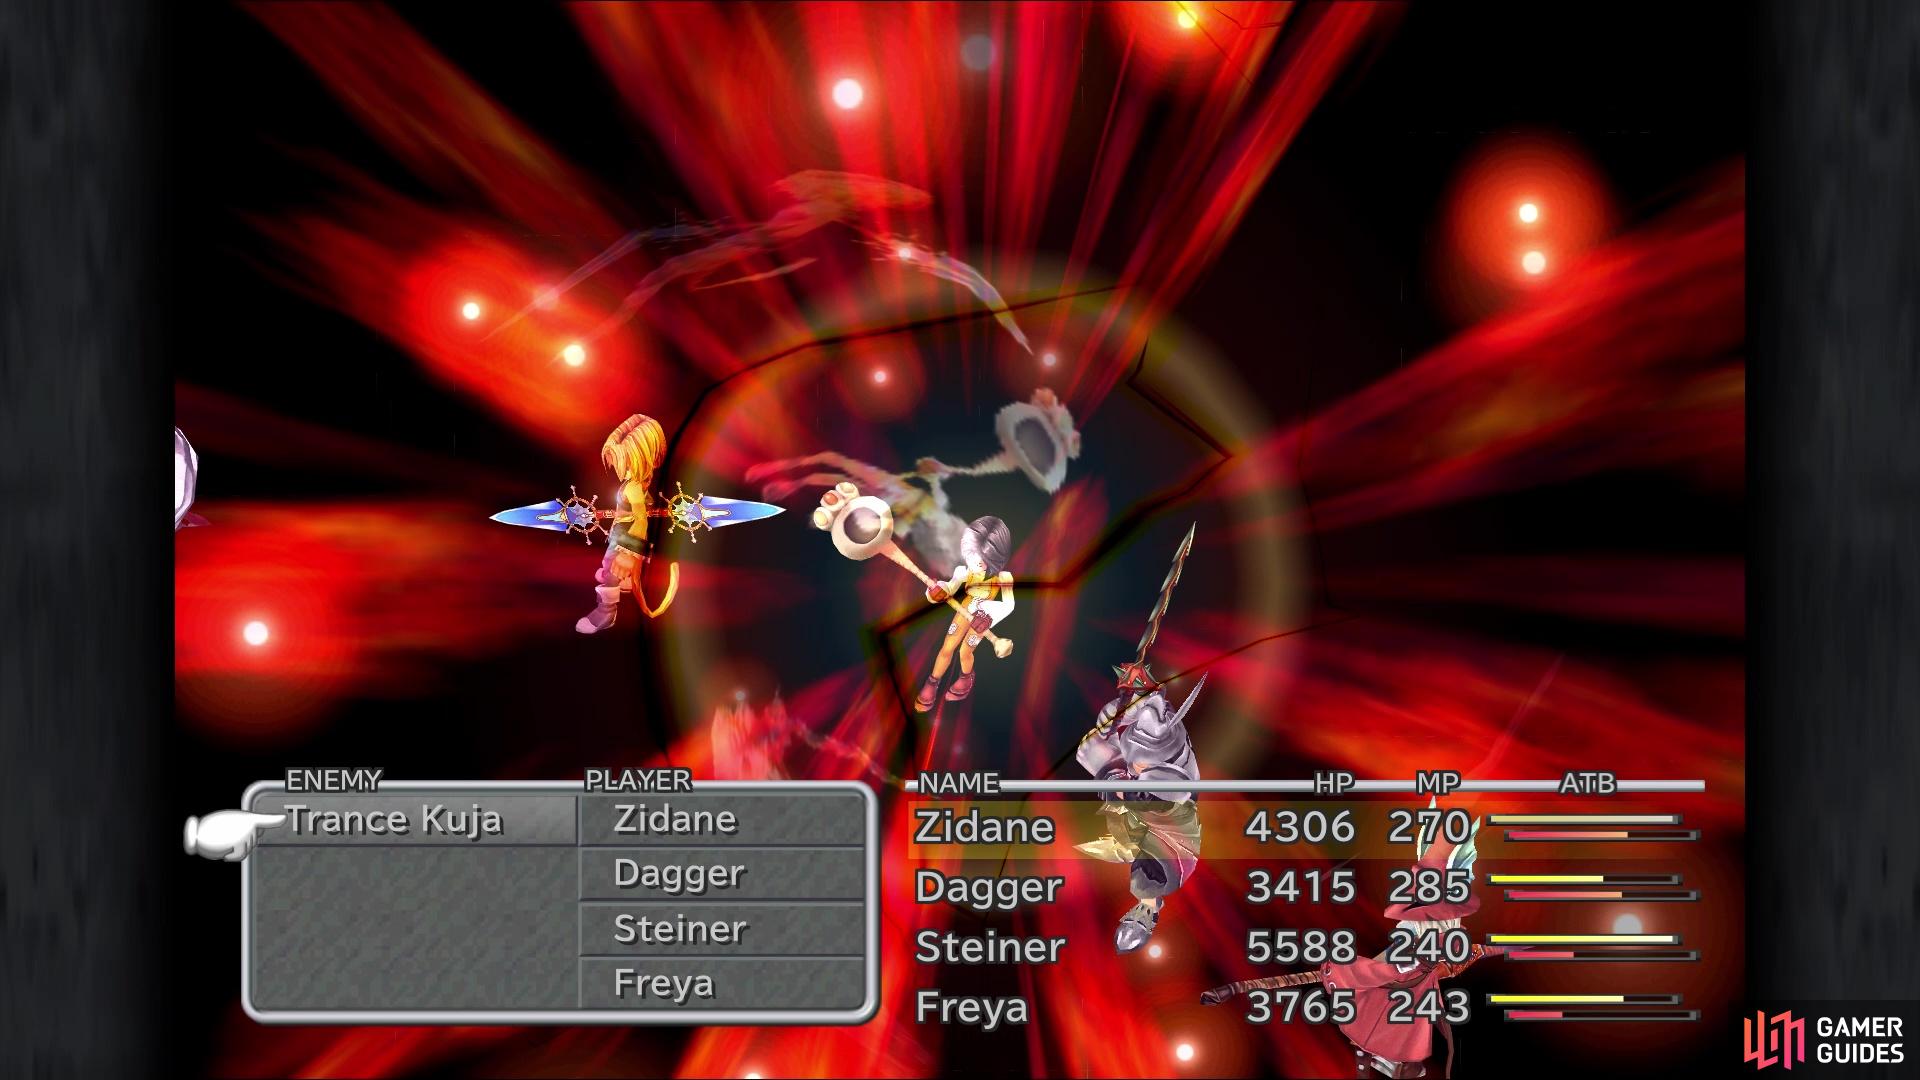
Kuja’s spells only hitting a single character can help a lot
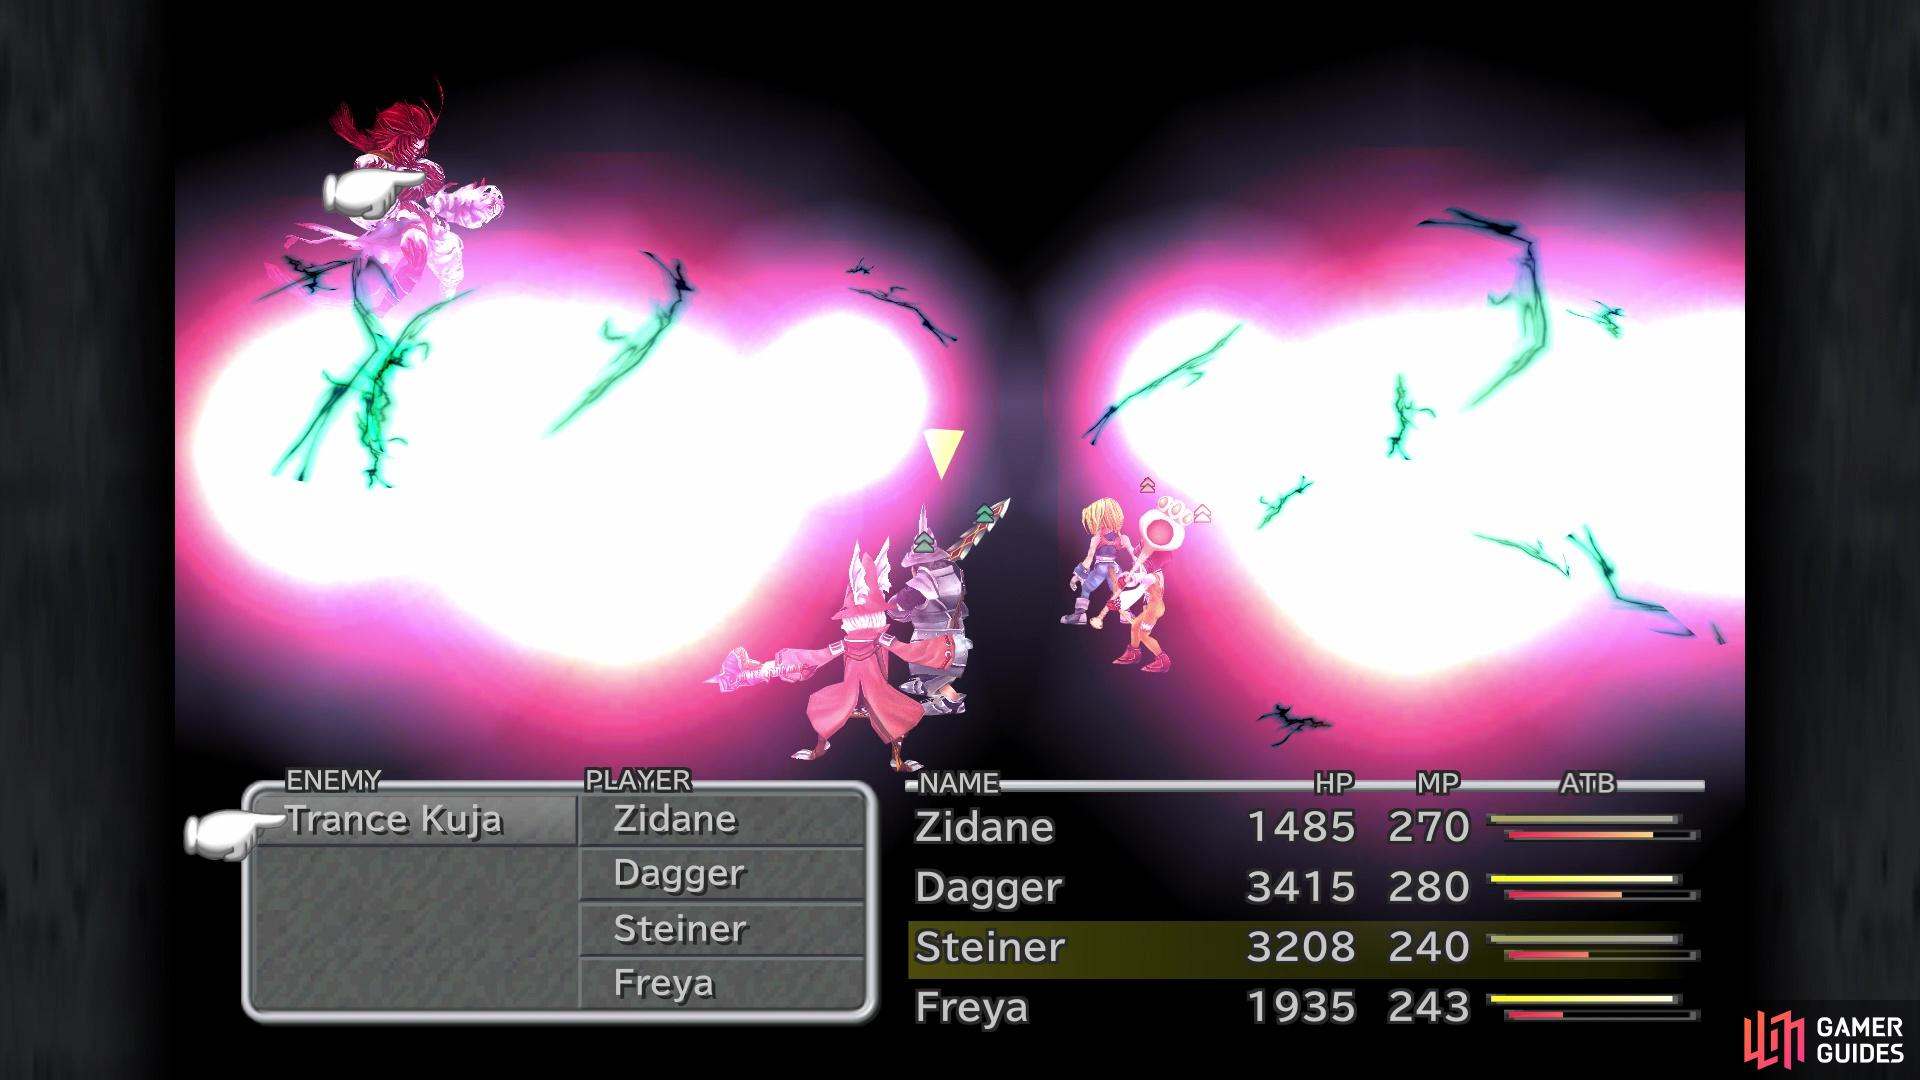
Flare Star is definitely the biggest problem in this battle
The worst part about Flare Star is that you might see Kuja use it twice in a row at low health, since one time is a counter. Having Auto-Regen on your characters is nice, but it doesn’t replace an actual healer. Other spells that Kuja has access to in this battle include Flare, Holy, Curaga and Reflect. The first two are nice, since they only target a single character, while you should easily outdamage his Curaga. If you’re using spells on Kuja, be careful of his Reflect, since Eiko is the only character who learns Dispel. There’s not really anything else to say about Kuja, other than he will use Ultima again upon his defeat.
With Kuja finally down, it seems like everything is over, but there is one more surprise waiting for you. An ominous voice rings out to Zidane, who is the only one left standing after Kuja’s Ultima. You will get an option to reform your party at this point, as well as equip them. You want your characters to have pretty much all of the status ailment immunities they can have. The biggest ones, though, are Body Temp, Clear Headed, Antibody, Locomotion, and Jelly. Having protection against fire, ice and lightning is also recommended. It’s time to get ready for the final boss of Final Fantasy IX!
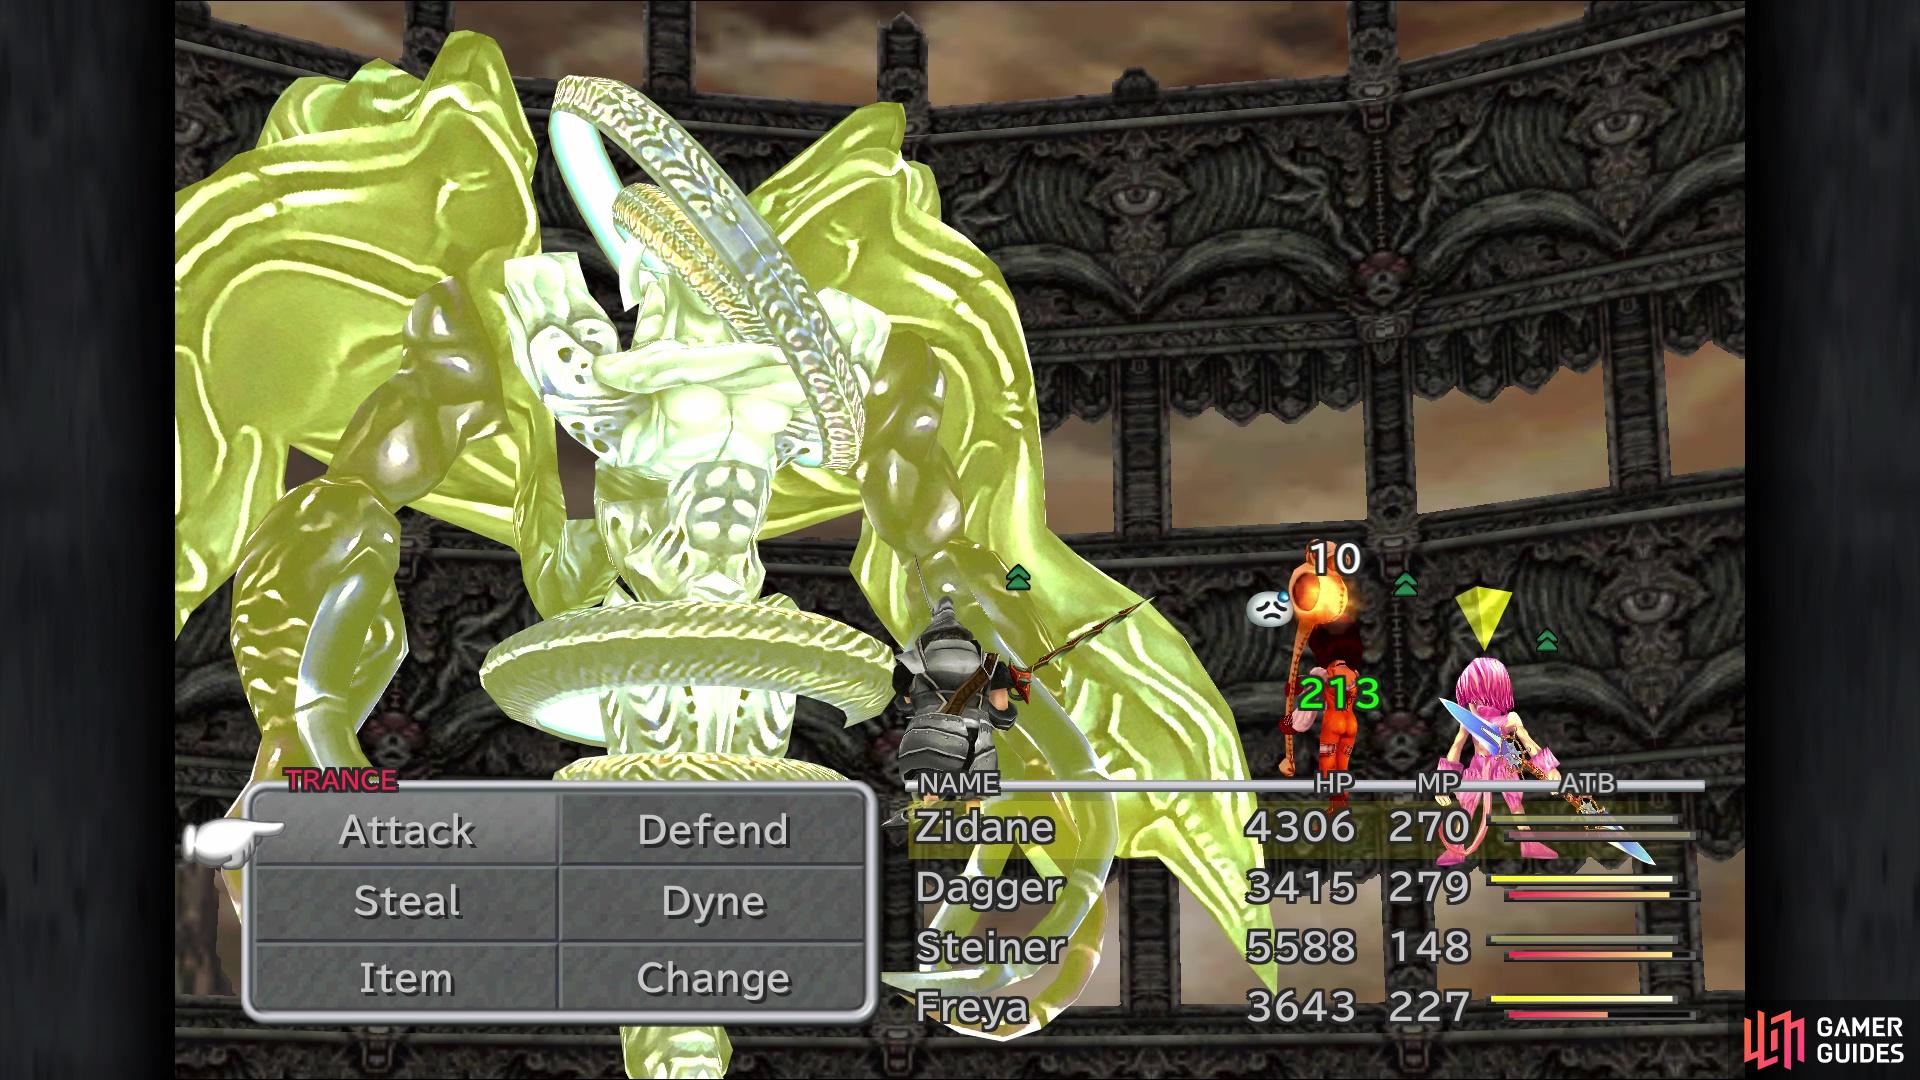
FINAL BOSS - Necron
As a final boss, Necron can definitely be a challenge, since some of his abilities make the battle a lot more difficult than needed. This is the time to use everything in your inventory and arsenal, as the longer this battle lasts, the more potential there is for you to die. Should that happen, you will need to redo the Trance Kuja battle again (and Deathguise, if you didn’t save after that). To start off, Necron has access to Flare, Holy, Firaga, Blizzaga and Thundaga. All of these skills you’ve seen before, so there’s nothing new there. He also has access to Curaga, Shell and Protect. As with Trance Kuja, Curaga shouldn’t really be an issue, but Protect/Shell will be annoying. If you have Eiko, then use Dispel; otherwise, deal with the reduced damage.
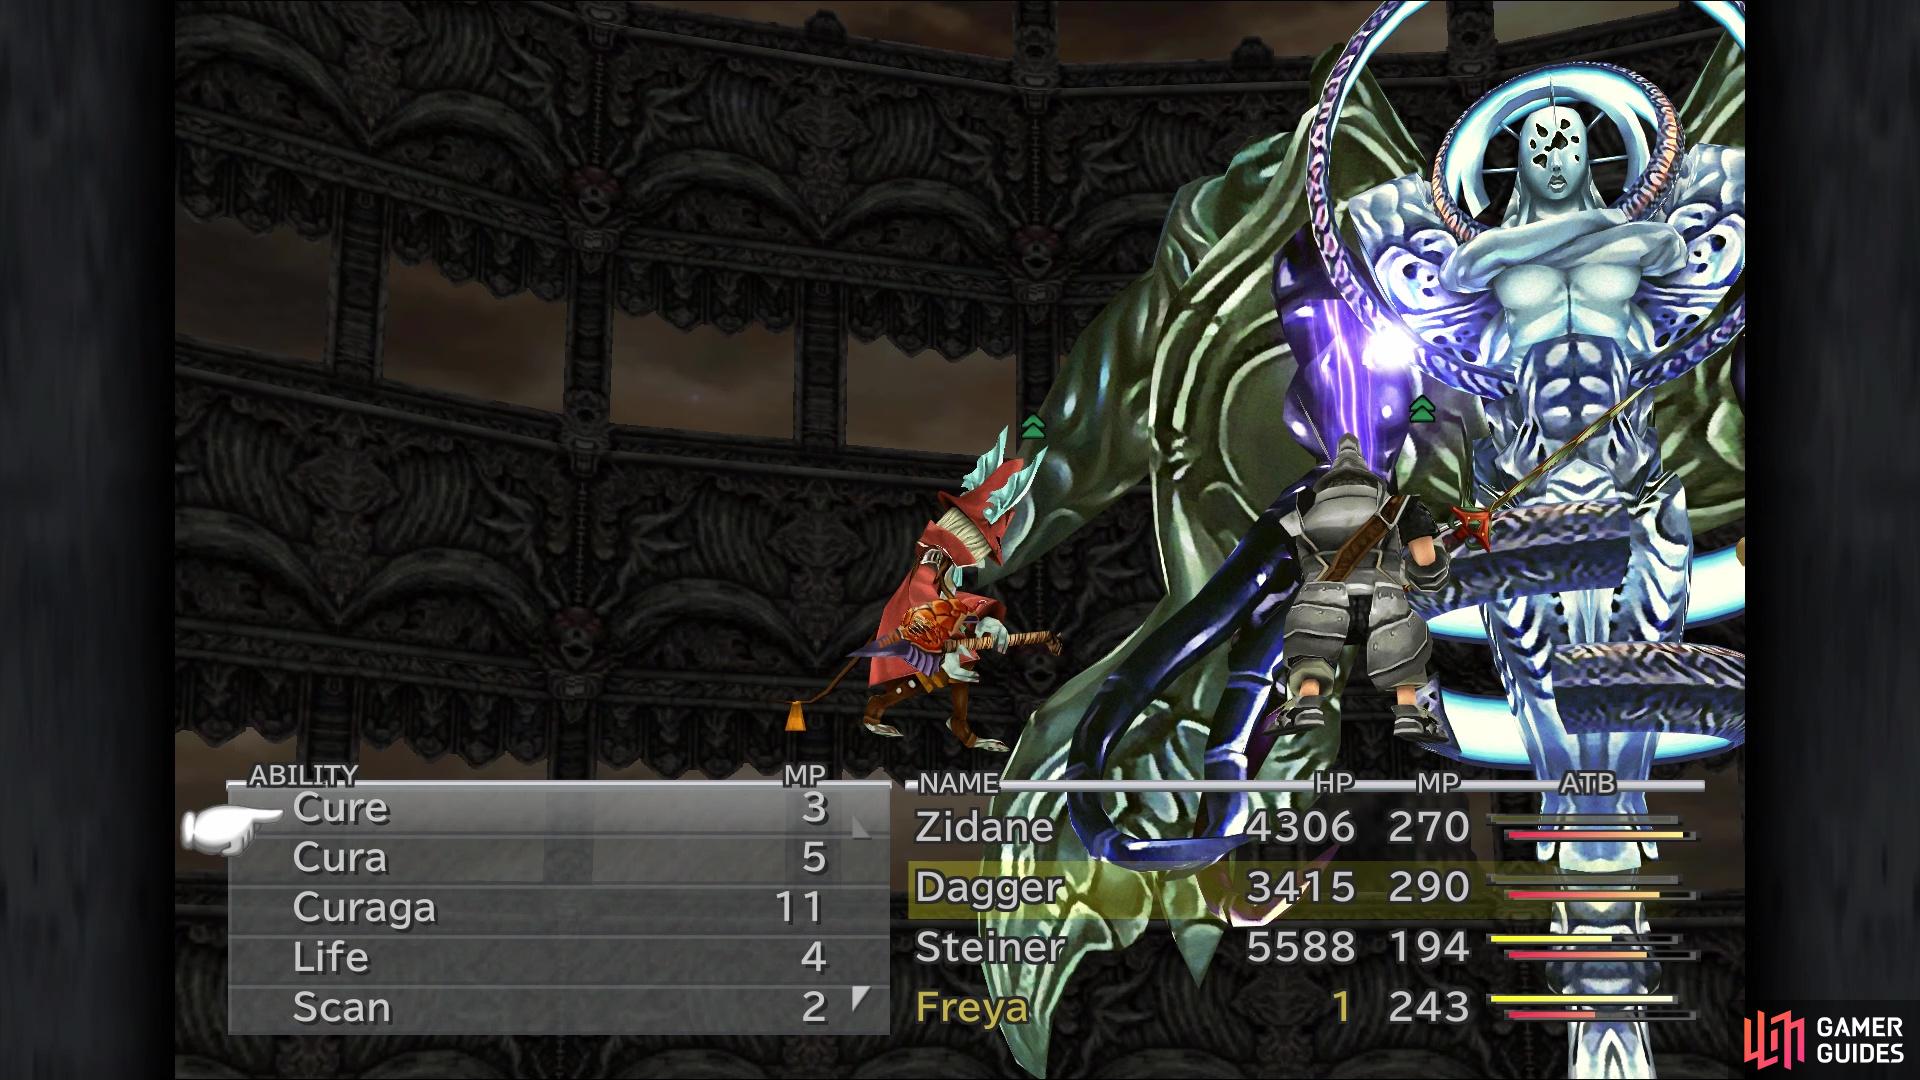
Blue Shockwave reduces a character’s HP to one
Grand Cross can inflict a bunch of ailments on your characters
Moving onto the unique abilities that Necron has, Neutron Ring is a powerful magical attack against your whole party that could be potentially dangerous, depending on when he uses it. Blue Shockwave only targets a single character, but that character will have their HP reduced to one, so you want to try and heal them as soon as possible. By far, the worst ability in Necron’s arsenal is called Grand Cross. This nasty spell can inflict all manner of status ailments on your party, including all of the following: Berserk, Doom, Freeze, Heat, Confuse, Poison, Trouble, Silence, Zombie, Darkness, Death, Petrify, Stop, Mini and Sleep. If you equipped the important abilities beforehand, then you should be protected from at least six of those.
There’s no telling what ailments will be forced on your characters, but recovery is an important mission after Grand Cross. If you happen to have brought Quina with you in the final battle, then his/her Angel’s Snack can be used to cure the majority of the ailments. As for damaging Necron, you want to use everything you got against him. Dragon’s Crest (Freya), Thievery (Zidane) and Frog Drop (Quina) all have the potential to deal max damage, without worry about defense. Steiner’s Shock is also very powerful, although Protect can make it not deal max damage. If Zidane gets his Trance during the battle, then his Dyne skills can also take a nice chunk out of Necron’s health.
Having a dedicated healer might be best for this battle, since you want everyone’s health to be as close to max as possible. Necron can sometimes get two attacks in a row, which can be devastating if he did something like Grand Cross and Neutron Ring back-to-back. There’s really nothing you can do about this, though, so grin and bear it if it should happen. Since this is the final battle in the game, don’t be afraid to use any items in your inventory, particularly Elixirs. Note that Necro has four more Elixirs to steal, should you run out of them.
Once you finally bring Necron down, sit back and enjoy the ending. There’s nothing really to do if you’ve done everything else already, so congratulations on finishing Final Fantasy IX!


No Comments