
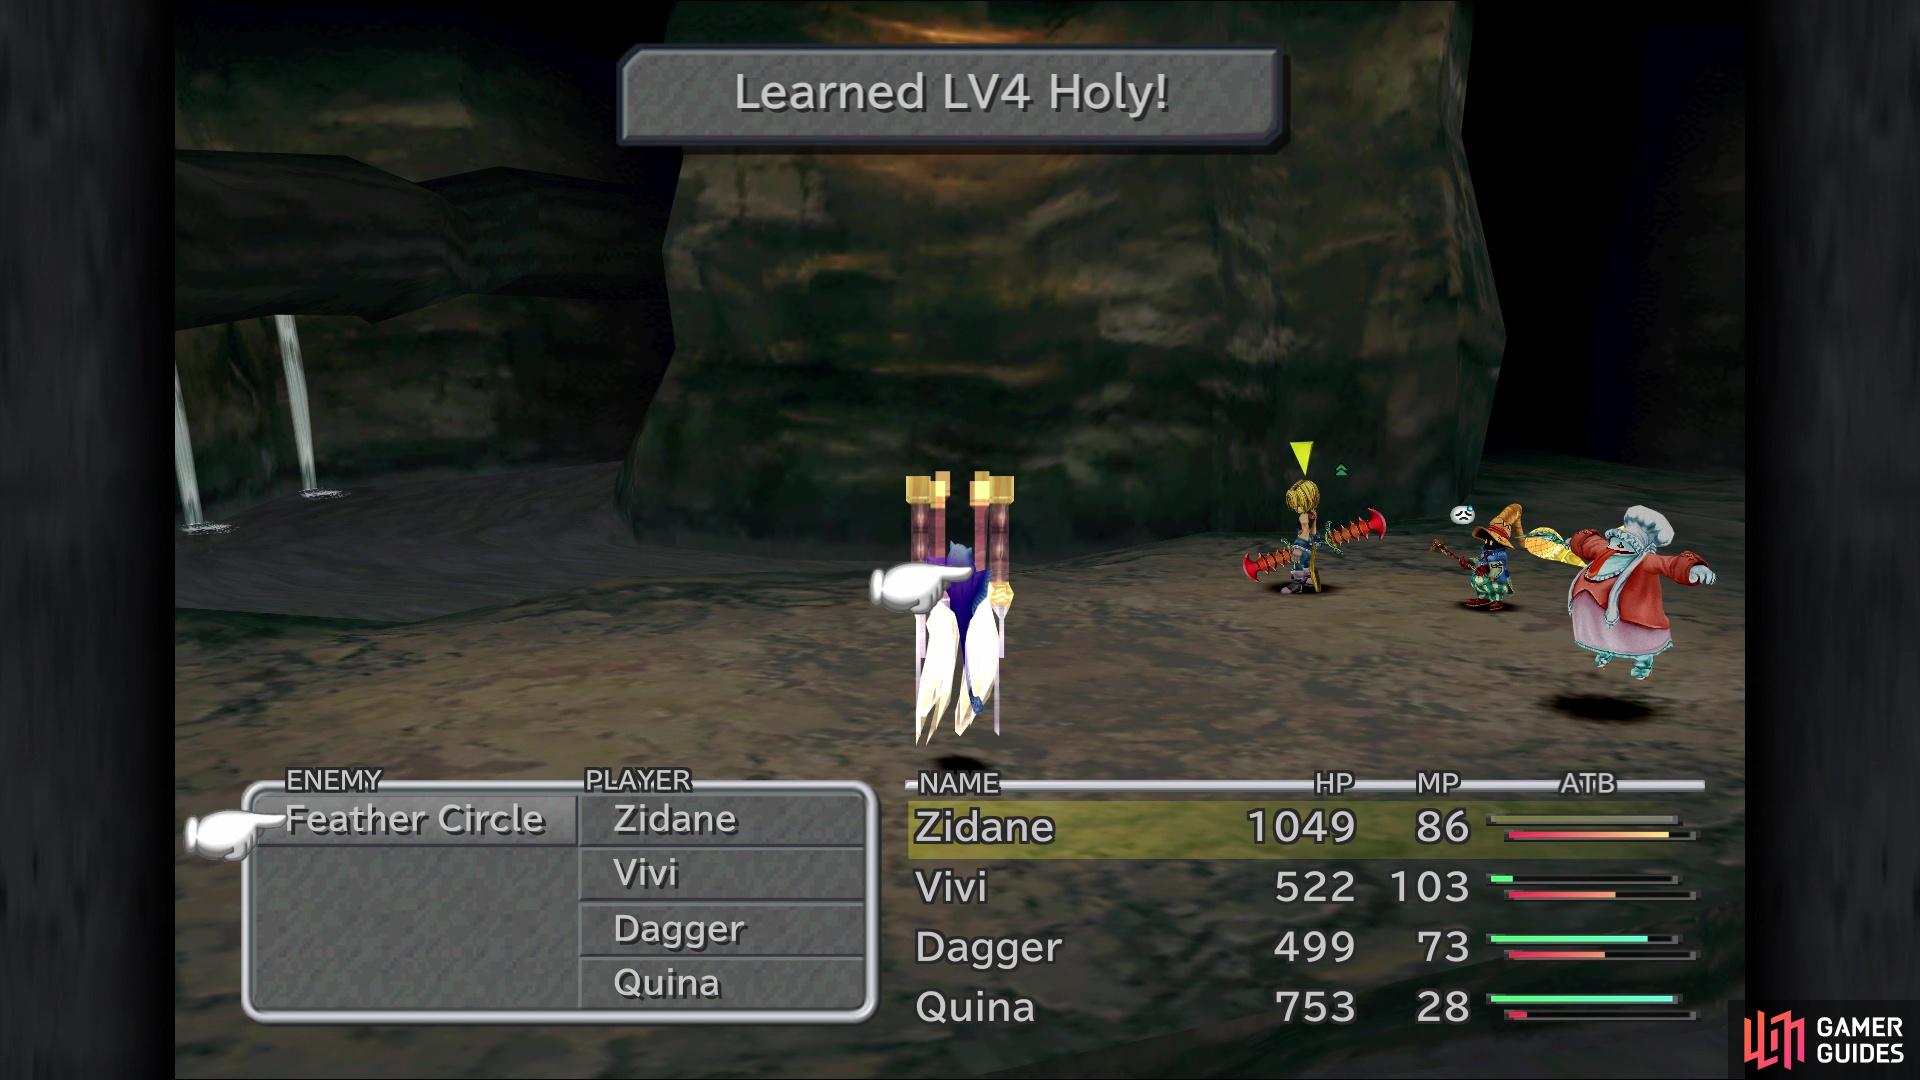
Fossil Roo can be an annoying dungeon and it’s easy to get lost in it a little later on in the place. When going through Fossil Roo, be on the lookout for a monster (or two), as you can learn some Blue Magic for Quina here. If you didn’t get White Wind from the Griffin in Cleyra’s Trunk, then you’ll find the same monster here. The other enemy that can be encountered for a Blue Magic is the Feather Circle, which has around 619 HP and can teach Quina LV4 Holy.
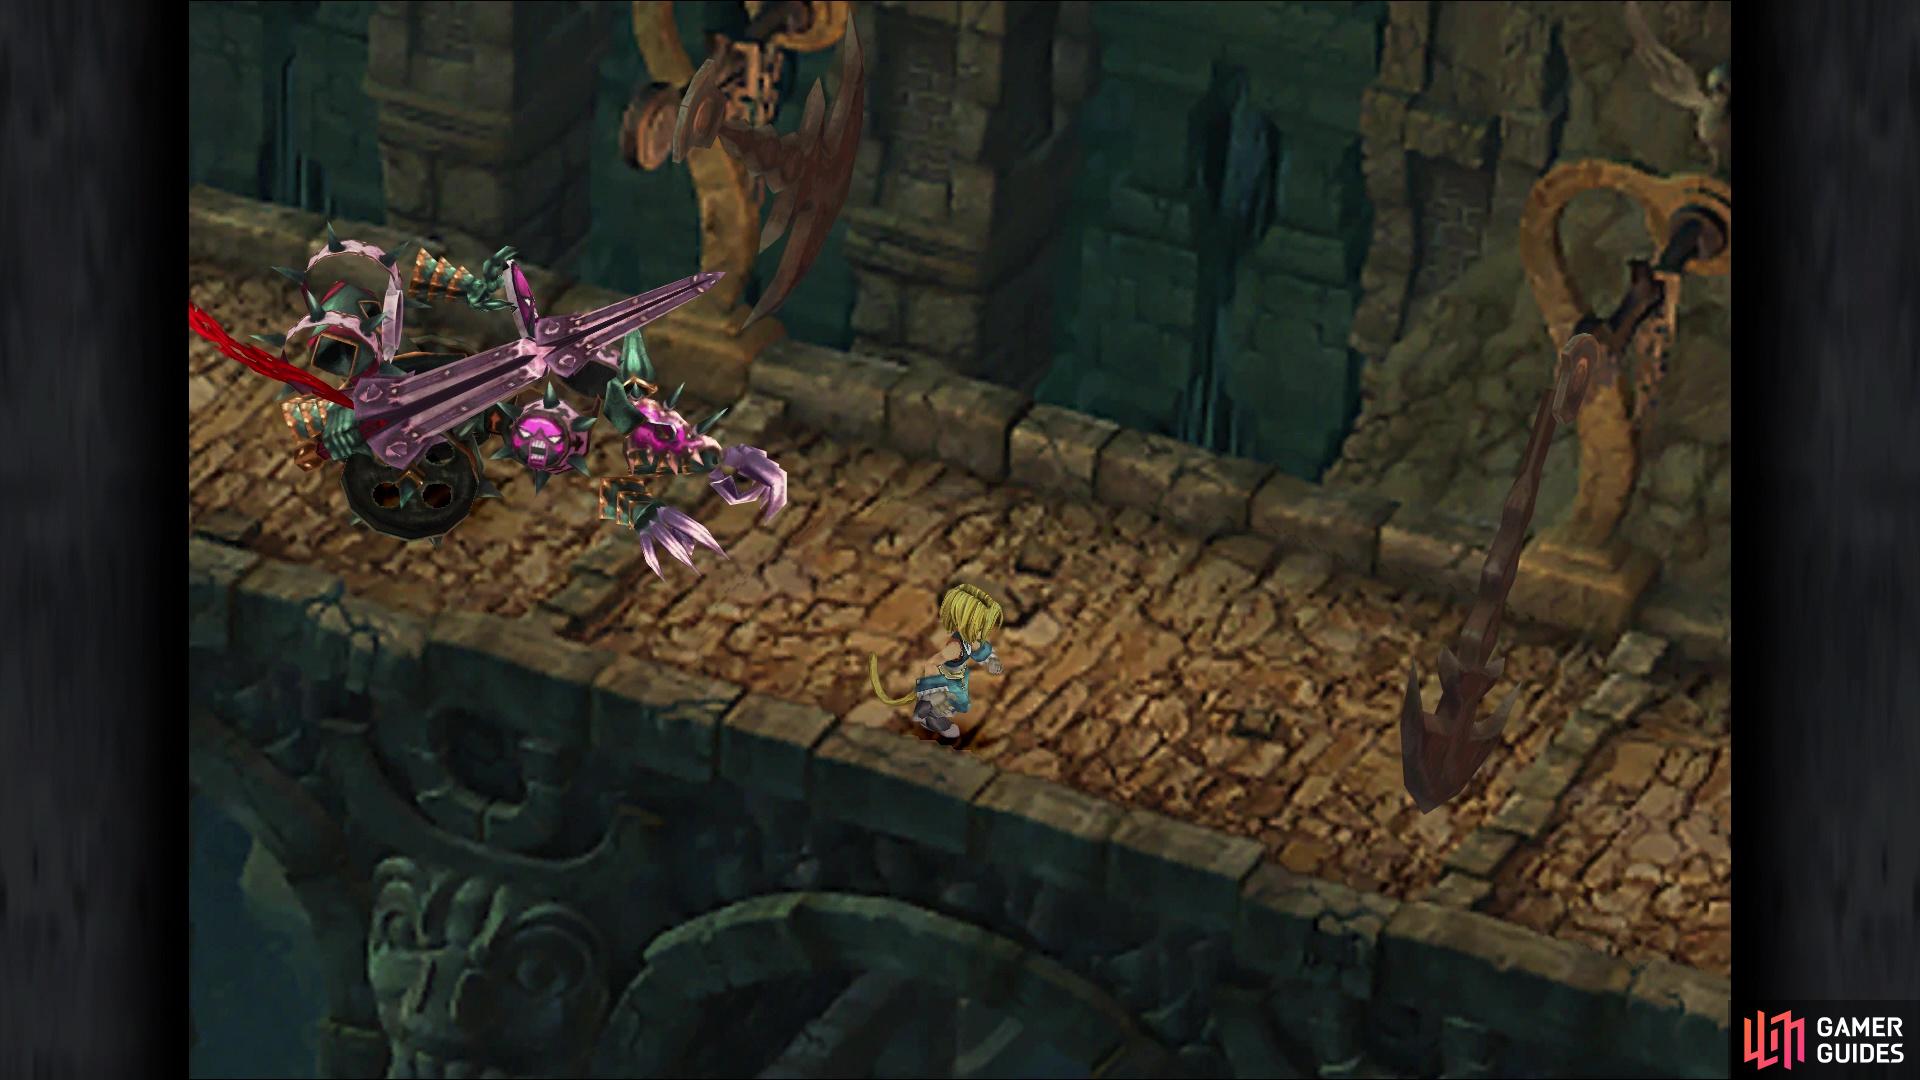
Of course, you won’t be fighting anything for the beginning portion of the dungeon, so just follow the path before you until some big, armored creature starts chasing after you. Armodullahan will chase after you through a little gauntlet of obstacles, mostly consisting of guillotine blades swinging back and forth. If the creature catches up to you, then you’ll have to do battle with it, but it doesn’t have a lot of HP. After depleting its HP, it will become incapacitated for a little bit, but will resume its chase after a short while.
By sticking to one side, it’ll be a little easier to dodge the blades
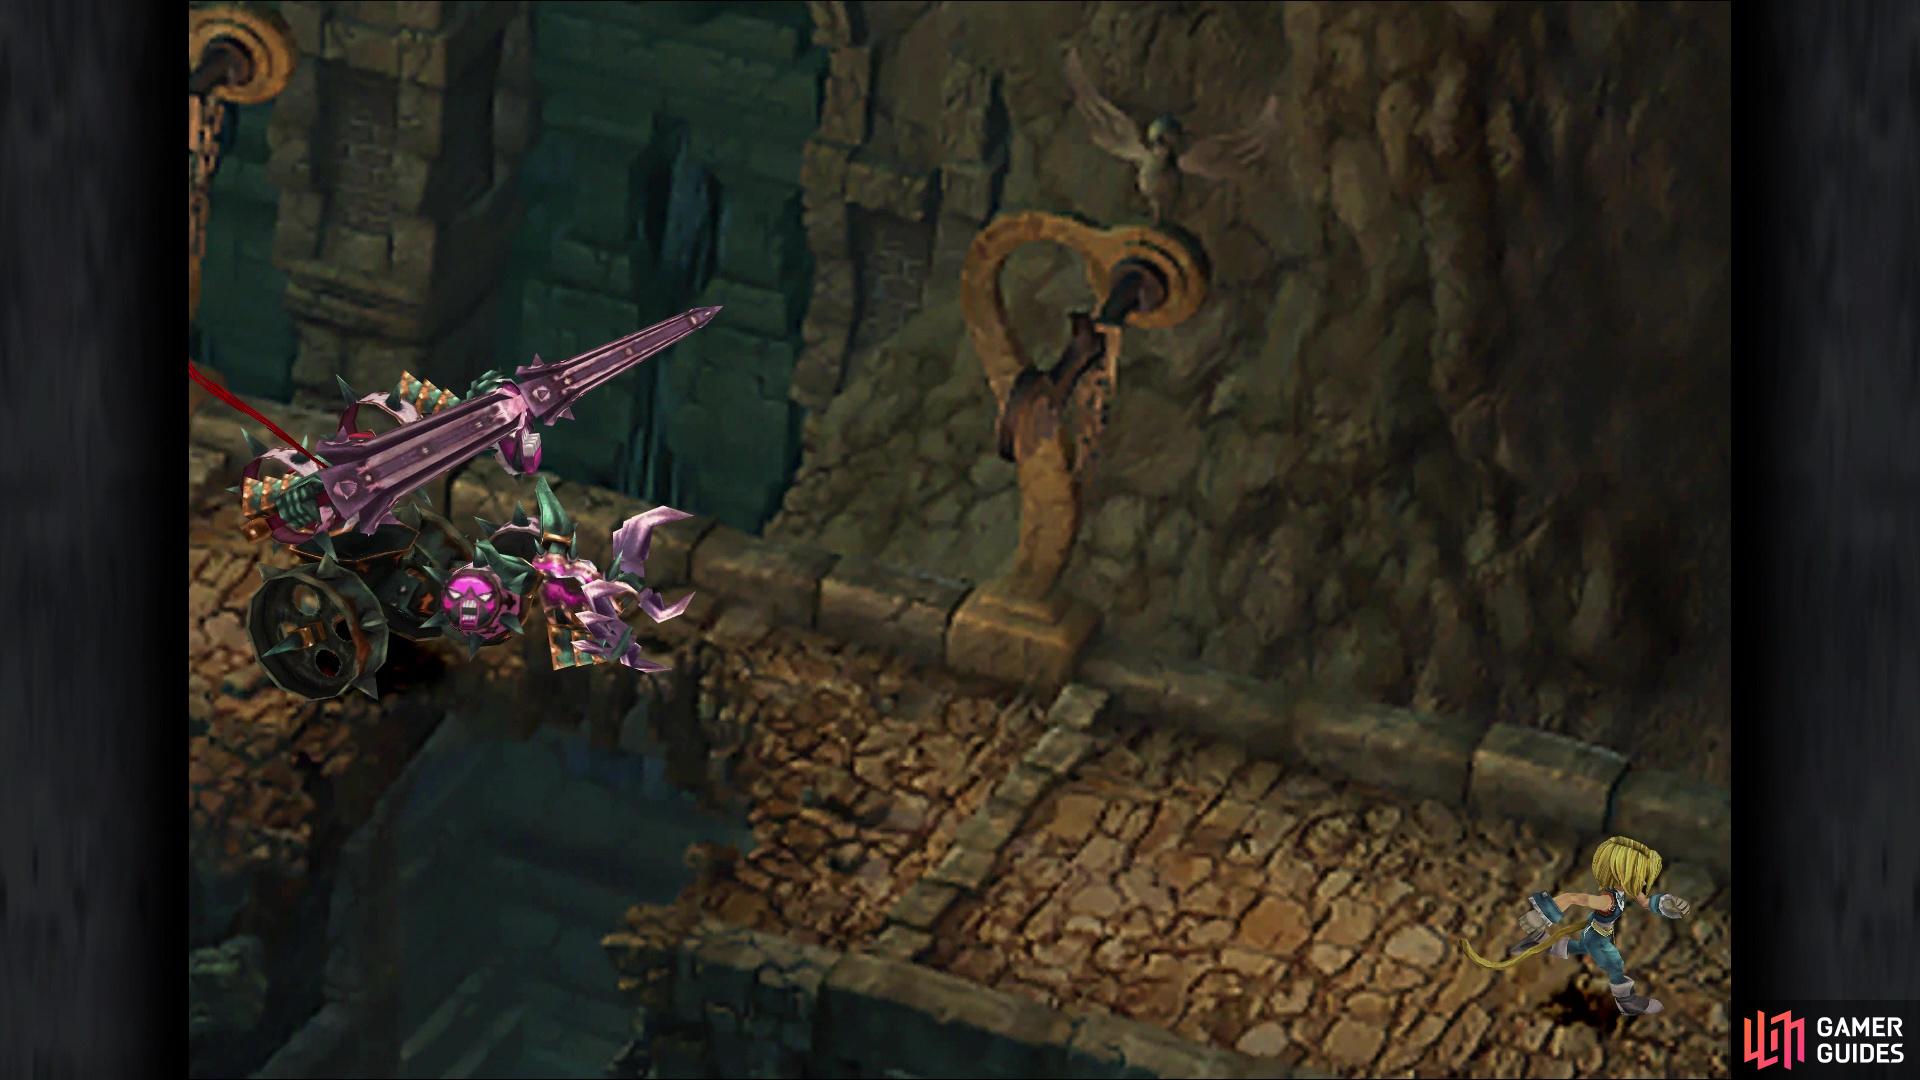
At the end, the Armodullahan will fall into the hole on its own
There will be two screens of blades to dodge, then on the third one, you will automatically jump over a hole, with the Armodullahan falling into it. This will lead into another scene, as well as a boss fight.
BOSS - Lani
Lani is definitely a tough boss, as she has access to the second tier of spells and her primary focus will be on Dagger. To add on to that, she is also quite fast and if Dagger is down, then she will turn her attention towards Vivi. There are a few ways to handle this fight, but having Chemist and Auto Potion on Dagger will pretty much keep her at full health the entire time, so you can concentrate on stealing Lani’s items and bringing down her HP. Alternatively, if you have Reflect on Dagger, then you could have her cast that on herself to pretty much send all damage back to the boss.
The only problem will come from Water, as Lani will cast that on the entire party, but you should have White Wind on Quina at this point, which doesn’t get reflected. She is susceptible to both Blind and Slow, with the latter being much more important than the former, as her physical attacks aren’t her strong point. It doesn’t hurt to put both on her, though, but don’t put them past survival first. As for stealing, Lani has an Ether, Gladius and Coral Sword on her, with the second two being good weapons. While the Coral Sword is nice and all, don’t dwell too much on it, as Lani might not be so nice.
Of course, if you manage to set up Dagger with Chemist and Auto-Potion, then you may get a lot more turns to try stealing the goods from Lani. While trying to steal items, Vivi can do whatever after he casts Slow on Lani, reapplying it whenever it drops. Quina can be your backup healer (or main, considering Dagger should be using Reflect), while Dagger just sits there and waits to reapply Reflect whenever it’s gone.
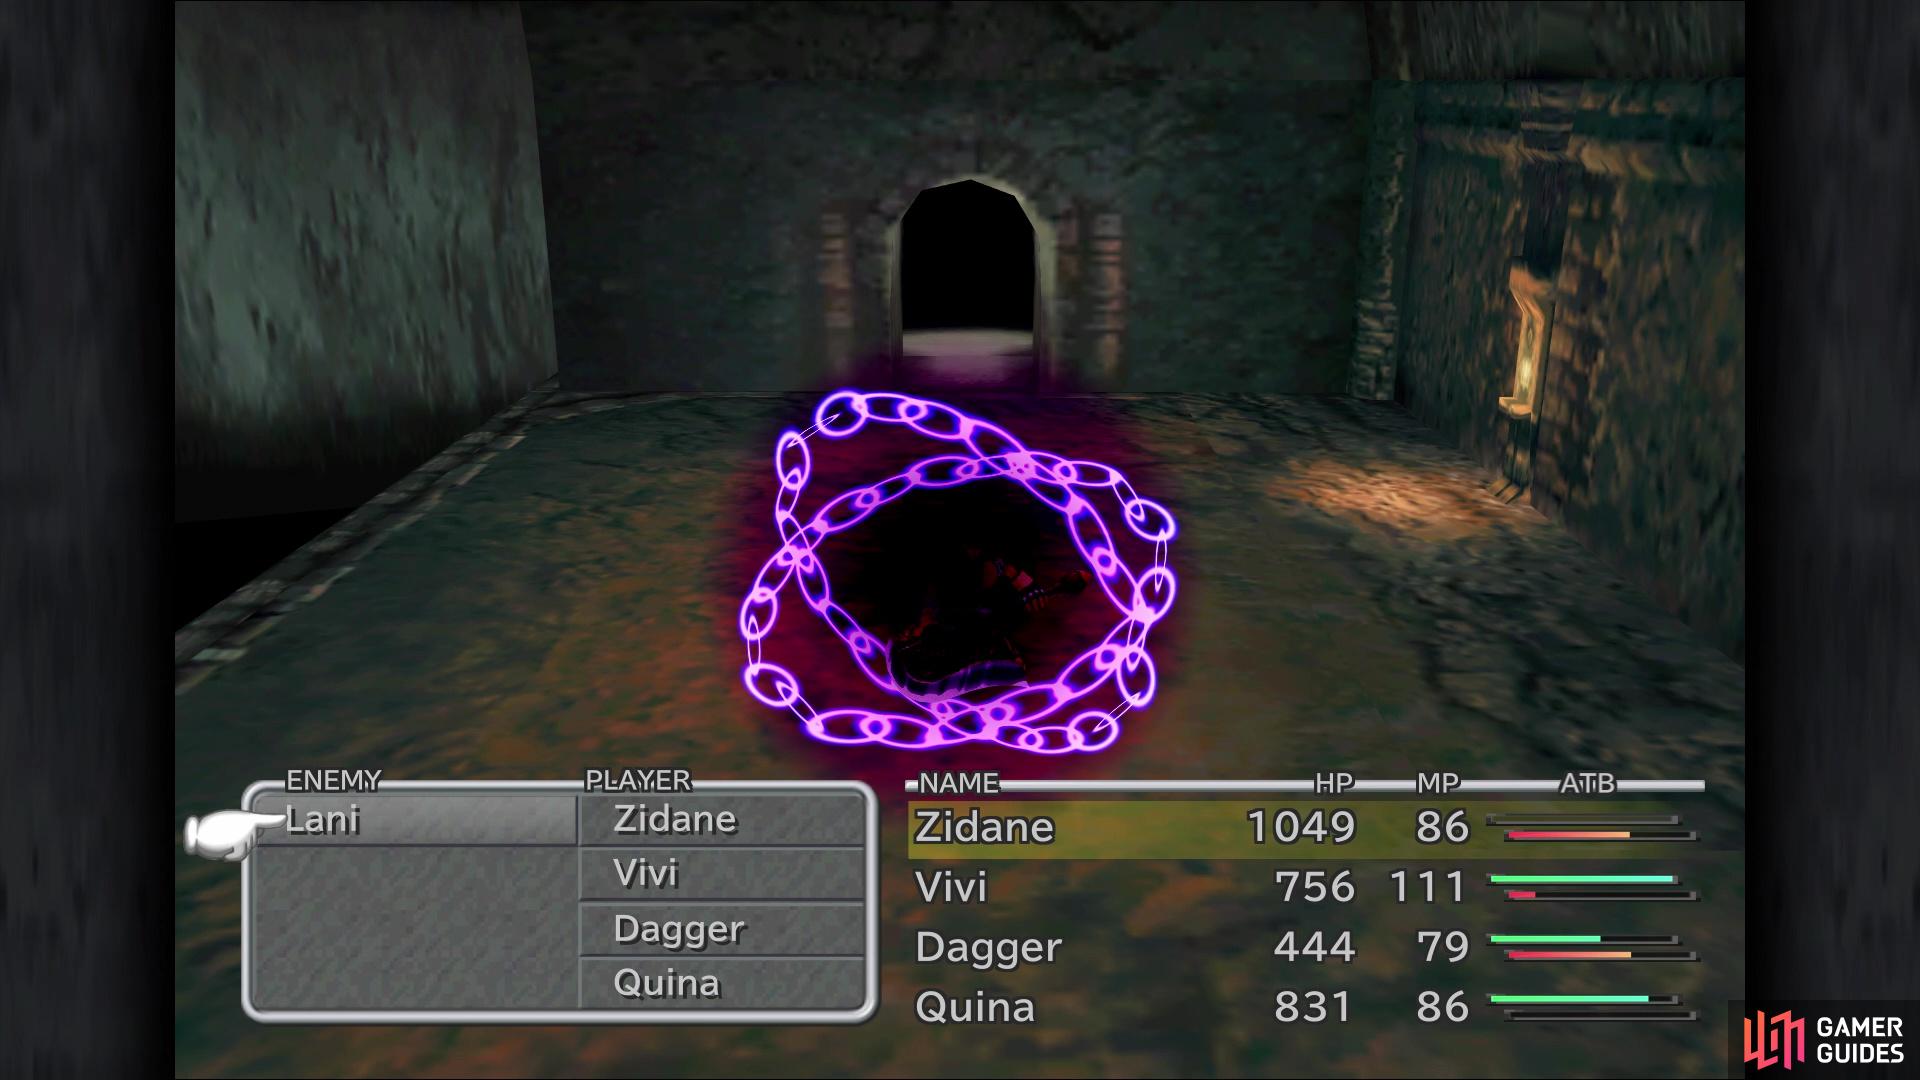
Slow helps out a lot in reducing Lani’s actions
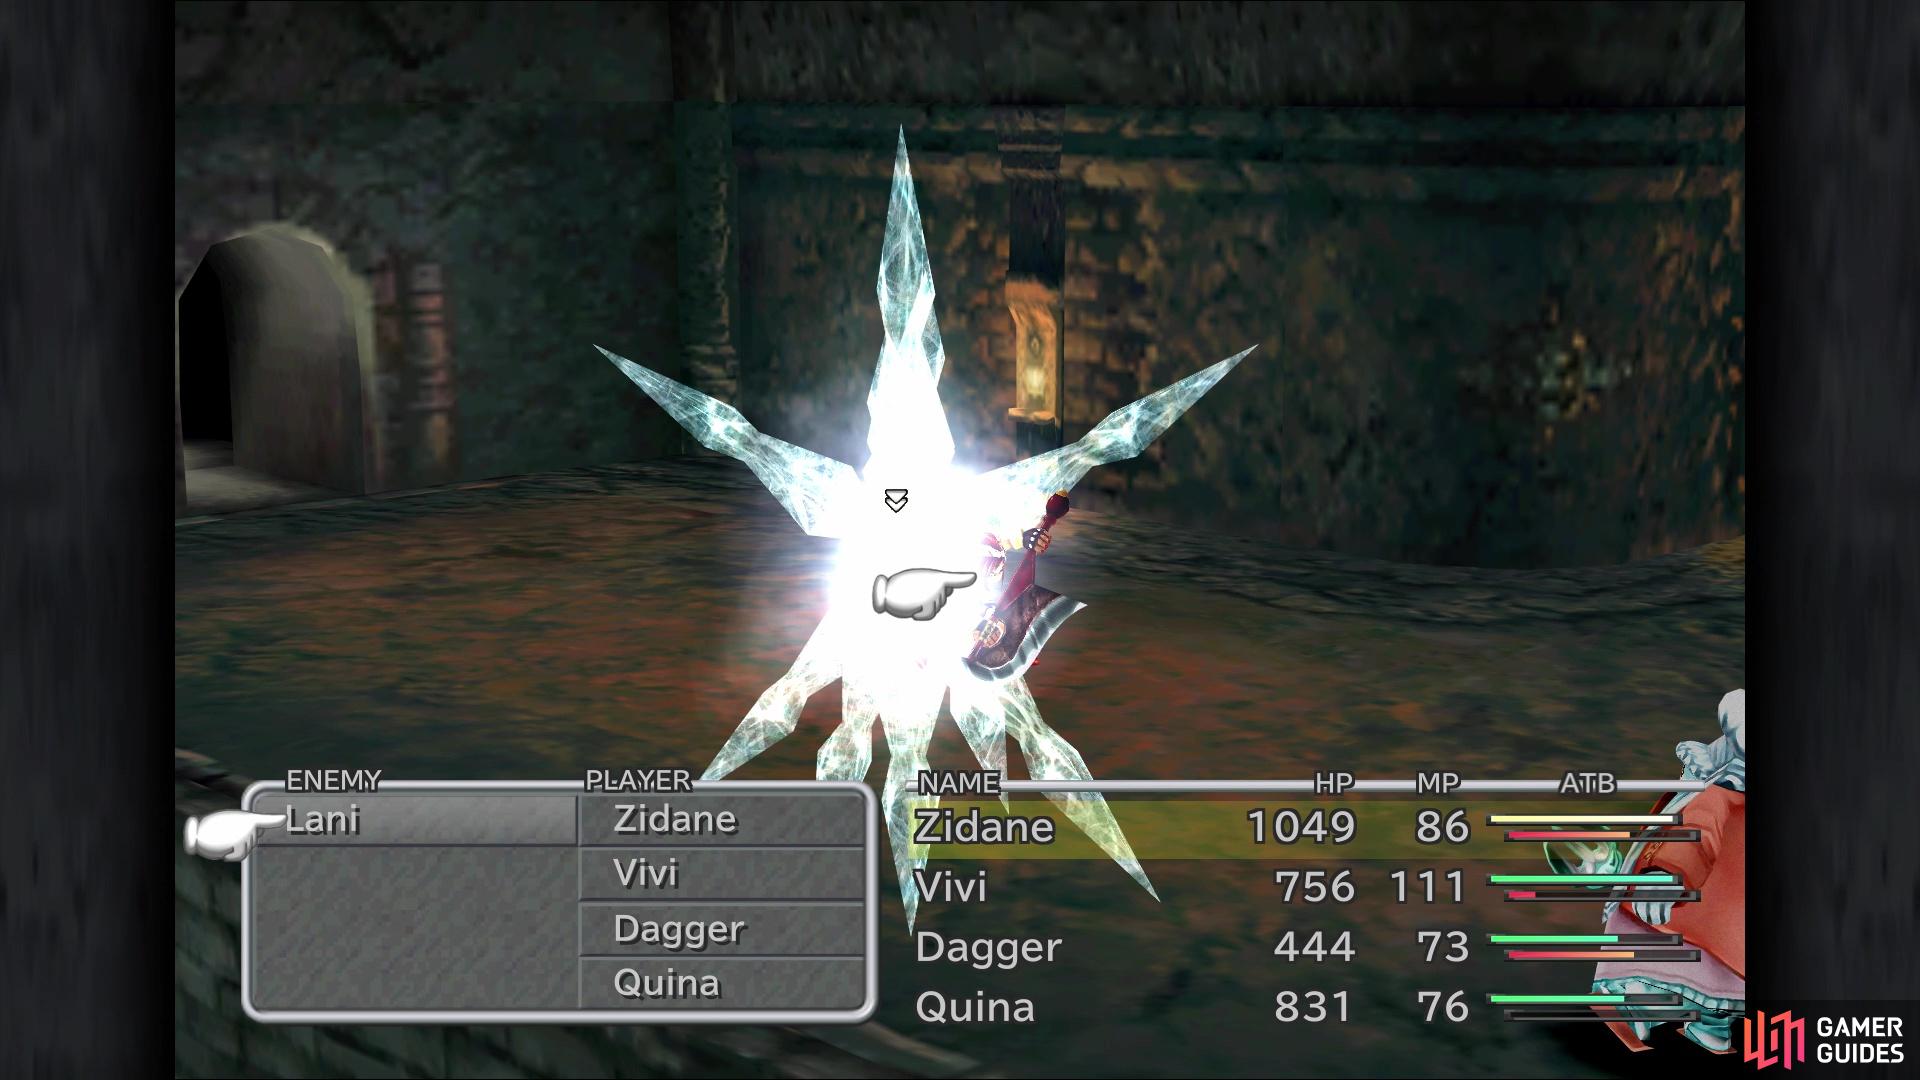
Since she targets Dagger the whole time, cast Reflect on her to have Lani hurt herself with her own spells
Gargant Taxi Service
After the battle is over, Lani will retreat, so head back to the beginning portions of the dungeon. Note that at this point, you will be getting into random battles, so keep a lookout for the monsters with Blue Magic, in case they show up. The alcove that the Armodullahan came out of is still open, so go in there and poke around until you see a prompt, which is a chest with an Elixir. Double back to where you fought Lani and head down the passage there to continue into the dungeon.
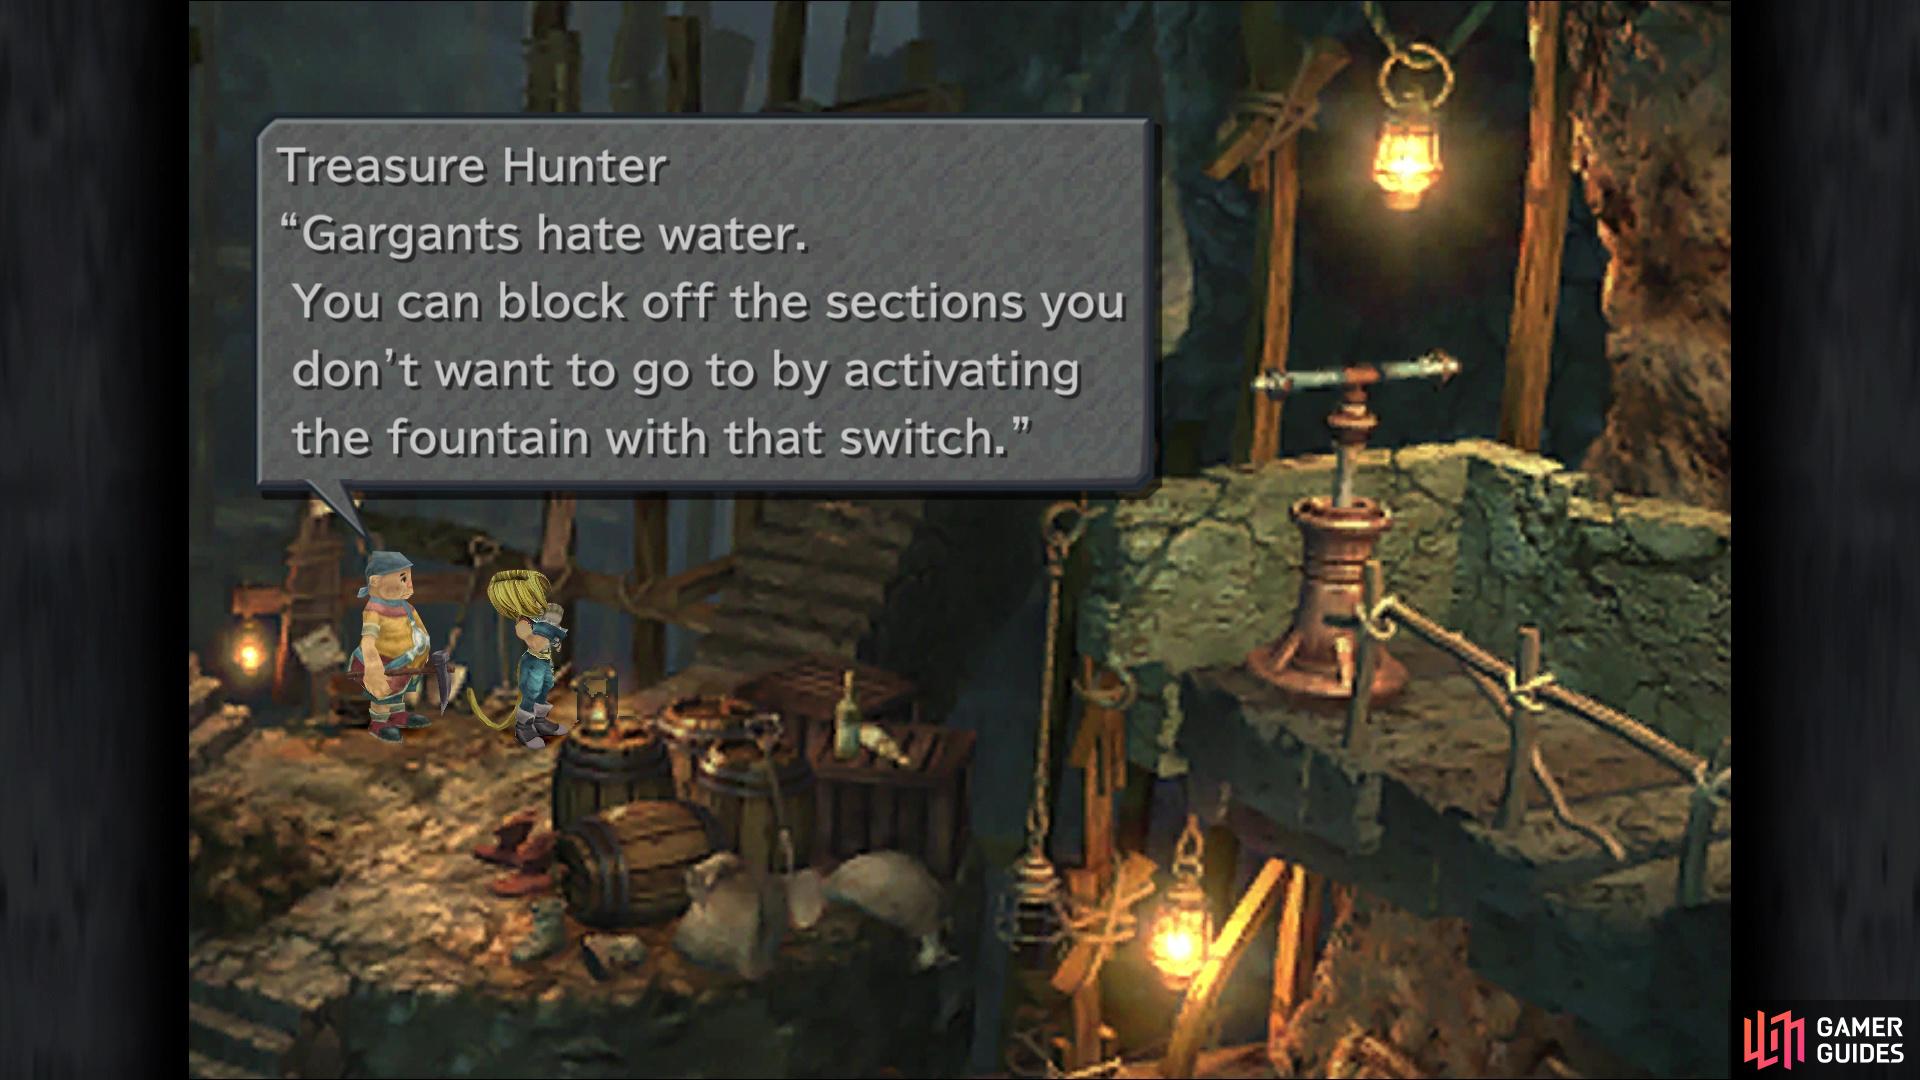
As you enter the next screen, you will see a wild gargant moving about, which will be how you get through Fossil Roo. On the far left side of the screen will be some flowers you can pick up, so do that and move a little bit to the right with them to find a prompt. This will make you ride the gargant to a new area, which has nothing, so just continue to the north. Talk to the Treasure Hunter here to learn how Fossil Roo works. Basically, you’ll be using the gargants to get around, but they only follow a set path. The switches will change the tracks that the gargants use, so if you want to go to a new area, hit one of those.
Ignore the paths for right now and go south to find a moogle, Mogki, as well as Stiltzkin. Select the Mognet option to see that he received a letter from Kuppo, then check out the shop to see the standard items. Speak with Stiltzkin after to see him selling another item set for 555 Gil, which contains a Phoenix Pinion, Remedy and Ether. Remember that you’ll need to purchase all item packs to obtain the Driving the Hard Bargain trophy/achievement. Now, let’s get back to the maze that is Fossil Roo.
Take the exit to the south, pick up a flower and ride the gargant here to a new screen, which doesn’t have much. However, go to the next screen to find a chest at the cliff’s edge, which contains a pair of Fairy Earrings. Return to the moogles and take the northern exit this time, riding the gargant to the next area. Go right here and hit the switch to change the course of the gargant, then go back and ride the gargant in the previous room. You should now be in a section with two different paths to take.
Activating the switches that control fountains will determine the course of the gargant
Don’t forget to grab this Blue Magic from the Feather Circle enemy
Take the path up the stairs first, where you’ll find a chest at the end (Ether). Return to the previous screen and take the other road, which will eventually lead around to another switch. Flip this switch, ride a gargant back to the previous area, hit the switch here once more, then take a gargant back to the area with the moogles. Go south of the moogles and take that gargant, which should bring you to an area called the Nest. There will be another Treasure Hunter here, who has some items for sale, but if you’ve been keeping up with everything, he won’t have anything new.
Climb the stairs next to the hunter and flip the switch (No. 4) here, then venture into the opening next to it to ride the gargant. In this new area, exit to the right and open the chest for a Lamia’s Tiara, then return to the area with the switch. Flip it again, then ride the same gargant to another section of the dungeon. Follow the path to the south that’ll lead to a screen with a scalable ivy wall. There will be something above you, as well as a pool of water below you. Get on the wall and attempt to move about, but you’ll likely be pushed into the water below by water spewing out of one of the decorative heads.
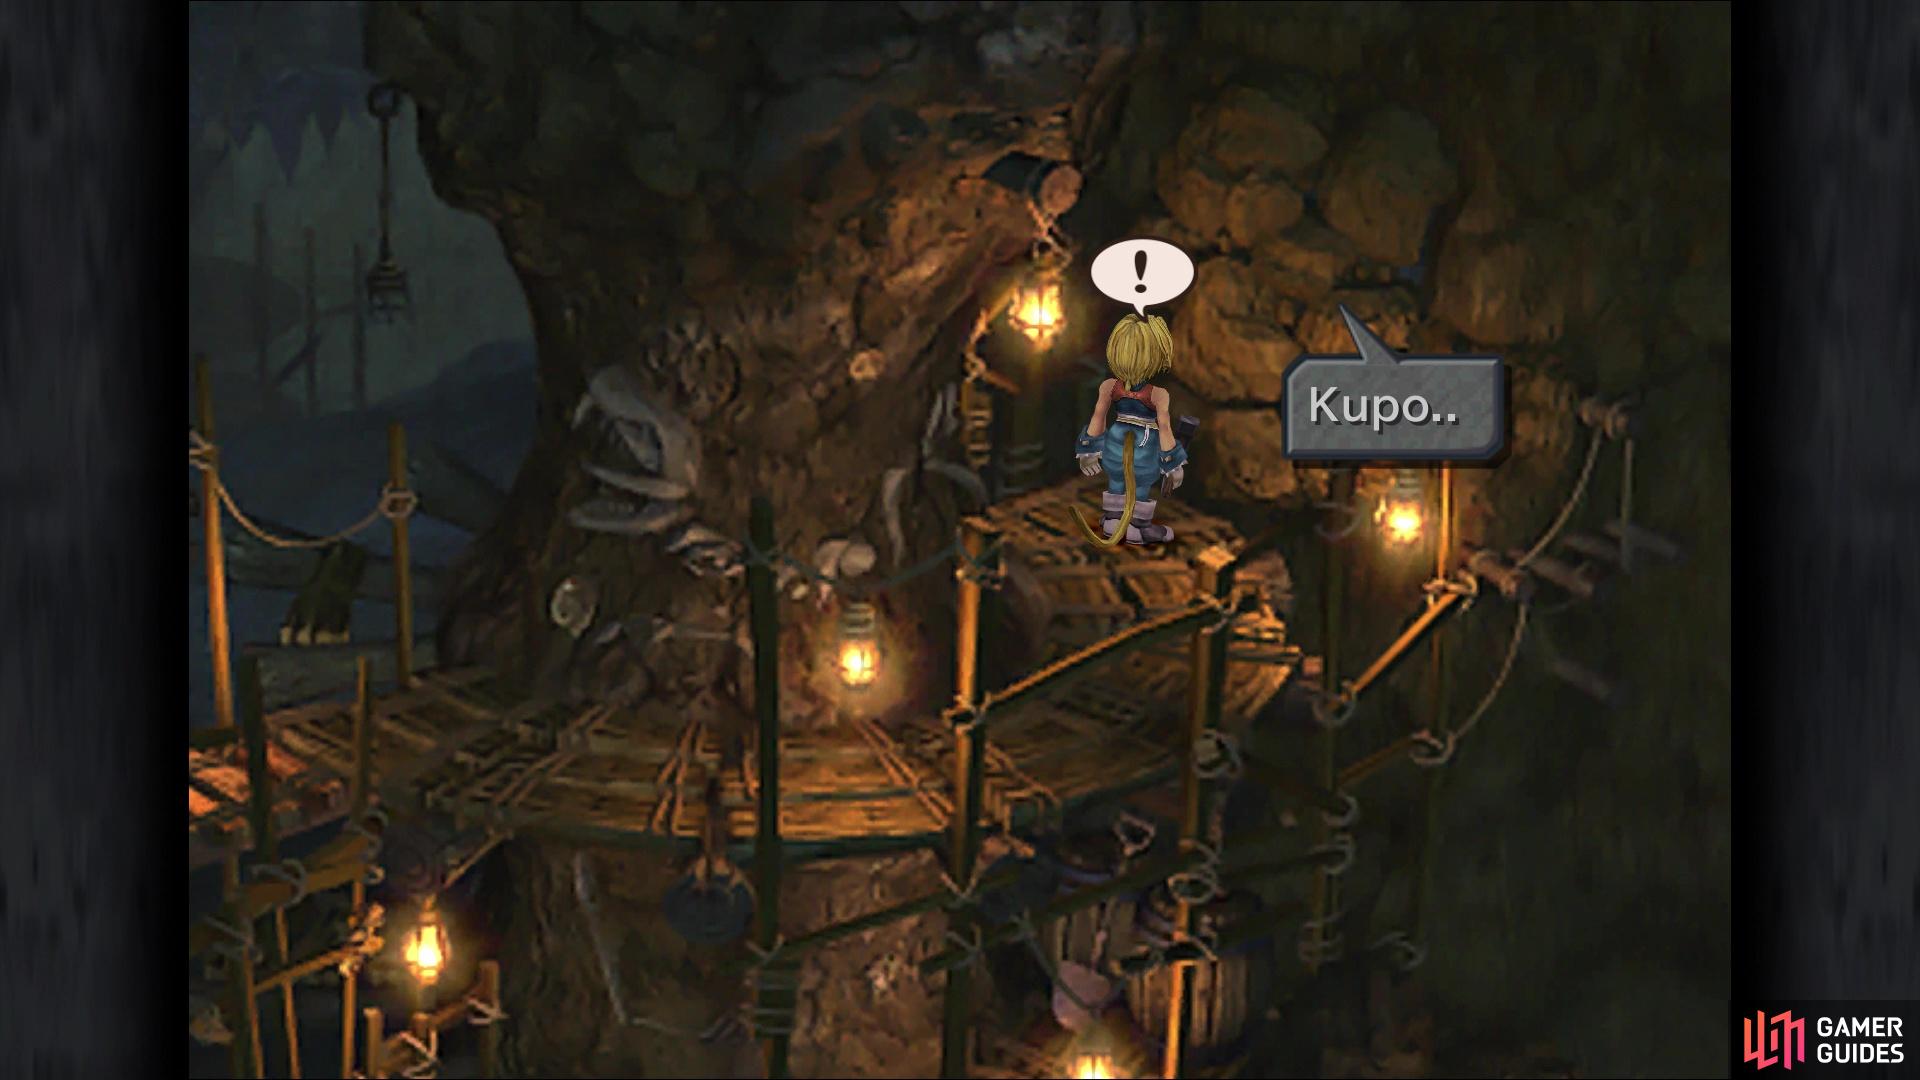
There are three stone heads on the wall, all of which have a specific point where they will spit out water and push you into the pool below. For now, get pushed into the pool, then climb the wall and take the top of the two exits on the right side. You should be in the room with another Treasure Hunter and upon speaking to him, he offers a chance to dig for a Potion of yours. There are two trophies/achievements you can get here, so take him up on his offer to dig. The first place is at the top, on the far right side, where you can see some loose rocks. Keep digging here until you uncover a moogle named Kuppo, earning you the Peek-A-Boo trophy/achievement.
You can use this moogle the same as all others, and he’ll sell the same items, too. Note that you can get a letter from Kuppo to deliver to Kupo, so make sure you get that. For the other trophy/achievement, you might need some patience. Whenever you dig enough times in a spot, you will receive an item, with most of them being nothing worth spending your time on digging. However, there is one item called the Madain’s Ring that will get you the The One Ring trophy/achievement. Your best option is to dig in a spot until you get an item, then move to another spot. Dig around 10 times before moving on, if you don’t find an item. After grabbing four to five items from on instance of digging, quit the mini-game, exit the screen and re-enter, opting to start the mini-game again.
Dig in this spot to find the trapped moogle
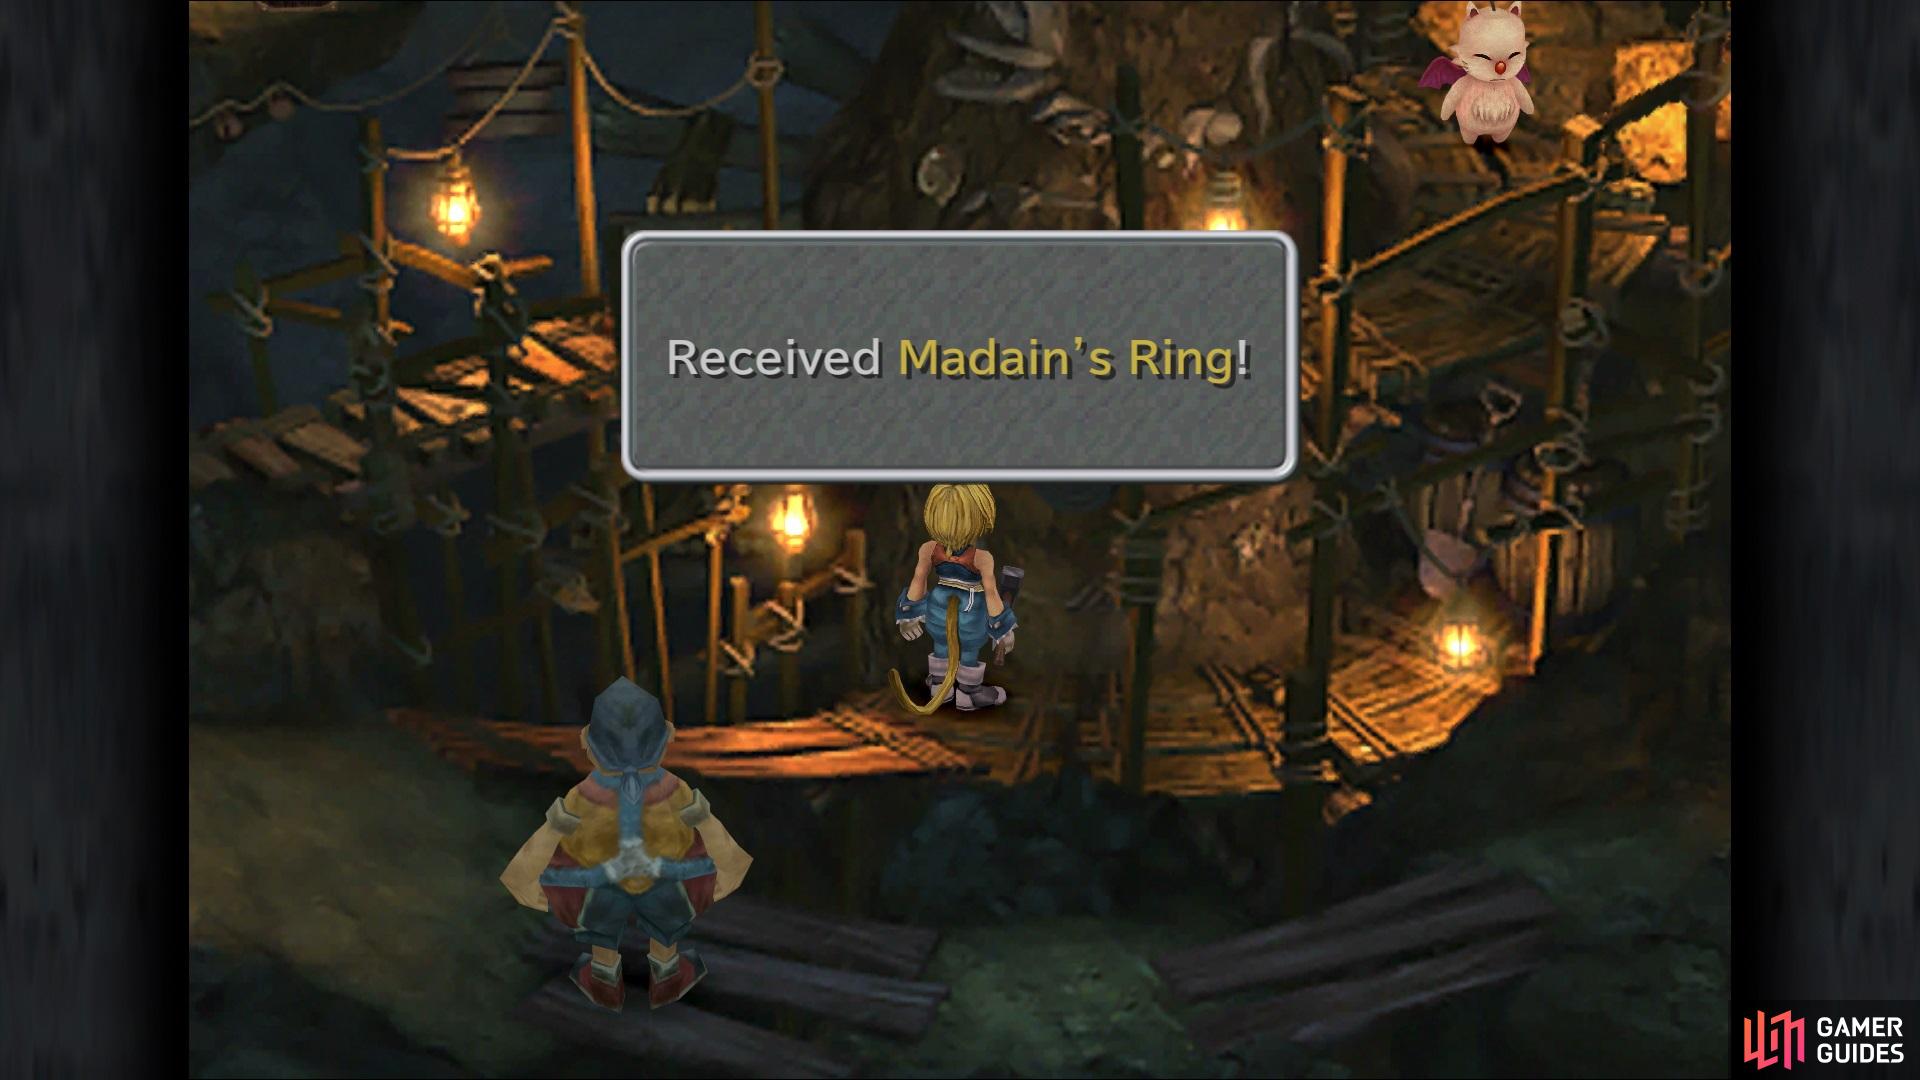
Although it’s random, you will eventually dig up the Madain’s Ring


This can take anywhere from five minutes to thirty minutes, maybe even more, as it’s completely random. It wouldn’t hurt to make another save at Kuppo here, then come back later if you grow bored of it. Once you’re done digging (make sure you quit the mini-game), find the exit in the bottom right and go to the end, where you should be able to find a Survival Vest. Return to the vine wall and climb up to the northwest corner, making sure you go straight up and then left to avoid getting knocked off of the wall. Heed the warning here about being shut out once you flip the switch and leave, getting anything else you need inside of the dungeon. Take the bottom right exit in the pool room and ride the gargant to one final screen, which will lead you to the Outer Continent.
No Comments