
When you’re in control, be sure to swap your junctions from the Selphie’s team to Squall’s team, then enter the gates of the garden (or exit to the world map if you want to save real quick). In the next screen you’ll find a Garden Faculty member shouting orders, demanding the students (who are running amok) to find and kill Cid. This might be problematic.
(1 of 3) Talk to a Garden Faculty member, who will demand to know where you loyalties lie
Garden Master versus Headmaster
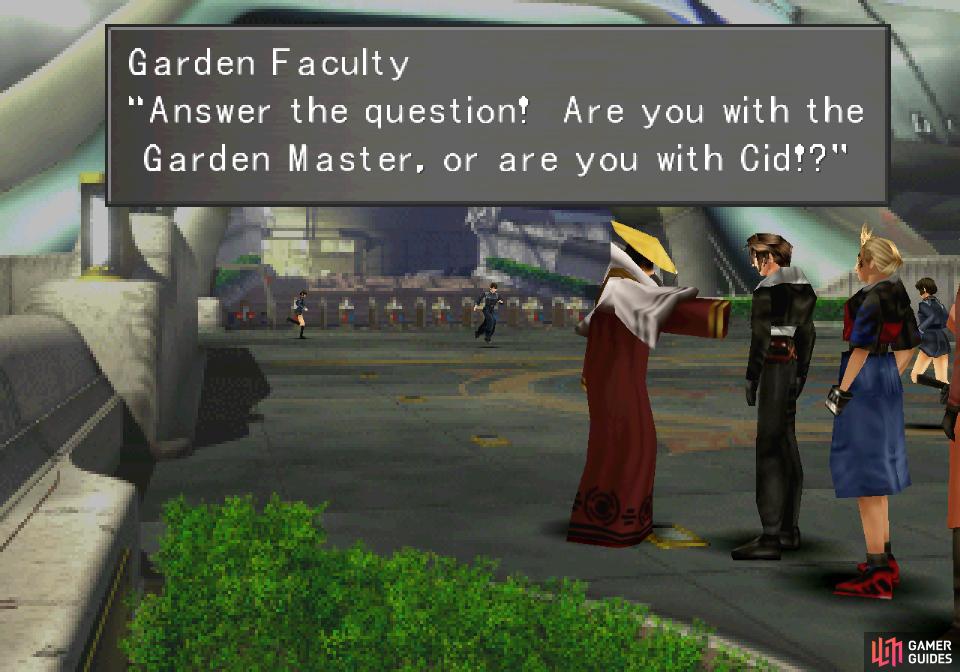
Continue through the garden until another Faculty Member stops you and demands you state your allegiance - either for some “Garden Master” or for Cid. As friendly as this NORG fellow sounds, it might be safer to stick with the devil you know, as it were, so respond with …I don’t get it and the Garden Faculty will show themselves rather rude by siccing some monsters on you. If this NORG person is as much of a jerk as its minions are, you’re definitely on team Cid!
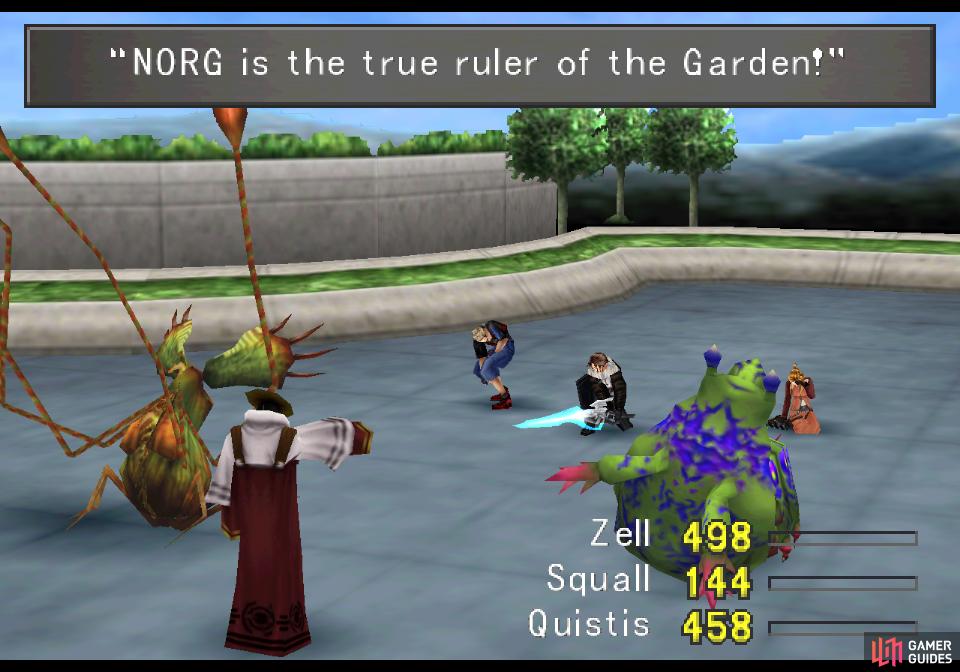
You’ll find yourself facing down a Caterchipillar and a Grat, weakling foes that shouldn’t trouble you much. Make use of the Caterchipillar to draw and cast Cure to bring your party to fighting form if necessary, then dispose of these foes however you find most expedient. The Garden Faculty will have fled, which is a shame but nothing you can do about it. Backtrack to where you found the first Garden Faculty member shouting orders and confront him, and now he’ll sic two Bombs on you. Dispose them, then head through the Garden to the turnstiles.
(1 of 2) Talk to an injured student to gain a Mega Potion
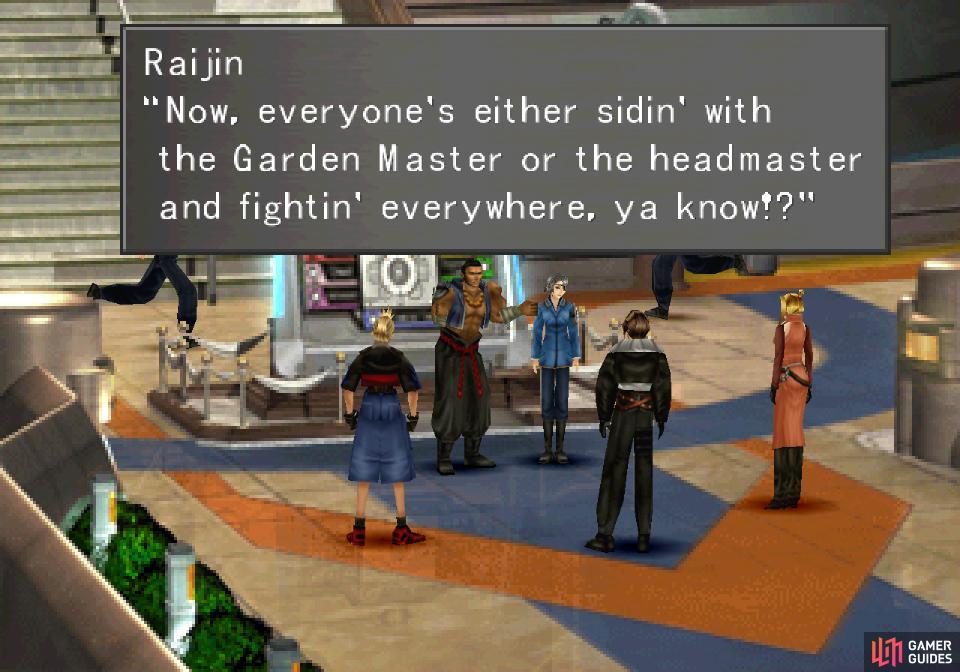
Talk to an injured student to gain a Mega Potion (left), then chat with Raijin and Fujin in the lobby. (right)
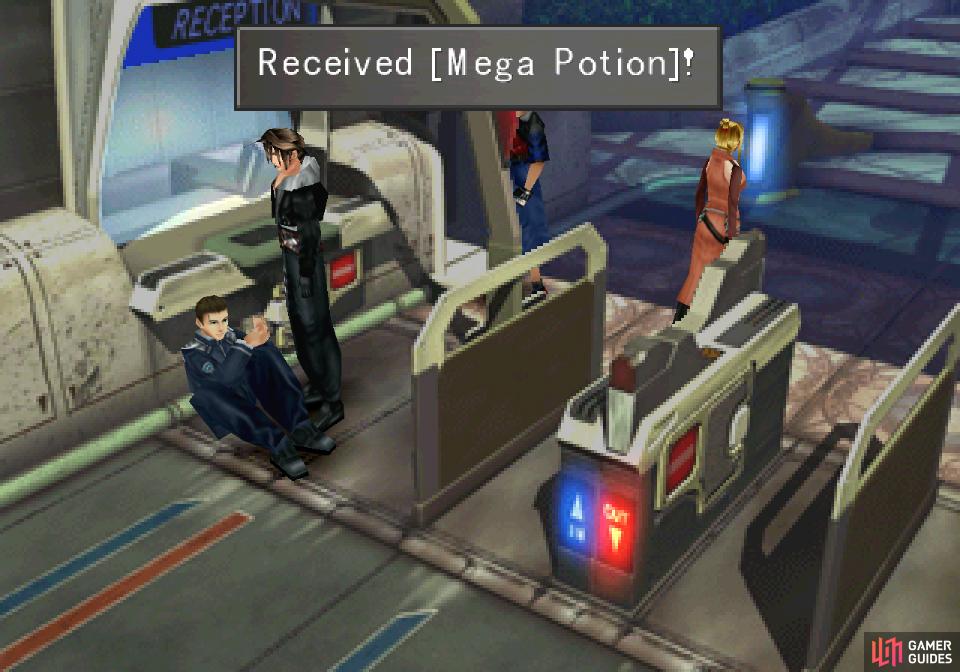
On the turnstile screen talk to a student on the ground twice to score a Mega-Potion, then continue to reach the 1st Floor Hall area. Approach the directory in the middle of the hall to talk to Fujin and Raijin, who agree to help get things under control… even though they claim to be on Seifer’s side. Bit strange to help Garden when Seifer’s master is trying to destroy it. Oh well.
(1 of 3) Help out the SeeDs in the hall near the Infirmary
Fighting the Garden Master’s Forces
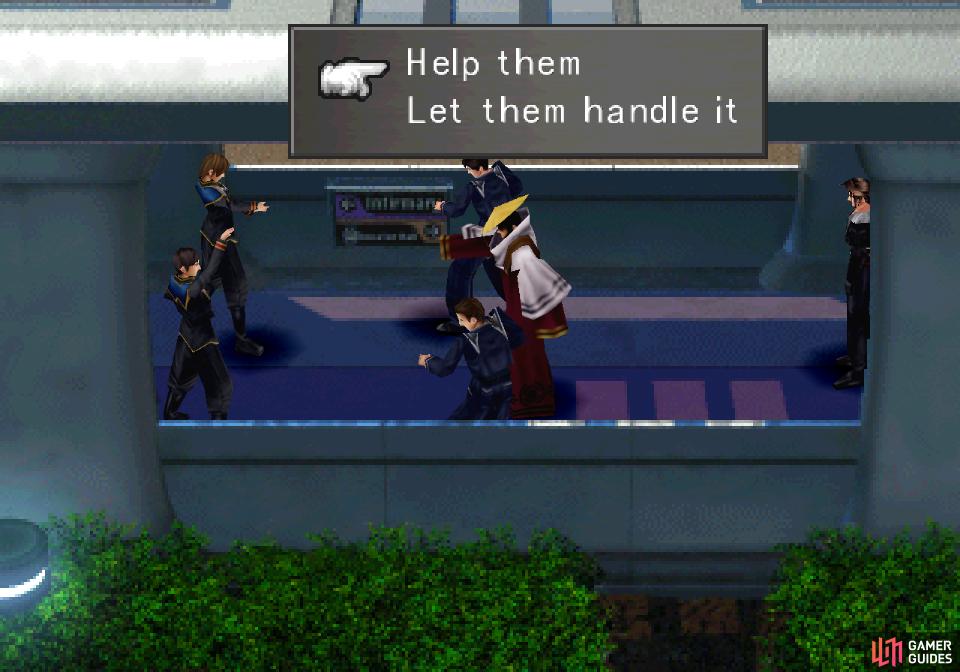
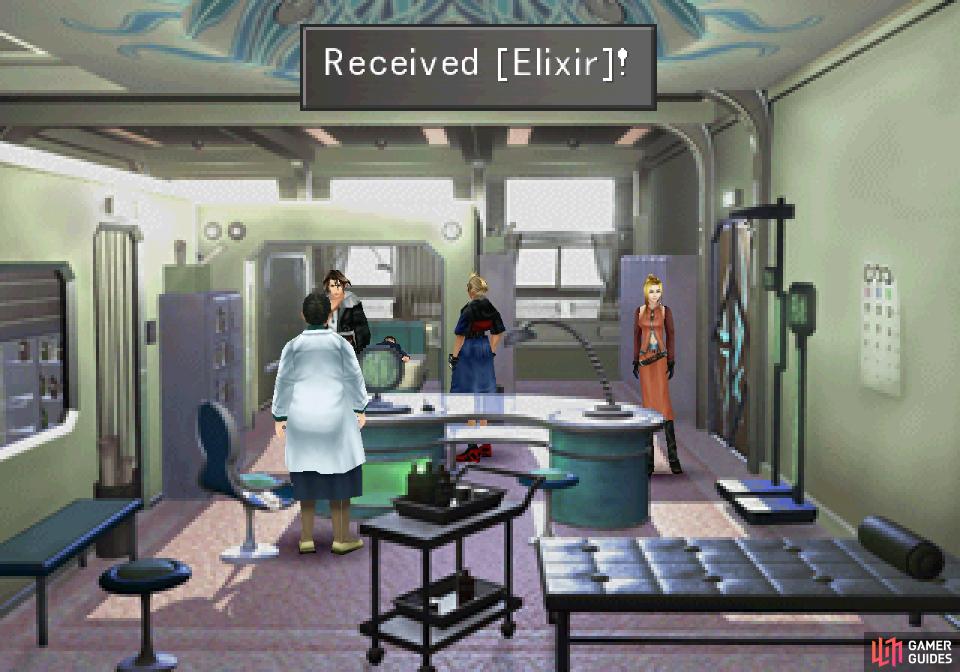
Guess you’re on team Cid by default, and that being the case you’ll need to seek out the missing headmaster. No need to make this complicated, head left and we’ll just sweep this area by exploring clockwise. In the hallway leading to the Infirmary you’ll find a Garden Faculty member confronting a pair of SeeDs, and if you interfere (pick the option Help them) you’ll have to fight a Granaldo. No different from the boss version you faced earlier, save it might be a higher level, and has no Raldos backing it up. Cut down the bug and after some chatter with Doctor Kadowaki, talk to Kadowaki again to score an Elixir. Nice.

(1 of 2) Declare your allegiance for the Headmaster
Declare your allegiance for the Headmaster (left), and you’ll be given an X-Potion (right)
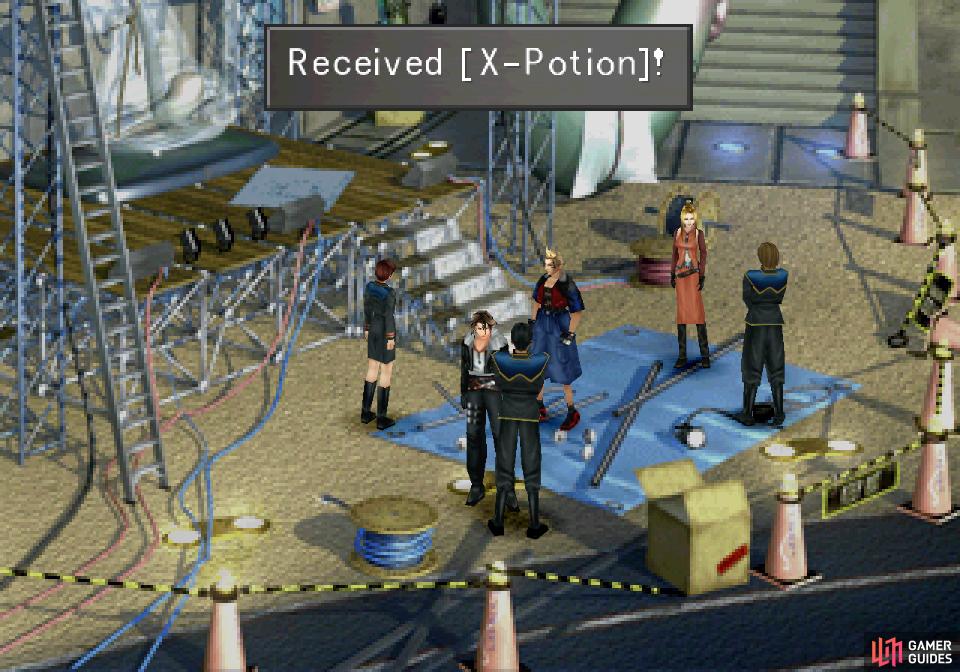
Return to the outer ring hall and continue clockwise (up) to reach the Quad, where a Garden Faculty member will shuffle past, complaining about the need for reinforcements. Let him go and continue to the stage, where you’ll be ambushed by some SeeDs when you draw close. Say you’re on the side of the headmaster (it’s true, and they clearly just fended off one of the Garden Master’s goons, so it’d be silly to say otherwise) then talk to the middle SeeD to gain an X-Potion.
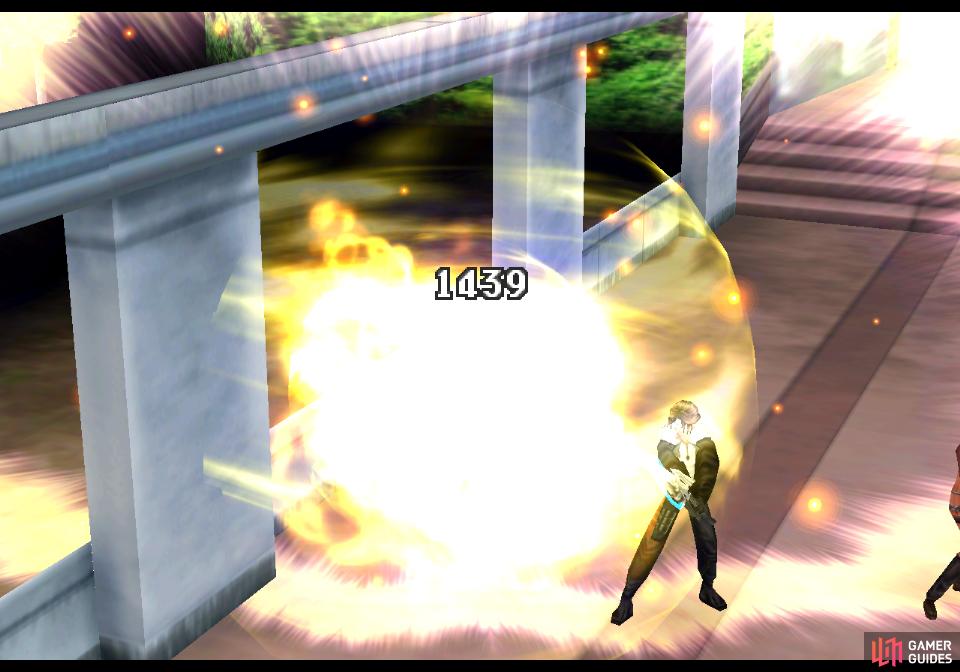
Return to the ring hall and continue clockwise to the next area, the Cafeteria. In the hallway leading to the cafeteria you’ll find another Garden Faculty member who will sic a monster on you - this time a lone Bomb. The Garden Faculty member optimistically commands its monster minion to “stall them”, which at best is what can be hoped for. This bomb is a higher-level variant of the normal Bombs you’ve been facing and will exhibit the tried-and-true Final Fantasy staple of growing larger when attack before using a “Suicide” attack after three hits. Endeavor to kill it before then, as the Suicide attack can deal around 1,500 damage to a single party member. Ouch.

(1 of 3) A sufficiently provoked Bomb can self-destruct
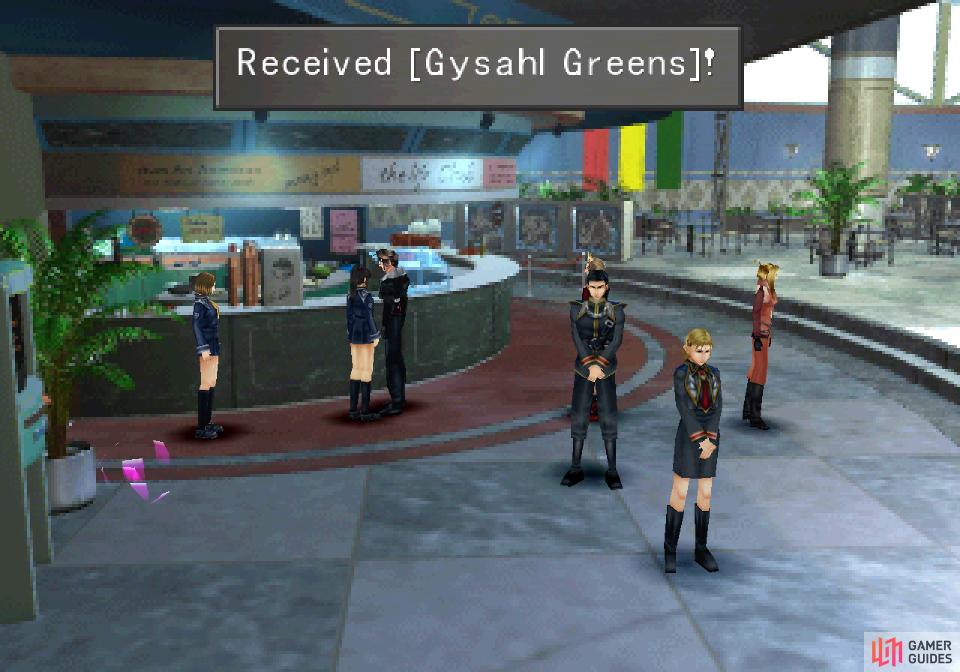
Enter the Cafeteria and after some chatter talk to the black-haired girl to get offered some hot dogs. Sadly for Zell, his celebration turns out to be premature. Looks like he’ll have to wait a bit longer for the culinary delight of D-grade meat stuffed into an intestinal hose. Talk to the girl again and she’ll give you the consolation prize of a Gysahl Green, which you have no use for just yet. Draw from the Demi draw point if you wish, then return to the ring-hall.
Next up is the Dormitory, where you’ll find another member of the Garden Faculty, who will sic yet another monster on you - this time a lone Caterchipillar. Destroy this underpowered critter, then enter the dorm to find a Save Point. Well, at least your room has been spared from this pogrom. What would Squall do without his collection of black leather half-jackets?
Exit back to the ring-hall and make your way to the Parking Lot. Go through the motions with yet another Garden Faculty member and defeat his pet Grendel, then enter the Parking Garage to find Cid! Or rather, a hologram of Cid. Smooth, Squall. Talk to the brown-haired student to score a Tent, then move on.
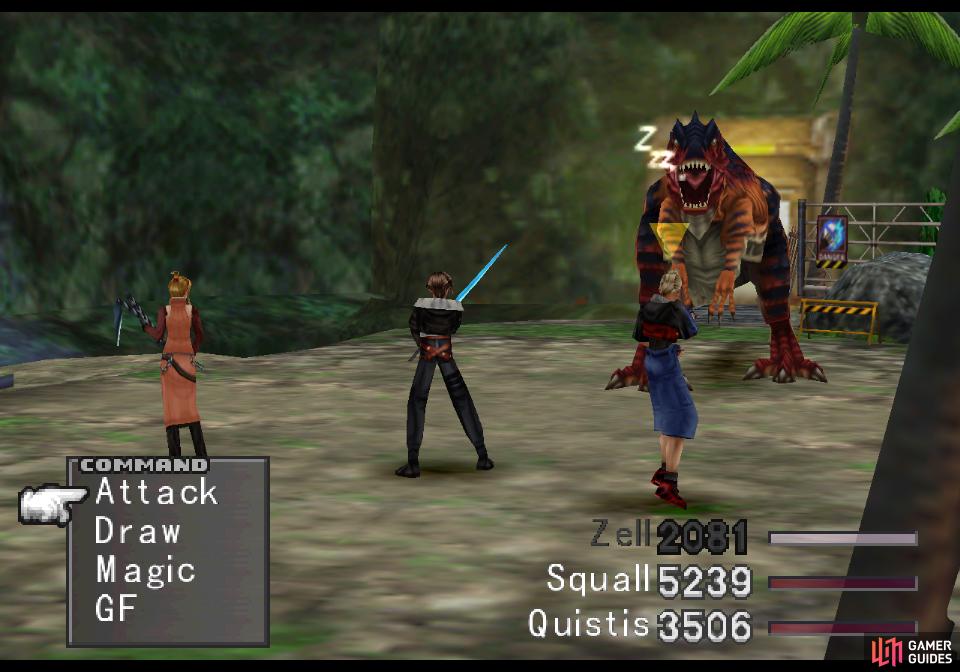
(1 of 3) Intervene in the training center
Make your way to the Training Center and you’ll witness a scene where some corrupt students have clearly let their loyalty to this mysterious Garden Master go to their head. Intervene and the Garden Faculty member will punish you by summoning a T-Rexaur. Finally, a real fight! Blind and Sleep both work wonders against this dinosaur. Whittle it down and enjoy that juicy 10 AP, then talk to the SeeD you rescued to get a Remedy.
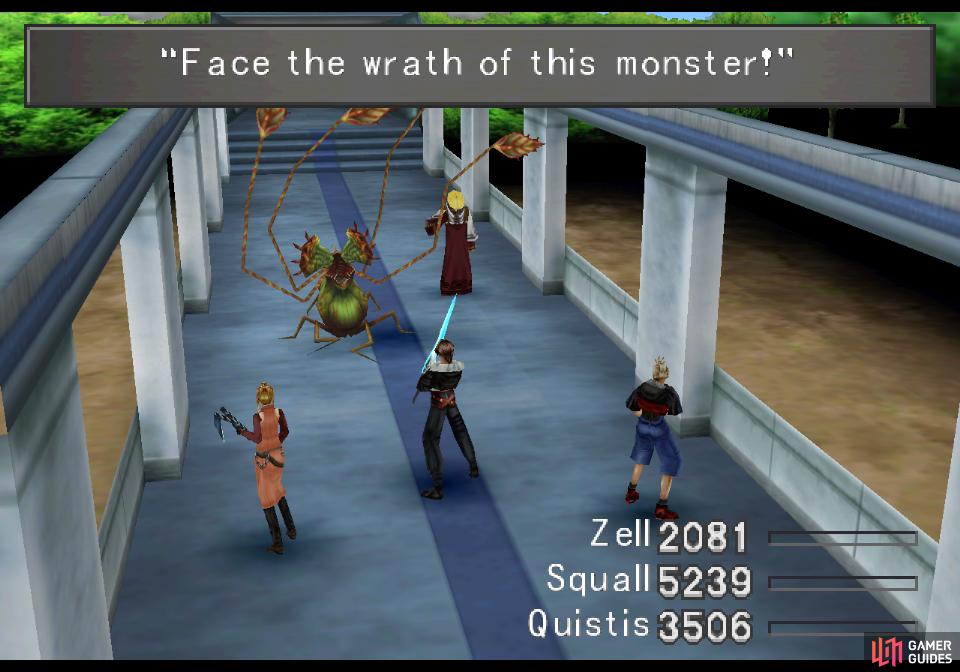
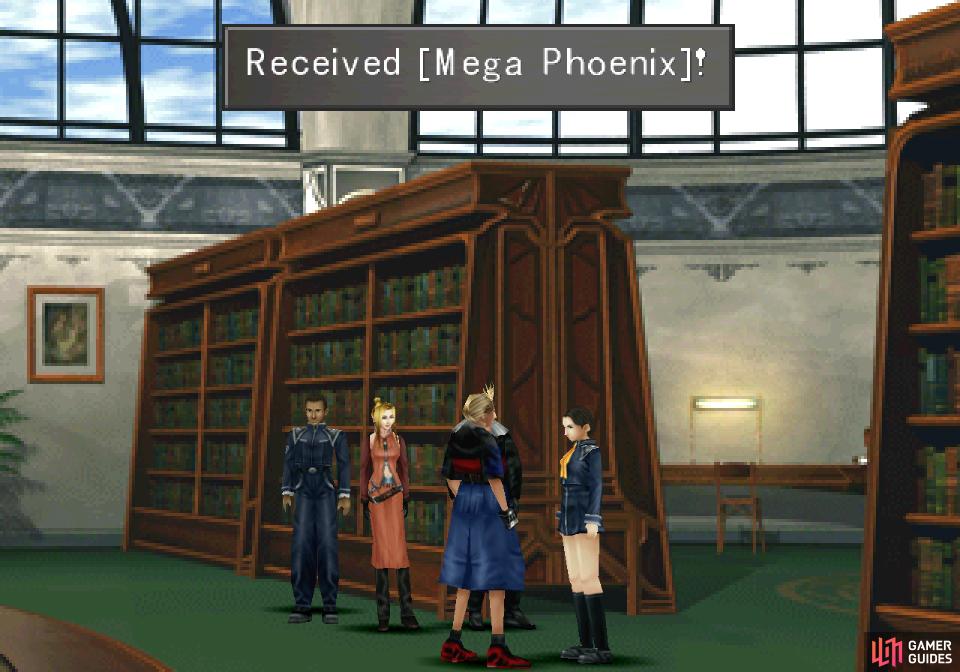
(1 of 2) Fight through the Garden Faculty’s monster en route to the LIbrary
Fight through the Garden Faculty’s monster en route to the LIbrary (left), then talk to a girl within to get a Remedy if you don’t have Zell with you, or a Mega Phoenix if you do (right)
Last stop on this floor is the Library, in the hall to which a Garden Faculty will sic a Grat on you. “Feel the wrath of this monster!”. What a joke. Stomp the Grat out of existence, then enter the Library and talk to the girl further in to the right to obtain a Remedy… unless Zell is in your party, in which case you’ll get a far superior Mega-Phoenix. Somebody’s got a crush!
Return back to where you began this little run-around (the central hall area with the elevator and directory) and you’ll spot Xu going up the elevator. Follow her up and exit to the left, then head up the hallway past Quistis’s former classroom. Bet that stings. In the next screen you’ll corner Xu, who sings that same tiresome refrain everybody else has in this area. After some chatter you’ll find out Cid’s location - hiding in plain sight, as it were.

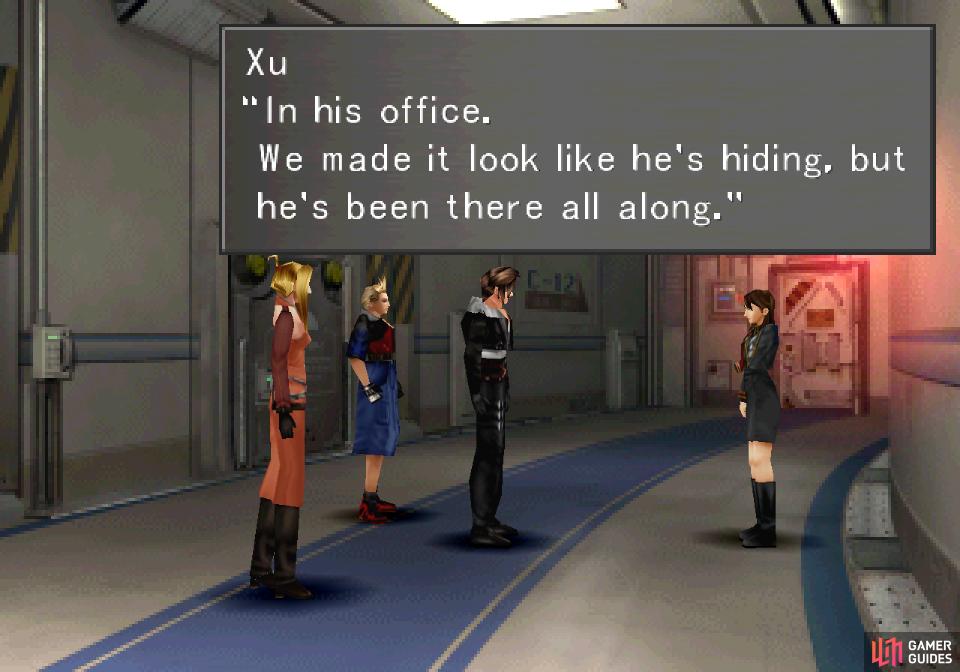

(1 of 3) After clearing the Garden Faculty in the 1st floor, return to the lobby to find Xu
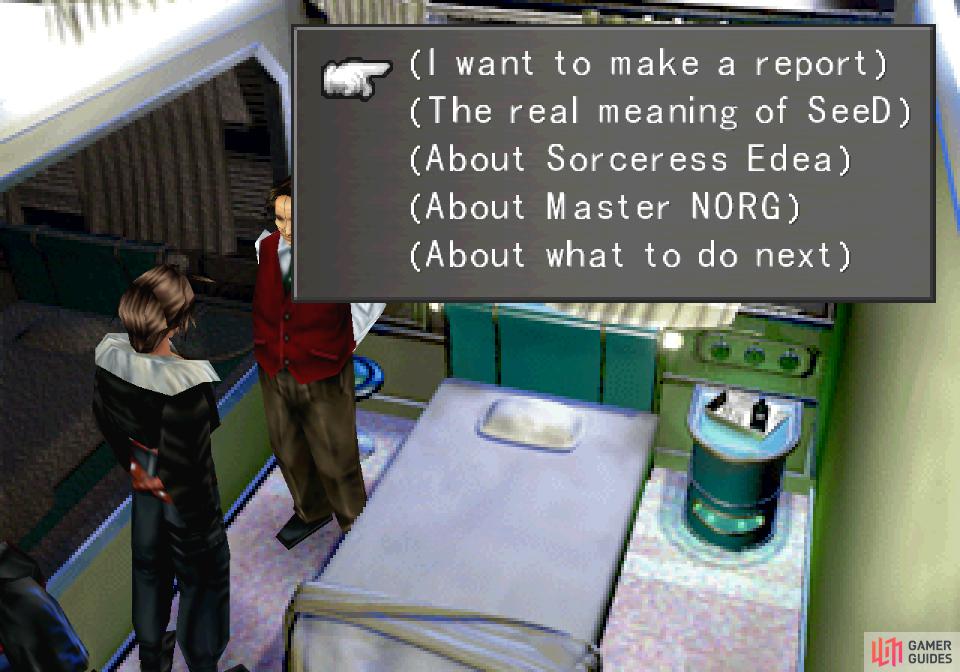
If you go through the door at the end of the hall you’ll find a guy standing on a balcony, whom you can play cards with if you wish. Seems a bit inappropriate, though, so follow Xu back to the elevator and you’ll automatically head up to Cid’s office. Continue through the doors and talk to Cid, and when he stops halfway through the conversation talk to him again and he’ll tell you what to do. His plan is full of unknowns, but a shot in the dark is better than nothing.

MD Level
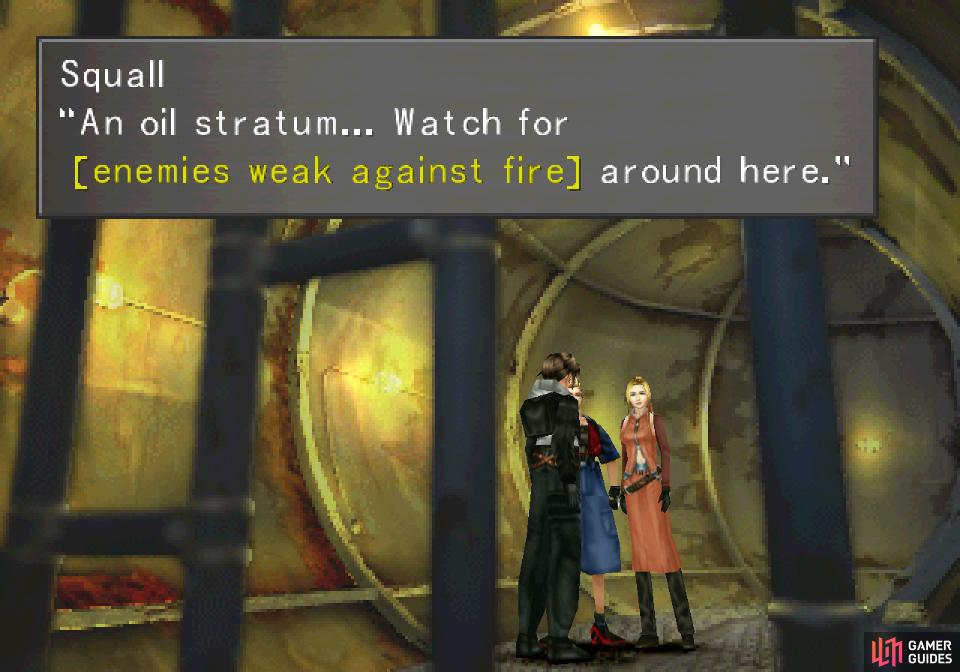
Return to the elevator, watch a scene, and when a complication occurs examine the control panel to the right, then open a hatch to the left. Climb down a ladder, marvel at a near miss, walk down a hallway and open another, larger hatch to drop down into an “oil stratum”. Squall will give you a helpful hit to junction fire magic to your Elemental Attack and try to lure you into a rather belated tutorial you probably don’t need at this point in the game.
Before you go it should be noted that in these ruins you’ll find Blobras, Blood Souls, Geezards and Tri-Face enemies, the latter of which is new and somewhat interesting. They have a decent store of HP, ranging from roughly 6,000 - 21,000. You can draw Blind and Silence at low levels (1-19), while they gain Bio (20+) and Slow (20-29) later on before finally possessing Flare, Pain and Stop (30+). If you’re high enough level, draw Flare, Pain and Stop if you need them, as the former is fantastic for junctioning to Strength, Pain is great for Magic and Stop… well, you might want the odd Status Attack and Status Defense junctions. You can Mug Curse Spikes from them, and they can drop Curse Spikes (all levels), Dead Spirits (1-29), Poison Powder (all levels) and Star Fragments (30+). They’re weak to Fire and Holy while absorbing Poison.
(1 of 2) When you enter the MD levels you’ll be reminded of the potency of elemental junctions
When you enter the MD levels you’ll be reminded of the potency of elemental junctions (left), Indulge in some button mashing to turn a wheel and continue deeper into the depths of the Garden (right)
When you’re done, continue down the tunnel to reach another screen, descend a ladder, then go through a door to the left. You’ll find yourself facing down a large wheel you’ll need to turn by rapidly mashing the [Talk] button (Square by default). If you can’t manage it on your first go, one of your companions will join you and you’ll be able to try again. Keep at it until you manage to turn the wheel, then exit via the door you entered and climb down a newly-revealed ladder.
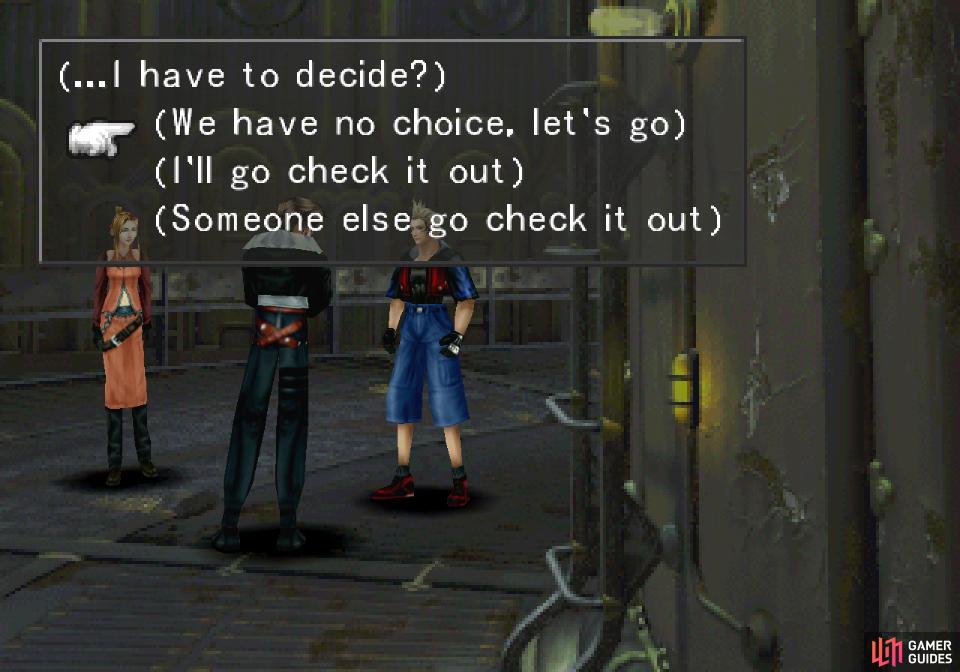
Descend some stairs to reach a large, circular area and head to the upper right to find another Full-Life draw point. Much win! Continue up and to the left and the group will contemplate a nearby ladder before giving you a meaningless dialogue choice. Squall ends up being the brave one whatever you choose, so you might as well pick I’ll go check it out.

(1 of 3) Draw from a Full-Life draw point
Once done, climb the ladder and with an assist from gravity Squall will end up in a control room. Activate a console to the right, then climb back down the somewhat unreliable ladder to return to your comrades and pick another pointless dialogue option. When they’re done babbling, head down towards the green flashing light on the railing to reveal… another ladder!
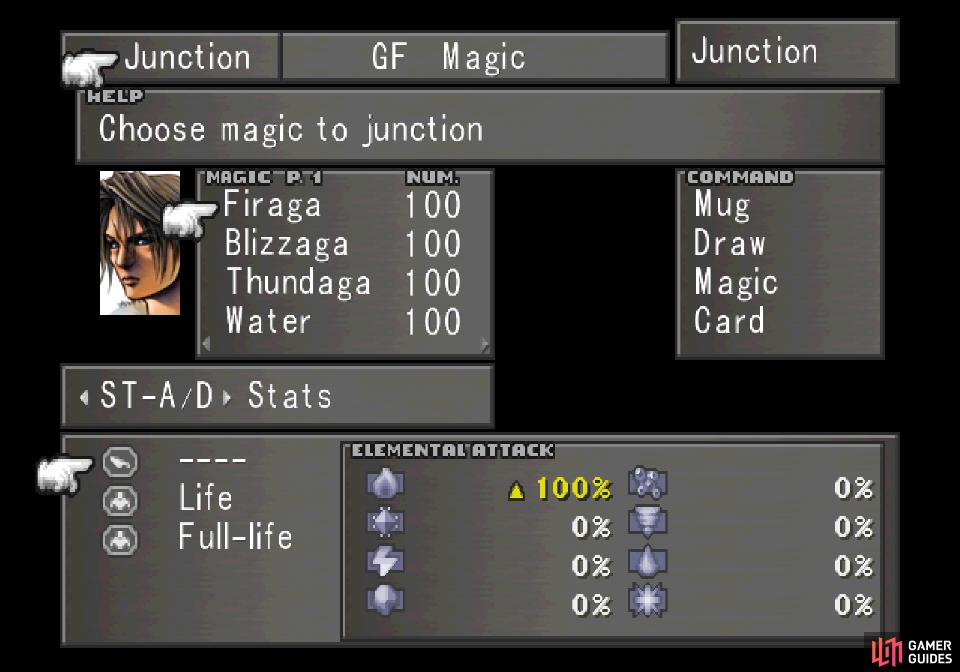
Descend the ladder and you’ll find a Save Point - huzzah! Junction fire to your Elemental Attack and if you can, junction Blind to your Status Defense and generally prepare yourself for a fight. Not saying there’s a boss or anything, but… you know. Once done, pull a lever nearby, then head across a bridge towards the door you opened only to be ambushed along the way…
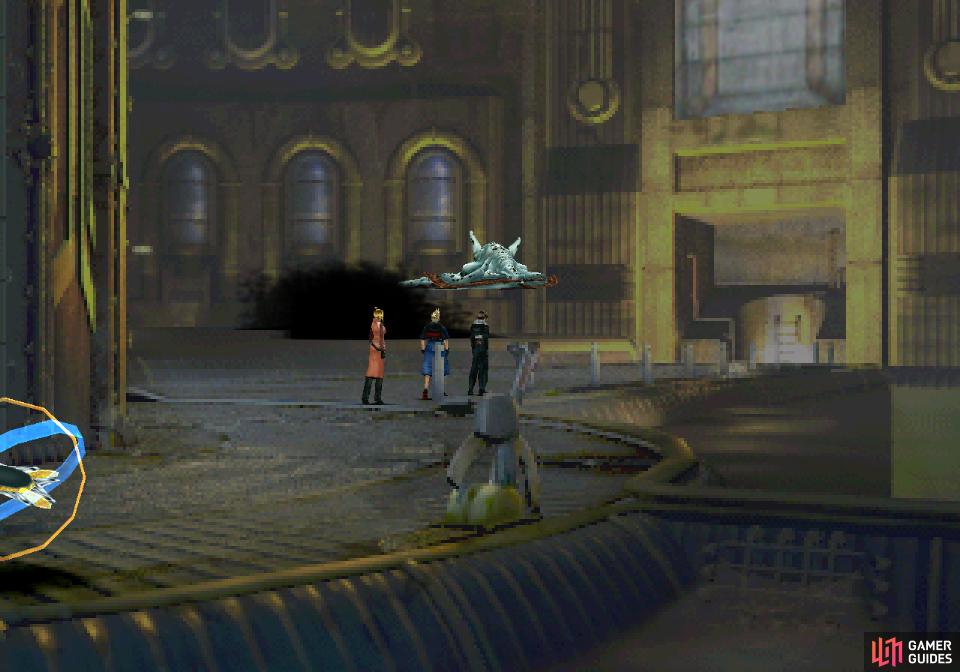
(1 of 2) Junction fire elemental magic to your Elemental Attack
Junction fire elemental magic to your Elemental Attack (left), then head across a bridge to encounter a new foe… (right)
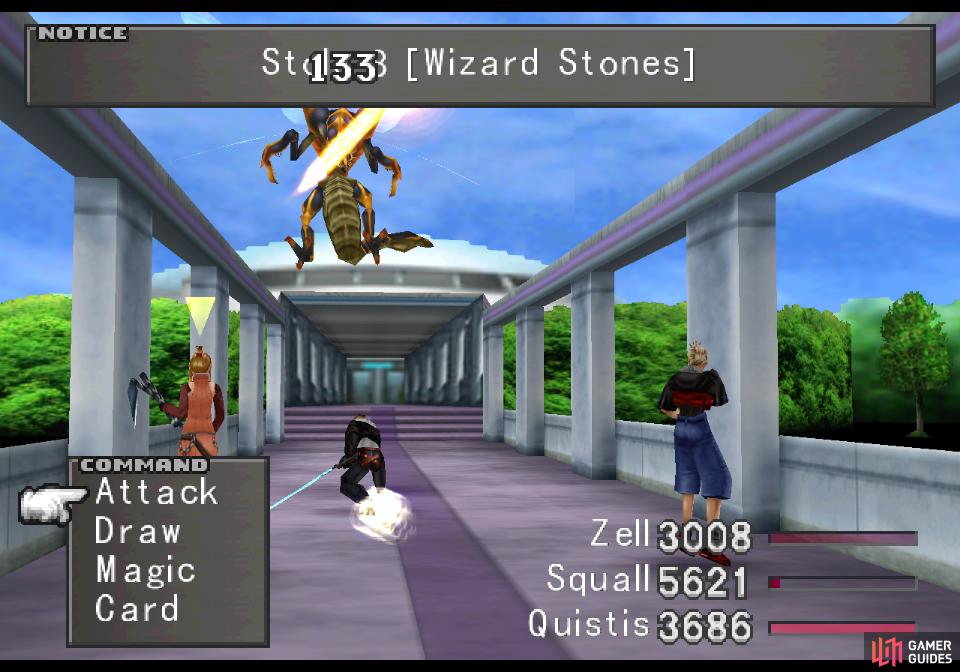
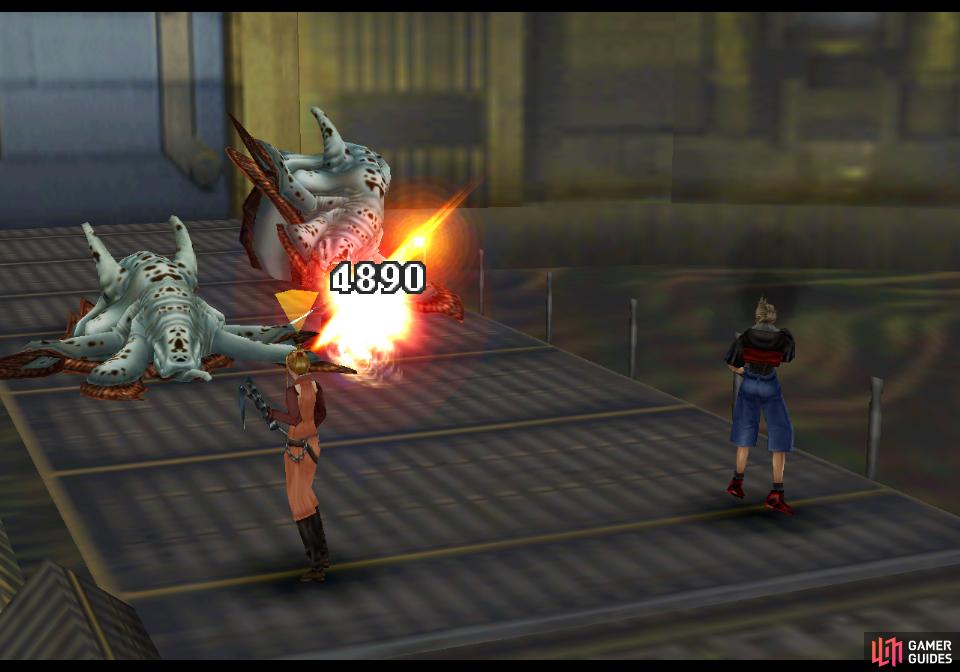
Boss - Oilboyle
Hey! These are those things from the cards! Ahem. Giant oil-dwelling monsters, Oilboyles are like the Iguion; a pair of high-tier monsters that aren’t quite unique bosses, as you can possibly encounter them again later on. That doesn’t mean they can’t be a challenge, however, and if you found BGH251F2 difficult, you may find these challenging, too. Disc 2 is getting serious!
| Oilboyle | |
|---|---|
| Lv: | 1-26 |
| HP: (Lv10) | 3,120 |
| HP: (Lv20) | 4,270 |
| HP: (Lv26) | 4,988 |
| Weaknesses: | Fire (200% damage) |
| Resistances: | Water (immune) |
| Status Resistances: | Immune to most status effects; Drain 0% – Eject 20% – LV Up 0% – LV Down 0% – Poison 50% – Reflect 0% – Regen 0% – Silence 20% – Sleep 20% – Slow 10% – The End 0% |
| EXP: | – |
| AP: | 10 (each) |
| Draw: (Lv1-19) | Blind, Confuse, Cure, Esuna |
| Draw: (Lv20-26) | Blind, Confuse, Cura, Esuna |
| Mug: | Fuel x4 |
| Drop: | Wizard Stone x8 |
While not quite as sturdy as BGH251F2 was (these monsters only have between 3,000 and nearly 5,000 HP), since there’s two of them their combined HP are somewhat close. They can pack quite a bunch with some of their attacks, but nothing nearly as dangerous as BGH251F2’s beam cannon. Plus, if you concentrate fire (perhaps literally?) on one, you can reduce their offensive power by half - this fight gets easier as it goes on, not more difficult.
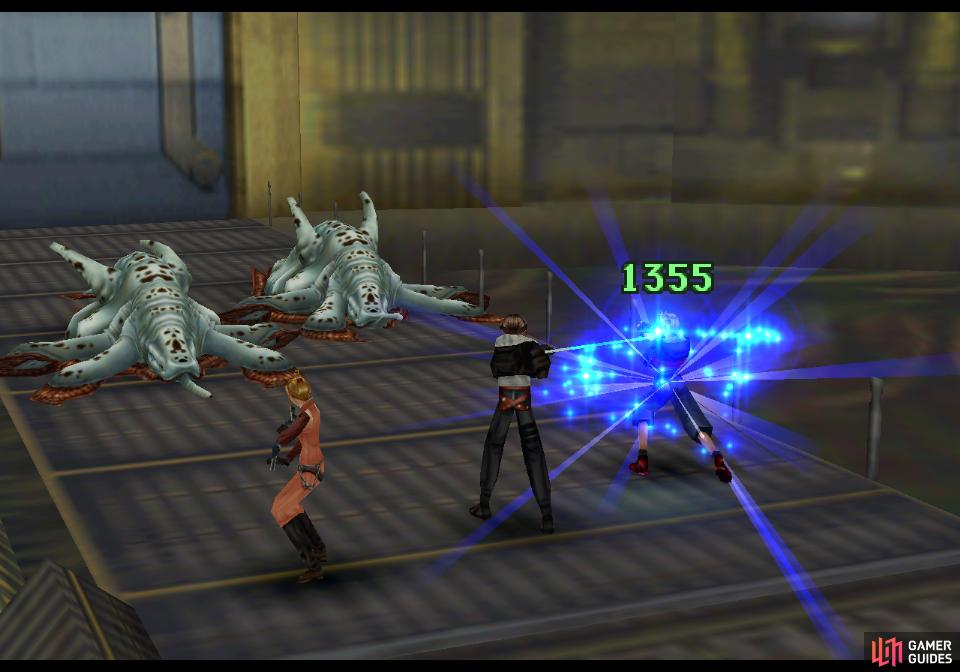
(1 of 2) You can draw restorative magics from the Oilboyles to keep your party alive
You can draw restorative magics from the Oilboyles to keep your party alive (left), A high-powered party junctioned with fire magic can potentially one-shot Oilboyles (right)
First and most obviously, the Oilboyles are weak to fire, so if you junctioned fire magic to your Elemental Attack you’ll deal double damage. Very nice. It’s not impossible for a character with Firaga junctioned to their Elemental Attack and Tornado/Flare/Holy junctioned to Strength to one-shot an Oilboyle, which… well, is pretty fun. Even a less capable party can deal health damage with modest junctions. Ifrit may also be useful, if he’s leveled up a bit, has SumMag+X% abilities and Boost.

(1 of 3) The Oilboyle’s melee attacks are moderately powerful
That’s not to say the Oilboyles wont be up to mischief themselves, nor that they’re necessarily push-overs. Their normal melee attack does a modest 150~ damage, while their Oil Shot attack can deal 250~ damage and inflict Darkness (hence the Blind Status Defense). Their most dangerous attack, Sonic Blast, is thankfully rare, dealing 250-350 damage to the entire party and possibly inflicting Curse.
Nasty things, but you can draw Cure/Cura from them if you need to keep healed, and Esuna to remove debuffs. Additional draws include Blind and Confuse, neither of which you should need, and neither of which affect Oilboyles. You can Mug Fuel from them, which… makes sense, but isn’t terribly useful. If you just kill them they’ll drop Wizard Stones. Neither of these are a great reward, so do what you wish.
After the Oilboyles are dead, save your game again if you wish, then continue across the bridge through the door you opened, descend another ladder (sigh), head left, then marvel at a massive device. Fidget with the control panel nearby several times then watch the scenes that follow, which are just as epic today as they were twenty years ago.

When you’re back in control, talk to Cid, then when Zell runs off talk to Cid again to follow Zell’s lead. Return down the main elevator to reach the 2nd floor, then head left, then up twice to reach the balcony, where you’ll be treated to more scenes. Yep, you’re movin’ alright. Return back to Cid and after some chatter Squall will take the Selphie approach to operating unfamiliar machinery, luckily averting another crisis. Plow through the scenes and dialogue to end this turbulent affair.
Balamb Garden evaded the missiles and is now afloat at sea. How this thing is seaworthy is anyone’s guess, but it’ll prove incredibly useful shortly… just as soon as you can figure out how to maneuver this damn thing. For now, a long-needed rest awaits, after which you should save your game then leave the Dormitory and return to Cid. There’s some cards we can play, but we’ll show restraint for once and postpone it until later, when the entire questline can be covered. If you understandably can’t wait, skip ahead to the “CC Group” page, where you’ll be able to complete the majority of this questline now.
Make your way to the 1st Floor Hall area with the elevator and the directory and a Garden Faculty will stop you and tell you that the Garden Master has summoned you. Oh yeah. Loose end, needs to be tied up. Glad this NORG is volunteering so you don’t have to hunt him down. Before you go, however, you might want to have a look at your junctions. You know, just in case your meeting with this Garden Master - whose minions already unleashed monsters on you and the Garden - should prove contentious. What are the odds, right?
Still, junction Tornado or Aero to your Elemental Attack if you can, make sure whomever uses Carbuncle has the GF option available, and try to ensure the Strength of whatever character as Mug isn’t too high if you can. There are some items definitely worth during this totally peaceful meeting, and it’d be a shame if somebody was defeated before they could manage to steal something. Try to boost your Elemental Defense against blizzard, fire, thunder and wind (or as many of those as possible) while you’ll be well-served if you junction Bio, Silence and Slow to Status Defense. If you have Auto-Haste you don’t need resistance to Slow, and Silence should take priority over other junctions.

(1 of 2) Travel down the elevator to witness the end of Cid’s chat with this Garden Master - it doesn’t go well
Travel down the elevator to witness the end of Cid’s chat with this Garden Master - it doesn’t go well (left), When you have your own audience with the Garden Master, you’ll see why, as the Garden Master refuses to be reasoned with and engages in hostilities (right)
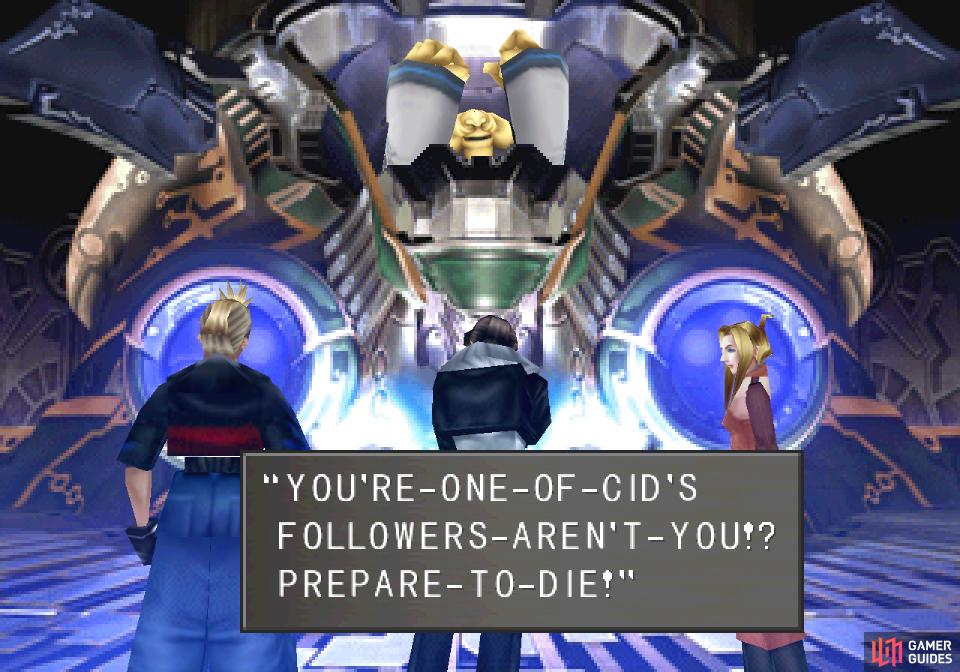
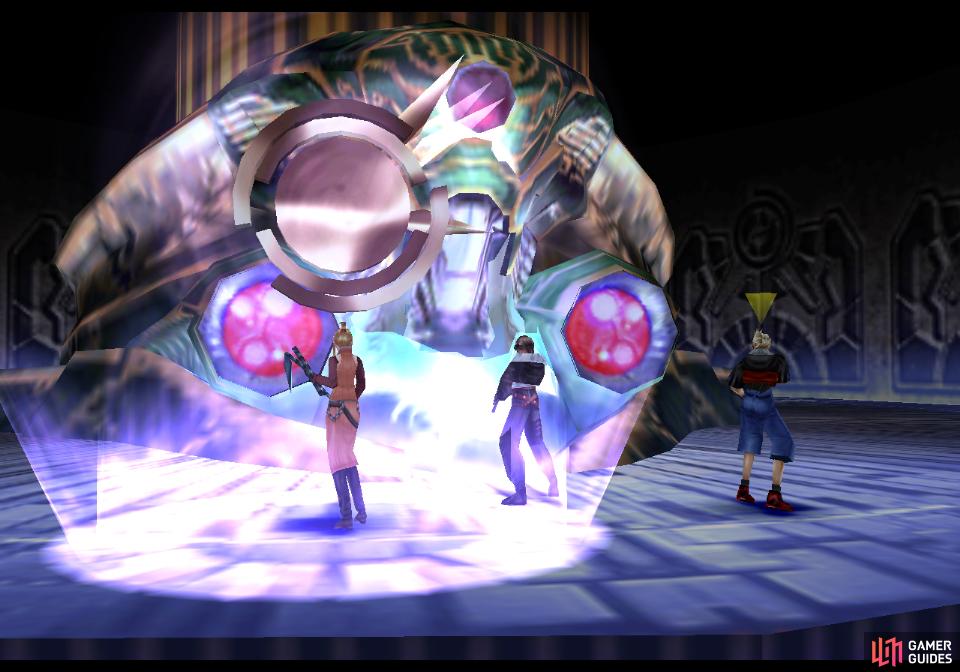
Get on the elevator and ride it down, after which you’ll be joined by your companions. Witness a scene with Cid, who clearly isn’t getting along with this Garden Master fellow (all that attempted murder can sour a relationship) and when you’re done talking to Cid exit to the left to meet the Garden Master. You’ll talk politics and business, learning about how you were used by Galbadia Garden, about Cid’s connection to Edea, and NORG’s plan to soothe the sorceress’s anger. Things are already going poorly, but once Cid is mentioned, NORG becomes unmanageable.
Boss - NORG
Whatever NORG is, he’s not human, and he doesn’t look terribly… shall we say, athletic? His machinery makes up for this weakness, and there are actually four parts to this boss, including two Orbs (which cannot be destroyed), the NORG Pod (which protects NORG while it’s intact) and NORG himself. To win you’ll need to cut through the NORG Pod, then defeat NORG.
| Left Orb | |
|---|---|
| Lv: | 1-27 |
| HP: (Lv10) | 685 |
| HP: (Lv20) | 1,810 |
| HP: (Lv27) | 2,865 |
| Weaknesses: | – |
| Resistances: | Immune to all elements save Gravity |
| Status Resistances: | Immune to most status effects; Drain 0% |
| EXP: | – |
| AP: | – |
| Draw: | Confuse, Dispel, Slow |
| Mug: | Spr Up x1-4 |
| Drop: | Wizard Stone x8 |
| Right Orb | |
|---|---|
| Lv: | 1-27 |
| HP: (Lv10) | 685 |
| HP: (Lv20) | 1,810 |
| HP: (Lv27) | 2,865 |
| Weaknesses: | – |
| Resistances: | Immune to all elements save Gravity |
| Status Resistances: | Immune to most status effects; Drain 0% |
| EXP: | – |
| AP: | – |
| Draw: (Lv1-19) | Life, Thunder |
| Draw: (Lv20-27) | Bio, Life, Thundara |
| Mug: | Mag Up x1-4 |
| Drop: | Wizard Stone x8 |
| NORG Pod | |
|---|---|
| Lv: | 1-27 |
| HP: | 2,000 |
| Weaknesses: | – |
| Resistances: | Gravity (immune), Poison (immune), Thunder (half) |
| Status Resistances: | Immune to most status effects; The End 0% |
| EXP: | – |
| AP: | – |
| Draw: (Lv1-19) | Cure |
| Draw: (Lv20-27) | Cura |
| Mug: | – |
| Drop: | – |
| NORG | |
|---|---|
| Lv: | 1-27 |
| HP: (Lv10) | 7,100 |
| HP: (Lv20) | 10,100 |
| HP: (Lv27) | 12,200 |
| Weaknesses: | Wind (200% damage) |
| Resistances: | Poison (immune) |
| Status Resistances: | Immune to most status effects; Drain 0% – Slow 10% – The End 0% |
| EXP: | – |
| AP: | 20 |
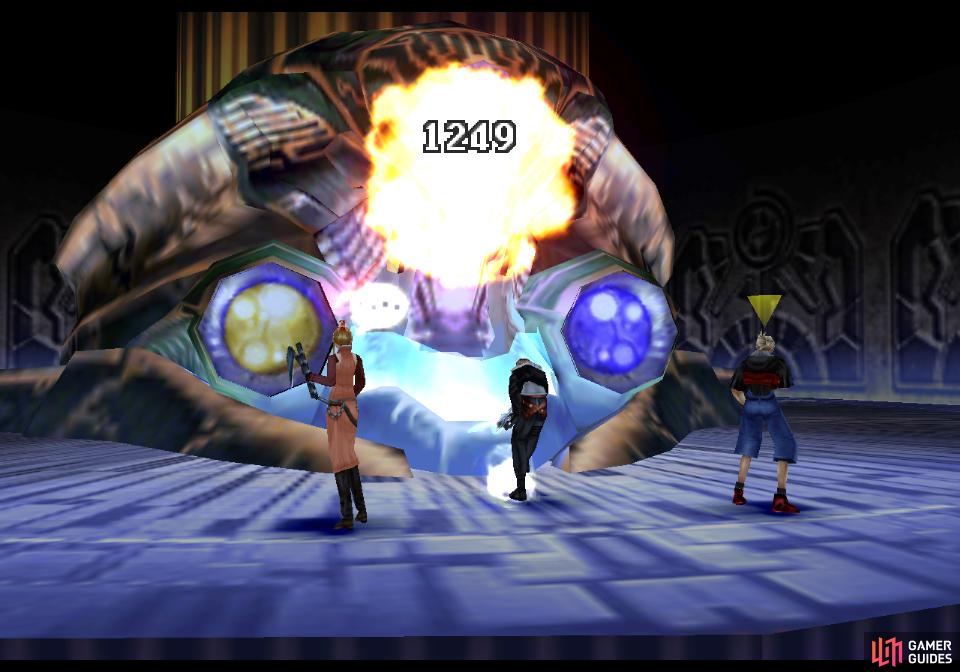
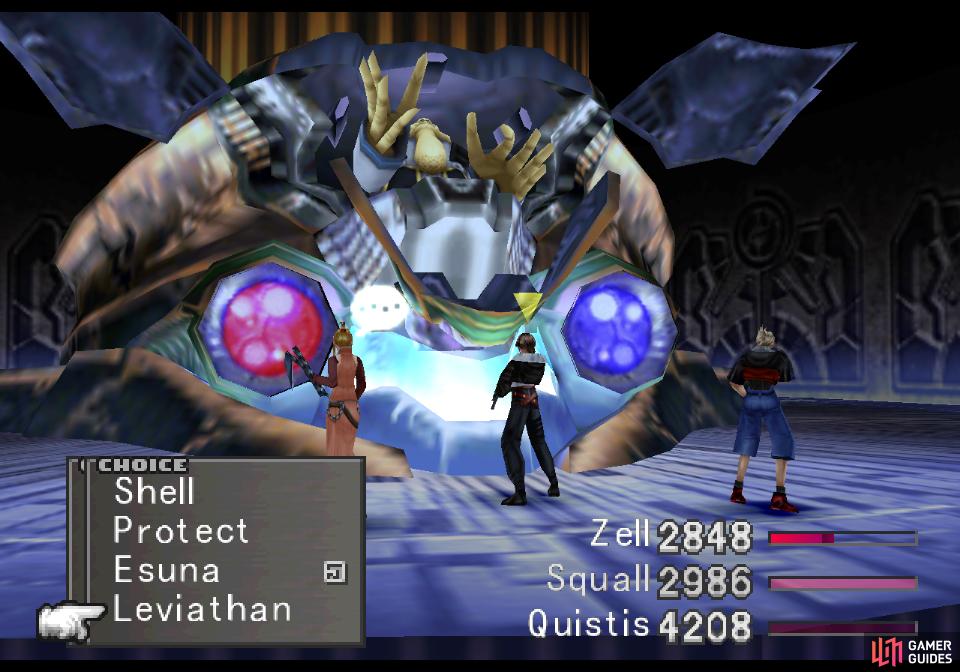
| Draw: | Esuna, Protect, Shell, Leviathan |
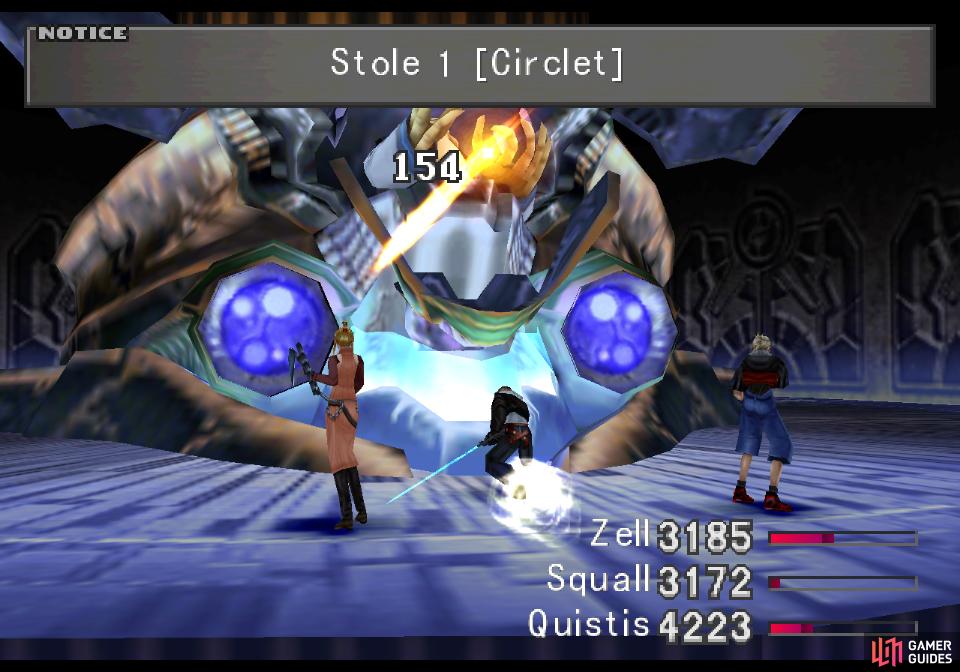
| Mug: | Circlet x1 |
| Drop: | Wizard Stone x1 |
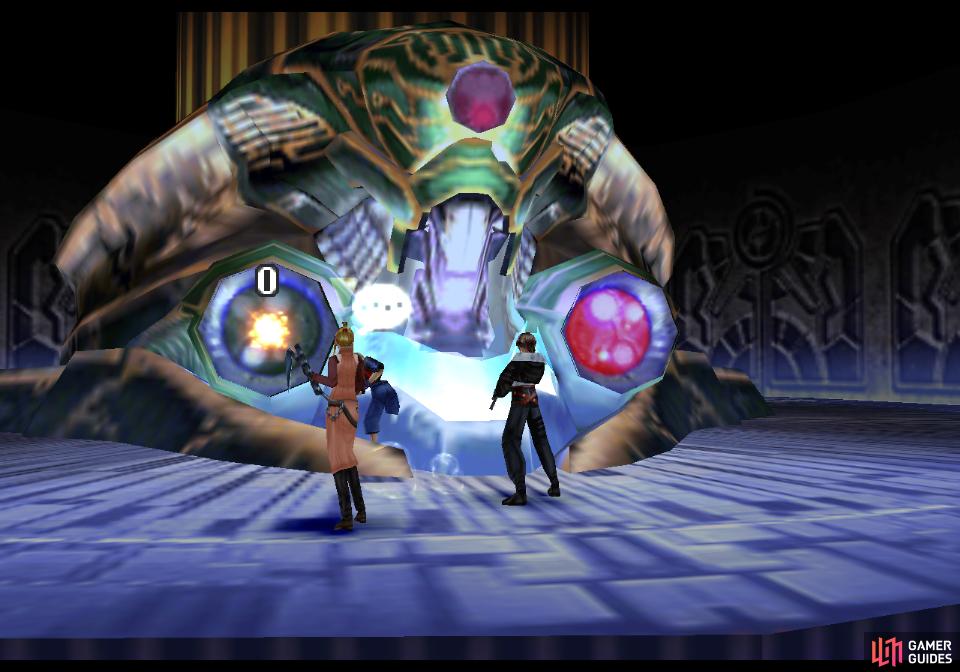
First things first, you should be aware that you can draw the Leviathan GF from NORG. Not the NORG Pod, NORG himself, so you’ll have to cut through the NORG Pod, first. Don’t let this GF slip through your fingers!
With that out of the way, turn your attention to the matter at hand. To start the fight you’ll be facing off against NORG’s machine, in which he’s safely entombed. The Pod itself doesn’t do much besides protect NORG, giving the Garden Master a 2,000 HP barrier and casting the odd Dispel.
(1 of 2) The NORG Pods can cast debuffs like Slow
The NORG Pods can cast debuffs like Slow (left), and offensive elemental magic like Tornado (right)
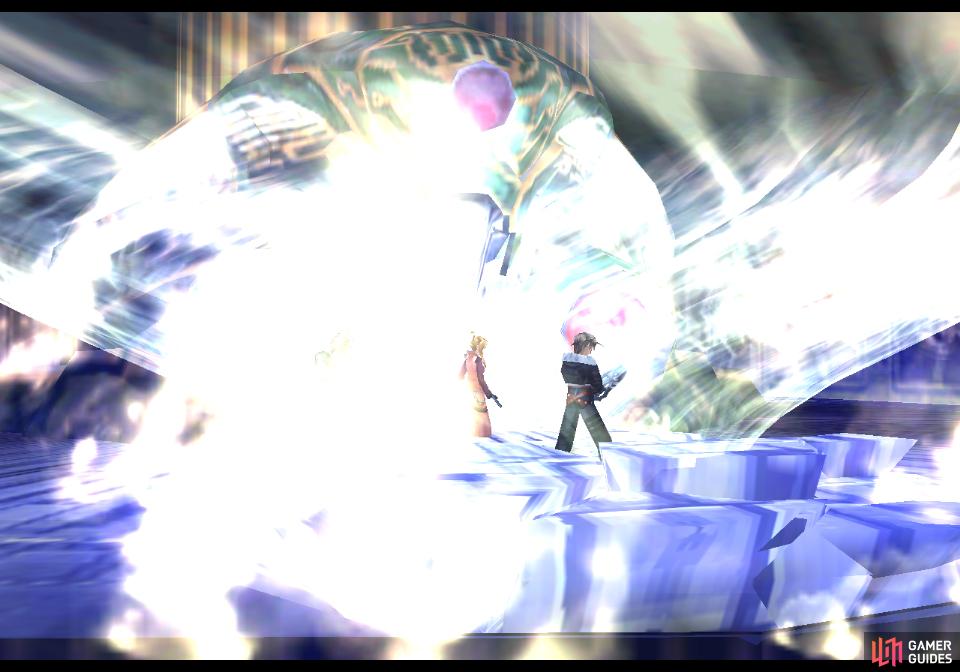
The Left Orb and Right Orb are more interesting, casting a variety of spells including Bio, Fira, Silence, Slow, Thundara and Tornado. They can’t be destroyed, but they can only cast spells when they’ve charged up, which is indicated by their color - NORG will cackle about this at the beginning of the fight. When they’re blue, they’re more or less dormant, and over a bit of time they’ll turn yellow, then red, at which point they’ll cast spells freely. Bio and the -ara tier elemental spells (Fira and Thundara) will struggle to do 100~ damage, depending on your Spirit score and resistances, while Bio will likely deal even less, although it can poison you. The most dangerous spell is Tornado, which can hit the entire party for upwards of 150~ damage.
(1 of 2) Attacking the Orbs will reset their color and inhibit their casting
Attacking the Orbs will reset their color and inhibit their casting (left), You can also neutralize NORG’s spells by using Carbuncle to cast Reflect on your party (right)
This damage doesn’t compare well to BGH251F2’s offensive output, or even the Oilboyles, but the status-affecting spells can be more troublesome. Silence, of course, will keep you from casting spells, drawing magic, or summoning GFs, and Slow will reduce the rate at which your ATB bar fills up. If you have Auto-Haste, you’ll be immune to this effect, which is a significant boon considering how often the Orbs like to cast it.
To defeat the Orbs you can just keep hitting them, attacking the NORG Pod when they’re blue. Auto-Haste will significantly help with this, as it’ll ensure you get to take turns faster than the orbs can charge. Failing that, you can draw and cast Shell to mitigate the damage, or summon Carbuncle to give your party Reflect, which will bounce the enemy’s spells back… usually to no real effect, but hey, at least it won’t hit you. Plus, it’s one of the few fights where Carbuncle is actually useful, so…
(1 of 2) Destroy the NORG Pod
Destroy the NORG Pod (left), to reveal NORG, from whom you can draw Leviathan (right)
When you deal 2,000 damage to the NORG Pod, it’ll open up and reveal NORG, who is none too happy with this development. NORG will cast Blizzara, Protect and Shell, as well as use his Psycho Blast ability, which can hit one character for 150~ damage. He’ll also use Water so long as you haven’t drawn Leviathan yet. All in all, not too scary.

(1 of 2) NORG can cast spells - including buffs like Protect - when exposed
NORG can cast spells - including buffs like Protect - when exposed (left), but he can also be attacked directly (right)
All this is made easier by the spells you can draw from these foes. From the Left Orb you can draw Confuse, Dispel and Slow, which are of limited use in this fight, at best. The Right Orb has Bio, Life and Thundara, the middle of which is useful if any of your allies should fall. While the NORG Pod is alive you can claim Cure or Cura (depending on level) which will ensure you’ve got a pretty easy go of things until the NORG Pod is gone. NORG is less generous with healing, but you can still draw Esuna, Protect, Shell and, of course, Leviathan. Do be sure to grab that, by the way.
As for your own offense, the Orbs are immune to most non-physical damage, so just attack them with your normal attacks to keep them at bay and focus on the NORG Pod whenever you can. The NORG Pod has fewer resistances, but still takes no damage from gravity or poison and only half damage from thunder. NORG himself is also immune to poison, but weak to wind, taking double damage from such sources. Most elements will avail you little, as the Orbs and the NORG Pod are immune to just about everything save Drain in the case of the former. NORG himself is also immune to most status effects, but can be affected by Slow and Drain.
(1 of 3) You can steal a Mag Up
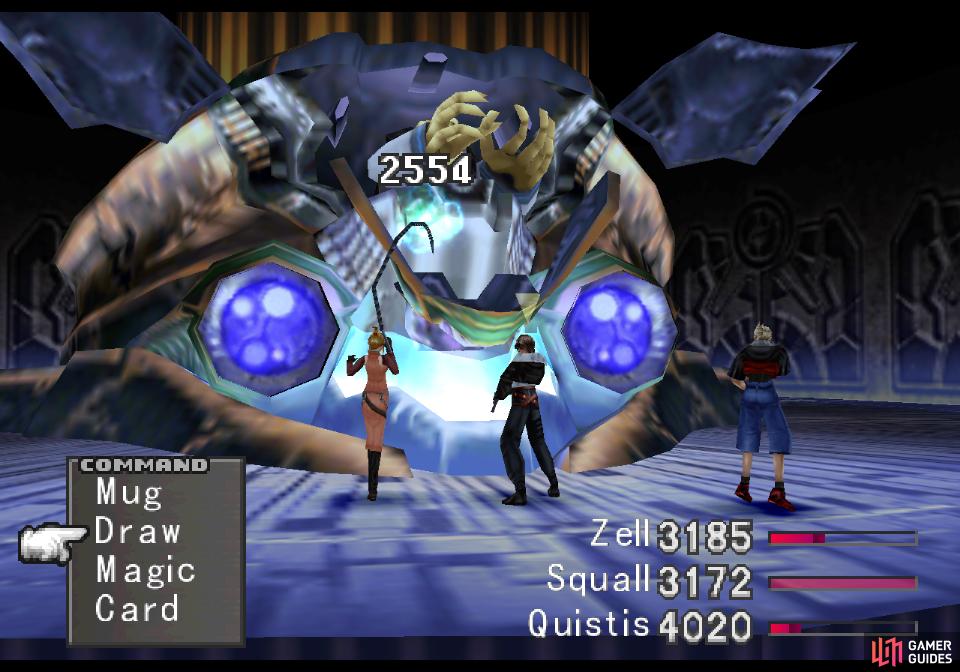
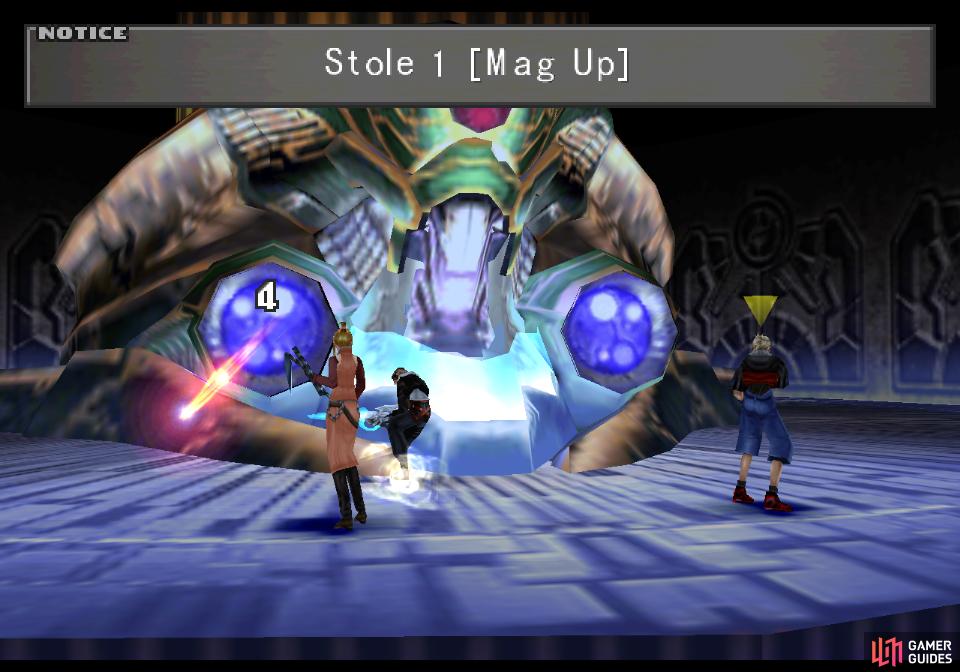
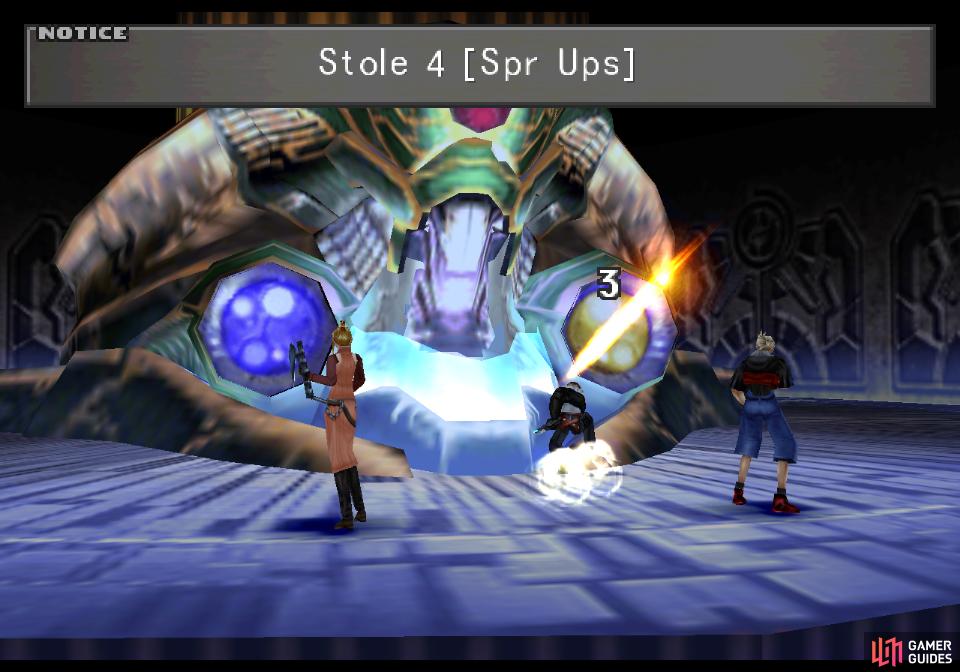
Don’t be in a huge rush to defeat NORG, however, as there are some items worth stealing. NORG himself can be Mugged for a Circlet while the Right Orb can be Mugged for between one and four Mag Up items and the Left Orb can be Mugged for between one and four Spr Up items. These items permanently increase the user’s Magic and Spirit stats, respectively, and while you can get several of them from a successful steal, you’re far more likely to only get one. Still, anything you can get is better than the alternative - if you don’t steal they’ll only drop some Wizard Stones.
Keep the Orbs at bay (perhaps with the aid of Carbuncle), destroy the NORG Pod to reveal NORG, draw Leviathan from the Garden Master, then whomp him to let him know where all his money has been going. After the battle, the team will resolve to chat to the headmaster - you know, the guy who had some psychotic monster operating out of the bowels of his school, whose wife you nearly assassinated? Before that messy business, let’s take a look at this new GF, Leviathan.
GF - Leviathan
Leviathan marks your eighth GF - half the possible GFs in the game are now yours. At least, if you’ve been following this guide. It was bound to happen sooner or later, but… well, your stat junctions should be in pretty fair shape right now, which means new GFs have a more limited window in which to prove their worth, and in this regard, Leviathan falls short. Leviathan starts out with Spr-J, which will serve the Ifrit/Carbuncle user well enough, but otherwise Leviathan can only innately learn Mag-J, Elem Atk-J and Elem Def-Jx2. Nice enough, but you should already have them on every character.
Other than stat junctions, Leviathan is fine. Its stat/ability focus is Spirit, possessing Spr+20%, Spr+40% and Spr Bonus. It’s refinery abilities include Supt Mag-RF and GR Recov Med-RF, which is quite nice as it’ll allow you to finally refine Aura, Dispel, Drain, Esuna, Protect, Reflect and Shell. Granted, you should have most of these spells by now, but being able to replenish them or less at will is a fine boon, and the ability to build up Aura stocks is always welcome. Learn these two skills first, as they’re by far the most interesting abilities Leviathan has available.
We junction the Leviathan GF to the Ifrit/Carbuncle user just to get Spr-J available immediately, although Leviathan’s user is ultimately not all that important. Not compared to the previous GFs, anyways, whose assignments are more or less set in stone at this point.
(1 of 3) Talk to Cid after dealing with NORG
Encounters at Sea
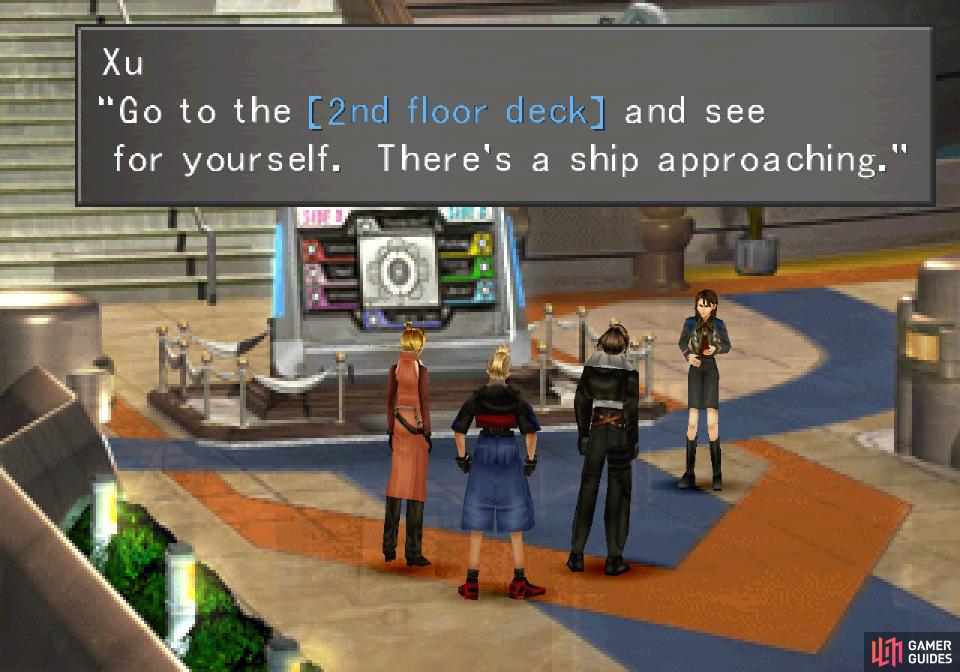
When you’re done messing around with your new GF, return to the elevator and take it up to the first floor and head left to the Infirmary. Talk to Doctor Kadowaki and she’ll let you see Cid, who is clearly having a bad day. Talk to him repeatedly and exhaust his dialogue options to learn more about SeeD’s mission, his relationship with Edea, NORG and any future plans, then return to the elevator. Here you’ll be intercepted by Xu, who will tell you to go to the balcony on the 2nd floor.
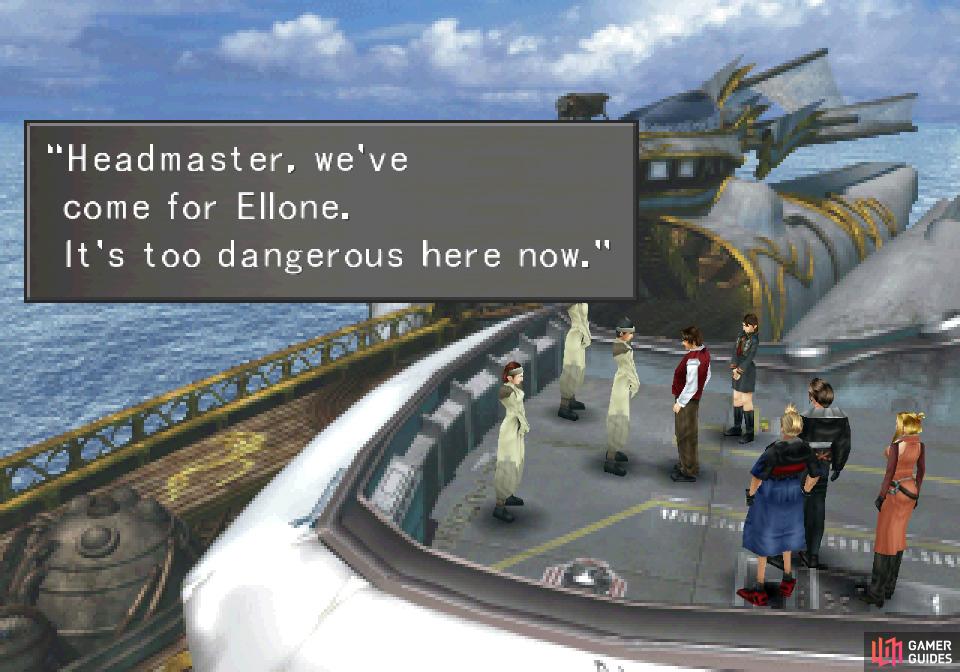
Enter the elevator, ride it up, and exit out to the balcony where you’ll be hailed by some odd guests. Pretty sure we can’t jump like that, SeeD or no. After some chatter you’ll be sent to find Ellone - the little girl from Laguna’s Winhill dream - whom you’ll find in the Library. Head to the back (rightmost end) of the Library and you’ll find her. You should recognize her as the woman who pestered you at the beginning of the game when you were in the Infirmary after your face-scarring sparring match with Seifer, and whom you saved from the Grandalo in the Training Center.
Endure some chatter, watch some scenes and suffer through Squall’s bout of infantilism and Squall will be woken up by one of his companions. The excuse varies, but leave the Dormitory and shortly thereafter you’ll find that Cid has got the intercoms working, but other scenes will make it abundantly clear that steering the Garden is still outside of his ability. He’ll then use the repaired intercom system to call you to his office, where he’ll tell you to explore the town the Garden got a bit too close to - Fisherman’s Horizon.


 Sign up
No Comments