
| Obtainable Skills/Blueprints |
|---|
| Electrospinning Specialist, Surgeon, Cybernetics Specialist, Drug Developer |
| # | Mission Task | Mandatory/Optional |
|---|---|---|
| 1 | Eliminated an armored vehicle. | Mandatory |
| 2 | Eliminated multiple fighting vehicles or gunships. | Optional |
| 3 | Eliminated all armored vehicles without receiving a resupply or fire support. | Optional |
| 4 | Secured the weapon carried by a transport truck. | Optional |
| 5 | Extracted an armored vehicle. | Optional |
| 6 | Extracted the four soldiers searching for the escaped prisoner. | Optional |
| 7 | Extracted six prisoners. | Optional |
| 8 | Extracted three tanks. | Optional |
As with the previous mission, the game suggests that you bring along some explosive weaponry of some kind. At this point, if you’ve been using the Fulton to extract a lot of enemies, you can move them around a bit to get to the point where you can develop the cheapest rocket launcher. The mission is timed, totalling 15 minutes and it will either last you that long or until you destroy all of the main enemy reinforcements.
There are three landing zones you can use for this mission, but this strategy will utilize the northernmost one. You will be dealing with APC-like vehicles and there’s a total of seven of them that will spawn throughout the mission, with some minor distractions. They will all exit the map in the north, which is why the northern LZ is perfect, as they will pass there without you having to run around too much.
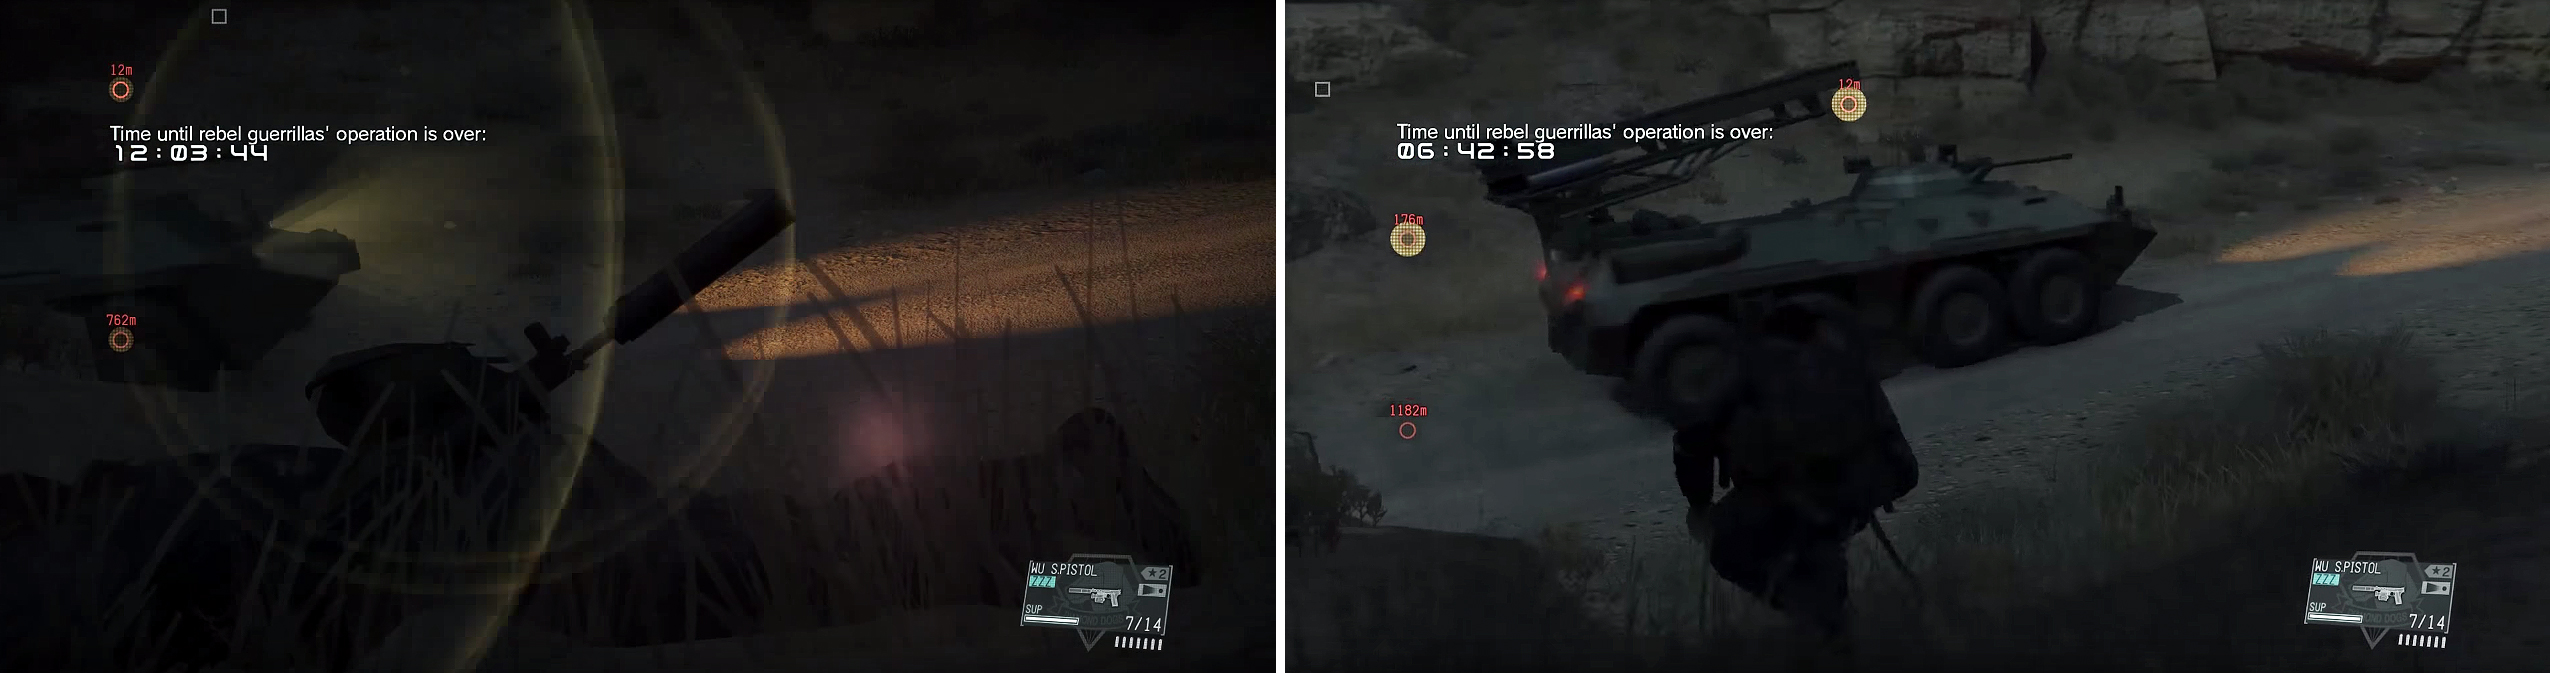
Look for the lens flare (left) and as soon as it disappears, you’re safe to move and get in behind the vehicle (right).
Note that this strategy will involve a lot of waiting, so be ready to sit for long periods of time. The intended route for the vehicles will be highlighted on your map, so you will know where they will drive. With this knowledge, you can lay bundles of C4 on the ground in anticipation of the vehicles running them over.
After destroying the first two, you will get a report that a four-wheeled vehicle is coming in from the north, carrying a prisoner with it. Equip your cardboard box and Quick Dive out of it, leaving it on the road. Do this one more time and when the prisoner escort arrives, they will stop to inspect the boxes, making it easy to put the enemies to sleep and extract the prisoner (and the soldiers, too, to get them out of the way).
It’s likely that you will have to be quick with them, as the third APC will be approaching the area. After the fourth one, a cargo truck will be approaching from the north and similar to the prisoner escort, you don’t want to blow it up. If the vehicle from the prisoner is still in the road, the truck will stop and the driver will get out, so put him to sleep, but know that the APC will come in at around the same time, so make sure you destroy it first.
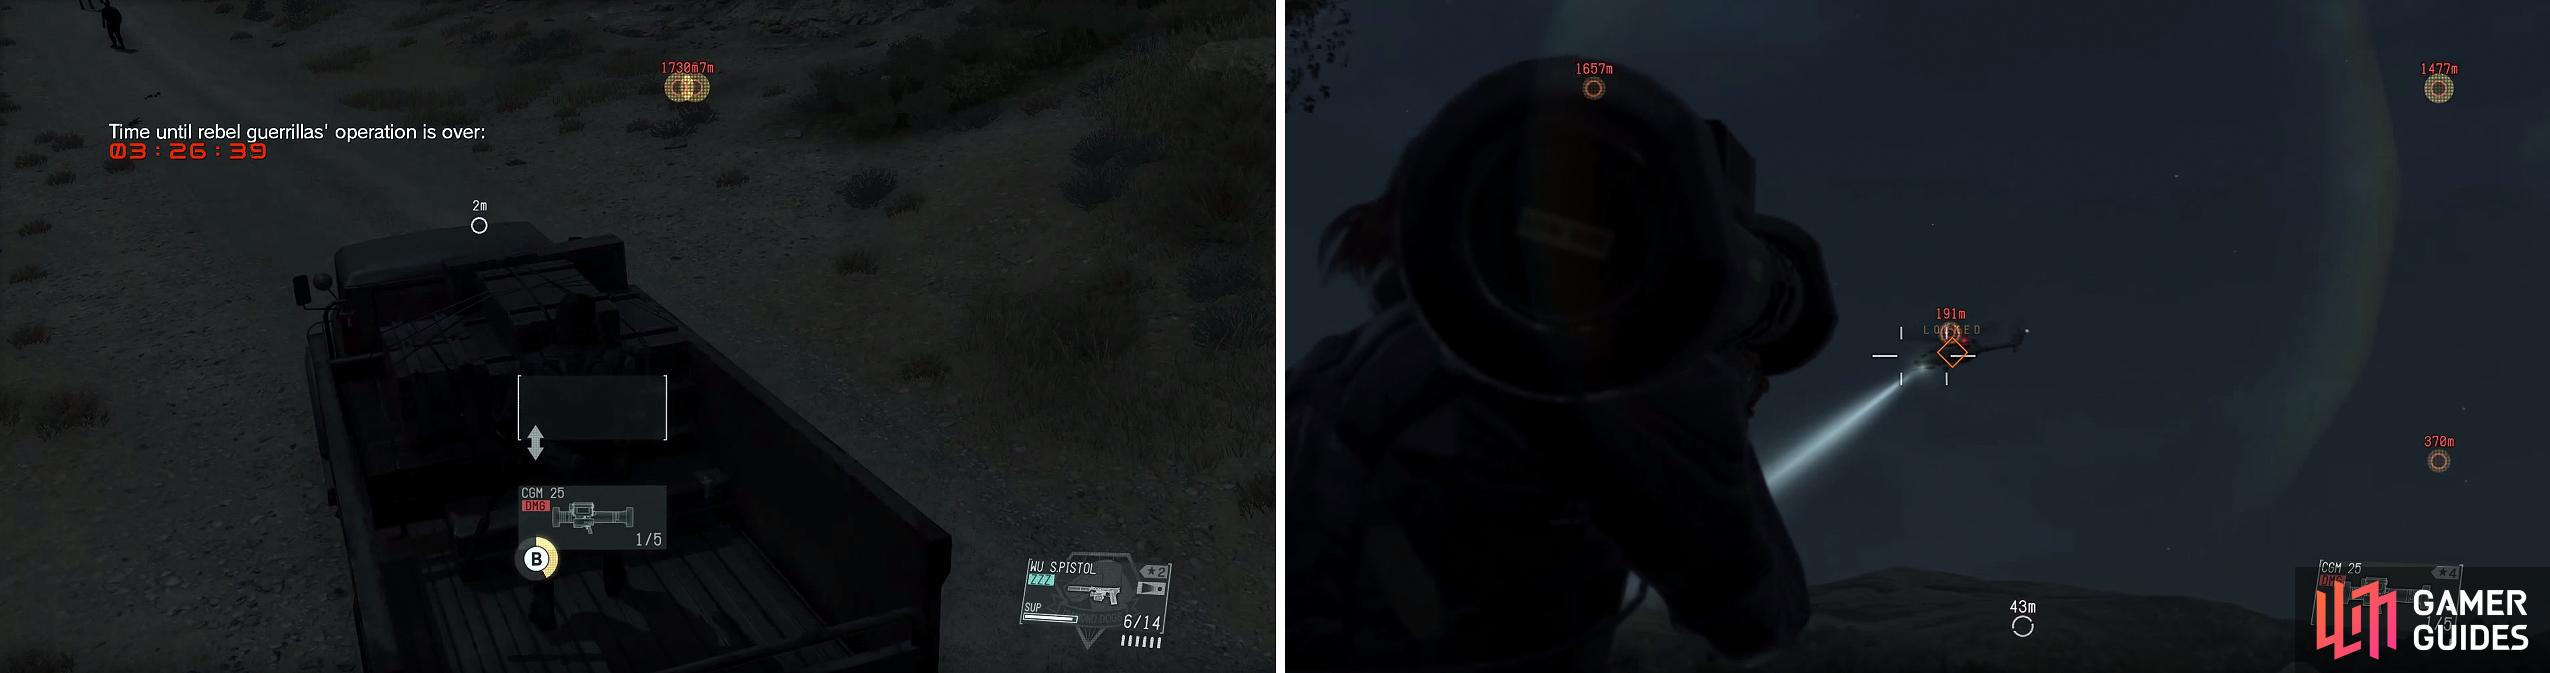
Once you’ve taken out the driver of the weapon’s transport, climb into the back to retrieve the rocket launcher (left). Use it on the enemy gunship at the LZ (right) to gain bonus points.
With the driver of the truck sleeping soundly, climb onto the back of the truck and pick up the weapon, fulfilling an optional mission task. That should be all but two of the vehicles you need to destroy, with Kaz chiming in that they are on their way not long after you’re finished. The good thing is that they start pretty far from this spot, so you have ample time to prepare. You might run out of time, but as long as you’ve destroyed one vehicle, you will pass the mission.
Note that if you capture/destroy all seven vehicles, the timer disappears and you’ll be told to exfiltrate the hot zone. However, stick around and you find out that there are some heavy guns coming after you now. There will be three tanks and a gunships and it’s up to you on whether you want to destroy them or not, although the “bonus” pay will be much more. You’re also allowed to leave the mission area, if you want, causing the mission to come to an end.
Mission Tasks 6 & 7
You will need to do multiple playthroughs of this mission in order to get all of the tasks, since it is very difficult to do so in one run. This is because the six prisoners are in different locations and will require you to do a lot of running around to get them. Waiting to do the prisoners until you have D-Dog with you will make it a lot easier to pinpoint their locations, since half of them will be moving. Remember that you need to eliminate/extract one vehicle in order to pass the mission.
To go after the prisoners, start at the landing zone in the southwest and you’ll find the first one directly north of the landing zone. From there, you will want to hurry and go onto the path that is west of Guardpost #15. Approaching this from the west (where you should be at) will reveal four enemies, who are after the prisoner further up on the trail (extracting these four enemies completes another mission task). If they reach the prisoner, then they will kill him.
Depending on how far along the mission is, you might get a call about a four-wheeled vehicle coming in from the north carrying another prisoner. If not, it’s time to go after the next one, who can be found inside of one of the “cells” outside at Lamar Khaate Palace. Head north along the westernmost road until you come to the eyeball-shaped split. The next prisoner will be in the river around there. If you’ve gotten the one in the jeep, then the final prisoner will be in the basement of Wakh Sind Barracks.
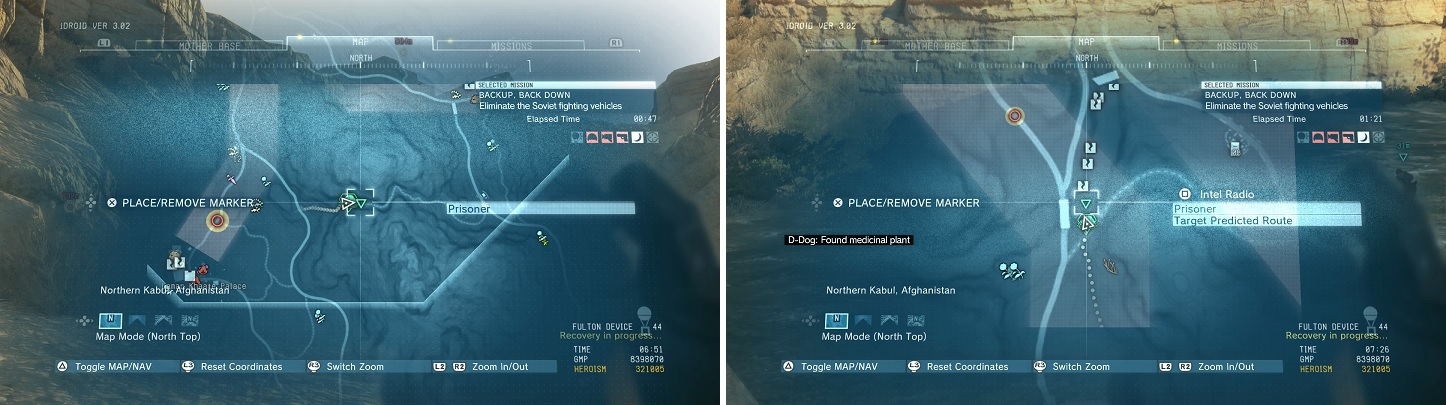
Two of the locations for the harder-to-find prisoners.
Mission Tasks 3 & 8
You only need the seven armored vehicles that come before the tanks and gunships at the end. If you have the Cargo 2 upgrade for the Fulton Device, then you can simply create a roadblock of some kind (D-Horse), then sneak behind the vehicle to extract it. Start at the northern landing zone for this, since one of the vehicles will begin near Yakho Oboo Supply Outpost.
Once you’ve gotten the seven armored vehicles, the timer will disappear and three tanks will come after you (as well as a gunship, but that doesn’t matter at all). While it looks like the tanks will converge onto your location, they will usually stop at a certain spot and move all around. Since they are already marked, use D-Horse to quickly get around on the map. If you know they are going to move past a certain location, park your horse while you wait and quickly move next to them to extract them.
No Comments