
61 - Unlucky Dog 01
The prisoner is located inside of Yakho Oboo Supply Outpost, which is a pretty big place with a lot of enemies roaming about inside. That means you’re going to need to be extra careful in your infiltration of the place. Scout with your binoculars and try to find a lone guard, who you should interrogate to find out the location of the prisoner.
You end up finding out that the prisoner is located in a locked room in the northern tip of the large compound, on the bottom floor. There will be at least one guard outside his door, but there might be two. Put however many there are to sleep using tranquilizer darts, then unlock the door and grab the hostage. Depending on if others saw you or not, you may need to take care of them first. Bring the prisoner outside and extract him with the Fulton system to finish.
62 - Unlucky Dog 02
The prisoner is located at Smasei Ruins, in a tiny cell-like structure, along with another prisoner that you don’t have to rescue (though you should anyway). There will be a few men guarding them, as well as plenty of others throughout the camp. The only ones you really need to take care of are the ones guarding the prisoners. Do that, unlock their cell, carry them outside and extract them to complete the Side Ops.
63 - Unlucky Dog 03
You will find this prisoner at Nova Braga Airport, which has quite a number of enemies patrolling. The one prisoner that you might see on the eastern side of the airport isn’t guarded by many enemies, so you might as well as rescue him first. If you’re having trouble getting onto the roof, there is a ladder on the side of the building.
The other target is on top of the main building in the airport and will require you to use some finesse, as there are a lot more enemies here. Try to lure some away from the others, extracting them via Fulton so they don’t wake up and foil your plans. You’ll have to approach the building from the east to find stairs to the second level, which will grant you access to a ladder to the top with the prisoner.
64 - Unlucky Dog 04
Head for Lufwa Valley, landing at the southern of the two close landing zones. One of the prisoners is located near the center of the highlighted area and is only guarded by a few enemies; you should have no trouble getting him. The other one, however, is located a little west/northwest of the mansion and as you may have noticed, there is a gunship patrolling the area.
Pay no mind to it and if you see it approaching, just get on the ground and crawl. There should be two groups of two enemies each patrolling the area, so put them to sleep and drop down to the prisoner on the rocks below the small waterfall, extracting him to finish.
65 - Unlucky Dog 05
It’s time to return to OKB Zero, which you know is heavily fortified. Fortunately, you don’t have to deal with the fully armored enemies and Walkers this time, but there are still a lot of enemies. Unfortunately, the prisoners are located pretty deep in the base, with one being inside a building in the second area and the other being in the last section. If need be, you can Fulton extract the enemies in your way to avoid any major confrontations.
66 - Eliminate the Heavy Infantry 01
There are two targets here and both are located at the guardpost, with no other enemies present. They are wearing helmets and full body armor, making it so you won’t be able to hit them with tranquilizer darts. So, the only thing you can do is sneak up behind them, grab and choke them unconscious, then extract them to Mother Base to complete this easy Side Ops.
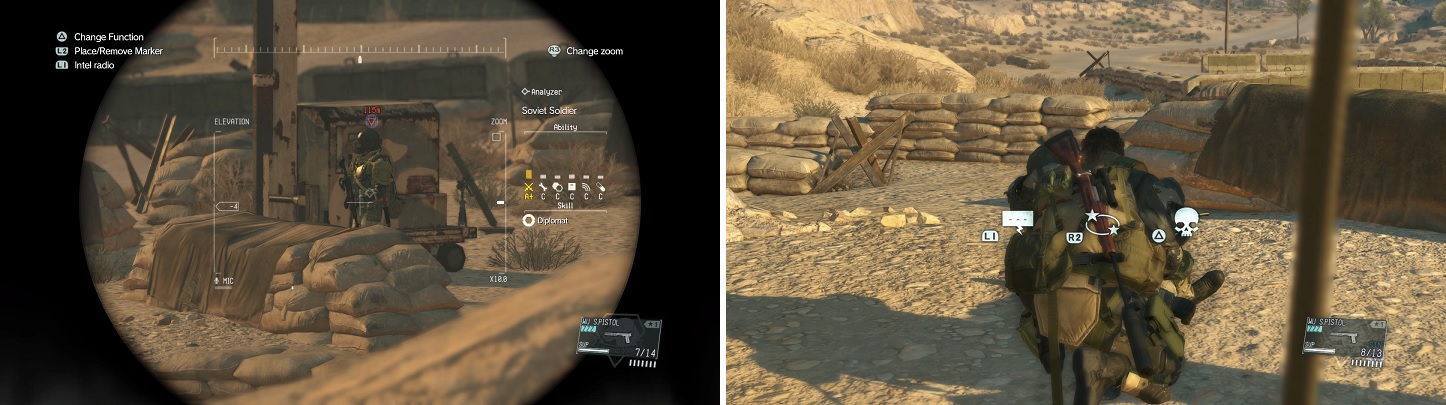
Heavy Infantry wear very thick armor (left), so they cannot be shot with tranq rounds. You’ll have to sneak up behind them (right) to knock them unconscious.
67 - Eliminate the Heavy Infantry 02
There are two targets and they will be walking along a road just outside of the guard post in the area. Since they are walking fairly close to each other, you’ll need to sneak up behind one, choke him out, then do the same with the other, since their armor doesn’t have many weak spots for hitting with tranquilizer darts.
68 - Eliminate the Heavy Infantry 03
You’ll encounter three targets at the guard post here, with no other enemies around them. They aren’t too close together, but close enough that you should be careful with your movements a little bit. One of them will likely go into the watchtower, meaning he will be easy to take out by simply yanking him down while you’re at the top of the ladder.
69 - Eliminate the Heavy Infantry 04
There’s only three targets you need to get this time, but they are located fairly close together and not that far from an enemy guard post. It might be a good idea to subdue the enemies at the guard post before going after the infantry, just in case. Doing it stealthily is a bit of a problem, although one of the enemies will be far enough away from the others. Since putting them to sleep with tranquilizers is nigh on impossible, you’ll have to watch their movements and time a CQC choke when they can’t notice you.
70 - Eliminate the Heavy Infantry 05
There are four targets at the guard post, with no other enemies around to bother you. They are pretty far apart from each other, making it easy to sneak up behind them one by one. The weird part is that one of the soldiers is a normal one (or at least it was for us!), so you can hit him with a tranquilizer dart. They might climb up into the watchtowers, but you can pull them down by climbing close to the top and pressing the CQC button when it shows up.
No Comments