
You will come across many locations in Sea of Stars, some of which are completely optional. However, it is those optional places that can help you score free loot that can make your characters more powerful. One of these places is the Sunken Docarri Ruins, of which, there’s a total of four of them. This page will focus on the Western Sunken Docarri Ruins, telling you where it is and how to solve the puzzle within it.
Where to Find the Western Sunken Docarri Ruins
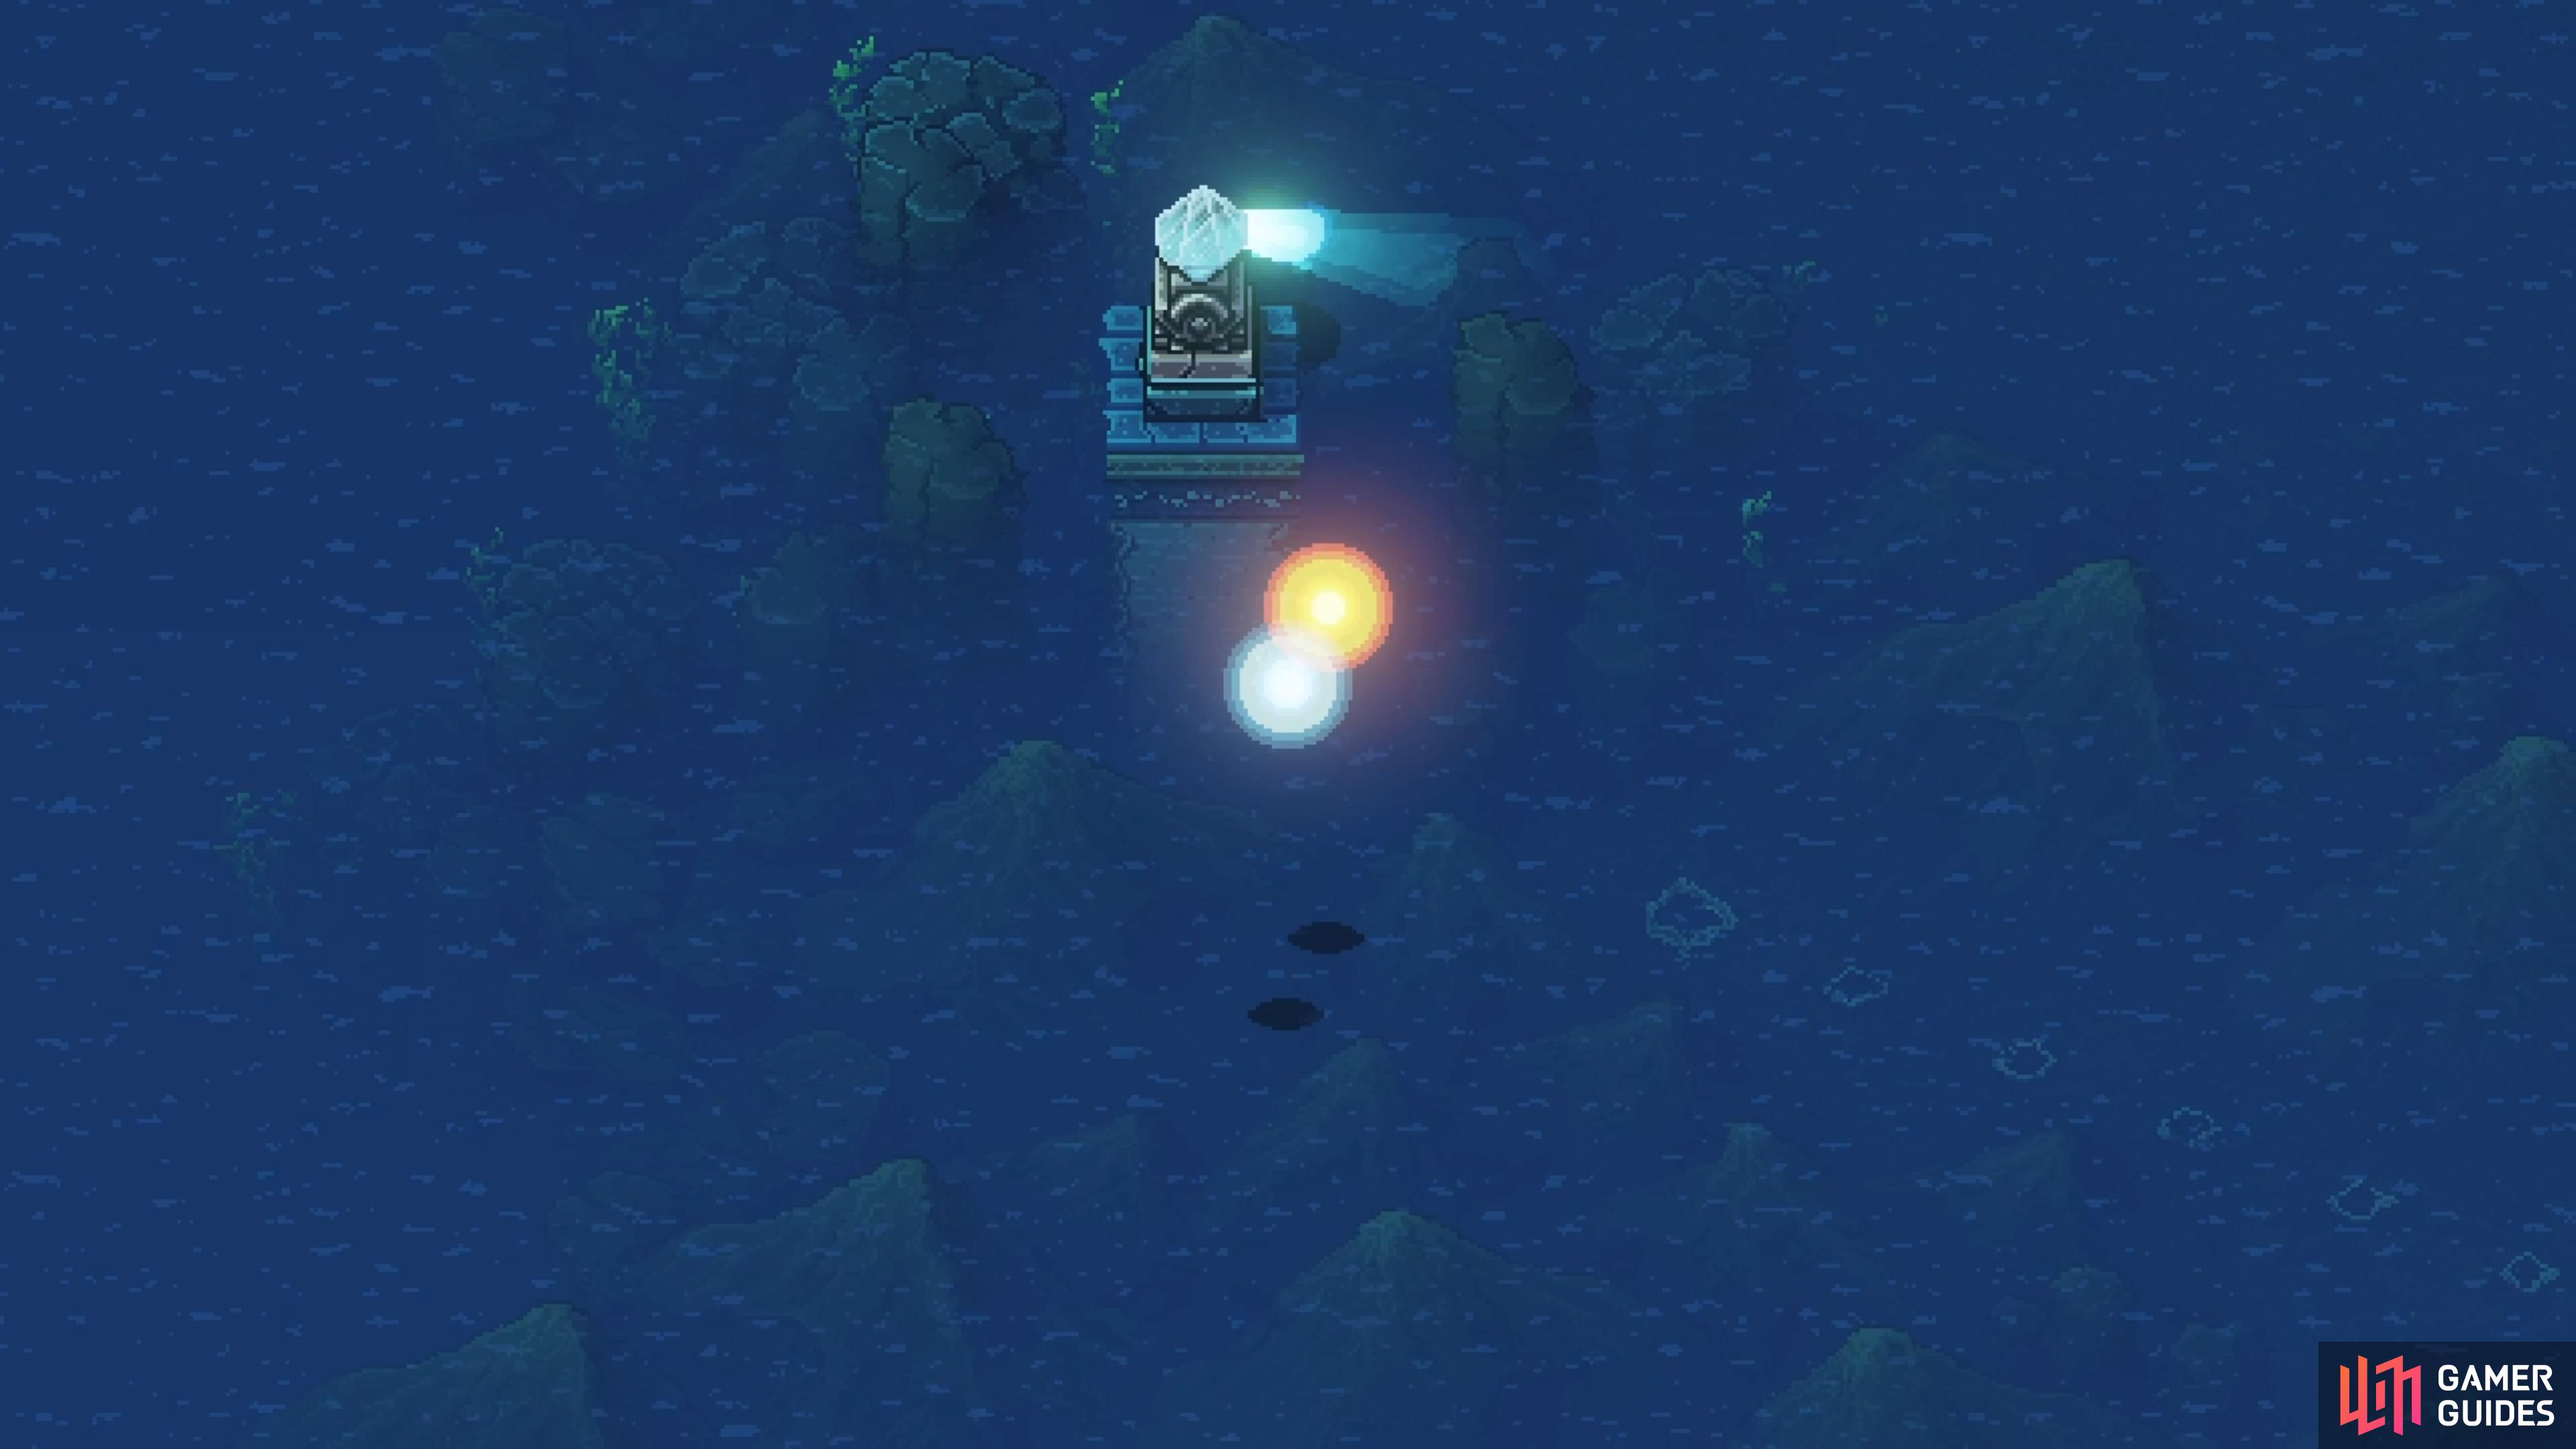
The light for this set of ruins is north of Evermist Island.
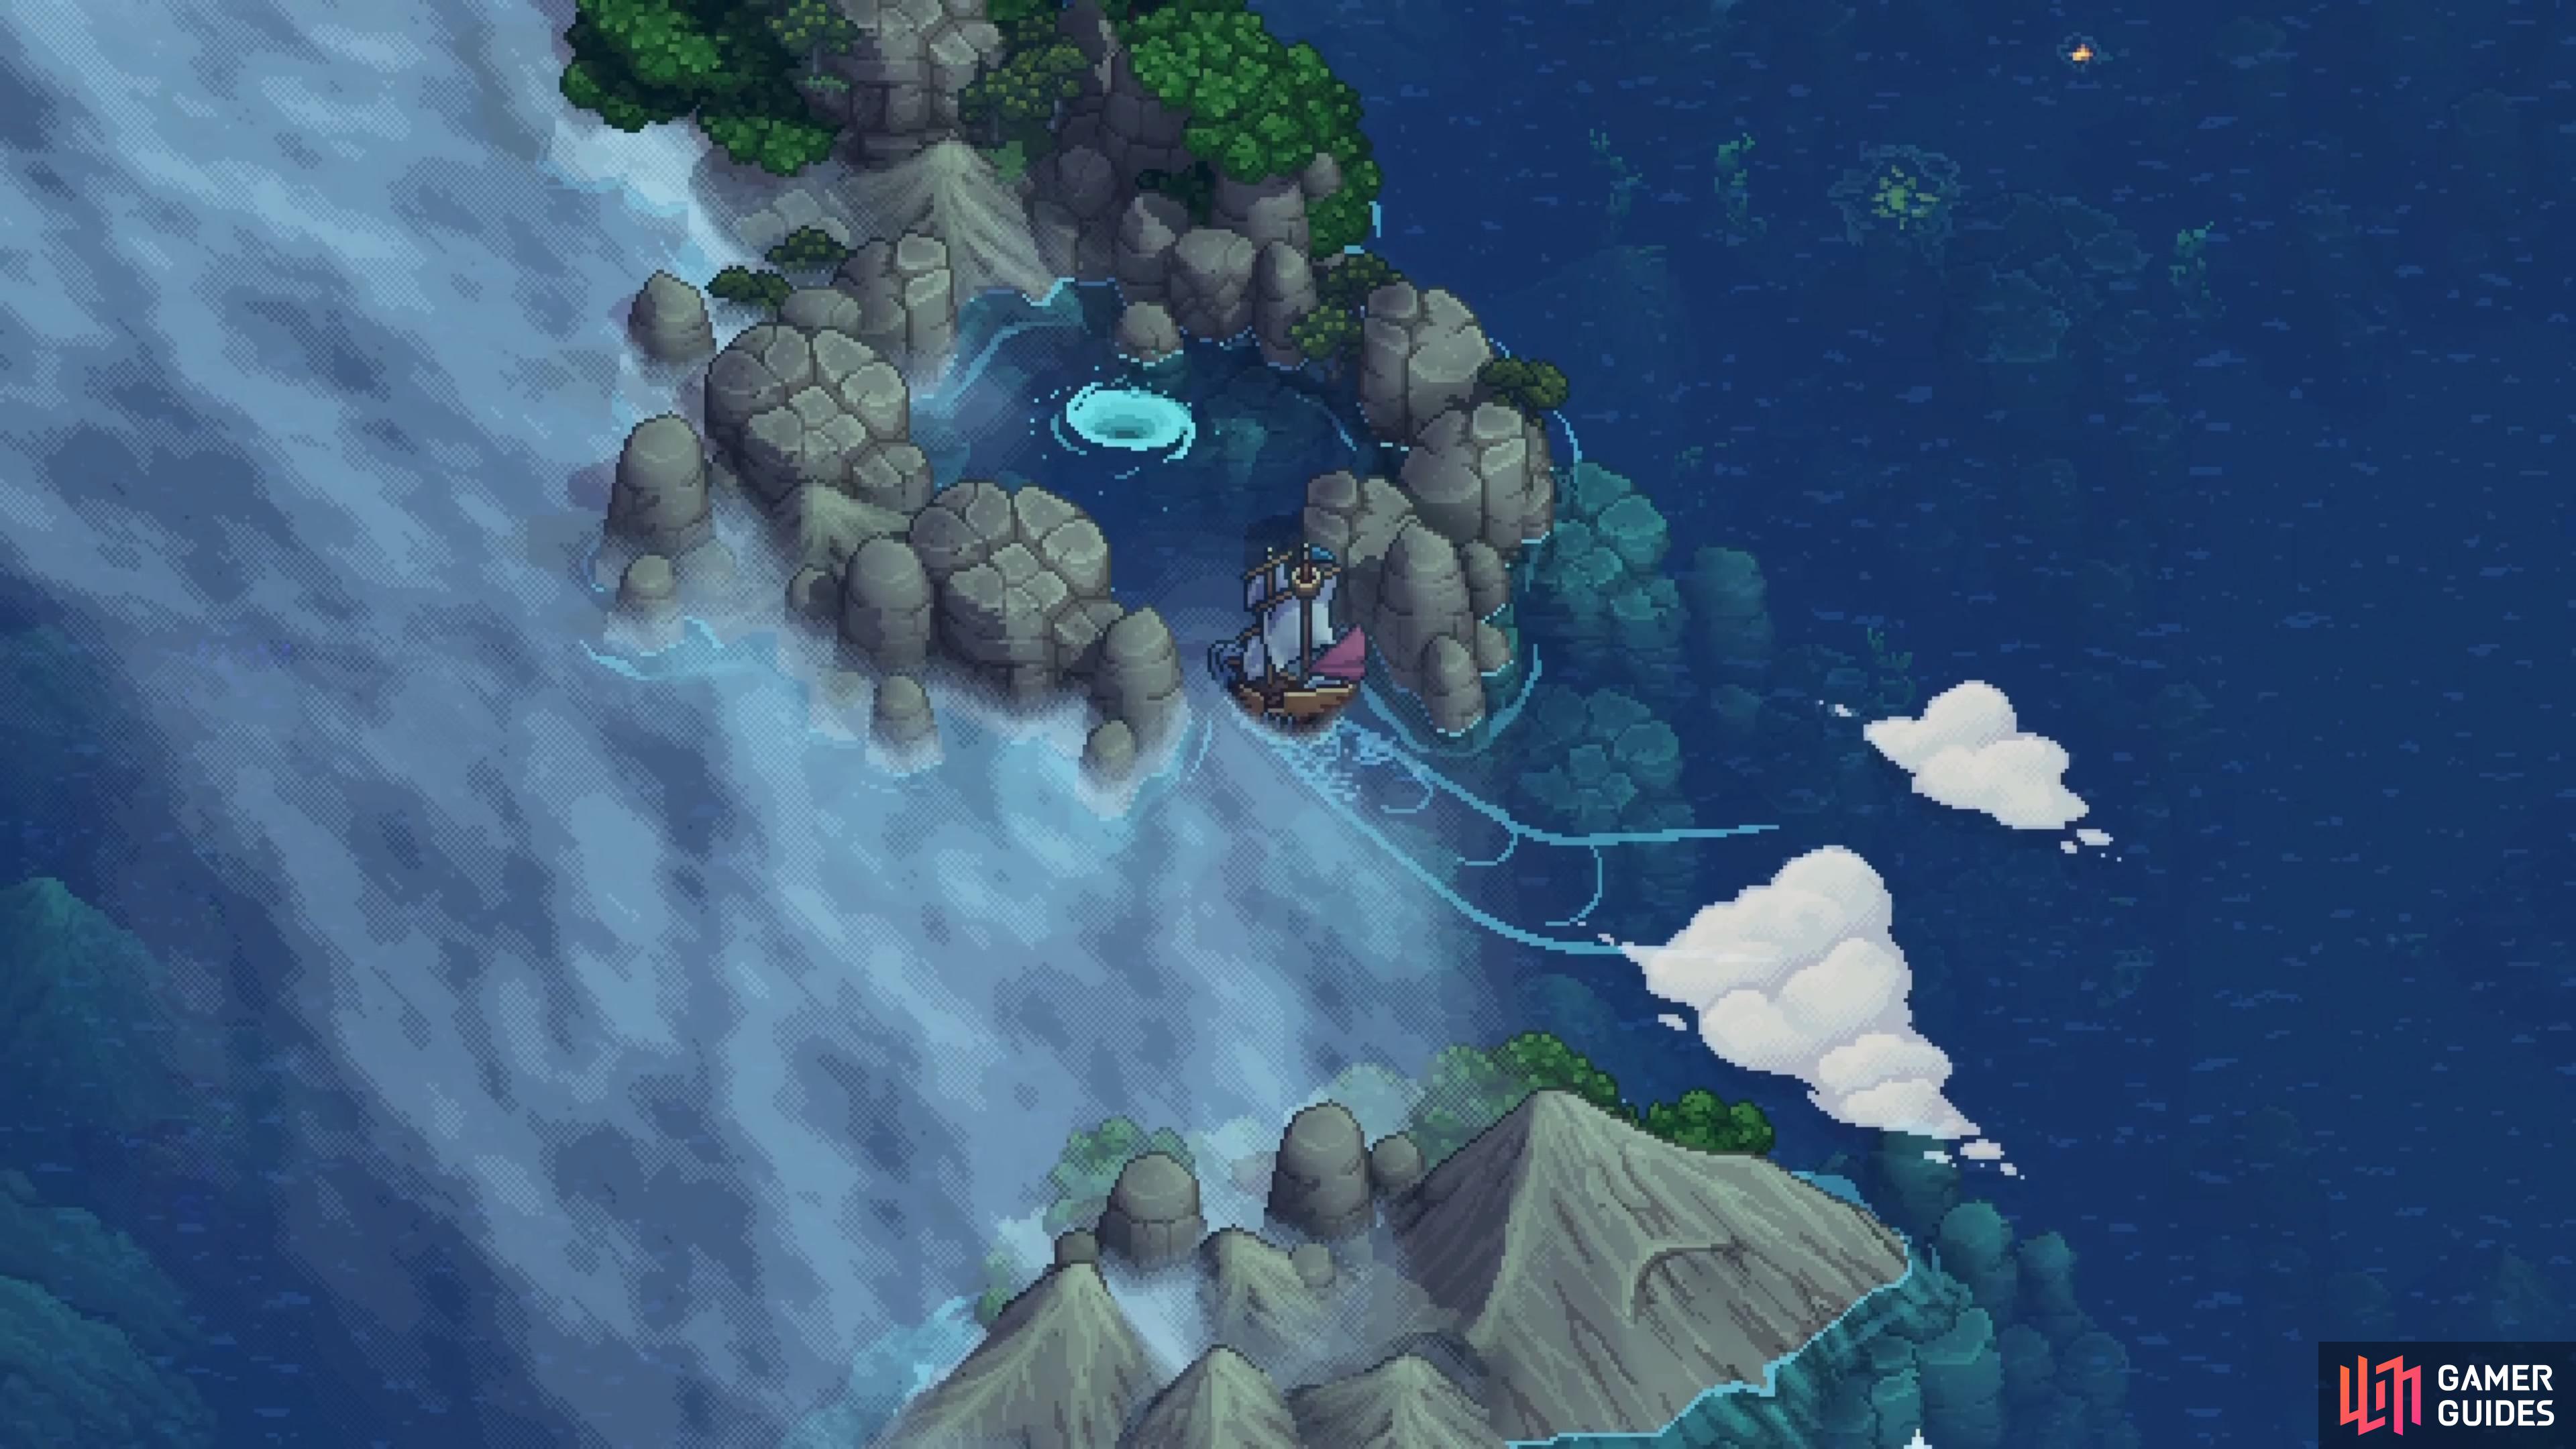
The whirlpool that leads to the ruins is in the middle of this island to the east of Evermist.
Near the end of the main story, you will gain the ability to fly, which is needed to access the final dungeon. This will also open up a bunch of optional content, one of which is the Sunken Docarri Ruins. To find out how to get these to appear, visit the How to Find the Sunken Docarri Ruins page. Once you do that, head to the northern side of Evermist Island and locate the light pillar. Light the rune, then follow the trail to the eastern side of Evermist, where you’ll find the whirlpool in the middle of the small island there.
How to Solve the Western Sunken Docarri Ruins Puzzle
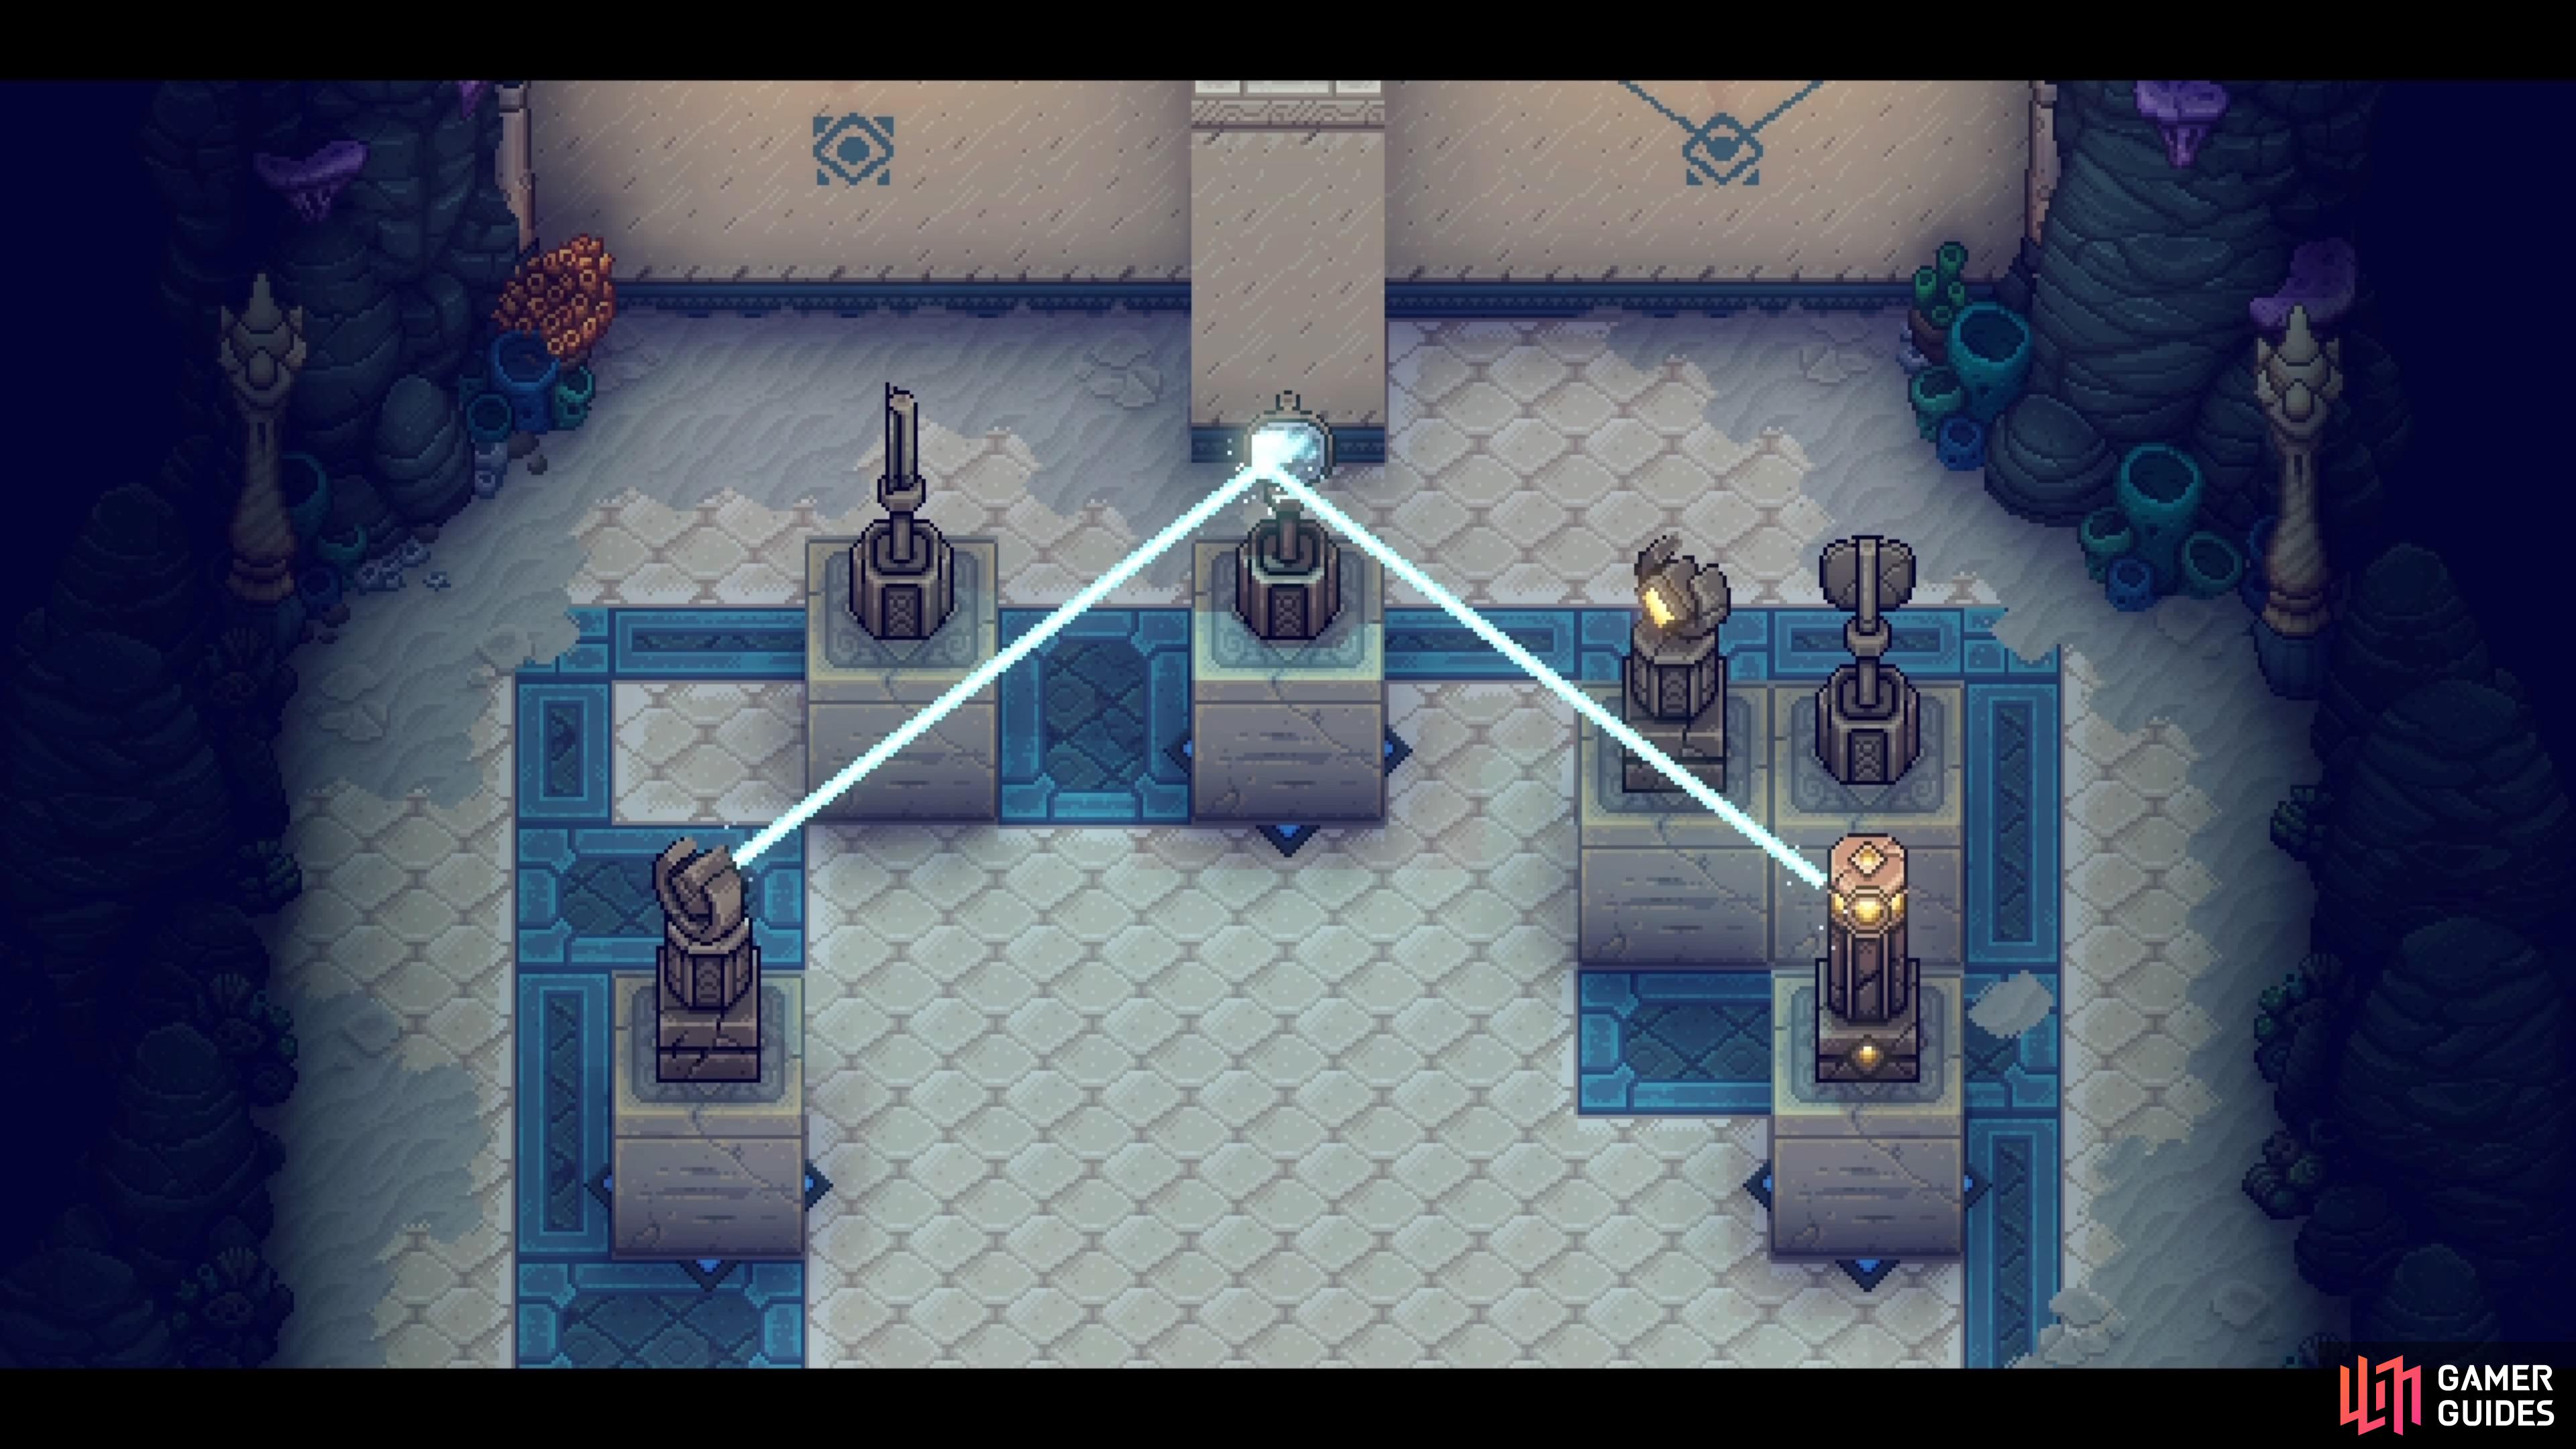
Of the three ruin puzzles, this one is definitely the most involved. You will be shown the mural on the back wall, once you hit the bell to enter the ruins. The goal of this puzzle is three-hold, as you need to position blocks in the room, then hit the button to recreate patterns on the wall. So, this puzzle will contain three mini-puzzles. Note that there is no way to actually get stuck, unless you purposefully try to do that. Once you establish one of the patterns, hit the button to make the laser appear and if everything works, then you will be done with that pattern.
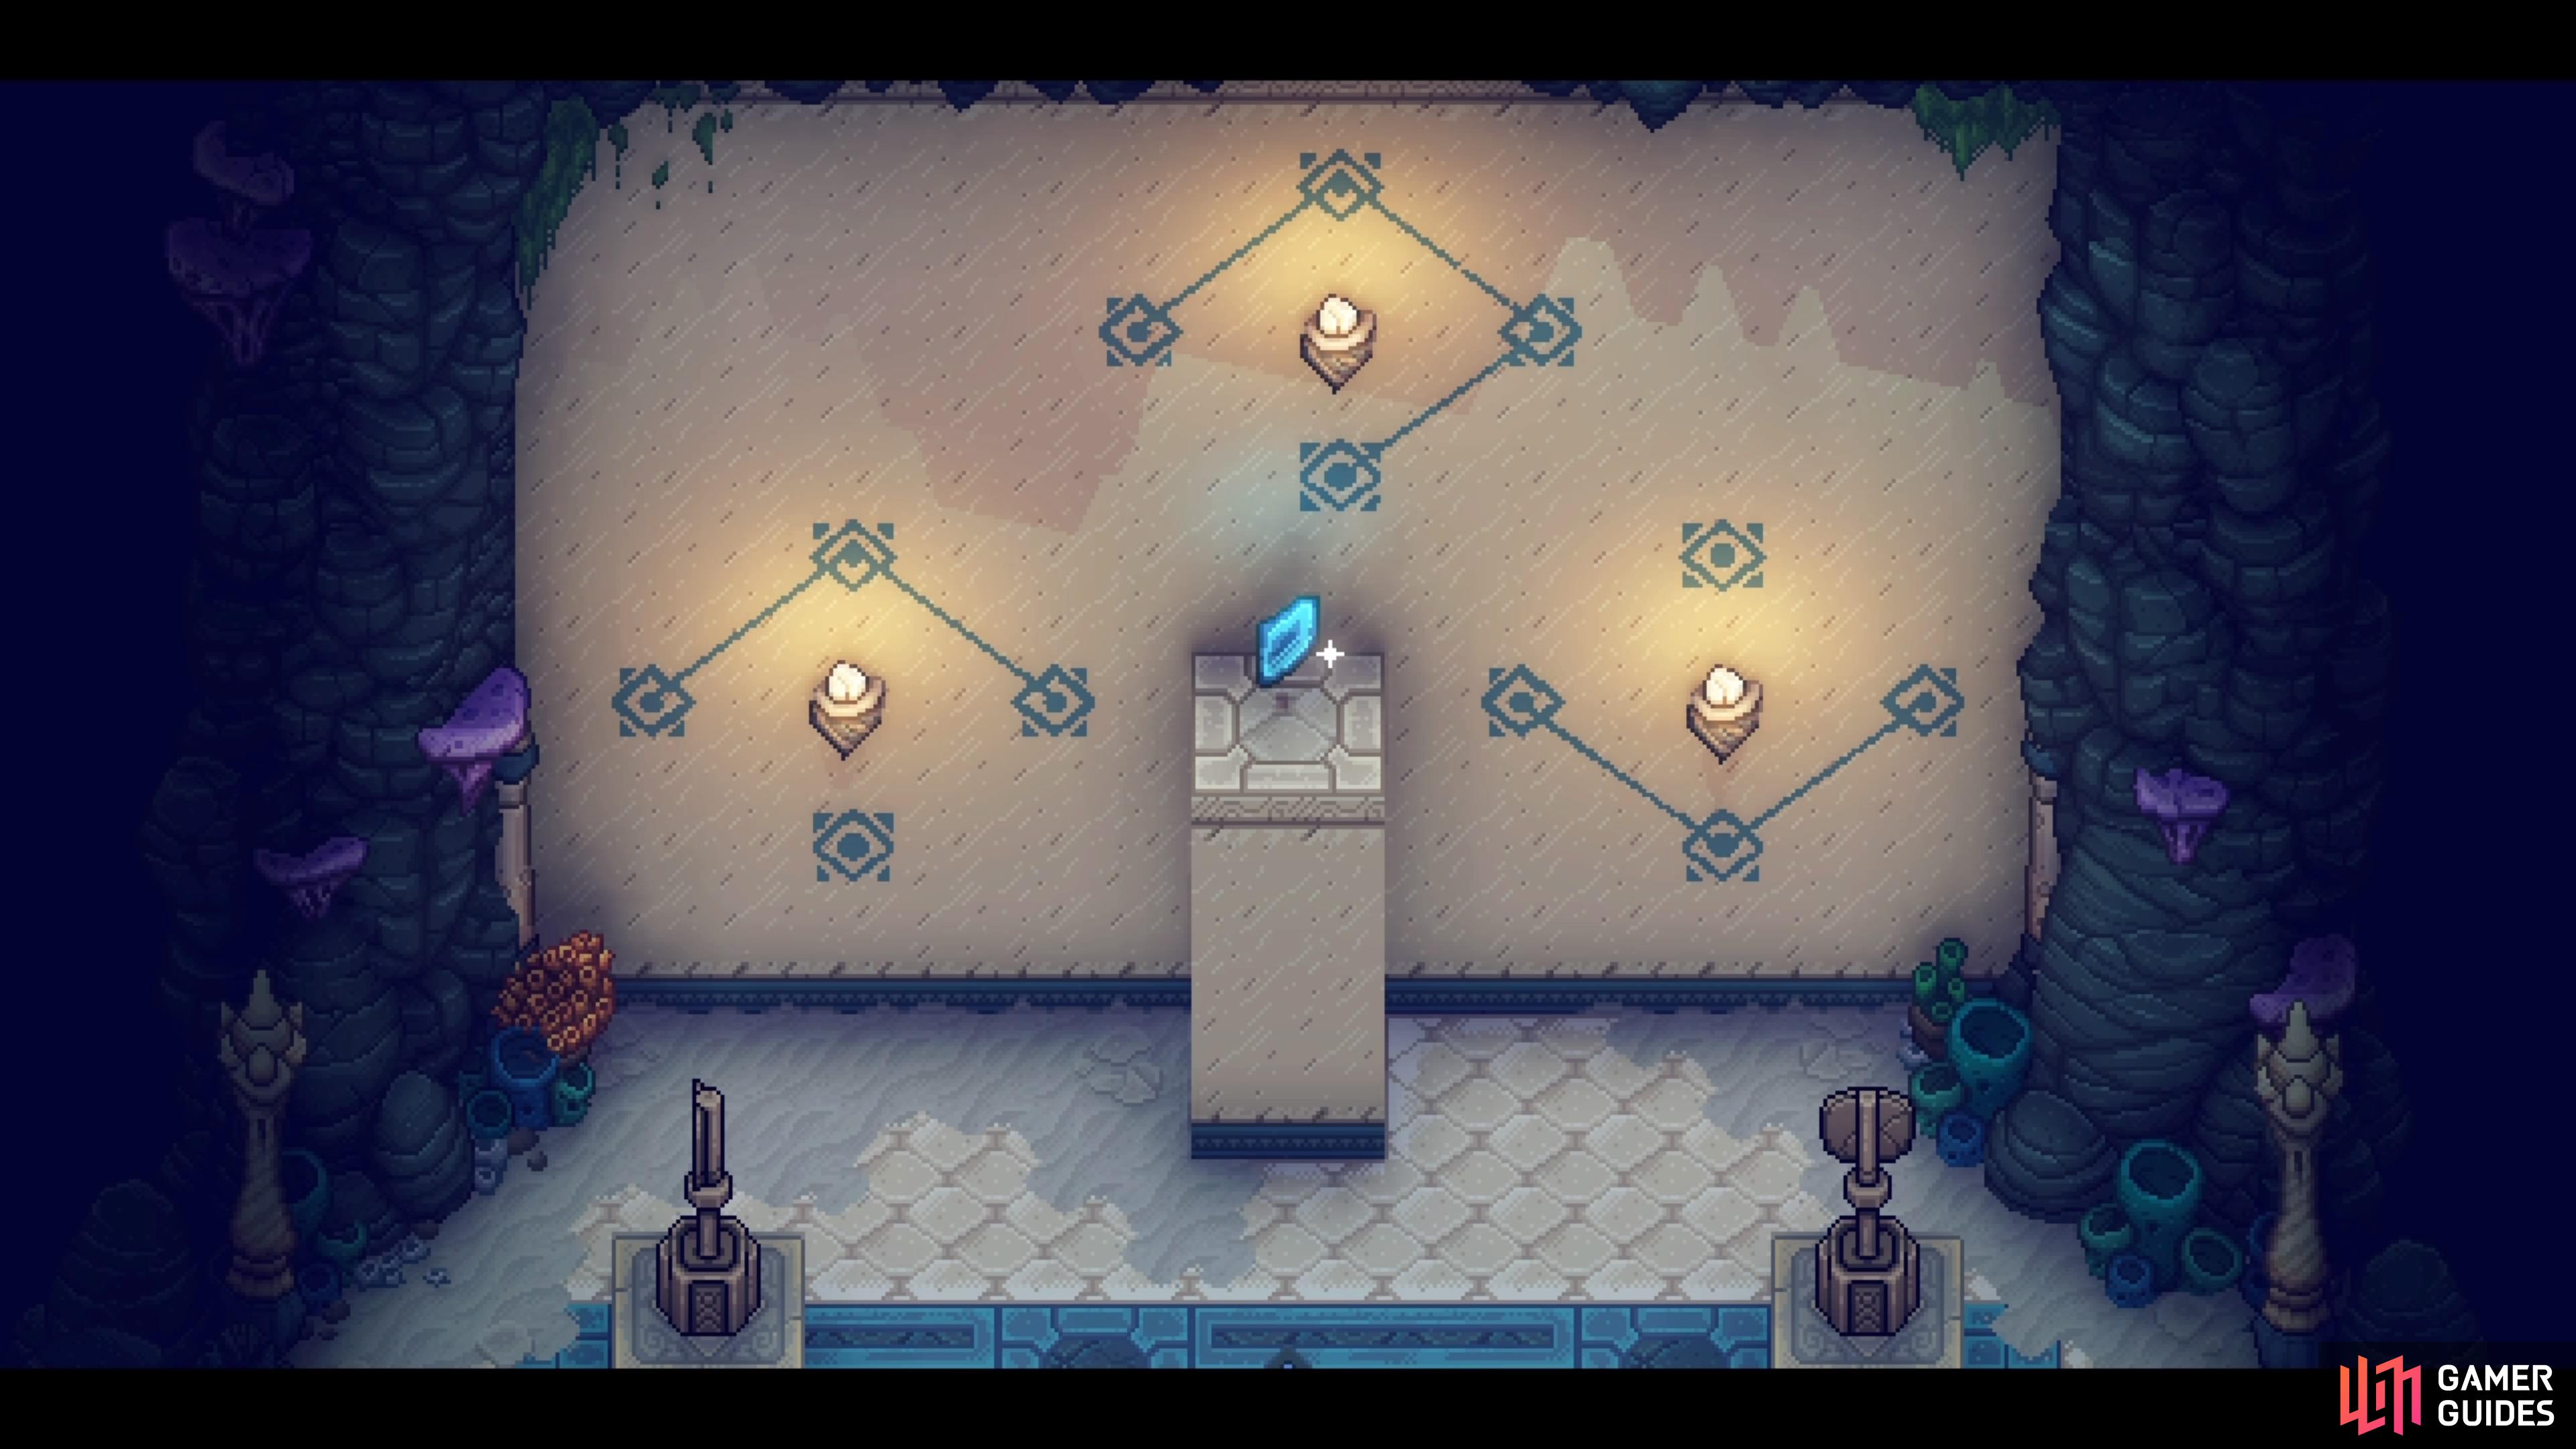
You will have to match all three patterns here to get the item.
There will be six different blocks to move around the field.
When you’re done with one pattern, you can exit and re-enter the room to reset the sliding blocks. Two blocks will emit lasers, one is the tower that receives the laser, and the other three are mirrors.
Left Pattern Solution
The solutions for these puzzles will be presented in a step-by-step format, instead of a giant paragraph. This makes it easier to solve, so you won’t happen to get lost.
- Move west block up
- Move east block left; this is where it stays
- Move first block right, then down
- Move the south-facing mirror in the southeast corner left, up, left, down, right, and up; this is its final position
- Move the first block out of the way (up works fine here)
- Move pillar block in southwest corner up, right, up, then right
- Stand on the button to solve this pattern
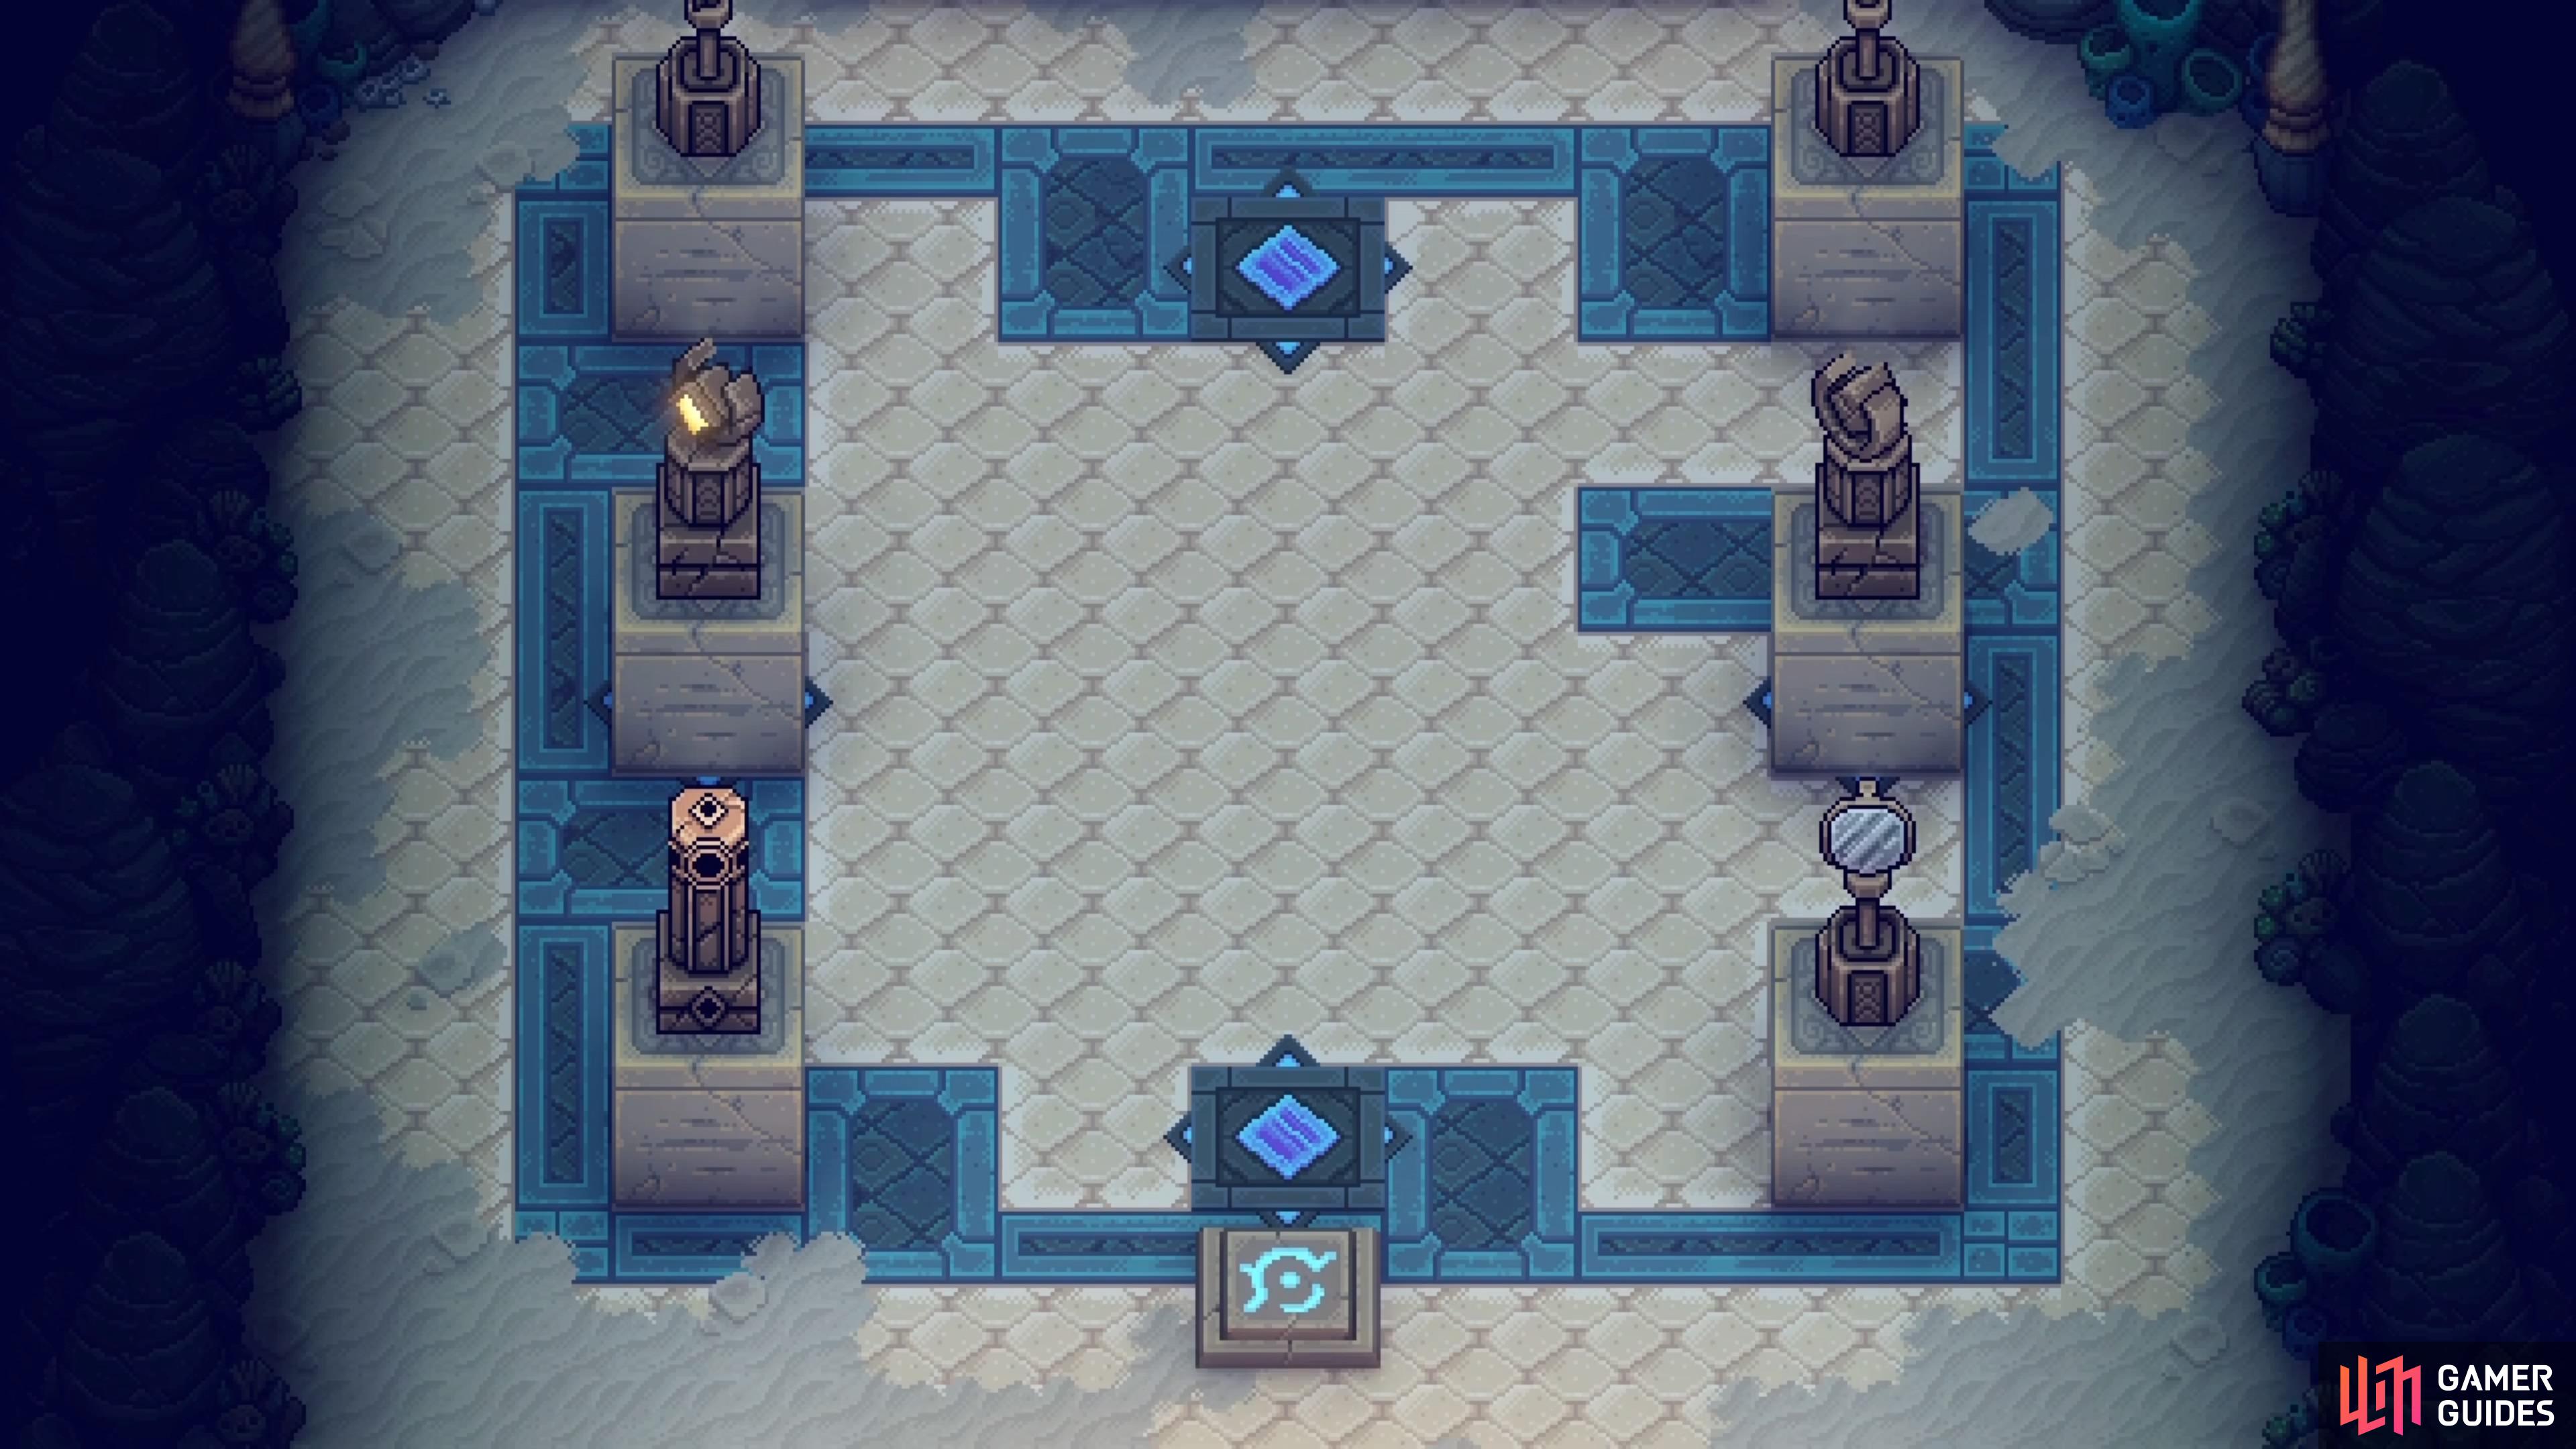
The solution needed for the left pattern.
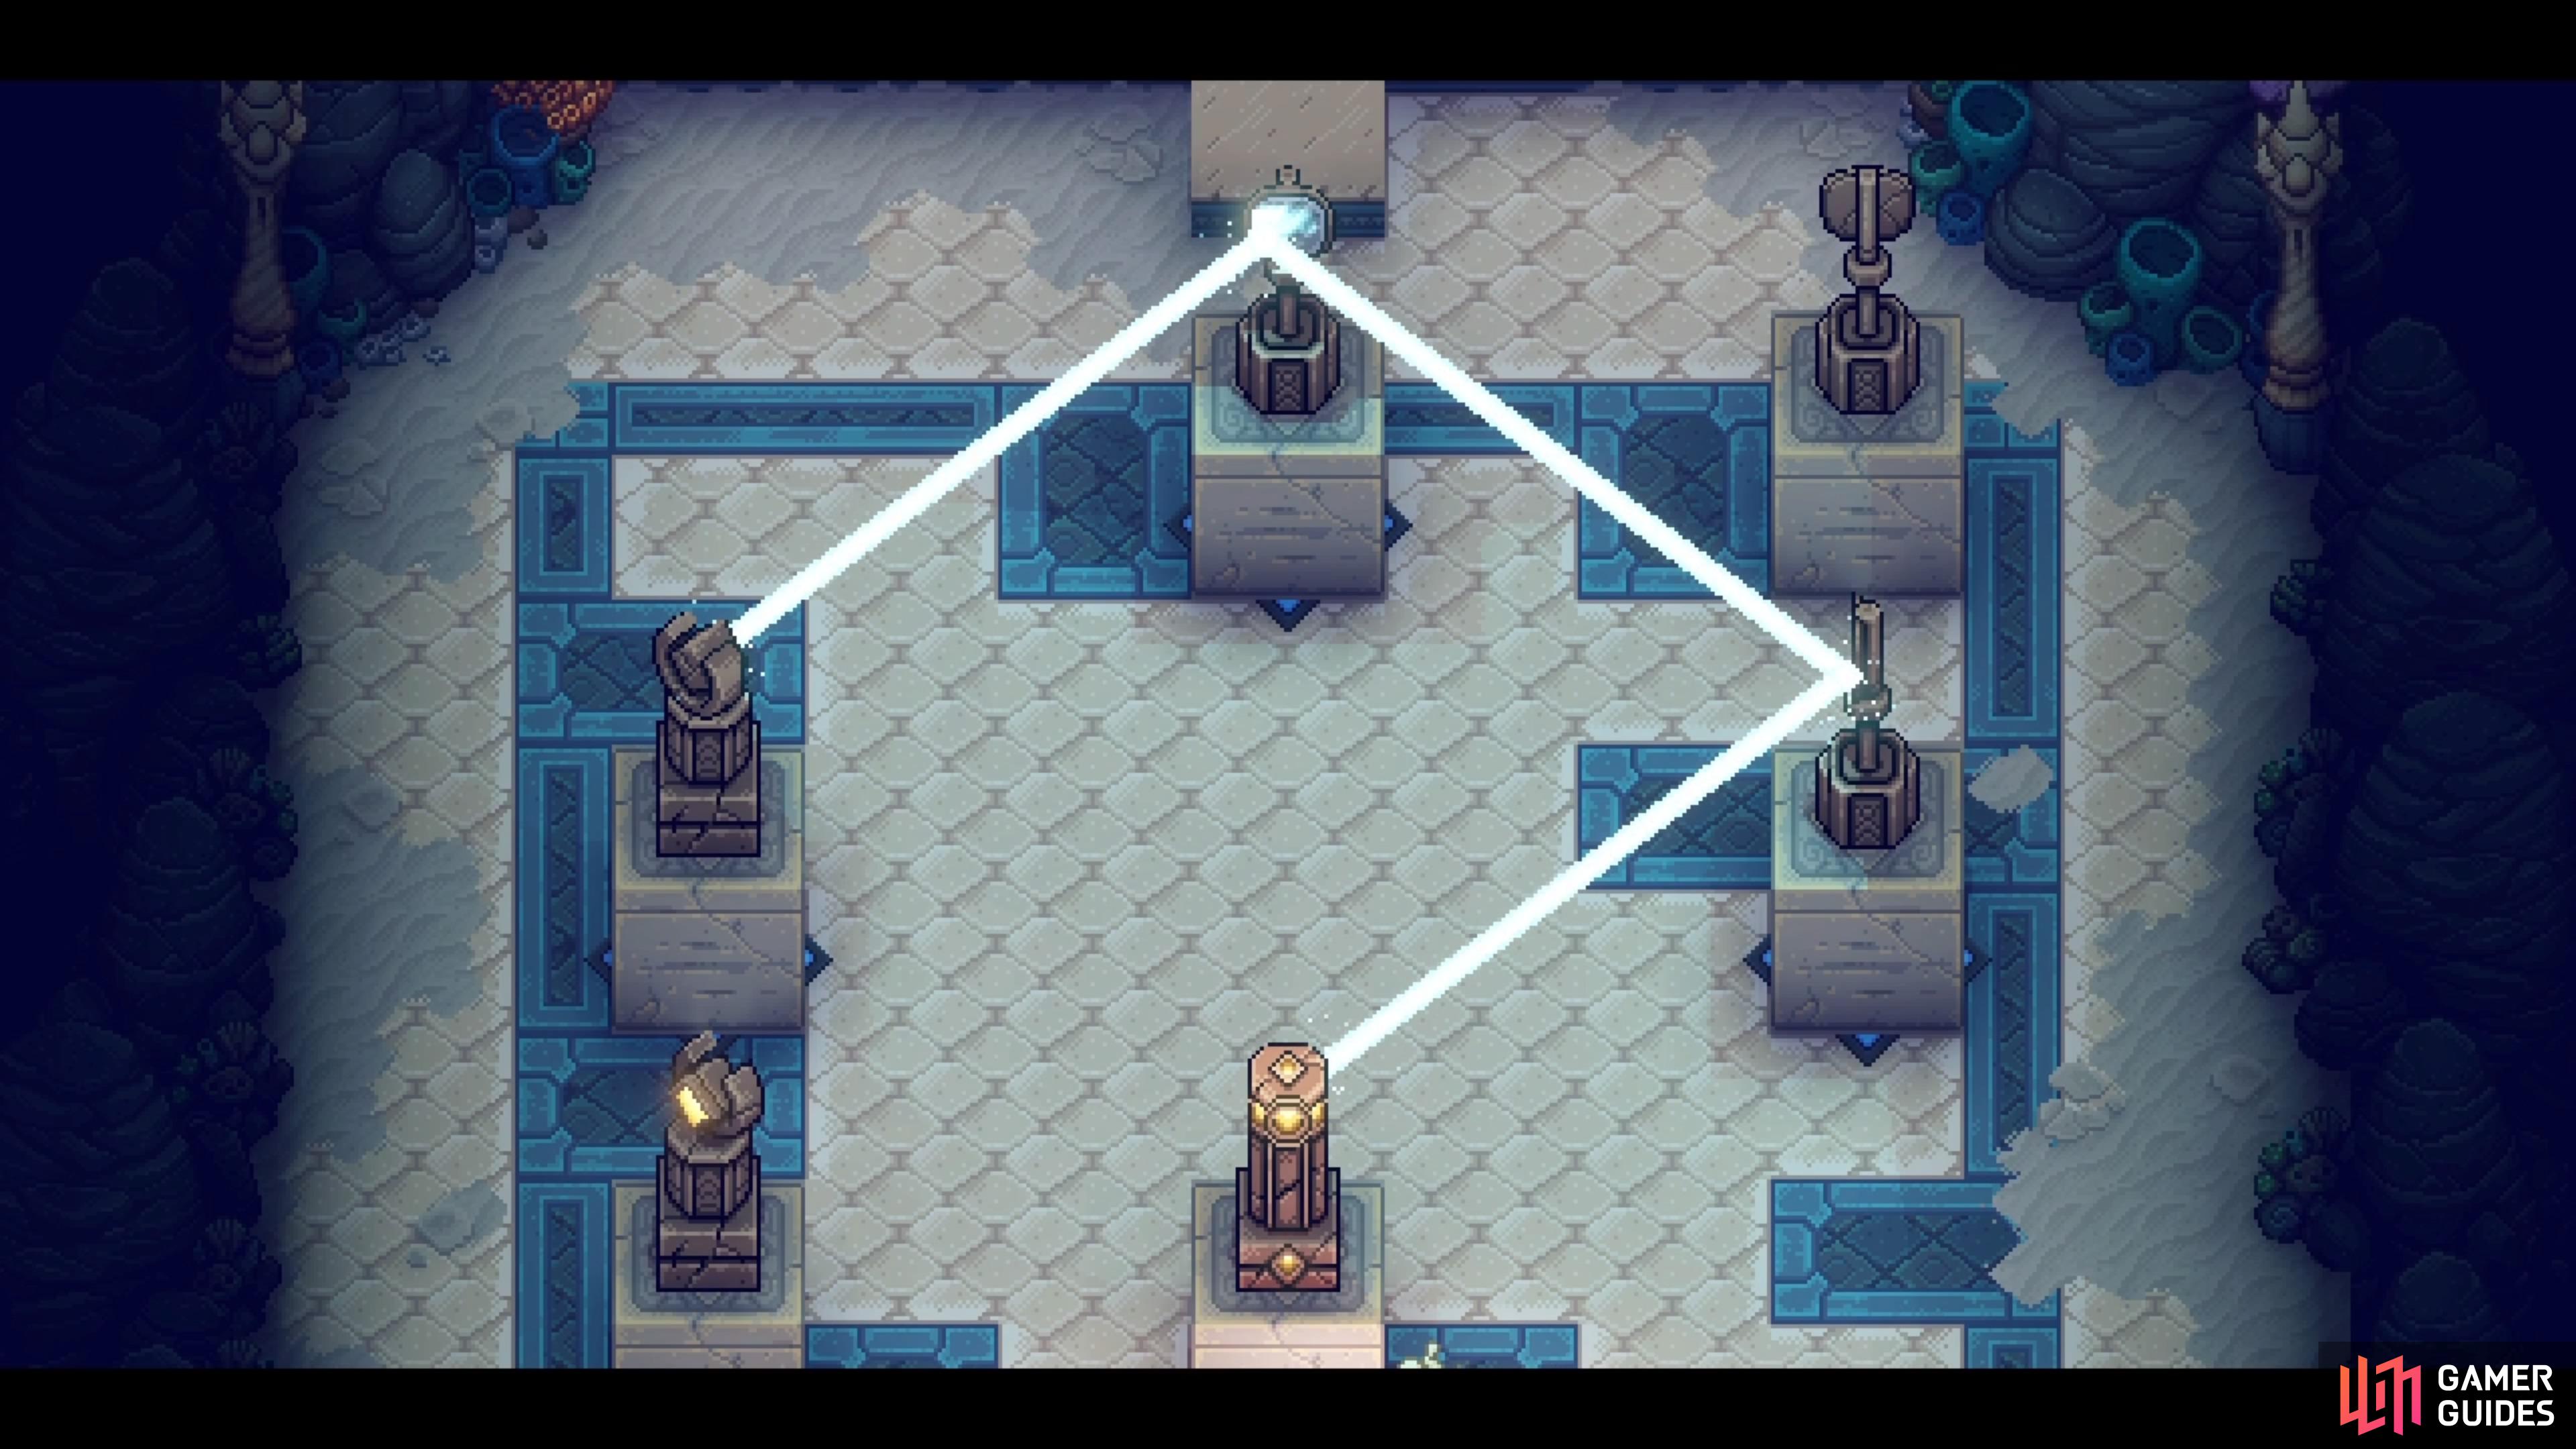
The solution needed for the middle pattern.
Middle Pattern Solution
If you did any other pattern beforehand, exit the room and re-enter to reset the blocks. This is the more complicated one and you can actually start it by having the one laser shooting from the left tile, or from the bottom tile.
- Move the west block up one
- Move the east block left; this is where it stays
- Move the south-facing mirror in the southeast corner left, up, left, down, right, and up
- Move the southwestern pillar block up, right and down
- Move the west-facing mirror in the northwest corner right, down, and right
- Move the northeastern block down one
- Move the mirror on the northern diamond tile right one, then slide the laser block at the bottom up and right
- Move the northern mirror to the left again
- Move the pillar block left, then push the west-facing mirror up, right, down, right, up, and right
- Move the pillar block to the right, then hit the button to solve the pattern
Right Pattern Solution
As before, leave and re-enter the room to reset the blocks, if you solved any of the other patterns.
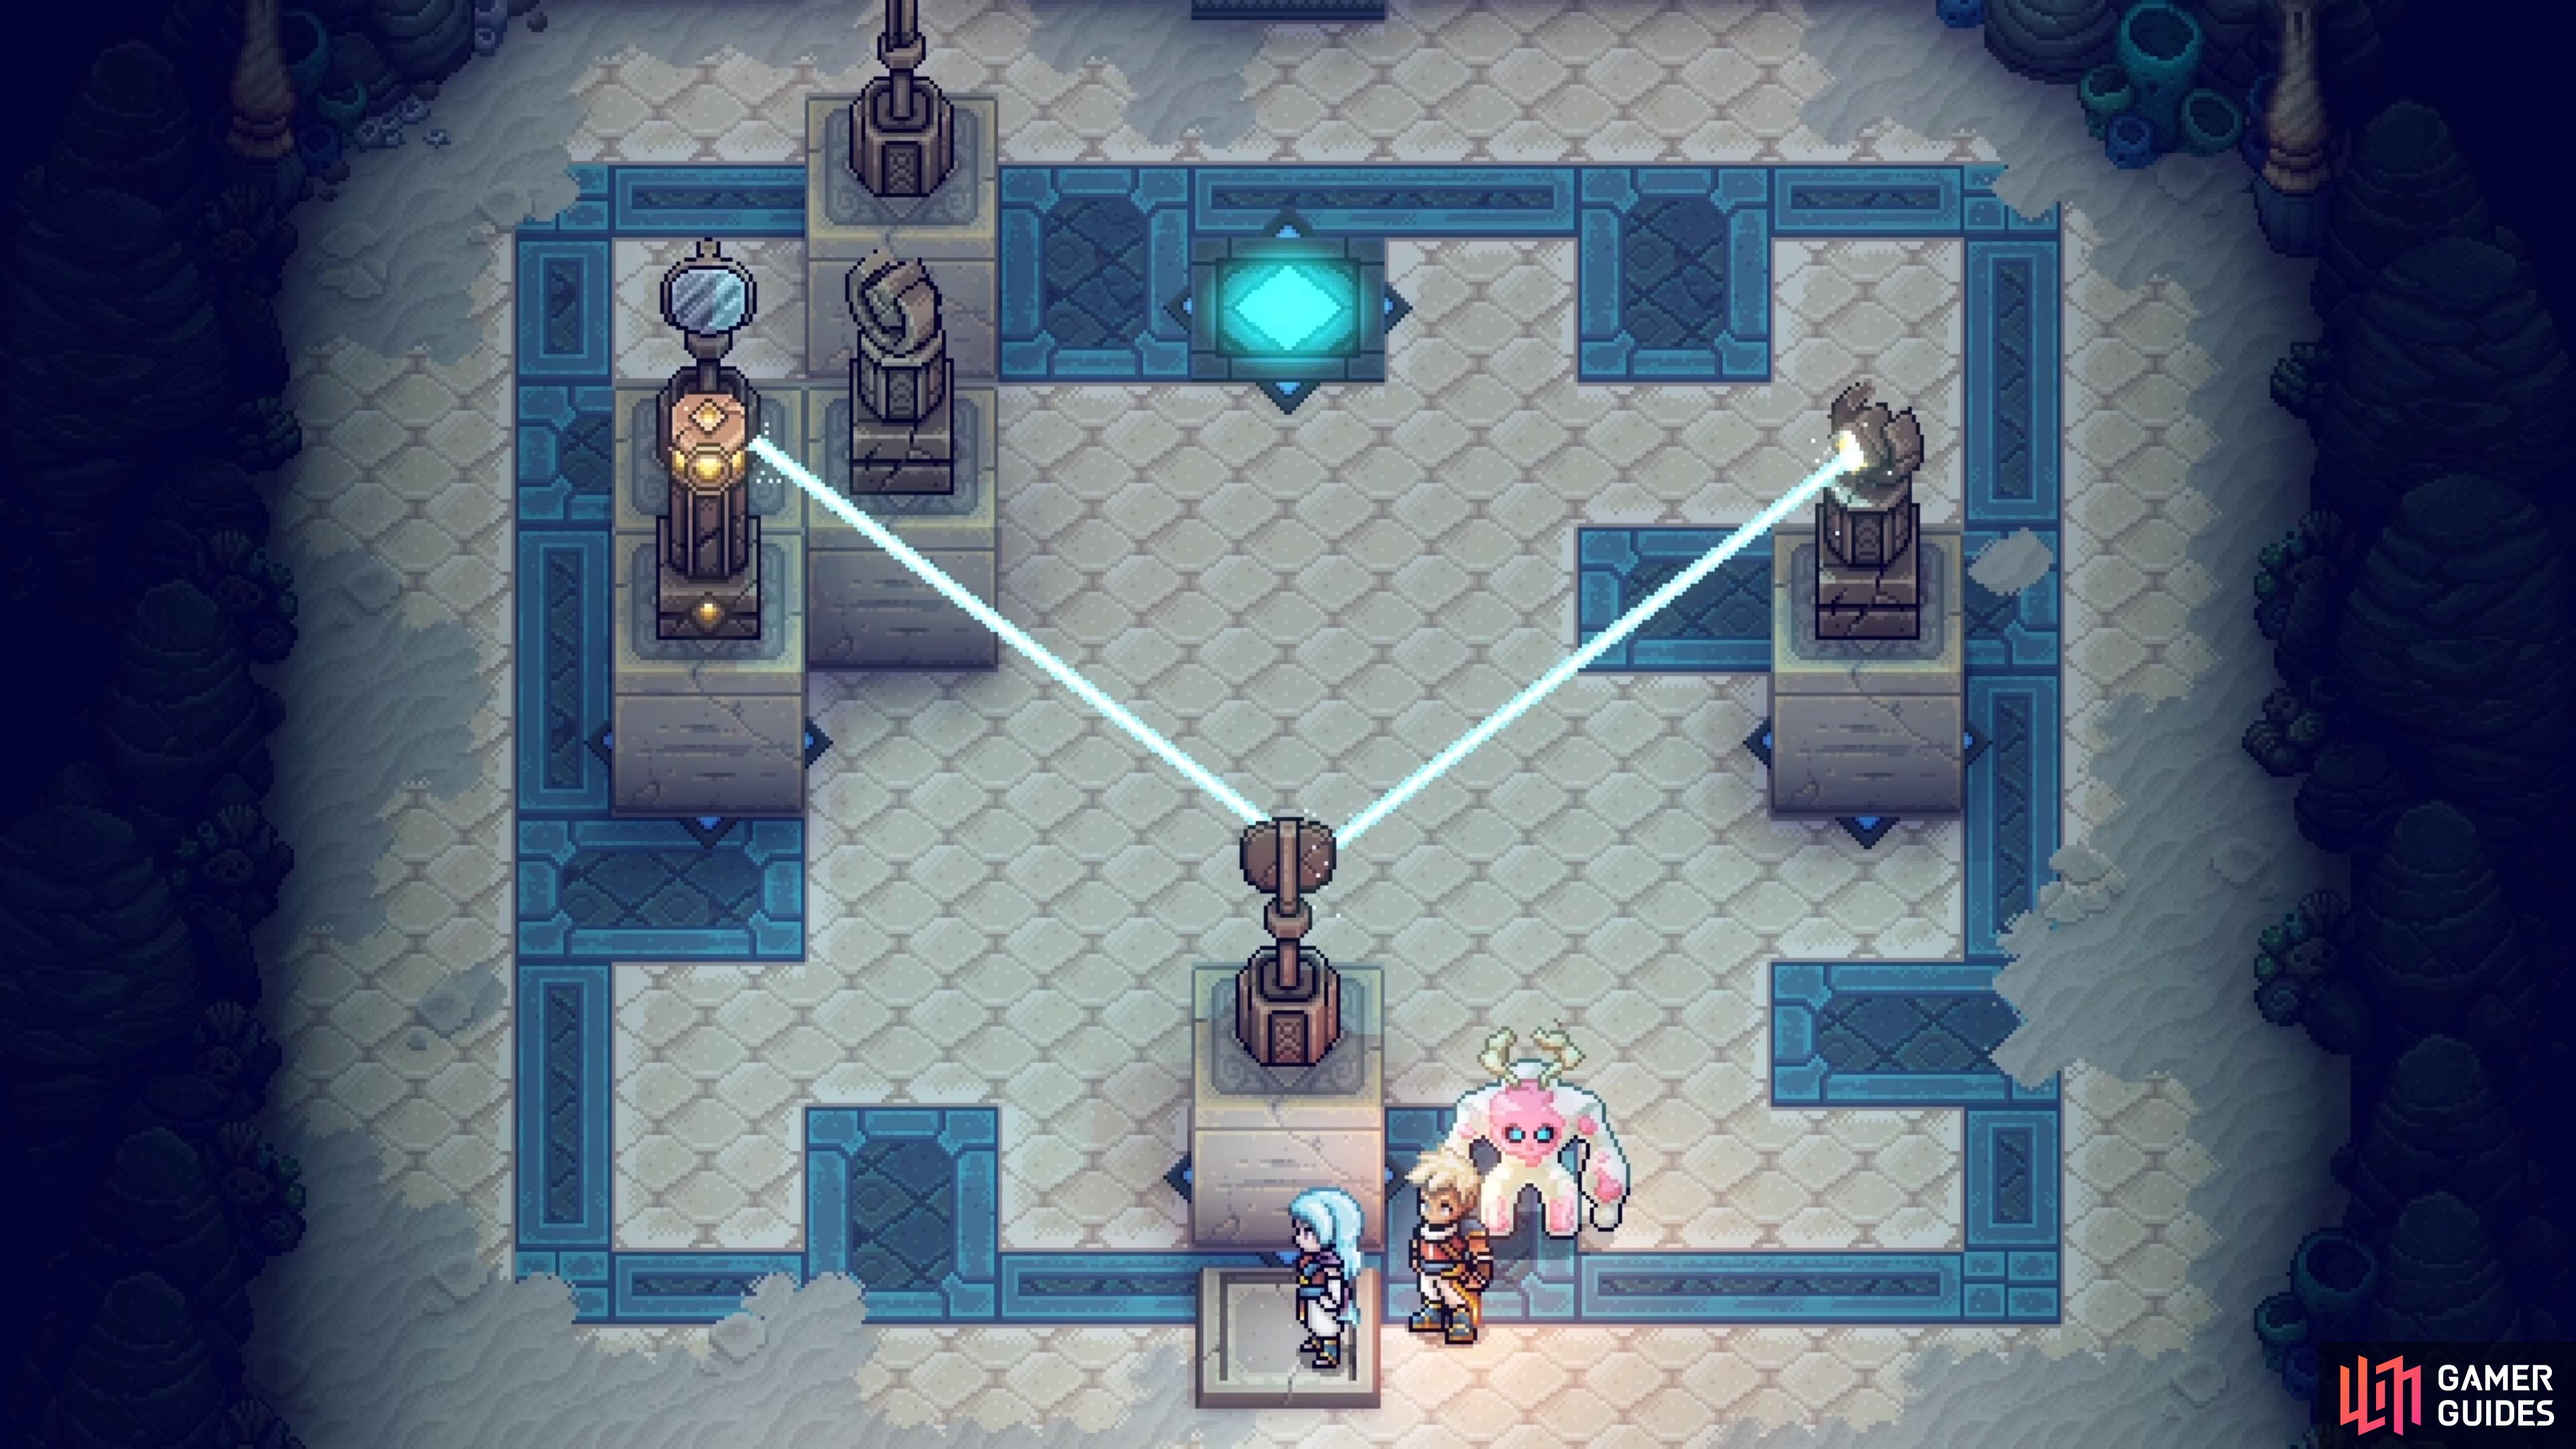
The solution needed for the right pattern.
After doing all three patterns, you will be able to get the Seal Fragment.
- Move eastern block down
- Move western block to the right
- Move the southwestern pillar block up, right, and up
- Move the first block left, then the other laser block down
- Move the pillar block left, then put the laser block back onto the diamond tile
- Move northwestern block right, then push the laser block on the left side up
- Push northeastern mirror (north-facing) down, left, down and right
- Hit the button to solve the puzzle
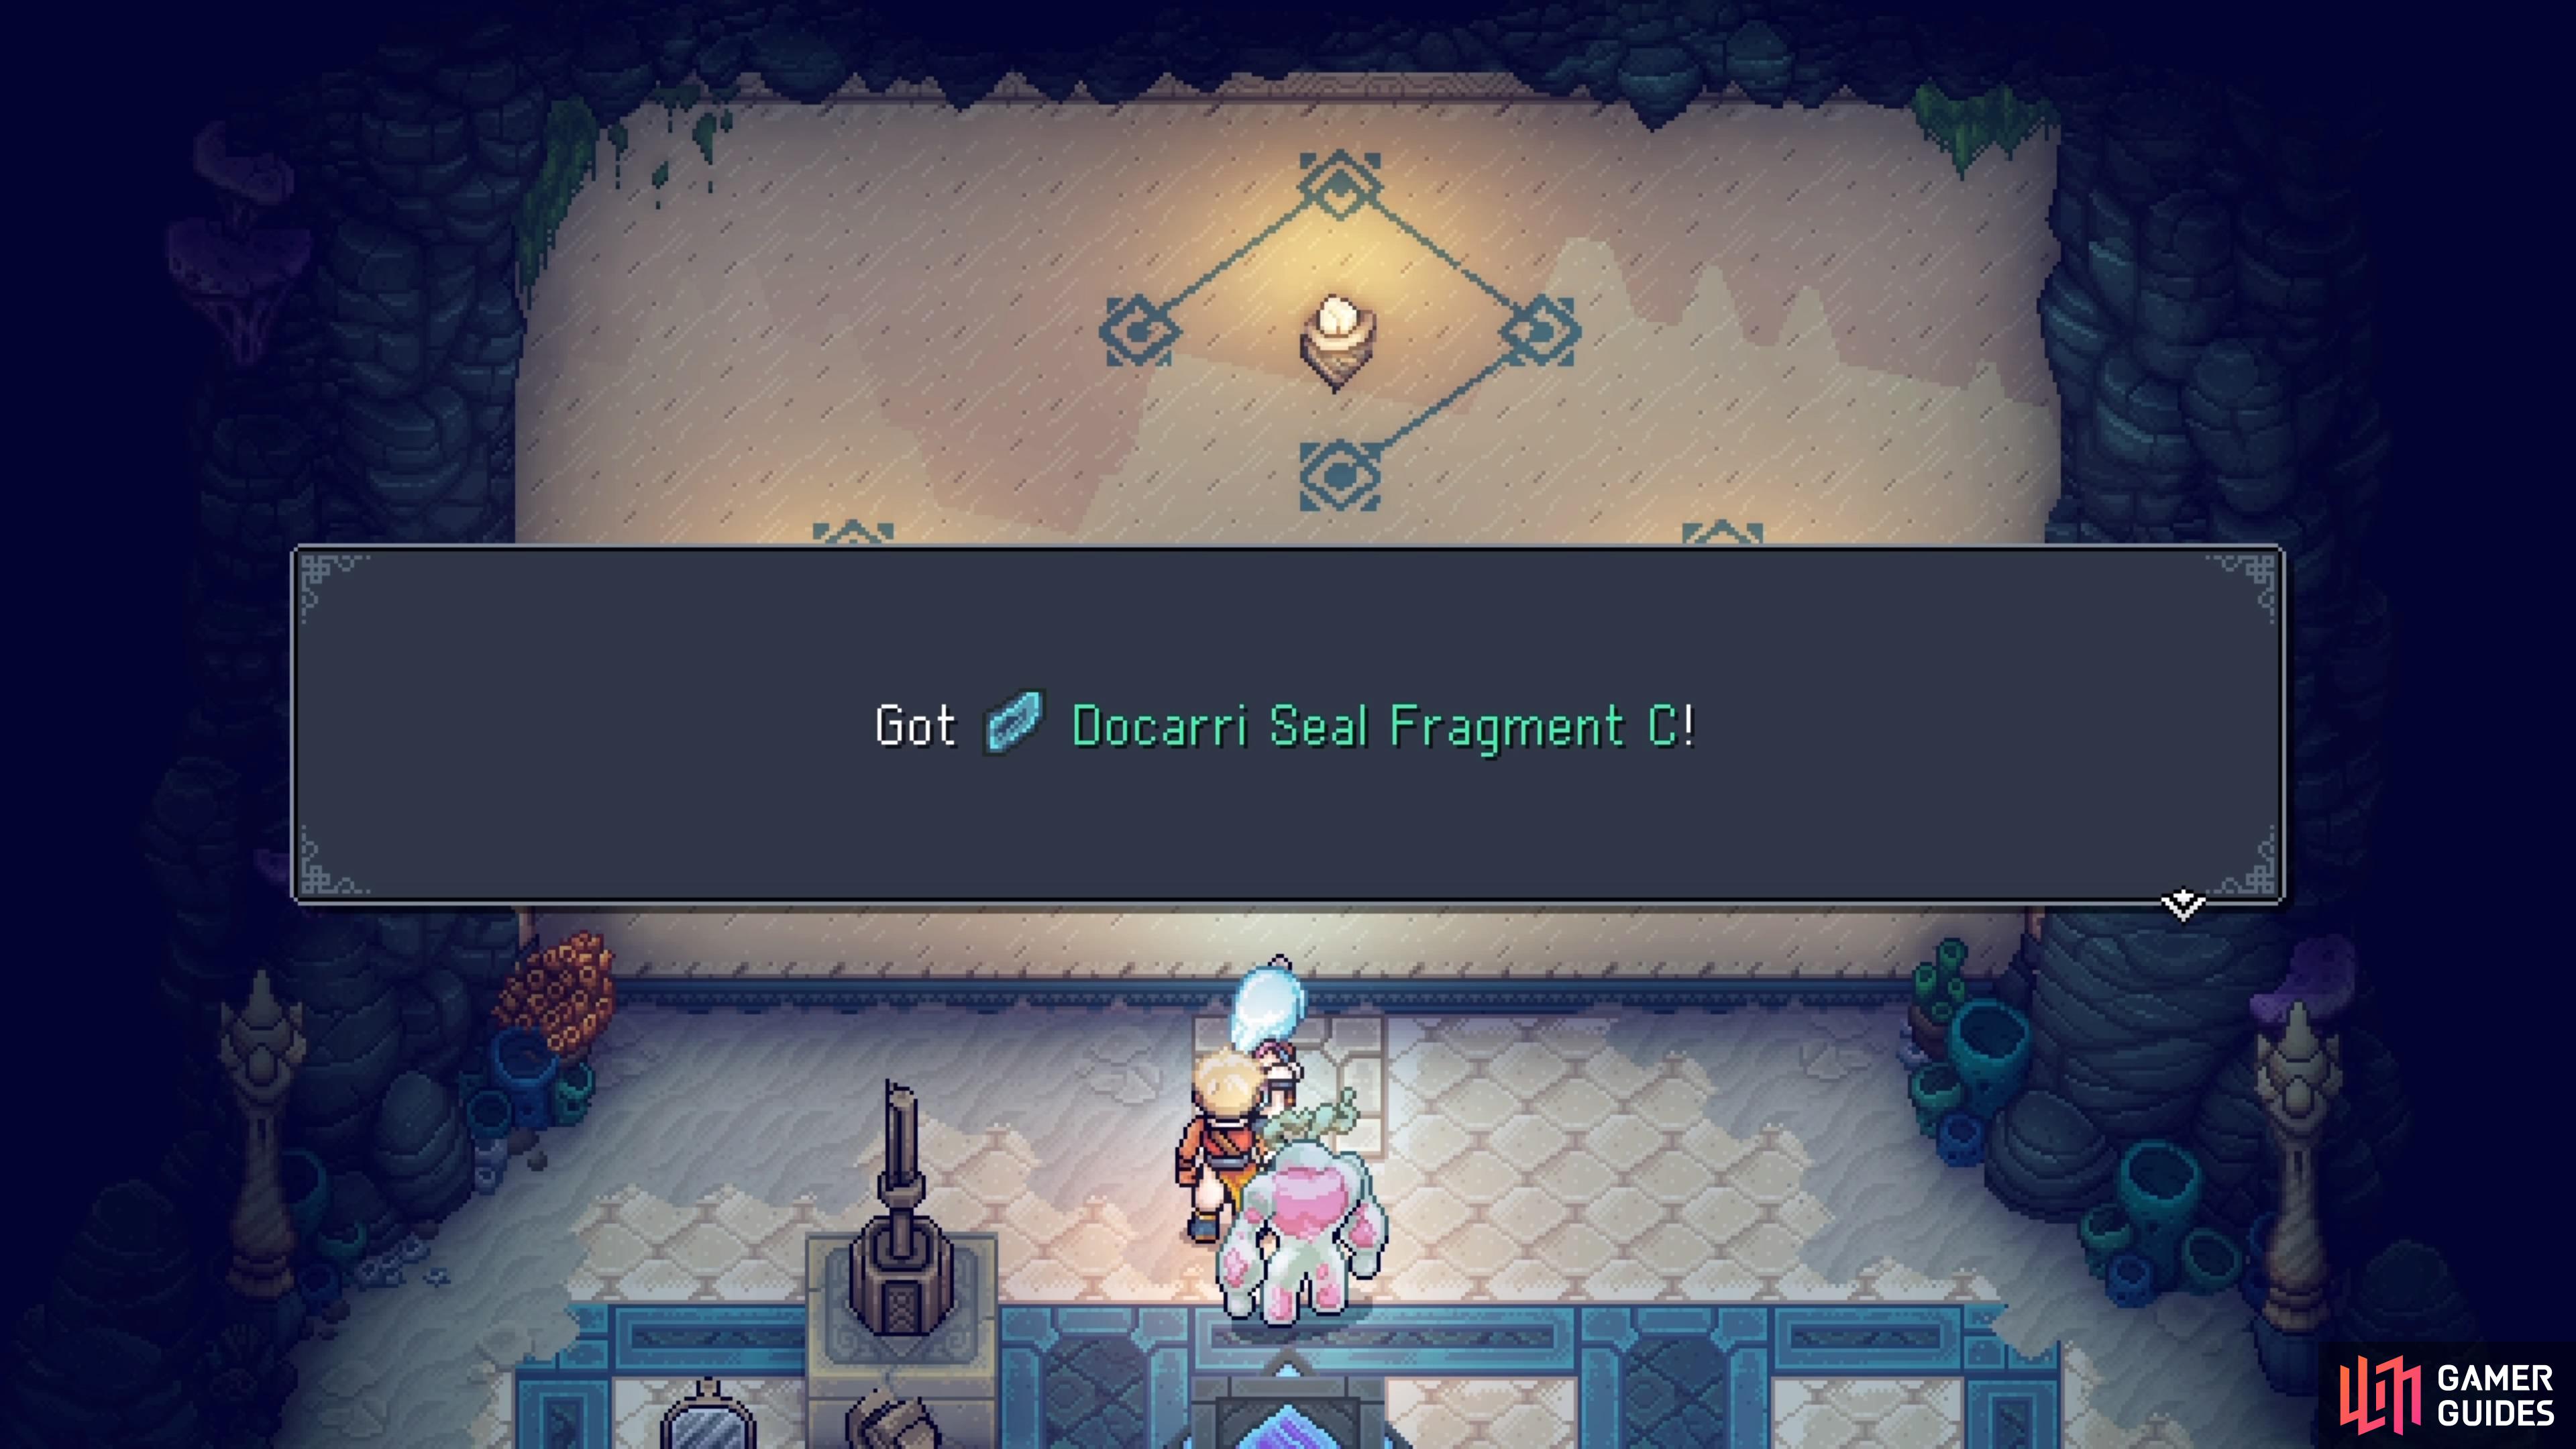
After solving all three pattern puzzles, the pedestal with the item will fall to the floor, allowing you to collect Docarri Seal Fragment C.
No Comments