
You will face a lot of tough enemies in Sea of Stars, including many bosses throughout your adventure. Some bosses, though, are built a little differently, like the Dwellers. You will face the Dweller of Torment in Torment Peak, a place that is feared because of what it does to your mind. This page will look at the Dweller of Torment’s moves, as well as offer the best tips and strategies for defeating it.
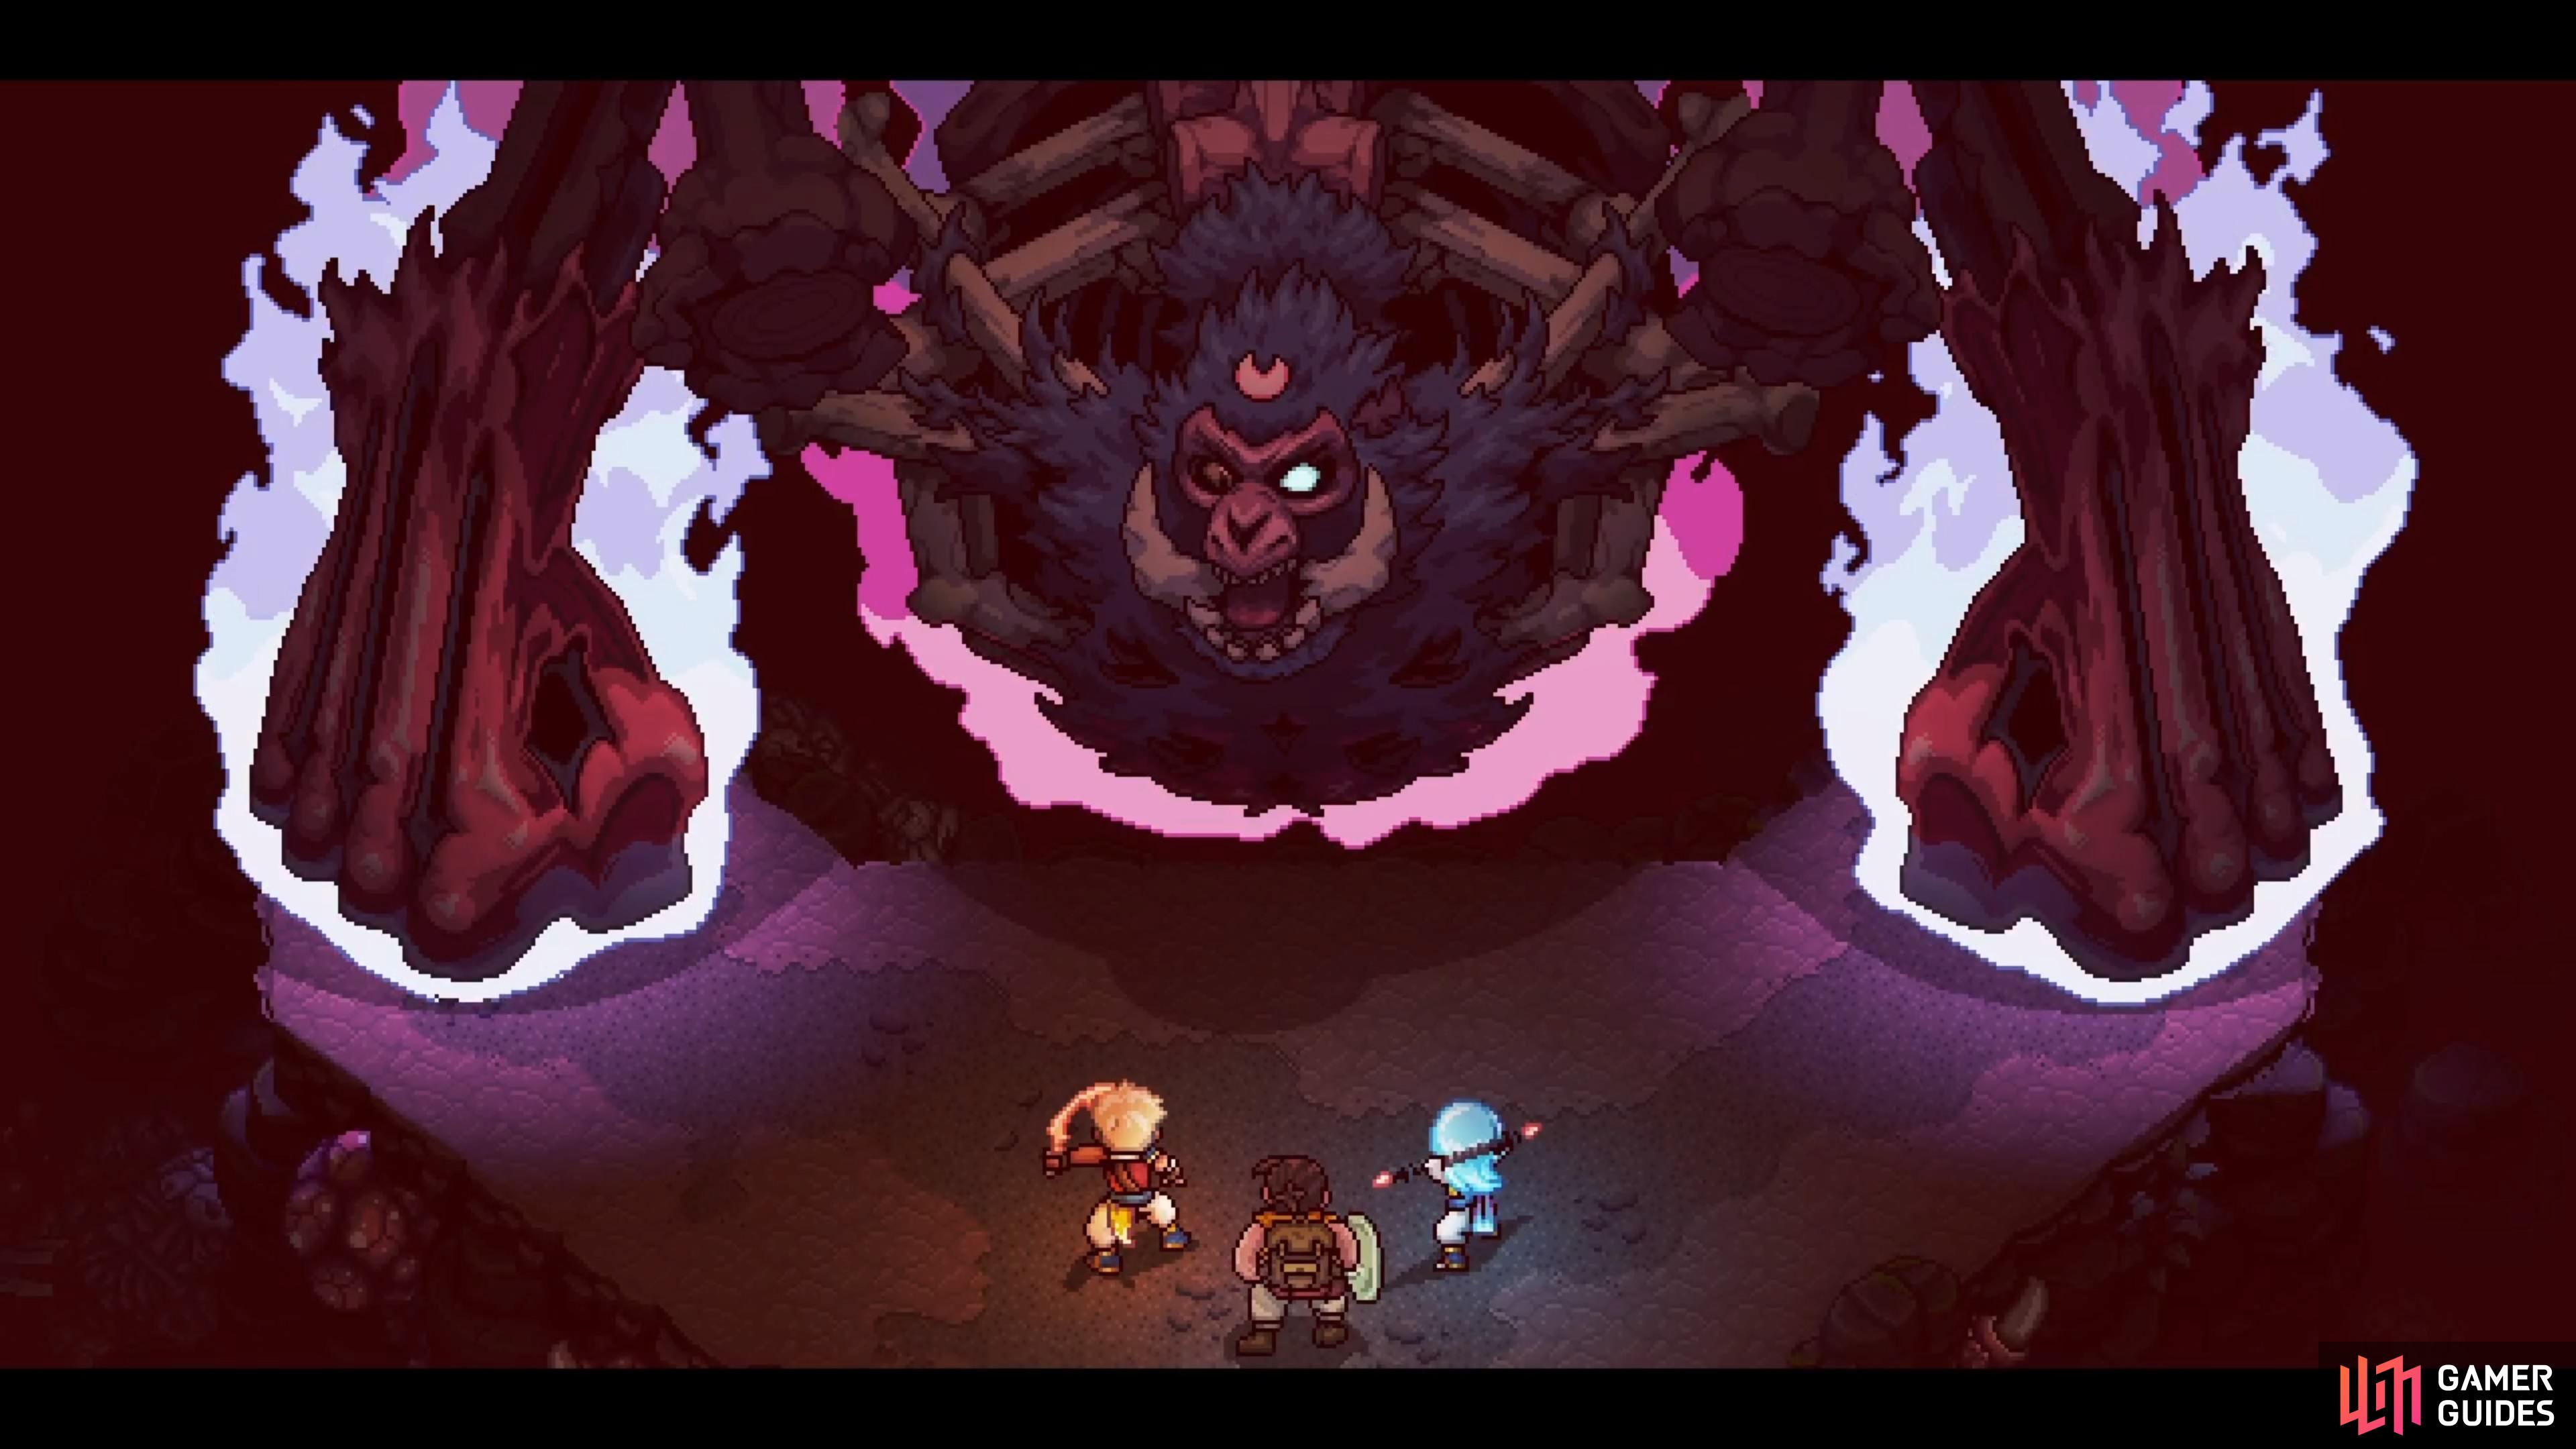
The Dweller of Torment can be a tricky boss, if you don’t know what to do.
How to Beat the Dweller of Torment in Sea of Stars
If you remember the Dweller of Woe boss fight, then you might recall that it doesn’t really take much damage from attacks that aren’t from your resident Solstice Warriors. That will hold true here, so both Serai and Garl will likely not be doing much damage. Garl might be the better option, since he can heal, then you can substitute in Serai whenever you need to deal Poison damage for locks. You will need to survive the beginning of the fight, as you deal no damage at all with anyone, then after a cutscene, the battle will truly begin. There is a bit of a gimmick to the battle, which involves the two arms, as you want to take them out first, before you can deal big damage to the main body.
All Dweller of Torment’s Attacks in Sea of Stars
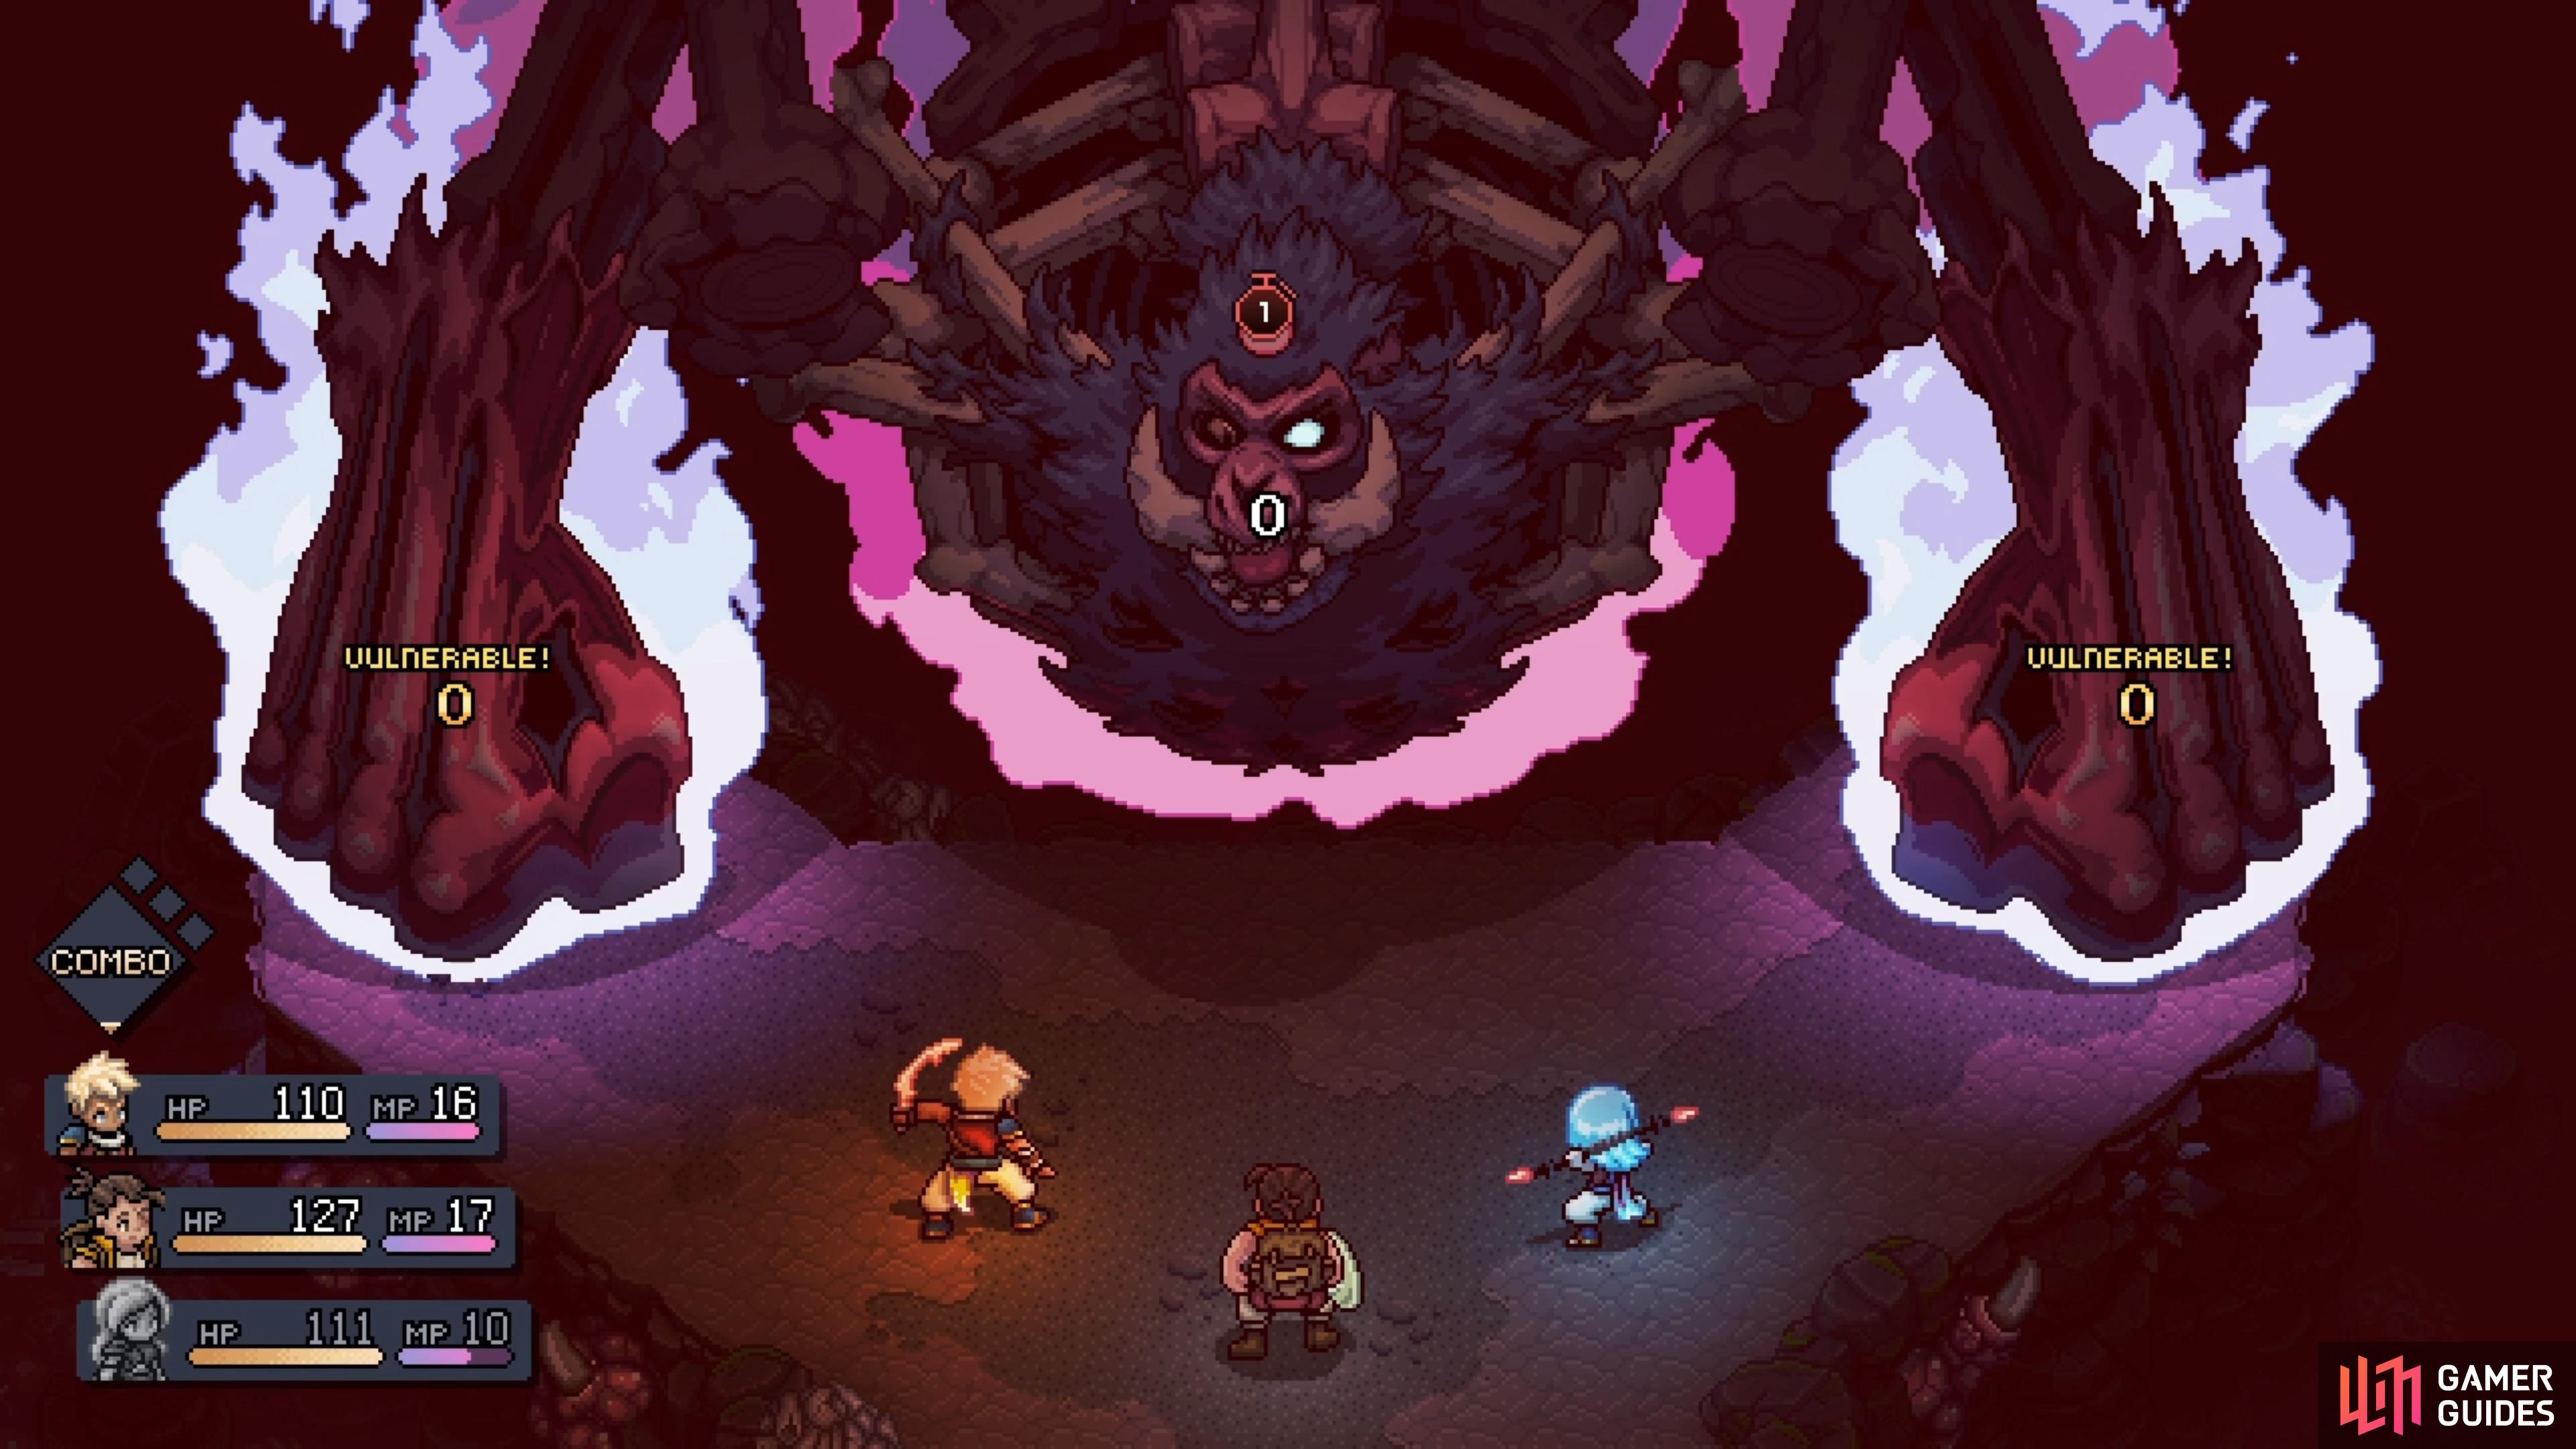
The following list is all of the attacks you will see during the Dweller of Torment boss fight. Note that its Left Arm will be on your right, and the Right Arm will be on the left. It does appear that each arm will have its exclusive attacks.
-
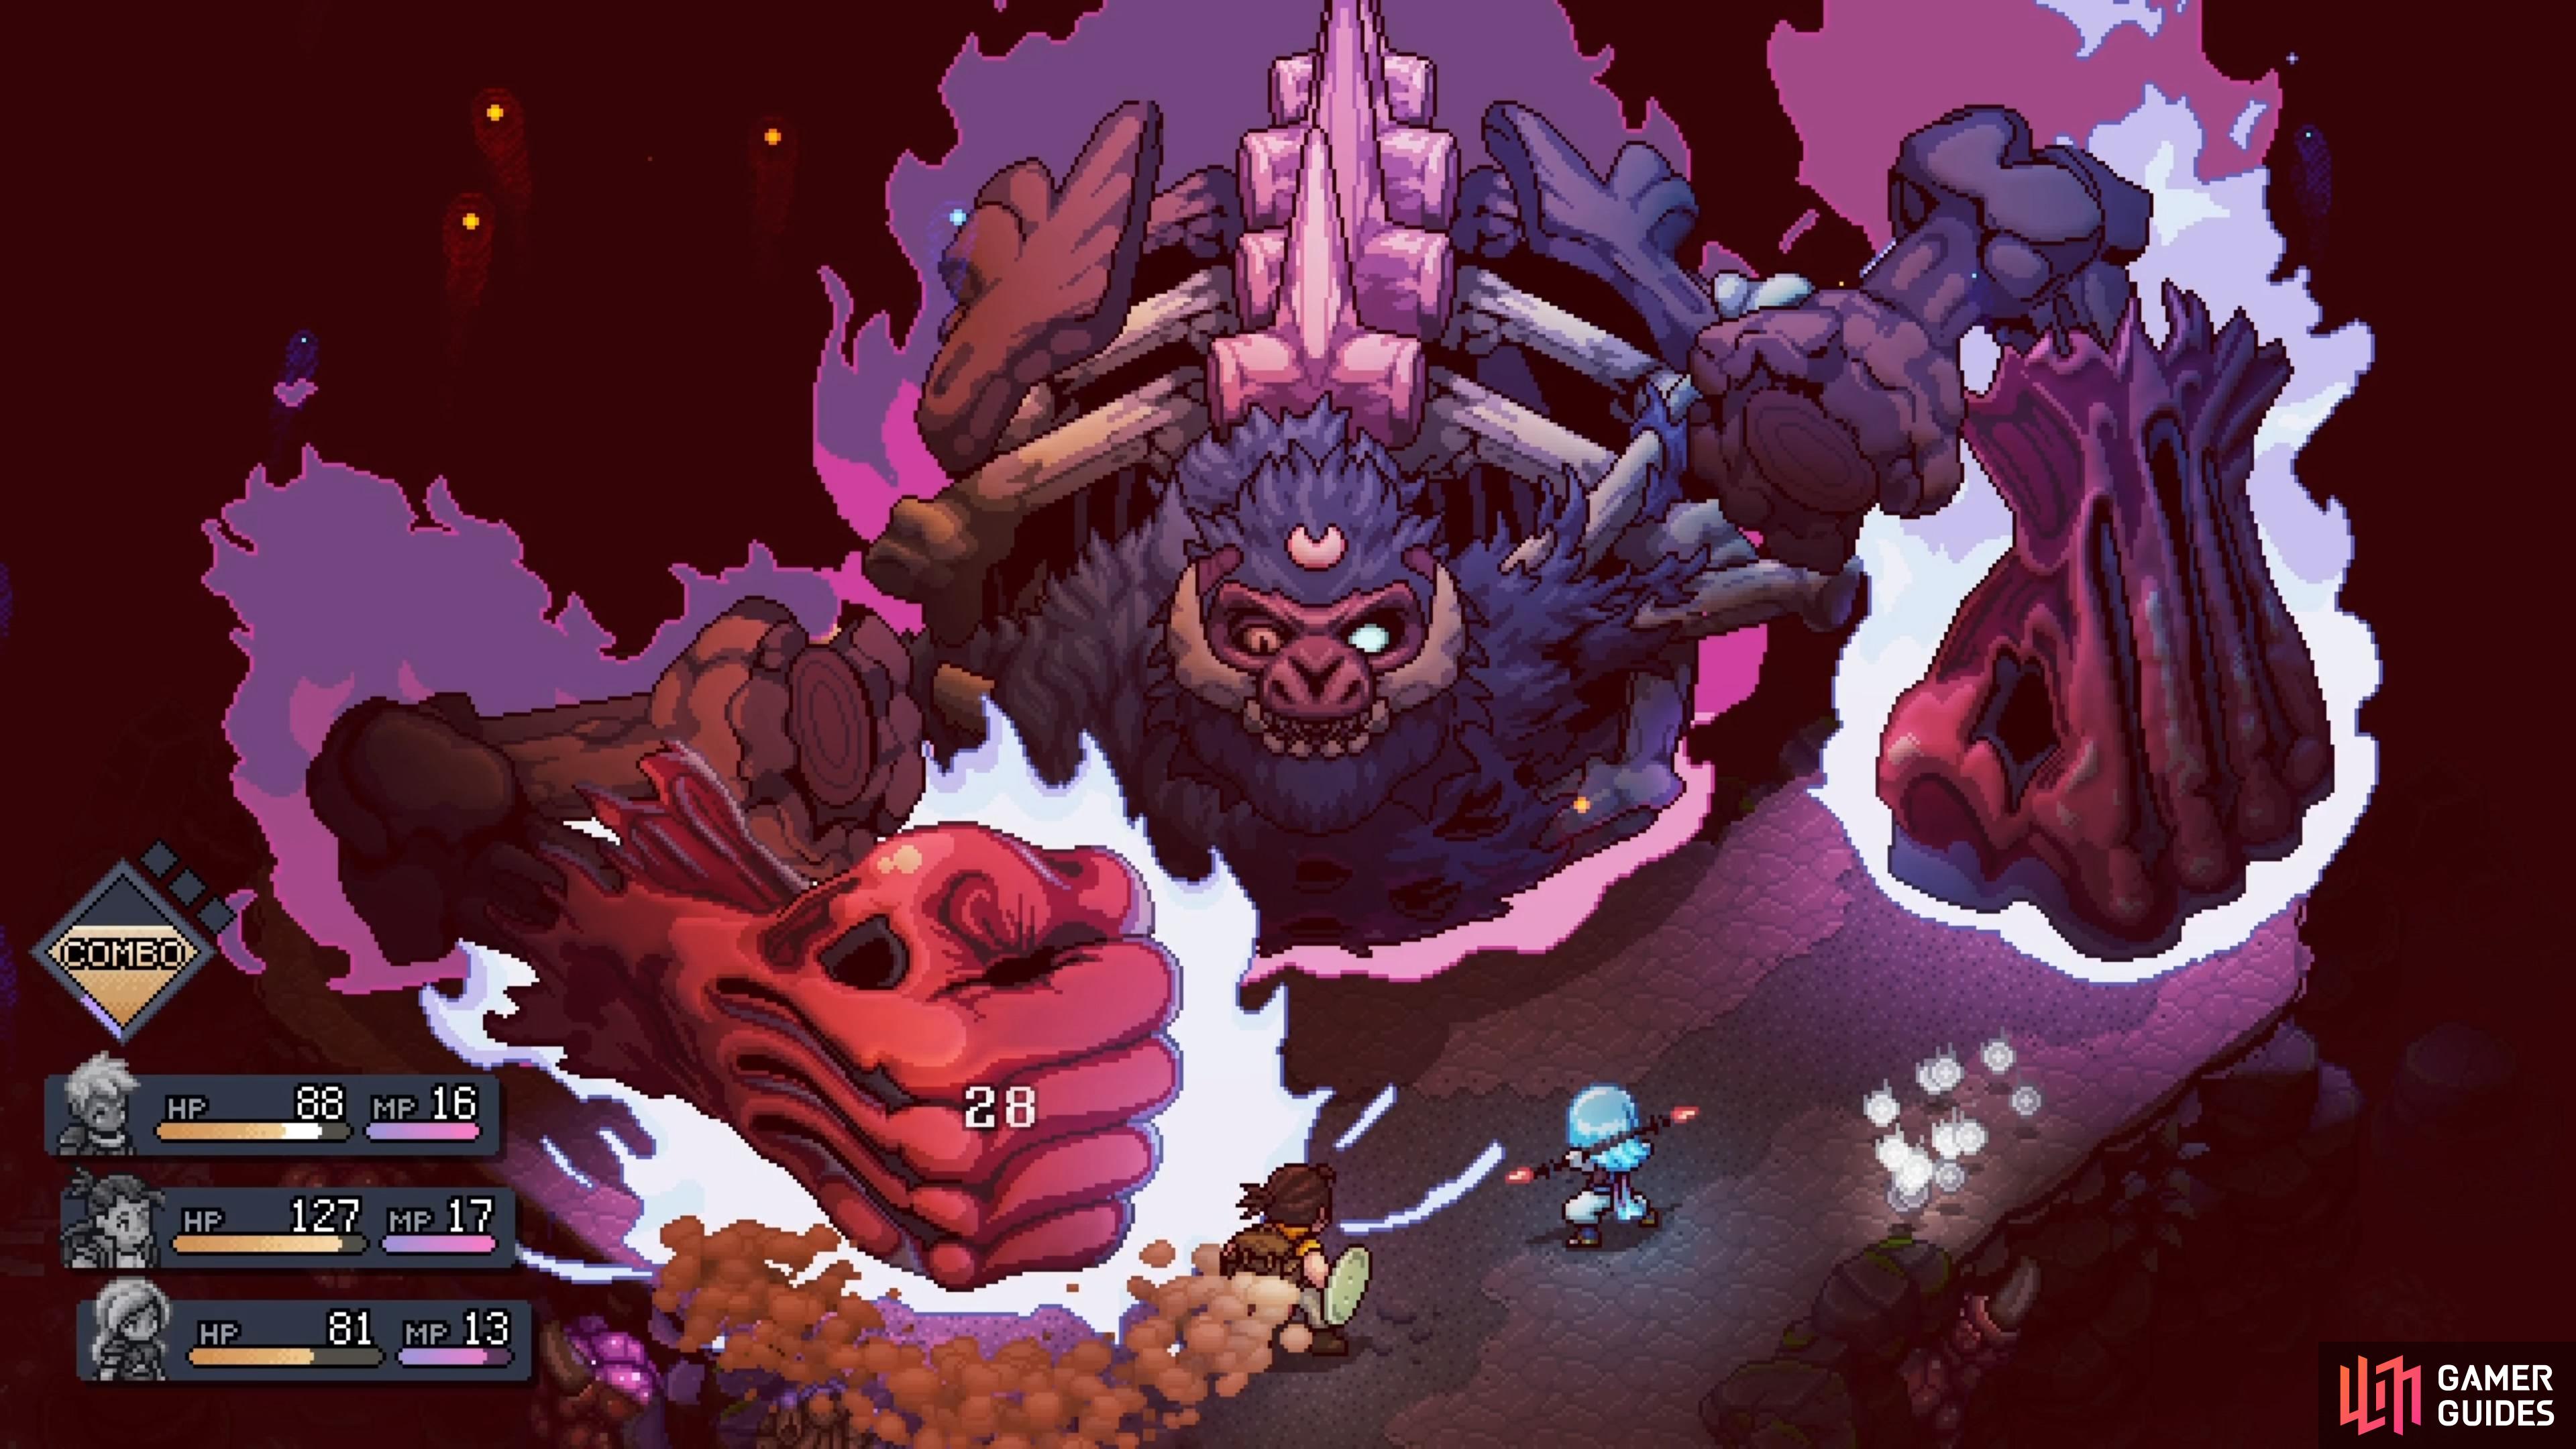
Fist Smash: The Dweller of Torment will smash the ground with one of its fists, dealing around 25-30 damage to a single character. It should be fairly easy to time your block for this attack, too, as you want to do it right before the move connects.
-
Boulder Toss: The Dweller of Torment will use its Right Arm to toss a large boulder at one of your characters. The damage isn’t too bad, although you may need to delay your timed block a little bit, depending on who is being attacked.
-
Ground Pound: The Dweller of Torment will use its Left Arm to pound the ground, knocking your characters into the air. You only need to time the block whenever you are about to land for the final time, as that is when the damage will occur. The attack will deal around 25-30 damage to the party.
-
Belly Drop: The lesser of the two special moves that the Dweller of Torment can do, it will jump into the air and then come crashing down on your characters. The point when it’s about to make contact with your characters is when you want to time your block. Depending on how many Locks you remove, this attack can deal around 20-30 damage to the entire party.
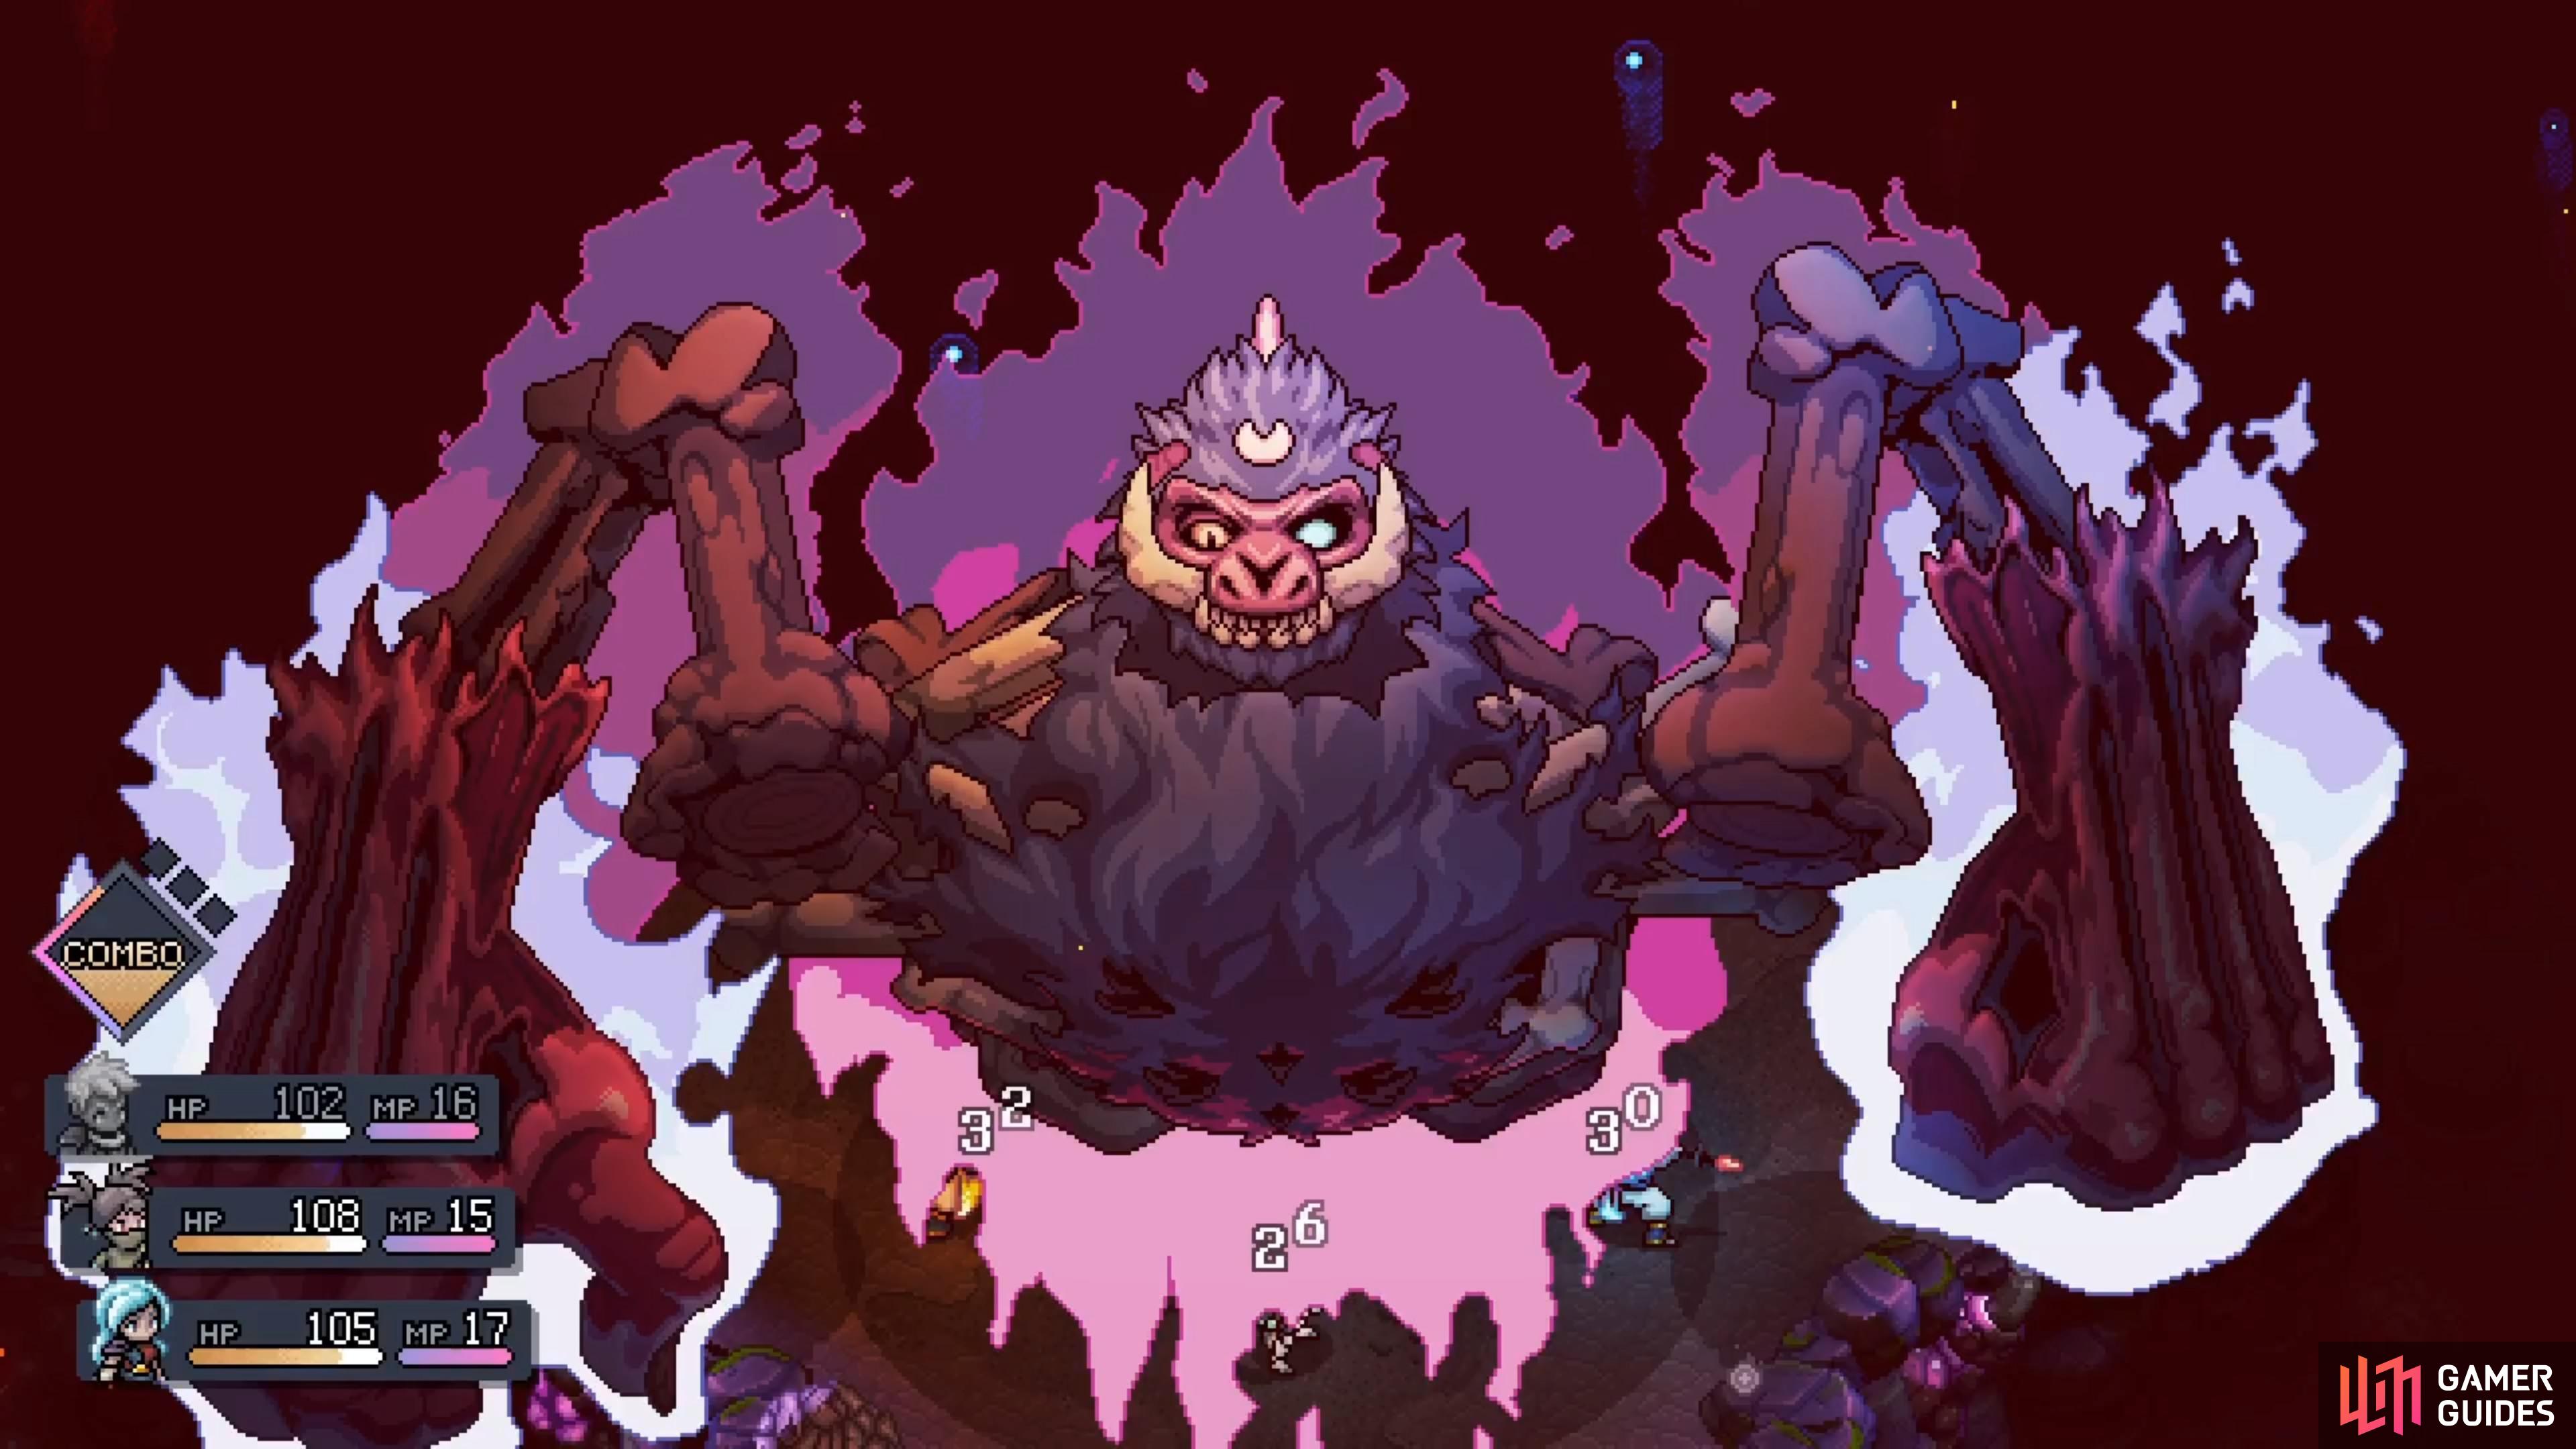
The Belly Drop attack comes when you see the fewer Locks of the two special skills.
Sonic Pain hits multiple times and it’s tough to time the block for all of them.
- Sonic Pain: This is the special attack that occurs whenever you see more Locks. The Dweller of Torment will do a scream that hits multiple times, damaging all characters for around 35+ damage. You will have to time blocks multiple times here, which can be quite difficult. It’s also challenging to cancel this move, since there tends to be multiple locks of different damage types. Note that you can always use Serai’s Disorient to delay the action.
Strategy for the Dweller of Torment Boss in Sea of Stars
When the battle begins, you won’t be able to use Serai for a few rounds, so you’ll be stuck with Zale, Valere and Garl. The goal at the start is to just survive, making sure to heal whenever someone’s health gets too low. The reason for this is because you deal absolutely no damage to the boss, no matter what you use. The best idea here is to simply stick with normal attacks, to generate Live Mana, and heal when necessary. After a few rounds of this, there will be a little bit of dialog and a cutscene will occur, which is when the true fight begins (Serai rejoins here).
You will deal no damage at all at the very beginning of the battle.
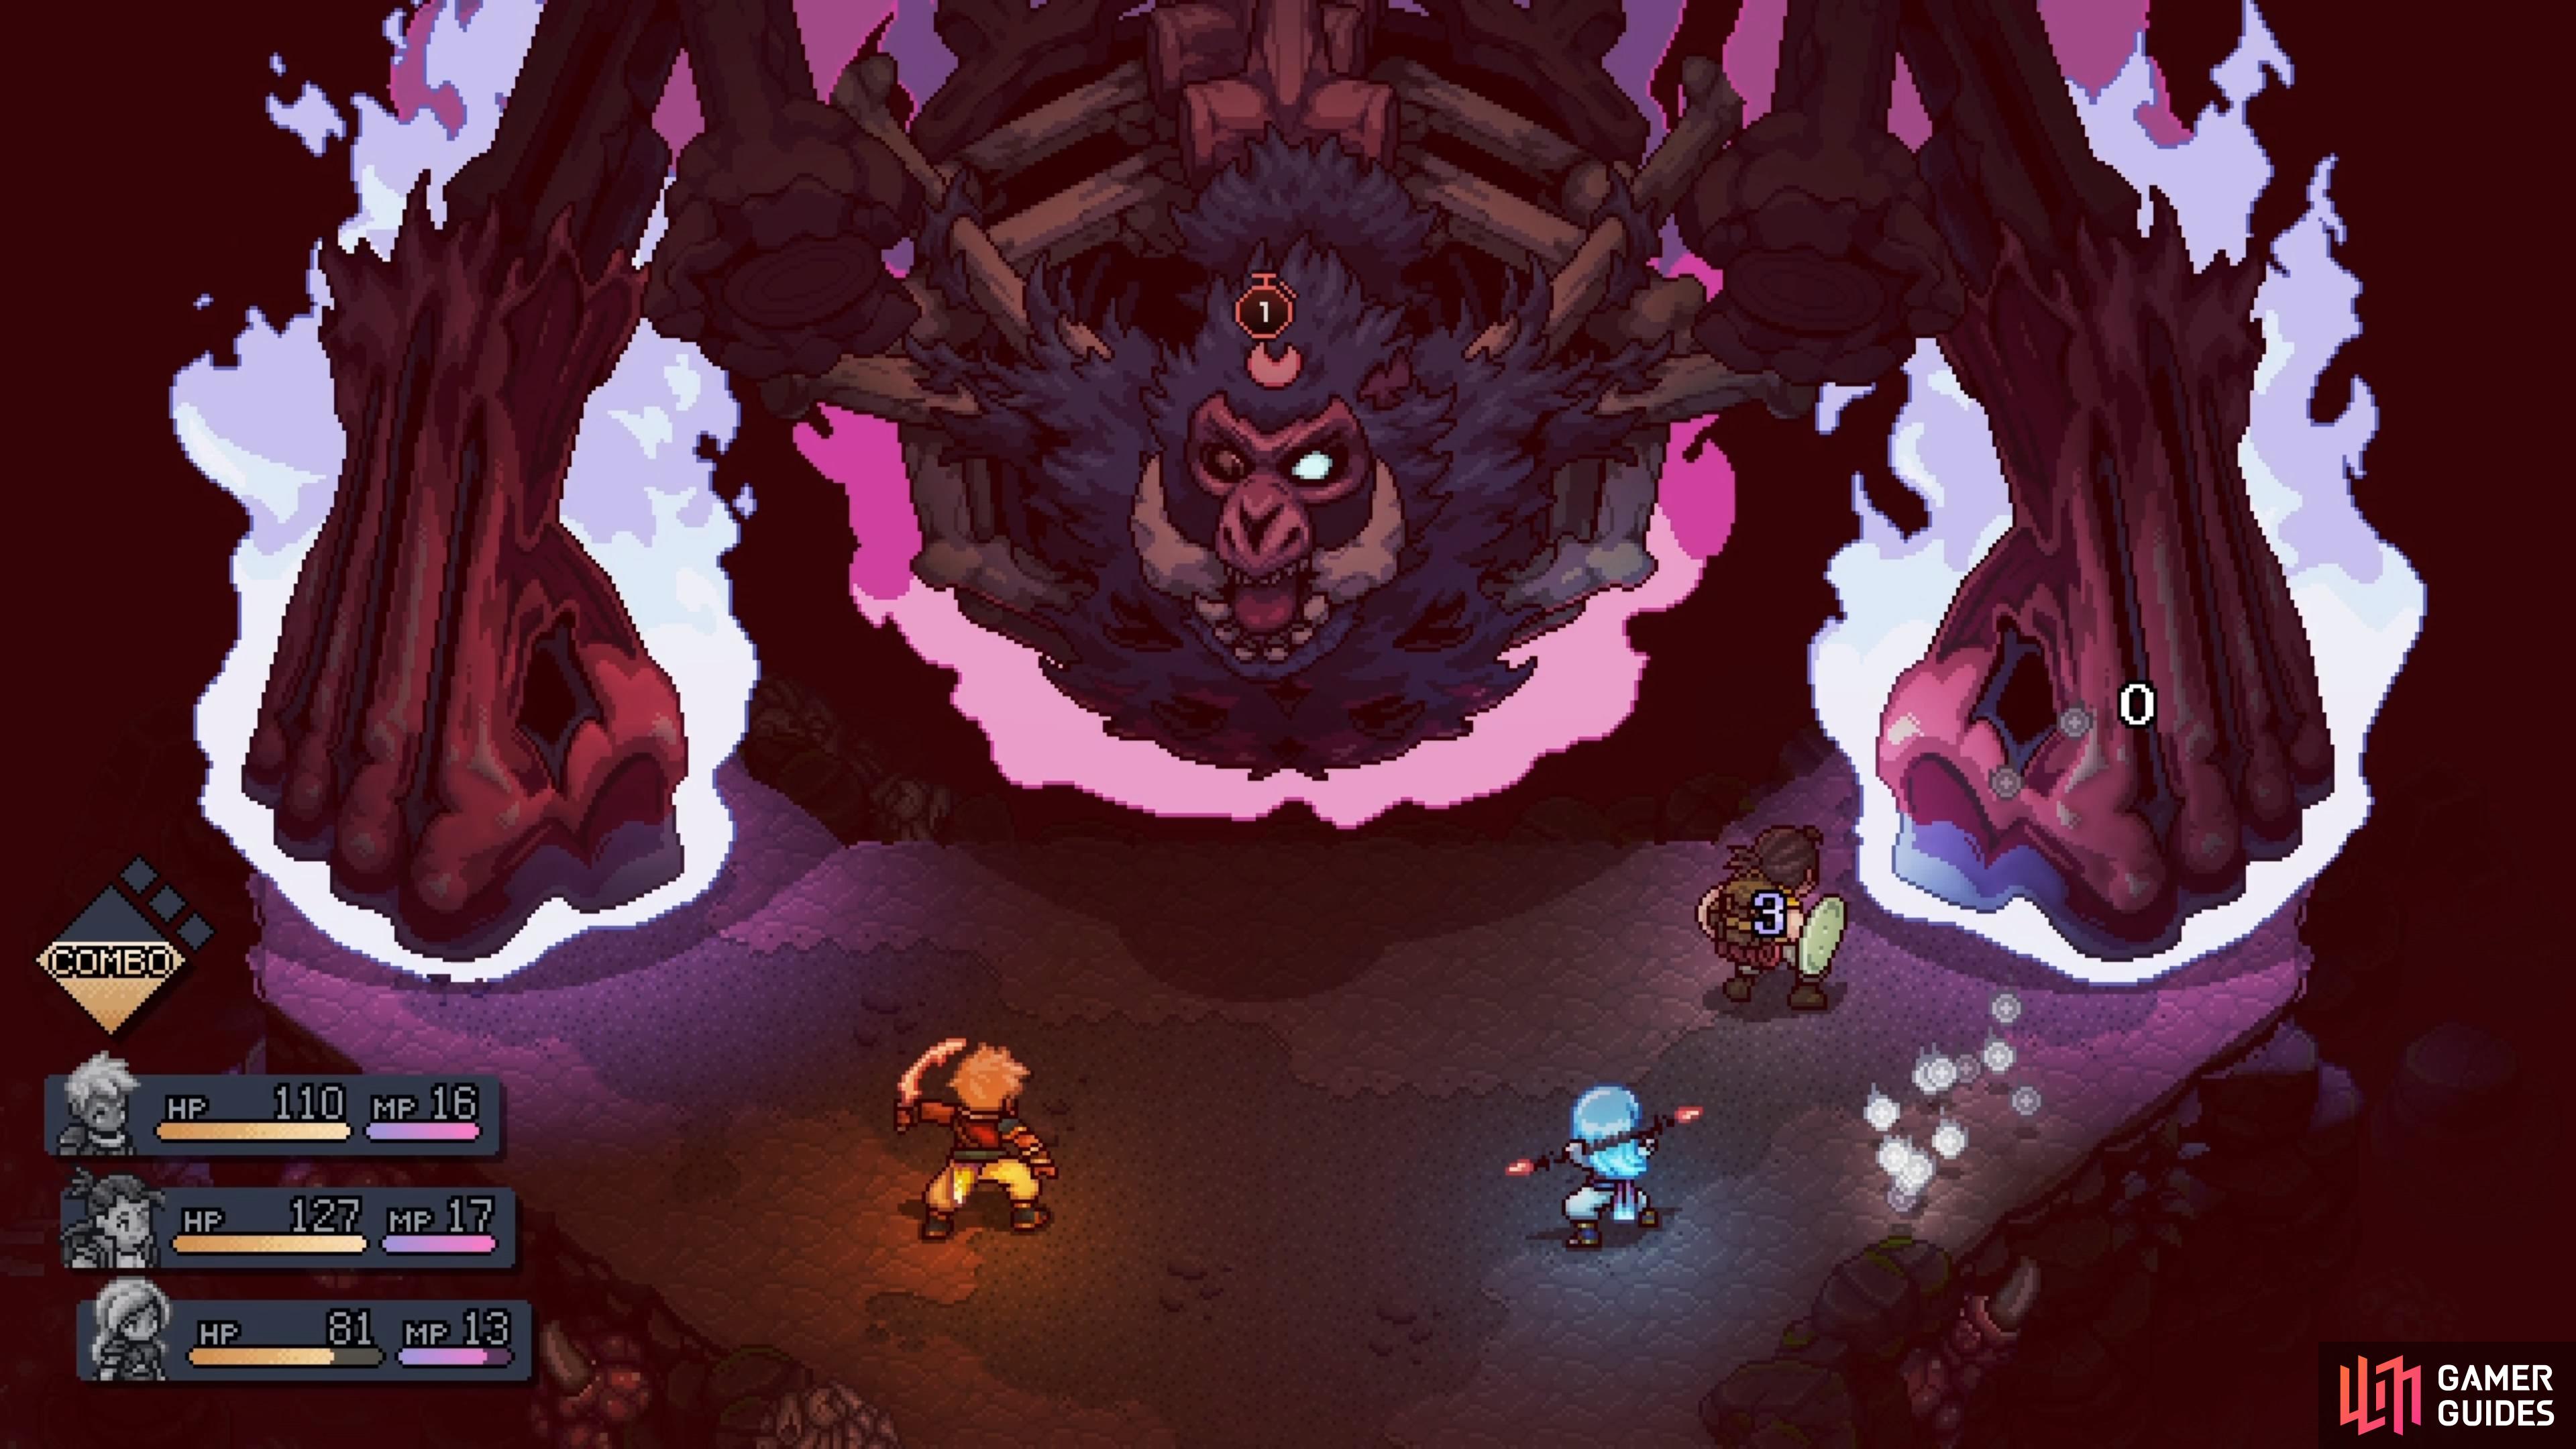
Use this time to do normal attacks to spawn Live Mana.
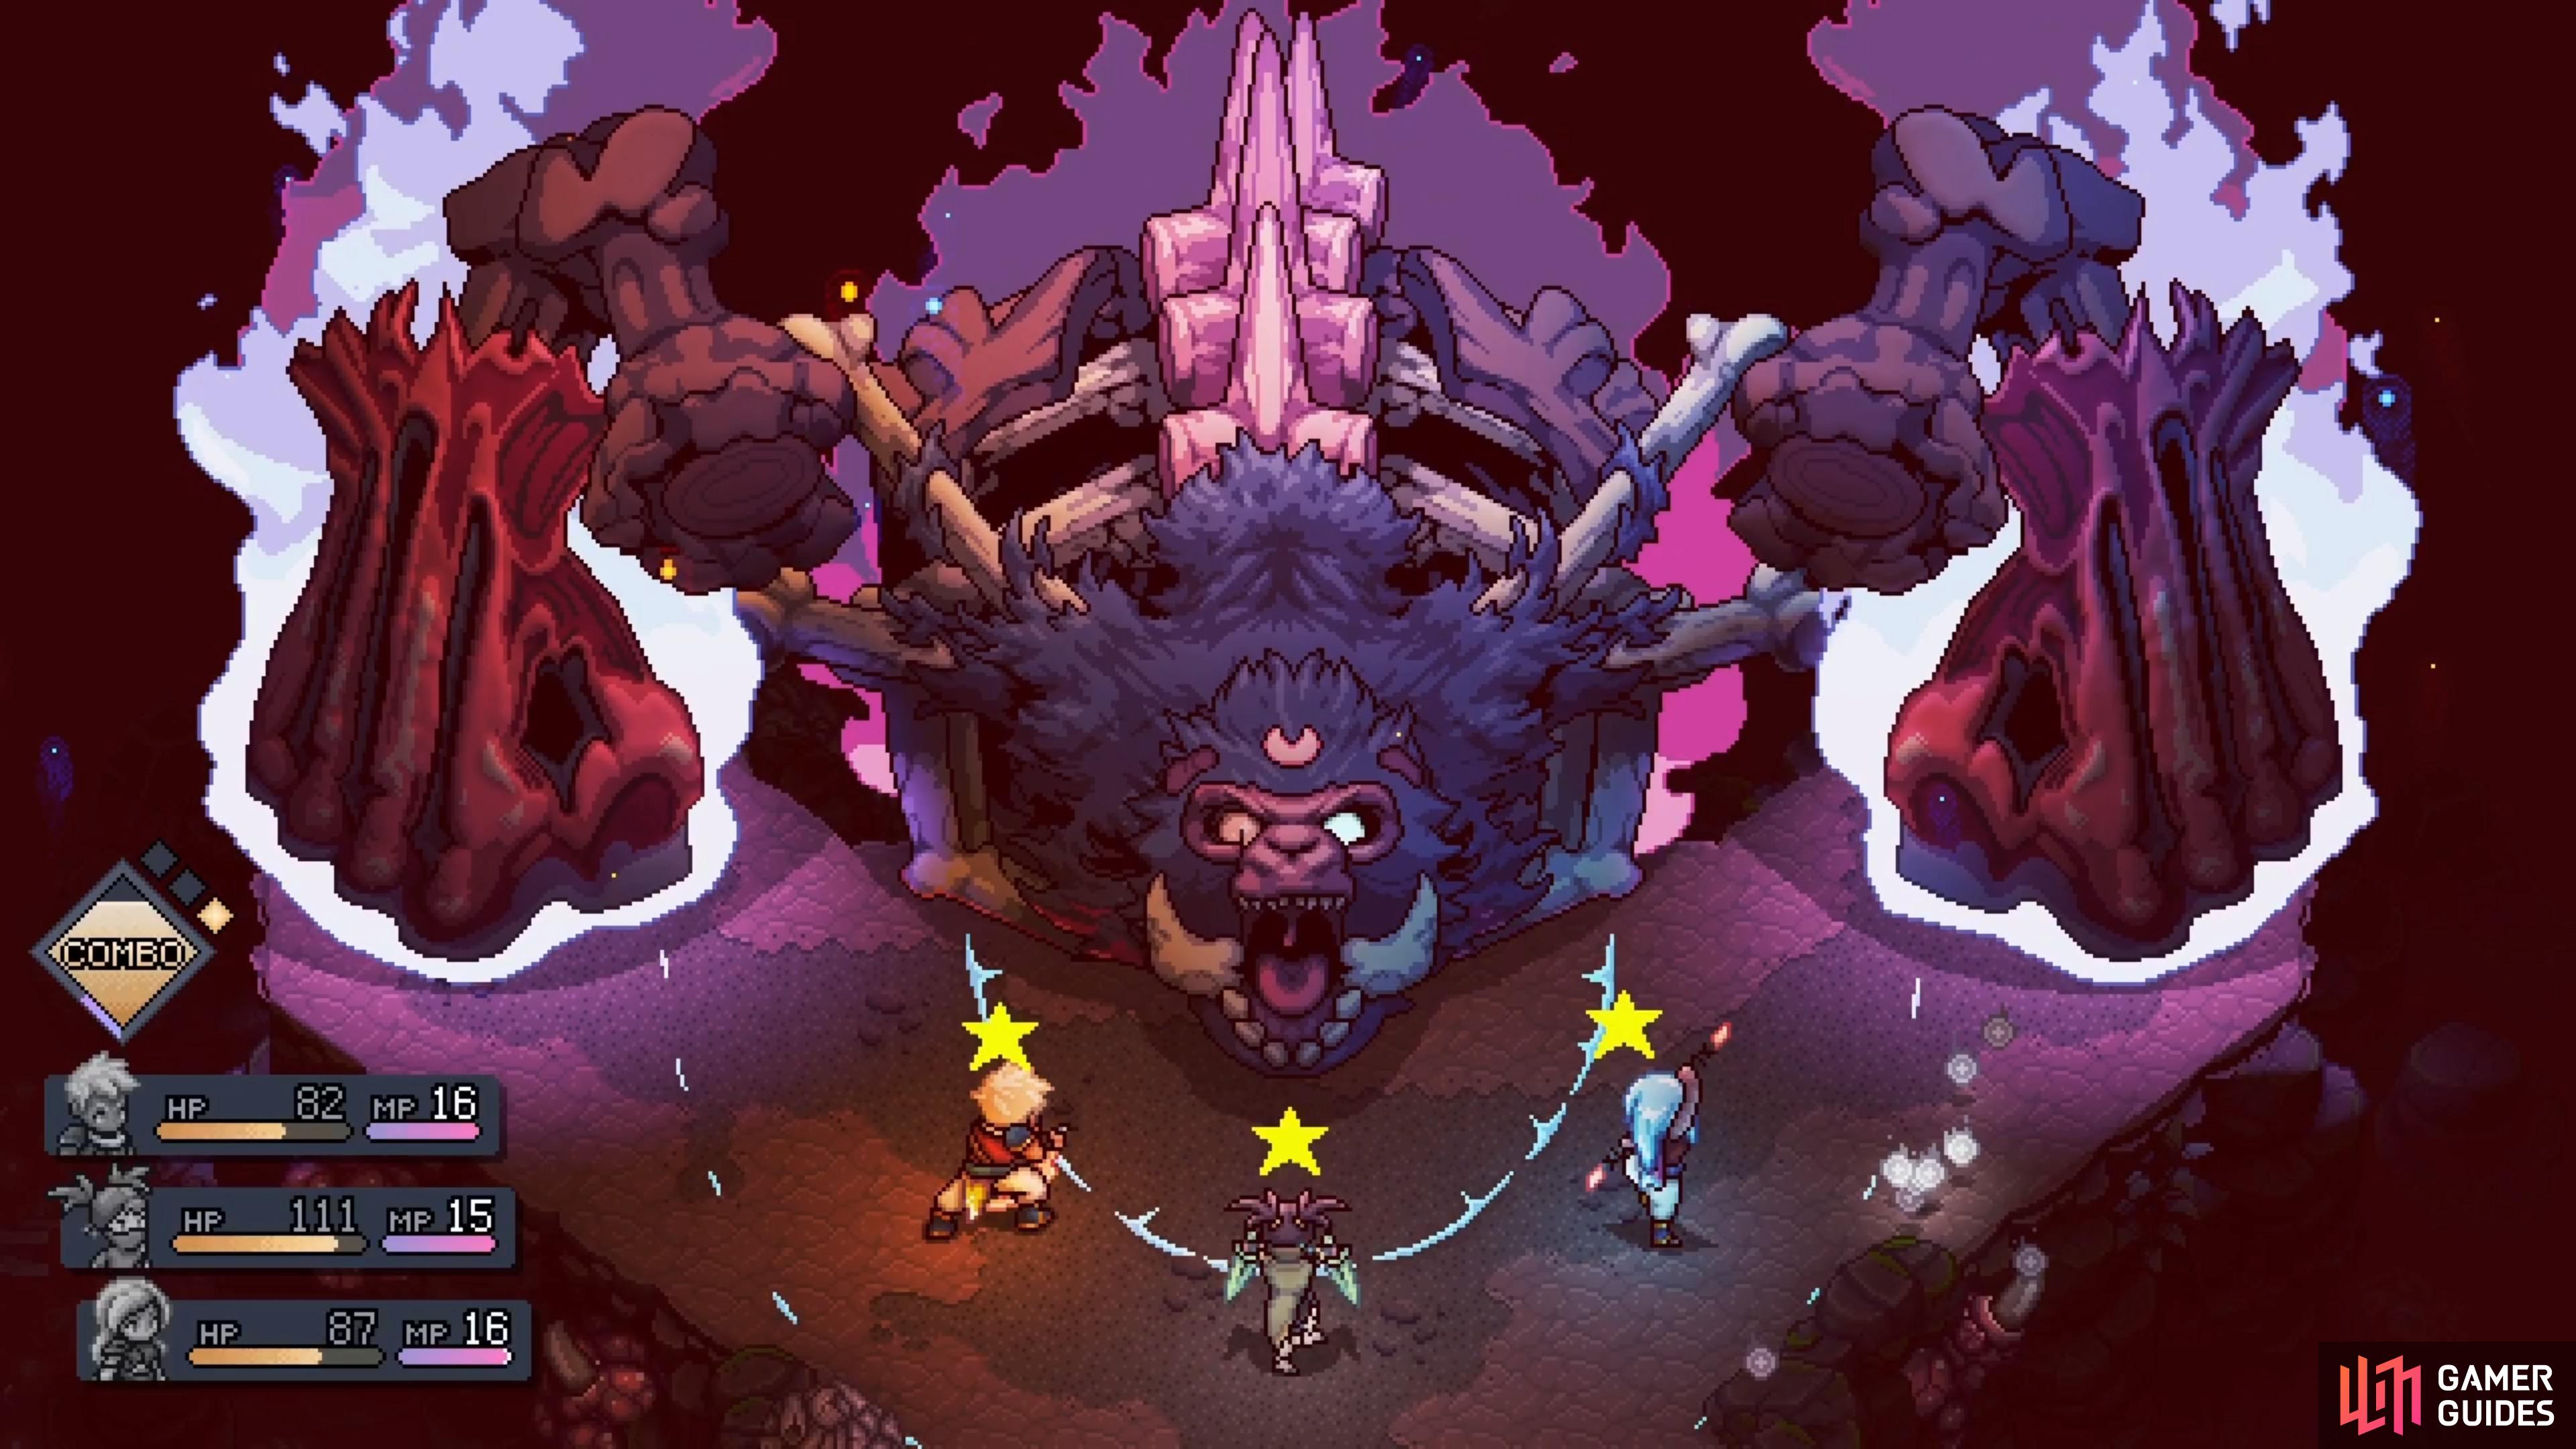
As you might have noticed, the Dweller of Torment has three targets: its main body, the Left Arm (on your right side), and the Right Arm (on your left). If you recall the Dweller of Woe battle, then you might remember that most normal attacks won’t do as much damage as you hope. Zale/Valere’s moon/sun magic, as well as their boosted attacks, will be the brunt of your damage here. Since that’s the case, they should be focused on using normal attacks for Live Mana, as well as supporting the others. In the case of Serai, she’s good to use, if you need an extra sword attack, or just the poison element.
If you attack the main body, even with the moon/sun elements, then you will notice it’s not doing a lot of damage. That’s because you will need to defeat the arms first before the main body becomes weak to those elements. Each arm has around 2,125 HP, but boosting with Zale/Valere, or just using their special attacks, should help cut that HP down really quickly. Once you defeat both arms, the Dweller of Torment will fall to the ground and become vulnerable to solstice magic. This is the opportunity to use your best attacks, like Combo Skills, to cut off a huge chunk of HP.
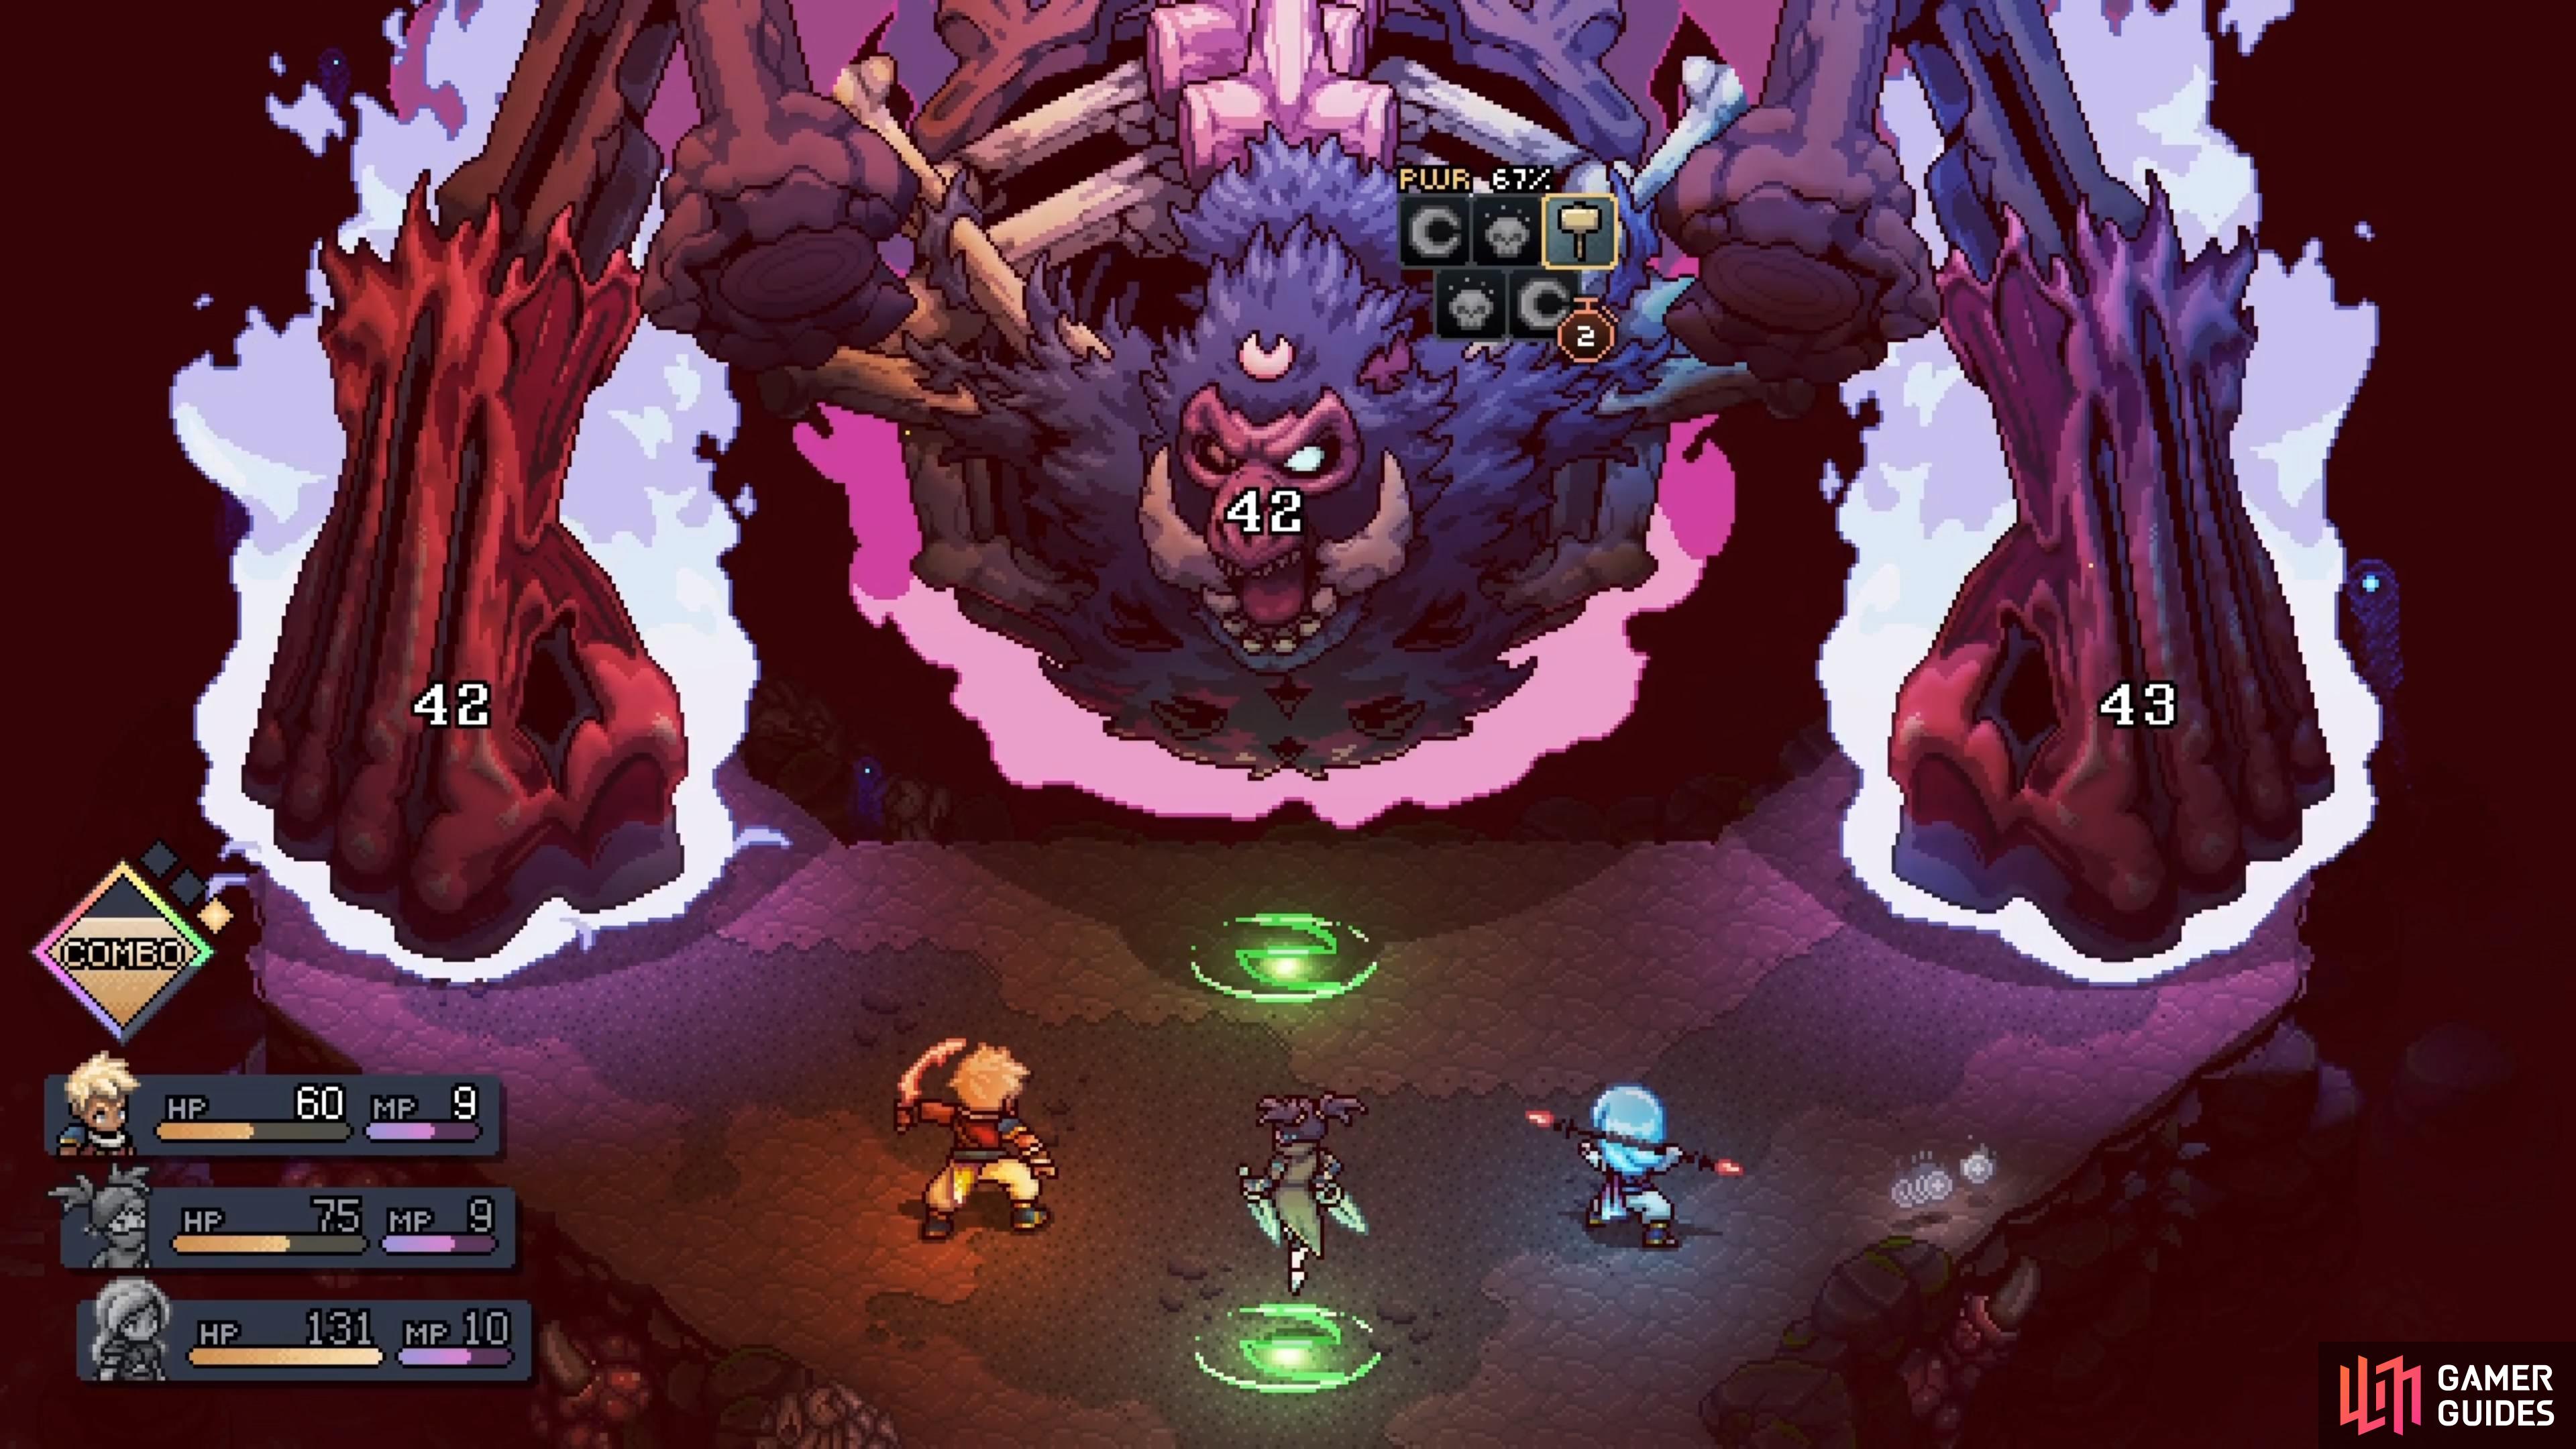
While it’s on the ground, it won’t do anything, but once the timer above its head reaches zero, the main body will get back up and both arms will be revived (with the HP amount mentioned above). From here, you will just be repeating the same strategy. If you need to heal the entire party, use items, and as a last resort, the Mending Light combo skill. Eventually, you will down the Dweller of Torment and be done with Torment Peak.
Mossy Cache Walkthrough - Sea of Stars
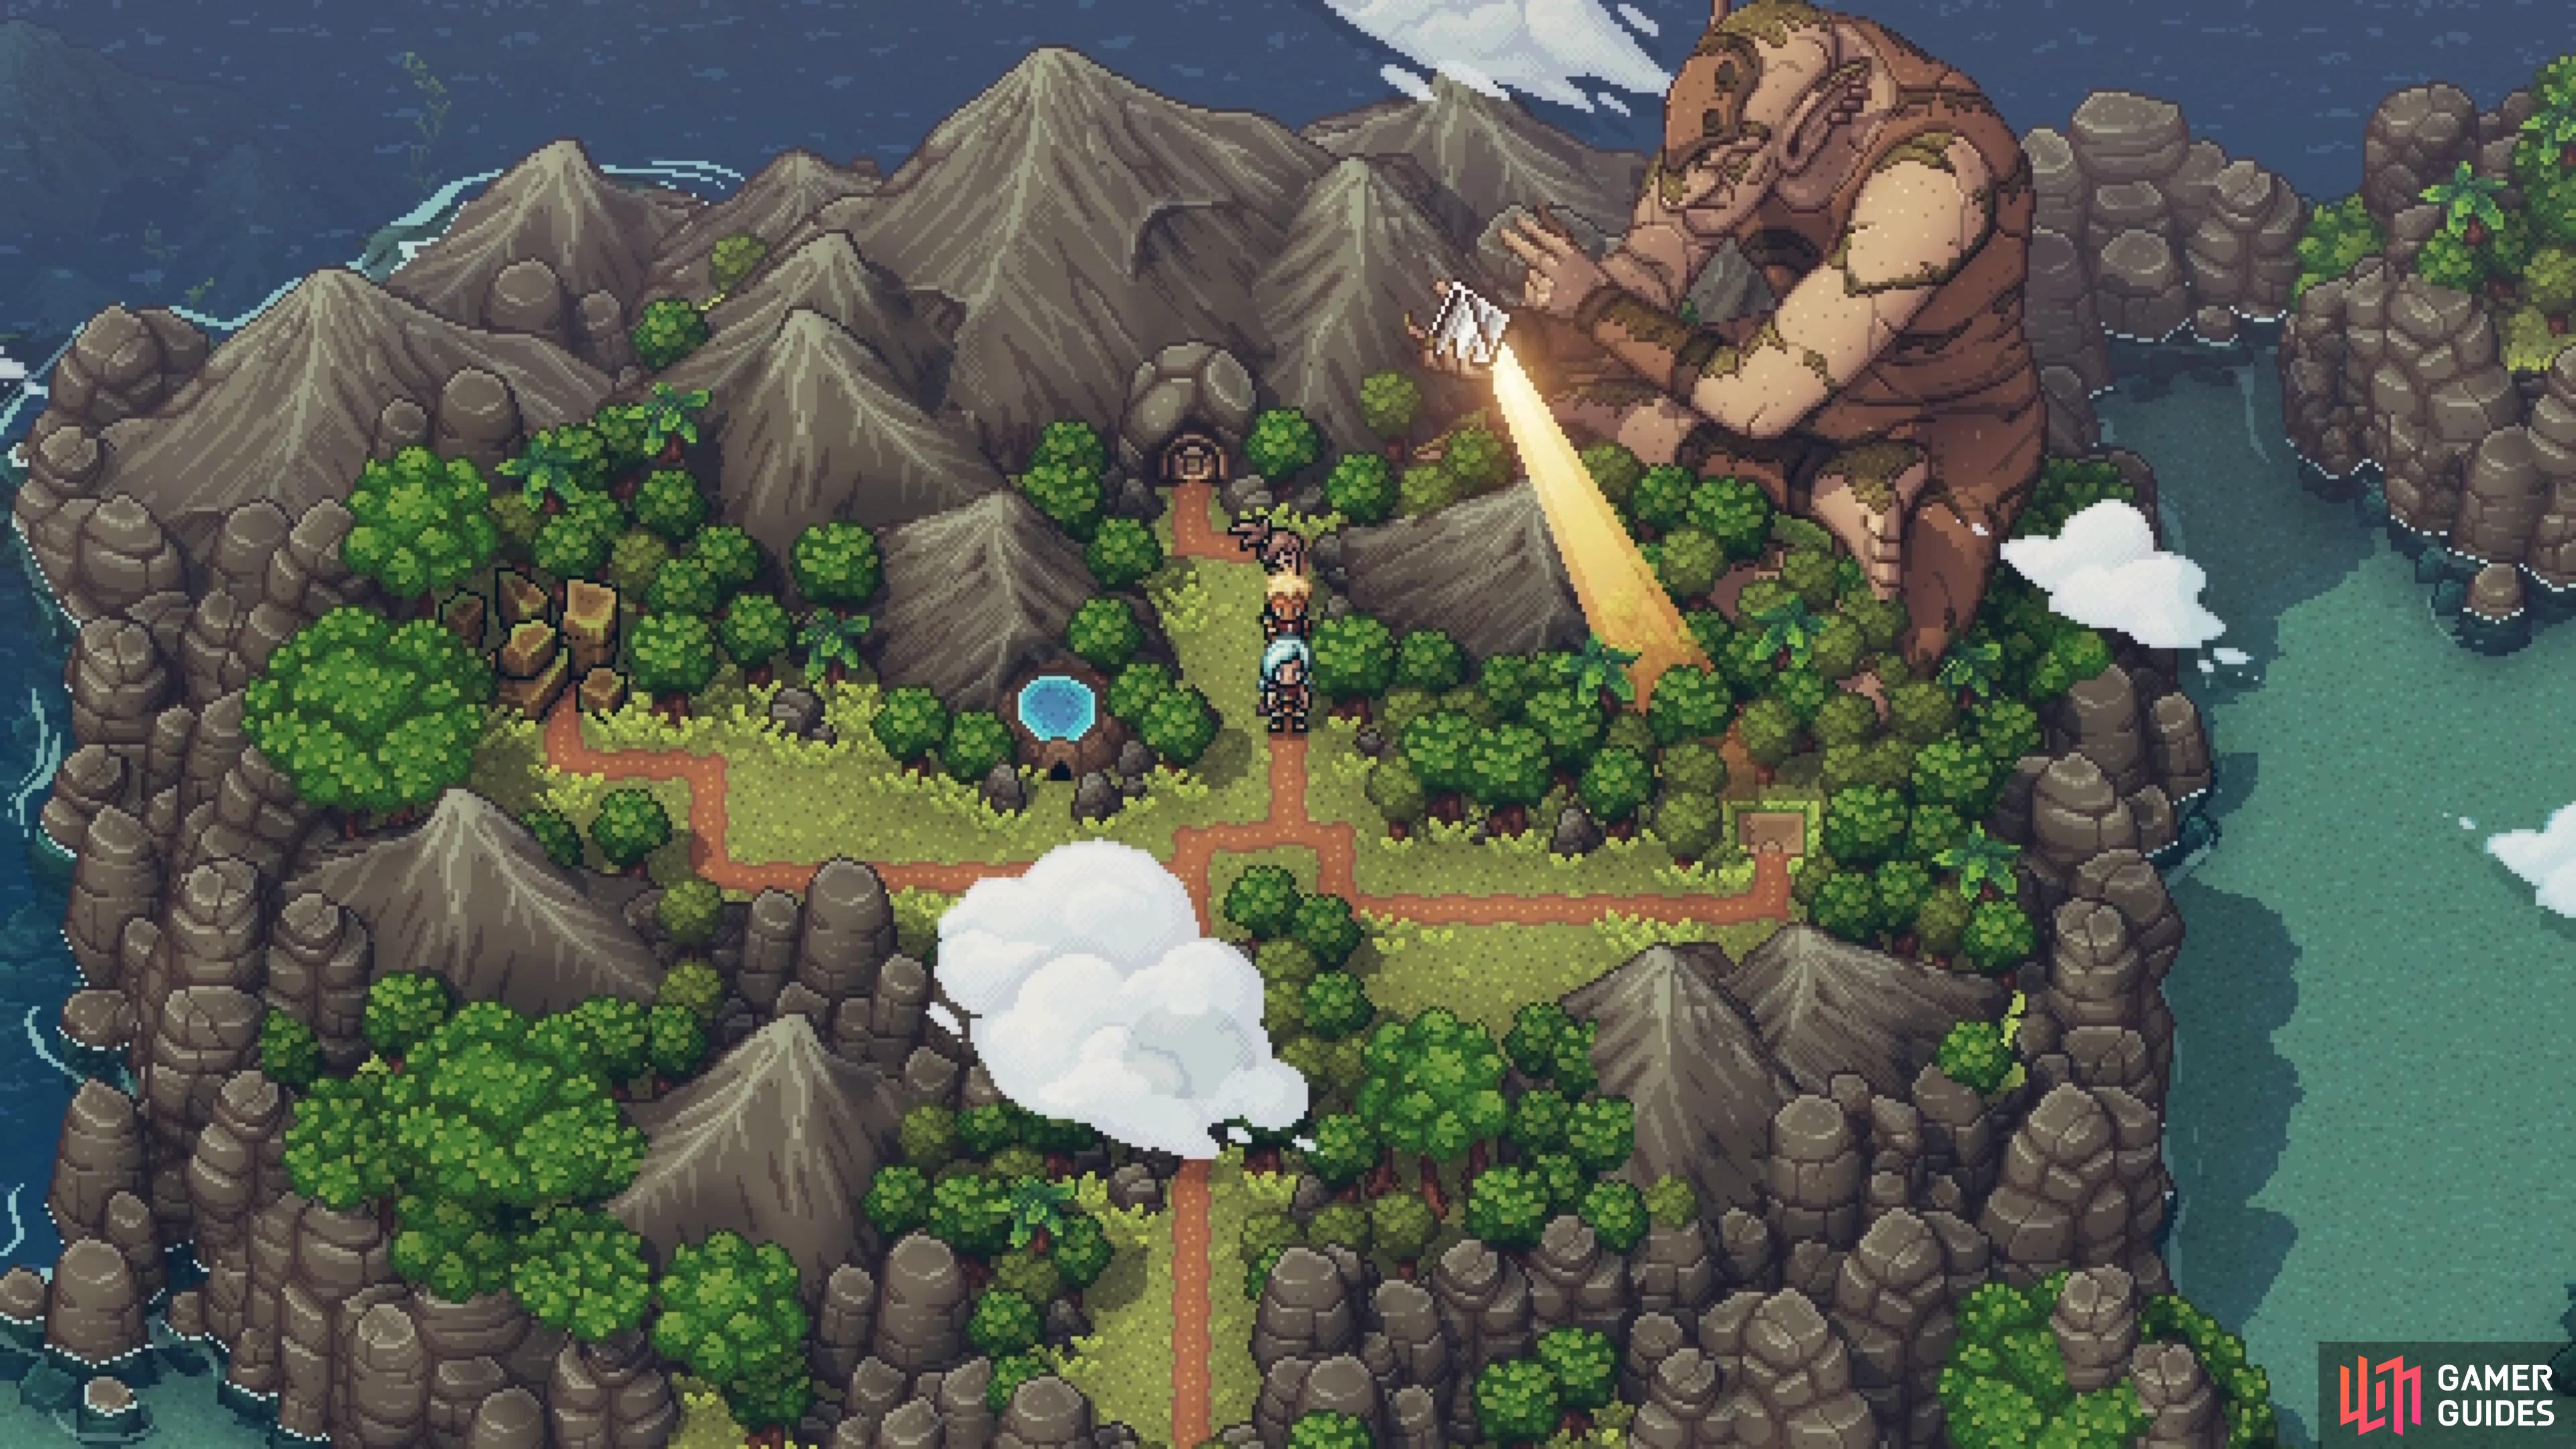
After the fight is over, watch the scenes that occur and the Gorilla Matriarch will restore the prism to the nearby statue. Return to the world map and use your Solstice Amulet to move the energy beam to the forest entrance on the right, revealing the Mossy Cache location. Enter the locale and you will see a puzzle right in front of you. This is a pretty easy puzzle, where you highlight the tile you want to turn. The reason it’s easy is because there is a border along the outer pieces, and every piece is a border piece, except the one in the middle.
So, just turn each piece until the border is where it needs to be, then you can turn the middle piece until you complete the puzzle. Pass over the area, then look off to the side to see a chest that contains a Rainbow Conch. On the northern end of the area, after doing a tiny bit of climbing, will be the Vial of Time, the item you were sent to get. Make your way back to Lake Docarria and use the portal on the one island to return to the alchemist. Resh’an, the Immortal Alchemist will now join your party! The next destination will be Mesa Island to the northeast.
No Comments