
You can get this quest from Phineas and/or Adjutant Akande

Both want you to skip the Hope to different locations - you choice determines your ultimate allegiance.
This quest can start a few different ways. If you completed The City and the Stars you’ll get the quest from Phineas, who wants you to skip the Hope to Terra 2. Getting this quest from Akande is a bit more complicated… mostly because the Board’s questline is more complicated. If you completed Signal Point in Space and left Reed Tobson in charge of a functional, powered Edgewater you’ll start Kept Secret But Not Forgotten afterwards, meanwhile if you reroute power to the Botanical Lab during Comes Now the Power or put Adelaide in charge of Edgewater, you’ll have to complete Foundation, first. If that’s not enough, if you didn’t start any of the Boards quests earlier (starting with Balance Due) Akande will contact you when you return to the Unreliable after completing The City and the Stars and offer you the quest Long Distance, after which you’ll start Kept Secret But Not Forgotten or Foundation depending on your choices as mentioned earlier… assuming, of course, you bother working with Akande at all in this last stage of the game.
Rerouting the Power
However you got to this point, travel to the Hope and disembark the Unreliable. Numerous skills will be useful here, including Science, Engineering, Lockpick and the entire Dialog tree… the usual suspects. That being the case, Parvati, SAM and Vicar Max all make for good companions for this part of the game, assuming you want to get by without resorting to violence.
While this quest is very similar if you have the Board version or Phineas version (if you have both, it essentially functions identically to the Board version), there are some differences to be aware of, which will be pointed out as we go. The first step is universal, however: cross a ramp to the west, travel north, then turn east to find a terminal on the southern end of some large piece of machinery. Interact with the terminal and pick the option [Patch] to reroute power from the Unreliable to the Hope.
Don’t neglect to read the [Logs] options on this and other terminals on the Hope, either. They’ll provide some interesting backstory for what happened to the Hope and her crew, those stalwarts who braved years relative isolation on a colony ship to get the colonists to Halcyon… fashionably late, of course.
Of Quincy and Cartridges
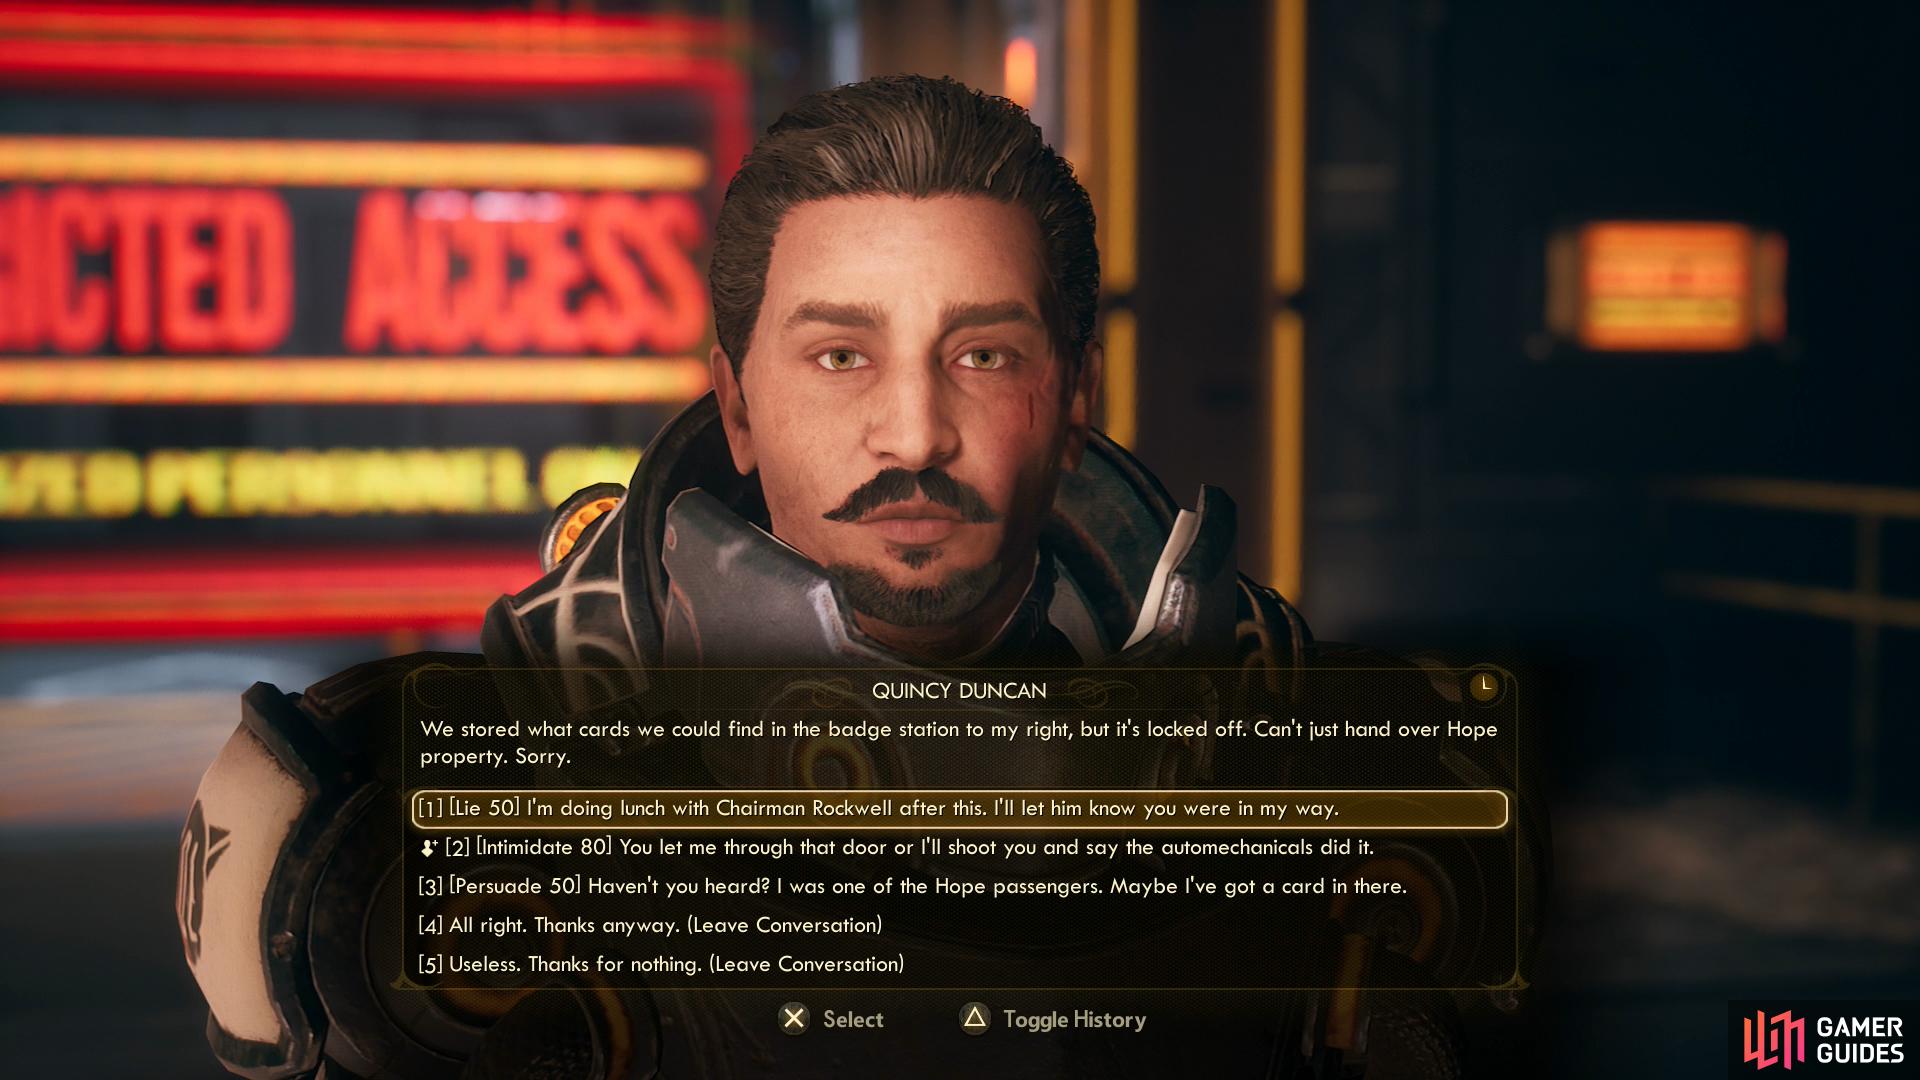
When that task is done, head around the machinery to the north and go up some stairs to find Quincy Duncan. If you’re working for Akande (regardless of whether you’re also working for Phineas) he’ll greet you and tell you that the automechanicals on the ship don’t recognize them, for whatever reason. Simply put, your on your own, and the jerk won’t even let you “borrow” a Hope ID cartridge despite the fact that they themselves tried to abuse these phony IDs, by his own admission. Pass a [Lie 50], [Intimidate 80] or [Persuade 50] check and he’ll change his mind, opening a door to the west.
If you’re not working for Akande (this essentially requires you to have skipped every Board quest in the game) Quincy will be considerably more hostile. You can convince him that you were sent here by the Board with an [Engineering 50] and [Lie 50] check or with a [Science 50] and [Lie 50] check. If you opt for the [Lie 80] check instead, he’ll wisely call bullshit, forcing you to pass either a subsequent [Lie 100], [Intimidate 80] or [Persuade 80] check. If you manage to succeed at any of these checks he’ll tell you to get some uniforms from the nearby “old badge station” to the west.
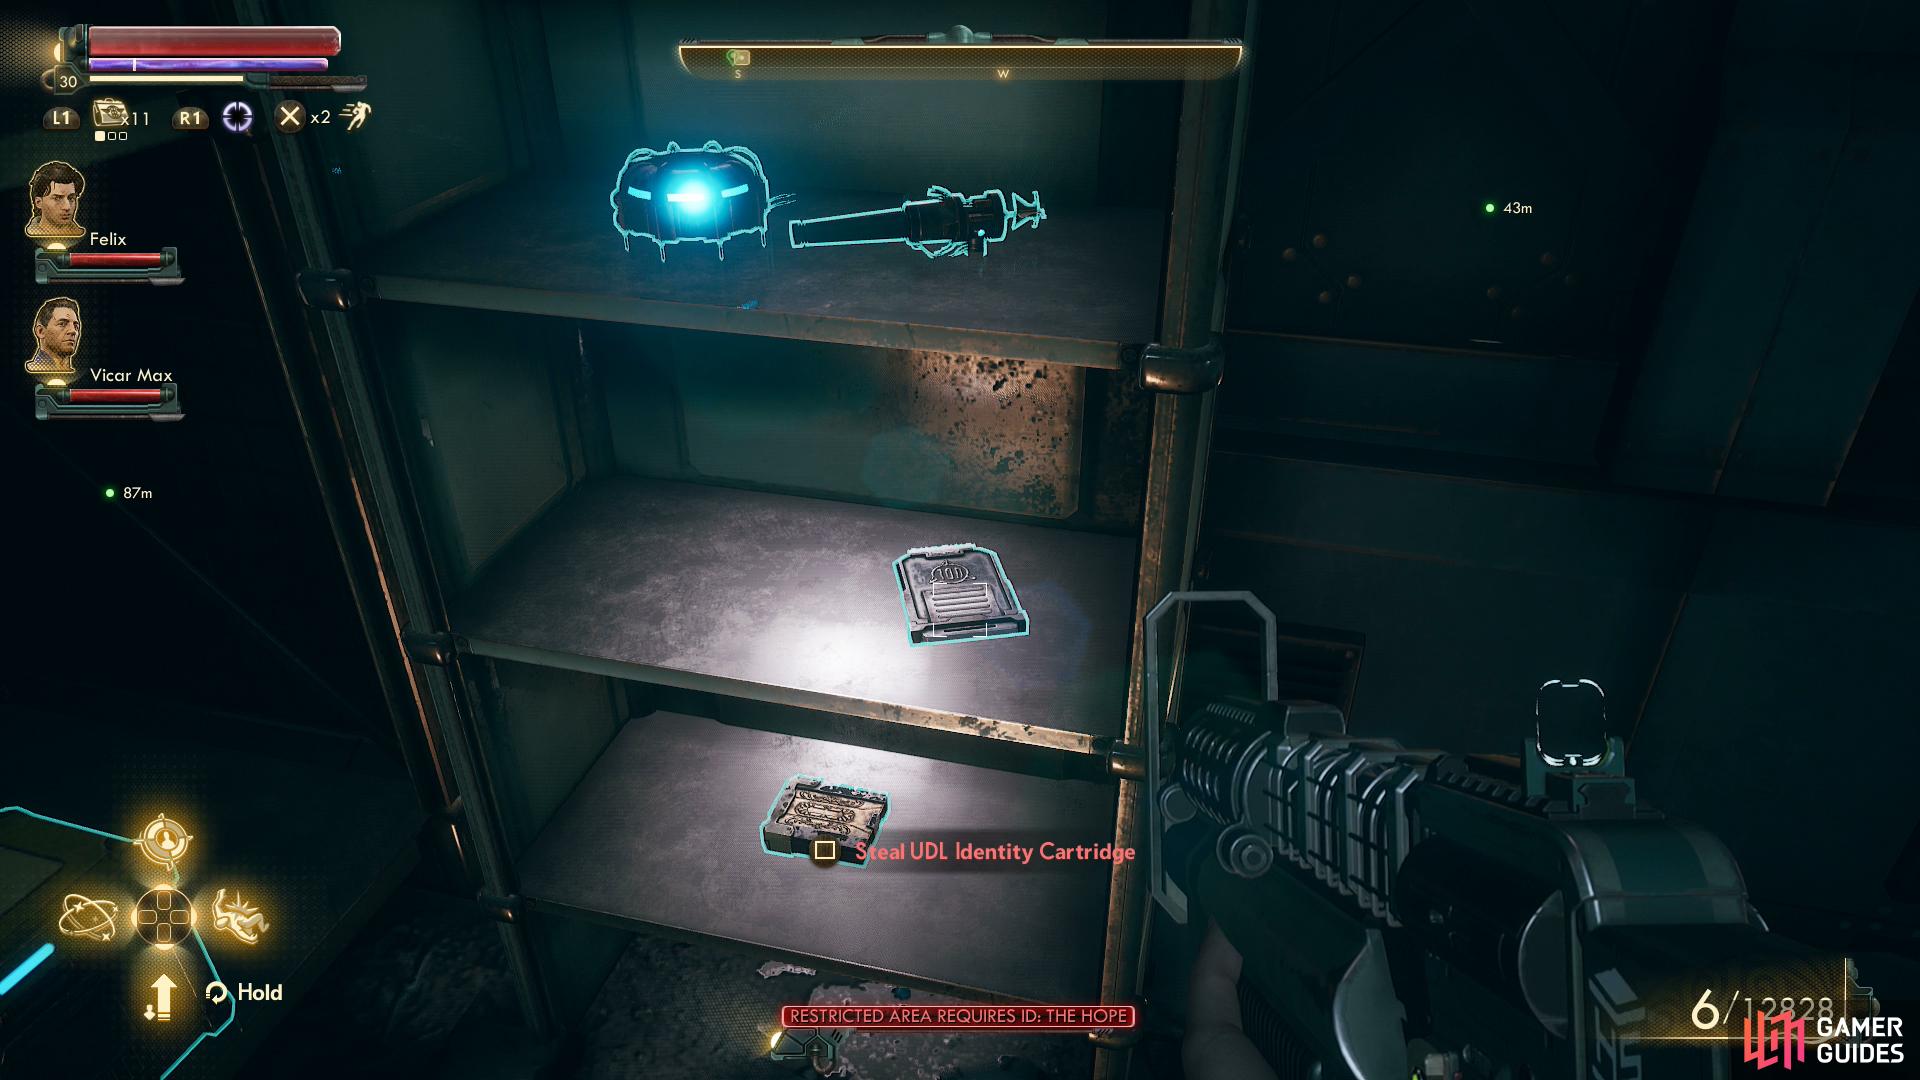
The benefit of talking your way past Quincy essentially boils down to access to the badge station to the west, wherein you’ll find a UDL Identity Cartridge on a shelf. Failing that, you can just work your way around to the western end of the badge office and pick a locked door [Lockpick 50] to get in here.
The significance of this UDL ID Cartridge varies based on what version of the quest you have. If you’re working with Akande in any capacity this UDL ID Cartridge is very useful, as the automechanicals are hostile to the corporate goons here, but for reasons that don’t apply to you thanks to Phineas’ Holographic Shroud. Your UDL ID Cartridges from Byzantium will not help you out here, but this new one on the Hope will, giving you cover from the automechanicals as you explore the restricted areas of the Hope. The robots will function similarly to any other guard, posing you questions if they catch you while your cover is down.
On the other hand if you’re not working with Akande, the automechanicals will not be hostile to the corporate troopers here, as evidenced by man and machine mingling beyond the restricted zone to the north of Quincy. In this case any of the numerous UDL ID Cartridges you found on Byzantium will work well enough to provide you cover here on the Hope. That being said, if you’re not working with Akande, you completed The City and the Stars and you definitely already have a UDL ID Cartridge, making this one - and basically the entire conversation with Quincy - redundant.
If you weren’t able to accomplish all you might have wished to with Quincy, don’t worry - you still have some options left. West of Quincy is the “old badge station”, and along the southern edge of this building, between two flights of stairs, is a ladder. Climb the ladder, head up some ramps, drop down a ledge to the north, then ascend another ramp to the north. If this seems familiar… well, it is. You moved through an area very similar on the Groundbreaker. Sister ships, indeed. Head east, north, then west to reach the northern end of a hole and note a door to the west. Ignore it for now and turn north to find a terminal.

Hack a terminal and you’ll get different options based on your route.
In either case, shutting down the Hope’s automechanicals is a fine choice.
This terminal has different functions depending on what version of the quest you’re on. If you’re working for Akande in any capacity you can pick the option [Hack 81] [Power Down Sentries] which will cause all the sentries in the large chamber below you and to the north to head to their designated bays and shut down. This won’t take care of every automechanical on the Hope, but it’ll come damn near it. Enough so that you can free explore almost anywhere on the Hope without a worry, and if you also have a proper UDL ID Cartridge… well, this quest just turned into little more than walking. Alternatively you can pick the [Hack 51] [Modify Hope Crew Roster] to give yourself a shiny new UDL ID Cartridge, which will give you cover against the automechanicals on the Hope.
Should you not be working with Akande, you’ll still get the option to [Hack 81] [Power Down Sentries], but this time around they’re only half of the problem, as the corporate troopers in your way obviously won’t be affected. You can try to pick the option [Hack 81] [Set Targeting Systems to UDL Employees], and while it doesn’t seem like much changes, it’s mostly because the troopers and automechanicals nearby just aren’t close enough. It will cause some infighting later on, which you won’t witness first hand, and the effects are… marginal, to say the least. If you plan to fight, you’re certainly better off just putting the bots to sleep.
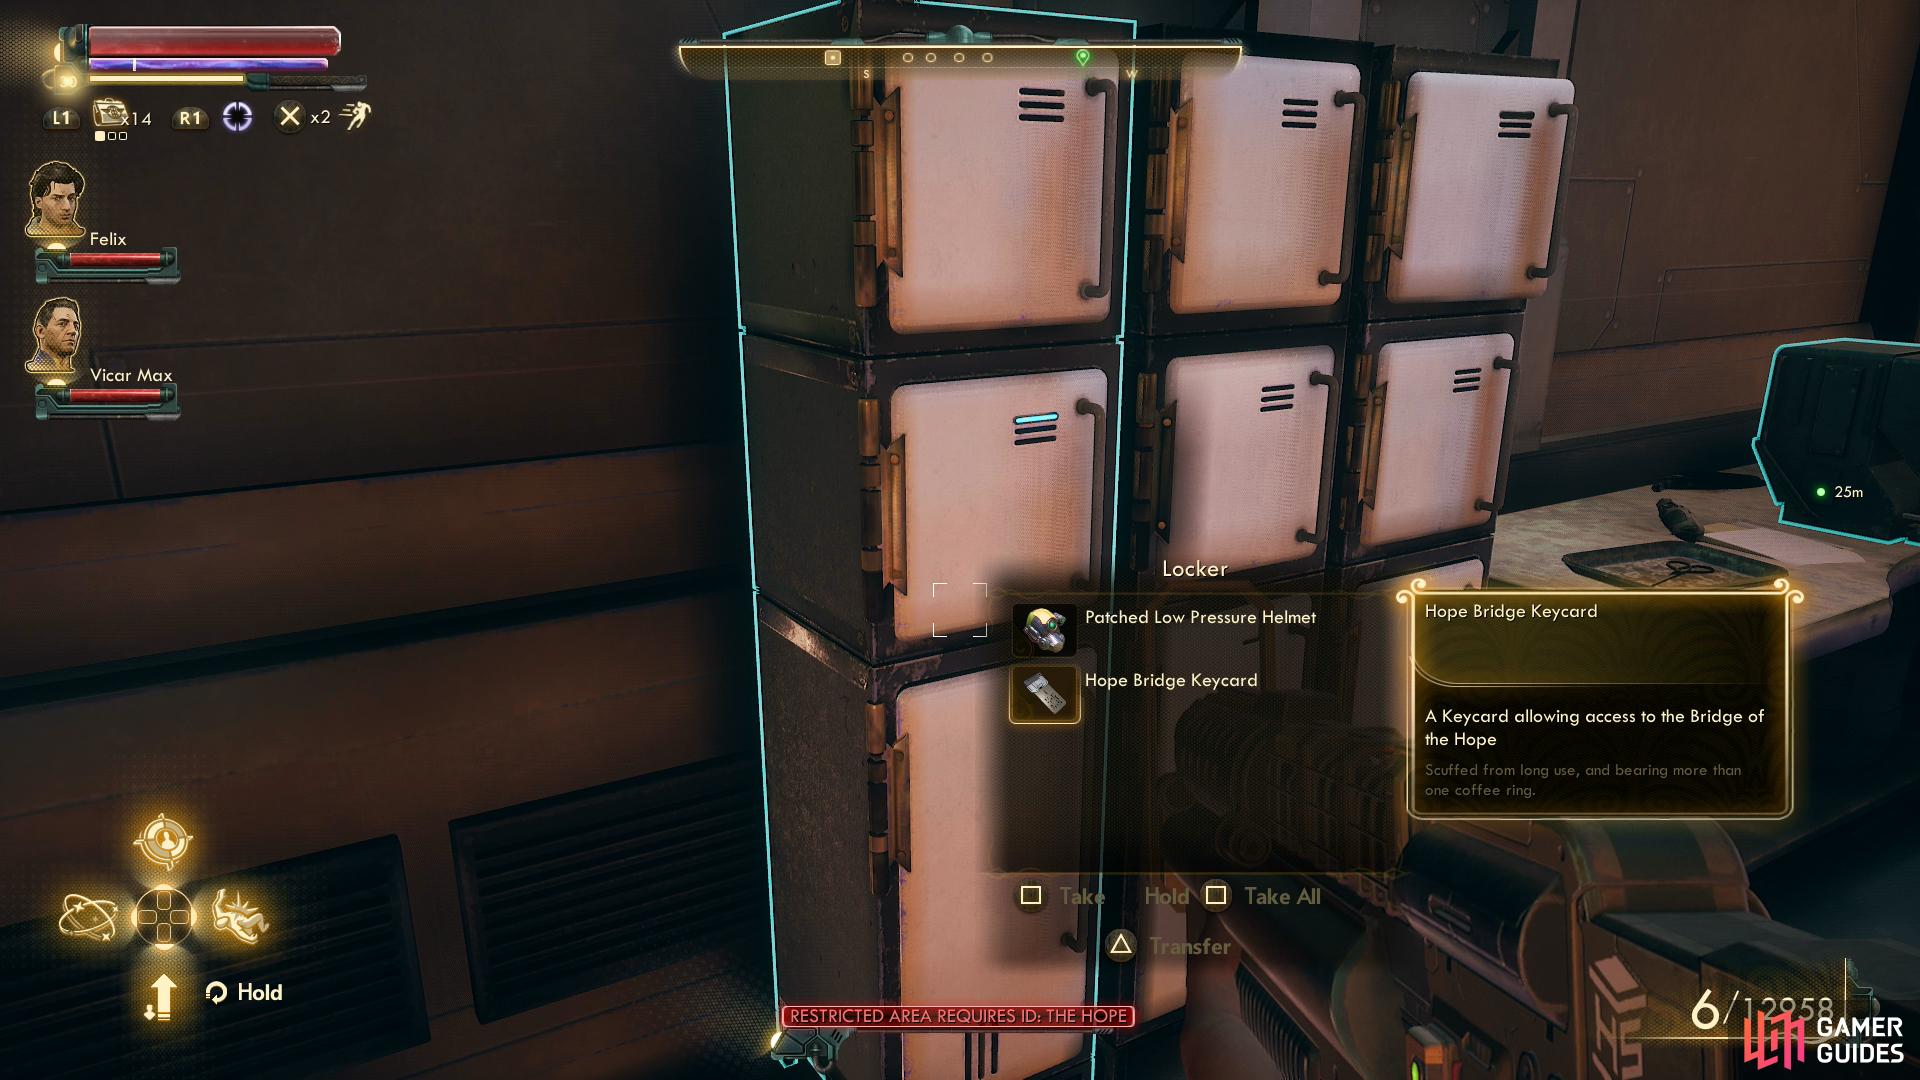
You can find a Hope Bridge Keycard in a locker
and another Hope UDL ID Cartridge on a shelf.
Killing, Keycards and Cartridges
Now that Quincy and the terminal have been discussed, hopefully you have a UDL ID Cartridge that works on the Hope (this should be guaranteed if you’re not working for Akande) and with luck you’ll have shut down some of the automechanicals. If not, never fear… there are, of course, options.
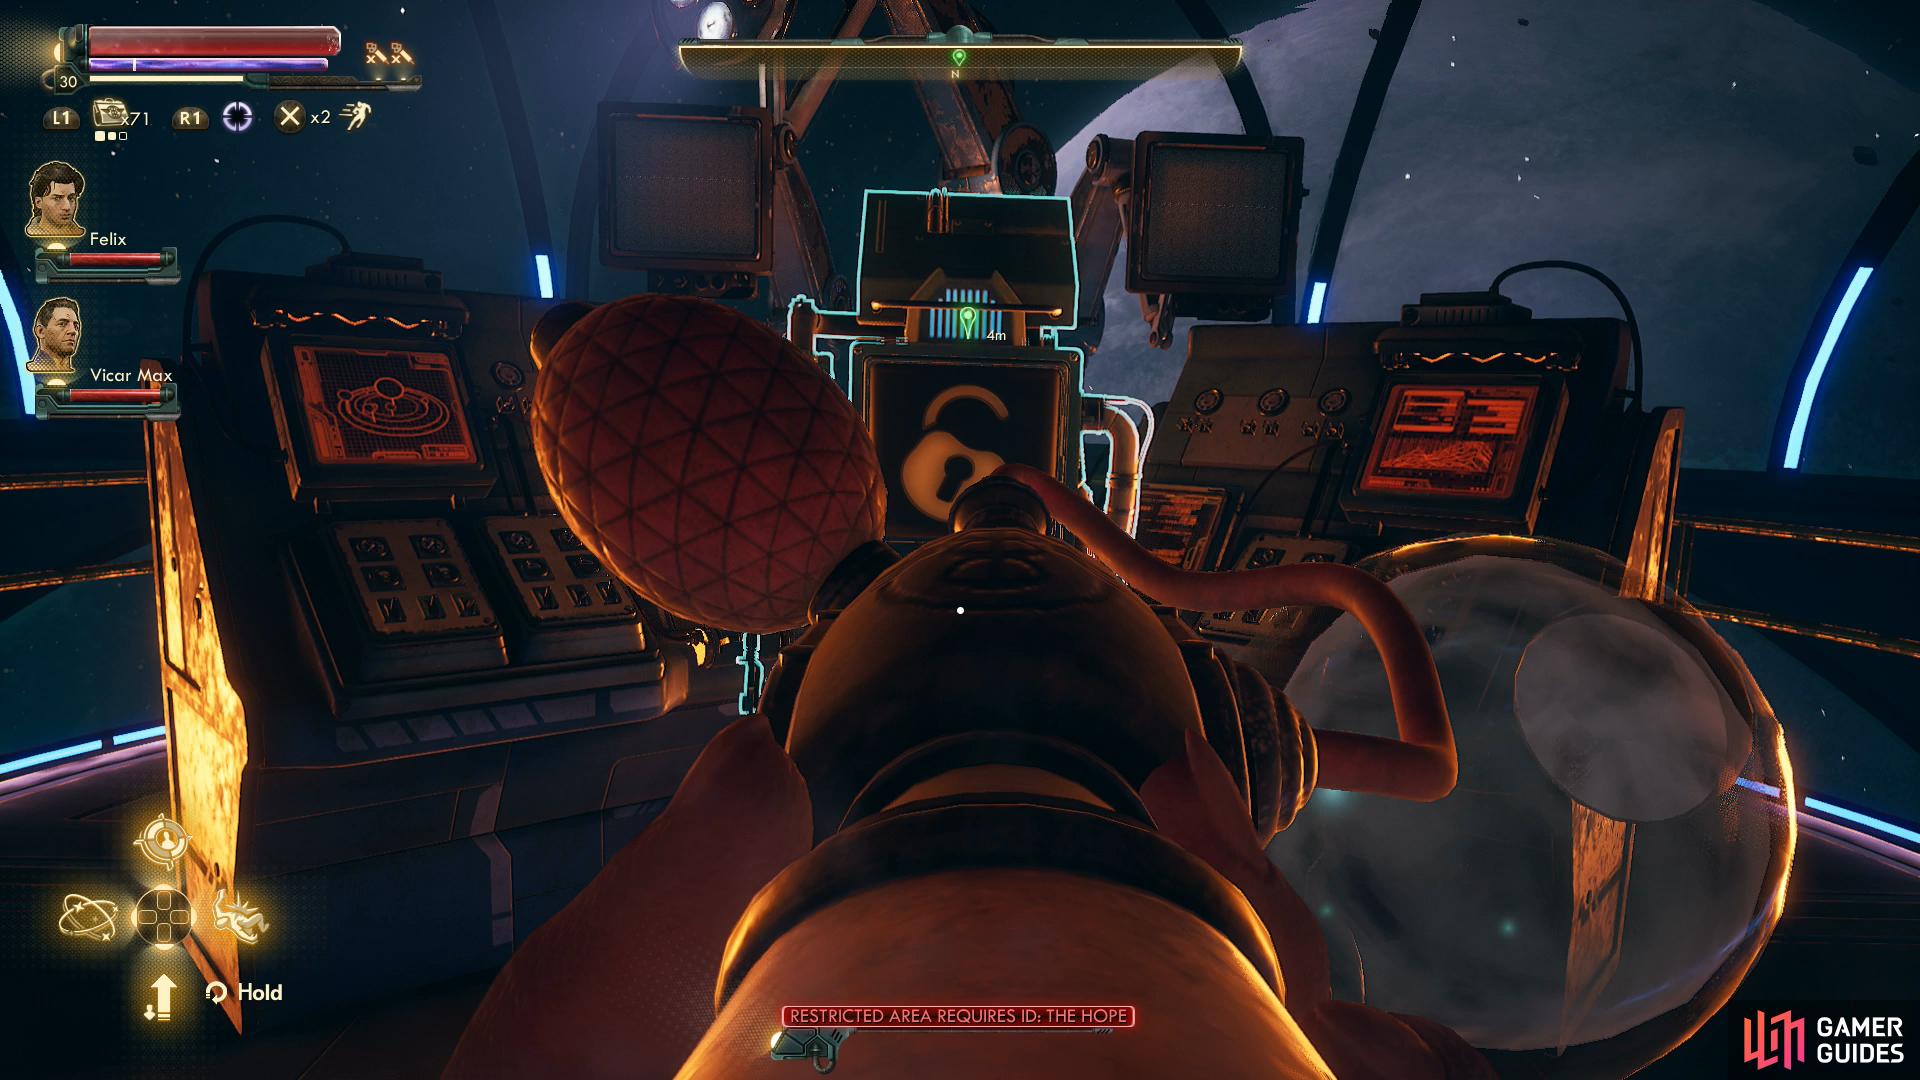
From the terminal just mentioned you can head west through a door and down some glowing red stairs to reach a small room which you can loot for some food items. To the east is a door that will take you out into the large area north of where Quincy stands. This is a restricted area, but if you have a UDL ID Cartridge you should be fine, or failing that, stealth will work - you won’t be going far.
Head through a doorway to the east, then down a walkway to the north and enter the room to your left (west), inside of which you’ll find a terminal with some… uh… interesting entries you can read. Search a nearby locker to find a Hope Bridge Keycard which will allow you to bypass an upcoming lock [Lockpick 50]. Speaking of which, there’s a door to the west that’s locked [Lockpick 75], and the keycard won’t help you a bit with this one, but if you can get through it, you can head down a chute to the north and bypass most of the enemies on this level of the ship.
If you’re more adventurous, leave the room with the sexy terminal and sneak your way across the walkway outside to the east - just be wary of one roving combat drone, assuming you haven’t put them all to sleep yet. Inside the room on the eastern end of the Hope you’ll find bins to loot, a terminal to read, and most importantly of all, another UDL ID Cartridge on a shelf in the southwestern corner of the room. The terminal is particularly interesting, as it discusses the Hope’s malfunctions and the consequences for the voyage crew.
Obviously you don’t need to go this way, you can try to sneak through the large area by just heading north from Quincy. If you already have one of the correct UDL ID Cartridges (remember, if you’re not working with Akande, the ones from Byzantium will work, if you are working with Akande you’ll need to get one of the two mentioned thus far on the Hope) you’ll be able to just walk past all your foes. Head past the ramps and turn left (west) to reach a doorway through which there are no enemies.
If you sneaked through via the door near the terminal, either go past the locked door in the room where you found the Hope Bridge Keycard (if you can pick this lock there’s no reason you shouldn’t also have a UDL ID Keycard…) and descend down the chute to find yourself near this door, or just head down the ramp from the room where you found the Hope Bridge Key and turn left (west) - it shouldn’t be too hard to avoid the automechanicals even if they are awake.
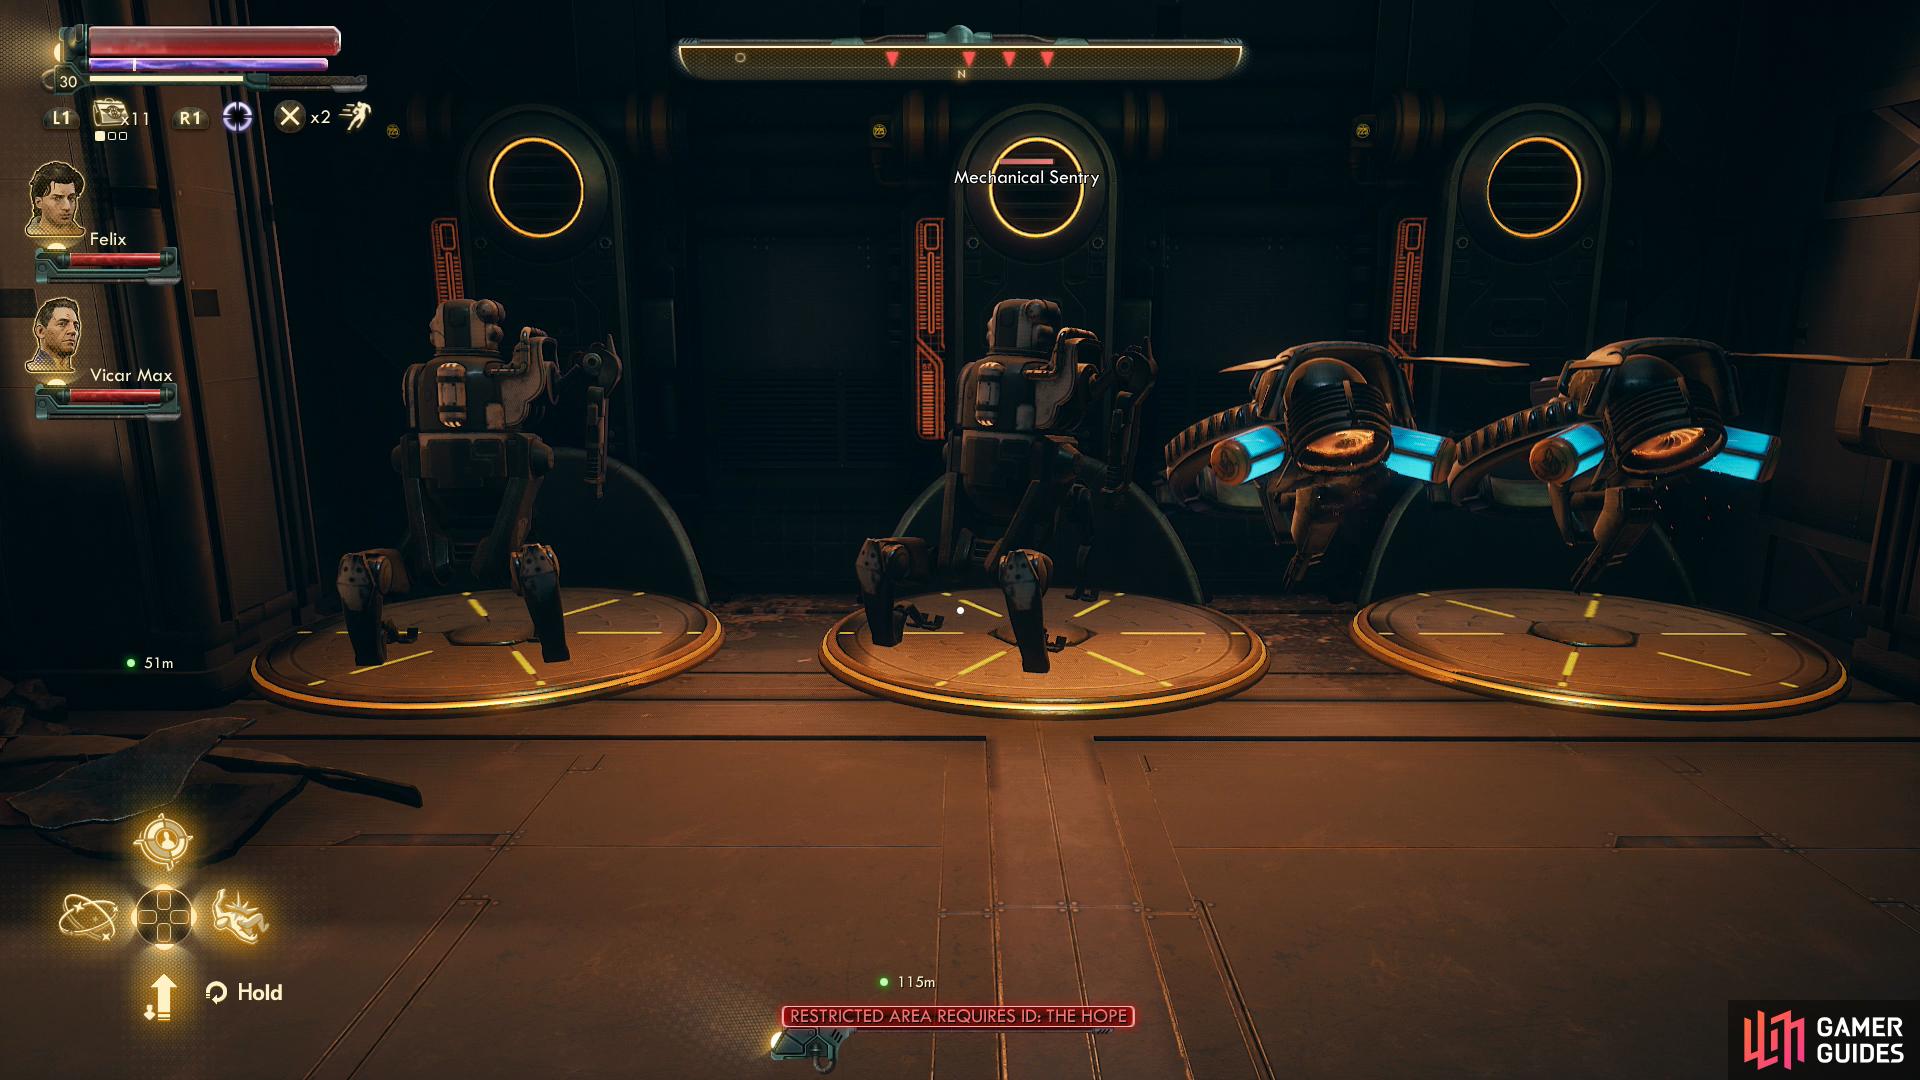
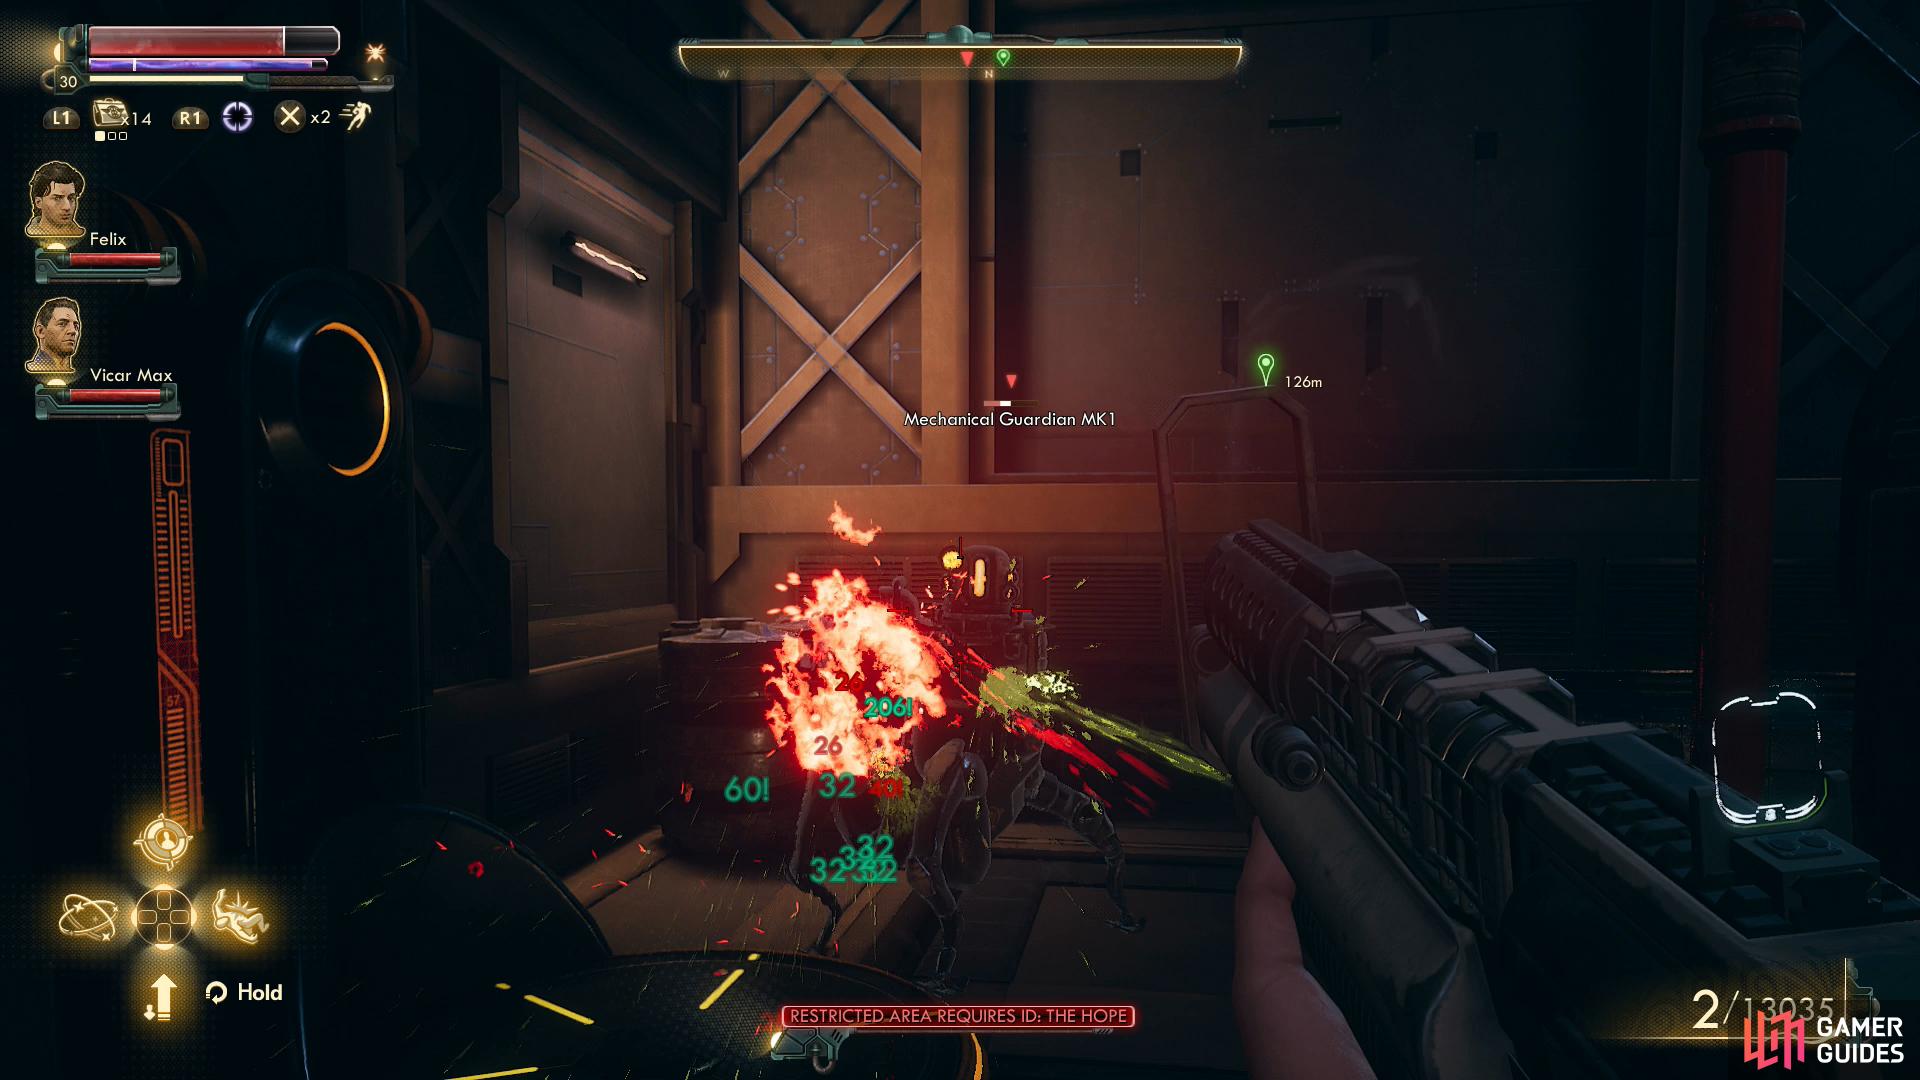
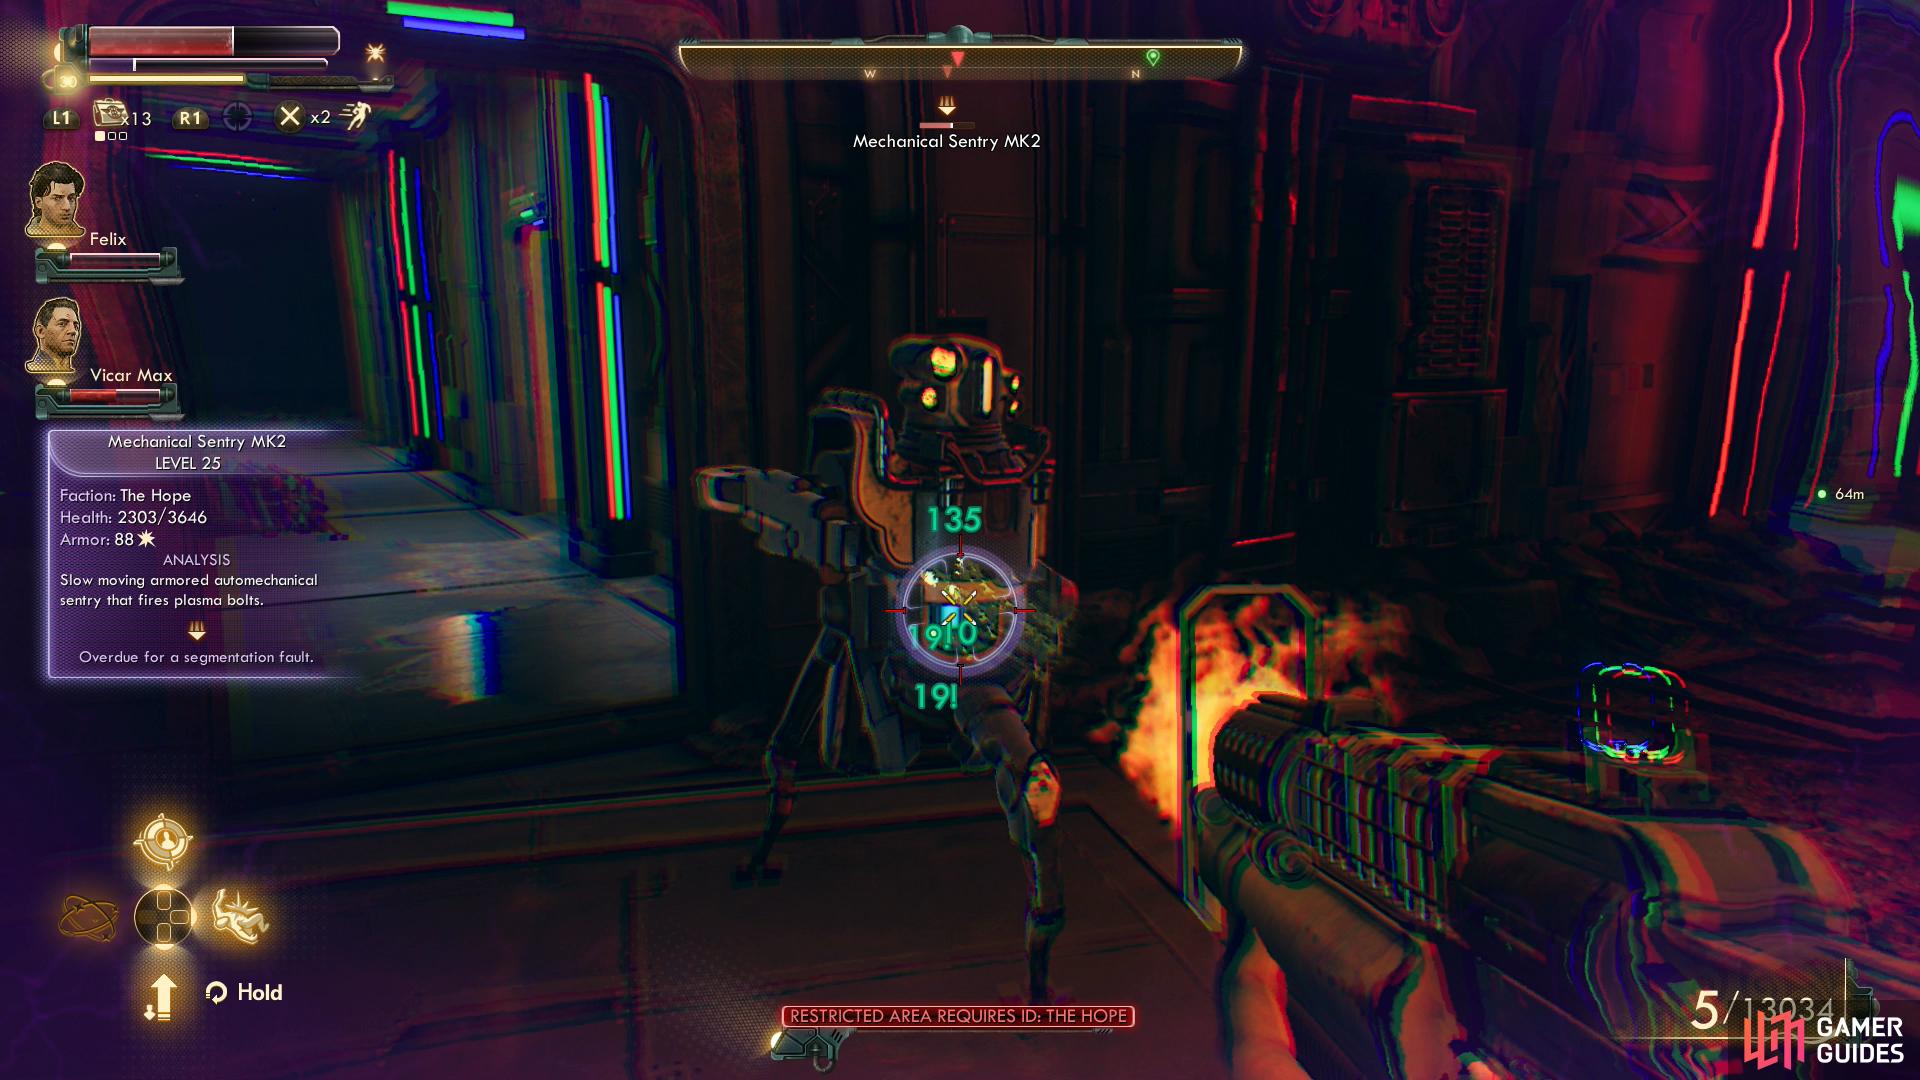
Then, of course, there’s the option of violence. While the corporate troopers and automechanicals should both be around Lv.25, they’re not really equally threatening. The corporate troopers tend to have only decent armor and HP and are armed with plasma weaponry, but the automechanicals - especially the Mechanical Guardians MK2 - will boast nearly 90 armor and over 3,000 HP, likely putting them roughly on par with your companions. Shock and corrosive damage work fine, but you really don’t want to be fighting more than a few of these at a time, especially on Hard difficulty.
Combat is definitely not the preferred option, then, nor is it required… especially not when Felix and Parvati can account for up to 41 Lockpick (+82 if you have Inspiration 60+) and Vicar Max and SAM can account for up to 40 Hack (+80 with Inspiration 60+), not to mention boosts to both that can be gained from wearing Stealth-boosting gear (easily another +5 points, or +10 if you have the Armor Master perk).
(1 of 3) Sneak your way past, or fight your way through, some automechanicals in the room with the comms terminal.
Rerouting Communications
Sneak, fight or, if you have a UDL ID Cartridge and/or powered down the automechanicals, simply waltz your way through the large room north of Quincy, then through a doorway to the left (west). Continue west and you’ll find a terminal with some more logs on it, which details your own resurrection and some of Phineas’ comments.
More interesting are the doors to the north and south, and although you’ll need to go south before you can achieve your goals on the Hope, going north first may be advised, as through that door you’re no longer in a restricted zone, which will of course allow your Holographic Shroud to recharge. You can get through the northern door via a [Lockpick 50] check or by simply using the Hope Bridge Key.
Go through the door, replenish your cover, the head through the door to the south. Here you’ll find two machines, who may be powered down depending on your actions earlier. If not, you may want to resort to stealth (or the cover of the Holographic Shroud), as fighting here may alert the automechanicals in the larger room to the east. Anyways, search a table on the eastern end of the room to find another Hope Bridge Keycard near another terminal full of interesting logs. How brave of Mr. Nolda to forego his rations for the good of others…
Anywho, search a corpse along the southeastern corner of the room to find yet another Hope Bridge Keycard, then use the terminal along the southern end of the room and pick the option [Reroute Communications Through the Unreliable]. Now you get to hear ADA yammering in your ear. Yay. You can also check out some [Logs] to read about some of Phineas’ work. Good thing you weren’t an early pick.
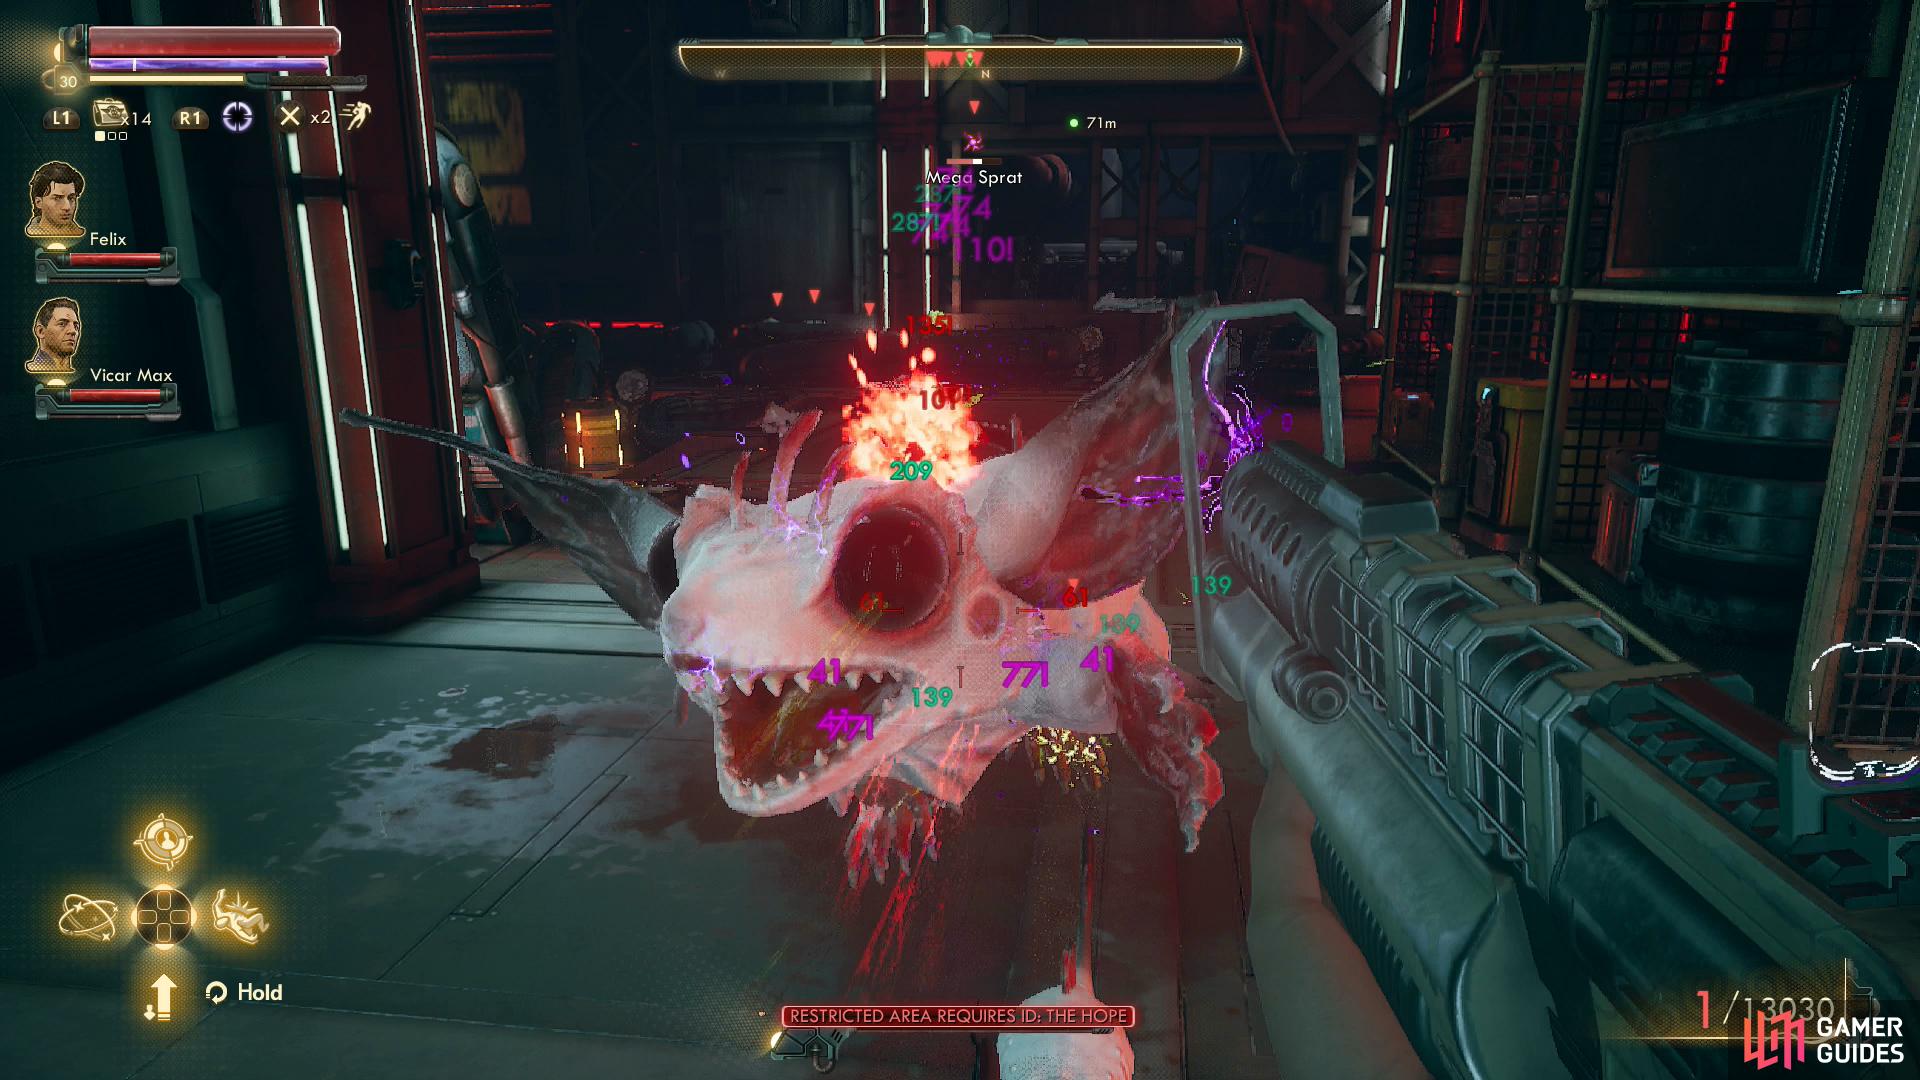
Kill a Megasprat and its minion sprats

then search some shelves for yet another UDL ID Cartridge.
Sprat Party
Leave the room with the comms terminal and head north through the locked door mentioned earlier. To your right (east) you should spot an elevator leading down, which is where you’ll need to ultimately go, but first… continue north to find another locked door [Lockpick 50]. If you can get through you’ll find a nest of sprats, including a rare Mega Sprat. Kill them, then loot some nearby shelves to the east to find yet another UDL ID Cartridge. Other than that you can find bins to loot and a numerous empty stasis pods, along with two datapads, one which mentions a “civil war” on board the Hope and another that describes the degeneration of extended cryostasis that has plagued Phineas for so long. Why that would affect the food supply for the Hope’s crew is… unsettling.
Return back through the door to the south, then ride up the elevator.
(1 of 3) If you lack a UDL ID Cartridge and fail at sneaking, you may have to fight some potent automechanicals outside the bridge.
To the Bridge
When the elevator stops, turn west and immediately ahead of you there should be some automechanical bays, which are hopefully either empty or filled with powered down robots. If you reset the targeting parameters earlier, these robots should have attacked the corporate troopers in the room to the north (non-Akande path only) while otherwise automechanicals will be guarding the aforementioned room to the north (any Akande-aligned version of this quest). Either way, there’s bound to be some opposition ahead, although whether it’s corporate troopers, automechanicals, both, or just one automechanical depends on what version of the quest you have and what actions you took earlier.
Either way, if you have a UDL ID Cartridge it’ll make getting past your opposition a simple matter, otherwise you’ll have to resort to combat or stealth. There are three ways to proceed, you can either head straight north through the large bay door to reach the bridge - the obvious choice if you’re not worried about foes, or you can attempt to reach the bridge via side rooms.
There are two doors to the left (west) and one to the right (east), the southern most of which on either side of the room lead to crew quarters. In the western crew quarters you’ll find a Perfecto box you can decorate the Hope with (northeastern quarters) and a terminal that details some of the crew’s descent into cannibalism (northwestern quarters).
In the eastern crew quarters you’ll find another terminal detailing the crew’s various reactions to cannibalism and the start of the “civil war” on board the Hope (northwestern quarters) while the northeaster quarters contains a passage to the north which will lead to the first mate’s room, which in turn leads to the bridge (north). This is probably the easiest way to sneak to the bridge, if you have to.
Finally, through the northern of the two western doors you’ll find the captain’s quarters, which also lead to the bridge.
Skipping the Hope
However you reached it, when you enter the bridge, search the area for some loot, then head down the long walkway to reach the bridge terminal.
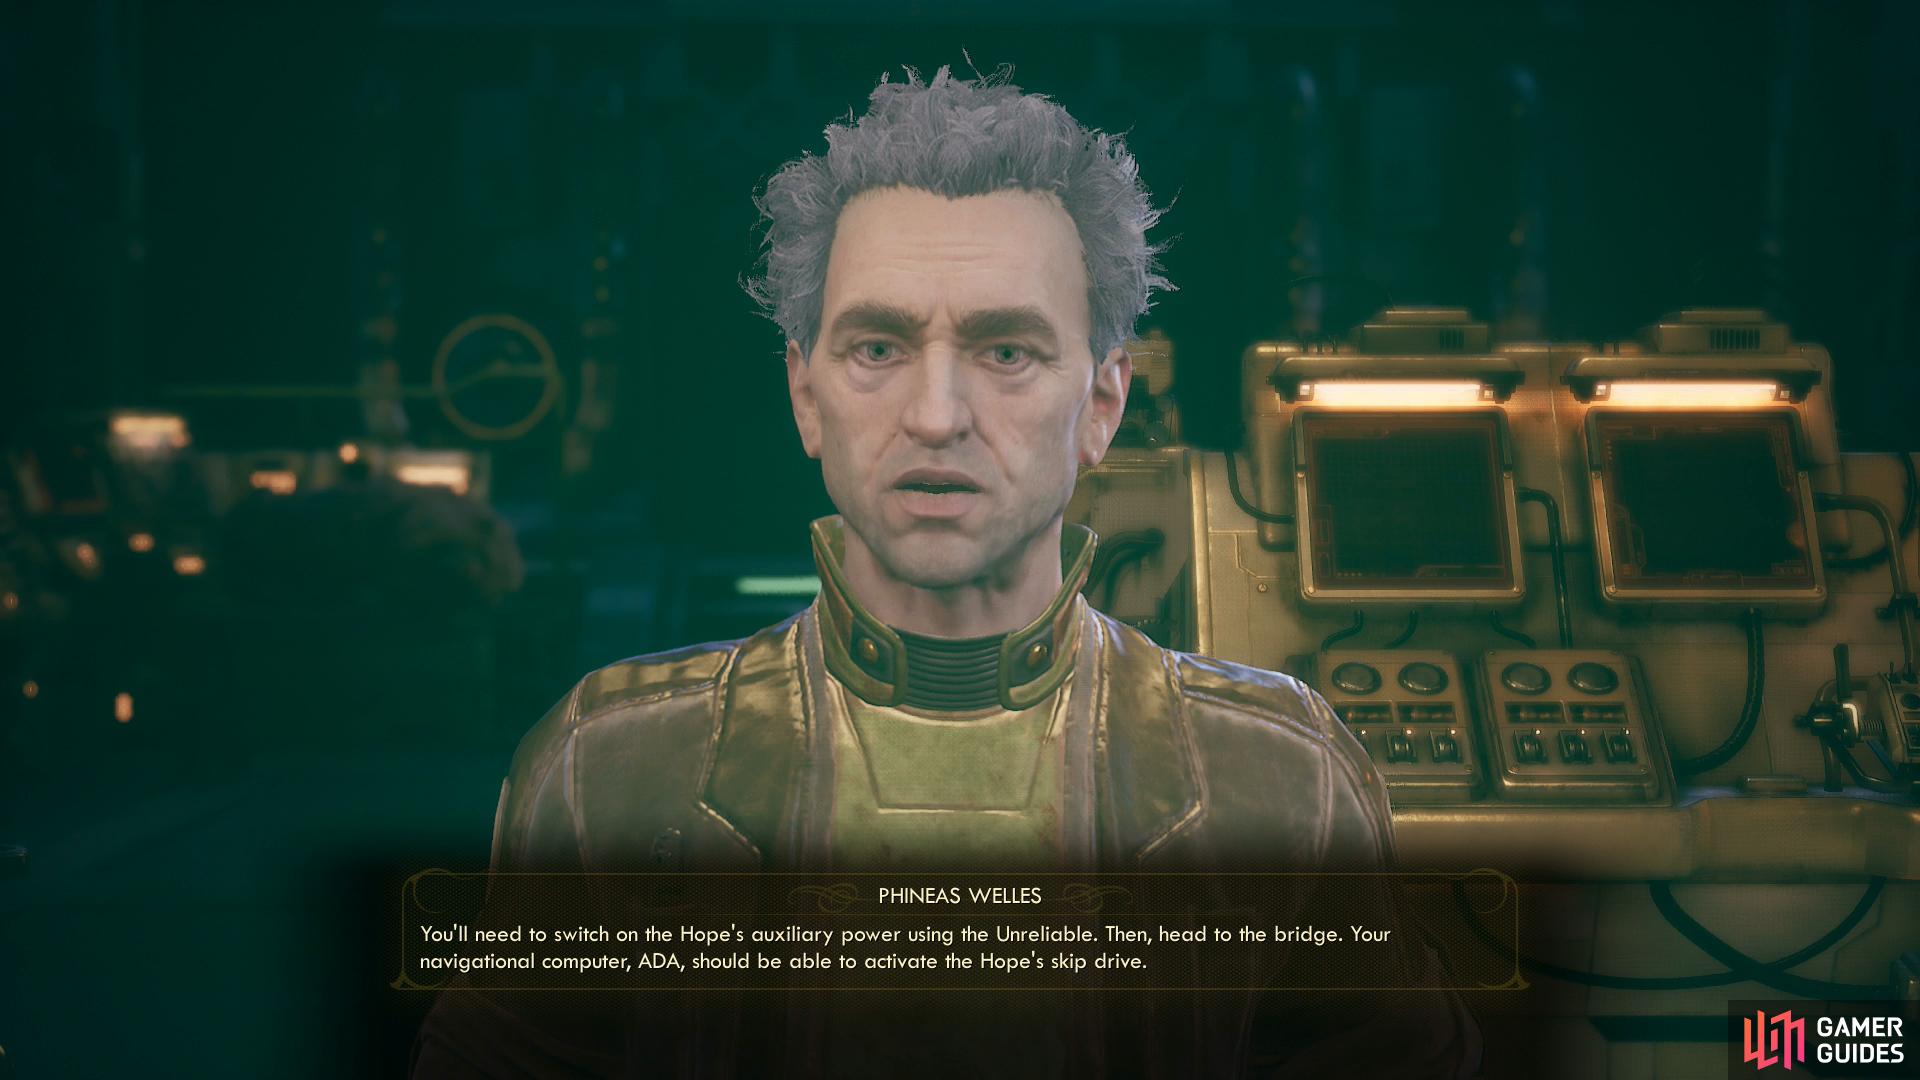
Interact with the terminal and pick the options [Comms] then [Patch ADA Through] to talk to ADA, after which you can ask her to refresh your memory on your options. When you’re ready to proceed, tell here where you want to skip the Hope - either to Terra 2 if you want to side with Phineas for the last quest, or to Tartarus if you want to side with Akande.
If you want to show off after you’ve set a destination, pick the option “I’m skipping it myself.”, then pass an [Intelligence] [Science 80] combined check to accomplish the feat. Otherwise, just let ADA do it - she’s more than competent enough.
On a more amusing note, if your Intelligence score is low enough (-1 or lower) to access [Dumb] options, you can bungle the skip in an epic fashion only marginally less than the Board has handled their management of Halcyon so far. Tell ADA you’re skipping the Hope yourself and pick the option [Dumb] Stand back, ADA. I know numbers real good.“ and… well, Phineas probably should have been more discerning about which of the Hope’s colonists he thawed. This will earn you the trophy/achievement “Sunburn”.
Should you be overburdened by Intelligence - never fear!… you can still manage this feat with the use of drugs. Equip some Adrena-Time in your inhaler and use it. Wait for the positive effects of the Adrena-Time to wear off (indicated by a syringe with a + symbol next to it near your health bar), after which you’ll suffer the withdrawals (indicated by a syringe with an x symbol next to it near your health bar), namely a -1 penalty to all your attributes… including Intelligence. You can do this repeatedly, just use a new dose of Adrena-Time when the positive effects end from the last dose. All told, you can stack three withdrawal effects, so all but the smartest characters should be able to drop their Intelligence low enough.

Skip the Hope to Tartarus
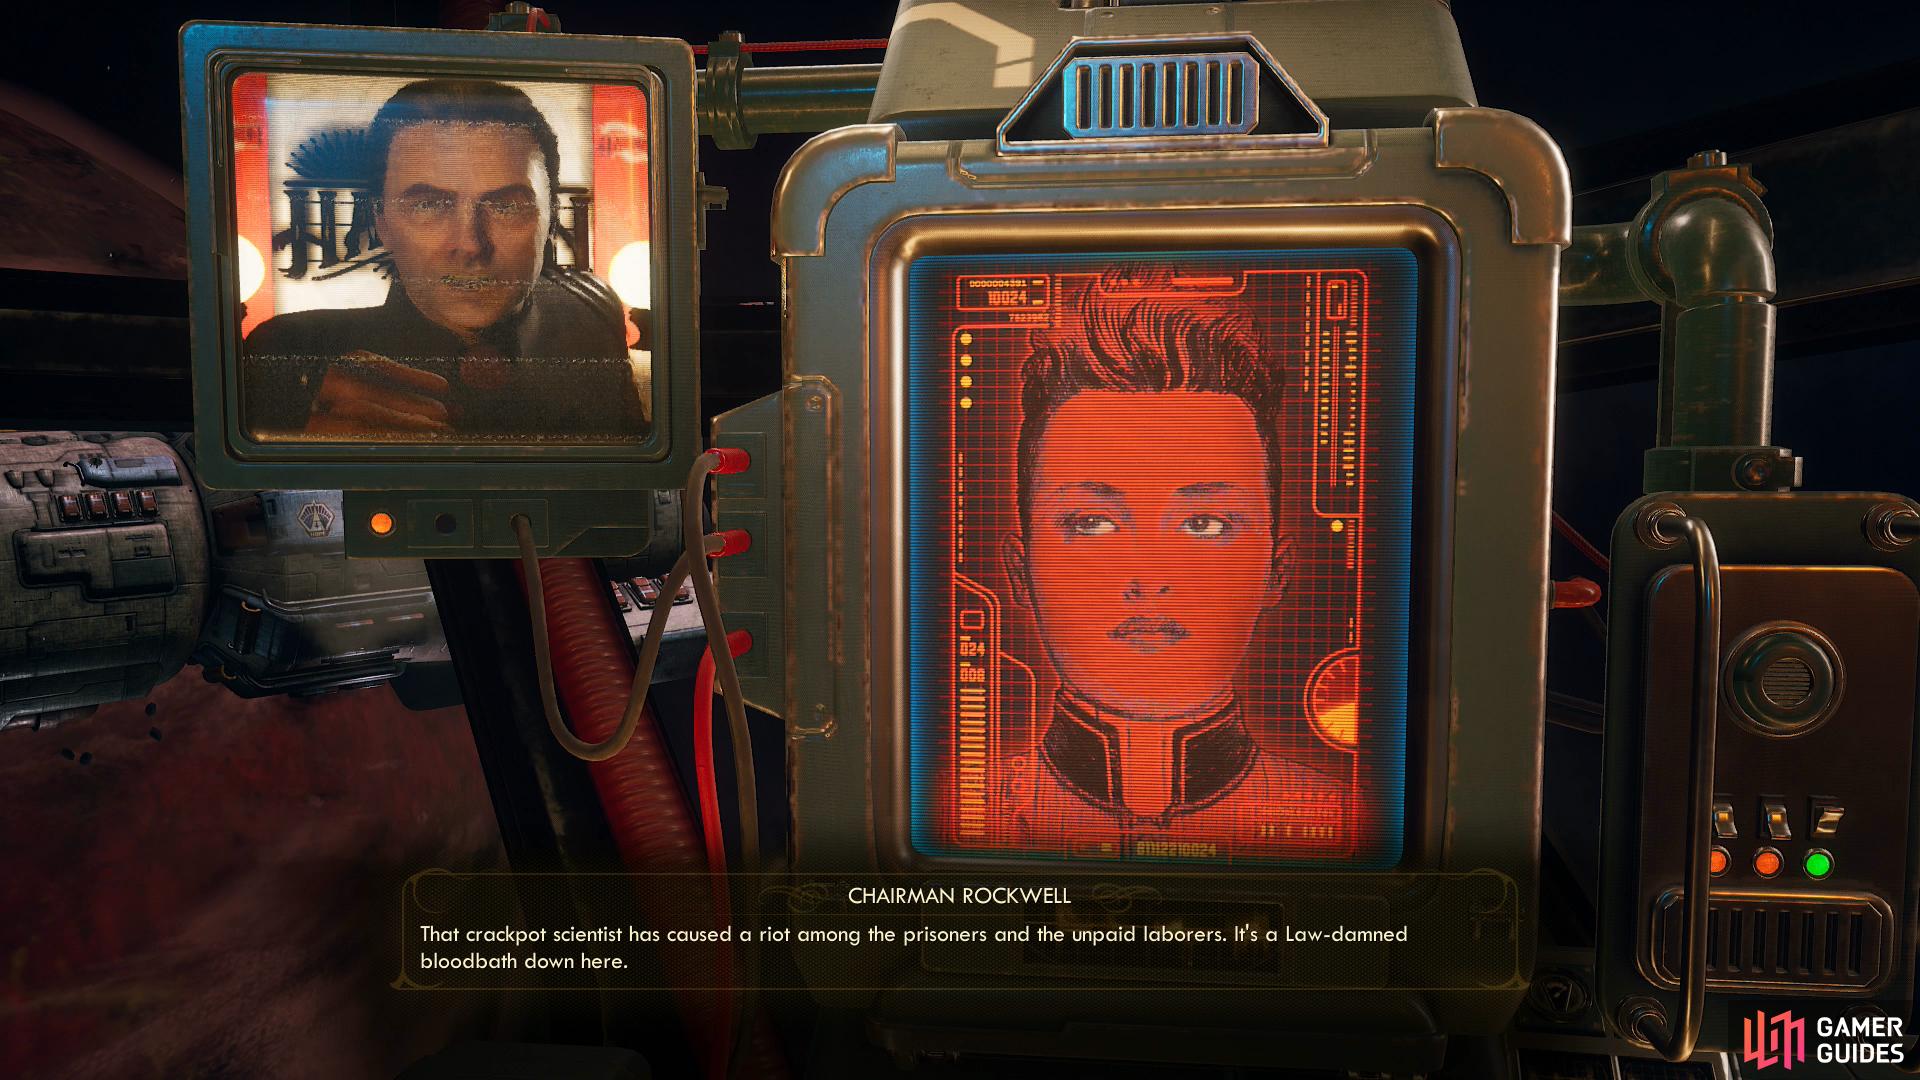
and you’ll be contacted by a panicking Chairman Rockwell.
Aftermath and Allegiances
If you skipped the Hope to Tartarus you’ll be told by ADA that you have a message waiting for you from Akande. Return to the Unreliable and enter the cockpit to find Chairman Rockwell’s face on your screen, instead. The bug you planted during Long Distance - whether bugged or not - finally allowed the Board to find Phineas, but as incompetent as ever, Phineas turned the tables on them, captured Sophia, and incited the prisoners on Tartarus to revolt.
Skip the Hope to Terra 2
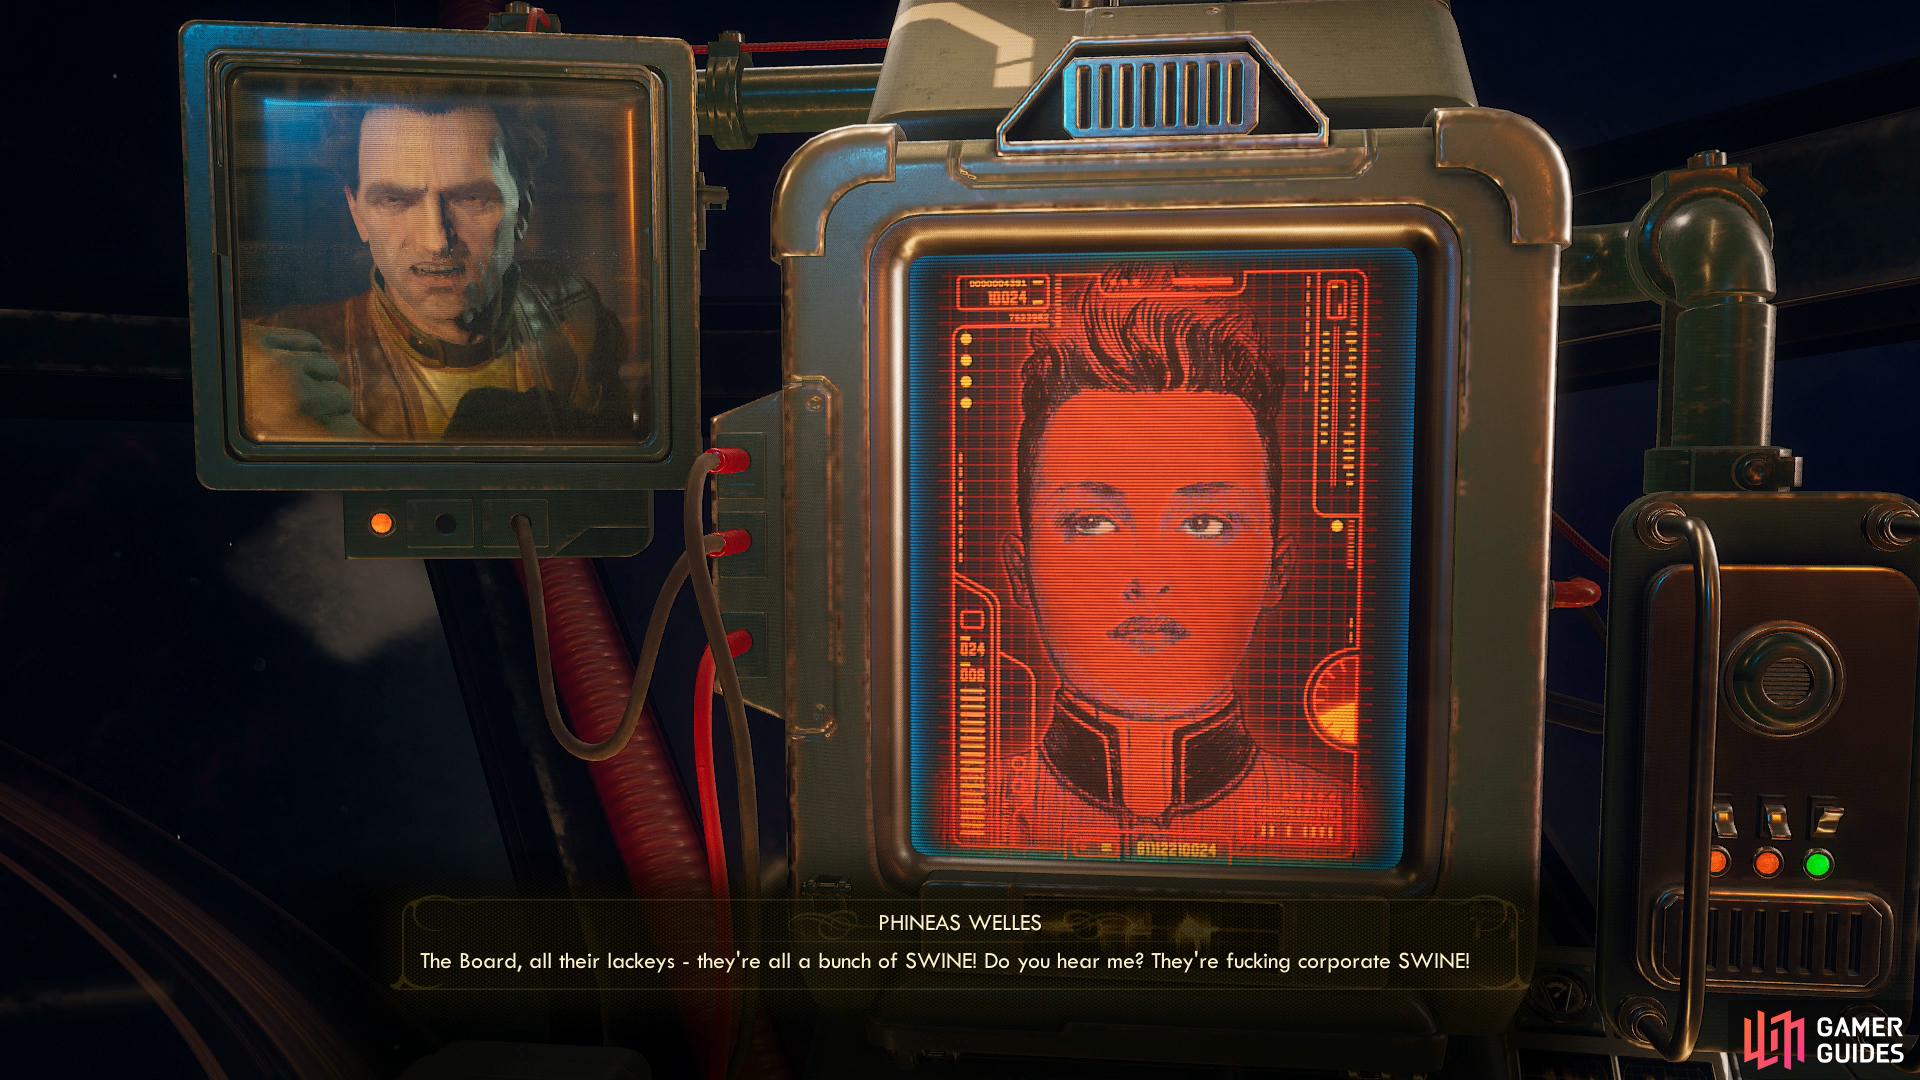
and you’ll receive a message from Phineas.
Alternatively, if you skipped the Hope to Terra 2, ADA will tell you contact Phineas, who is oddly unresponsive. Skipping the Hope to Terra 2 will result in a rather large amount of negative Board reputation… not that it matters much at this point. Return to the Unreliable and enter the cockpit to get a panicked message from Phineas. Apparently the Board found him (regardless of what you did during Long Distance) and… well, it doesn’t look good.
Travel to Phineas’ Lab, which you’ll find overrun with corporate troopers. Overrun in this case means there’s about four of them, but they’re fairly strong! Only took them thirty years to find Phineas… Anyways, you’ll need to fight through or corporate troopers, who can now be found outside of the sealed-off section of Phineas’ lab. The door is on the western end of the room, so you really only need to watch out for one patrolling trooper, as the rest have their backs to you and they can’t see you through the glass that protected Phineas, anyways.

Once in Phineas’ sanctum, check out a terminal to find that you’ll need a [Hack 90] check to gain access. If this isn’t possible, loot a cystypig on a table to find Phineas’ Terminal Passcode, which will get you through. However you manage it, read Phineas’ message on the terminal to find out that Phineas has been taken to Tartarus, and that he has a “care package” for you - just pick the option [Open Panel], go through two doors to the south and search the eastern wall to find the Tartarus Navkey. On the table below you’ll also find the unique light assault rifle Phin’s Phorce, which fires three-round bursts of n-ray energy.
If you haven’t already, consider reading the logs on Phineas’ terminal to reveal Phineas’ motivations. Seems that he embarked on his life’s work partially out of ego - to prove he could revive the Hope’s colonists, but the benevolent idea that the colonists should be revived always seemed present, and probably only grew as Phineas’ body count did. You can justify a thousand failures if you can save a hundred thousand lives. Not much difference between Phineas and the cannibals on the Hope, in that regard, it’s just a matter of scale. One can only guess at some point Phineas found out just how incompetent the Board was and decided the Hope’s colonists must be revived if Halcyon were to be saved. A mixed character, to be sure, but there’s no going back now - all your work will have been for naught if you don’t recover Phineas. He’s the only person who can save the Hope’s colonists now. Return to the Unreliable.
Regardless of which route you took, you’ll have a chat with your crew and ADA will tell you to take care of any unfinished business. You made your allegiance clear on the Hope, but traveling to Tartarus is the point of no return for the entire game - once you go there, you’re not coming back. So begins the final quest, Brave New World.
No Comments