
| Quest Information | . |
|---|---|
| Location: | Groundbreaker |
| How to Start: | Complete the quest “Salvager in the Sky” |
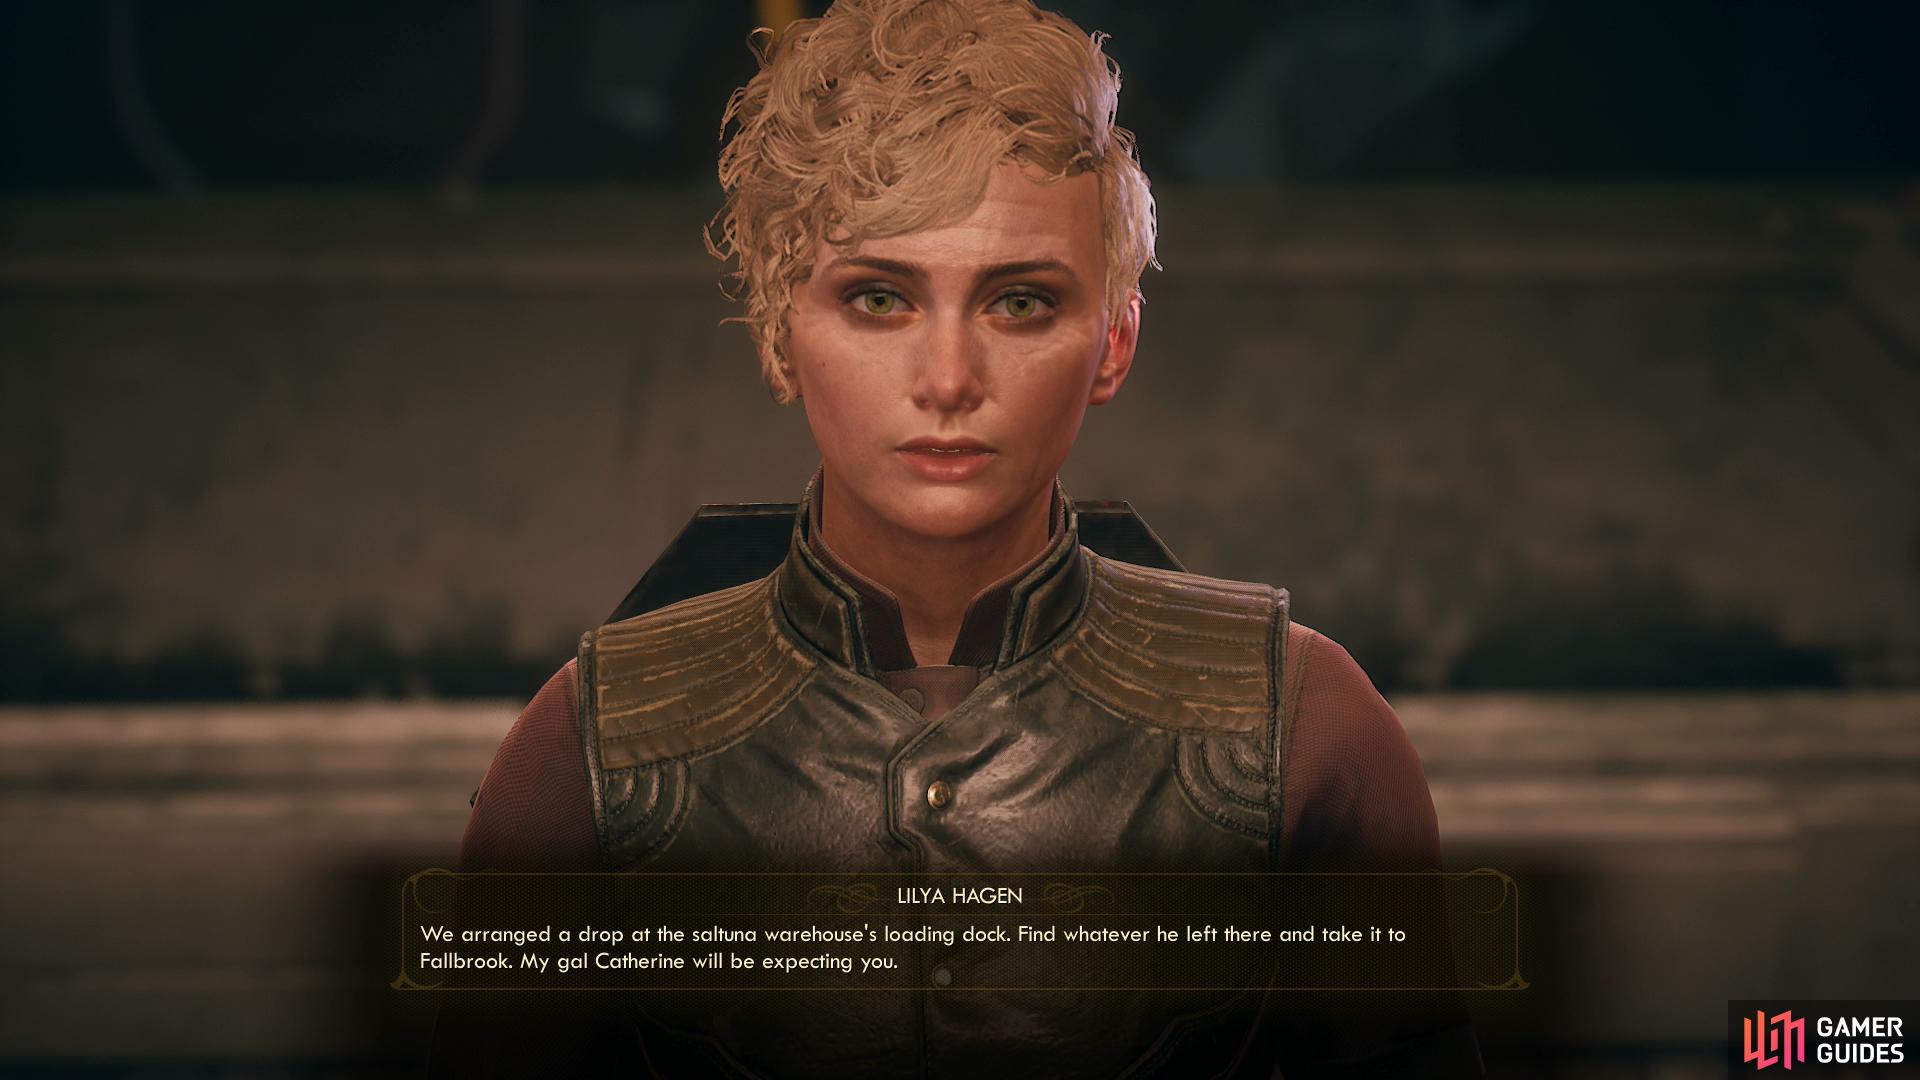
To start this quest you’ll need to complete Salvager in the Sky, which mostly involves acquiring a Stellar Bay Navkey and talking to Lilya Hagen in the SubLight office on Groundbreaker. You can, of course, acquire a Stellar Bay Navkey by purchasing one off Gladys on Groundbreaker, or by working for the Board and completing the quest Long Distance. However you obtain it, all you need to do is talk to Lilya Hagen afterwards to end Salvager in the Sky and start this quest.
Chasing Vapor on Monarch
Travel to Monarch and land at the Stellar Bay Landing Pad, then exit the Unreliable and ride down to reach Stellar Bay. From the elevator head south to reach the Yacht Club, then turn west until you find the large bay door to the right (north) leading to the saltuna warehouse. Head north through the warehouse and exit through another large bay door to reach the fishery bay. Turn left (west) and search behind some crates to find the corpse of a SubLight Contractor, on which you’ll find a Bloody Note. Take the note, climb a ladder to the west, then loot a bin and pick up a SubLight ID Cartridge on the ground near said bin.
Now you’ll need to travel Fallbrook, which you can do by exiting out the southeastern gate, or by using the hatch near the SubLight contractor’s corpse. Once outside you’ll just need to cross the bridge to the southwest, follow the winding road south and east past Amber Heights to reach Fallbrook at the southeastern corner of Monarch. Along the way you’ll encounter raptidons, marauders, and perhaps the odd canid and/or mantid, most of which are around level 16, and easy enough to run past, if you don’t trust your combat prowess. That said, fighting is likely inevitable in this quest, and your foes later on aren’t going to be any weaker, so if you can’t combat these foes, you may want to level up doing other quests.
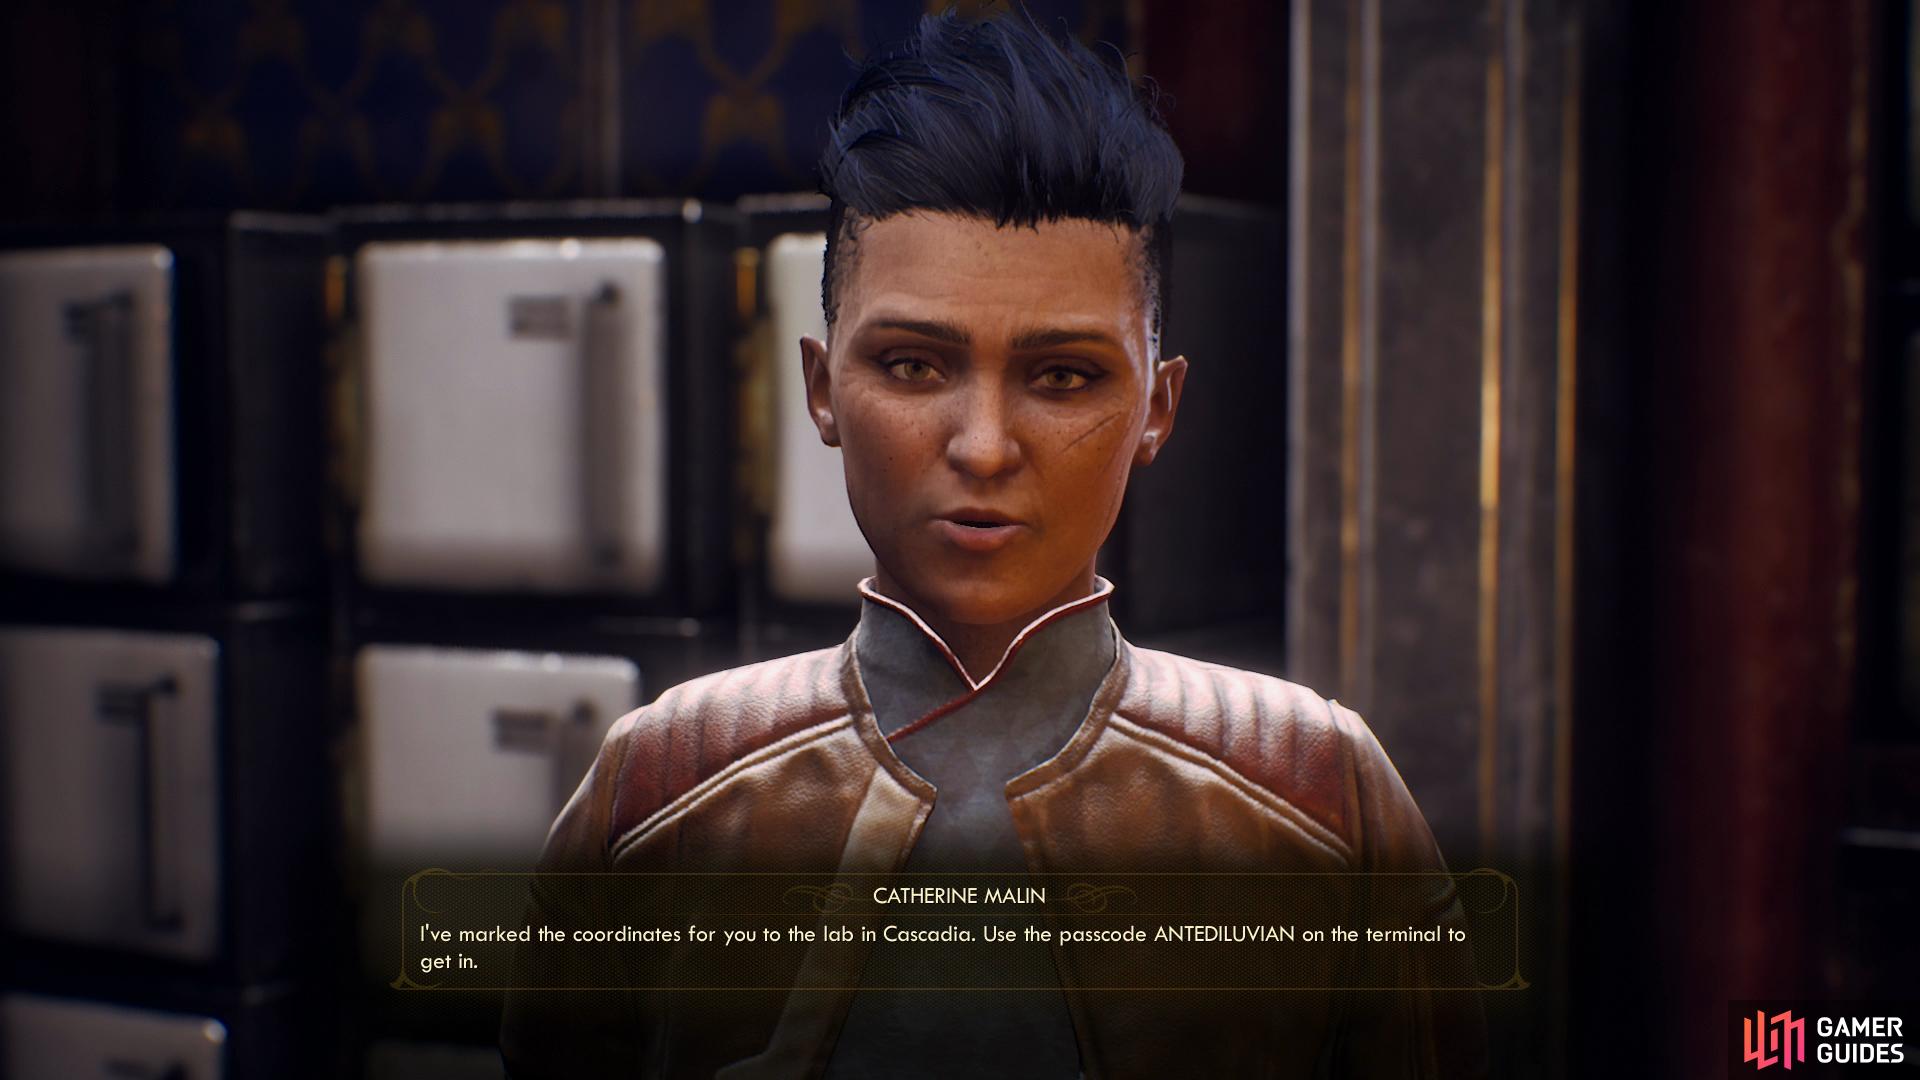
Anywho, when you reach Fallbrook, enter the city and follow the road through town until you find “Malin’s House of Hospitality” to the right. Enter the building and talk to Catherine Malin, telling her - in one way or another - that Hagen sent you and Malin will fill you in on the plan. It’s a good thing you have a ship, as you’ll apparently need to siphon the Alta-Vitae gas with it, and to get to the lab where the gas is stored you’ll need to fight your way through Cascadia, not to mention the lab itself. Malin does suggest there may be a way to use the lab’s ventilation system to your advantage, but this only mitigates the amount of fighting ahead. Nyoka and Ellie are both listed in dialogue (big “hint-hint” from the developers here!) as characters who may ease your burden, but if fighting is unavoidable, corrosive or n-ray damage aren’t bad choices for dealing with mantids. If that’s not hand-holdy enough, Parvati and Max will also be mentioned when it comes to actually siphoning the gas, a feat which will otherwise require “someone with technical skills”… or failing that, you could resort to a risky sounding “plasma overload”.
In any event, you’ll get a passcode and a map marker for talking to Malin, making this a necessary step in the quest.
Talk to Malin to gain precious information about your assignment
then travel to Cascadia and use a terminal to open the way to the Rizzo Secret Laboratory.
Rizzo Secret Laboratory - First Terminal
Despite the mantids in the lab and the inherent dangers of the gas you’re expected to secure, getting to Cascadia is a feat in itself. To get there, just exit Fallbrook and follow a road largely to the west, along the way fighting various marauders and mantids that block your path. In Cascadia itself you’ll find more marauders, which have wisely taken control of the town - even the compromised walls around Cascadia are better than nothing, it seems. The marauders are numerous, but hit and run tactics are as effective as ever, so they shouldn’t be that hard to pick off.
If you want to maximize the productivity of your stay here, note that the quests Canid’s Cradle and Don’t Bite the Sun both have business in Cascadia. At the very least you should try to get the sealed door separating northern Cascadia and southern Cascadia opened, as this will allow you to land at the Cascadia Landing Pad in northern Cascadia and simply walk across the bridge over the chasm that divides Cascadia… provided you can kill the raptidons and mantids that occupy the northern half, anyways. To get this door open you’ll need to pass a [Hack 100] check or interact with a terminal in a bar on the western edge of southern Cascadia and pick the option [March 11th, 2344] to get an access code, which you can then use on the terminal besides the door to open it.
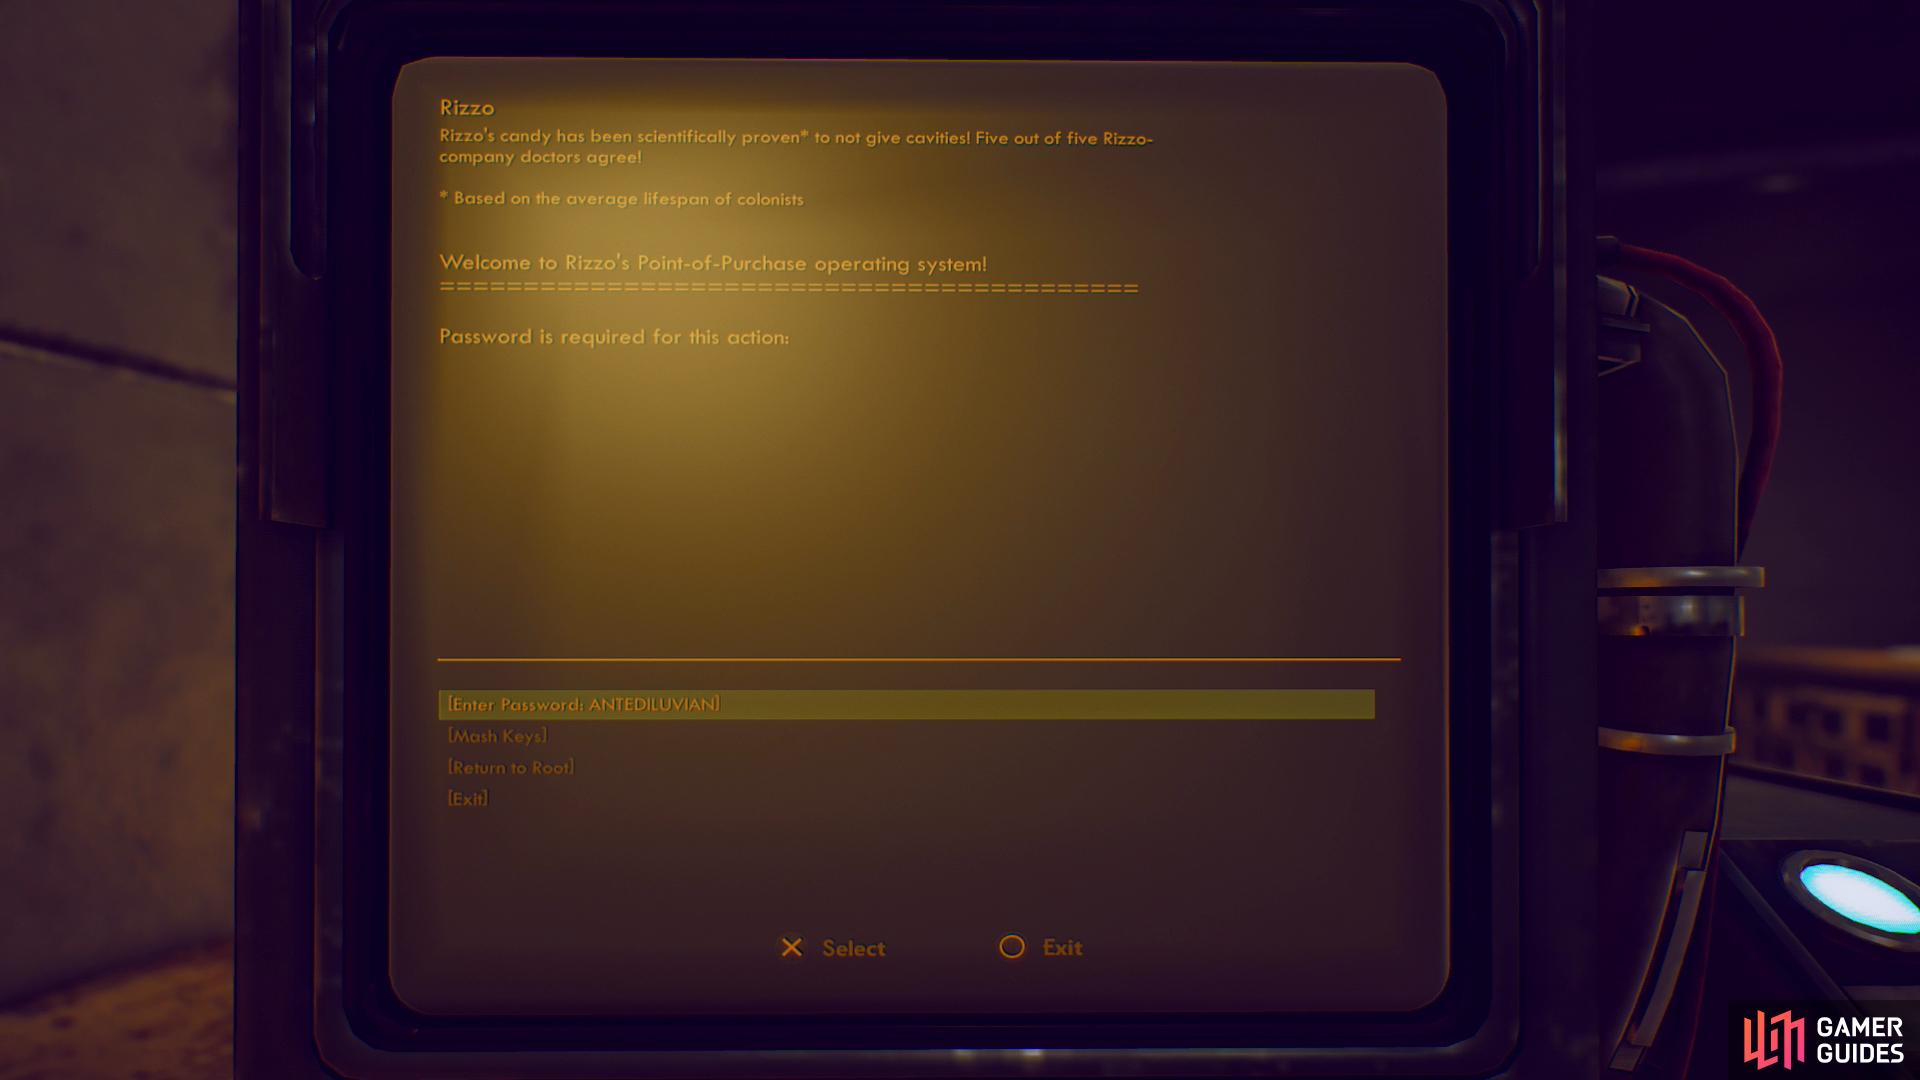
As for the lab itself, enter a building on the eastern edge of southern Cascadia and use a terminal. Pick the options [Supervisor Override] followed by [Enter Password: ANTEDILUVIAN] to cause an elevator to pop up through a doorway to the east, which will take you down into the lab.
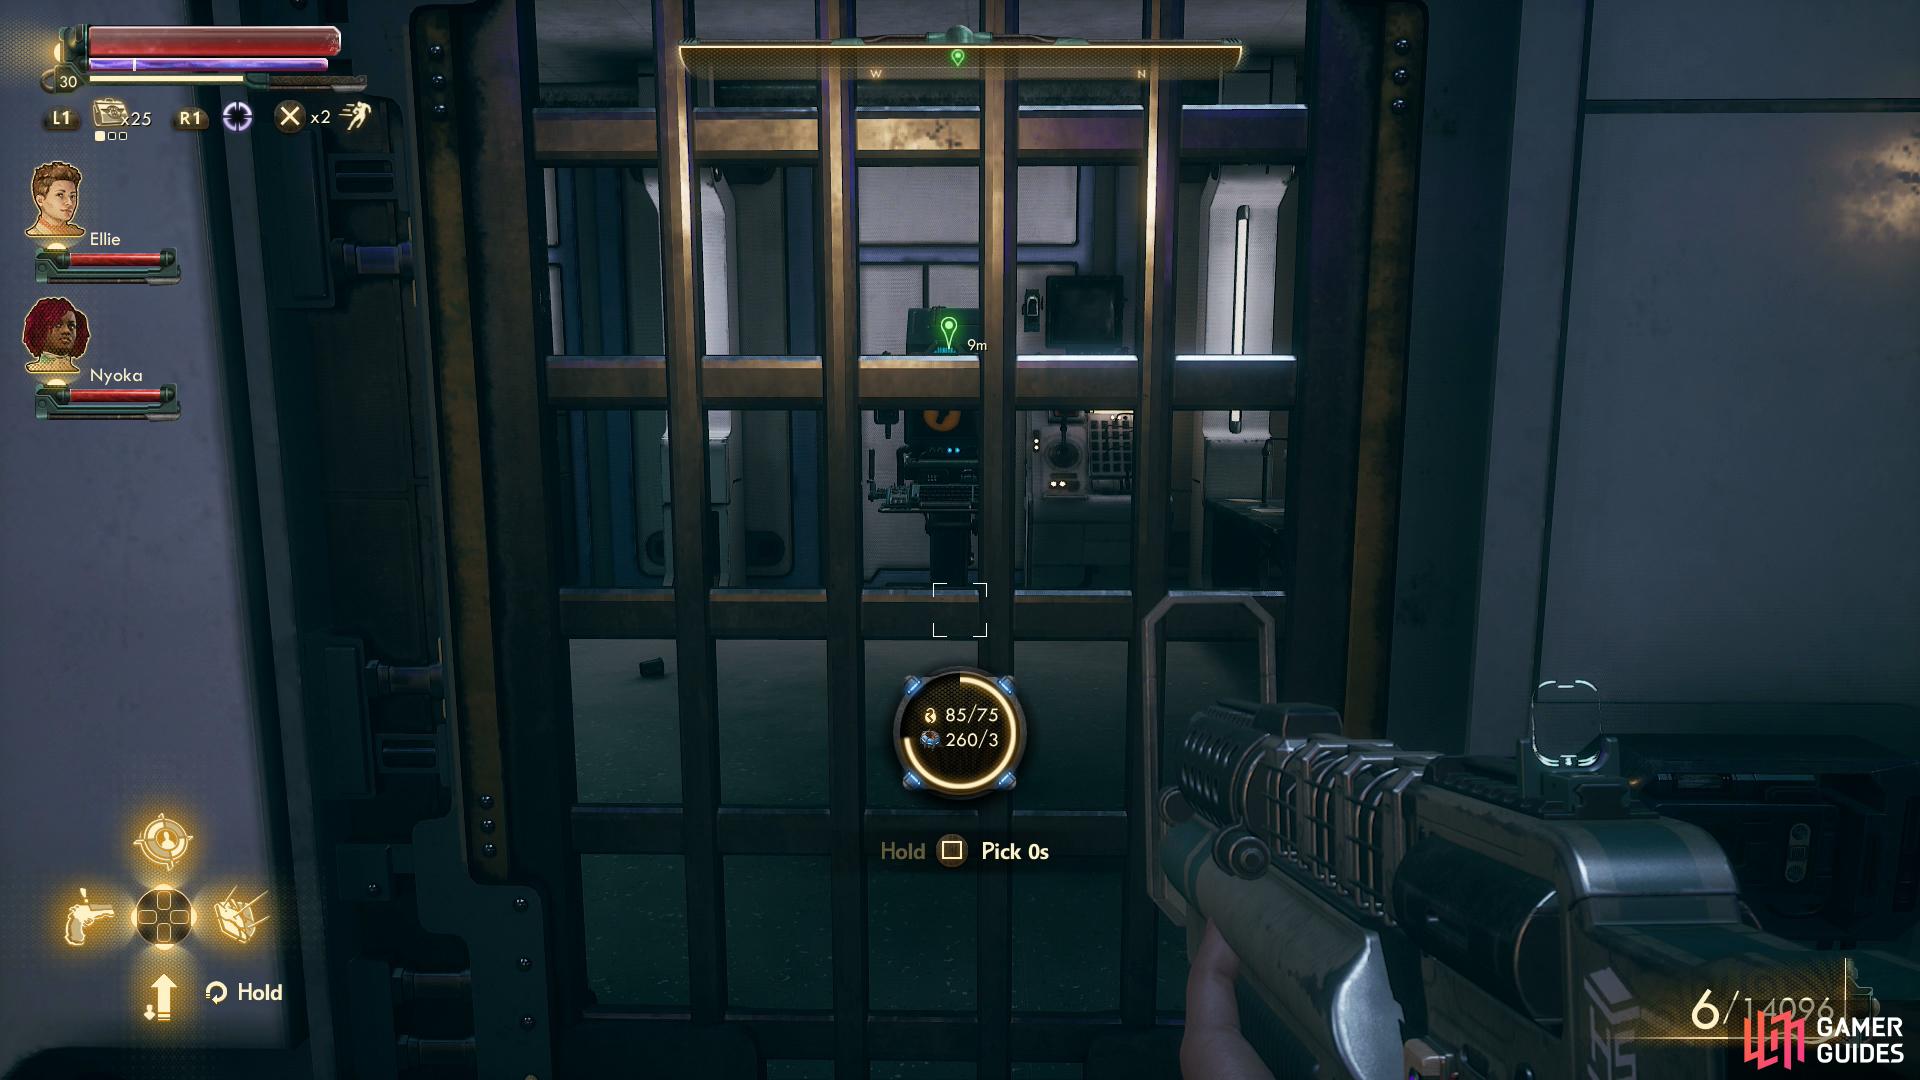
Once you’re in the lab, head northwest to find two doors - a cage door to the left [Lockpick 85] and a more conventional door to the right. If you open the door to the right you’ll immediately be accosted by some automechanicals, who demand your ID. Make up an excuse and pass a [Lie 60] check to get past, or, if you bring Felix along he’ll make up an excuse so pathetic that the robots will decide you can’t possibly be any real threat. Yes, really. Failing that, you can always just destroy the machines. However you deal with them, getting access to this room will allow you to pass through a door to the southwest, bypassing the locked cage door… or you could just pick the lock.
However you manage it, use a terminal and pick the option [Signal ADA to Land on the Cascadia Pad], then [Search - Fuel Controls]. One step of this process down, just… oh, two more to go?
Disarm some mines
and if your Lockpick score is supreme you can avoid an obnoxious section of traps.
Rizzo Secret Laboratory - Mantisphyxiation
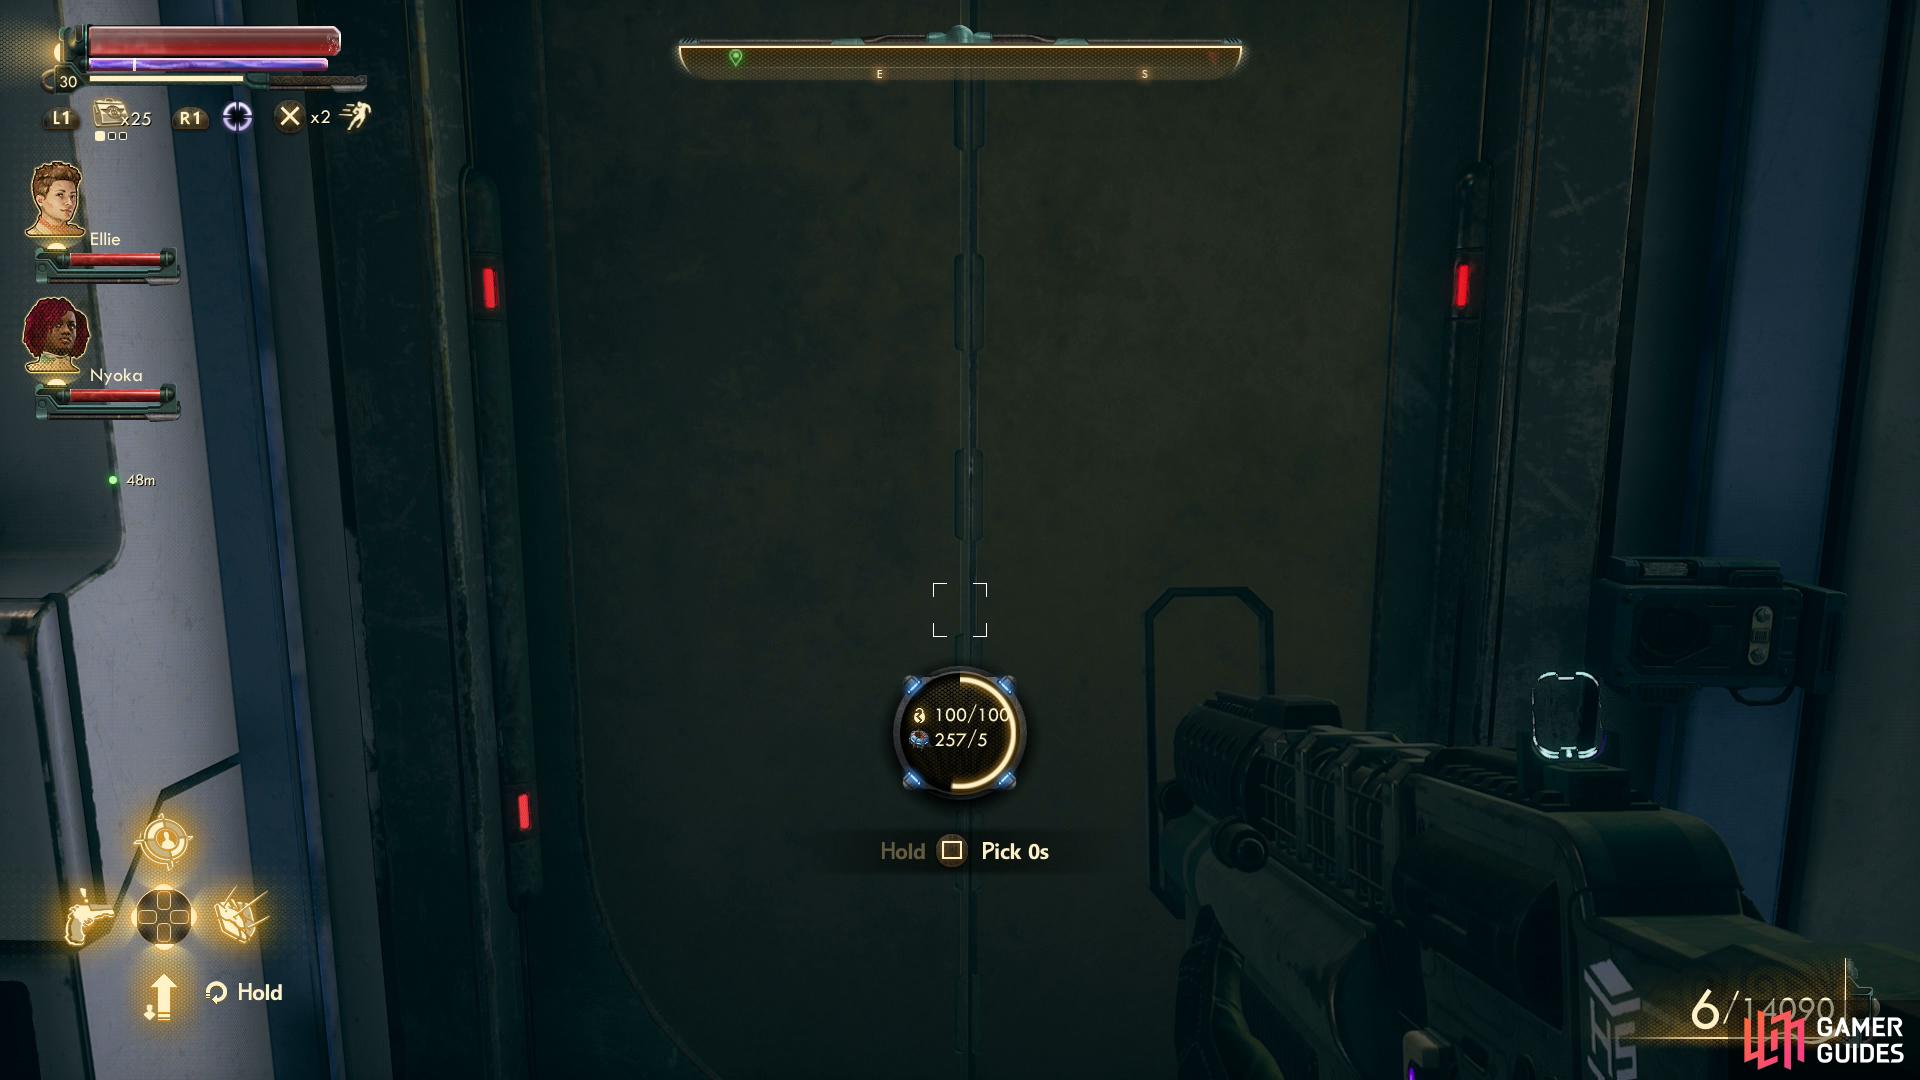
That sounds simpler in practice than it may be in actuality, but one step at a time, and we’ll get there. ADA will contact you and tell you the next steps you’ll have to take; go through the barred door to the southwest, turn left (southeast), then turn right (southwest) and descend some stairs and pass through another door. When you reach a hallway you can find two doors to the right (northwest), the first (northeastern-most) of which merely contains some dead mantipillars and an inoperable automechanical. Beyond the second (southwestern-most) of these doors [Lockpick 35] you’ll find a small room with a good bit of loot, none of which is unique.
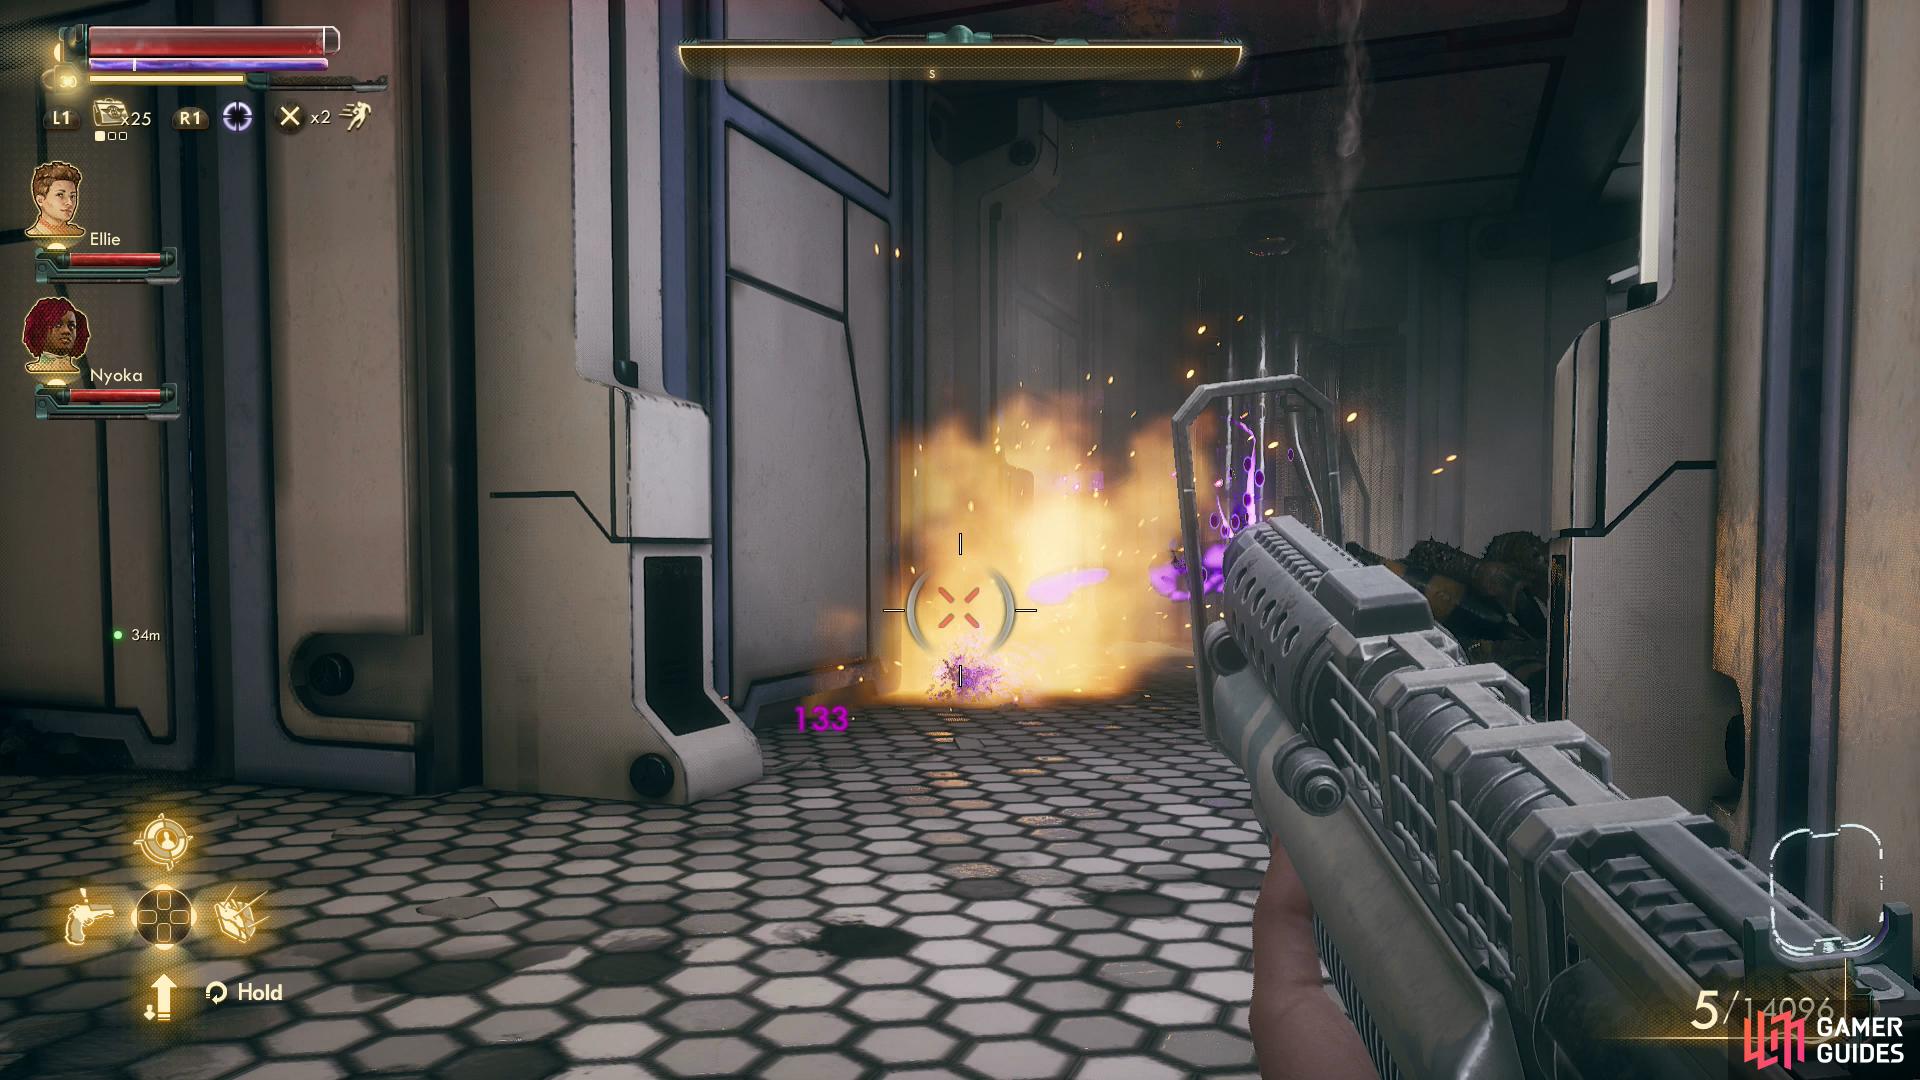
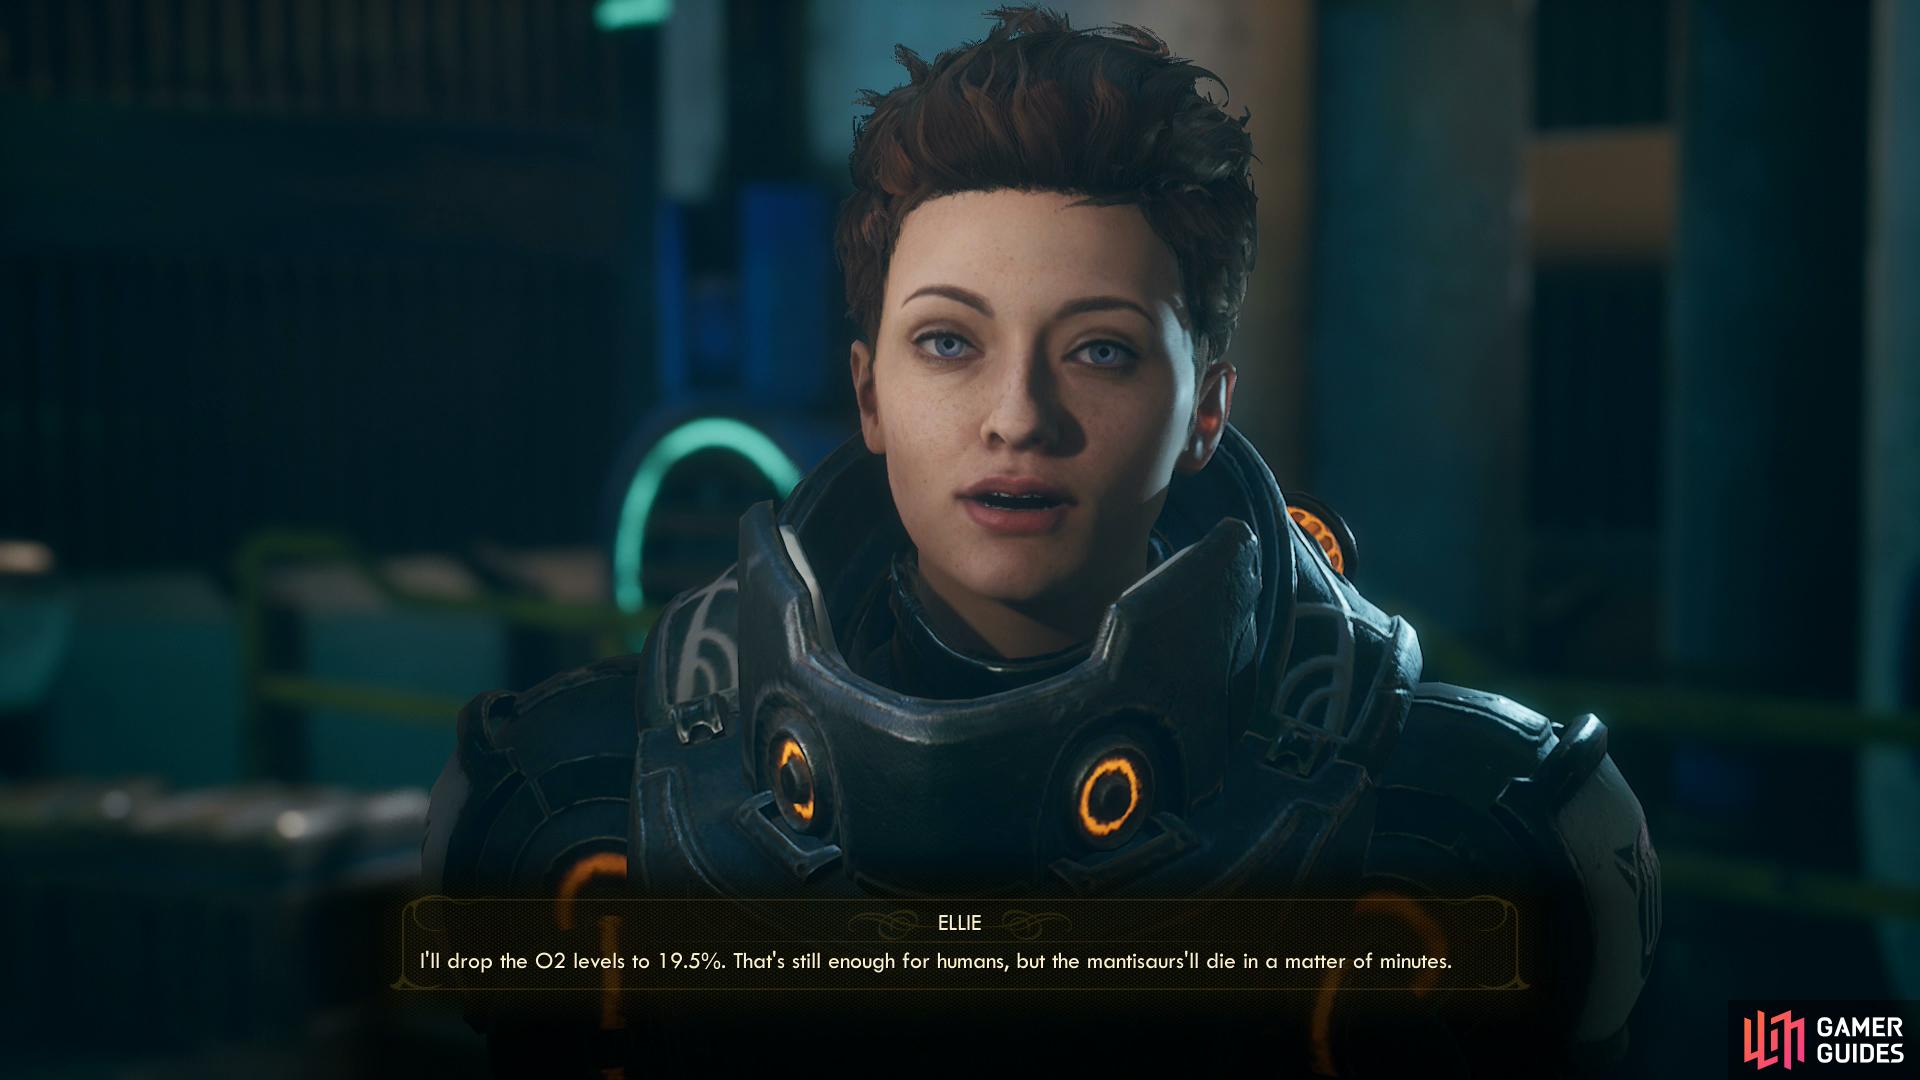
Continue down a hallway until you reach a fork, at which you can turn left (southeast) to find a mantid-filled room. If you want to dispatch all the mantids in this lab you’ll (a feat you’ll need Ellie and Nyoka to accomplish), however, you’ll first need to head southwest. Be wary of the mines in the room ahead, and in the next room you’ll find two electrical tripwire traps and two more mines. If you turn left (southeast) you’ll find another locked door [Lockpick 100]. If you can get past, great, you’ve just saved yourself a bunch of bother; interact with the terminal in the room beyond and Ellie or Nyoka will intervene to lower the oxygen content in the lab to kill the mantids. The terminal is otherwise useless.
If you can’t get through the locked door, you’ll just have to go the long way around. Jump over one electrical tripwire, and duck under the other, then continue down a hallway to the southwest and head through a doorway to the southeast to reach a room occupied by two automechanicals. No sweet-talking your way out this time, you’ll need to dispatch both bots or sneak past them, but given what lies ahead, violence is probably the safer option.
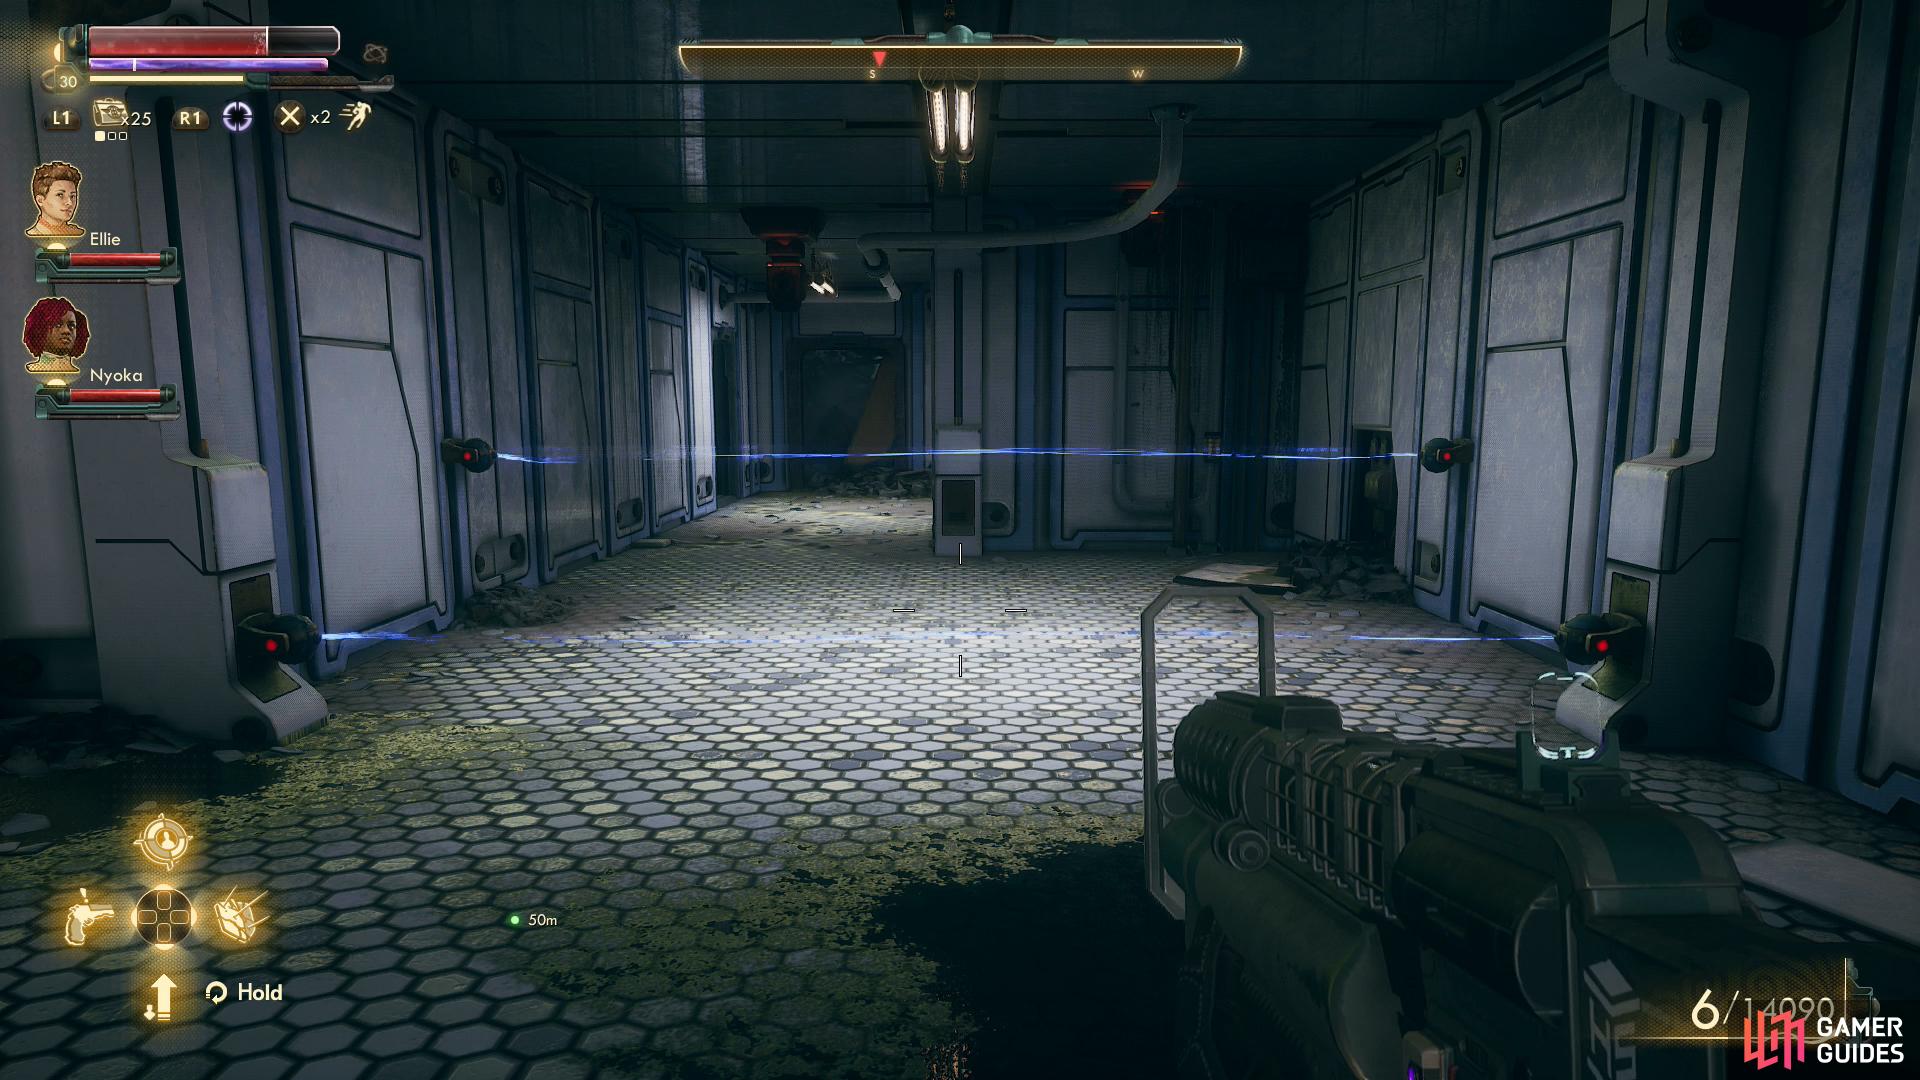
Loot the automechanical-occupied room, then exit to the southeast and turn left (northeast) to find a hallway lined with steam leaks. Some of these you can get past just by hugging one end of the hallway or another, some you just have to duck under, and some stop and start intermittently. If you are playing on Supernova difficulty and have companions… well, they’re likely too stupid to navigate this hallway without getting themselves killed, so be sure to have them hold position somewhere. Before you rush on through the steam, be wary of some mines on the walls at the end of the hallway - one of the few truly nasty traps in this game. Once you bypass the steam and the mines, go through a doorway to reach the room where Ellie or Nyoka can adjust the O2 levels in the lab to kill the mantids.
Rizzo Secret Laboratory - Second Terminal
If you can kill off the mantids, huzzah! If not… well, some high velocity shells will always suffice. Go through a barred door to the northeast and down a short hallway to find yourself in front of the door that leads to the first mantid-occupied room. If they’re still alive, kill them, if not, not, either way head northeast, climb a ladder, use a terminal and pick the option [Align Fueling System] then {Initiate transfer of Alta-Vitae gas] to move the chains on this quest.
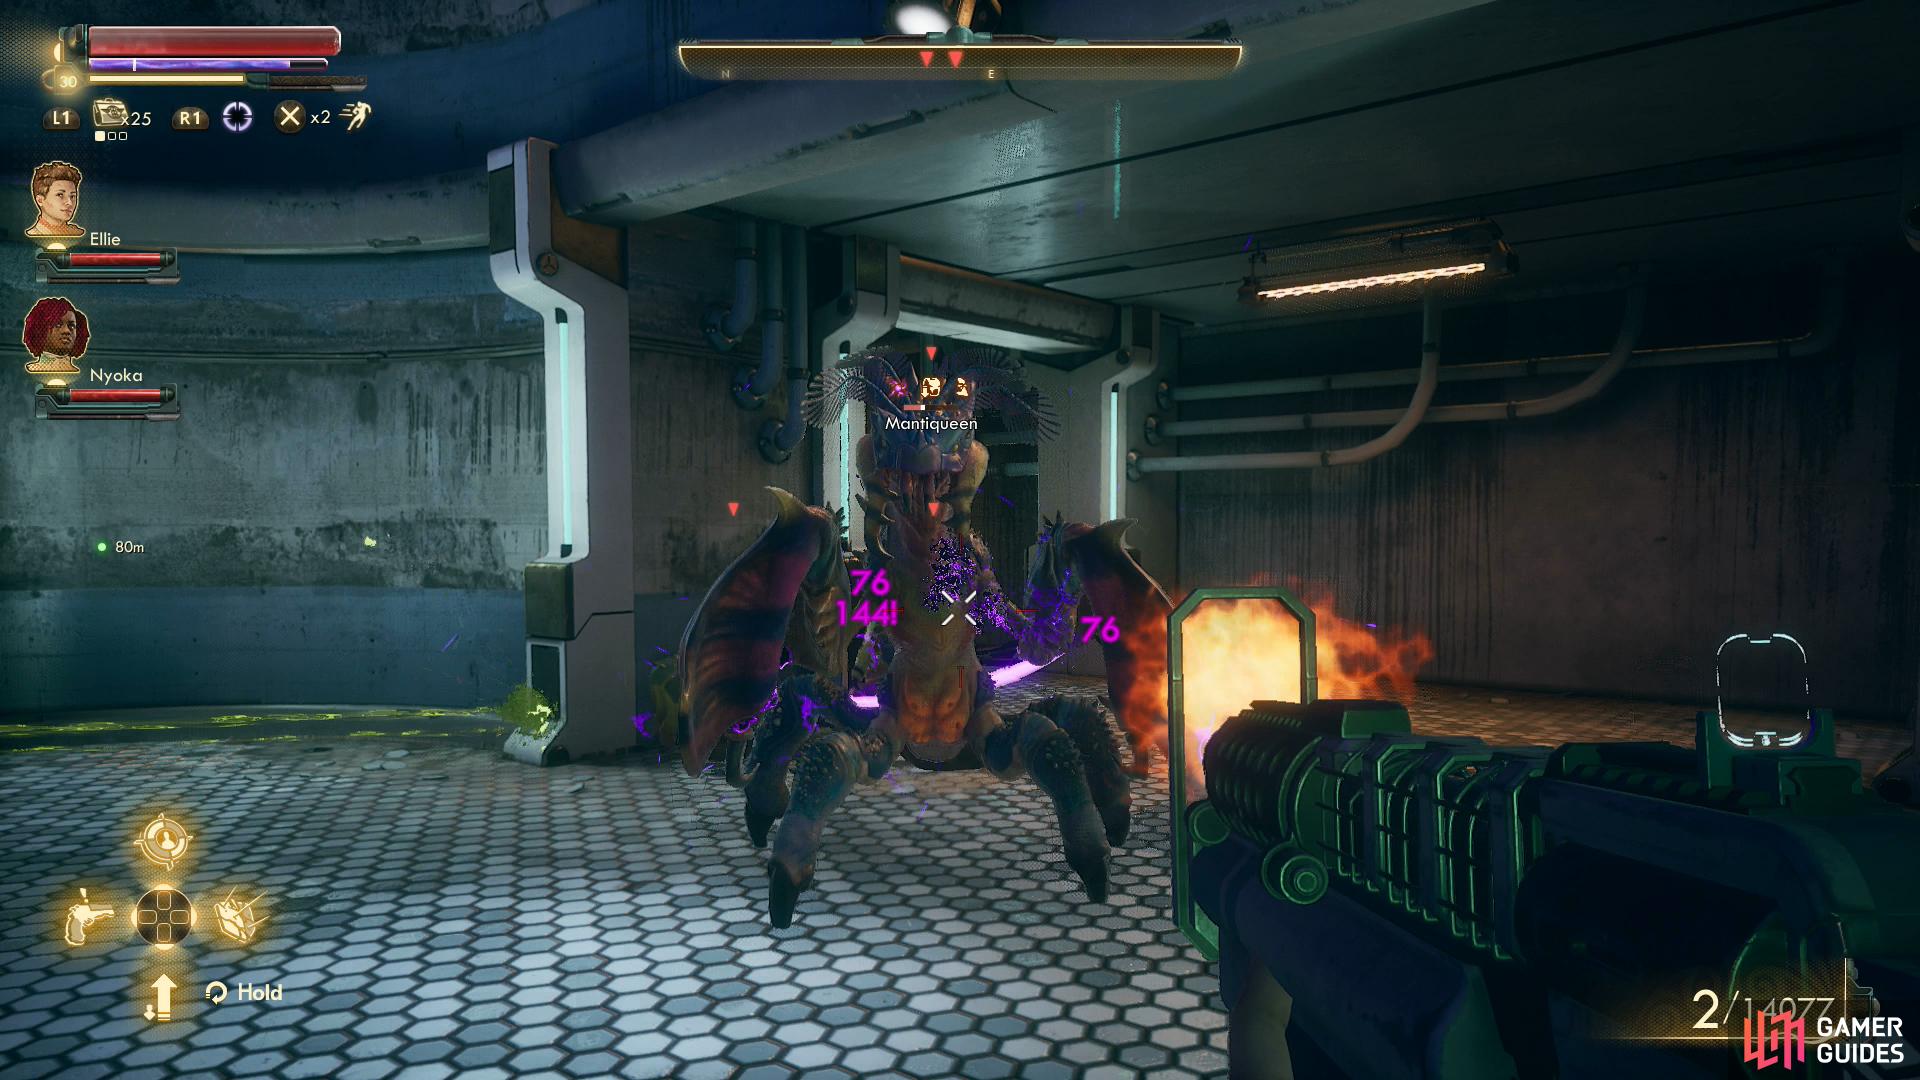
Once done, drop down from the elevated platform (after looting the bin [Lockpick 25], of course) and go through a door to the southeast to find a larger lab chamber occupied by mantids - superior to the ones in the previous room both in number and quality. Be especially wary of a Mantiqueen who lurks to the southeast, and who will certainly be drawn out by the fight… assuming they’re not all dead already. If they’re alive, kill them, then note a scientist being kept in stasis. Weird.
Continue southeast until the path forks, at which point turn southwest to find a small room with two locked bins [Lockpick 25] and a terminal, the latter of which just has some notes about the research they were doing the the sacrifice made by the scientist in the previous lab. Go northeast and ascend some stairs, kill any mantids in the chamber you find yourself in (they were all likely lured away by the fighting earlier) then ascend another flight of stairs to find another terminal.
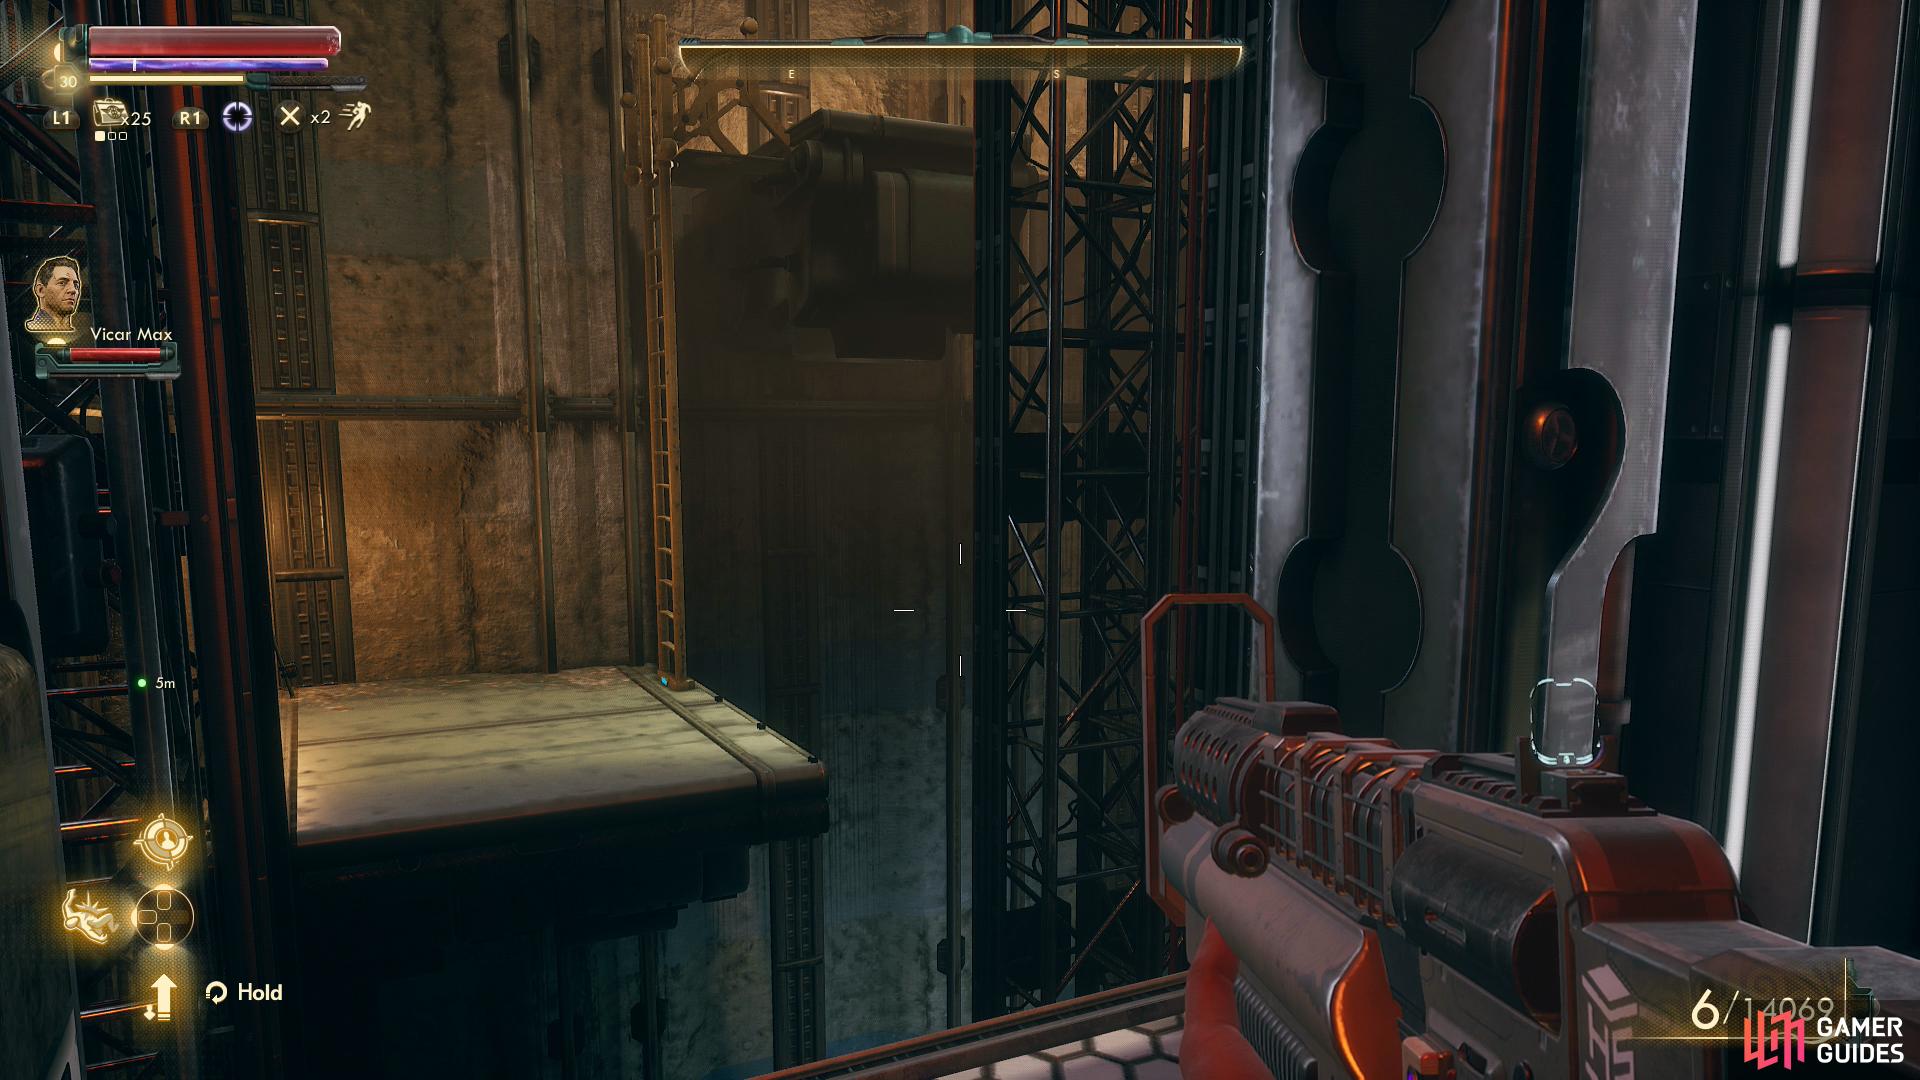
Jump to some ledges and climb some ladders
to reach the Mind Control Ray.
Mind Control ray
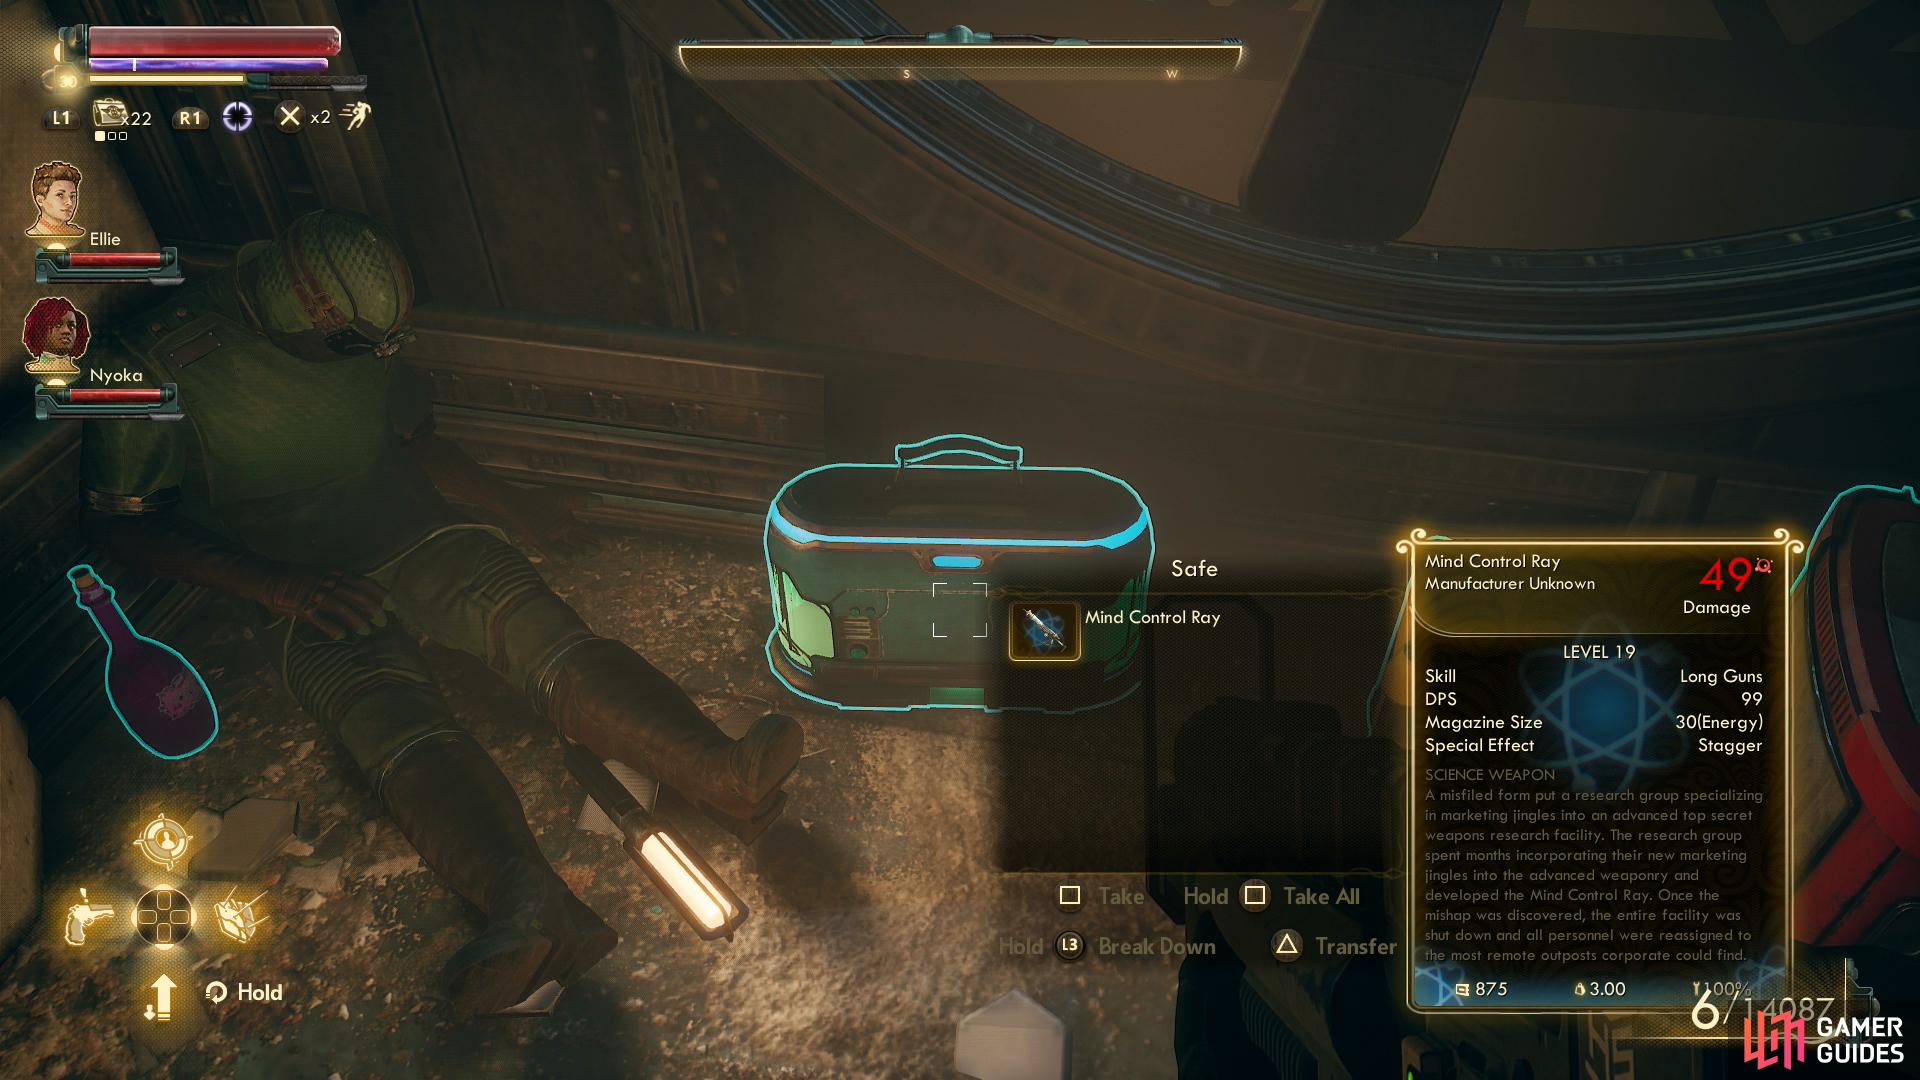
Do not interact with this terminal yet! It’s the third and final terminal you need to access to make off with the Alta-Vitae gas, but there’s a good reason to abstain for a moment. Instead, note the doorway to the southeast, beyond which you’ll find perhaps the game’s only platforming segment. Ugh. It should be noted that once again, your companions are not up to the task of following you through this area unscathed, so if you’re playing in Supernova difficulty, have them hold position (if indeed you even need to bother with this in Supernova difficulty…), then jump over to a ledge to the southeast. Climb a ladder, jump a gap to the southwest, climb another ladder, then loot a safe to find the Mind Control Ray science weapon. Collecting this should update (dare we say, complete?) the quest Weapons From the Void. Anyways, climb back down, jump across the platforms and return to the previous room and interact with the terminal.
Rizzo Secret Laboratory - Third Terminal
If you have Parvati or Max with you (Parvati will be favored if you have both) when you interact with the terminal they’ll do their thing (hacking or engineering, respectively) and get the gas flowing to the storage tanks on the Cascadia Landing Pad. In Parvati’s case there’s an optional [Engineering 60] check you can pass while talking to her, although if you can make that check, you don’t really need Parvati for this.
If you don’t have either of those two, when you interact with the terminal pick the option [Connect Storage Tanks to the Landing Pad Refueling System], after which you’ll get three viable options: [Engineering 40], [Hack 60] or [Overload Plasma Regulators to Force the Gas Through the System]. If you pass either of the skill checks, you’ll achieve your goal without any complications (presumably these are the same tasks Parvati or Max perform). On the other hand, if you “overload the plasma regulators” the complex will fill up with plasma and you’ll be encouraged to leave. There doesn’t seem to be an actual time limit on this, but the plasma will prevent you from taking more than a few steps back to the southwest, rending the vast majority of the lab inaccessible. No big loss, really, especially since this does not prevent you from going back and getting the Mind Control Ray if you didn’t get it yet.
Rizzo Secret Laboratory - Alta-Vitae Getaway
However you manage it, leave the lab via an elevator to the northeast to surface in a small building in the northern part of Cascadia. This could be a problem, but first, loot around a bit for some admittedly trivial treasures, then go through a barred door to the northwest. Once outside, you may have a fight on your hands, as the northern ruins of Cascadia are occupied by mantids and raptidons, in the latter case including two unique specimens named Euryale and Stheno. If you’ve cleared this place already, great, just stroll over to the landing pad to the southwest. If you haven’t cleared it, you’ll have to fight through some of the toughest foes on Monarch, with levels in the low twenties and high teens. Stealth may be a better option, or failing that, backtracking through the lab (assuming it’s not filled with plasma) and just fast traveling to the Unreliable.
Once you reach the Unreliable, just fly back to the Groundbreaker and report your success to Lilya Hagen to gain some positive SubLight reputation and 2,188 Bits. If you pass a [Persuade 100] check she’ll give you an extra 500 Bits. More importantly, she’ll give you another job immediately, starting the quest The Ice Palace.
No Comments