
Your destination - the Botanical Lab - is quite a ways off, being located along the northwestern part of Emerald Vale. While this is a short trip as far as time is concerned, the vale is densely populated, and unless you spent time doing side quests (highly recommended, by the way) you’ll probably have to fight quite a few marauders if you stick to the roads, and Primals if you don’t. Speaking of which, Primals tend to be pretty resilient to physical damage, which means all of your conventional firearms. A Plasma Rifle will fare quite well against them, however, especially if you charge it up.

(1 of 3) In a Primal Nest between Edgewater and the Botanical Lab you can find Ol’ Reliable.
To the Botanical Lab
When you’re ready to attempt to journey, exit via Edgewater’s northwestern gate and follow the road north until it forks, at which point follow the northeastern fork until you reach a cluster of buildings marked on your map as the Abandoned Outpost. You’ll likely have to fight marauders at both the fork and the Abandoned Outpost if you didn’t clear them out during one side quest or another earlier… or if you dawdled about afterwards.
After you bypass the Abandoned Outpost note that you can find a gulch northwest of the road, which will be marked on your map as a Primal Nest when you discover it. As the name implies, there are numerous Primals here, but if you can vanquish them you’ll find the rare Light Machine Gun Ol’ Reliable. As its name implies, it has impressive durability - a full clip might not even cost you 1% durability loss!
Continue following the road north to find the Abandoned Industrial Zone, another cluster of marauder-infested buildings. Unlike the other marauders, these ones won’t respawn, and may include Guillaume Antrim, who is a bounty target for the quest Fistful of Digits. You can also find Zoe Chandler here, who will cheer as you murder marauders, and she’s part of another quest, but you need not bother talking to her just yet.
Follow the road west and you’ll find another batch of marauders picking over some cargo. Exterminate or avoid them and continue following the road until you reach another fork. Turning southwest will lead you to some more buildings and another fork, which in turn will lead to the Geothermal Power Plant. You’ll get to that soon enough, but for now head northwest to reach the Botanical Lab.
On the road you’ll be intercepted by a woman named Grace Romero, who is presumably responsible for the dead Canids in the road. Chat with her and she’ll tell you about a missing girl named Zoe, whom you may have met in the Abandoned Industrial Zone. Grace is apparently the only competent fighter here, so she can’t just leave the Botanical Lab undefended and go searching for Zoe and… you can see where this is going, right? This should start the quest A Few Kindred Spirits, which you can undertake at your leisure.
There’s plenty to loot around the Botanical Lab, especially if you’re willing to be sneaky and take some five-finger discounts. In addition to that you can talk to Stefan to further the quest A Few Kindred Spirits and purchase the rare Fiver revolver from him. You can also talk to a would-be engineer named Thomas to start the quest The Frightened Engineer, which partially overlaps with Comes Now the Power, as it requires you to venture to the Geothermal Power Plant to complete.

Talk to Adelaide and she’ll ask you to reroute the power to the Botanical Lab, dooming Edgewater.
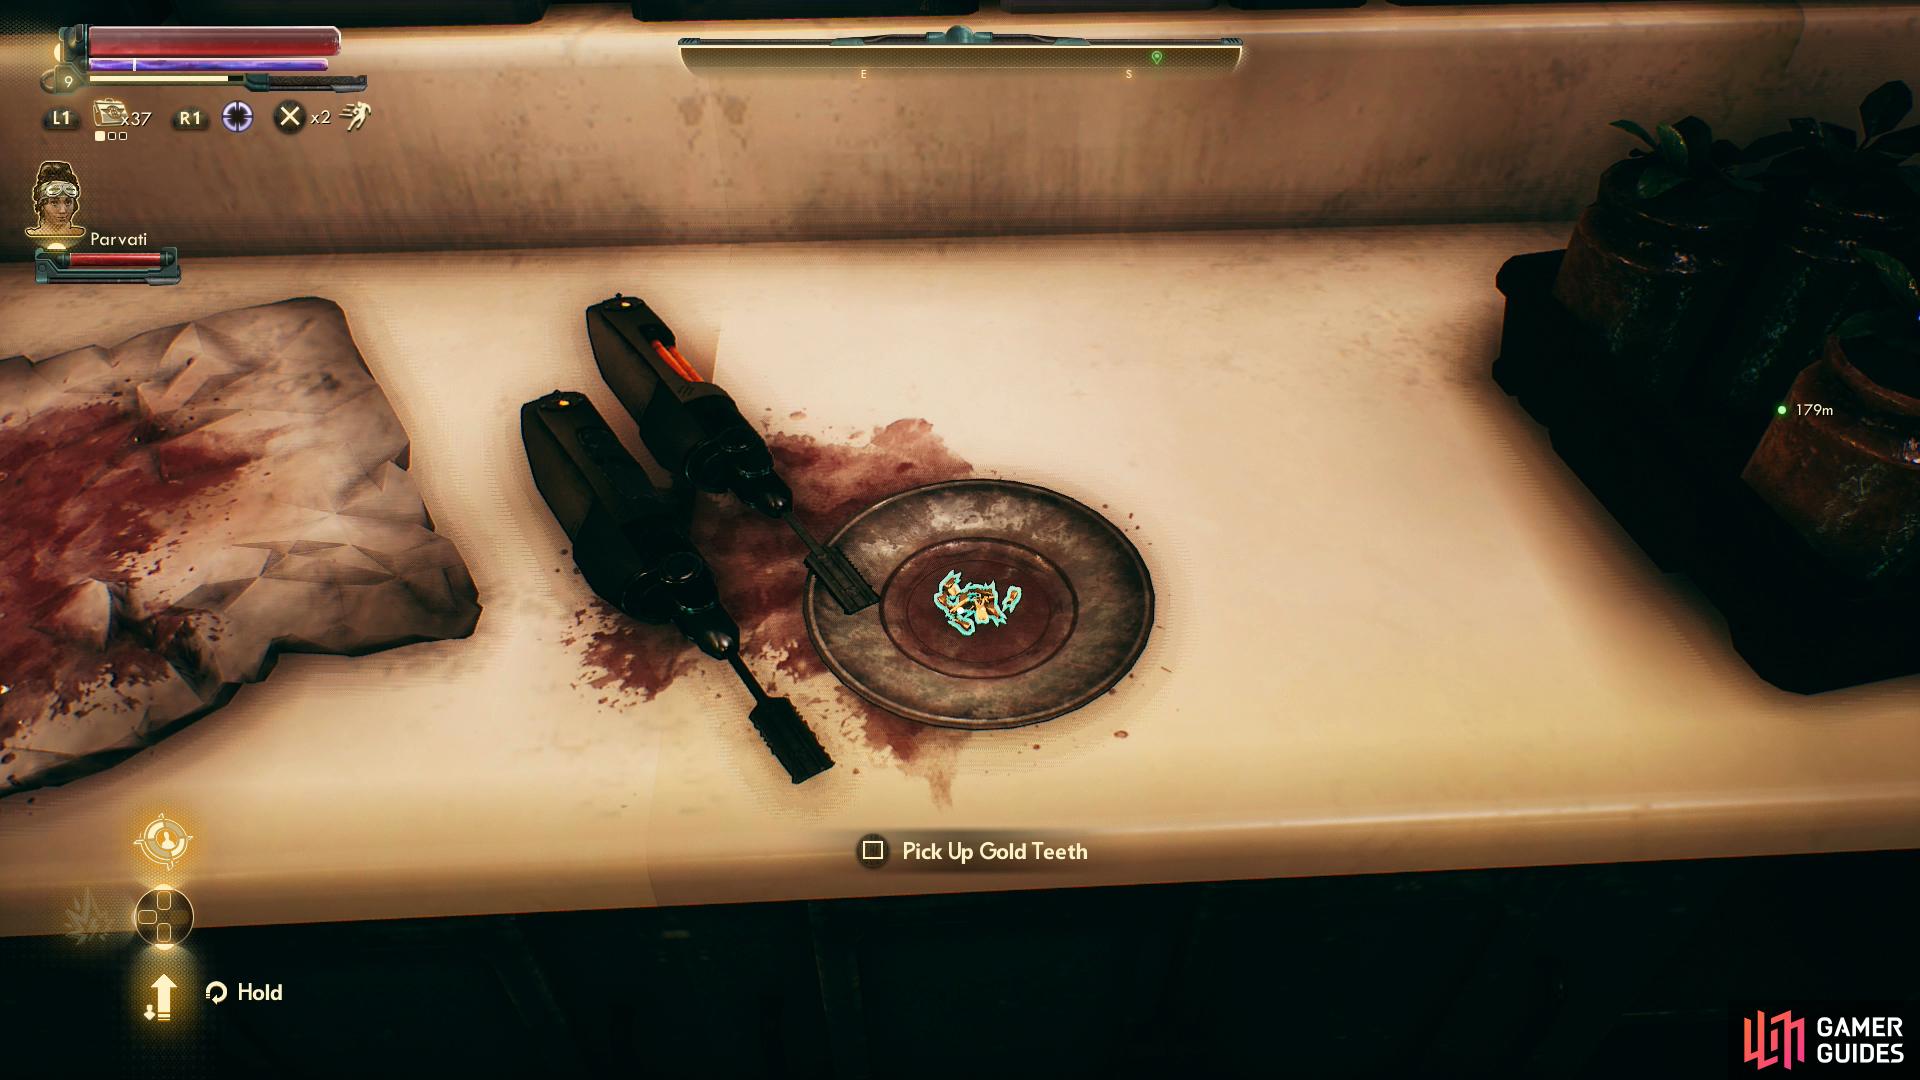
You can find out what her “special fertilizer is made of if you pick up some Gold Teeth - it’ll also answer what became of poor Eugene…
Adelaide’s Offer
Find Adelaide in the center of the Botanical Lab - the actual lab, not the village that has grown up around it - and chat with her to learn about what she’s been able to accomplish here with her “special fertilizer” and about her contentious past in Edgewater. When you’re ready to move things along, pick the dialogue option “Reed sent me to make peace with you.” to find out that… well, they’re not friends. After telling her the details, she’ll make you a counter offer; go to the Geothermal Power Plant like Reed wants, but cut off Edgewater’s power instead. The power regulator from the cannery will work just as well as the one in the Botanical Lab for your purposes.
You can’t make your choice yet, but at least now when you reach the Geothermal Power Plant you’ll have options. Speaking of options, before you leave the Botanical Lab, enter a room to the south and search some counters to the east to find some Gold Teeth. After finding these you can return to Adelaide and confront her to learn - provided you can pass a [Science 15] check - what she’s using in this “special fertilizer” of hers.

If you travel the back way to the Geothermal Power Plant, be wary of mines.

Via roads or rivers, the Geothermal Power Plant shouldn’t be hard to find.
To the Geothermal Power Plant
It’s time to head over to the Geothermal Power Plant, which can be found to the south of the Botanical Lab. To get there, you can just follow the road from the Botanical Lab back to the fork, turn southwest at the first fork until you reach a second, then follow the road west from the second fork to find it.
Alternatively if you head to the end of the road near the Botanical Lab and turn southwest you’ll find a pass through some hills. Detonate the mines here (there are about eight of them in total) and continue southwest to find a river, which you can follow southeast, over a short cliff, and eventually to a bridge right outside of the Geothermal Power Plant.

Exploring the Geothermal Power Plant - Exterior
Now that you’ve found the Geothermal Power Plant, the next immediate matter is getting inside. This is a trivial matter, as the fence is compromised in numerous areas, especially a hole dug under the northwestern corner - courtesy of some Canids. The Canids corpses should give you pause however - just because the perimeter has been breached doesn’t mean it’s undefended. Indeed, you’ll find numerous automechanicals stomping around here, and some preparations may be in order.
First, if you haven’t started the quest Die, Robot, you may want to start it. It’ll eventually send you to the Geothermal Power Plant - two birds and all that. Second, you’ll get a Mag-2-Zap mod, which you can install in a weapon of choice… provided it has a magazine mod slot, of course. Enemies all have different strengths and weaknesses, and while you’ve largely been able to ignore it up until now, if you’re playing in Hard difficulty or Supernova, you might want to modify some weapons with Mag-2-Zap mods to help vanquish the robots within and around the Geothermal Power Plant. Third, you can also accomplish an objective for the quest The Frightened Engineer in here, so there’s potentially much to be done in the Geothermal Power Plant.
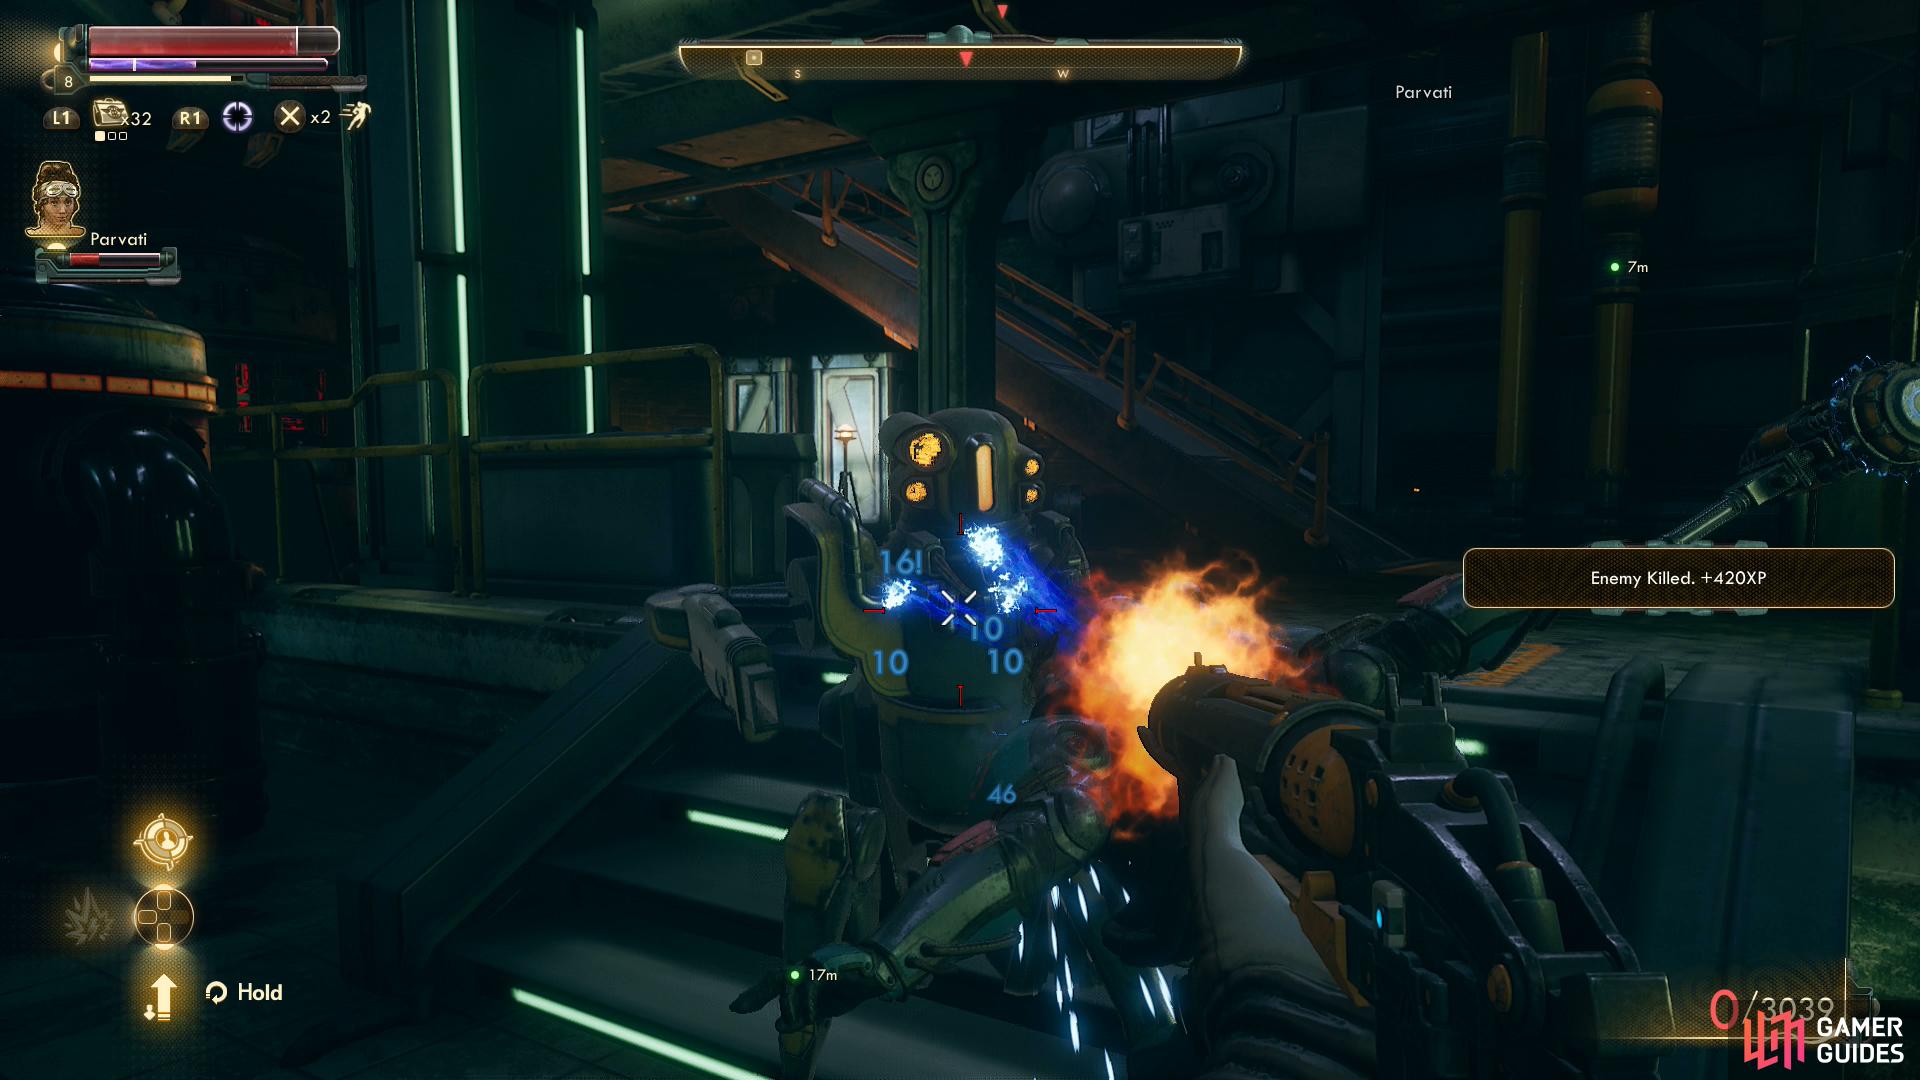
Sneak through a hole in - or under - the fence around the Geothermal Power Plant and dispatch the robots within. The weakspots on automechanicals tends to be blue lights on their chassis somewhere, which are worth aiming for if you can. If you have shock damage weapons, you probably don’t need to bother, and honestly, the difference between physical damage and shock damage is pretty stark - especially on Hard difficulty. Wipe out the robots prowling the exterior of the plant, then search a guard station near the northern shock barrier to find a terminal [Hack 6] you can use to disable said security fences. Not that they really hindered you, but hey, one less thing to worry about. Loot around the exterior of the Geothermal Power Plant, note the vending machine you can find to the west of one of the entrances to the plant and when you’re ready enter the plant.
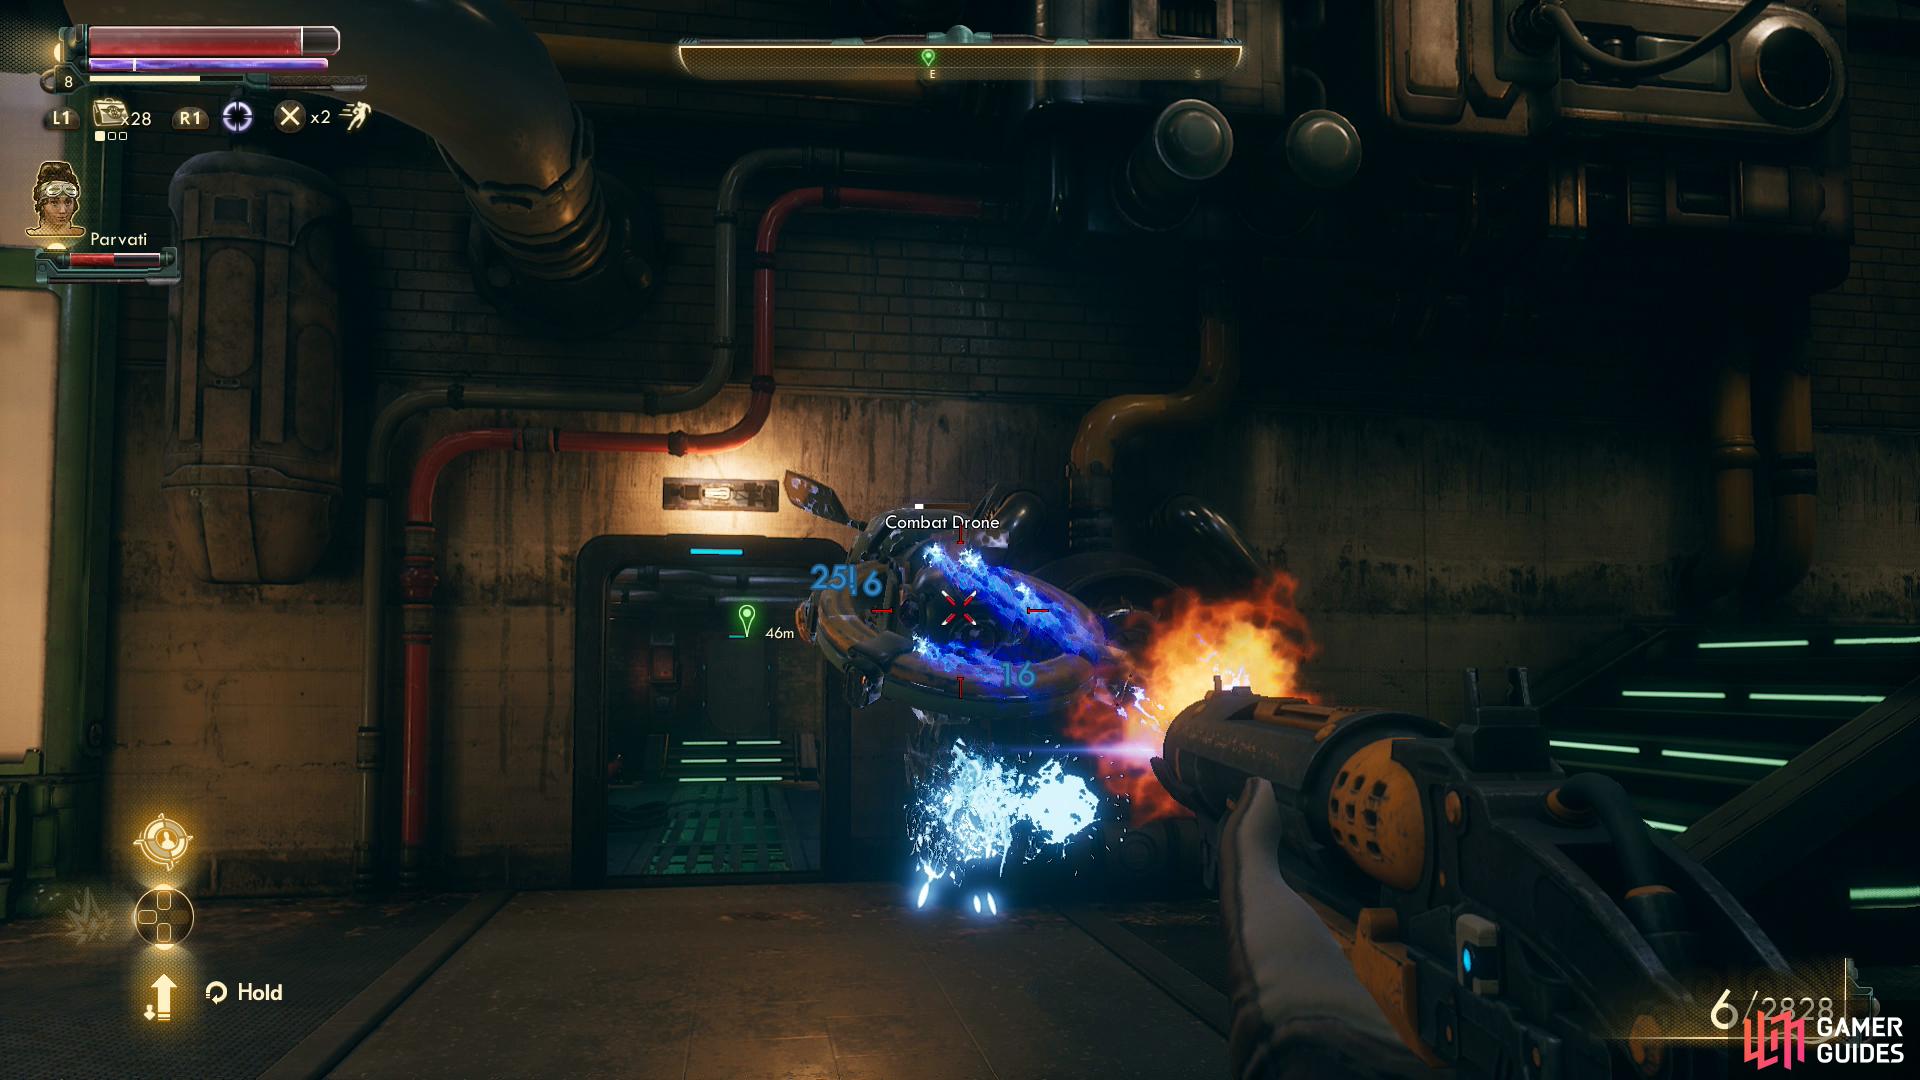
Dispatch some automechanicals near the entrance to the power plant
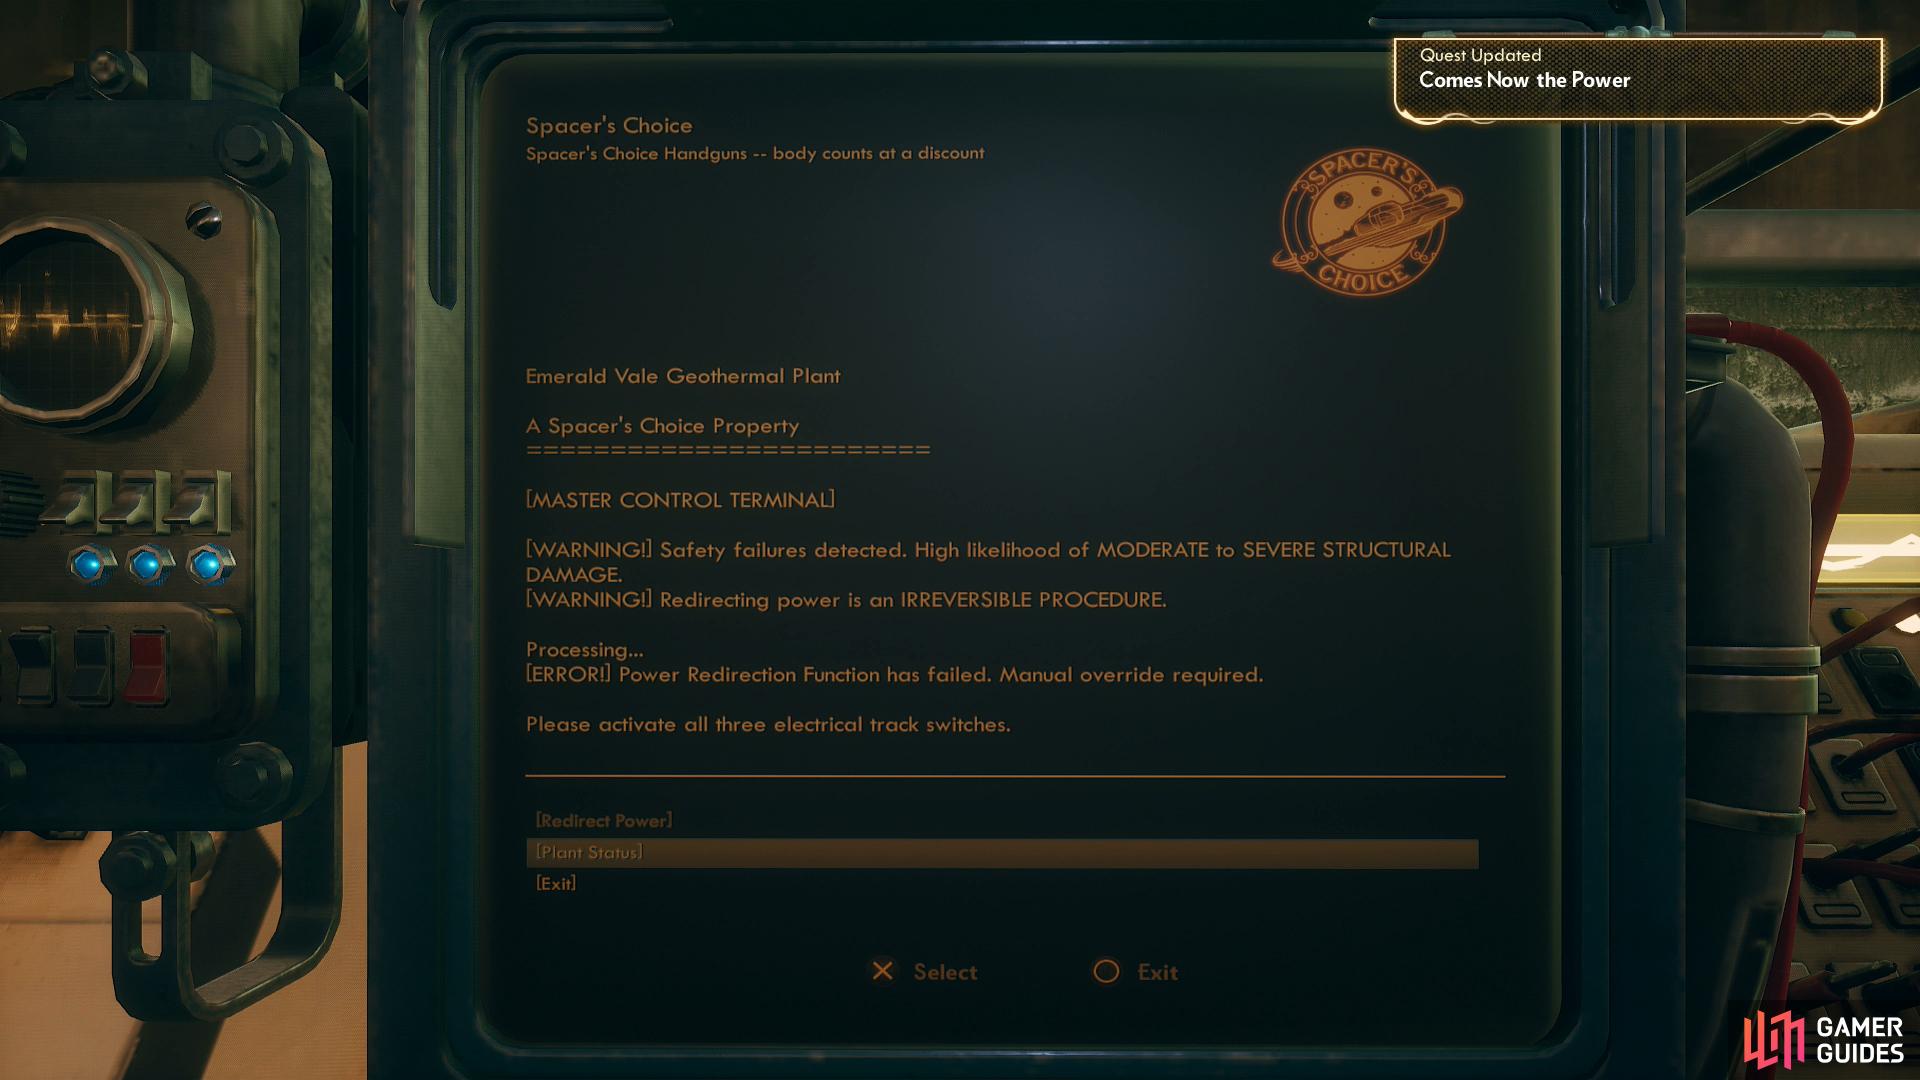
after you fight your way to the Master Control Terminal you’ll find out that you must hit three override switches, first.
Exploring the Geothermal Power Plant - Interior
There are two entrances to the Geothermal Power Plant, one on the northeastern side of the building and one on the northwestern side. Which you pick doesn’t really matter, as they both lead to roughly the same area. If you went through the northwestern door, continue north through a doorway to reach a large - yet cluttered - room. If you came through the northeastern entrance you’ll enter into this room, albeit behind some crates.
Either way, destroy a Mechanical Sentry and a Combat Drone, then head through a doorway and down a hallway to the east to find the room with the Master Control Terminal. Interact with it and pick the [Redirect Power] option only to be told that you’ll need to manually override the power redirection function by finding three electrical locks within the plant. Joy.
Return back west to the larger room and once inside immediately turn left (south) to find some stairs and a doorway beside them. Go through the door and interact with a terminal and pick [Access File 01] to find out that a copy of the Young Spacer’s Guide to Mechanical Engineering may be found in the repair bay, which you may need for the quest The Frightened Engineer. Good to know.
If you return to the previous, larger room and head up the stairs you’ll find a locked door [Lockpick 25], but you can also get in via a ladder along the southwestern corner of the room. Once inside you can search a terminal to either unlock the aforementioned locked door (for what it matters now) and to read some messages between the former plant manager and the higher-ups in Spacer’s Choice. “Upgrading” automechanicals in conjunction with downsizing the workforce to improve profitability is almost certain to be a bad thing.
(1 of 3) Using a security terminal will get you into the depths of the plant and shed light on the location of the logic module you need.
Anyways, return to the large, clutter-filled room and head down some stairs to the north and turn left to find two doors, one locked [Lockpick 45] and one not. Pick the locked (southern) door if you can, beyond which you’ll find a Corrupted Logic Module on a shelf. This will satisfy Ludwig and complete the quest Die, Robot if you take it to him. If you can’t pick this lock, don’t worry - you can find a key shortly.
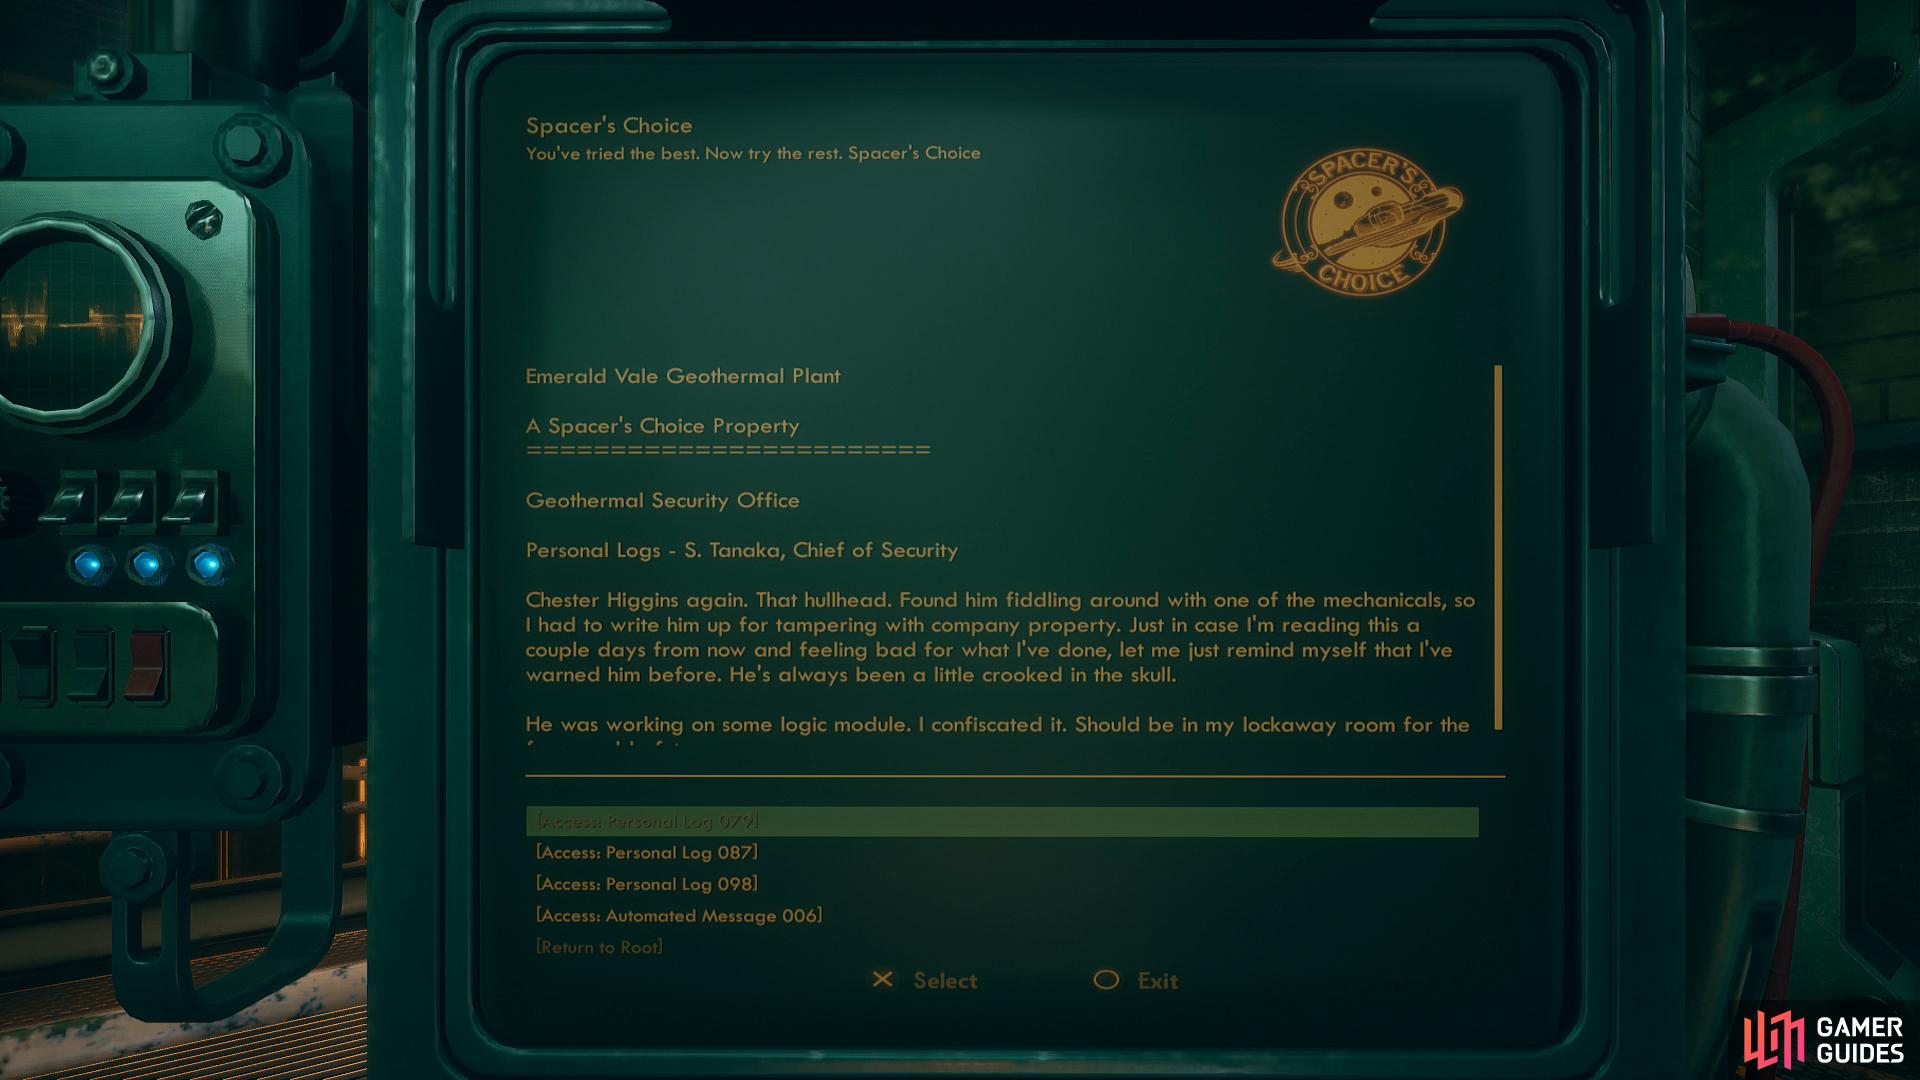
Head through the unlocked (northern) door and use a terminal to unlock a sealed door at the northern end of the hallway, which you can access with the code Reed Tobson gave you. If you check the [Personal Files] and [Access: Personal Log 079] you’ll learn about a confiscated logic module in the lockaway room, which was pointed out to you earlier. Another entry, [Access: Personal Log 098] mentions the obvious conclusion to this automechanical replacement business.

Scrap some more automechanicals
then flip the first override switch.
Go through the now-unsealed door at the northern end of the hallway and follow the walkway east, then head down a ramp to the north. Once down the ramp scratch off another automechanical, then turn right (east) through another doorway to find a large room with two more automechanicals. Scrap them, then search to the west to find the first of the three electrical locks you need to manually override. Do so, loot the room, then note you have three apparent ways to proceed: through a door to the east, through a door to the northeast, or up some stairs to the northwest.
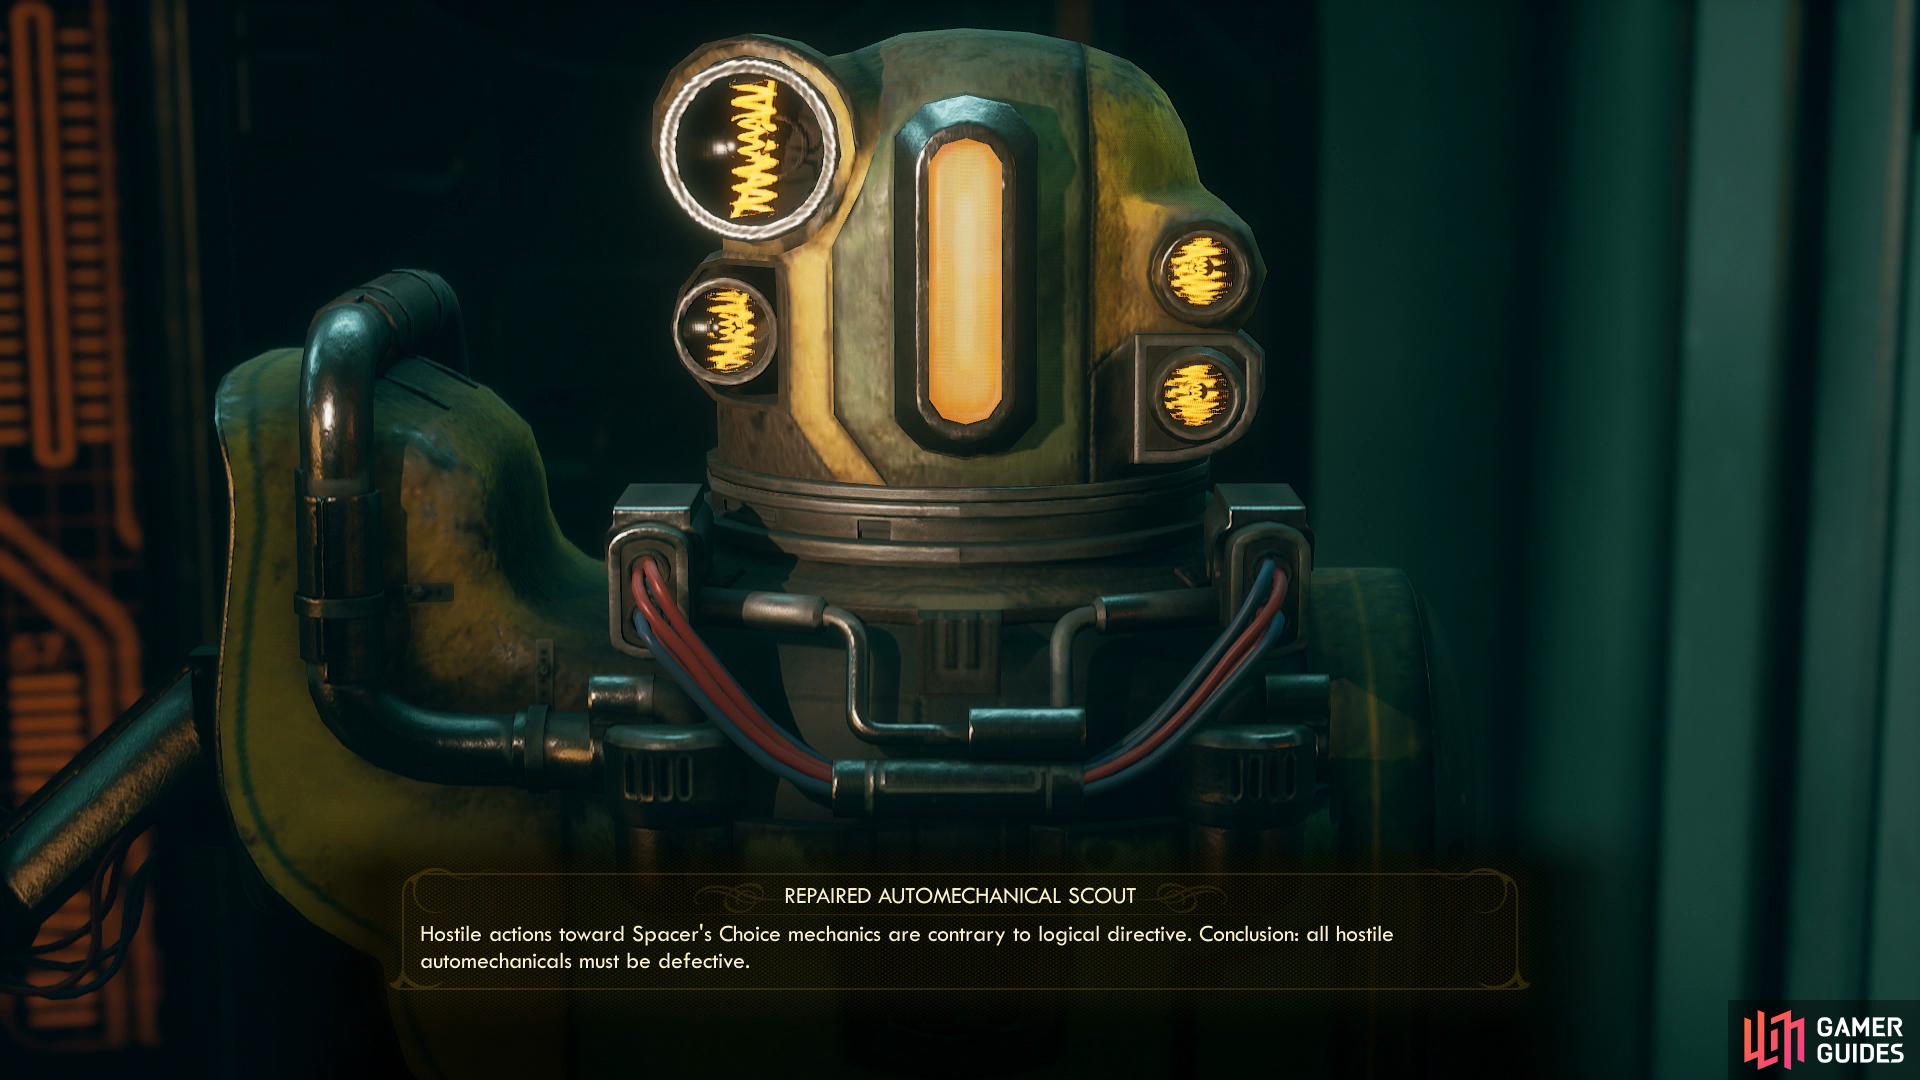
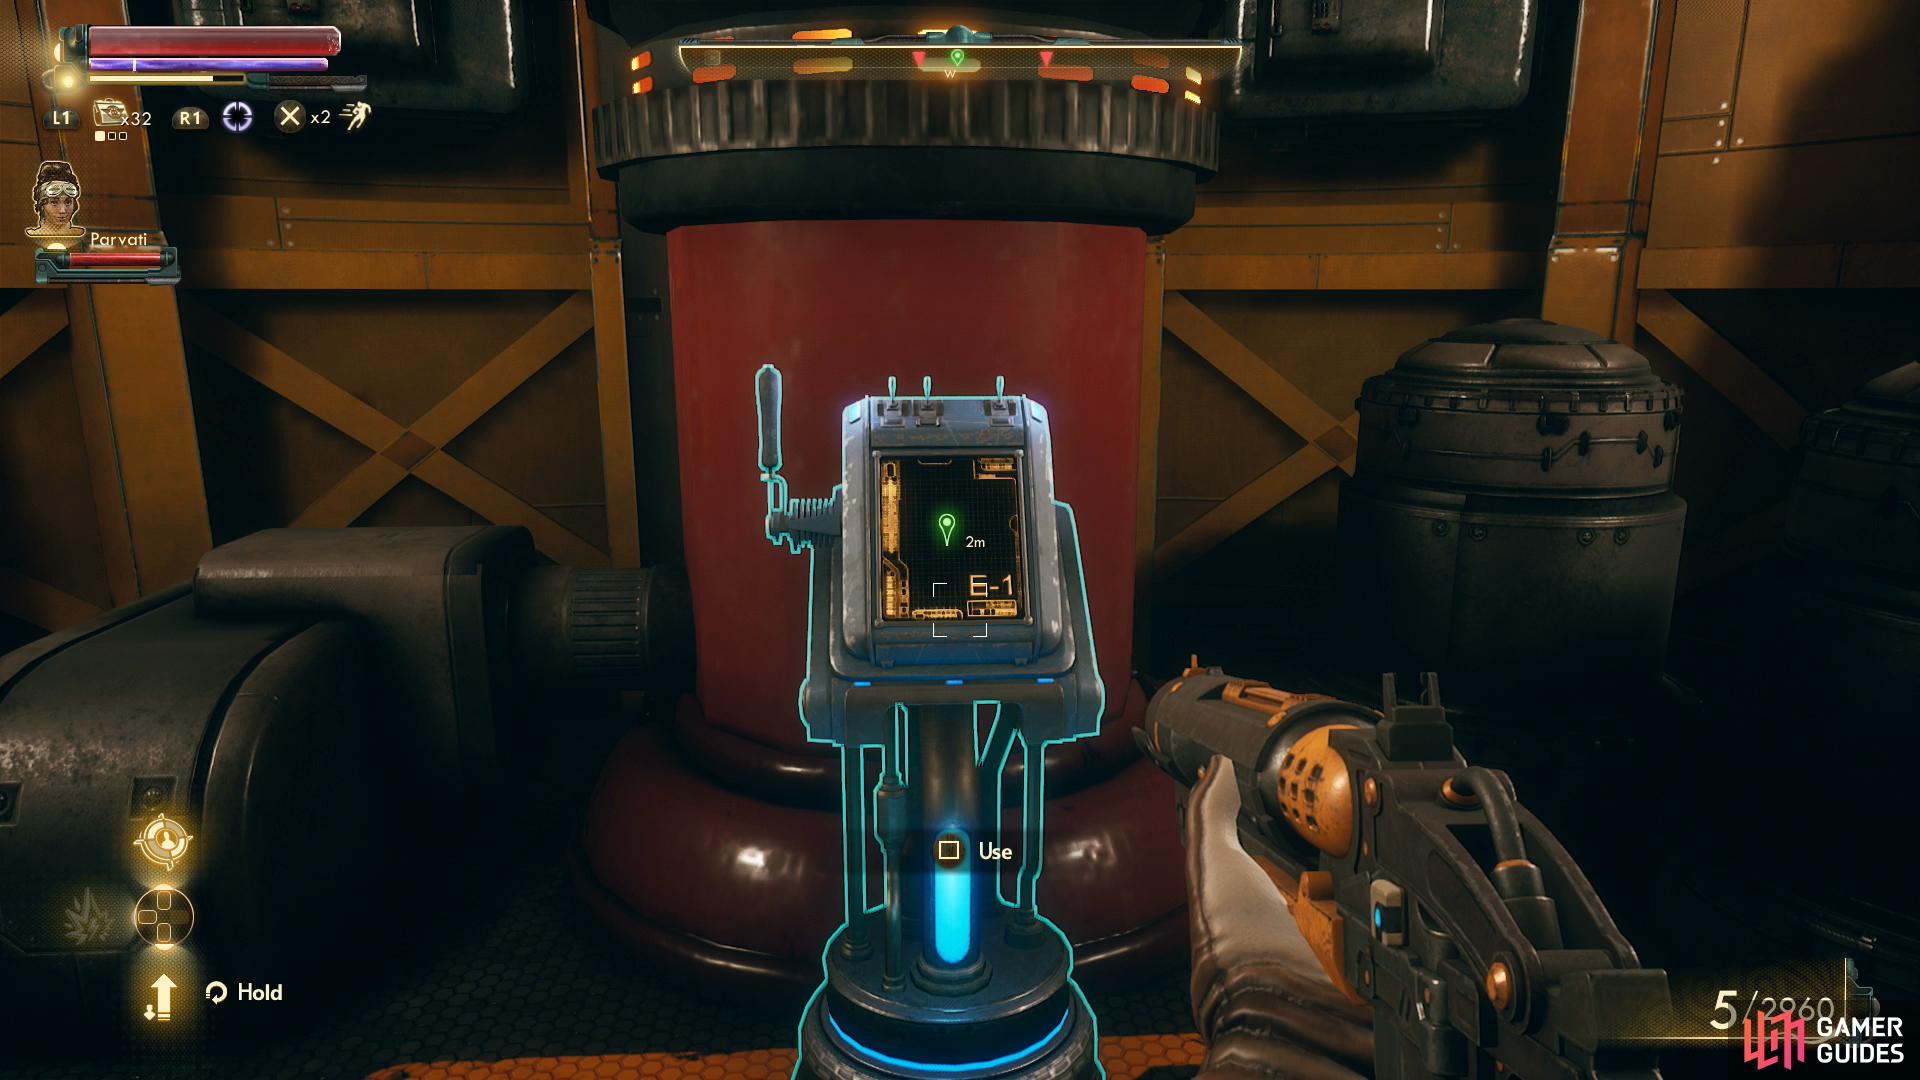
If you fixed the automechanical scout during the quest “Die, Robot” you can get it to help you fight the rest of the automechanicals.

If you can hack the automechanical control terminal you can turn the automechanicals on each other.
Go through the door to the east and, if you repaired the robot back at the Edgewater junkyard you’ll find your automechanical pal here waiting for you. Talk to it and respond with “This is odd. Why aren’t you attacking me?” to get a bit of robot logic… logic that’s beneficial to you, as this scout will now help you exterminate the other robots in the plant if you give it the word. In any event, search a table near a terminal to find a note saying that the “Young Spacer’s Guide to Mechanical Engineering” has been borrowed by another worker and taken down to “the pit”. Lovely.
Ascend the nearby stairs, cross a walkway, then turn right (north) through a door to find another control room. At the eastern end of this room, behind an overturned table, you’ll find the security chief, who seems to have tried to make a stand against the machines. Shame he failed, but you can loot him for a Light Machine Gun and the Geothermal Security Chief’s Keycard, which will get you through the door that contains the Corrupted Logic Module.
Along the western end of the room you’ll find a terminal requiring either a whopping [Hack 69] score, or Chester’s Passcode. If you can manage to access it, pick the [Modify Behavior] entry, followed by [Select New Target], [Define Intruders] and finally [Define Intruders as Spacer’s Choice Automechanicals], which will turn the automechanicals against each other. You can watch the fruits of your labor play out by looking through the nearby window.
A few less automechanicals to face is always a good thing, but you’ll need to get into the room to the west for it to matter. And who knows, if you Hack skill wasn’t good enough, maybe you can find Chester’s Passcode along the way? In any event, go down some stairs to the east to find yourself back in the room with the first electrical override switch. Yep, it’s all one big loop. Time to go through the doorway to the northeast… into the pit.
Once you enter the pit you’ll hear a man named Higgins yelling at you. Hey! Just the guy we need to find. Go down some stairs to travel between floor 01 and floor 02, then note a split in the path ahead. If you go left you’ll reach a closed door, while the path to the right will terminate in a ladder. Head right and climb down the ladder to reach floor 03, then descend another ladder to reach floor 04, where you’ll find Higgins, who totally hasn’t been rendered nutty by an untold amount of time spent hiding in the bowels of this plant.

Talk to Higgins to get his passcode
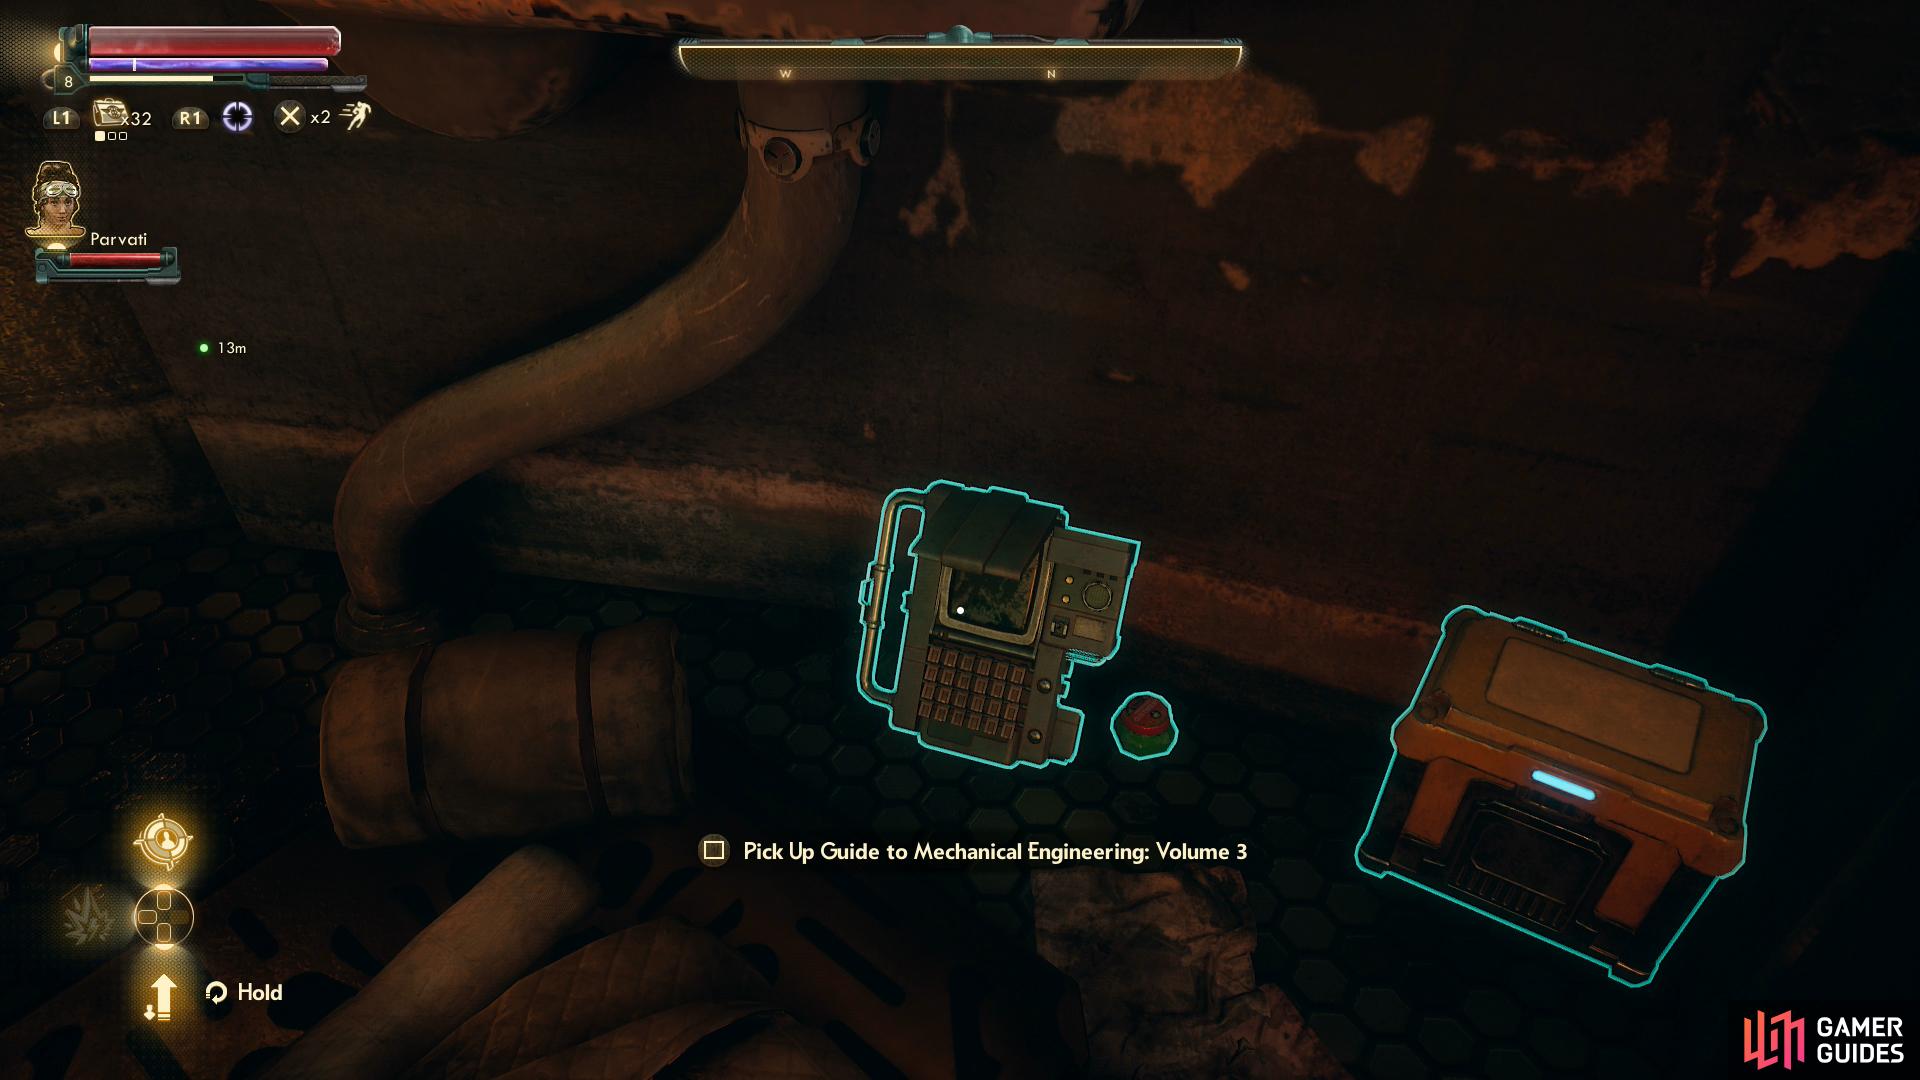
and grab the Guide to Mechanical Engineering: Volume 3 while you’re down in the pit.
Pass a [Sneak 30] check if you wish to show off (and earn some XP). Try to glean what information you can from him, then ask about dealing with the automechanicals and pass either a [Persuade 20], [Intimidate 20] or [Lie 70] check and he’ll give you Chester’s Passcode and tell you about the behavior control terminal upstairs - the one we talked about just a moment ago. You can also pass an optional [Engineering 10] check to muse about the reason why the automechanicals went haywire, but this is just for bonus XP.
When you’re done pestering Higgins, search near his bedroll in the northwestern corner of the room to find the Guide to Mechanical Engineering: Volume 3, the last such datapad that Thomas Kemp needs to finish his collection… and hopefully become a somewhat competent engineer. You can return these datapads at your own leisure, as well as return to the Mechanical Control Terminal upstairs and set the prowling automechanicals against each other, if you wish. When you’re ready to continue deeper into the plant, however, return to floor 02 of the pit and go through the door to the west.
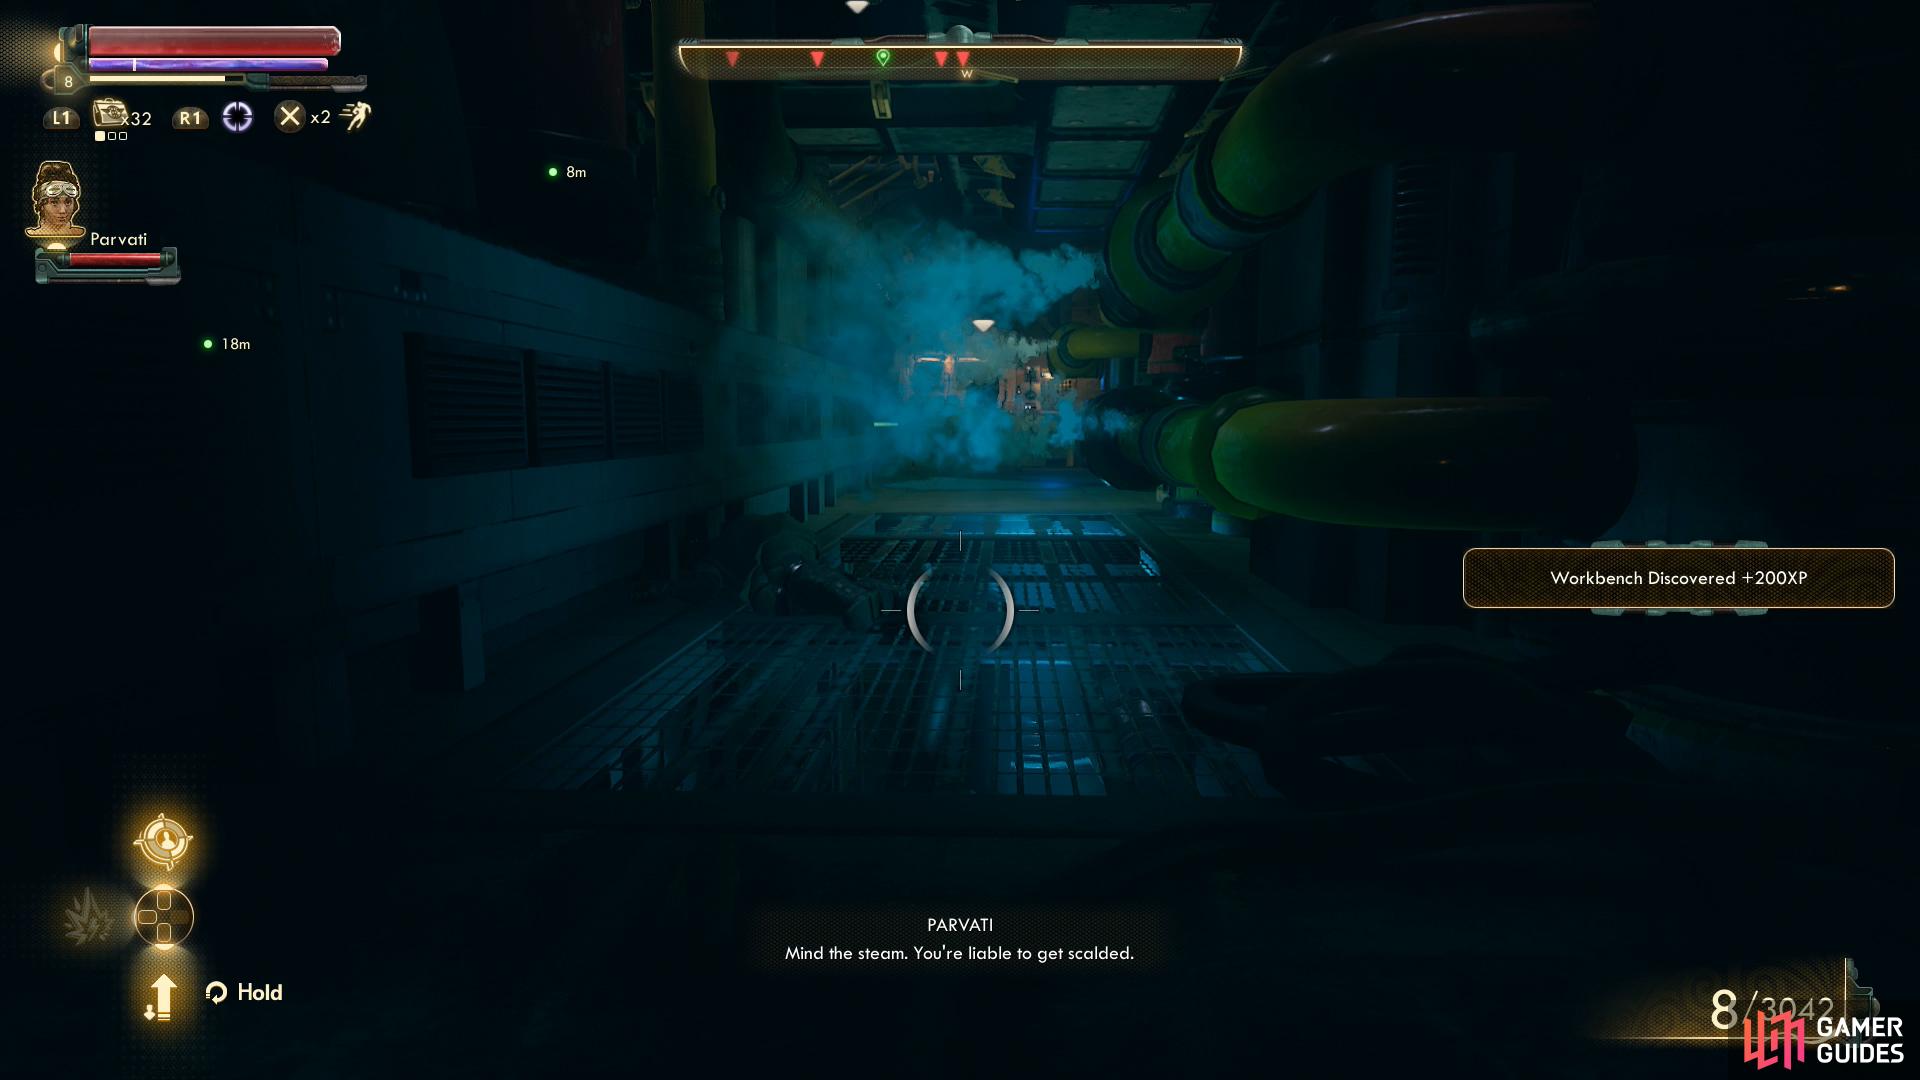
In the hallway beyond the aforementioned door you’ll find another door at the end of the hallway (to the west) and a locked door [Lockpick 25] midway down the hallway (to the north). If you can pick the lock you’ll find a room with a workbench, a ladder, and beyond the ladder to the west, a passage filled with steam. Ouchie, scalding, don’t touch it steam.
Whether you go through the door at the end of the hallway or climb the ladder, both will lead to a two-story room occupied by a handful of automechanicals (or perhaps just one, if you set them to target each other). Obviously if you climb the ladder you’ll end up on the upper walkways, where you’ll find the second of the three electrical locks you need to manually override before you can reroute the power. Defeat the robot(s), flip the switch, and if you want to shut off the steam you’ll find a terminal under a ramp, in the northwestern corner of the ground floor. Just pick the option [Engineering 20] [Shut off steam release valves.].
The room with the third override switch has even more automechanicals for you to fight
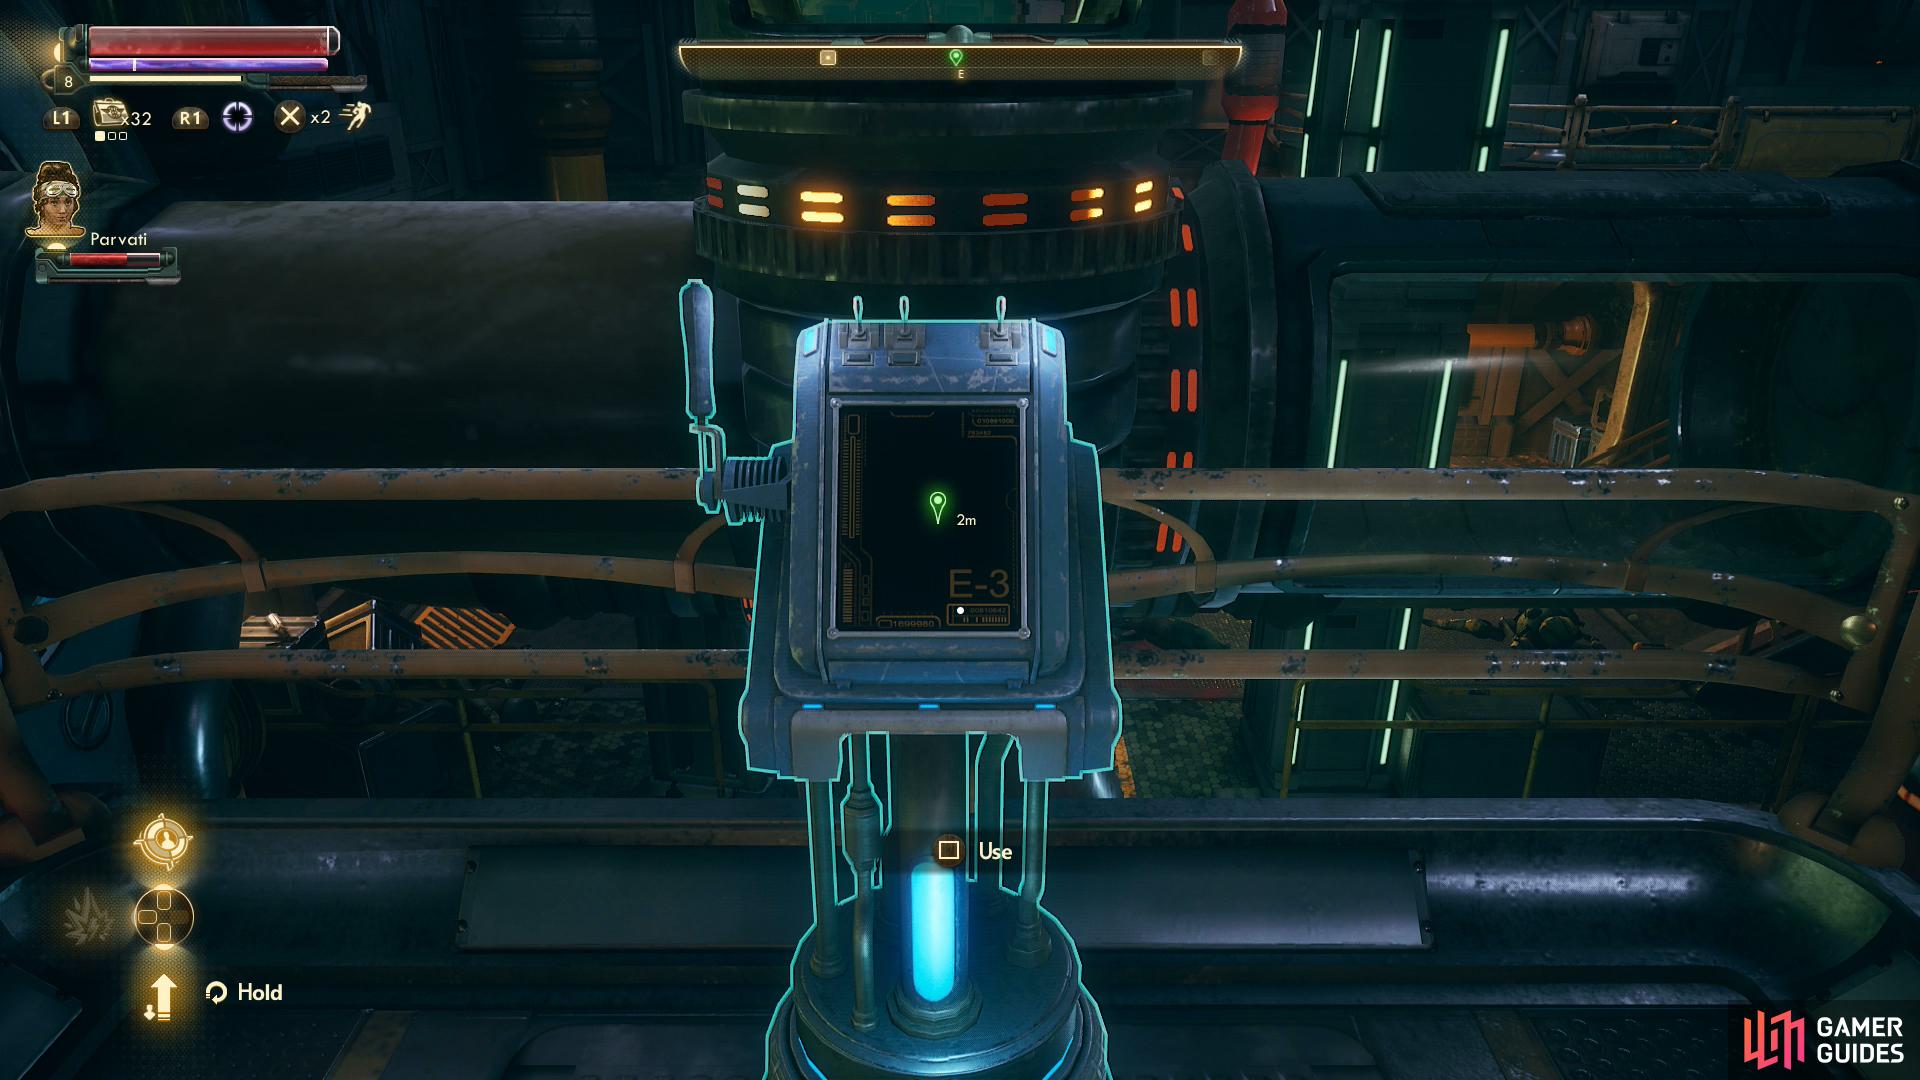
once they’re vanquished, hit the third override switch.
Two down, one to go. Ascend the ramp to the walkways and find a door to the south beyond which is a large room filled with automechanicals. It’s here that changing the targeting parameters will have the biggest influence, as the several bots in here can be a nuisance… you know, if you don’t have a shock weapon and are playing in a higher difficulty. In any event, dust the robot(s), ascend a ramp and unbar two doors, one to the south (which leads to some walkways just beyond the Geothermal Security Office) and one to the east (which leads to some walkways near the room with the Automechanical Control Terminal). More importantly, continue west, then south, then east from the ramp to find the third of the three electrical locks you need to manually override before you can reroute the power. Flip it and head back to the Geothermal Master Control Terminal near the beginning of the plant.

When you approach the Master Control Terminal, Parvati will make her opinion known.
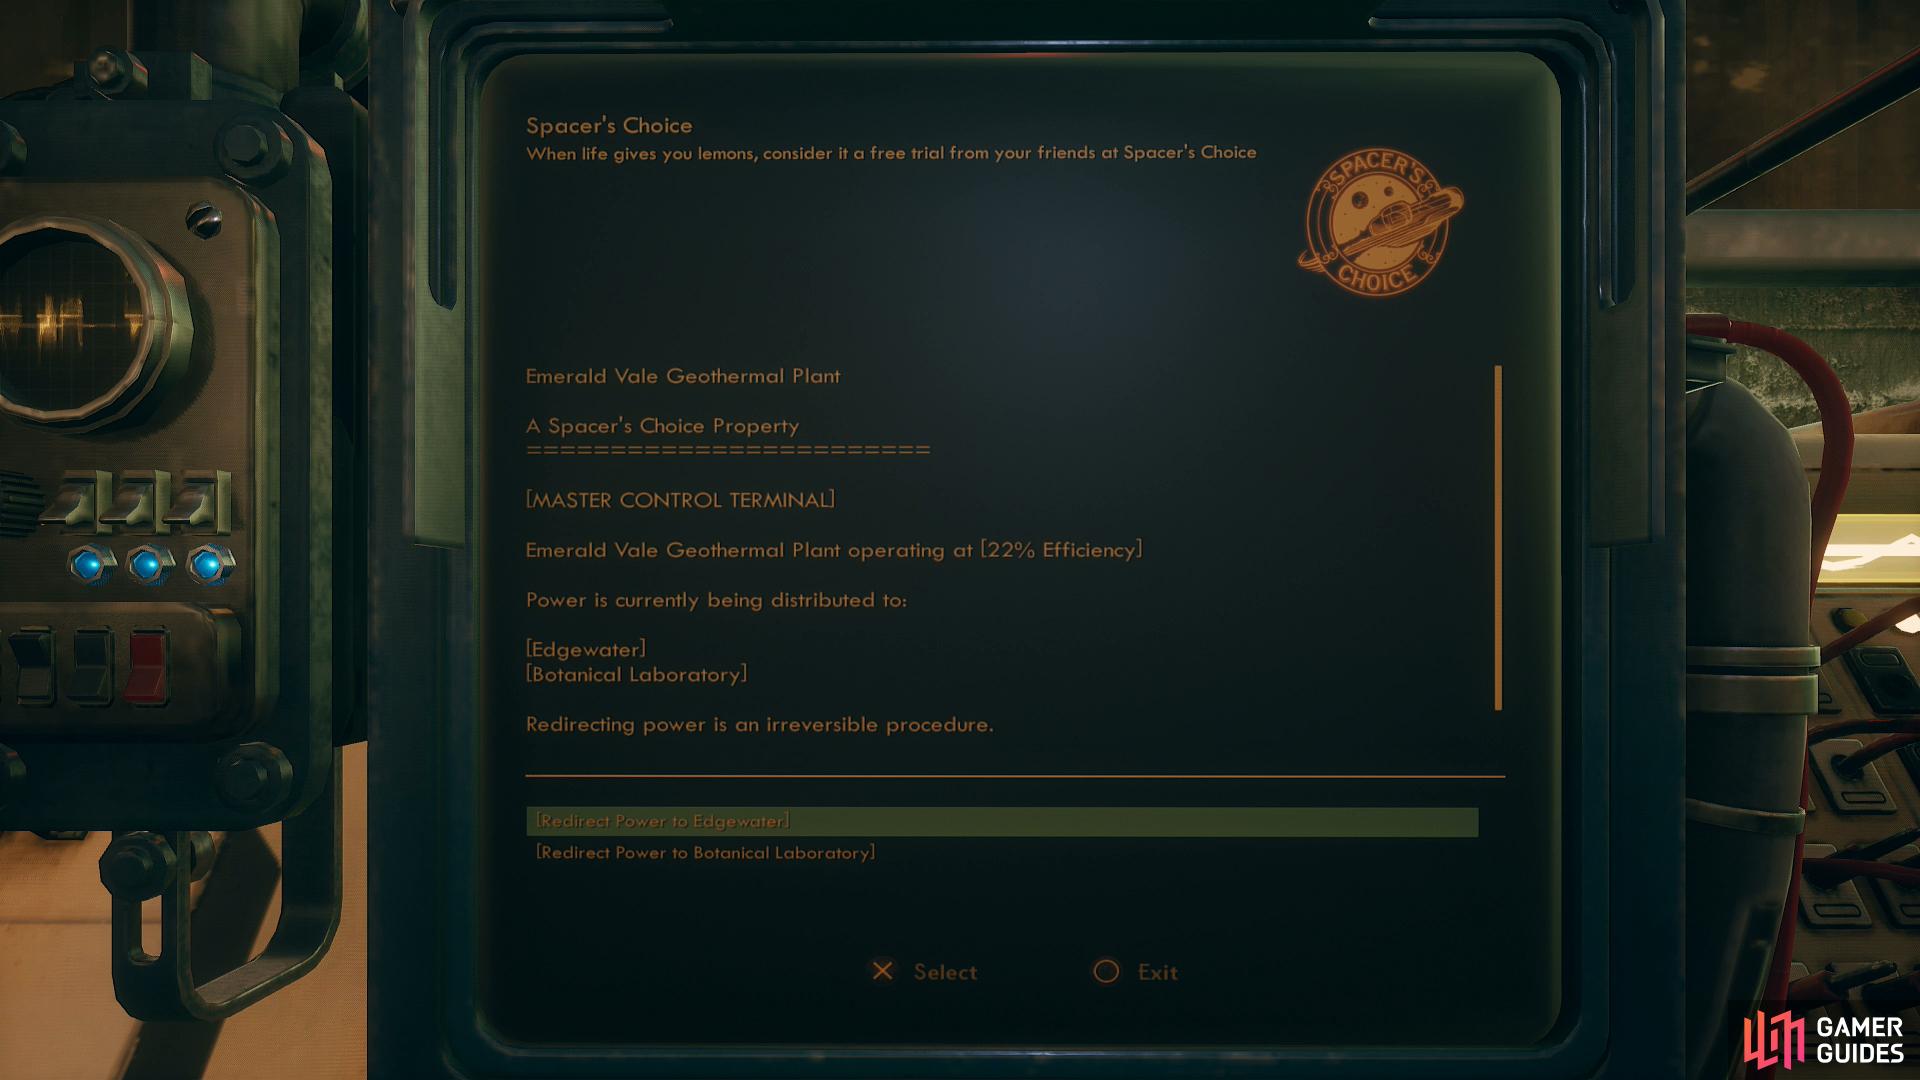
Choose whether to reroute the power to Edgewater or the Botanical Lab.
Rerouting the Power
When you approach, Parvati will chat with you and make her opinion known. Not surprisingly, she’s not in favor of cutting the power to Edgewater, effectively killing the town. Sentimental, that one. Say what you will - Parvati will stick by you no matter what your decision, and consider making a HARD SAVE here in case you want to make a different choice later.
This is the Megaton decision for The Outer Worlds, and you’ll choose which settlement dies and which one thrives… or rather, persists. Obviously the faction you favor with power will think much more highly of you than the one you deprive (although negative reputation gain for either action is surprisingly small). Provided you completed all the other side quests for said faction before this choice, it should be enough to get you to 100% positive reputation with the faction you favor.
Read the warning below if you want to plan for potential trophies/achievements and don’t mind some minor SPOILERS
In any event, depending on the choice you made this quest will split. If you sided with the deserters at the Botanical Lab, check out the text under the heading “Siding with the Deserters”. If you sided with the residents of Edgewater and sent the power there, instead, check out the text under the heading “Siding with Edgewater”.
![Succeed at an [Intimidate 30] check to convince Reed to stand down](/assets/guides/161/the_outer_worlds_comes_now_the_power_reed_intimidate.jpg)
Siding with the Deserters
Reroute the power to the Botanical Lab, after which you’ll need to head back to Edgewater to behold your handiwork. If you take a detour and head back to Adelaide, however, you’ll find that her intended reception of the Edgewater residents is… well, not all it could be.
Return to Edgewater and make your way to the cannery, where you’ll find a crowd of disgruntled workers standing out front. Head inside to find Reed Tobson inside, who demands to know why you double-crossed him, which essentially boils down to an [Intimidate 30] check. If you can pass it Reed will call off his guards and you’ll be able to grab the power regulator without a fuss. If not, you’ll need to kill Reed and his guards to get the power regulator.
In any event, now that you have your power regulator skip ahead to the heading “The Unreliable”.

(1 of 3) If you routed power away from the Botanical Lab, Adelaide will be understandably unhappy, and pointedly tell you she won’t go back to Edgewater while Reed is in power.
Siding with Edgewater
Reroute the power to Edgewater, after which you’ll need to return back to the Botanical Lab and confront Adelaide, who is none too happy with you, as is to be expected. She doesn’t have the guards that Reed does, but she’ll “punish” you by forcing you to confront the rest of the deserters, which in this case means talk to Thomas and/or Grace. Reed needs his workers back, and despite their loss of power they’ll only return to Edgewater if you satisfy some of their concerns… in other words, you’ll need to complete the quest The Frightened Engineer for Thomas and A Few Kindred Spirits for Grace. Once those are completed you’ll be able to talk the deserters into returning to Edgewater, no dialogue checks required.
Adelaide is a bit more work, as she’ll pointedly tell you she’ll only return to Edgewater if Reed isn’t there. You can safely ignore this and return to Reed after getting the deserters to return, and in fact rerouting the power to Edgewater and keeping Reed in charge is the only way to later get the trophy/achievement “Mightier than the Sword”. If, however, if you want the best of both worlds - to preserve Edgewater and get Reed out of office - you’ll need to tell Adelaide “I’m willing to deal with Reed for you.” followed by “Reed isn’t just going to leave his post. I’ll need some help convincing him.”, although her solution to Edgewater’s woes is… well, rather short-term and gruesome.

You can convince Reed to step down in favor of Adelaide with some dialogue checks and/or knowledge of her “special fertilizer”.
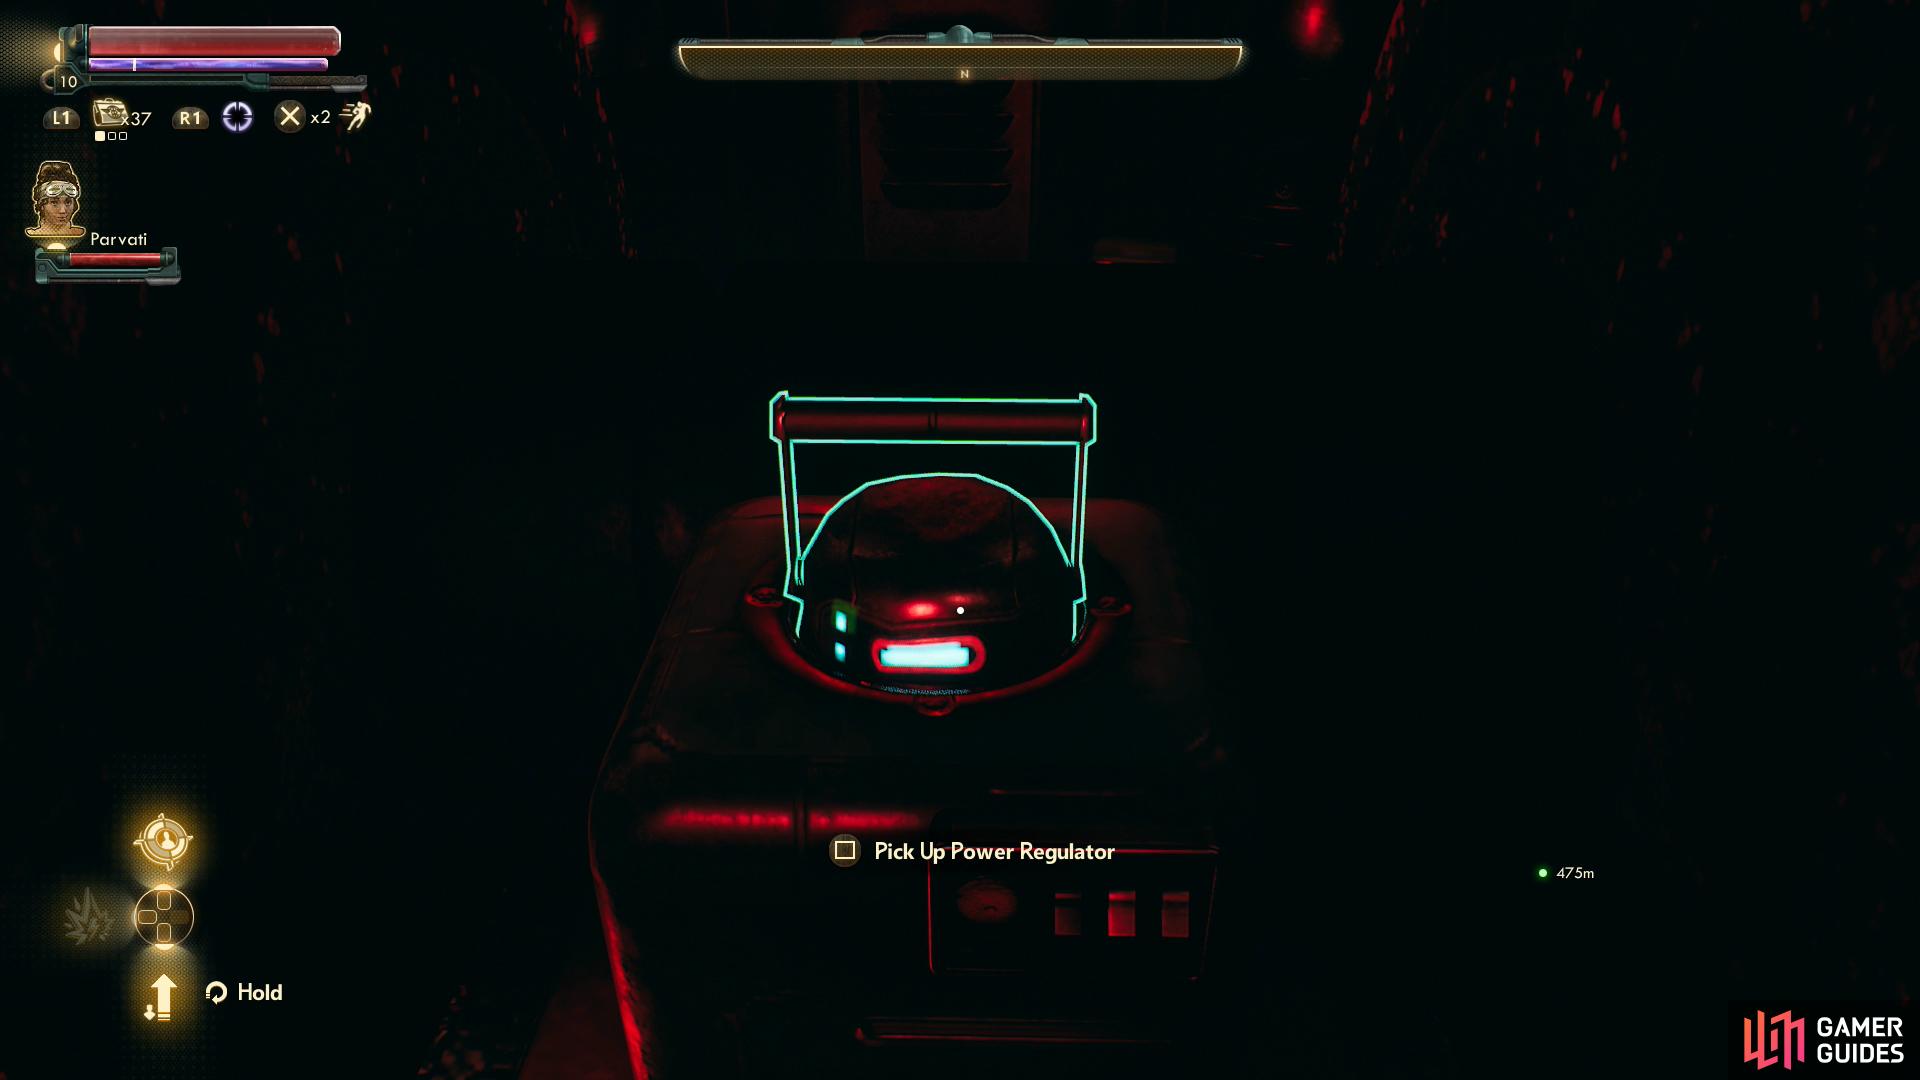
Either way, claim the power regulator from the Botanical Lab.
Return to Reed and, if you’re angling to overthrow him in favor of Adelaide, tell him about Adelaide’s condition, then inform him about the health of the deserters. You can go down a lengthy dialogue chain where you learn about Edgewater’s dietary deficiencies, but unless you pass a [Persuade 15] check followed either by a [Lie 25] check or by revealing what Adelaide’s “special fertilizer” is Reed’s not going anywhere. If you get him to step down, return to Adelaide and tell her the news, for which you’ll receive Adelaide’s Watch, which will sell for a cool 1,750 Bits.
Once the deserters have been convinced to go back to Edgewater and you’ve decided whether you want to leave Reed in charge or replace him with Adelaide (and have talked to all relevant parties about your decision) return to your ship. This should finally complete Comes Now the Power, and advance Stranger in a Strange Land. Either way, continue with “The Unreliable” heading below.

The Unreliable
Now that you’ve made your choice and have obtained the power regulator, return to the Unreliable. When you approach the ship, Parvati will stop you and ask to join your crew on a more permanent basis. There’s no gameplay reason to decline, so we’ll assume you take Parvati along. Once back on the Unreliable you’ll find Vicar Max waiting for you, too. He’ll be available to take with you the next time you leave your ship… well, after you leave Emerald Vale for the first time, anyways.
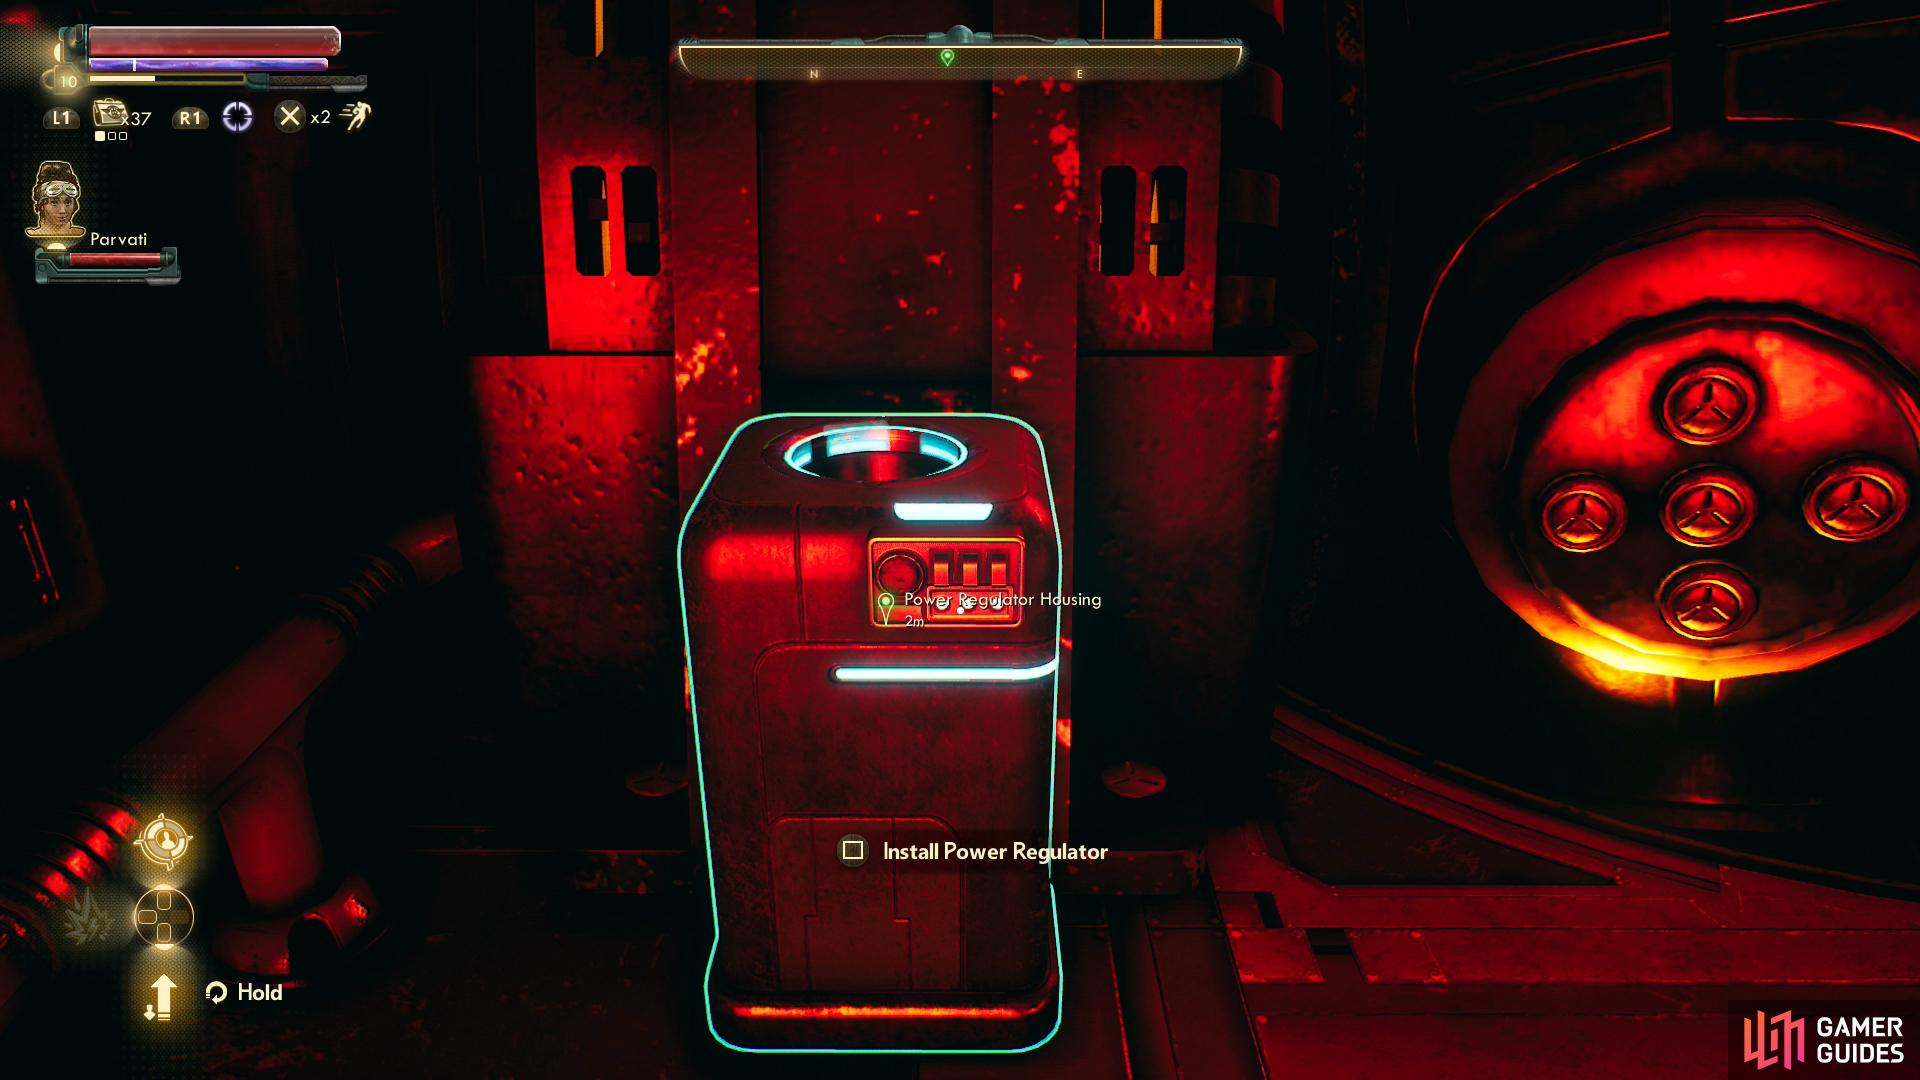
Talk to ADA and she’ll comment on your actions before questioning your engineering competence, giving you a chance to pass an [Engineering 20] check. In any event, head into the cargo room and climb a ladder, then continue northeast past another ladder to reach the engine room, where you’ll find a Power Regulator Housing. Drop the power regulator in and the Unreliable will come to life. Huzzah! Return to ADA and tell her about your success at basic engineering, after which you’ll be able to take the Unreliable into orbit.
Once in orbit you’ll be contacted by Phineas, who will, at length, tell you that your search for the chemicals that will revive the Hope colonists will require you to travel to Stellar Bay on Monarch. The only problem is you’ll need a Navkey to get there, and to get that you’ll need to do business with a woman named Gladys Culkelly, who operates a black market on the Groundbreaker. Okay, you don’t really need to get this Navkey, you could always just travel to another, less secure landing spot - in this case Cascadia - but the hostile wildlife you’d have to survive as you make your way to to Stellar Bay on foot makes this a less than safe option. He’ll also tell you about a Holographic Shroud he invented, a stealth device that’ll become a regular gameplay mechanic going forward - something we’ll cover in detail when it’s more relevant.
With that the quest Stranger in a Strange Land will finally end and you’ll start up Passage to Anywhere, another potentially long-running superquest which you’ll be dealing with for a while. You can select your destination from the Navigation Terminal now, but before you head anywhere, you might want to explore the Unreliable a bit, as there are a few things worth pointing out.
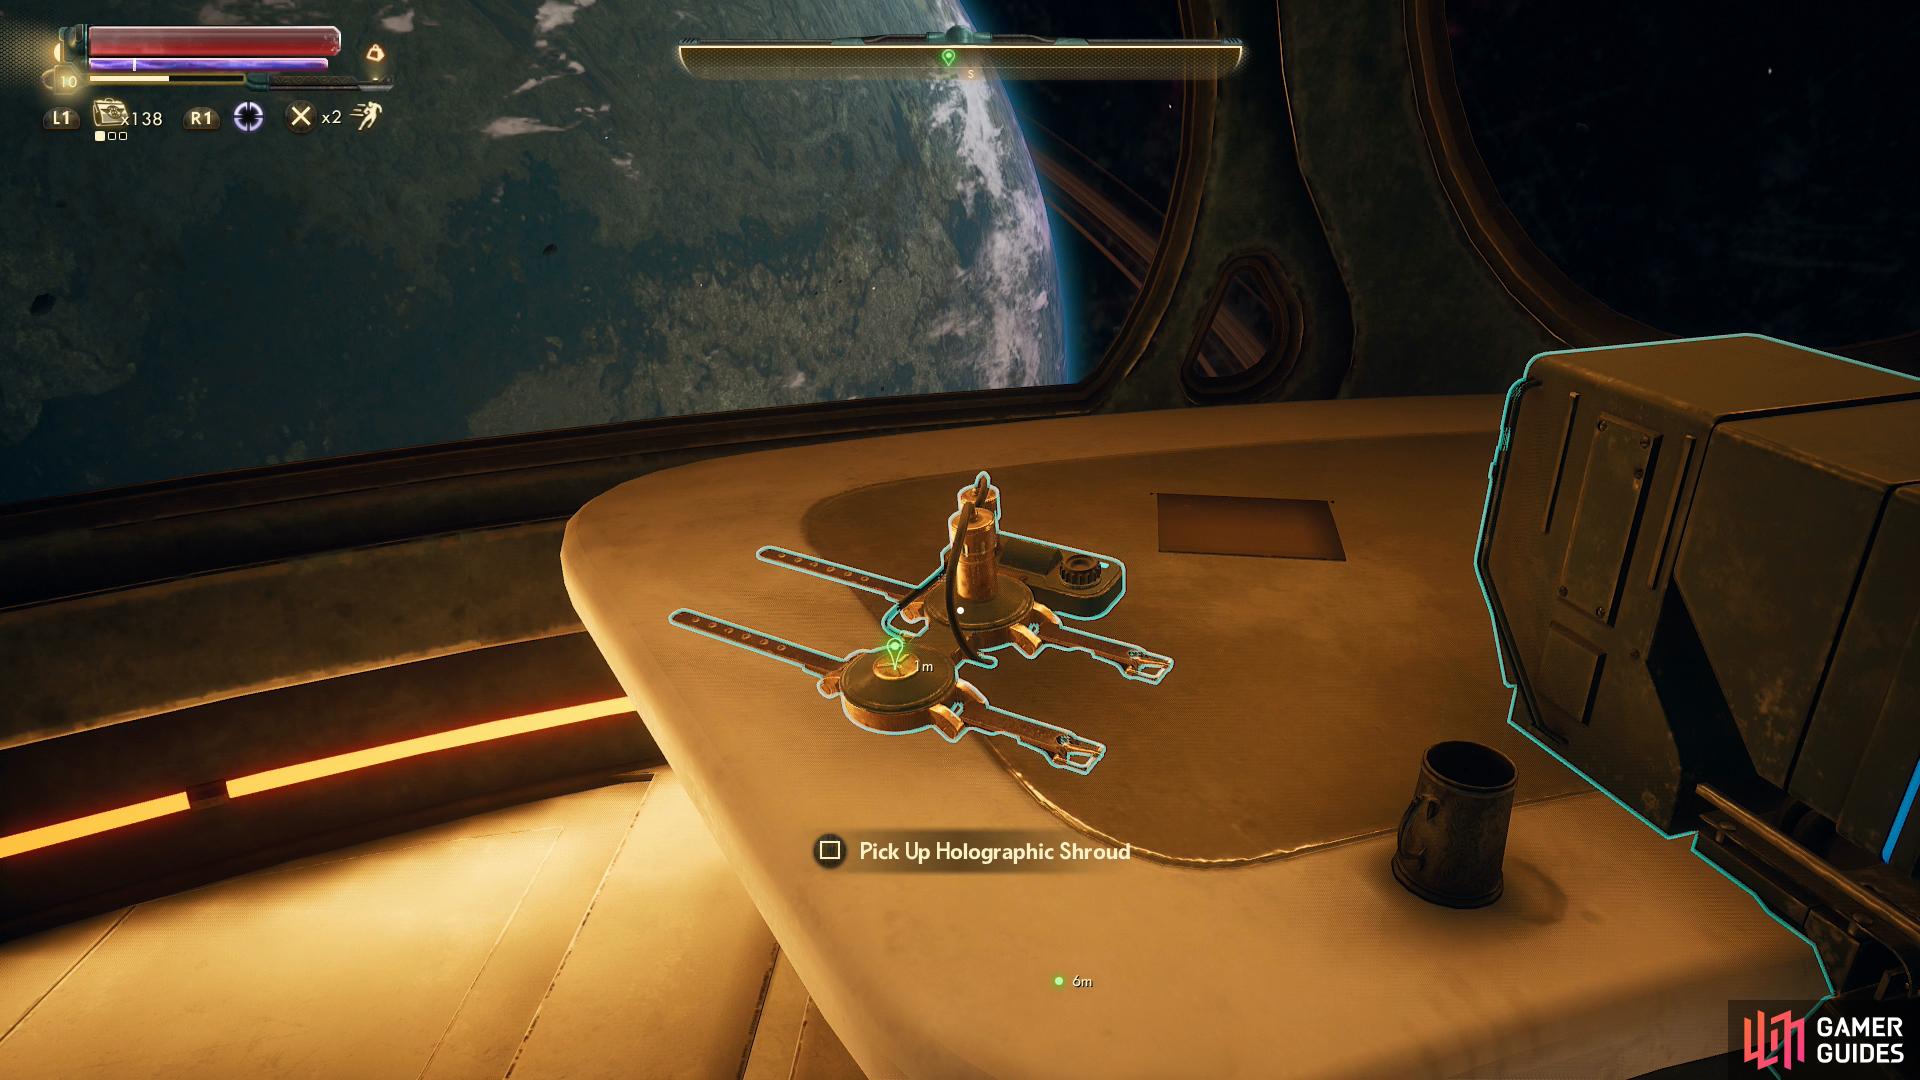
Now that you’ve restored power and have the ship up and running (and flying!) all the doors will be open allowing you to explore more thoroughly. If you head up a flight of stairs opposite the entrance to ship you’ll find the captains quarters - your quarters - inside of which you’ll find the Holographic Shroud on a desk along with a terminal. Be sure to grab the Holographic Shroud, as it’ll give you considerably more options for completing quests, and is worth a huge hunk of XP, as well.
If you take a gander at the terminal you might just find some messages pertaining to some of your deeds in Emerald Vale, and you’ll certainly find some of Alex Hawthorne’s old correspondence, particularly some messages with a man named Udom Bedford. This Udom seems fond of impounding Hawthorne’s ship (accidentally, of course) and questioning the deceased captain about the whereabouts of Phineas. There’s also some logs about some of Phineas’ experimental weapons (in this case a Shrink Ray) and another scientist who created some hammer or another. Reading these will start the side quest Weapons From the Void, a long-running quest that’ll track your acquisition of various “science weapons”. Aren’t all weapons technically science weapons? Whatever the case, it’s definitely worth your while to track these down.
Most importantly for packrats, you’ll find a Bin in the corner of your room, where you can stash your ill-gotten gains. There are also two Lockers on the ground floor where you can stack loot, not to mention two Fridges in the kitchen - plenty of space to stash and organize items, if you care to do so.
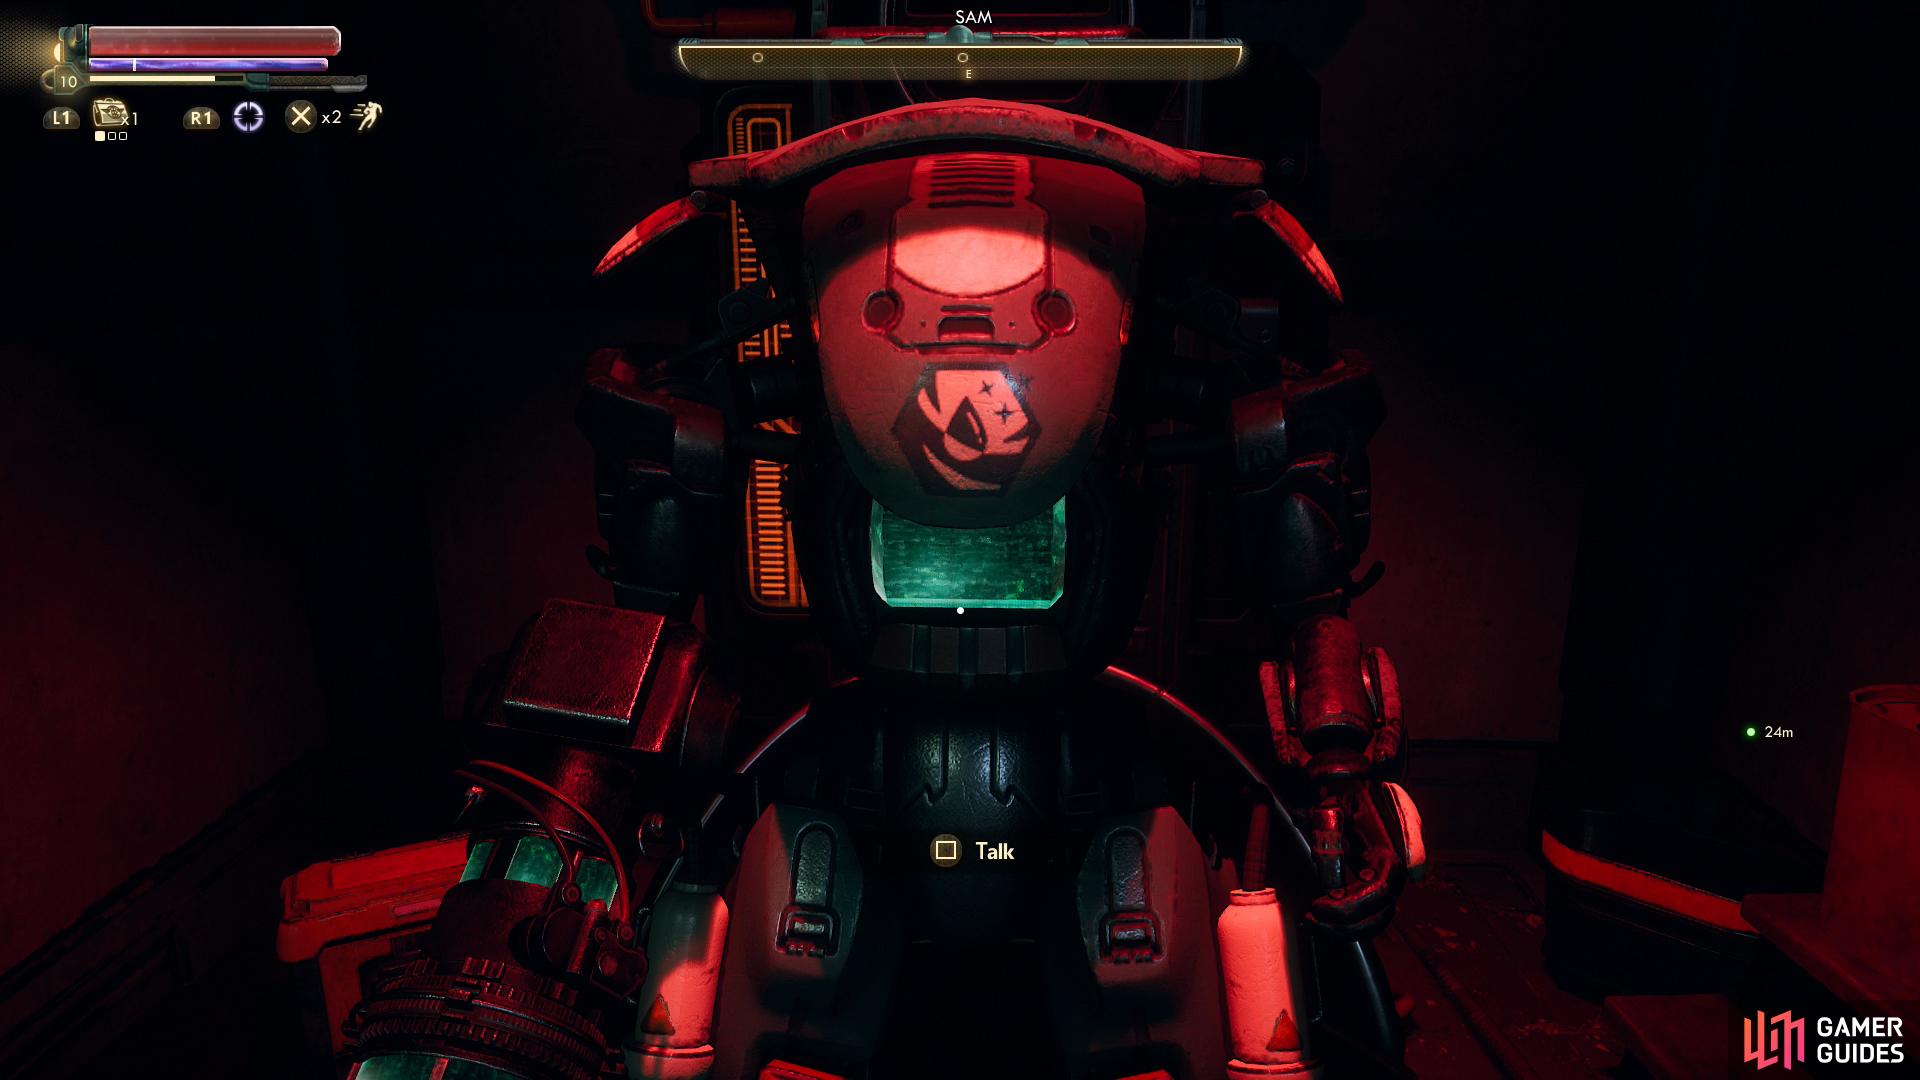
There’s plenty of other loot you can gather around the ship - especially in the crew quarters - but the last truly important things to consider doing on the Unreliable at this time is to set in motion some companion quests… Leave the captain’s quarters and head up another flight of stairs, then enter a janitorial closet to the right (east). Inside you’ll find a disabled automechanical, SAM, and merely examining it will start the companion quest The Cleaning Machine.
Return downstairs and ask ADA about the janitorial bot, then head back up to your quarters and check the terminal, which will now have the entry [Search Term: SAM], which will turn up three entries you can read, the third of which will mention an Acid Sweeper which Hawthorne planned to… acquire… which can now be found in Roseway. This advances the quest The Cleaning Machine and earns you some XP. Who knows? Maybe you’ll find a reason to venture to Roseway at some point, in which case keep poor SAM in mind.
Next up you’ll want to talk to Vicar Max, who can be found in his quarters. Talk to him and ask him about the book he wanted to find and he will - after potentially quite a bit of chatter - tell you that he’s keen on tracking down a colleague of his, and to do that he’ll need to access a data cartridge from a security terminal on Groundbreaker, specifically so he can acquire a registry of crew manifests for arrivals and departures from the station. This starts the quest The Empty Man.
In any event, you should now have a good idea of what you can do on the Unreliable and have picked up a few quests. Return to the cockpit and use the Navigation Terminal to get a view of the Halcyon system. Your possible destinations (areas you can travel to are highlighted in blue) include Phineas’ Lab, Terra 2 (Edgewater Landing Pad), the Groundbreaker, Monarch (Cascadia Landing Pad) and Scylla. Groundbreaker should be your next major destination, as the quest XP you can earn there may level you up a few times, not to mention its where you’ll need to travel to advance virtually every quest you currently have. The foes in Scylla and Monarch aren’t insurmountable, but on Groundbreaker you’ll unlock another destination that’s a more gradual difficulty increase.
…of course, nobody will fault you if you take a quick trip to Phineas’ Lab to grab that Shrink Way and advance Weapons From the Void, first. In fact, lets do that now before we travel to the rather busy Groundbreaker.
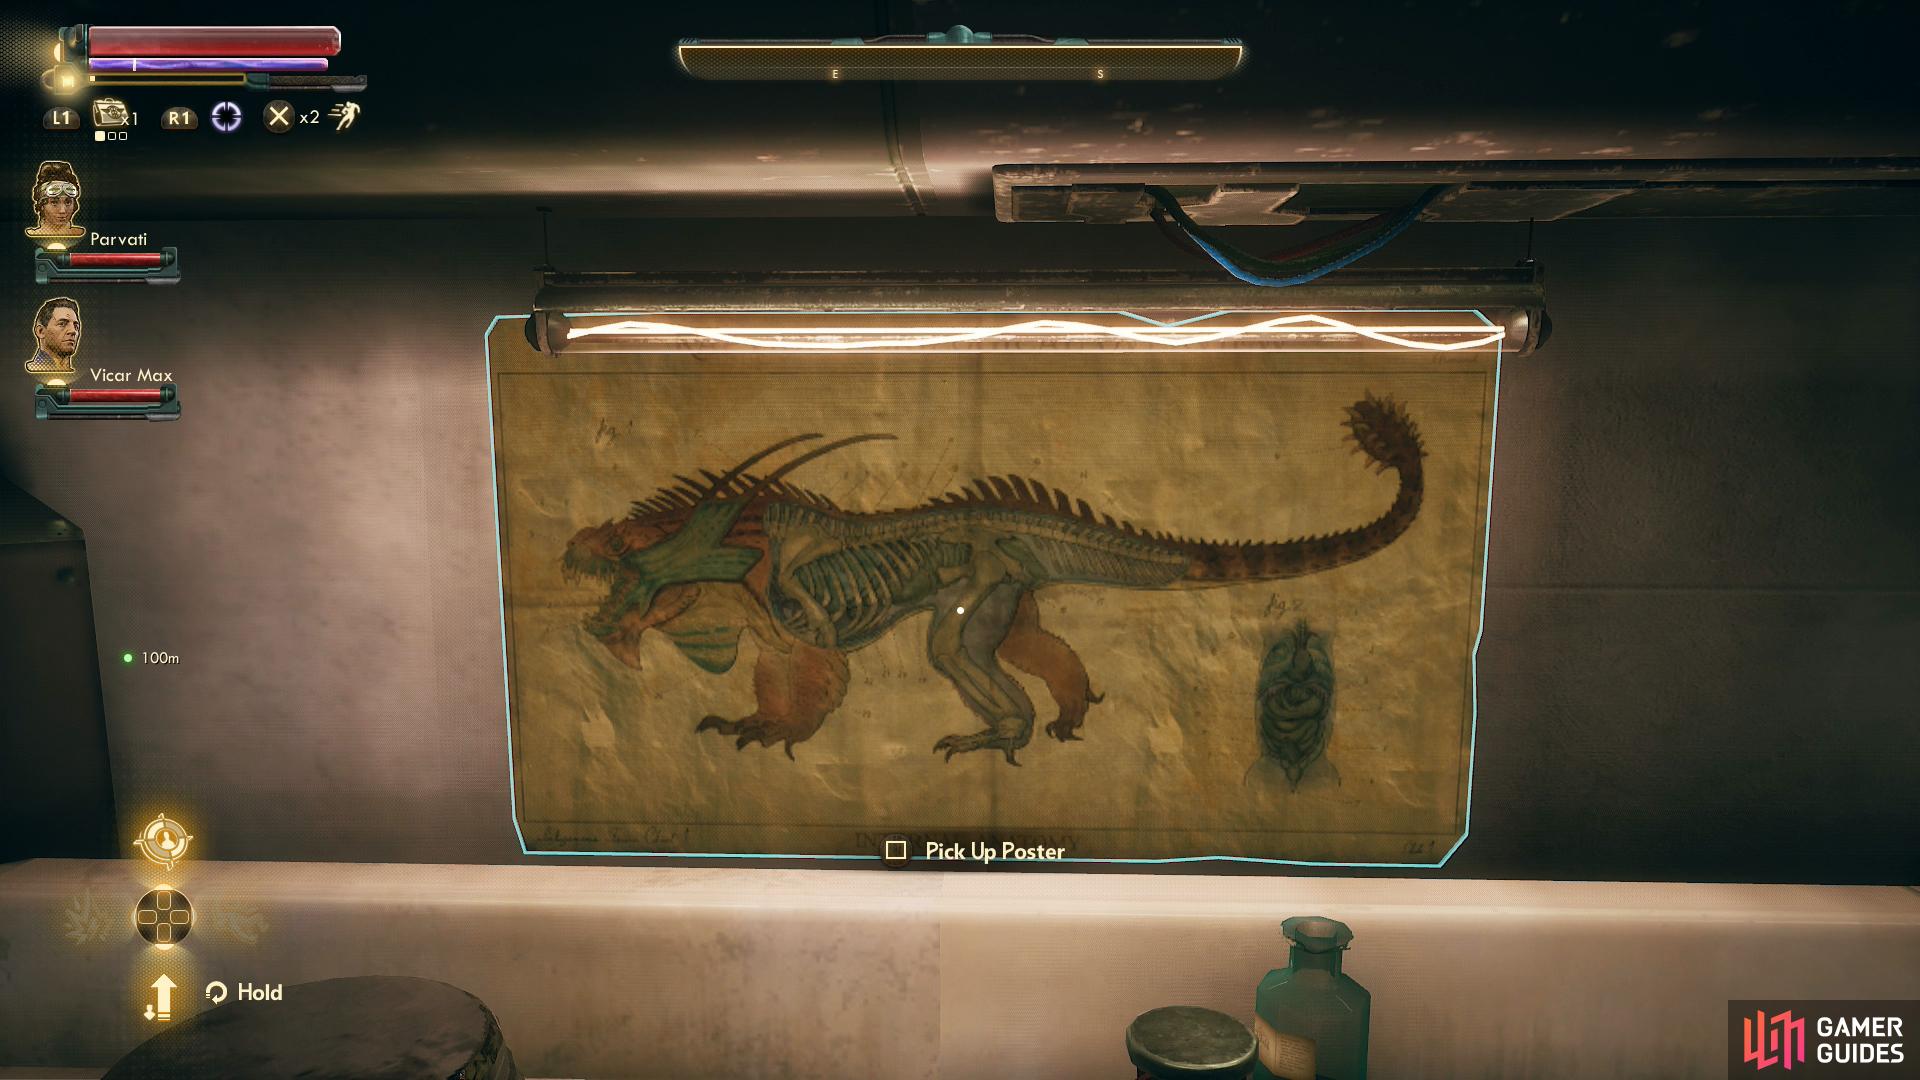
You’ll find a variety of posters in Phineas’ Lab, which you can use to decorate your ship.
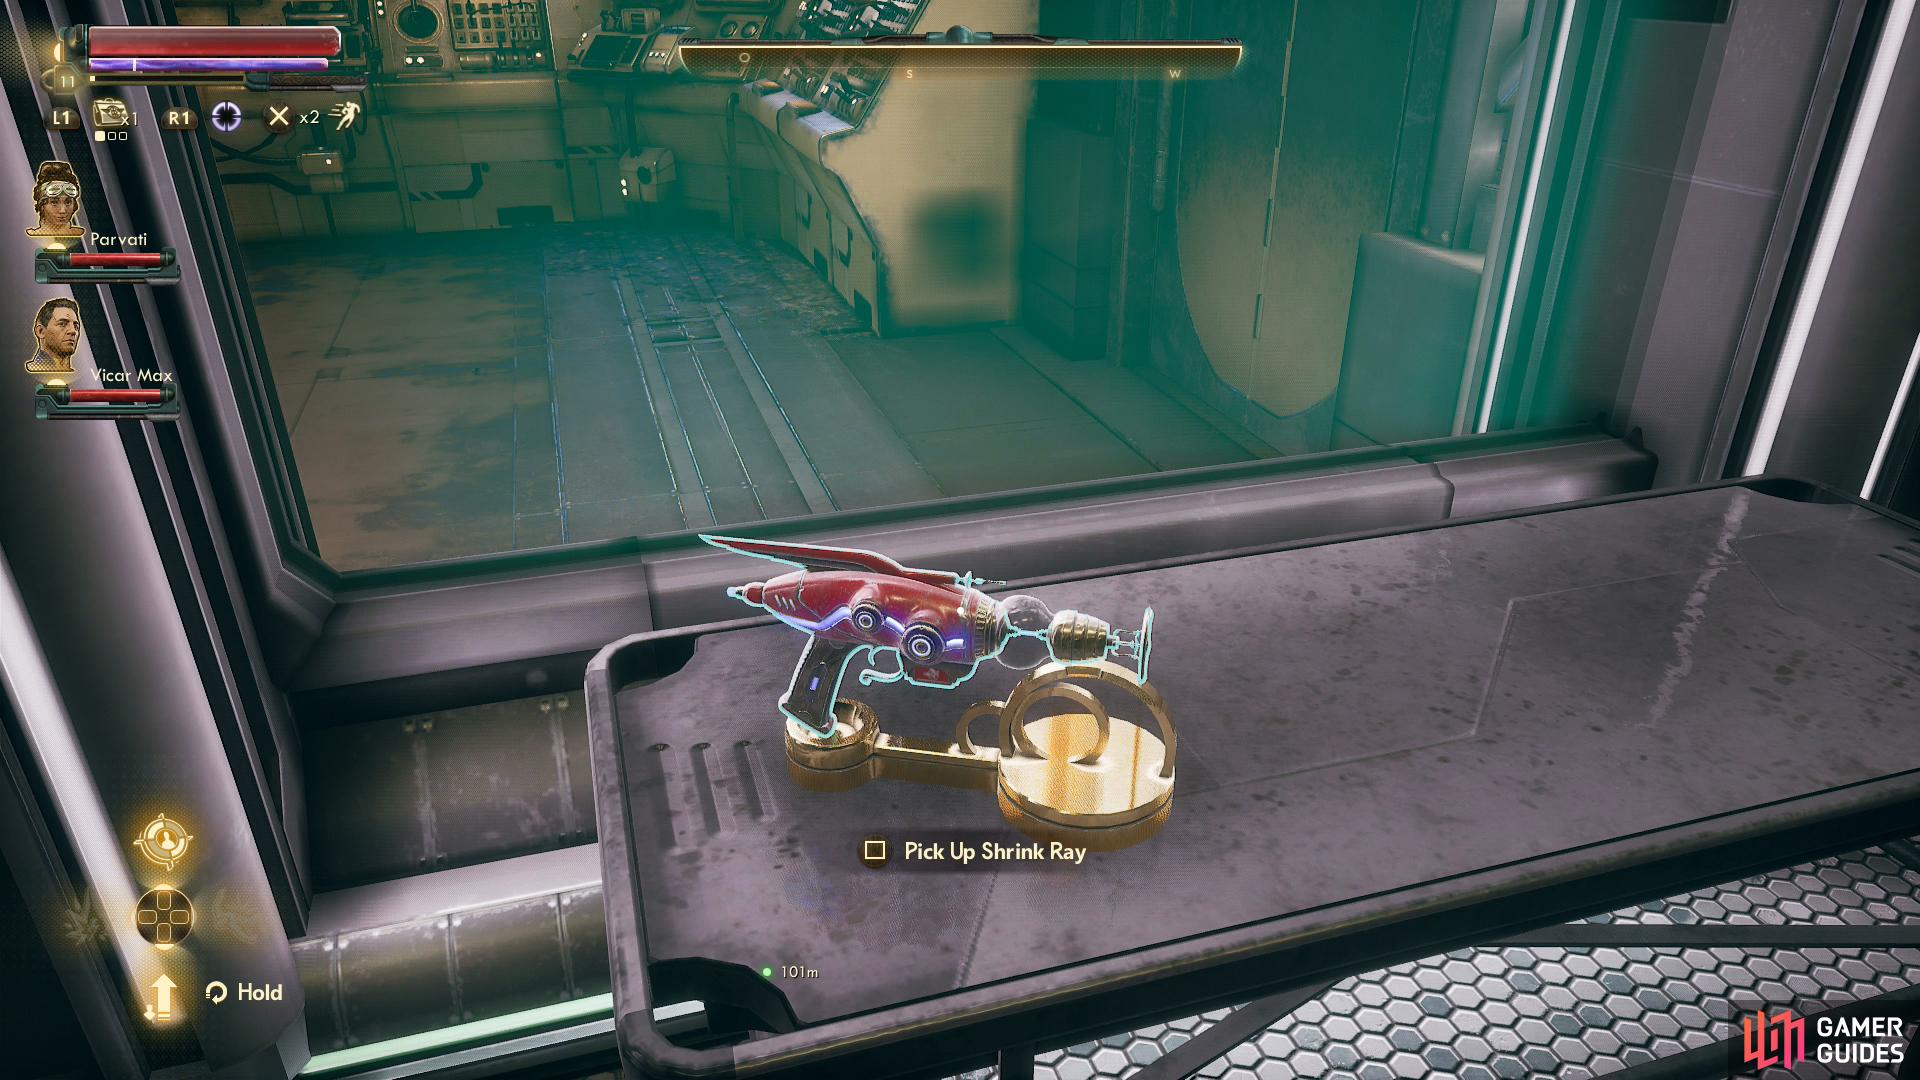
Naturally you can also find a Shrink Ray.
Phineas’ Lab
Once you arrive you’ll get the opportunity to pick you crew, which is really just a matter of exclusion at this point. There’s no reason not to bring both Parvati and Vicar Max along, as they’ll both give you skill bonuses so long as they’re in your active party. Parvati you should already be familiar with, but Vicar Max will contribute to your Intimidate, Hack and Science skills so long as he’s in your active party.
Anywho, exit the ship and search the landing platform for the odd container and lootable - Phineas won’t mind a little borrowing among friends - then head south through two doors to reach the lab proper. Phineas is safely behind some rather sturdy glass (no derailing the plot!), but you can talk to him through a microphone, if you wish. There’s surprisingly little of substance that’ll be said, however, although you can pass a [Science 25] check for some XP.
As for loot, pick up a Hibernation Helmet on a table northeast of Phineas, while along the eastern edge of the lab you’ll find three Posters you can nab, two on a wall and one on a table. Finally grab the Shrink Ray off a table just west of the microphone you can use to talk to Phineas. Less interesting loot can also be found lying around, especially scrap from ruined automechanicals, and you can also interact with two terminals, both of which will allow you to perform a [Hack 25] check. There’s also a bit of lore on your revival from Phineas’ perspective, if that interests you.
When you’re done looting around, return to the Unreliable and head to the Groundbreaker.
No Comments