
Rendezvous with Hawthorne
Watch some scenes at the start of the game, then create your character. After this, a man named Phineas Welles will fill you in on some rather important details. You’re a colonist aboard the Hope, a ship full of thousands of settlers sent to the Halcyon system. Unfortunately due to a malfunction your ship took longer than expected to reach its destination - some 70 years - and after being frozen for so long there were some… complications in reviving the Hope’s colonists. Suffice to say, without the proper chemicals the colonists had the unfortunate tendency to liquefy and Phineas needs you to go acquire more chemicals to revive the rest of the Hope’s popsicles - a task easier for you than him given that he’s a wanted criminal.
With this backstory you’ll begin your first quest, Stranger in a Strange Land and sent planetside to Terra 2 to meet with a smuggler named Hawthorne. When you land you’ll find that Hawthorne came down with a bad case of getting crushed by your pod on account of him being a complete moron. Well then. Uh… looks like you’re the proud owner of Hawthorne’s ship! You know, once you find it. Possession is nine-tenths of the law, after all.
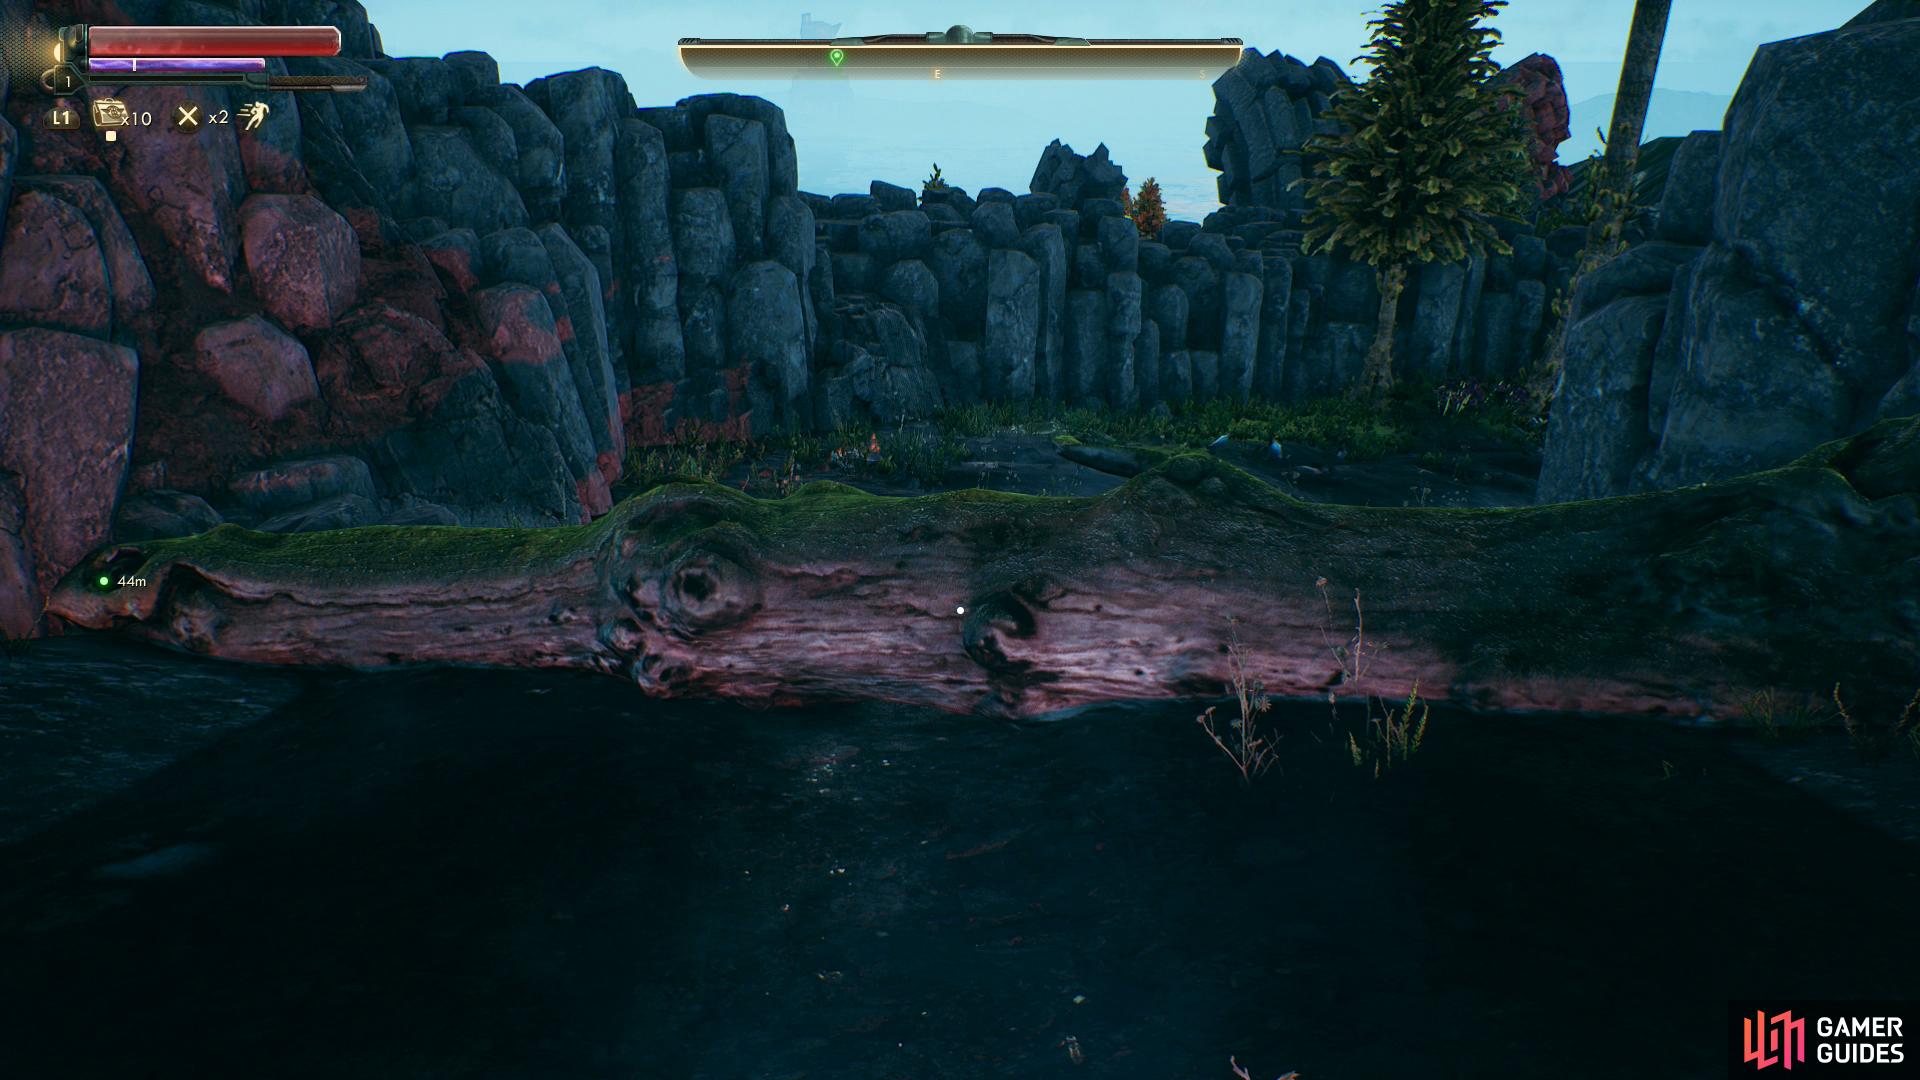
Jump over one log
then crouch under another.
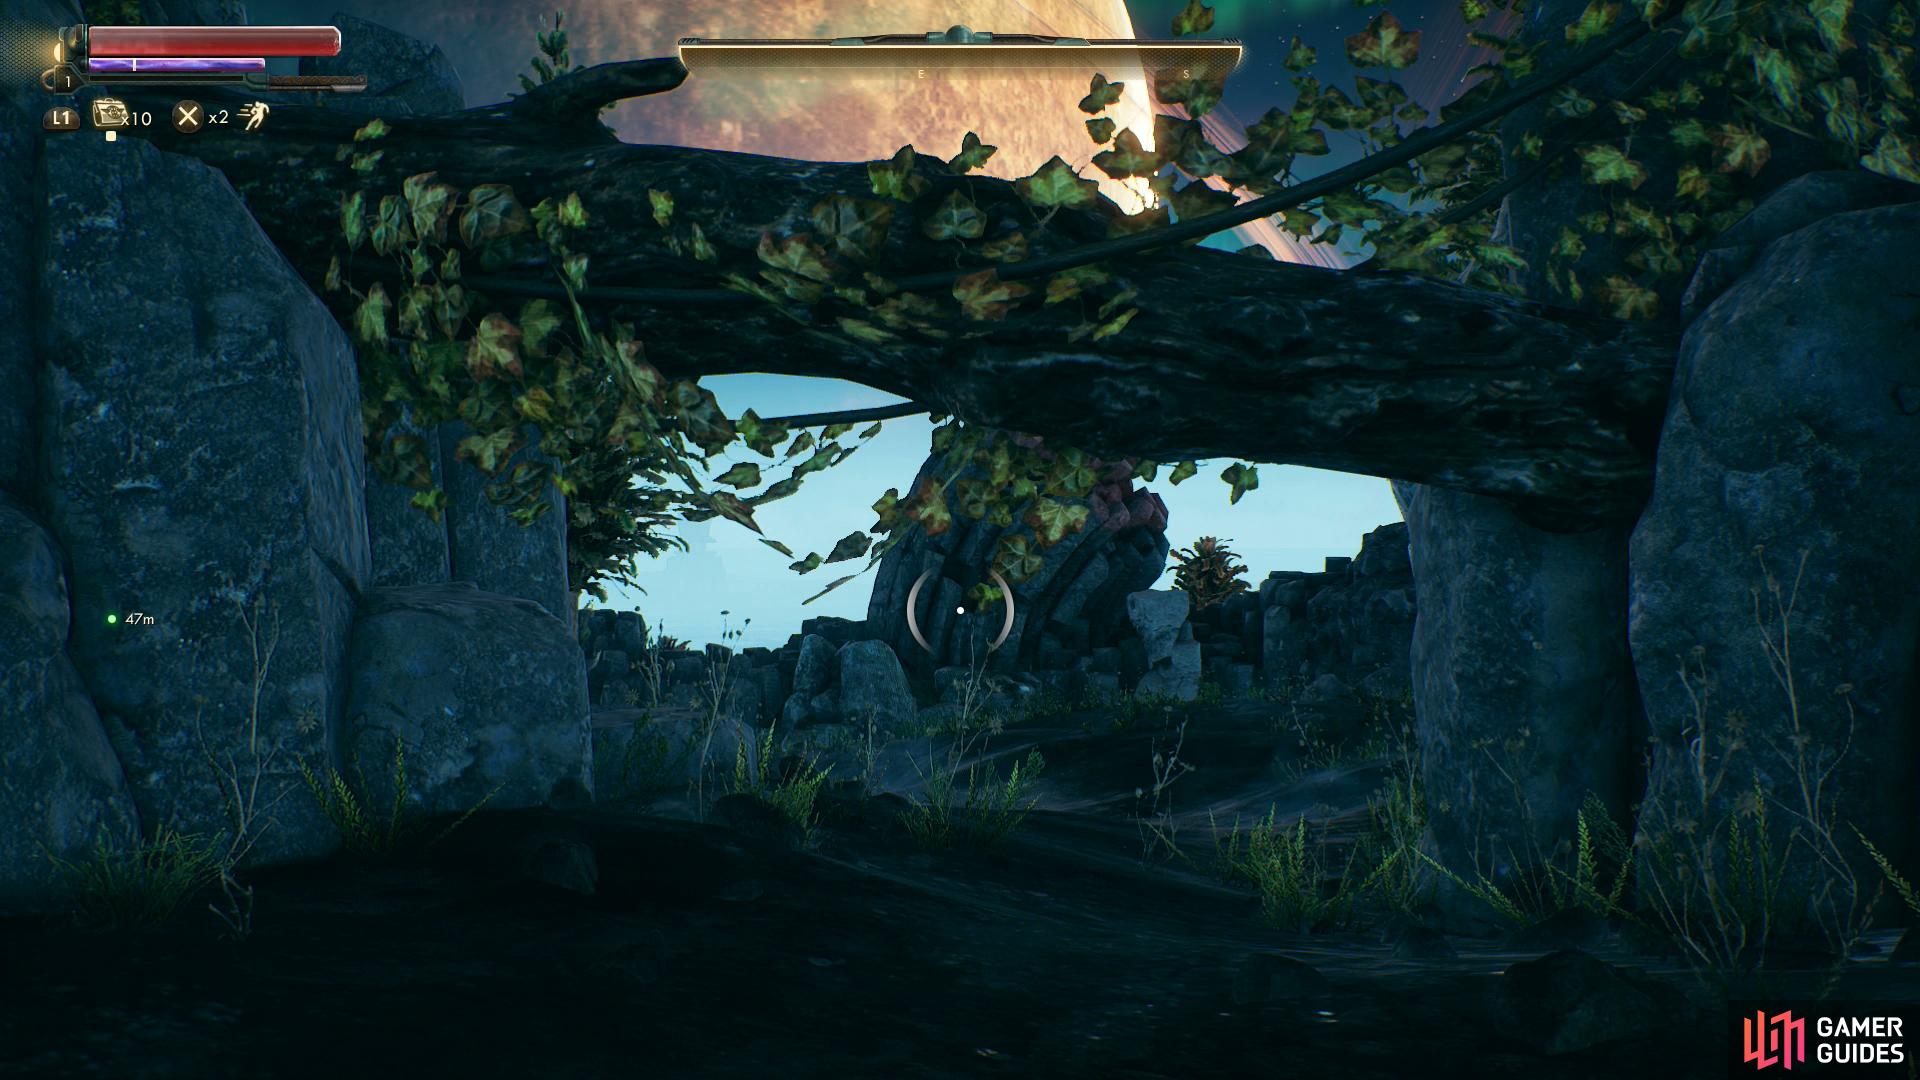
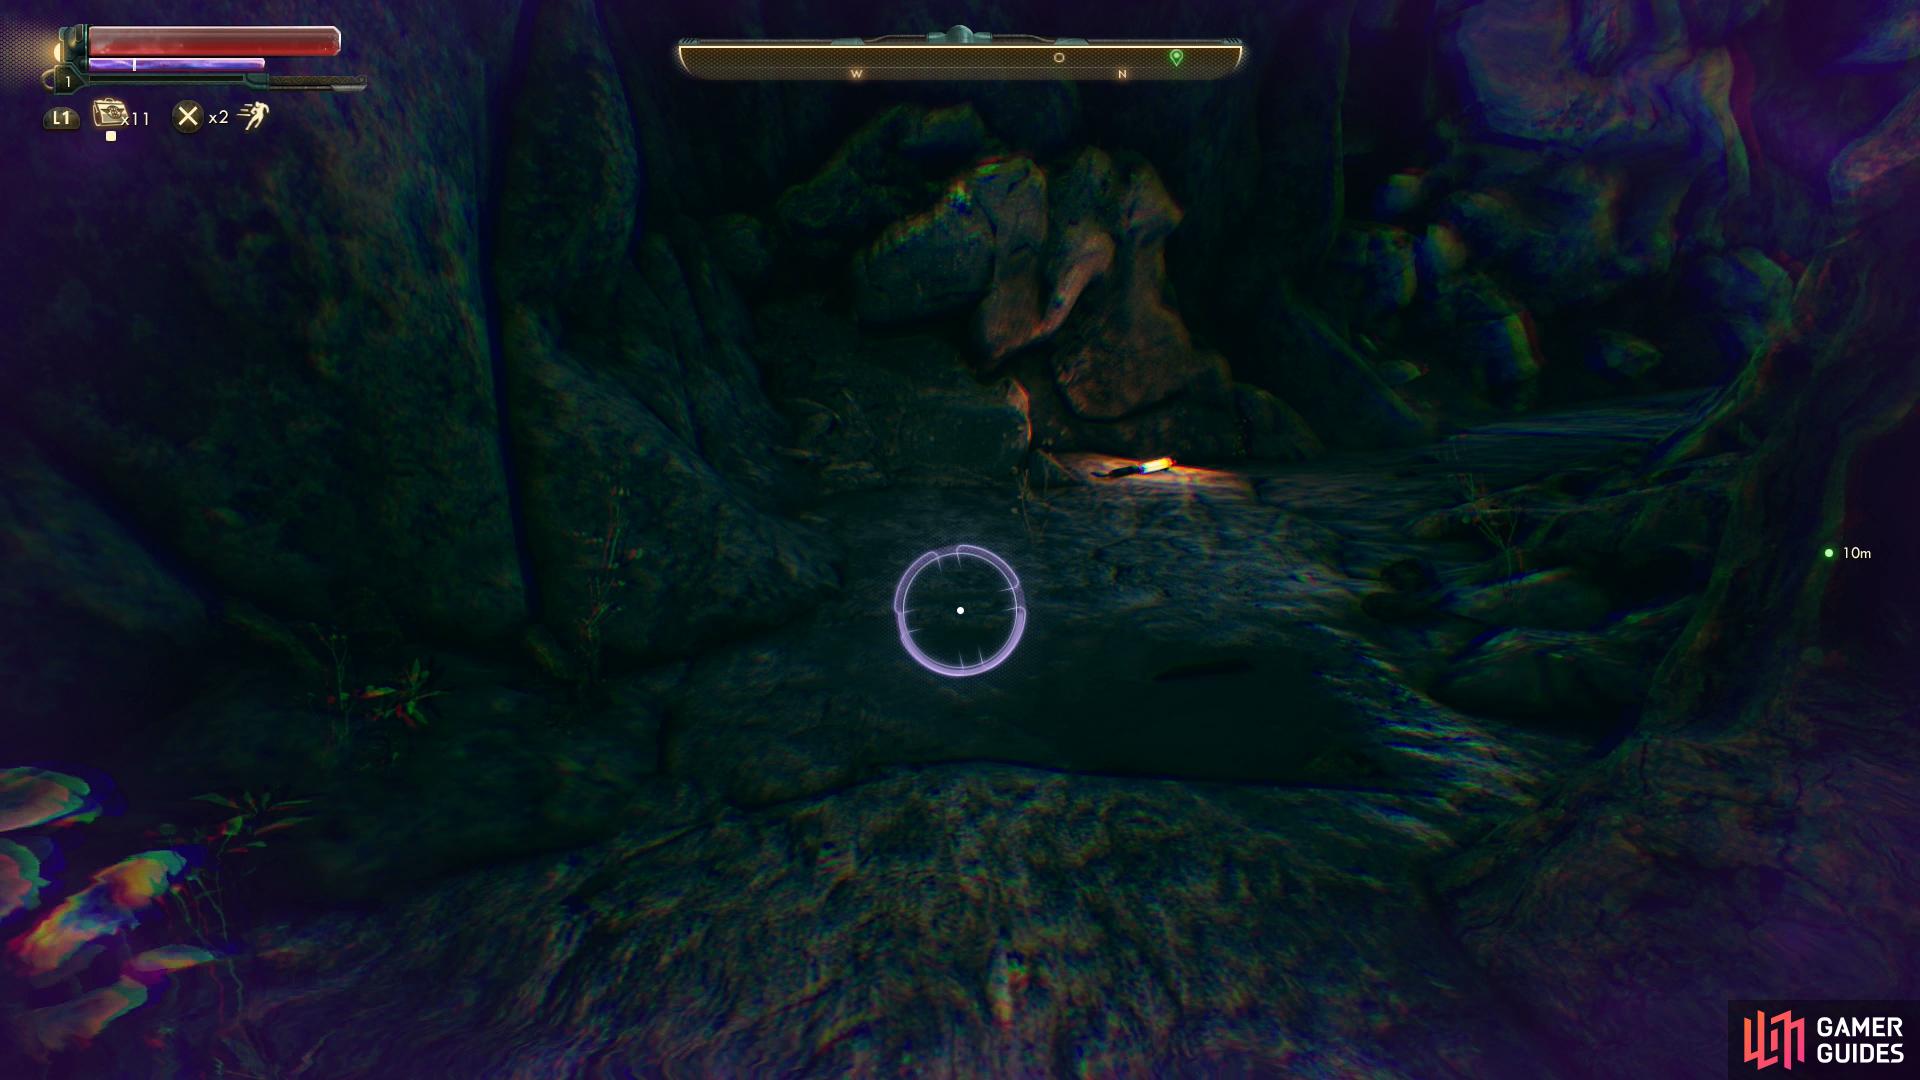
When you’re in control, head downhill to the east and when prompted jump [X/A] over a log and turn southeast to find another log, which you’ll need to crouch [CIRCLE/B] to pass under. Follow the linear path ahead until you reach a camp, where you’ll find the corpse of a Marauder, who just so happens to be missing his legs. Between this marauder and Hawthorne, they’ve got one functional body! Anyways, loot an Adreno off the corpse and continue downhill and note some Canids on a ledge to the west. This is supposed to give you incentive to sneak past the beasts since you currently have no means by which you can defend yourself, but the Canids can’t actually attack you and will harmlessly run off, so you don’t need to bother.
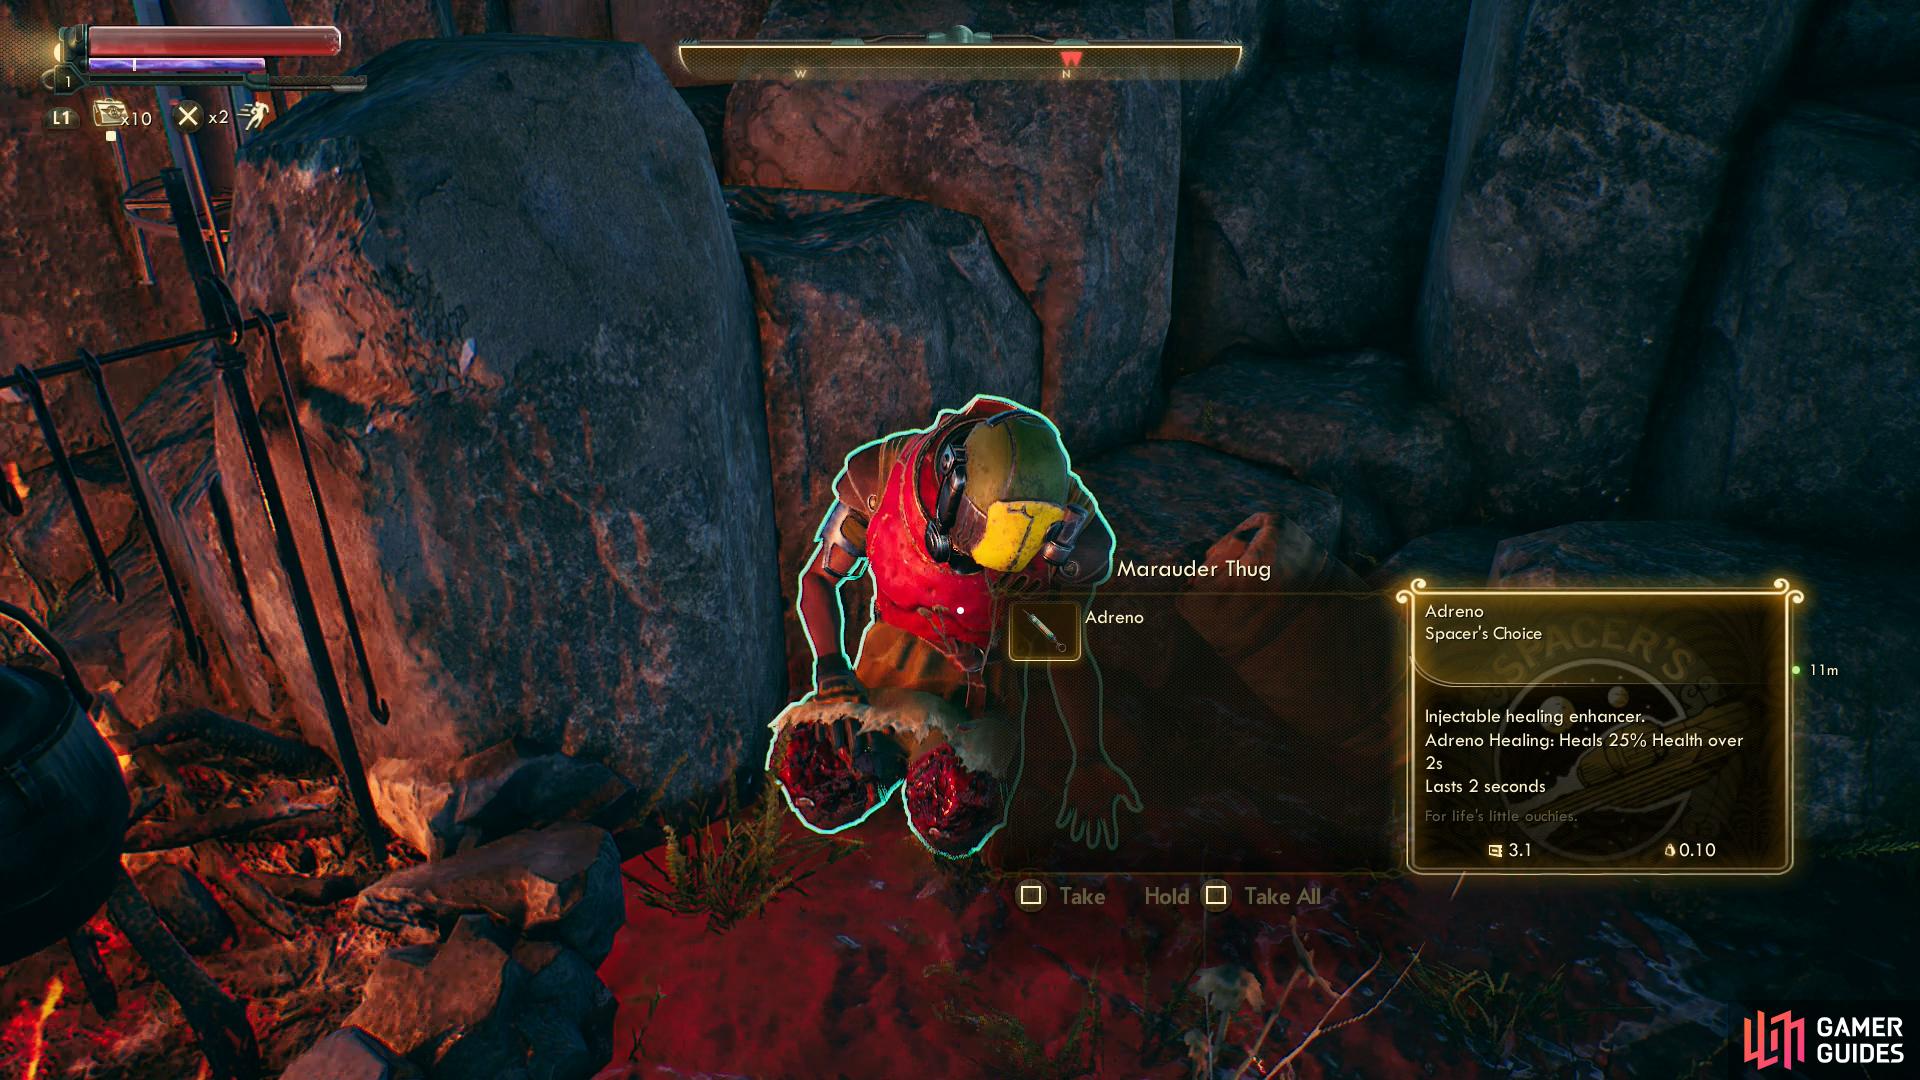
Loot a marauder corpse for some Adreno
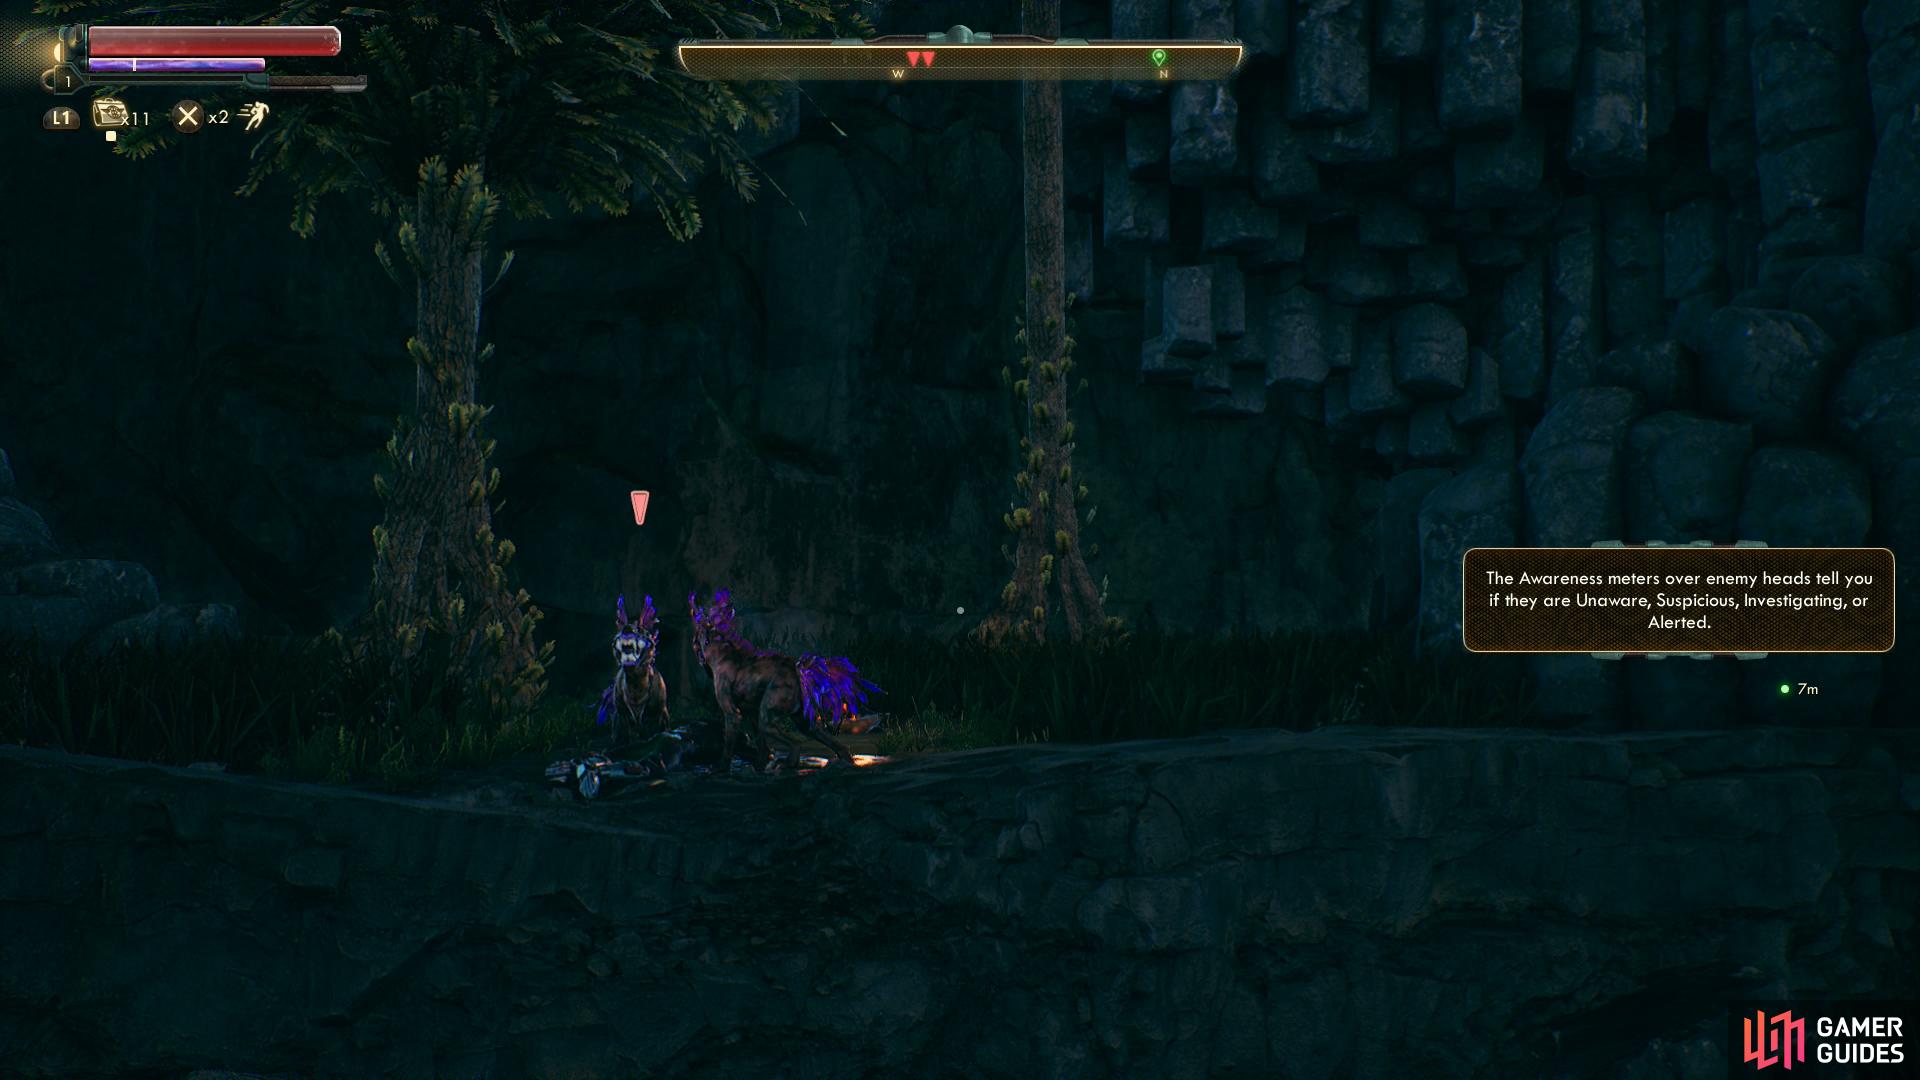
then sneak past some Canids… or not.
Sneak Tutorial
Still, it’s a good opportunity to explain sneaking, which may well be an important aspect of the game, depending on your playstyle. To sneak, simply crouch by pressing the [CIRCLE/B] button, at which point you’ll be fairly hard to detect regardless of your Sneak score, assuming you avoid an enemy’s line of sight, something made easier by hiding in high grass. If an enemy does start to detect you, however, you’ll see an exclamation point appear over the enemy’s head and start to fill white. Once this is full the enemy will be alerted to your presence and may start actively searching for you, and if they keep detecting you the now-full white exclamation point will start to fill red. Once this second exclamation point is fully red you’ll be detected and the enemy may attack. If at any point before you’re fully detected you get out of an enemy’s sight their detection meters will start to deplete at a pace depending upon your investment in the Sneak skill.
If you attack an enemy while sneaking and you have the NOVICE skill unlock (20 points in Sneak) you’ll perform a Sneak Attack, dealing extra damage against enemies. This will naturally alert enemies to your presence, and if you fail to kill the foe you’re sneak attacking they’ll detect you fully and start fighting back. If you kill your target, however, there’s a good chance you won’t be detected outright, although enemies in the area will likely be alerted and start searching for you. If you attack again you’ll almost certainly be detected, but if you wait long enough the enemy should lose interest, allowing you to safely perform another sneak attack.
That’s all there is to sneaking, it’s somewhat simplified in this game compared to others of its ilk, really only forcing you to manage cover, line of sight, and worst of all, patience. But once you get the hang of sneaking it’ll prove to be one of your most potent weapons!
As you pass through a cave you’ll experience some odd side-effects from your extended cryostasis.

At some point you’ll need to drop down a ledge, introducing you to your old friend - fall damage.
Damage, Healing and the Inhaler
Continue north into a cave, crouch down (if you’re not already) then drop down a ledge and pass through the linear cave, where you’ll experience and odd… side-effect from your long hibernation. Eventually you’ll reach a more substantial ledge you’ll need to drop down, which will introduce you to some new gameplay elements: fall damage, passive health regeneration, and your Inhaler.
Fall damage should be pretty self-explanatory - dropping from great heights hurts. Once you sustain damage from the fall you’ll be prompted to heal with your Inhaler by pressing [L1/LB], but assuming your Temperament isn’t Below Average you’ll have some degree of passive health regeneration. No need to waste Adreno - the healing drug slotted into your Inhaler - when a little time will take care of your ouchies.
You currently have ten Adreno (assuming you looted one off the Marauder earlier), and each use of the Inhaler will use one dose of each consumable slotted into the Inhaler. Right now you should only be able to have one consumable slotted into your Inhaler at a time, but as you increase your Medical skill score you’ll unlock up to four. Adreno causes you to regenerate 25% of your health over two seconds, but additional consumables have varying effects, allowing you to turn your Inhaler from a simple healing tool to a device that can provide a combination of buffs and/or healing, depending on what consumables you have slotted into it. Something to keep in mind for the future, to be sure.
Pelham’s Faulty Pistol
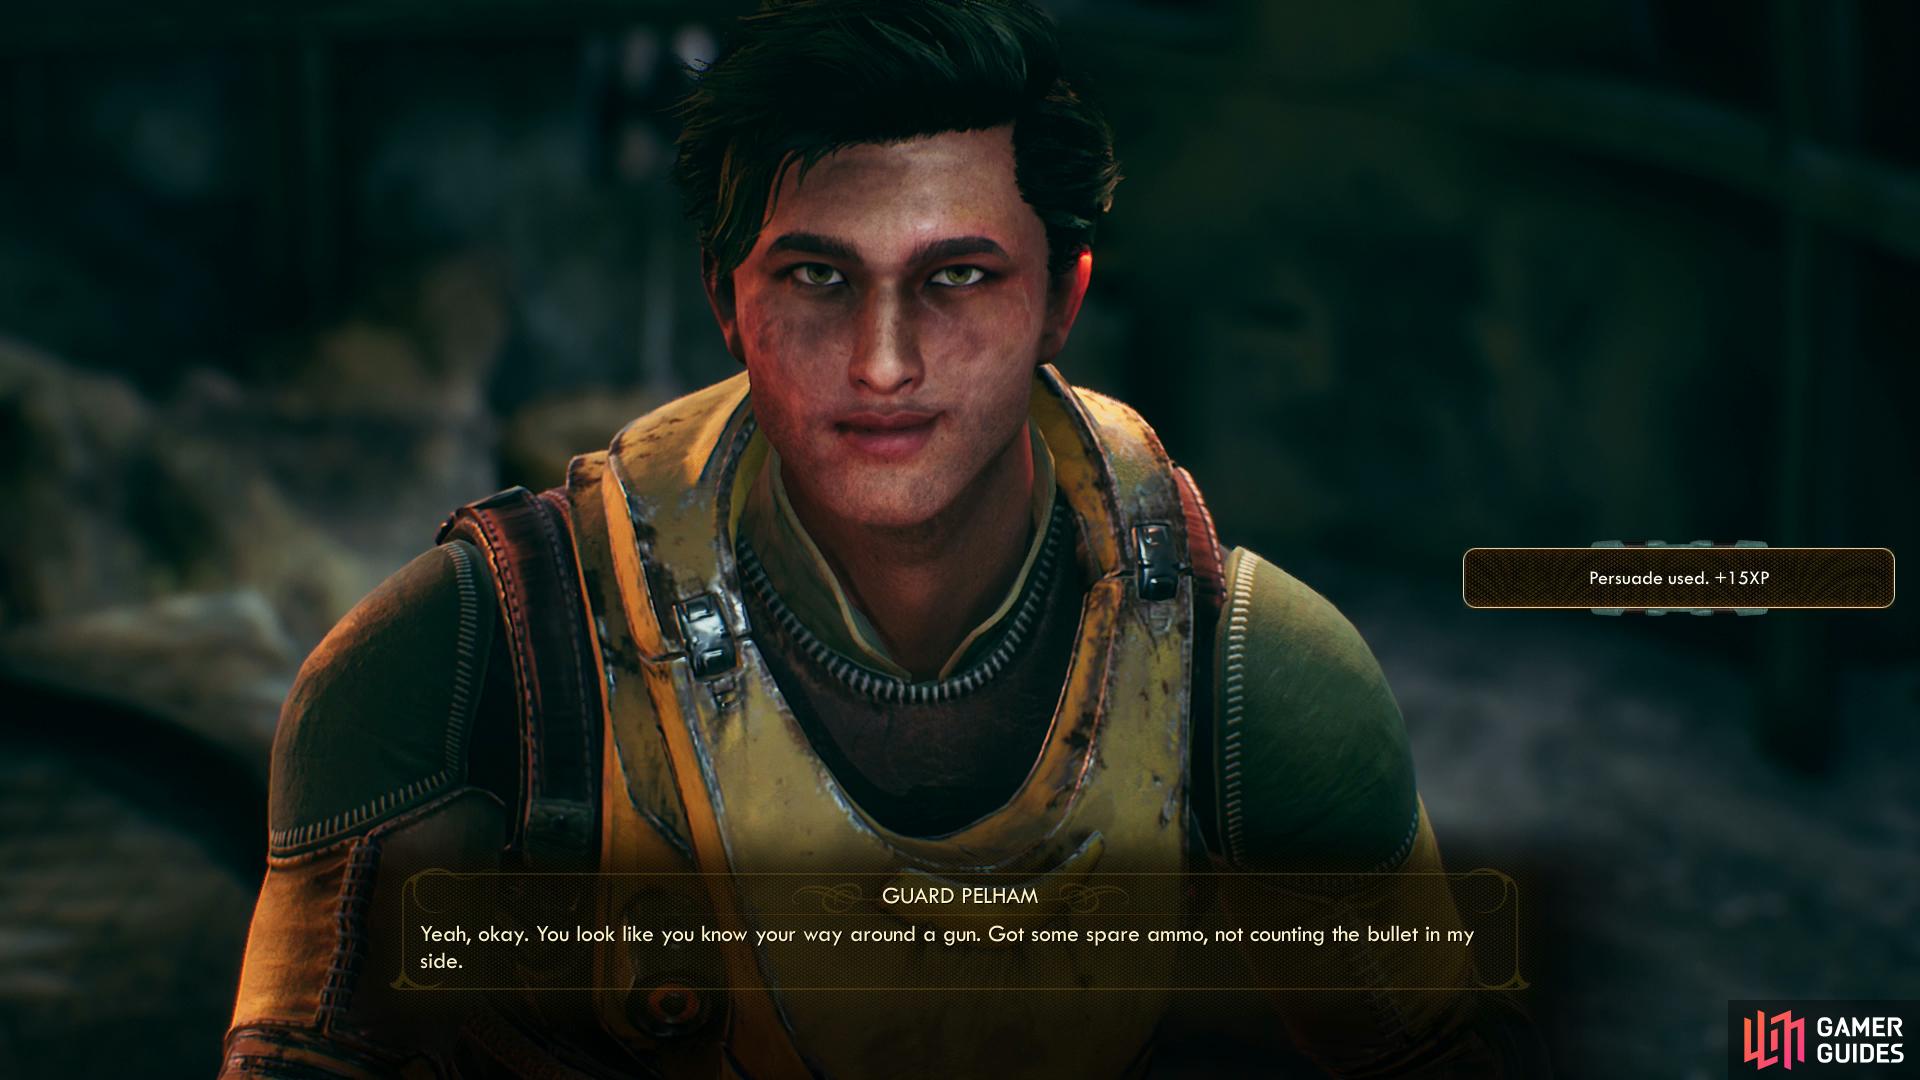
Continue through the cave until you find an injured man - Guard Pelham - who will introduce himself with a forced corporate slogan. Assuming you didn’t tank your Intelligence or Temperament you should be able to pass a [Medical 5] check to patch him up and earn some XP. Exhaust his dialogue options and you’ll learn he’s here investigating the ship that landed out in the open, attracting both corporate stooges and marauders alike. Shouldn’t really be much of a surprise that Hawthorne was a bit dense, considering how he ended up. When capable, pass a Dialog check of some variety ([Persuade 1], [Lie 1] or [Intimidate 1]) and Pelham will forfeit his gun - it was more of a threat to him than anybody else, anyways.
You now possess a ranged weapon, a melee weapon and some ammo, as Pelham should have given you a Light Pistol, a Sentry Sabre and Light Ammo x111. The pistol should have been automatically equipped, and you can reload it by pressing [SQUARE/X], fire by pressing [R2/RT] and switch between equipped weapons by pressing [TRIANGLE/Y] (if you hold this button it’ll bring up a weapon select menu so you can more quickly cycle between all your equipped weapons). The Sentry Sabre can be equipped in your inventory, if you want to bother, and it’s worth noting that you can have four different weapons equipped at any given time.
Before you leave, loot around the shelter Pelham sits at to score some consumables and a Mag-Pick or two - not essential loot, but you can never have too many Mag-Picks! When you’re ready to press on, shoot some canisters to the southeast (stand at a safe distance, obviously!) then crouch through the hole beyond said canisters and continue to the mouth of the cave.
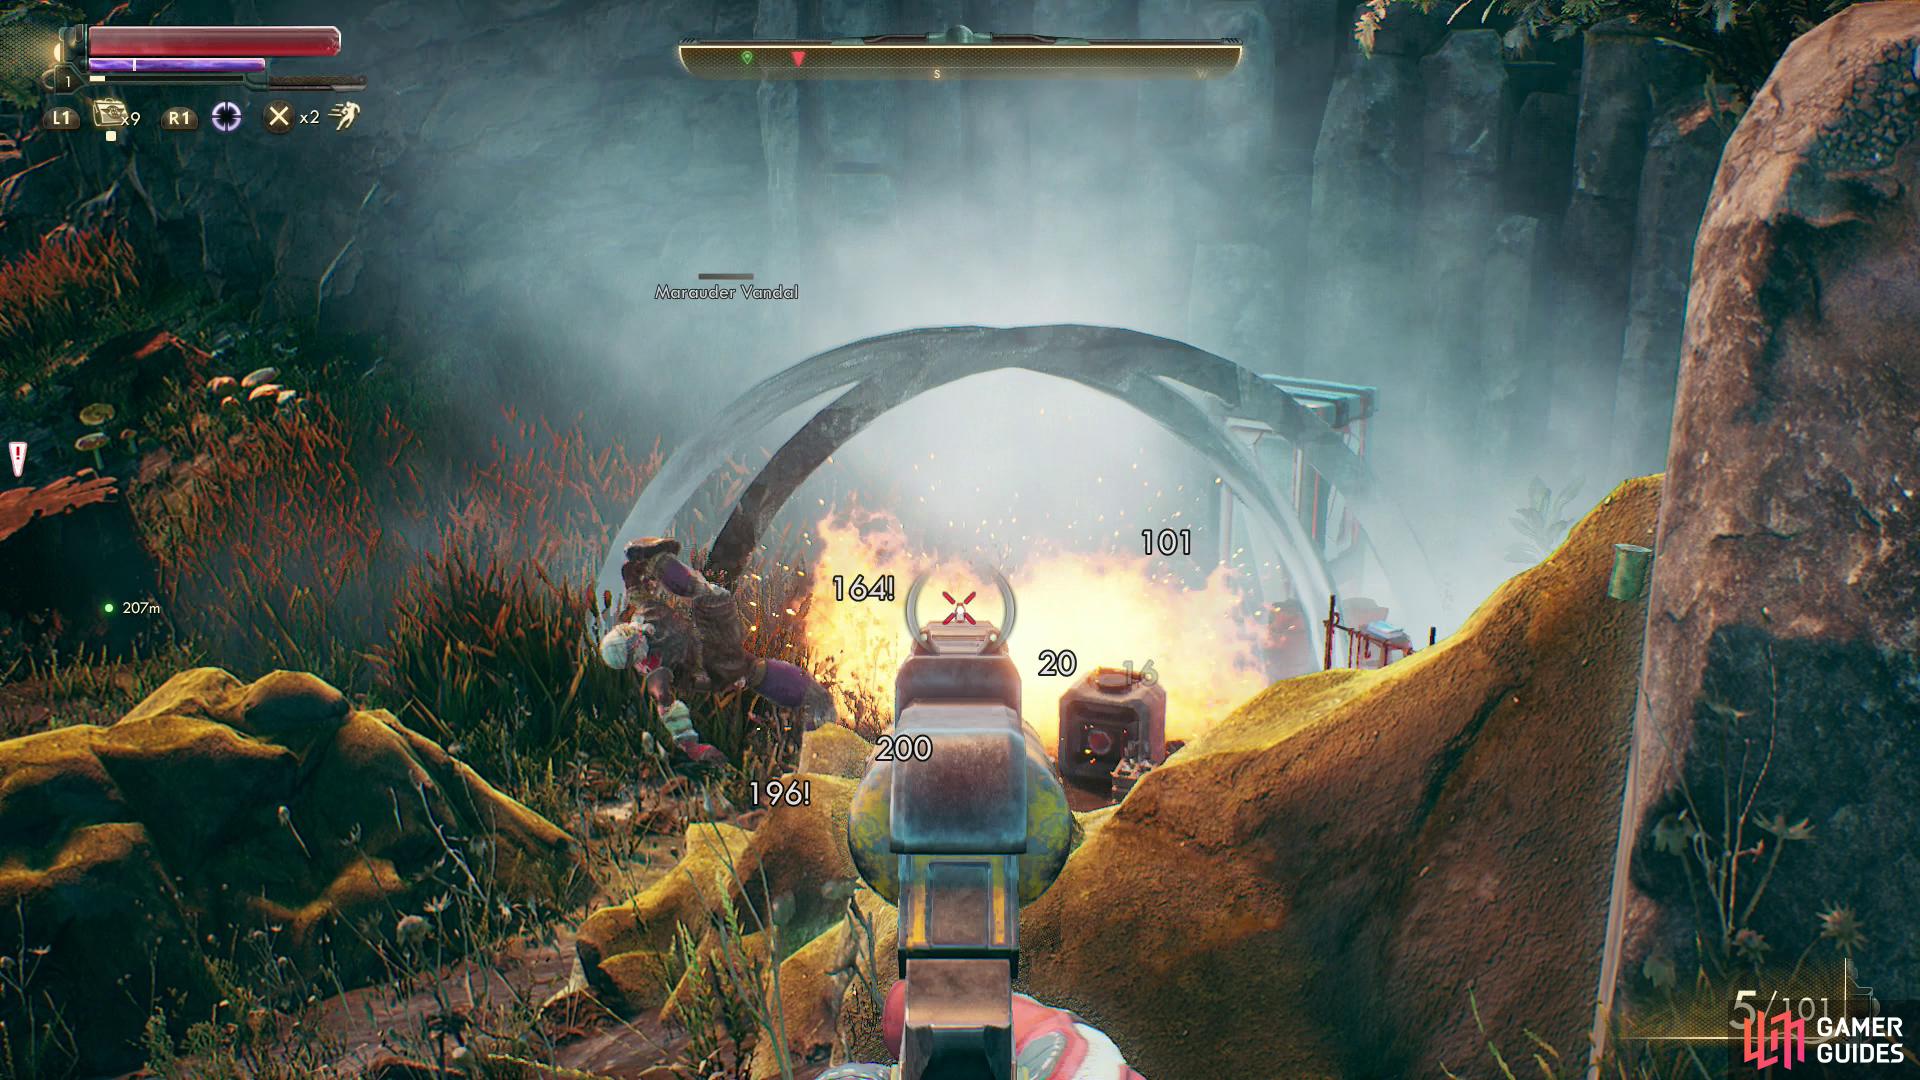
Take out a marauder by shooting some more explosive barrels
then use TTD to efficiently eliminate the other marauder.
To the Unreliable
Exit the cave and you’ll get a tutorial on Tactical Time Dilation (TTD), which you can activate by pressing [R1/RB] to slow down time to assist in combat. Actions taken during TTD will deplete your TTD meter (the purple bar at the top left of the screen, below the red health bar) by varying degrees depending on your weapon, skill unlocks and perks, and attacks made during TTD, aside from being easier to hit specific targets and locations on targets, may have extra effects, again depending on what weapon, skill unlocks and perks you have.
Time to put this all into practice, as two Marauders block your path forward, one occupying a camp below you (behind some rocks) while another hides behind some more rocks further on. You can take one out immediately by shooting some explosive barrels, then dispatch the other with TTD. Once both Marauders are dead, loot them and their camp to find another novelty - a locked container!
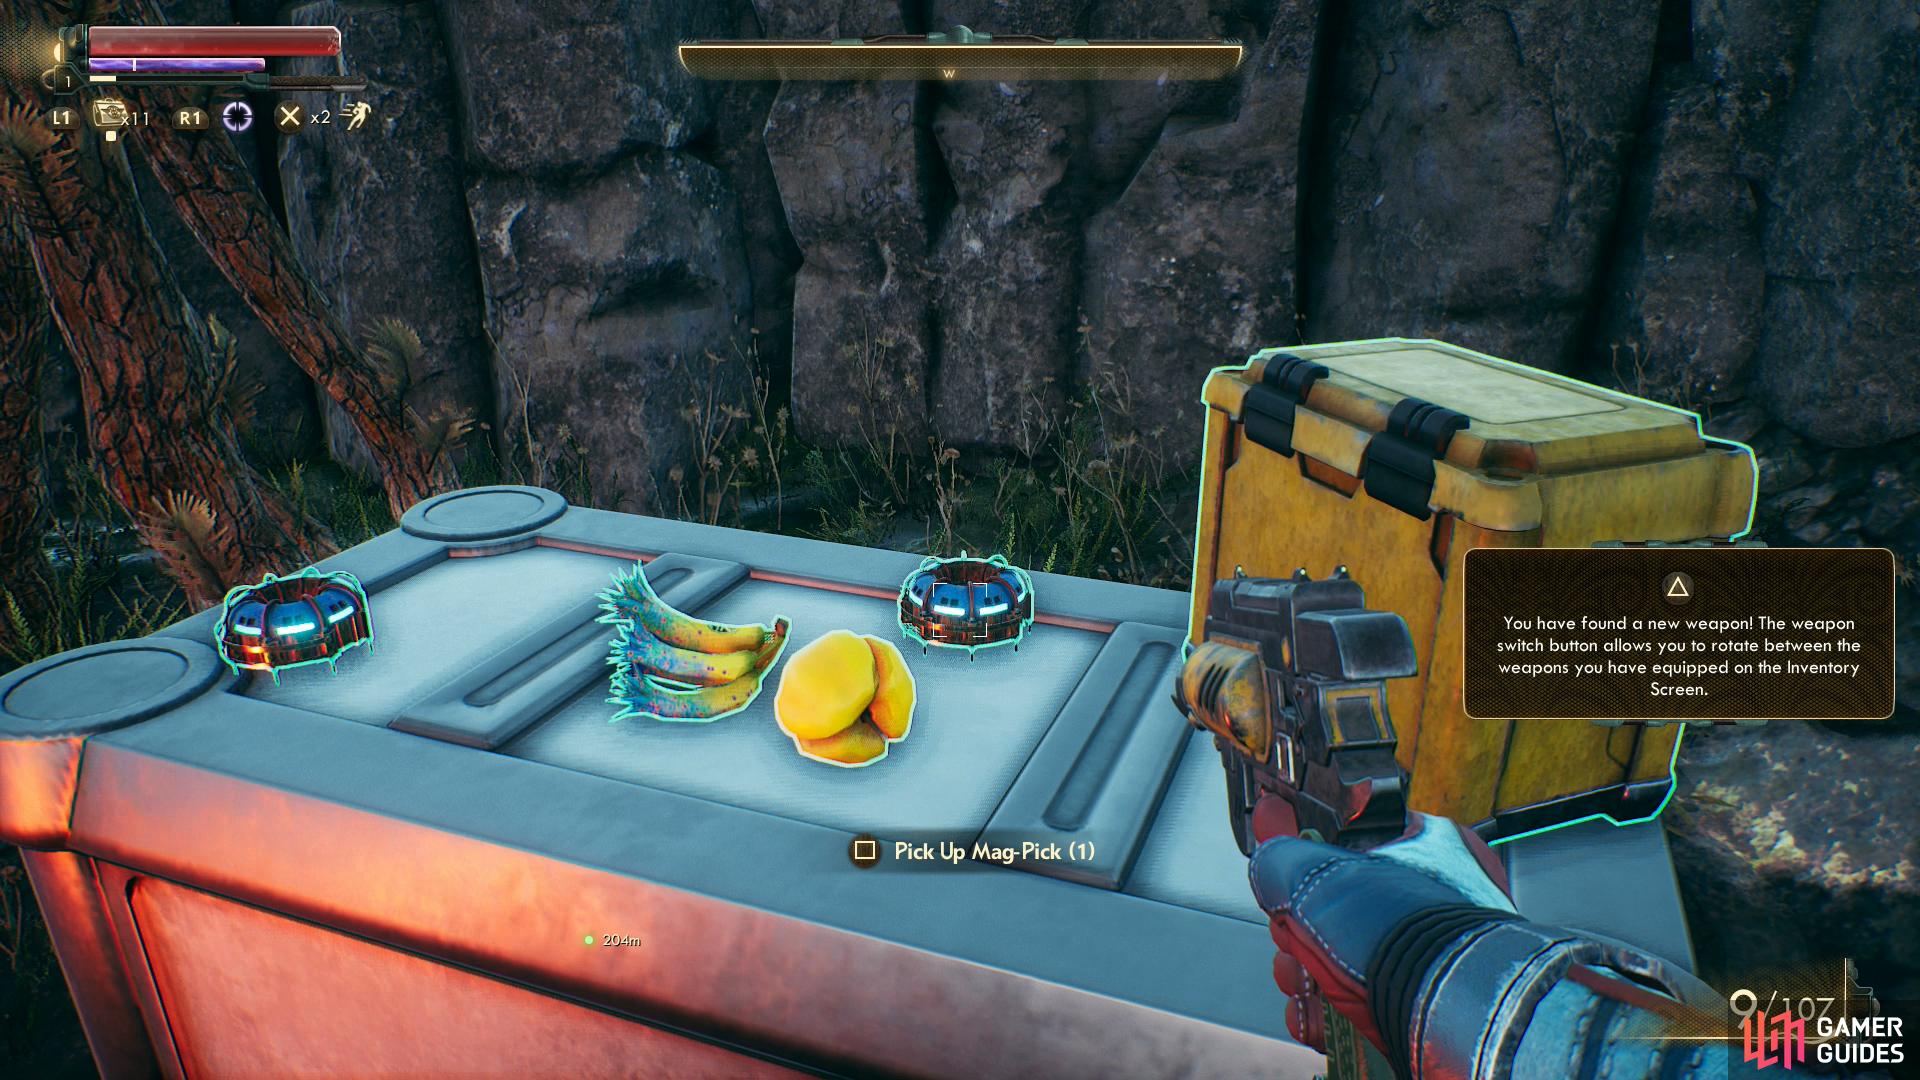
To open locks you’ll need Mag-Picks, which can be found in abundance throughout the Halcyon system.
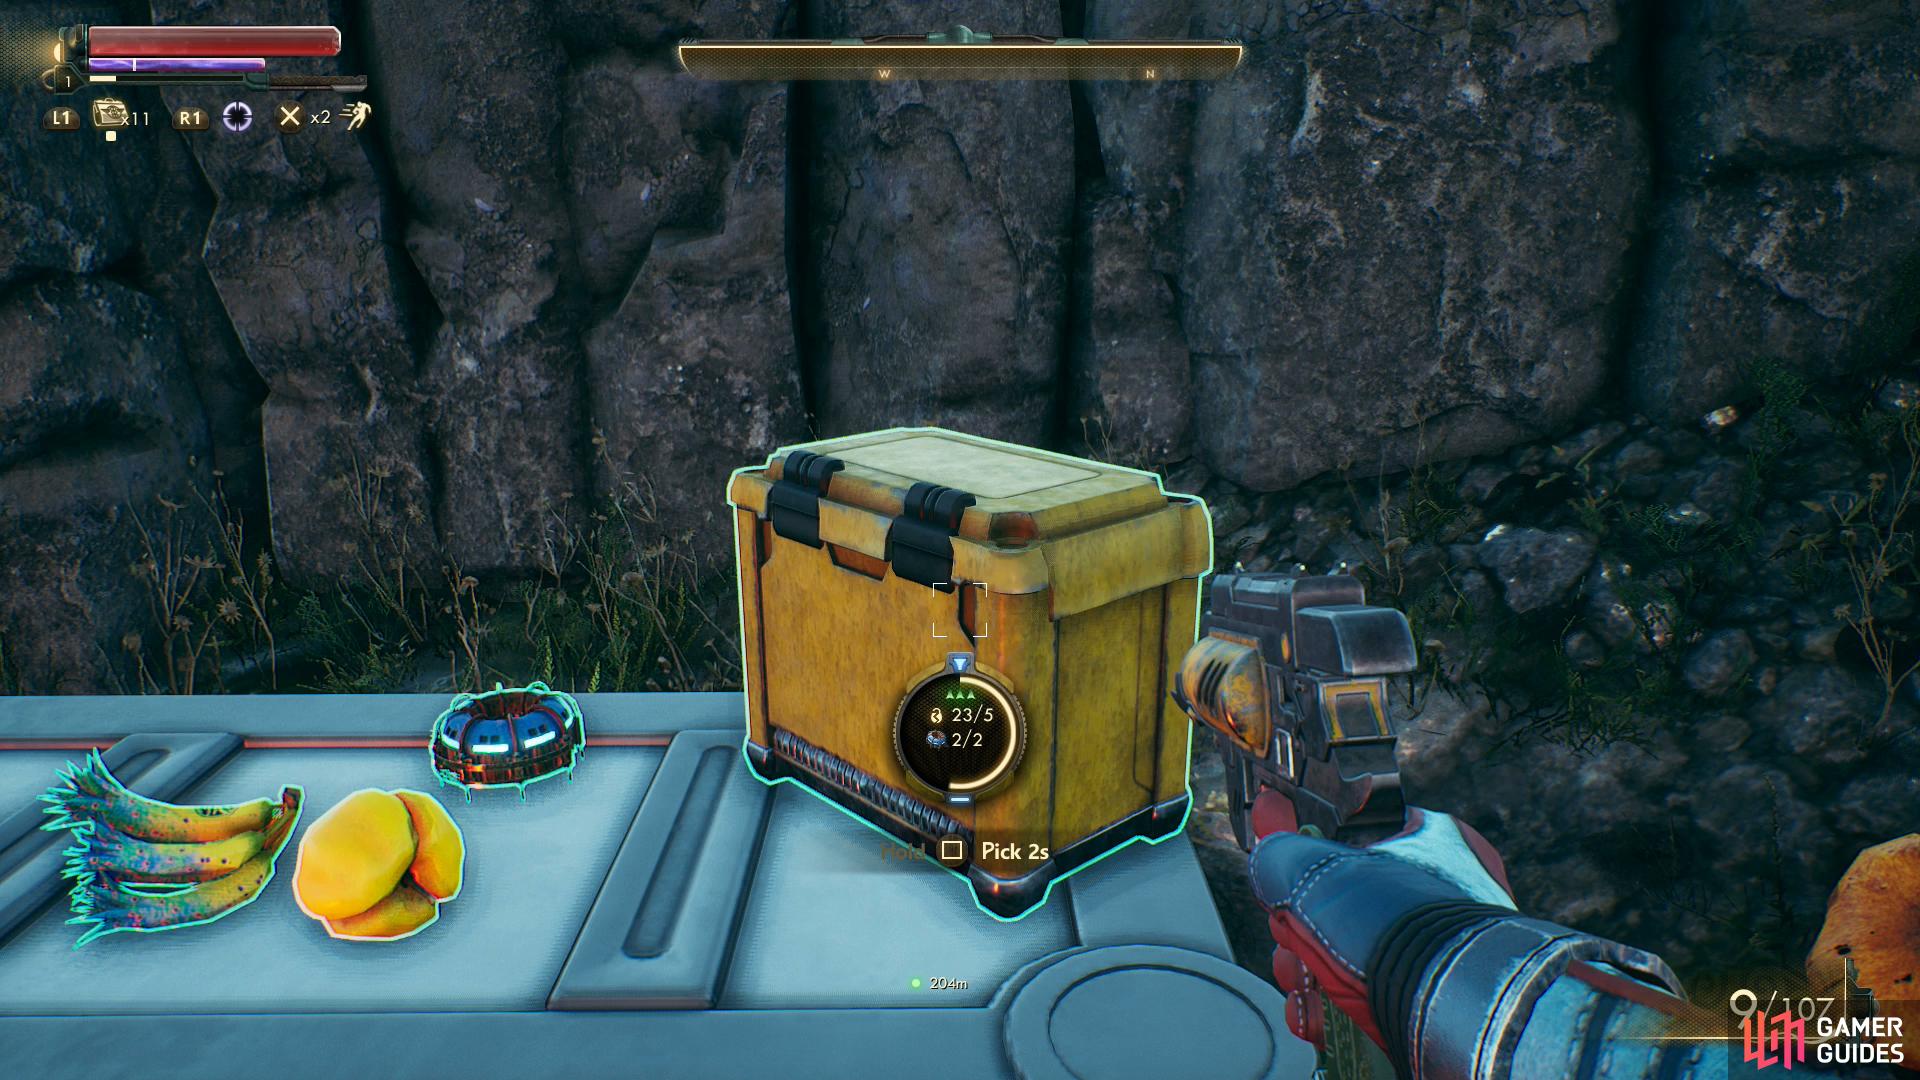
Picking locks is merely a matter of having sufficient skill, time and Mag-Picks.
Locked containers are unfortunately an aspect of life in the Halcyon system you’ll need to get used to. Turns out people don’t want you stealing their stuff! The nerve. It’s too bad for them, then, that Mag-Picks little the world, enabling a loot-hungry former popsicle to get at anything they might want to appropriate provided they have a little skill in Lockpick.
As far as gameplay goes, picking locks is pretty simple. Each locked containers has a minimum Lockpick skill score required (in this case, a measly 5), and assuming you exceed this amount you’ll be able to attempt to pick the lock, expending Mag-Picks in the process. The amount by which your Lockpick skill score exceeds the lock’s difficulty will influence the number of Mag-Picks expended. It’s all a numbers game, and perhaps a cost-benefit analysis on your part. No minigame to bother with. If you get caught stealing, however, people might not be too happy about it, so you’ll want to ensure you’re sneaking if there potential witnesses around (and you care if they catch you), but for now just hold down the [SQUARE/X] button to get at the goods inside.
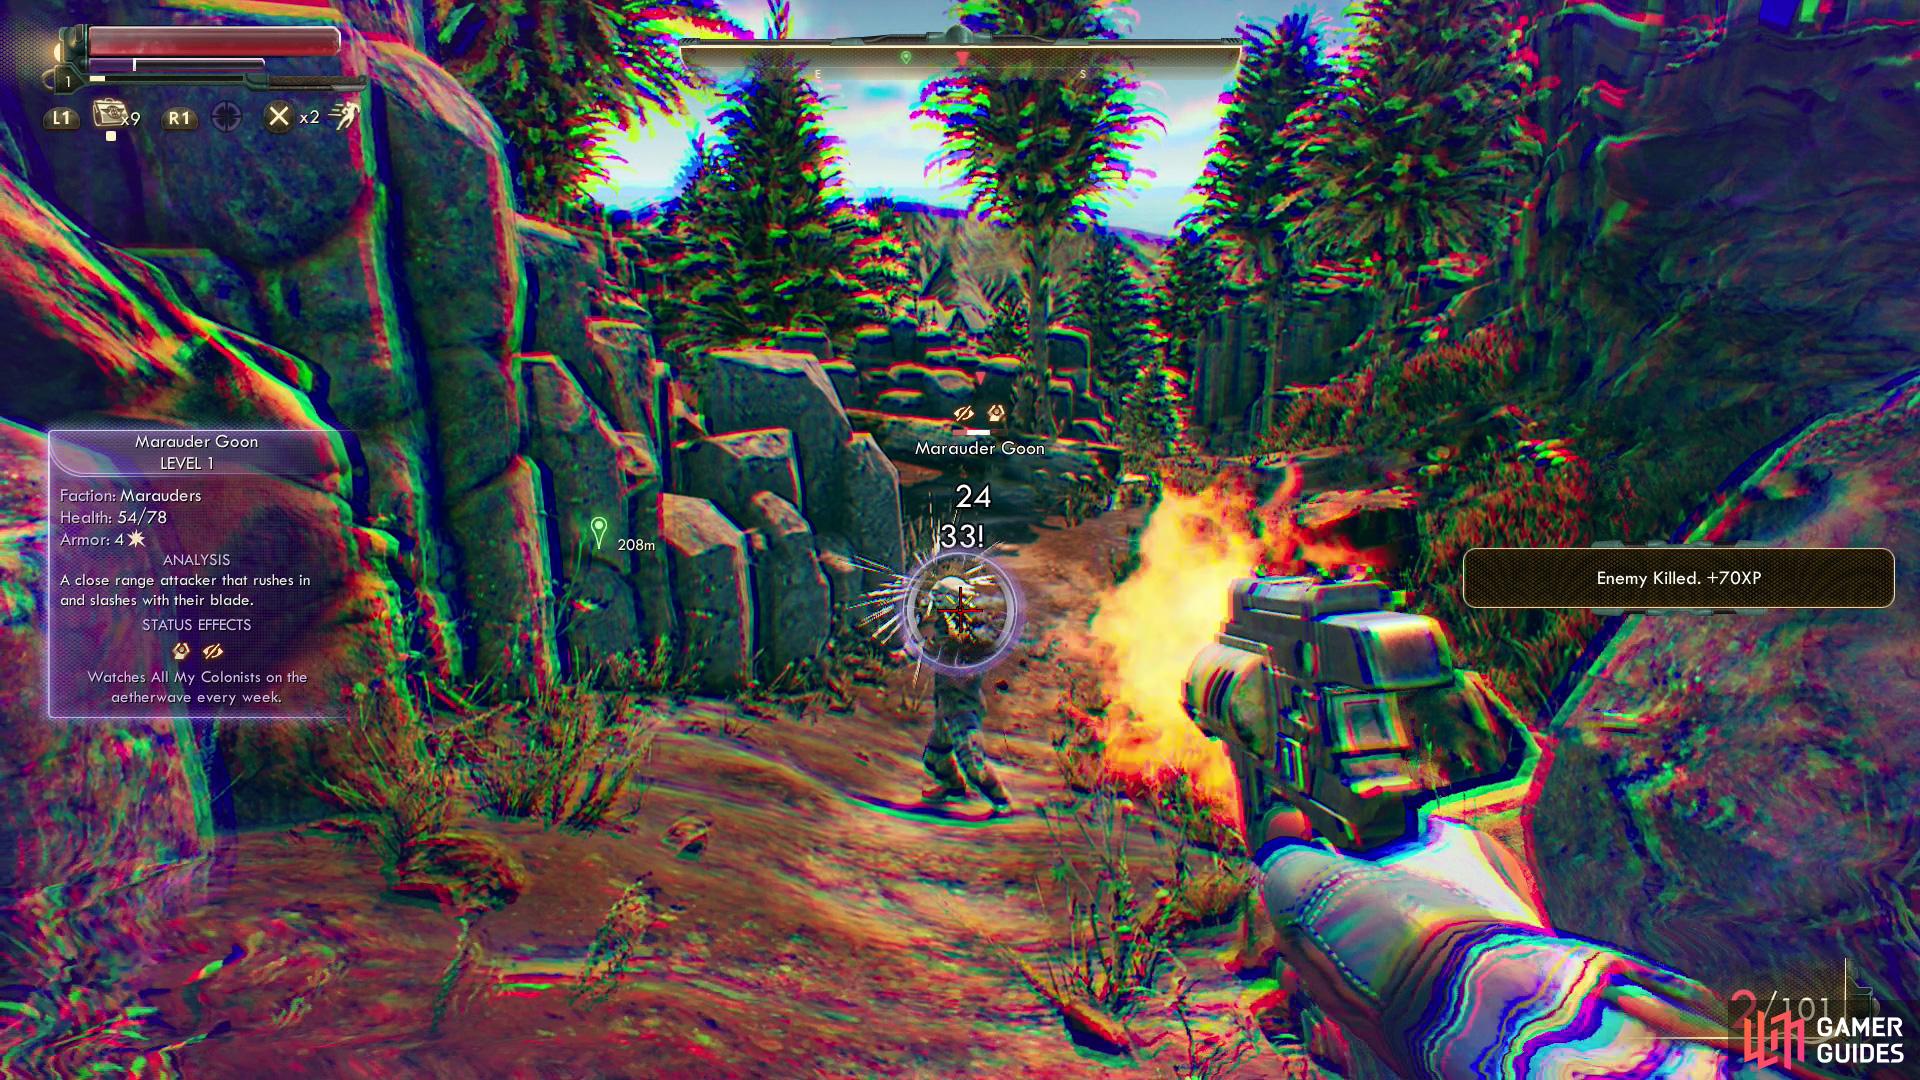
Loot the camp, then continue downhill to find another trio of Marauders in your way. Some tall grass makes sneak attacking a fine way to start things out. In Hard/Supernova difficulty, we found it necessary to start out combat with a sneak attack, finish off our target with TTD, then run back to the cave we found Pelham in to shake pursuit. Repeat this process until you foes are dead, then continue downhill, drop down a series of ledges and behold Hawthorne’s ship to the east, just… sitting out in the open.
Convince Mercer to do her job
then help her rout some marauders.
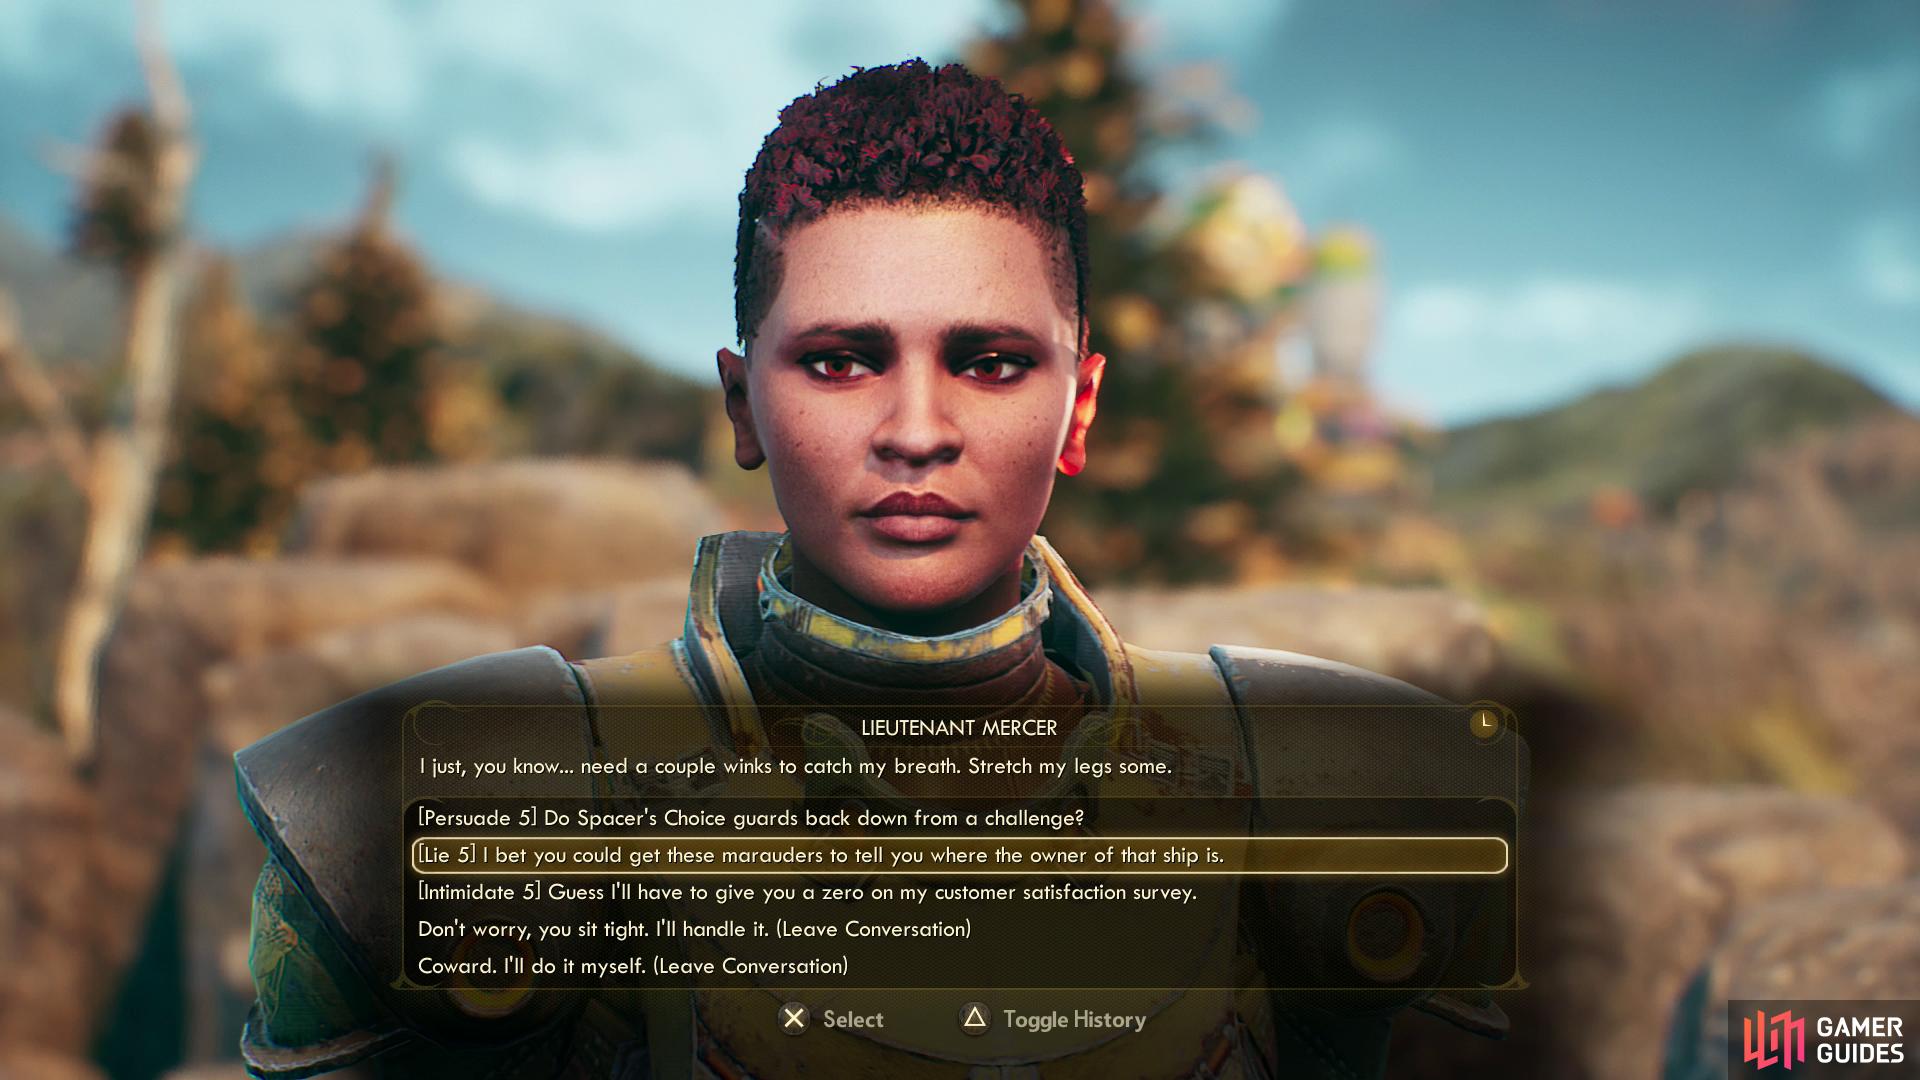
Once down the ledge you’ll be hailed by Lieutenant Mercer, who is bravely hiding behind some rocks along with her subordinate, Private Kimball. A red-shirt if ever there was one. Talk to them to find out their purpose for being here and the complication that prevents them from carrying out their super vital corporate obligations. Bit of an issue with priorities here. Eventually you’ll have a shot at a Dialog check ([Persuade 5], [Lie 5] or [Intimidate 5]), any of which will provoke the guards into doing their damn job and engaging the marauders. If you can’t manage it, you’ll have to go it alone, although if you find yourself in trouble you can run back to the two guards and they’ll contribute to the fight.
Take down the marauders (the help of Mercer and Kimball is quite handy in Hard/Supernova difficulty), then board Hawthorne’s ship.
Becoming Captain Alex Hawthorne
Once inside, head through a door to the right (west) where a computerized voice will attempt to dissuade you from poking about too much. You can explore the rest of the ship for some more comments from this voice, but most of the doors are closed right now. Don’t worry, you’ll get around to it soon enough.
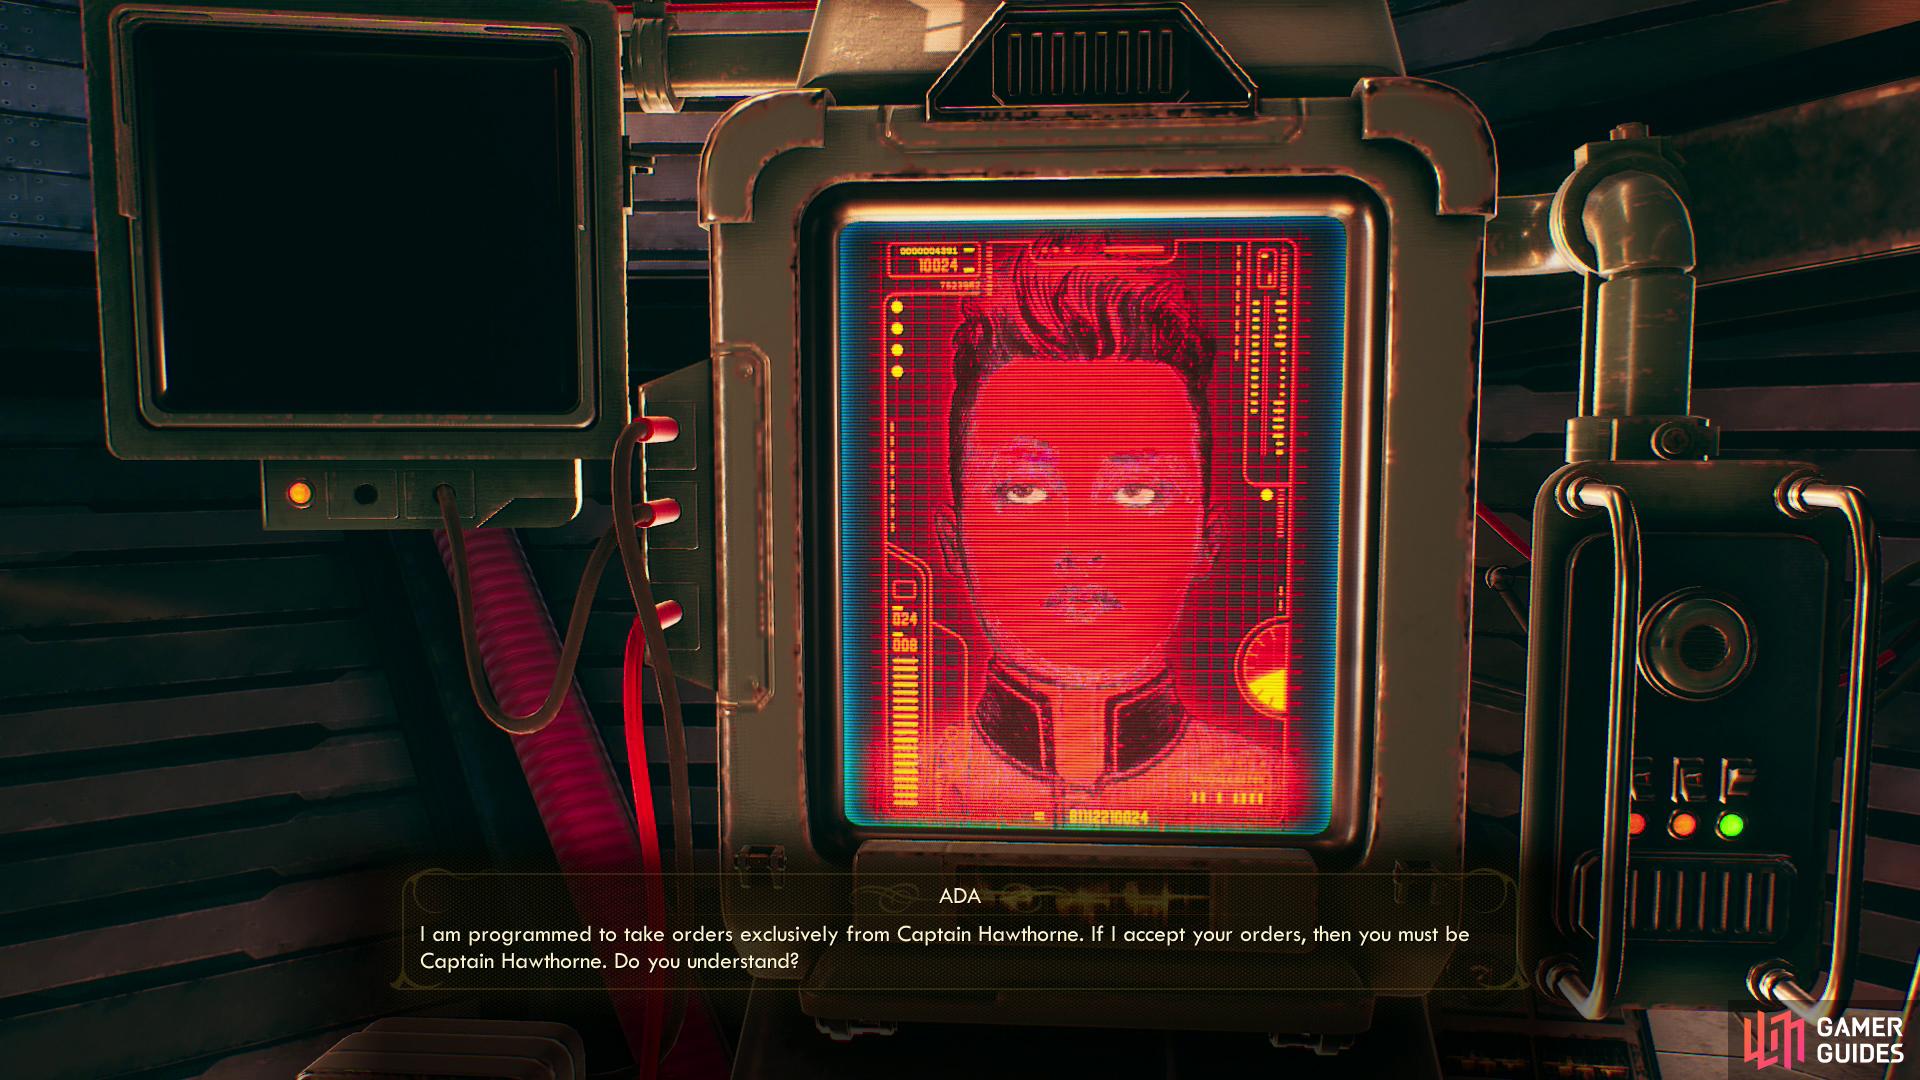
Interact with a terminal to encounter ADA, the ship’s AI, who will threaten you with destruction for trespassing. Call her bluff and after some chatter she’ll very pointedly tell you that she can only accept orders from “Captain Alex Hawthorne”, and will repeat the condition even if you tell her about Hawthorne’s dimwitted demise. Play along (or not, ADA has no time for your stupidity) and ADA will tell you that the ship is currently grounded due to engine trouble. Looks like you’ll need a power regulator to leave, and if you’re capable, make the observation [Engineering 5] that such a part is unlikely to be found just lying around.
Looks like you’ve got a new task to complete, although it’s still part of the same quest, Stranger in a Strange Land. This lengthy quest will be going on for quite a while, but don’t you worry… well find some diversions soon enough. ADA will give you your new Captain’s Identification and you’ll be free to go hunting for this power regulator.
Welcome to your ship, Captain Alex Hawthorne!
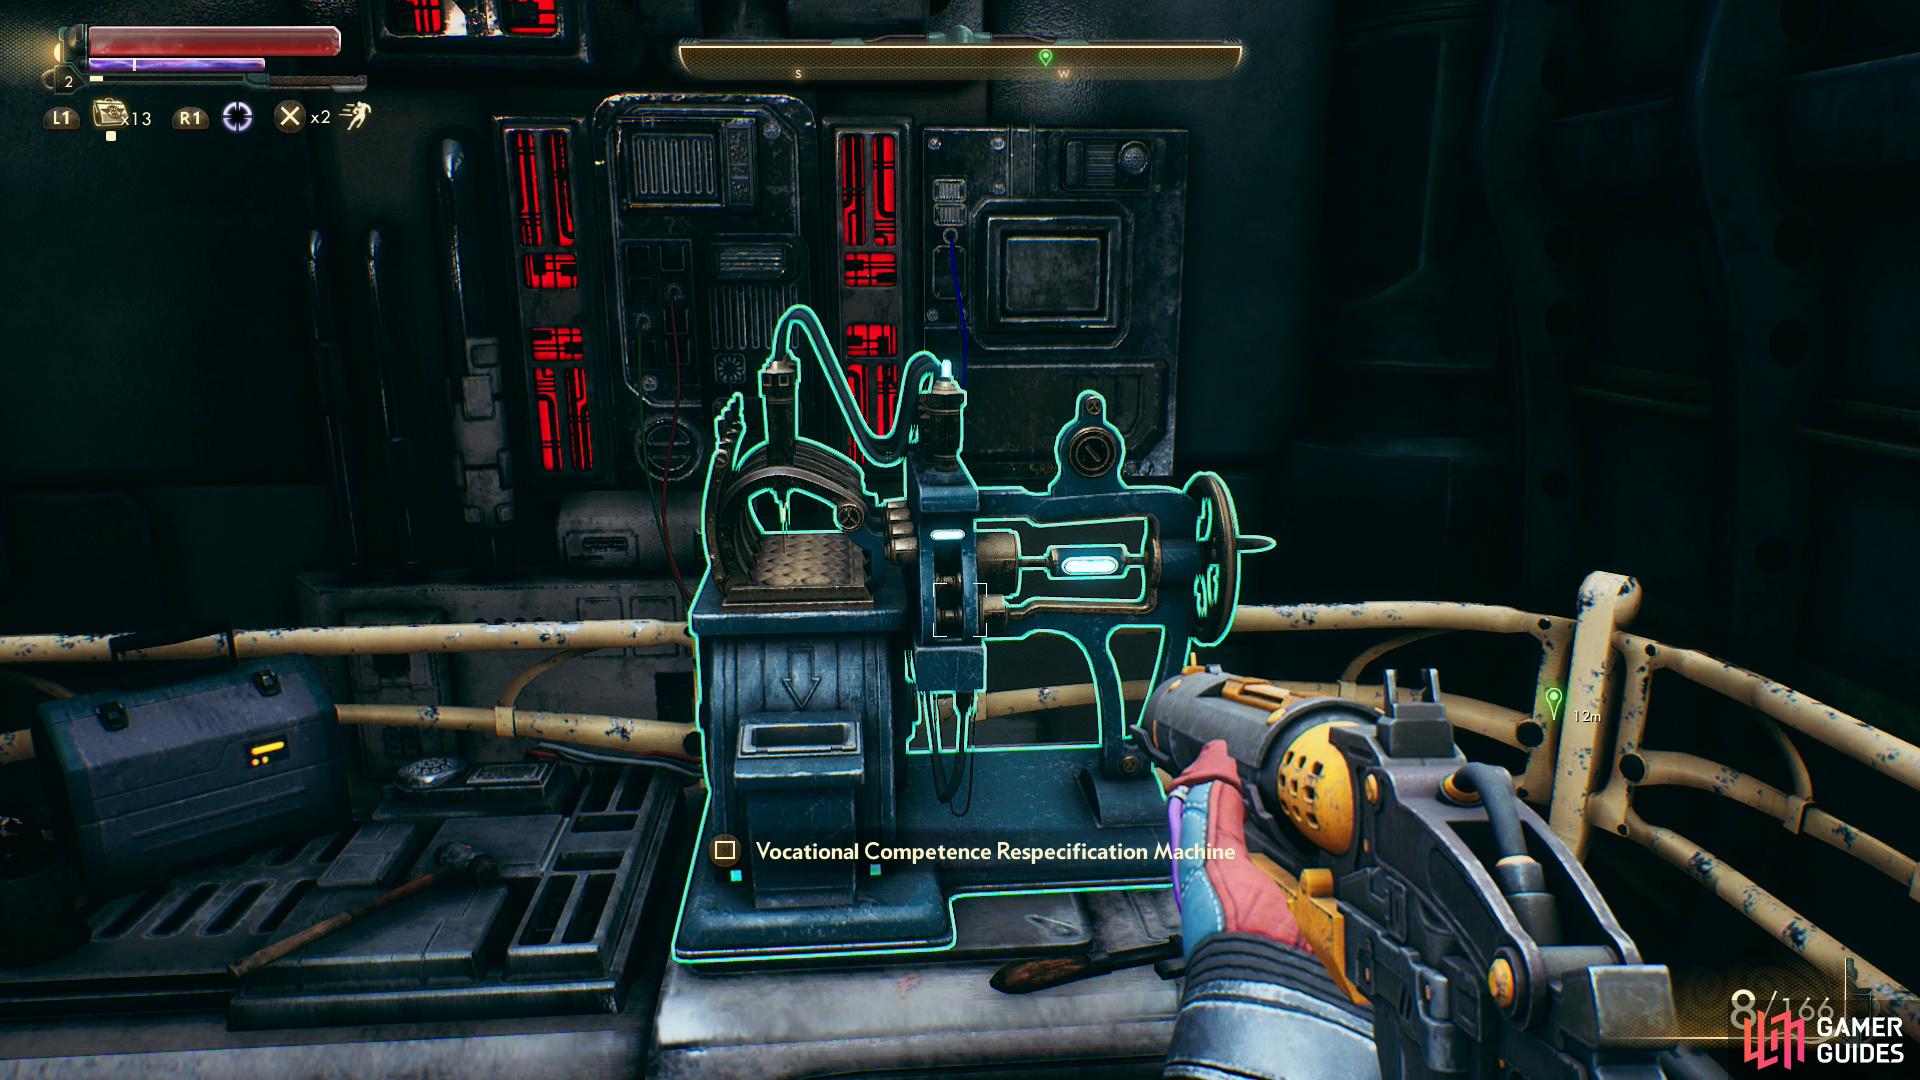
(1 of 3) In the cargo room you’ll find the Vocational Competence Respecification Machine, which allows you to respec.
Workbenches, Respecing and Leveling Up
Before you leave the Unreliable, there’s some business to take care of. First, you should have gained a nice hunk of XP for talking to ADA - enough to level you up, in fact. Leveling up will automatically increase your Health, but you’ll also gain ten skill points to distribute however you wish, and since you’ve hit Level 2 - an even level - you’ll get a perk to spend.
For us, (and if you’re following our build advice, for you as well!) this level isn’t hard to manage. We dump all our points into Stealth to finally unlock Sneak Attacks proper-like, as well as gaining access to the COMPETENT skill unlock for Hack, allowing us to access restricted items in vending machines. The lower Mag-Pick costs for raising Lockpick is always welcome, as well, and generally being able to get into more containers will help out quite a bit this early in the game, when resources are scarce. For our perk we pick Toughness, which will raise our Health from an awful 550 to a… well, slightly less awful 825.
Now that you’ve leveled up, it’s time to start fretting over mistakes… don’t worry, you’re fine, but just in case leave the cockpit and head into the cargo bay to the northeast (left from the entrance). In here you’ll find a workbench along the northwestern wall, as ADA will helpfully point out (don’t worry, we’ll get to this soon enough), but for now climb a ladder and take a J-journey on a metal walkway to find the Vocational Competence Respecification Machine. The respec machine! You can spend Bits (the game’s currency, which you’re currently quite deficient in) to reset most spent skill points and perk picks. The first time you use this it’ll cost 500 Bits, and every subsequent use will double the cost, so only respec when you absolutely need to… which is not now.
Once the Vocational Competence Respecification Machine is noted, jump back down to the ground floor of the cargo room (don’t worry, you’ll heal… probably) and search around the workbench for some Weapon Parts and a Sawed-Off Shotgun which is in desperate need of repair.
Interact with the workbench and navigate to the “Repair” tab to view your damaged gear, then select the Sawed-Off Shotgun. At the right of the screen you’ll see your Weapon Parts and the number of Weapon Parts it’ll take to repair the selected gear, and if your Engineering score is low enough, you may not have enough Weapon Parts for the task at hand. If so, navigate to the “Break Down” tab and destroy unwanted arms and armor to gain Weapon Parts and Armor Parts, respectively. At this early stage in the game, you’re probably better off breaking down excess gear for parts instead of selling them for the paltry Bits you’ll earn by selling them, especially since so much early-game gear sells for less than 10 Bits.
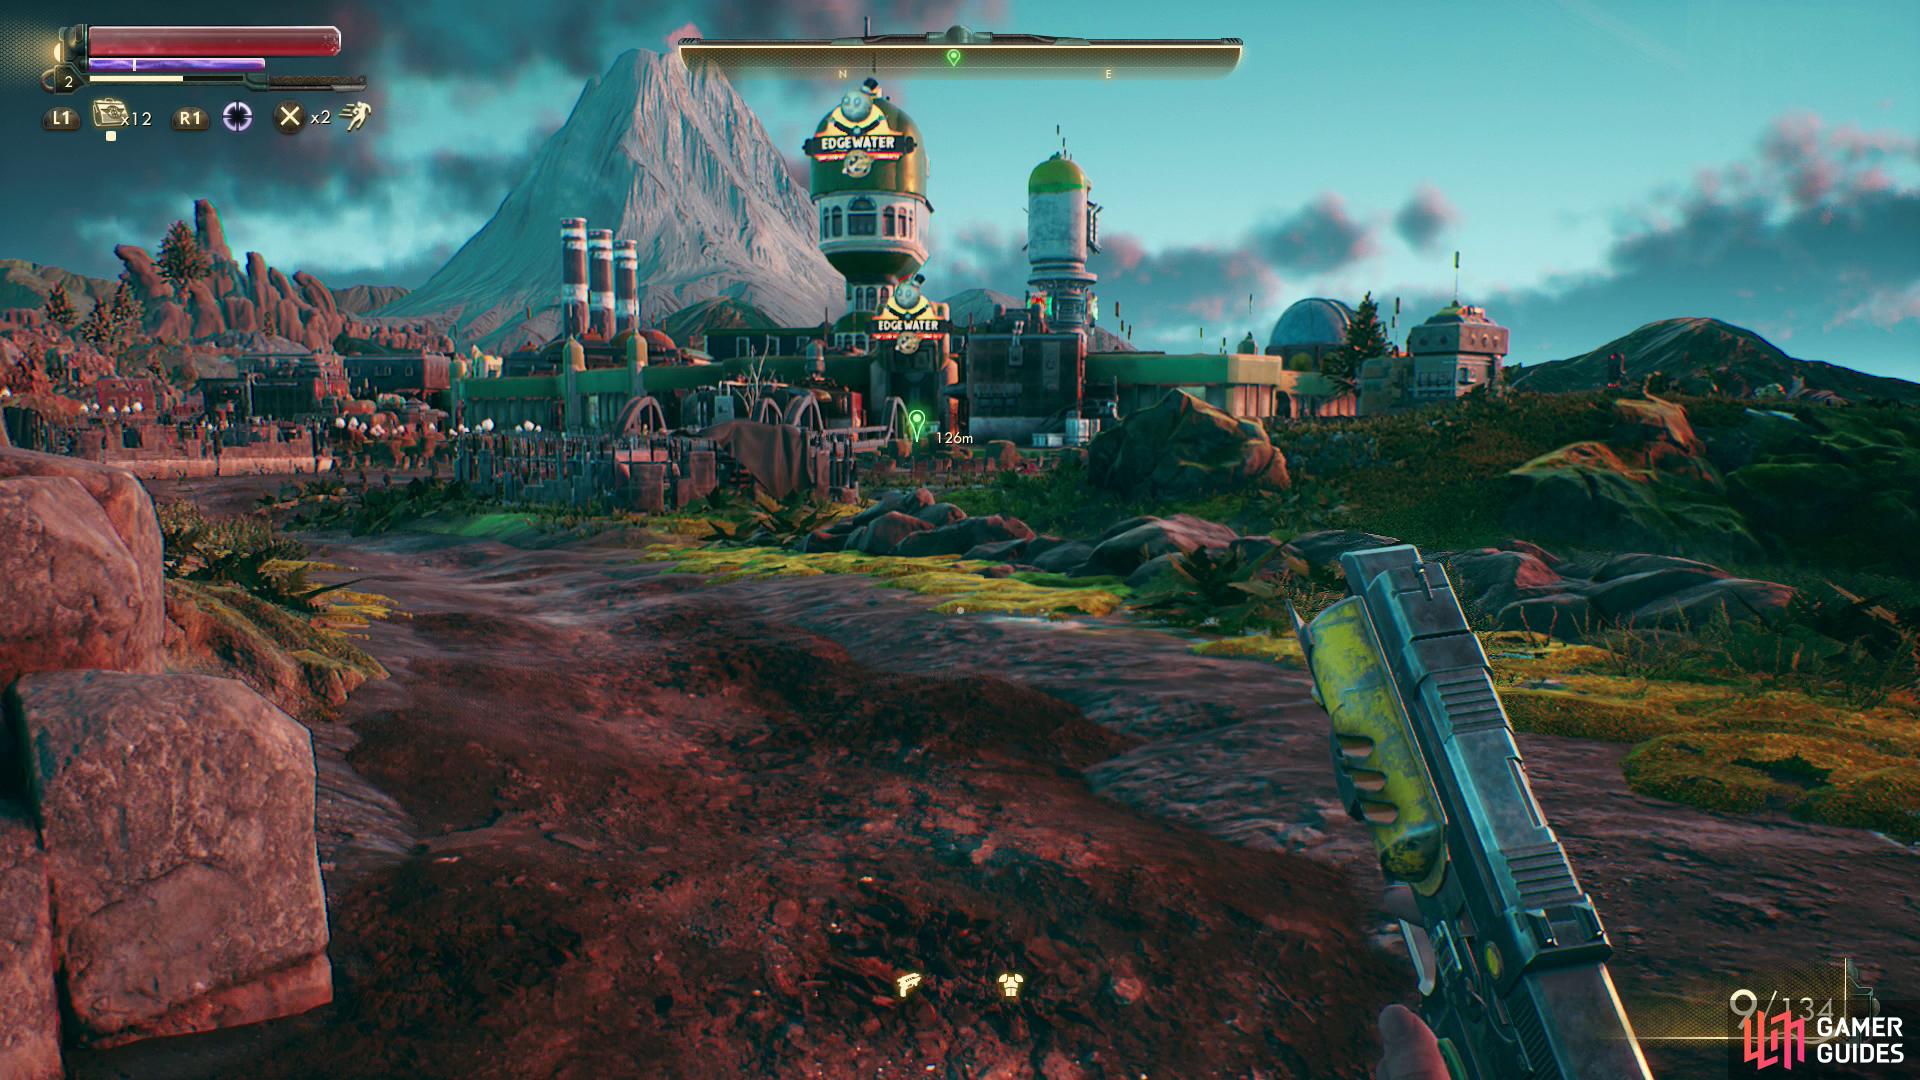
Repair the Sawed-Off Shotgun, equip it - it’ll prove quite useful at warding off foes in close-quarters, provided you don’t care to bother with melee weapons - then leave your ship. Time to see if you can find a power regulator somewhere on this world. The nearby town of Edgewater is probably a good place to start your search.
Make your way to Edgewater

outside of which you’ll find Silas, who needs you to collect some gravesite fees.
To Edgewater
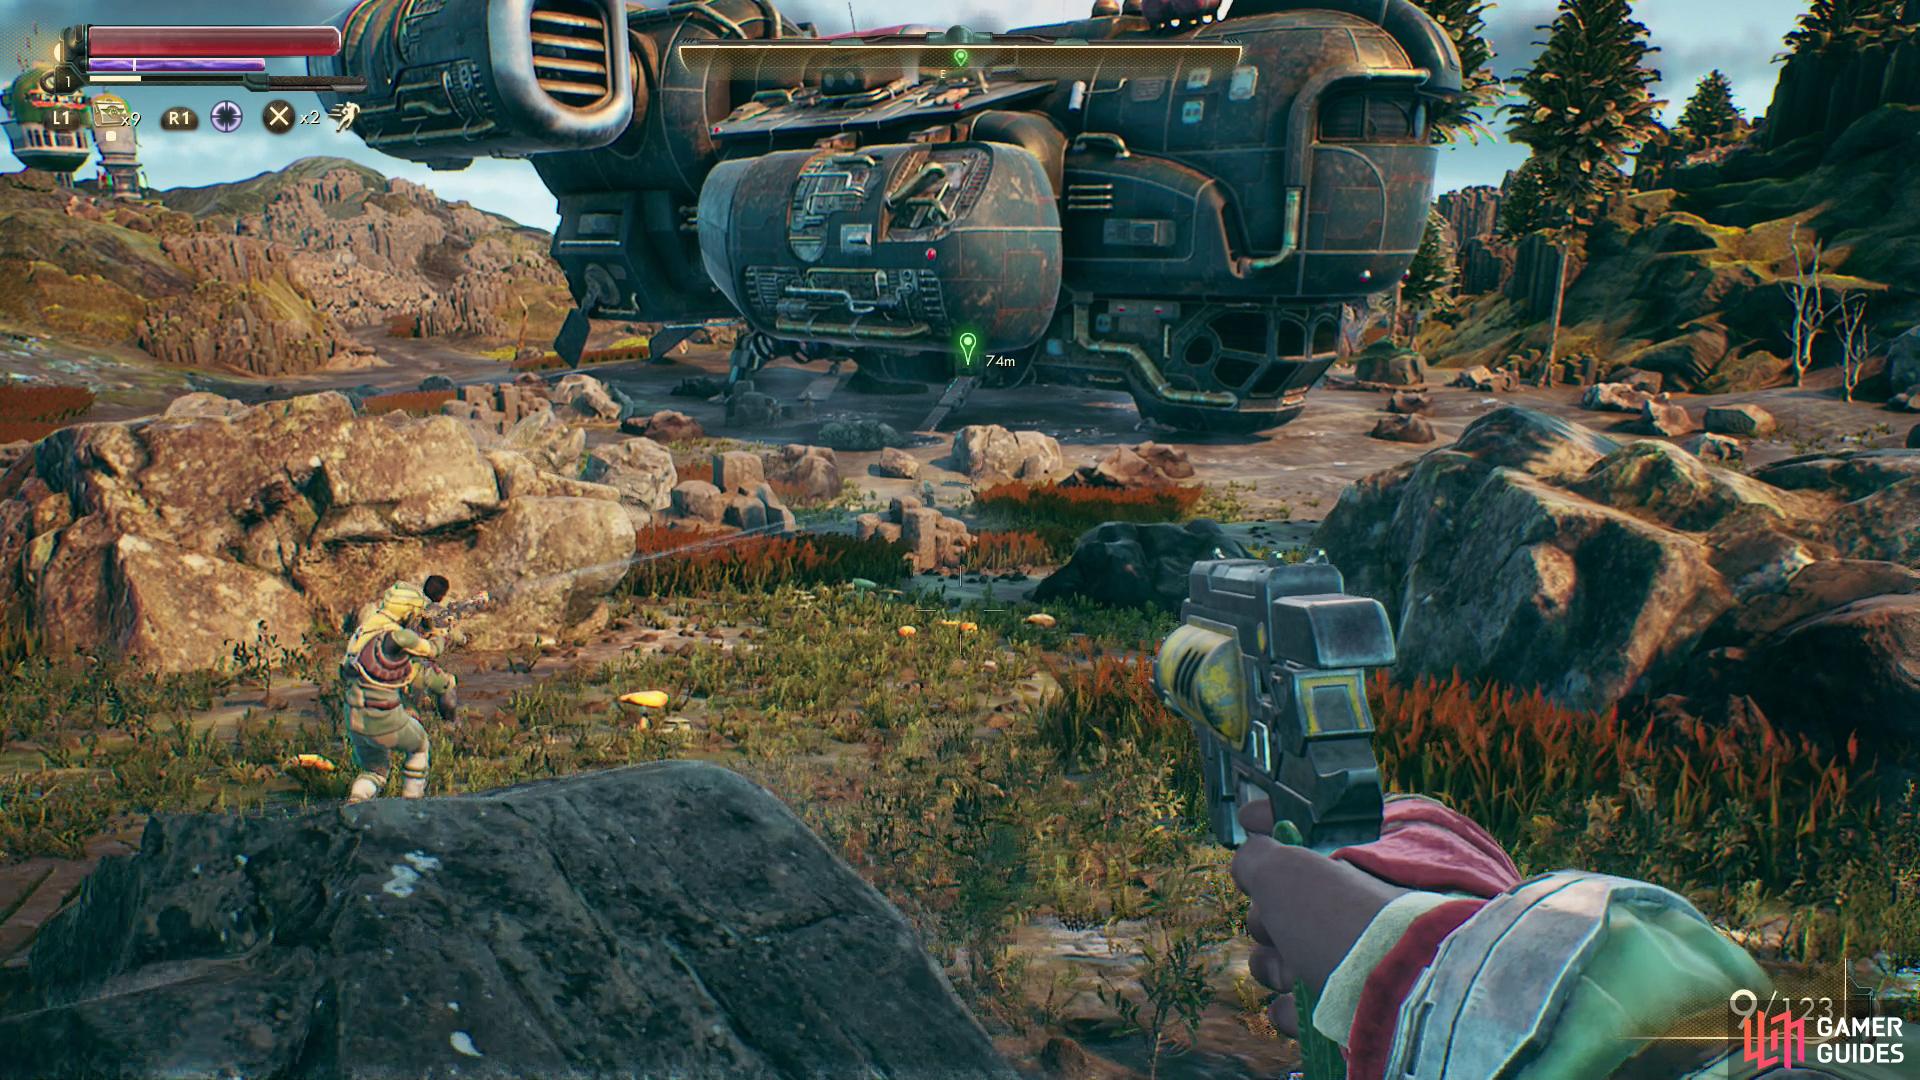
When you leave the ship you’ll be pestered by Mercer and Kimball, assuming they’re alive. If they are, say whatever you wish (assuming you avoid picking a fight) and you’ll be referred to Edgewater. You know, in case you haven’t resolved to go there yet anyways. Best case scenario, pass a [Lie 5] dialogue check for some bonus XP, then head northeast from the Unreliable to find a poor excuse for a road. Follow this road - such as it is - to the east, northeast and dispatch three marauders in your way (in Hard/Supernova difficulty, hit-and-run still works well) then continue through a cave and follow the road to reach Edgewater.
On the bridge leading to Edgewater you’ll find Silas, the Junior Inhumer for the town of Edgewater. Talk to him to glean information about Edgewater, his job, potentially getting yourself a bit of work, and of course any information about the power regulator you need. You can even lie [Lie 1] about your identity as Alex Hawthorne, which will be a recurring fable you can peddle. Asking about work and marauders will lead to Silas giving you your first Side Quest (well, technically a Task), A Small Grave Matter, which you can peruse on your own volition by following the link - ideally you’ll run across them as you explore Edgewater, and after you make a key diplomatic contact in Edgewater the time will be ripe for all manner of diversions.
If you ask about marauders you’ll get a blatant cover up, but at least you’ll be informed that you can talk to one Constable Reyes about bounties. Finally, if you ask about this power regulator you need you’ll be referred to Reed Tobson, whose office looms over the cannery - Edgewater’s sole reason for being.
With that chat done, head across the bridge to find the gates to Edgewater. If you want, you can circle around the town and go on a looting spree. Sneak to make sure nobody is watching, grab whatever isn’t nailed down, pick locks when you encounter them. Your prize for doing so is potentially hundreds of ammo, Mag-Picks, Bypass Shunts, consumables, Bits and the odd weapon and armor, not to mention a fair bit of XP for any locks you pick or computers you hack. It’s optional, but highly recommended.
If you need a spot to sell loot without much fuss, you’ll find some vending machines on the Edgewater Landing Pad, which is just southeast of the city (the gate you’re at now is along Edgewater’s southwestern side). There’s also plenty of loot to be had around the landing pad, and a quest you can pick up, but it’s something we’ll discuss later. Assuming you get a Hack score of 20 you’ll be able to sell junk to vending machines, and at Hack 40 you’ll be able to buy restricted items, which typically includes Mag-Picks (16 Bits) and Bypass Shunts (12 Bits). Assuming you’ve got a passable Lockpick score (it’s hard to have a good Hack score without also having a decent Lockpick score), these Mag-Picks should pay for themselves, as the value you’ll get out of locked containers typically covers the cost of Mag-Picks - especially when your Lockpick score is high enough to start allowing you to pick locks without expending Mag-Picks.
Anywho, when you’re done plundering the outskirts of Edgewater, enter the city. Time to meet Reed Tobson.
Exploring Edgewater
Once inside Edgewater, look up and north to spot the tower looming above the rest of town - the big moon-headed Spacer’s Choice mascot and the obvious “EDGEWATER” sign should make it clear where this is. In that edifice you’ll find Reed Tobson, and you need not worry about finding the Saltuna cannery - it takes up the entire northwestern edge of town.
Before you beeline there, however, note there are numerous quests you can find and much loot to be hand if you care to get it. In the latter case, you’ll need to do some sneaking, pick a few locks, and be wary of Edgewater residents who might spot you, but it shouldn’t be all that hard to grab a fair amount of plunder without suffering any consequences. As with the looting spree outside of Edgewater, this is purely optional, but highly recommended. The looting will be left up to you - there’s not much in the way of unique loot (at least, nothing that won’t be covered later) that you can scrounge, but plenty of ammo, consumables and Bits, among other treasures.
As for NPCs you can talk to, here’s quick rundown:
-
Conrad Sadik in the barber shop (which also seems to double as the mortuary, judging by the corpses in the back?) is one of the delinquents you need to secure rentals from for the quest A Small Grave Matter, but you can also learn about the plague (and Spacer’s Choice wretched rhetoric on the connection between work ethic and health) and Vicar Maximilian.
-
In the unmarked sick house (across the street from - east of - the barber shop) you’ll find Rosemary Kwan. You can’t do much for her but pass a [Medical 5] check to earn some XP.
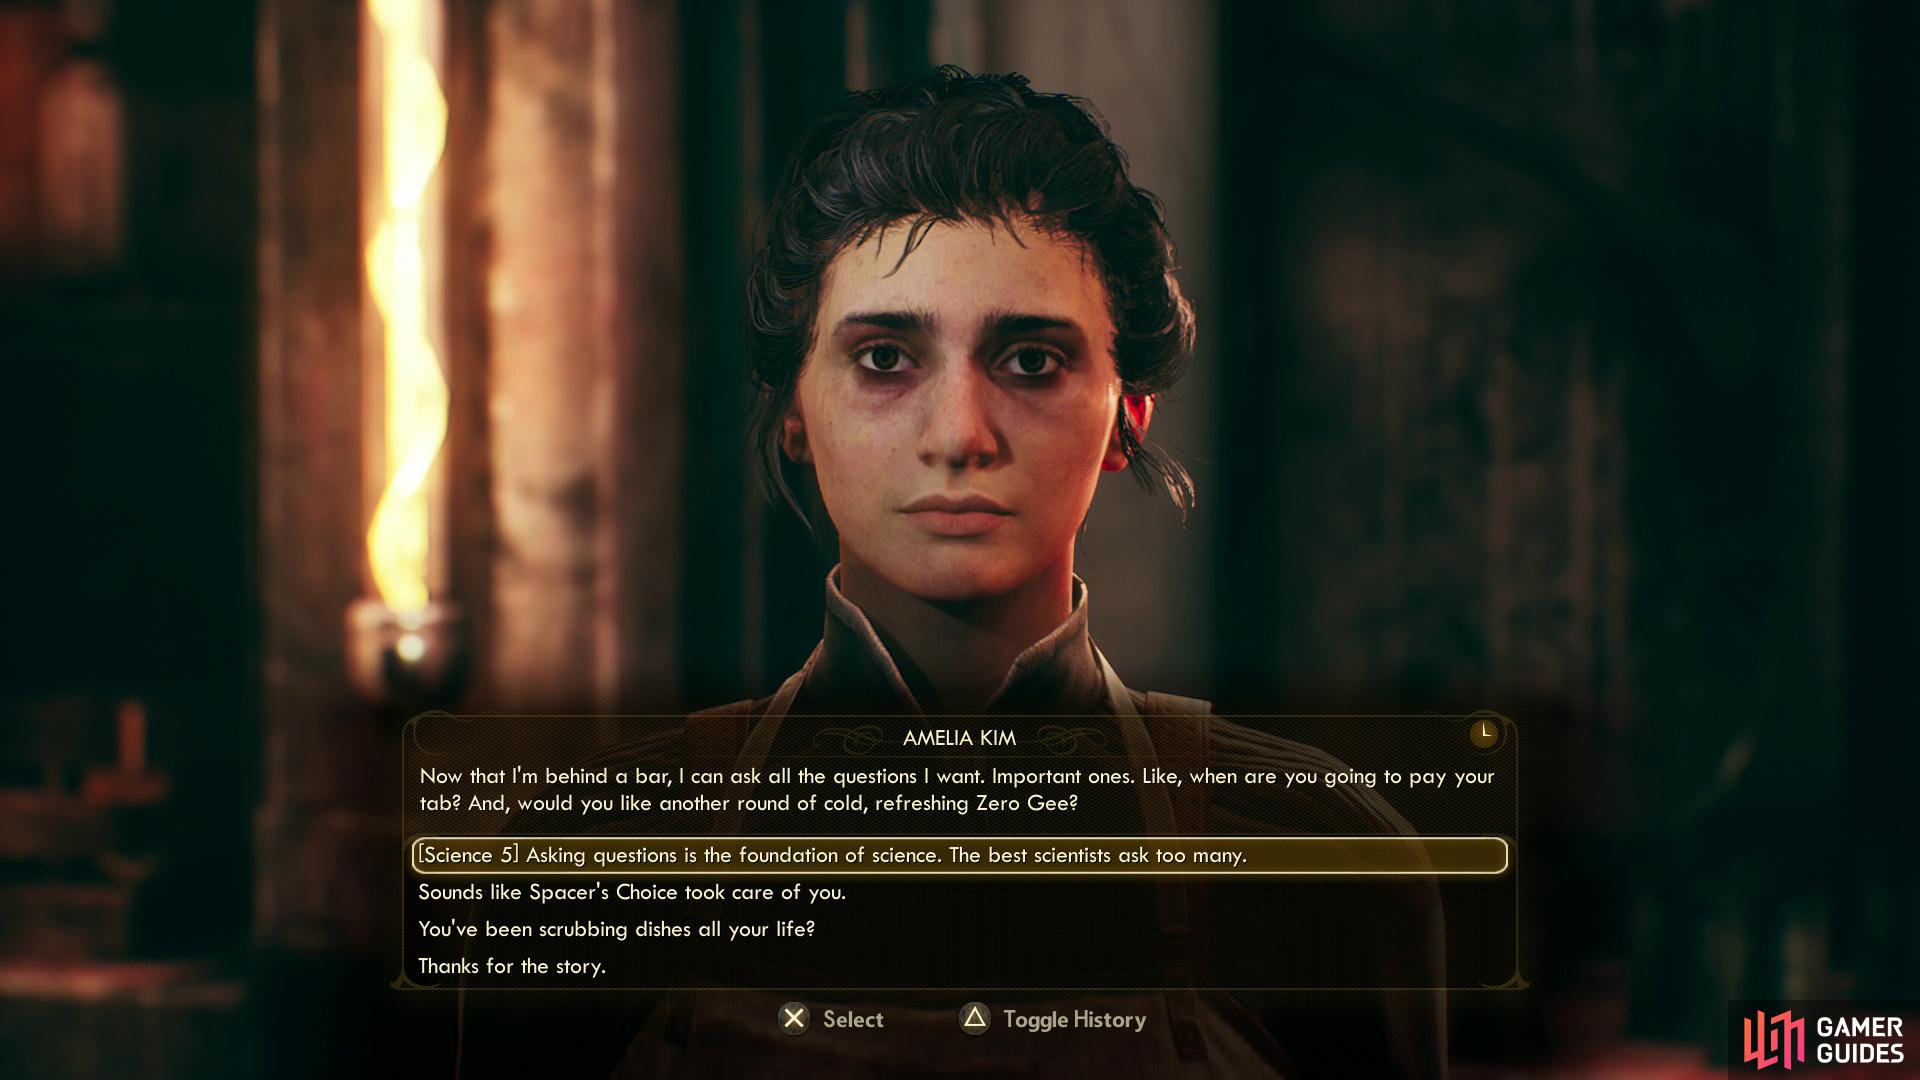
You can chat with Amelia in the cantina to attempt some dialogue checks

and buy the unique weapon Maxwell from the general store.
-
Amelia Kim at the Cantina will give you the opportunity to pass some dialogue checks, including a [Lie 1] (another Alex Hawthorne fib and a goofy jest about being a ghost), [Science 5], [Persuade 26] and a [Charm] and some [Perception] checks, for what that’s worth.
-
To the southeast of the Cantina you’ll find the General Store, where you can chat with Julius Moreau and peruse his wares. He sells the unique Impact Hammer, Maxwell, if that sort of thing interests you.
- Northeast of the General Store you’ll find the church, wherein you can talk to Vicar Maximilian, who espouses the tenets of Scientism… but doesn’t seem enthused about Edgewater itself. In fact, he repeatedly and snarkily dismisses this dismal little backwater, but on the plus side you can pick up the quest The Illustrated Manual, which tasks you with acquiring a banned, heretical book in the vicinity of Emerald Vale. Something to keep in mind when you’re done in Edgewater.

Talk to Reyes to pick up some bounties
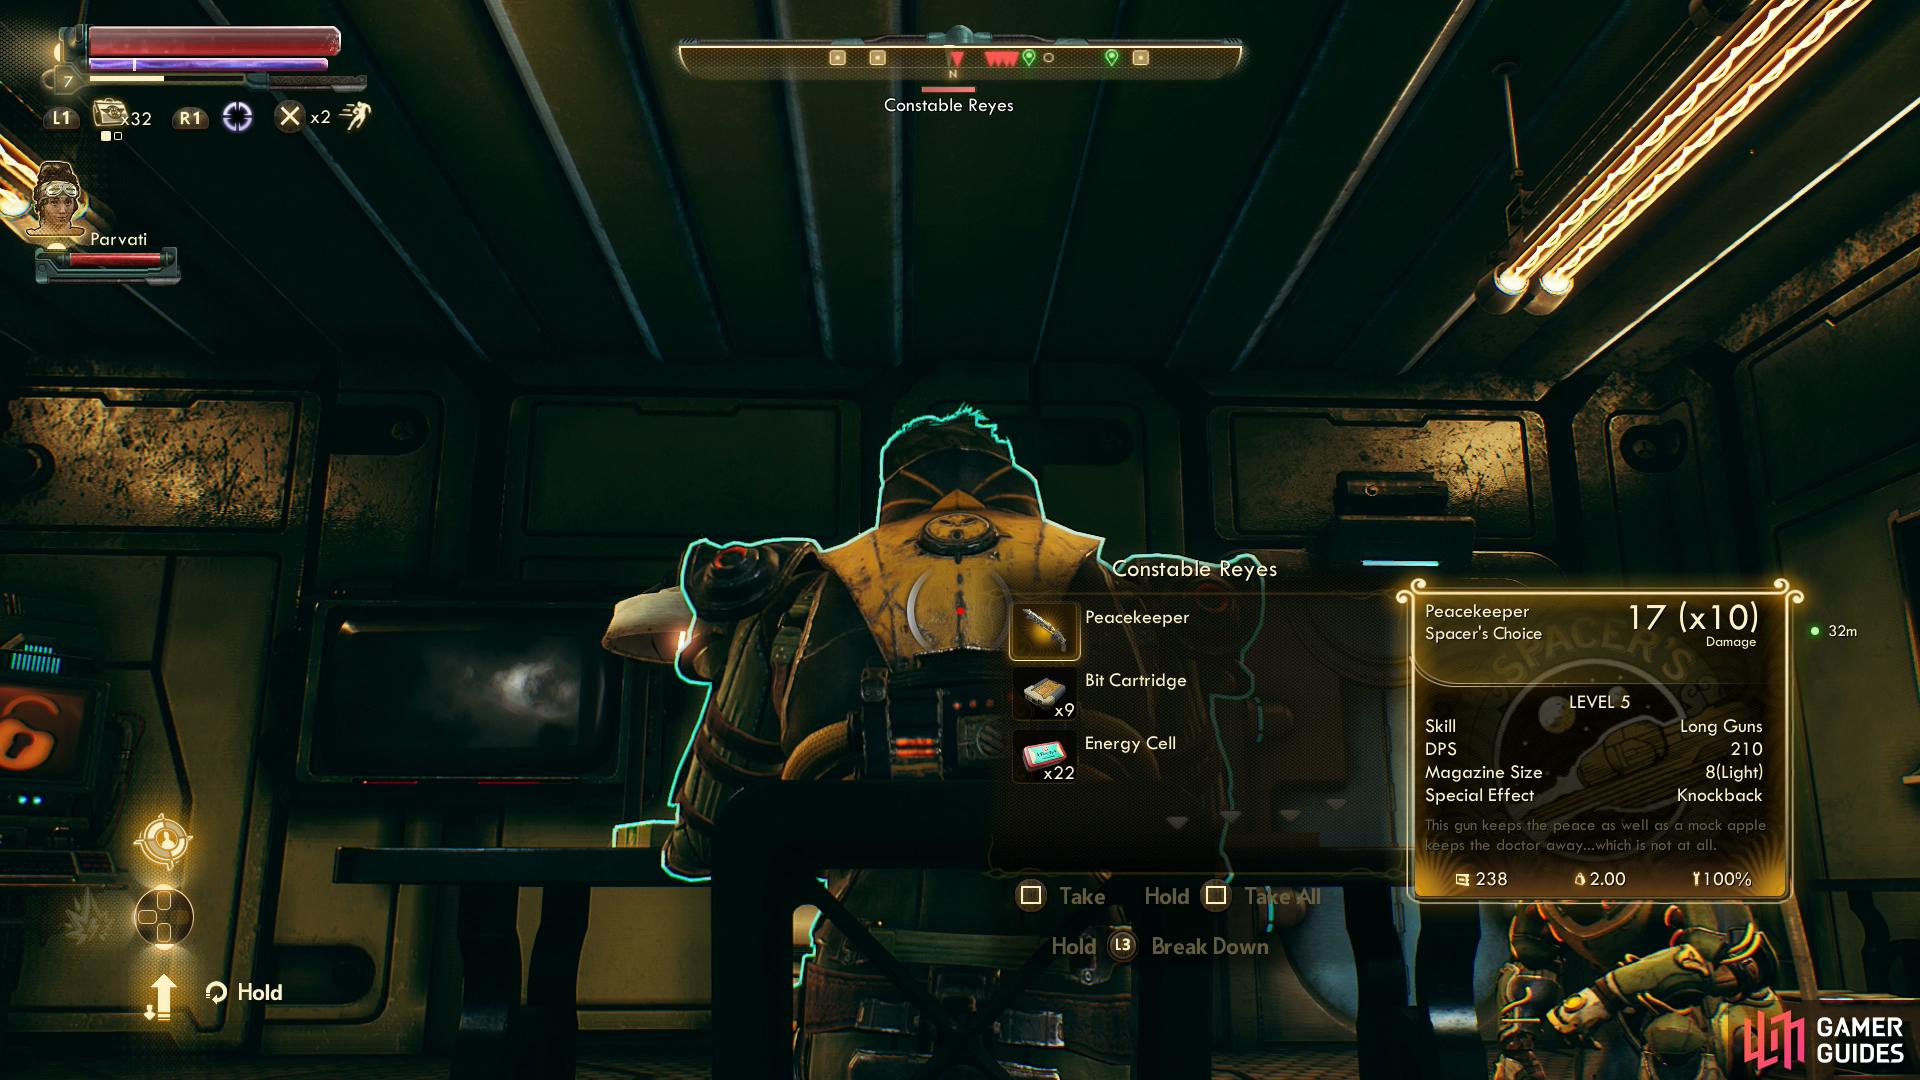
You can steal the unique “Peacekeeper” weapon from her.
-
West of the Cantina you’ll find the home of Martin Abernathy, another person you need to shakedown for Silas. More than that, however, this hypochondriac will ask you to secure some medicine from the now marauder-infested community center, starting the quest The Long Tomorrow. Once outside a woman named Esther Blaine will hail you, giving you a chance to pass a few dialogue checks and giving you another option for how to resolve this quest.
-
Finally head southwest of the Cantina to find the Constable’s office, inside of which sits Constable Reyes. Offer to help with the marauder problem to start the quest Fistful of Digits, then ask whatever questions you wish. If you want to learn more about the bounties, check out the terminal in her office… really doesn’t seem like crimes warranting execution, but a job’s a job.
Pick up these quests if you want, but don’t bother with them yet. They’ll be easier to finish in the near future.
Meeting Reed
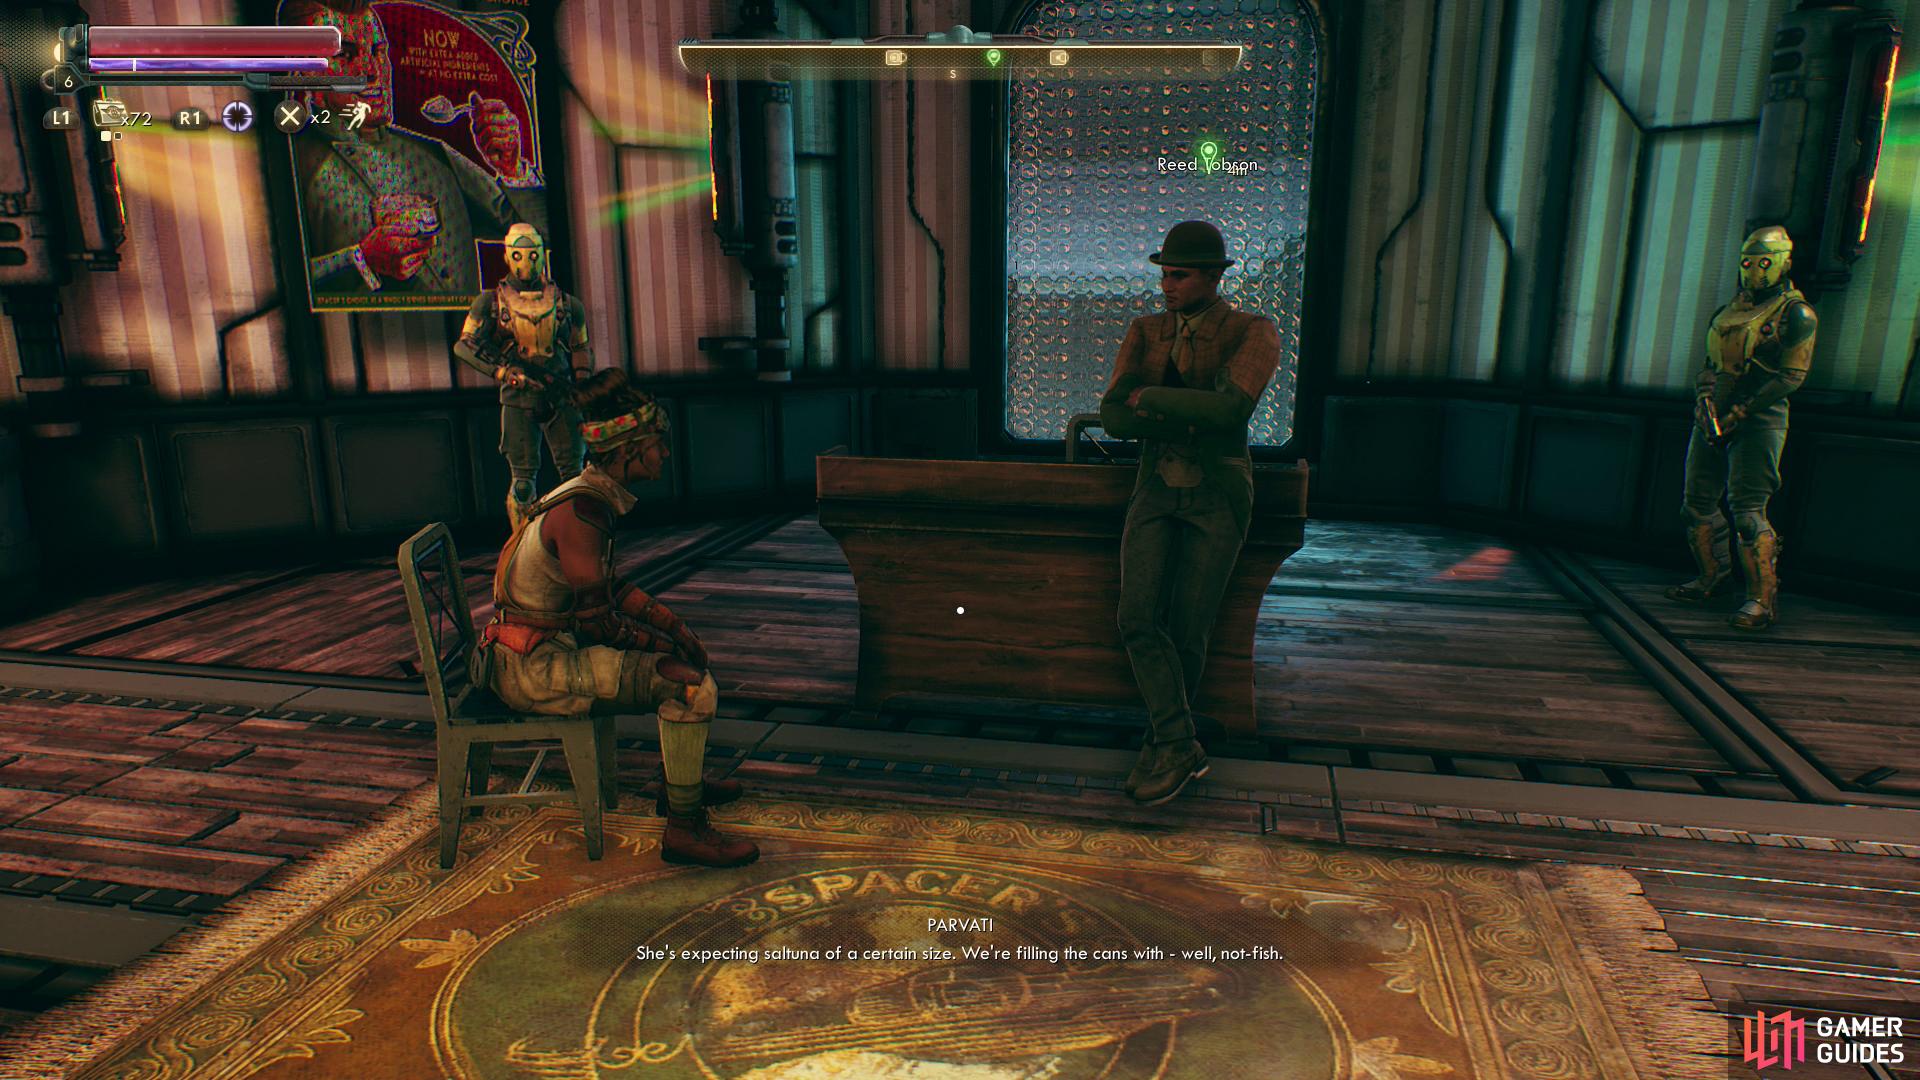
Now that Edgewater has been explored, enter the cannery and ride an elevator up to Reed Tobson’s office, where you’ll find him in the midst of a discussion with a woman named Parvati. When they stop yammering, approach Reed and he’ll address you - get through the formalities and ask about the power regulator and you’ll find there are two such devices in Emerald Vale: one powers Edgewater, and the other can be found at a “mostly abandoned” botanical lab. His suggestion is simple, just head over to the geothermal plant, reroute all the power to Edgewater, and take the now-useless power regulator from the botanical plant. Useless for them, anyways, it’ll still perform dandy for you.
The complication, of course, is the “mostly” part of the “mostly abandoned” phrase. Seems some Edgewater deserters are now living free from the corporate yoke in the botanical garden, and Reed’s offer is a bit of quid pro quo. You turn off their power and they’ll have no choice but to return to work in Edgewater, and you, of course, get your power regulator. Question him further and he’ll request you talk to the leader of the deserters - Adelaide - and kindly tell them that you’re strong-arming them into leaving. It’s not a decision you’ll have to finalize yet, so agree to help out.
Before you leave, Parvati will offer to join you on your expedition, to which Reed surprisingly agrees. After you get Reed’s Geothermal Passcode and a bit more chatter you’ll be free to go - be sure to accept Parvati’s help, if you want a companion. The extra firepower will come in handy for the fights ahead. In any event, this starts a new main quest, Comes Now the Power, which branches off from Stranger in a Strange Land. To progress the latter you’ll need to work on the former, which currently tasks you with delivering Reed’s message to Adelaide.
Before you run off and start searching for deserters and crushing communities, there’s a bit more to do in Edgewater. Now that you (presumably) have a companion, head down the elevator and Parvati will ask to speak with you, advocating for the deserters and ultimately referring you to speak to Vicar Max again. You can also ride back up the elevator now and question Reed more thoroughly to learn about Adelaide and her deserters, his own failures, the plague and the “saltuna” they’re canning here. Interesting stuff, to be sure, and a few dialogue checks here and there, if that interests you.

Companion: Parvati
Side quests and deserters await, but first you should talk to Vicar Max again and search the Edgewater Landing Pad. Before any of that, however, let’s talk about companions.
When you have a companion you’ll find them listed in your menu, where you can view their weapons, armor, perks and details. The weapons and armor you give them don’t seem to make much of a difference in as much as companions don’t seem to have any particular affinities or aversions, so give them what you have on hand, or give them gear that’ll encourage them to fight in the way you wish them to to fight. Each companion can be equipped with a ranged weapon, a melee weapon, a suit of armor and a helmet, and their armor bonuses aren’t as important as your own, so you may wish to just focus on giving them to heaviest, most protective armor you can find.
That said, you do gain some bonuses by having companions. First and most important are skill bonuses. Each companion has three skills they specialize in - in Parvati’s case, Persuade, Lockpick and Engineering. As they level up, these skills will improve, and you’ll get a bonus to your own skills equal to 25% of your companion’s skill total. For example, Parvati should start out with roughly Persuade 20~, Lockpick 30~, Engineering 35~, thus giving you bonuses to those skills equal to 25% of her own. It’s a small but appreciable bonus now, but these can grow quite substantial by late-game, when companions typically have skill scores of 70 to 80. If you get your Inspiration skill up to 60 you’ll earn a skill unlock that doubles this companion bonus, giving you a bonus to your skills of 50% of your companion skills, which is a heft boost, indeed. Only active companions contribute to your own skills - companions not in your party at the time do not.
Companions also gain perks every five levels, which are similar in function to your own. Each companion has their own perk tree of five tiers, with 3-4 perks per tier. Picking one perk will allow you access to the next tier, and while many of the perks are the same between companions (including obligatory bonuses like health, armor, ranged or melee damage, ability damage, etc) they also have unique perks on tiers 1-3 which typically give you some bonus, as well. Parvati, for example, has the Bonus Support Engineering perk, which will give you a +10 bonus to Engineering while she’s in your party. Companions level up with you, so you don’t need to worry about their XP, and all companion perks are automatically reset if you use the Vocational Competence Respecification Machine.
If that’s not enough, companions also have special abilities they can use once you attain the Inspiration 20 skill unlock. Meet this threshold and each companion will have an ability assigned to the [LEFT] and [RIGHT] buttons on the D-pad. Just aim at a target and press the aforementioned button to have your companion perform said ability. In Parvati’s case, this ability is “Overload”, and like most companion abilities it’ll deal direct damage to one foe - it’s free damage, albeit with a cooldown, definitely something worth sinking a few points into the Leadership skill category to unlock.
Finally you can alter the companion’s behaviors on their menu tab, where you’ll find three options: Distance, Weapon and Mode:
- Distance: Determines the range at which your companions follow you (Close, Medium or Far).
- Weapon: Determines what weapons your companion will use (Melee, Mixed or Ranged).
- Mode: Determines when you character will attack (Passive, Defensive or Aggressive).
We see no reason to change up the Medium/Mixed/Aggressive standard, as your companions rarely get in your way, won’t attack until a fight breaks out, allowing you to sneak and snipe just fine, and will contribute to combat well enough. On Supernova difficulty you may wish to set them to “Ranged” just to keep them out of trouble. You can press [UP] on the D-pad to direct your companions to target a specific foe, or press [DOWN] on the D-pad to have them move to a specific area - in either case, whatever you’re aiming at will be the target.
Whew.
Oh, and to sweeten the deal even further, each companion you bring with you (you can travel with up to two at a time) will increase your carrying capacity by 10kg.
The Vicar’s Advice
Return to Vicar Max and mention Reed’s task to him. His opinion is, perhaps unsurprisingly, in-line with Reed’s desires: send the power to Edgewater and send the deserters back here. Might not be the most helpful bit of advice, but you’ll gain a good bit of XP for talking to him, so it’s well worth the diversion.
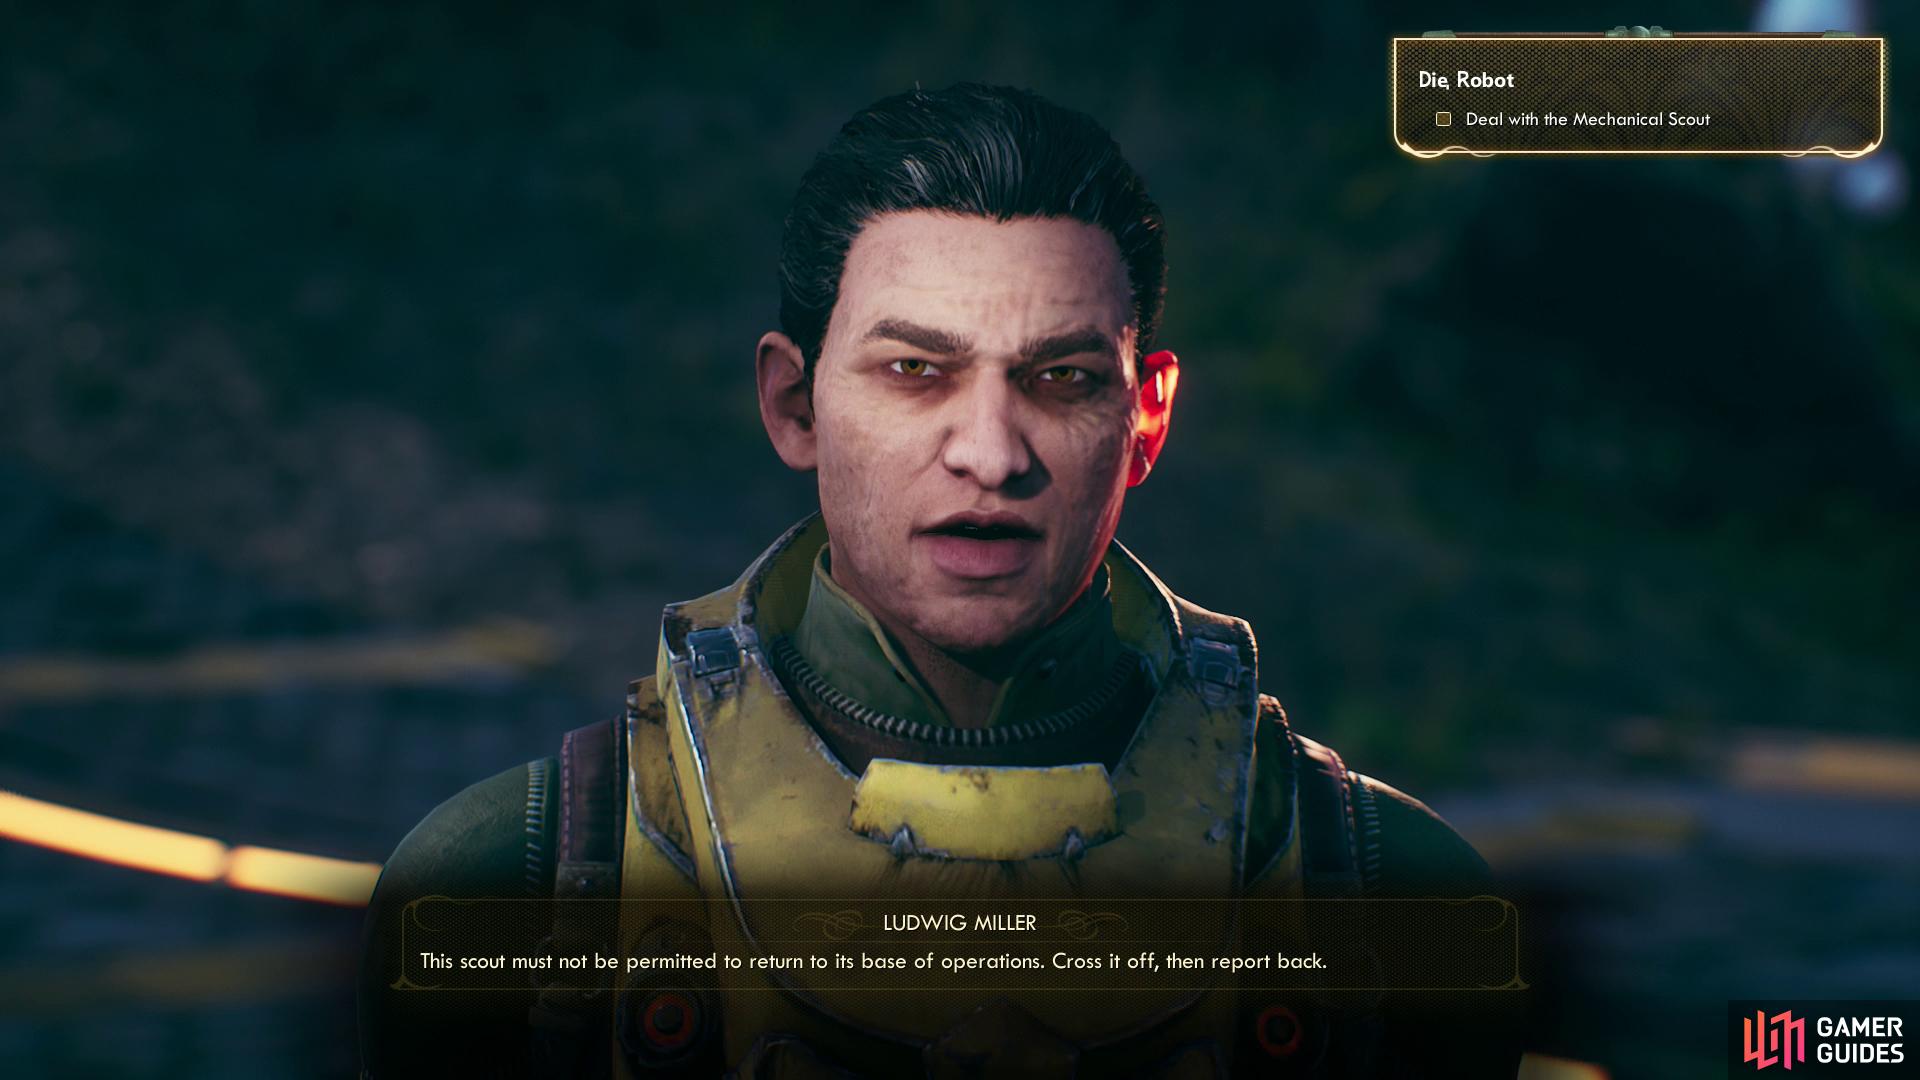
Promise to help Ludwig fend off an imaginary automechanical invasion
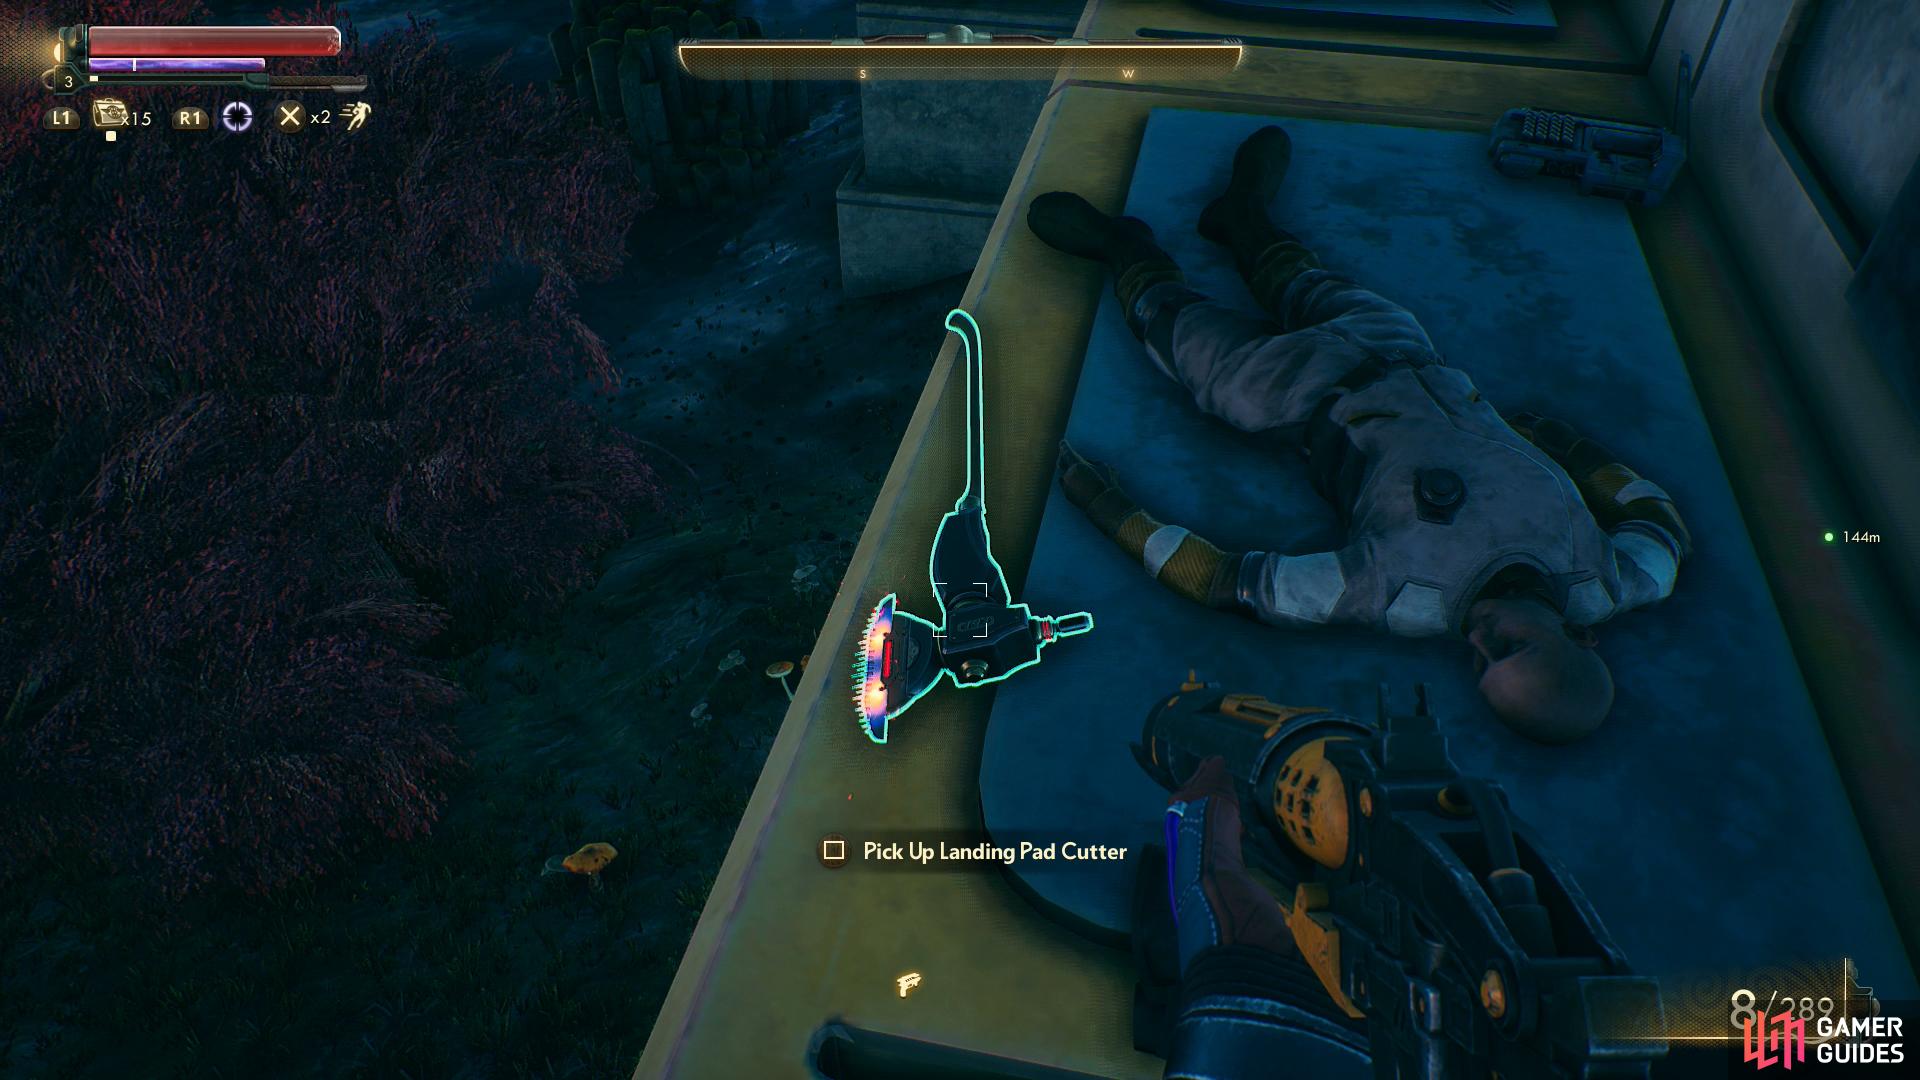
then search the edges of the landing pad to find the “Landing Pad Cutter” unique weapon.
Edgewater Landing Pad
Leave Edgewater via the eastern gate and follow a road downhill to reach the obvious landing platform ahead. Near a small building along the western edge of the landing pad you’ll find some vending machines, while further to the west is a warehouse full of loot, if you can avoid the patrolling guard and pick some locks.
In and around the small building you’ll find Ludwig Miller pacing about. Talk to him to find out that he’s… not all there, being paranoid about some mechanical conspiracy. After he rants, aspire to be a good soldier in this imaginary war (and perhaps pass a [Persuade 5] check to earn an up-front enlistment bonus) to start the quest Die, Robot. He’s also behind in his payments to Silas, for the record.
Now, for one last bit of loot. Leave the landing pad and circle around its perimeter, heading northeast then southeast until you find a yellow-and-white ledge running around the bottom of the landing pad platform. Follow this ledge southeast, then southwest and you’ll find some corpses guarded by a Pteroray - an alien mix of a pterosaur and mantis? Whatever it is, kill it, then pick up the Landing Pad Cutter lying on the ground, which clearly wasn’t up to the task of removing the pteroray nests. Their loss is your gain.
Anyways, you’re now done looting, collecting quests and chatting with colonists around Edgewater, which makes this a fine time to complete some of the outstanding side quests you have before tracking down these deserters - a task made easier with Parvati in your party. These quests include:
Deal with as many of those as you wish, then move on to Comes Now the Power.
No Comments