
If you completed Radio Free Monarch for Phineas (regardless if you also completed Signal Point in Space for Akande) you’ll be able to return to Phineas’ Lab and tell him of your accomplishment. Having gained the intel he was after, he’ll tell you the next phase of his plan: You need to head to Byzantium and steal the chemical Phineas needs to revive the Hope. These chemicals apparently have been ordered by one Minister Clarke, one of the highest suits in the Board hierarchy.
So, travel to Byzantium, crown jewel of the colony and the Board’s stronghold and steal an incredibly valuable batch of chemicals from Earth’s representative in Halcyon. Cake!

(1 of 3) When you arrive, Ellie will pester you, starting the quest “The Low Crusade”.
Return to the Unreliable and travel to Terra 2, landing on the newly-acquired Byzantium Freight Port Landing Pad. As you go to leave your ship you’ll find Ellie waiting for you, who apparently has something she needs to say. Apparently she was born in Byzantium, and wants to visit her parents… and for some reason she wants you to come along, and she doesn’t exactly want you to make a great first impression. In fact, she wants you to make a right boor of yourself. This starts the quest The Low Crusade, which you can see to any time you’re willing to take Ellie along with you to Byzantium.
Anyways, when you exit your ship at the Byzantium Freight Port Landing Pad, have a look around the area. You’ll find plenty of loot strewn about this area, so search around and grab what you will, then search among the crates southwest of the landing pad to find Phineas’ contact, Carmen Imagawa. After indulging in some optional wrangling over codenames, she’ll tell you that you need to seek out Minister Clarke, which is easier said than done, considering the man’s something a recluse who rarely leaves his heavily guarded estate. She has surprisingly little useful information to share save that some of Clarke’s guards hang around Billingsly’s House of Inebriation - taking advantage of one may give you the chance to get a key to the house.
From Carmen continue southwest to southwestern edge of the dock area to find a bay door. From here if you continue west then south you’ll reach the retiree processing area, where the luckiest of the unlucky plebs go after winning a lottery granting them an easy retirement on Byzantium. A cynical ploy to boost morale among the majority of Halycon’s workers who otherwise have nothing to look forward to save a miserable, undignified death and burial in a rented corporate plot. Not much to see here, but if you search a shelf in the middle of the storage room you can find a Tossball to decorate the Unreliable with. On a surprisingly only slightly less awful note, you can instead head west to find an elevator which will take you up to Byzantium itself.
As can be expected from the largest city in Halcyon, there’s a lot to see and do in Byzantium, including loot to find and quests to start. This was already covered in The Puppet Masters, but we’d be remiss if we didn’t include a similar section for those who didn’t align with the Board. That said, it’s all the same quests, just starting from the opposite end of Byzantium, so if you already came to Byzantium by following the Board’s quests, feel free to skip to the “Meeting Minister Clarke” header below, where this quest will resume.
Exploring Byzantium
– From the elevator leading down the Byzantium Freight Port Landing Pad, head northwest then southwest to reach an intersection, where you should be hailed by Maverick Johnston, who will offer you an audition, starting the quest At Central. If you don’t meet him here, you can find him in the Odeon Pictures building, which is northwest of the orrery in the center of Prosperity Plaza.

– Continue down some stairs southwest of the intersection where you (may have) met Maverick Johnston to reach Paradise Plaza itself, which is dominated by the aforementioned orrery. From the orrery head west, northwest to find the Bijou’s establishment, which is currently close. No matter, jump over a fence to the right (northwest) of the door to Bijous and search the southwestern wall to find a Poster you can snatch to decorate your ship with.
– Along the northeastern end of the Prosperity Plaza you’ll find the Forsythe Luxury Munitions shop, run by Winston Forsythe. Naturally you can buy a variety of weapons and weapon mods from him, including the unique weapons The Exterminator and Pink Slip, should you have an absurd amount of cash to burn.
– Return to the orrery in the center of Paradise Plaza and form there head up some stairs to the southwest and turn left (southeast) to find Jolicoeur’s Haberdashery. Inside you’ll find Celeste Jolicoeur, the store’s proprietor. She seems oddly enamored with you, and if you wade through her fawning compliments she’ll offer to make an outfit worthy of you… if you can find the right materials. This starts the task Makes Space Suits, Won’t Travel. You can also buy armor and clothing from her, some of which can be difficult to find otherwise, but none of which is technically a rare/unique item.
– From the orrery at the center of Prosperity Plaza head up some stairs to the northwest, then turn southwest and go up a second flight of stairs to reach Billingsly’s House of Inebriation. You can talk to Mr. Billingsly if you want, but if you’re not doing any of the Board quests, he’s got little to say. If you want any actual service at the bar, you’ll need to talk to the Bartender Mechanical.
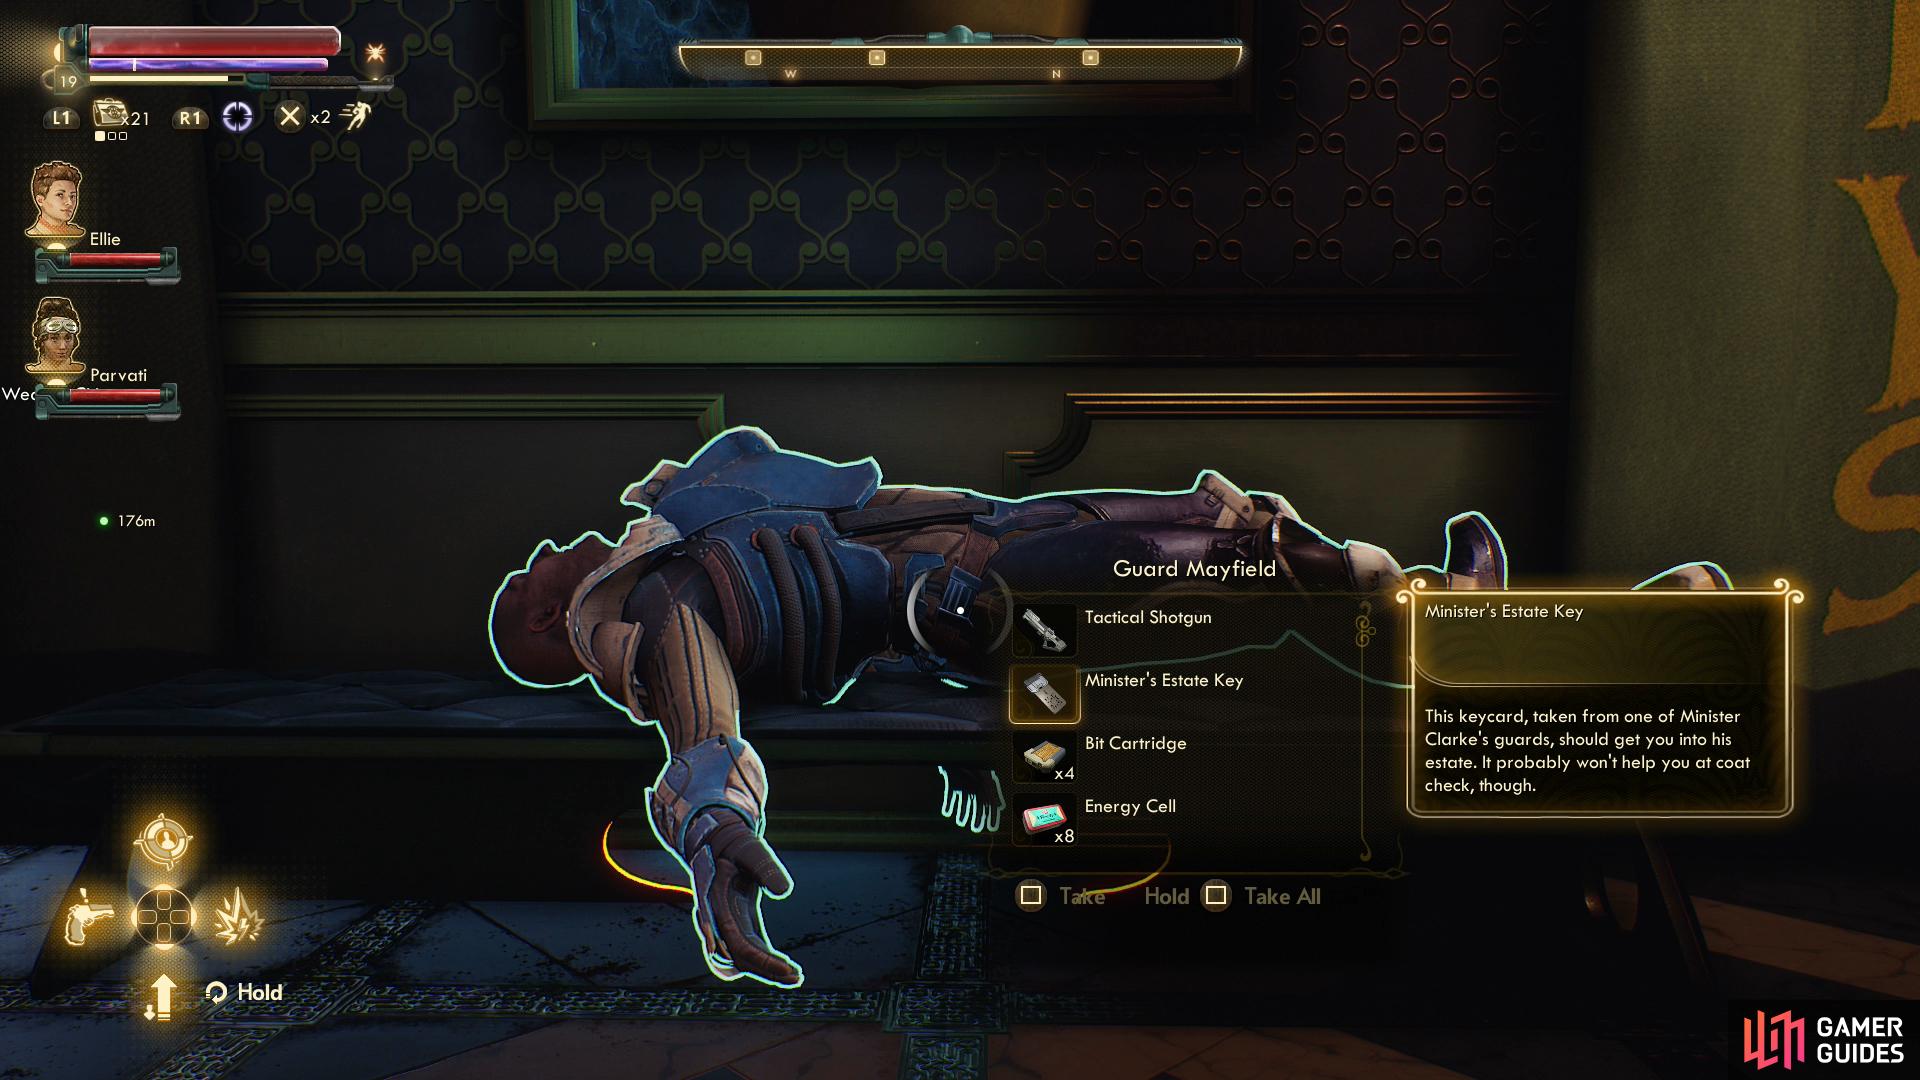
– Also in Billingsly’s House of Inebriation you’ll find Guard Mayfield, who is quite proud of his new job as one of Minister Clarke’s bodyguards. Pressing him for information will cause him to reveal that he doesn’t really know much about Clarke, but he does have a key to Clarke’s estate. If you pour three bottles of Spectrum Vodka down his throat (you’ll need Ellie in your party, or you’ll need to pass a [Persuade 40] or [Medical 40] check to get him to drink a third time), he’ll get sick, head to an adjacent room, and die. Oops. But you can loot him for his Minster’s Estate Key, bypassing the locked door at the back of the estate [Lockpick 60]. This will make sneaking into Minister Clarke’s estate trivially less difficult, for what that’s worth.

Alonzo Vallejos will give you the quest “All Halcyon in a Day”.
While an incompetent, serial-obsessed man named Giles Molina will give you the quest “Cupid of the Laboratory”.
– Leave the bar and return down the stairs to the northeast, and once back on the road head a few steps further down the street to the northwest, only to find a tunnel to your left (southwest). Keep this tunnel in mind, as it leads to an elevator which will take you down to the maintenance tunnels, but first continue north to reach the Bureau of Exploration building. Inside you can talk to Alonzo Vallejos to start the task All Halcyon in a Day.
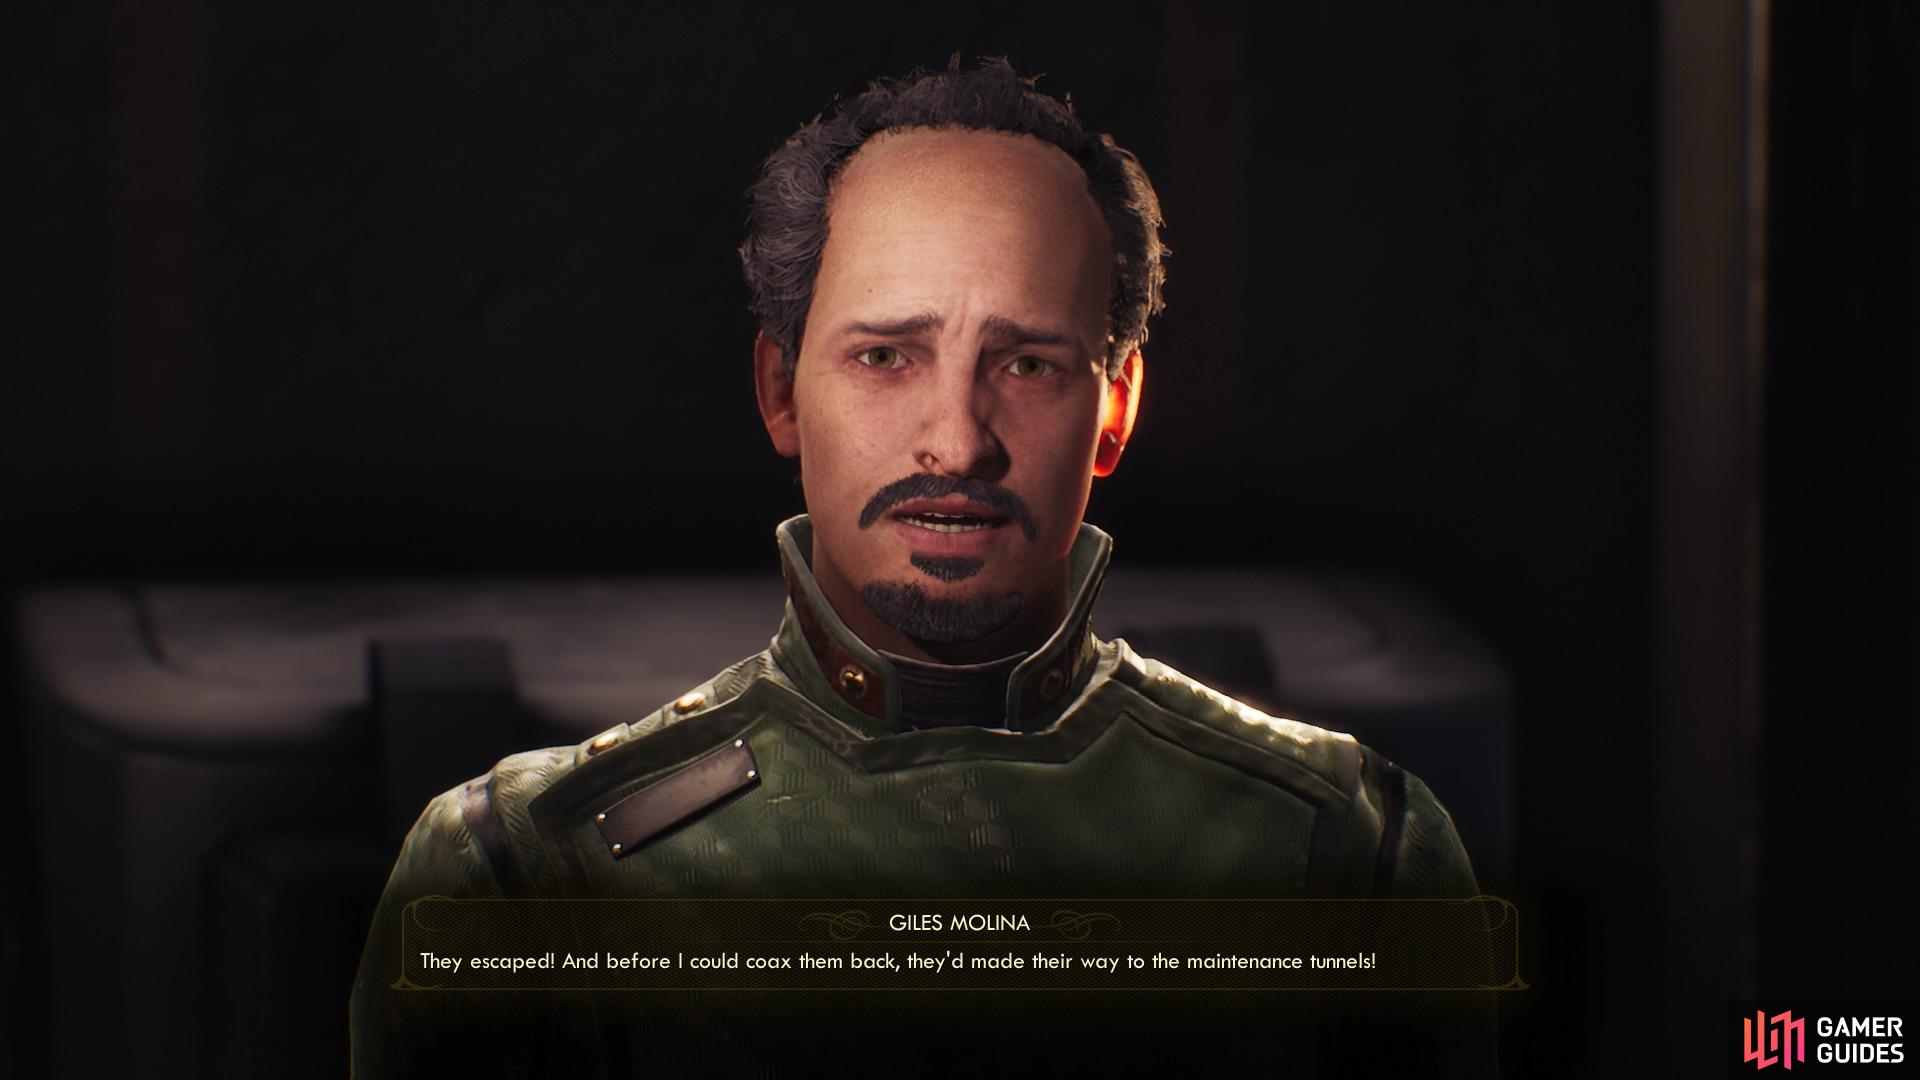
– Return outside and backtrack down the street a short distance southeast to the passage leading to the elevator that in turn leads to the maintenance tunnel area. Head southwest down this tunnel to find the aforementioned elevator, near which is one Giles Molina. Offer to look for his sprats and to start the quest Cupid of the Laboratory. If you’re keen on making The City and the Stars easier, completing this quest isn’t a bad idea, if for no better reason than it gives you an excuse to plunder the maintenance tunnels.
– Near the elevator to the maintenance tunnels you can also find a door leading to the back area of the Halcyon Parcel Service building - HPS for short. While you don’t have an excuse to come here just yet, you can actually bypass a trivial phase of the quest The City and the Stars by doing so. Head into the HPS building, wait for a guard to pass, then pick the locked door [Lockpick 60] ahead to reach the parcel storage room. Search a shelf to find a Parcel for Minister Clarke which will give you an excuse to enter his estate.
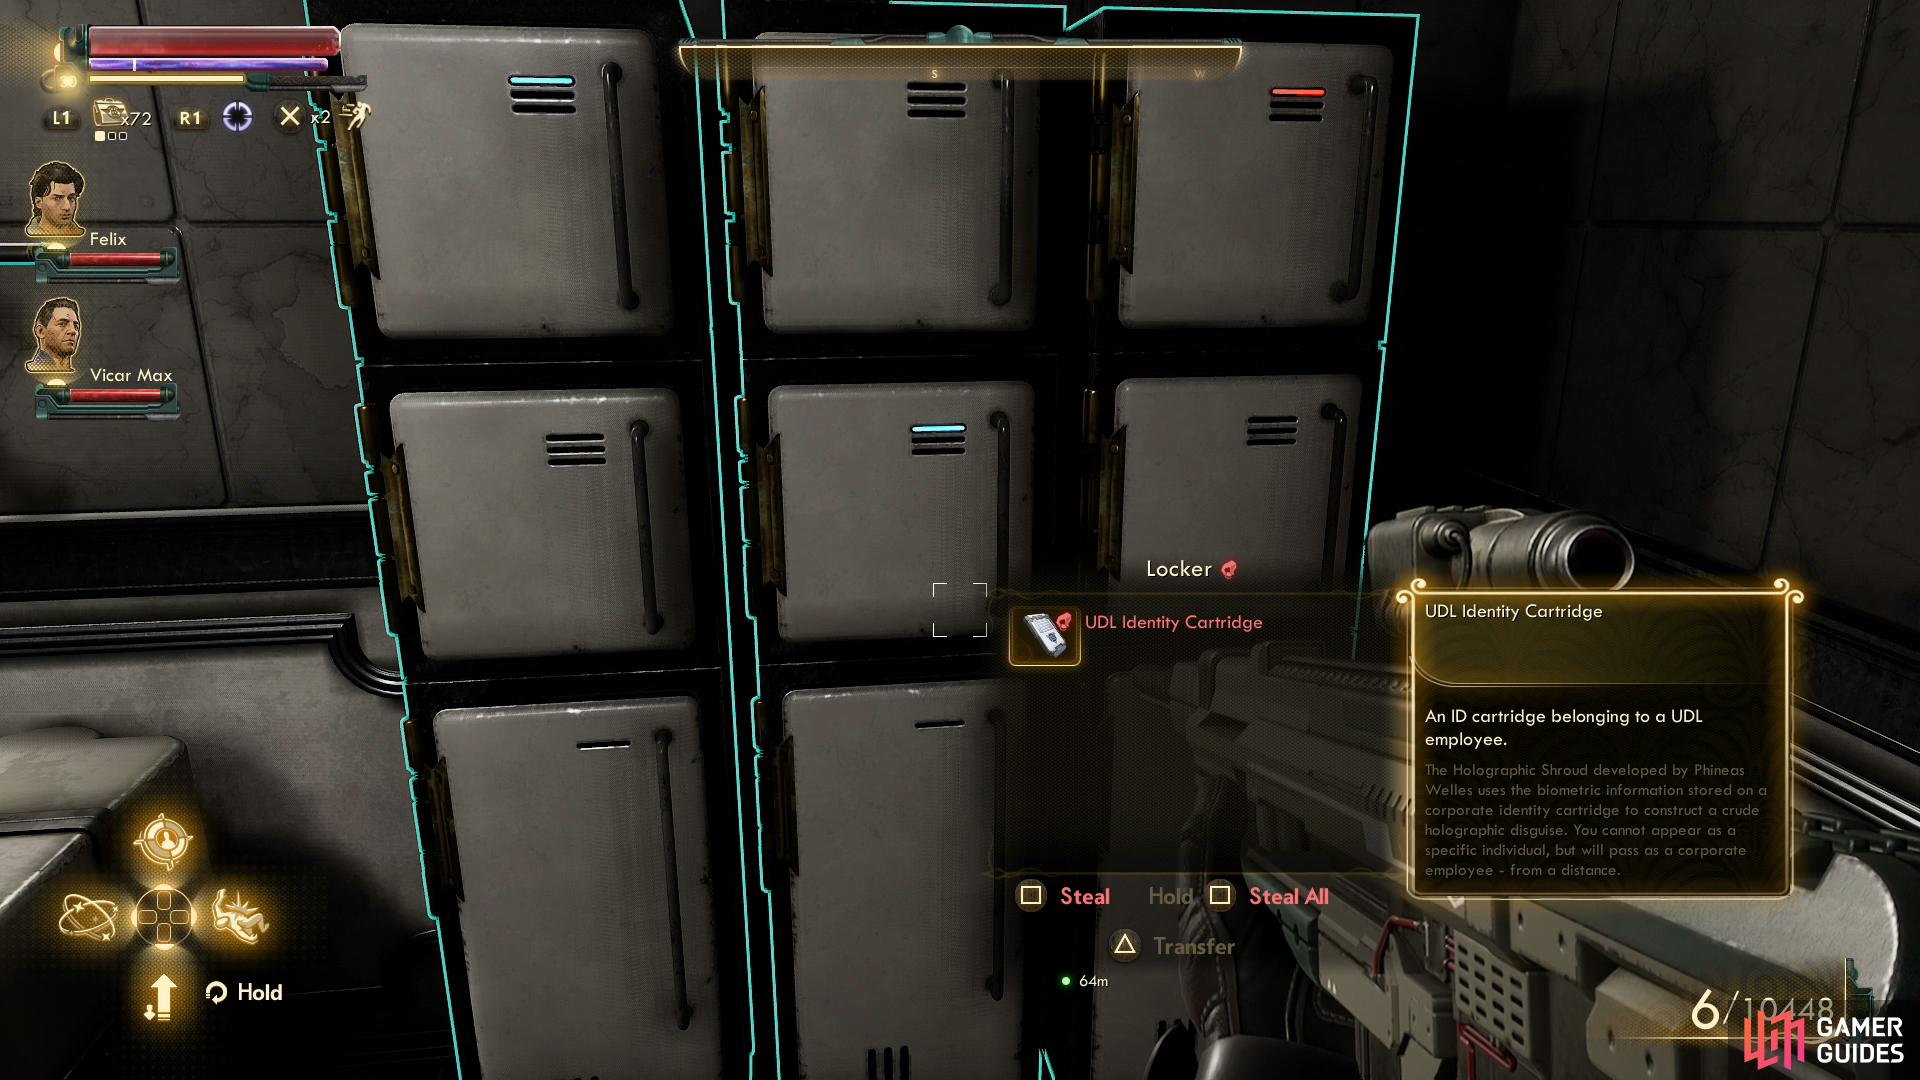
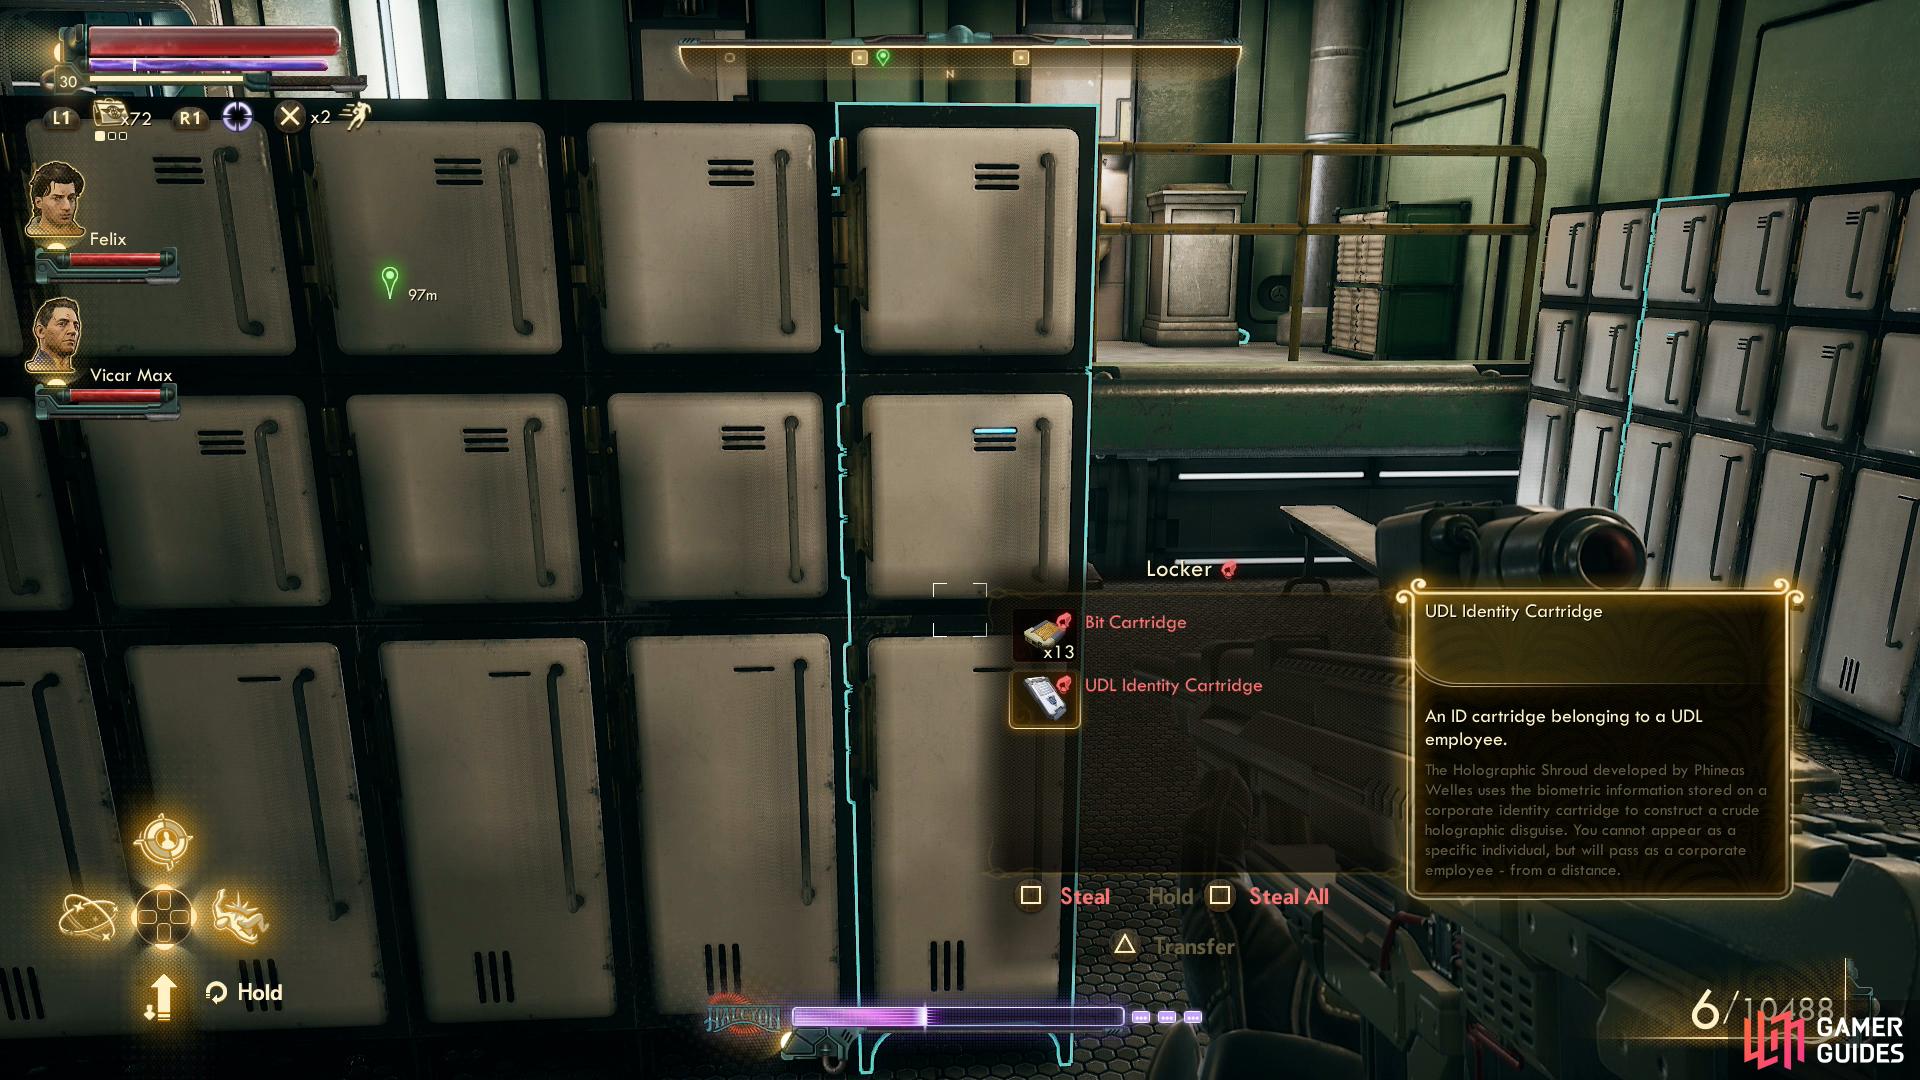
– Another item that’ll help you infiltrate Minister Clarke’s estate can be found nearby. From the elevator to the maintenance tunnels head southwest to reach a walkway near the canal. Turn southeast and head through a tunnel and continue past a vending machine to find two guards talking, one of which is sitting. Search under the bench one is sitting on to find a UDL Identity Cartridge. They probably shouldn’t just leave these things out in the open…
– Turn around and follow the canal northwest and head up some stairs to find yourself near a bridge spanning said canal. If you turn right (northeast) and head down some stairs you’ll find the Odeon Pictures building to the left (northwest), where you can start the quest At Central by talking to Maverick Johnston, if you haven’t already.
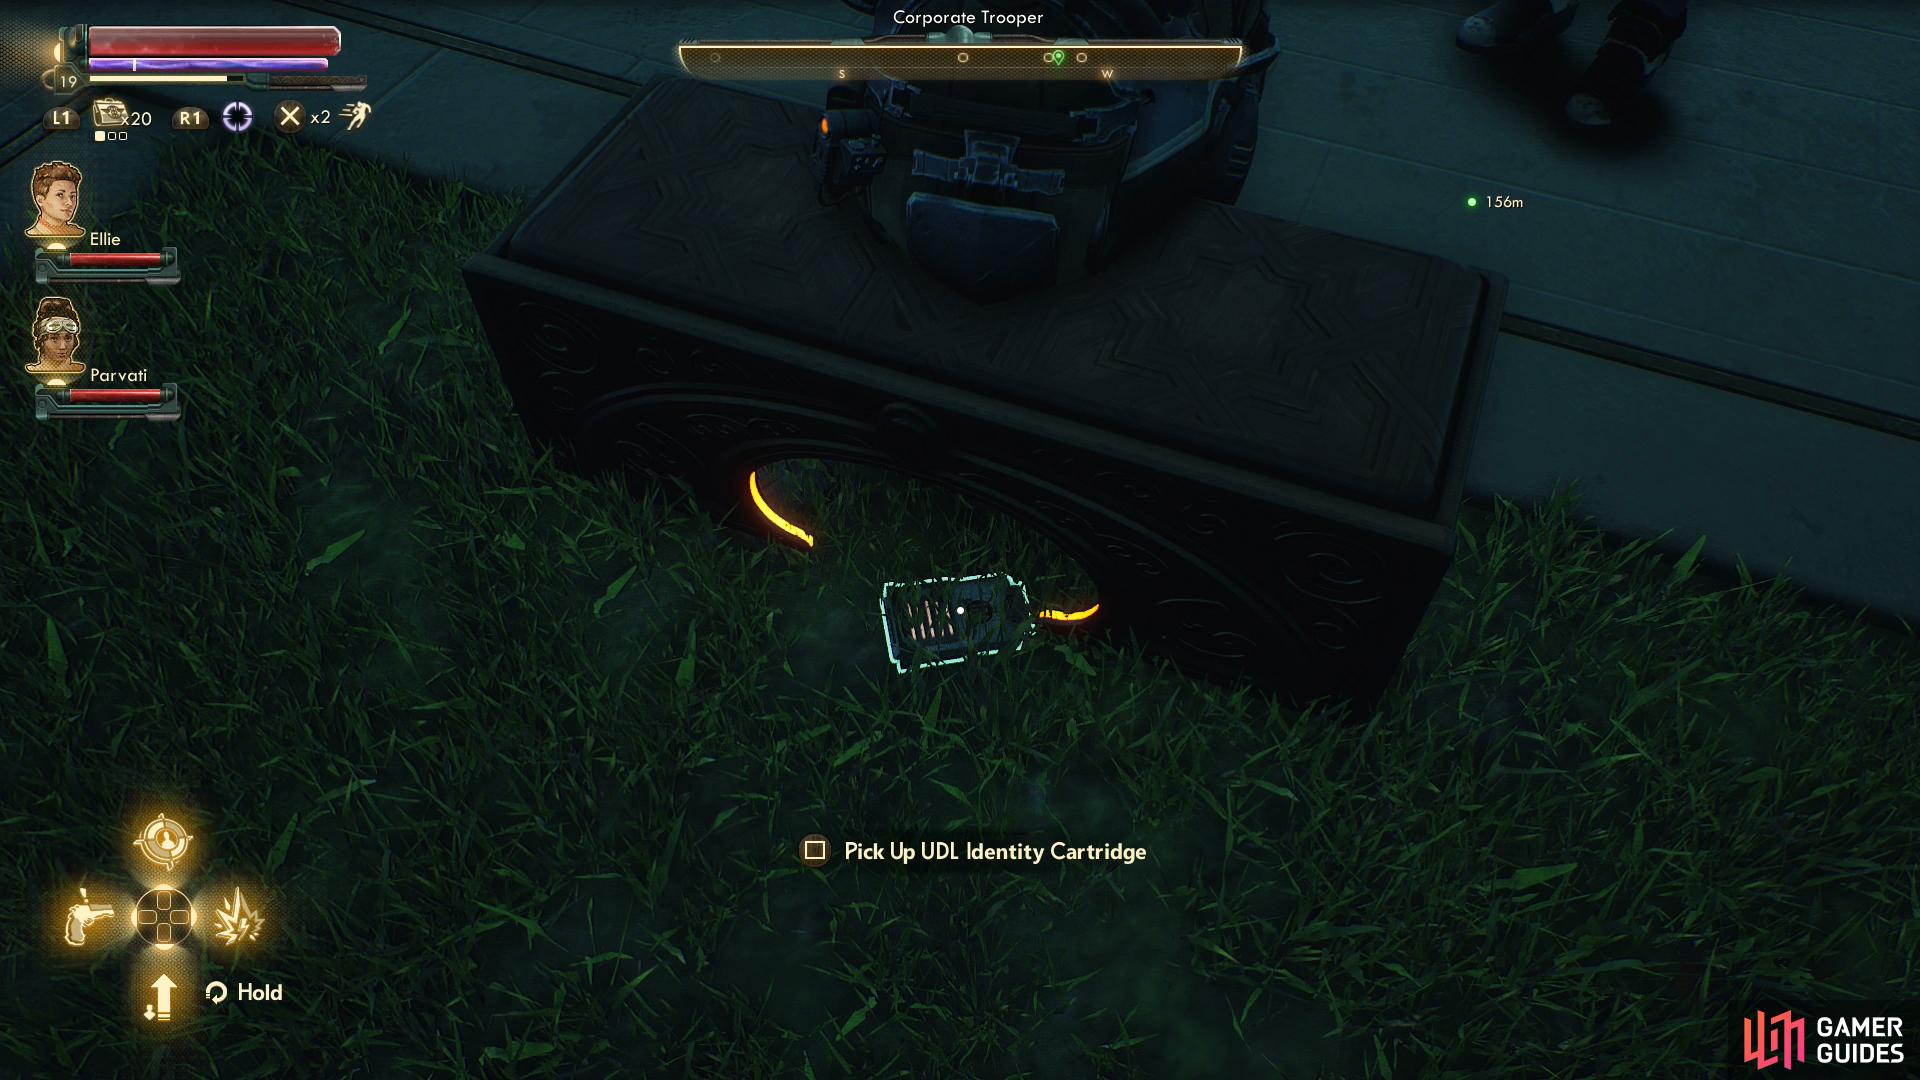
You can find a UDL ID Cartridge under a bench near the canal.

A spoiled socialite named Hortense Ingalsbee will give you the quest “Why Call Them Back From Retirement?”
– On the other hand, cross the bridge to the southwest and reach the Estates District. At an intersection you can turn right (northwest) to find the Fenhill Estate, where you’ll need to take Ellie for the quest The Low Crusade. On the other hand, if you turn left (southeast) at this interaction you’ll find a woman named Hortense Ingalsbee, who seems dreadfully concerned about Byzantium being infested with people of improper station… including you. Talk to her and after enduring some obnoxious chatter with her ask “What’s wrong with more people coming to Byzantium?” to get her whining about early retirees to find out what this is really all about. Agree to help her to start the quest Why Call Them Back From Retirement?.
– Keep going southeast and you’ll find Minister Clarke’s residence, which is guarded by some corporate troopers. You won’t necessarily know what this place is, of course, but you can trick the information out of a guard with a [Persuade 25] check. This is the place you’re looking for, and is a fine point at which to turn your attention from exploring Byzantium to the task at hand (assuming you don’t want to go and complete any of these new side quests first, of course). Don’t worry about Acropolis District - you’ll get there in due time. For now, however, let’s discuss meeting Minister Clarke.
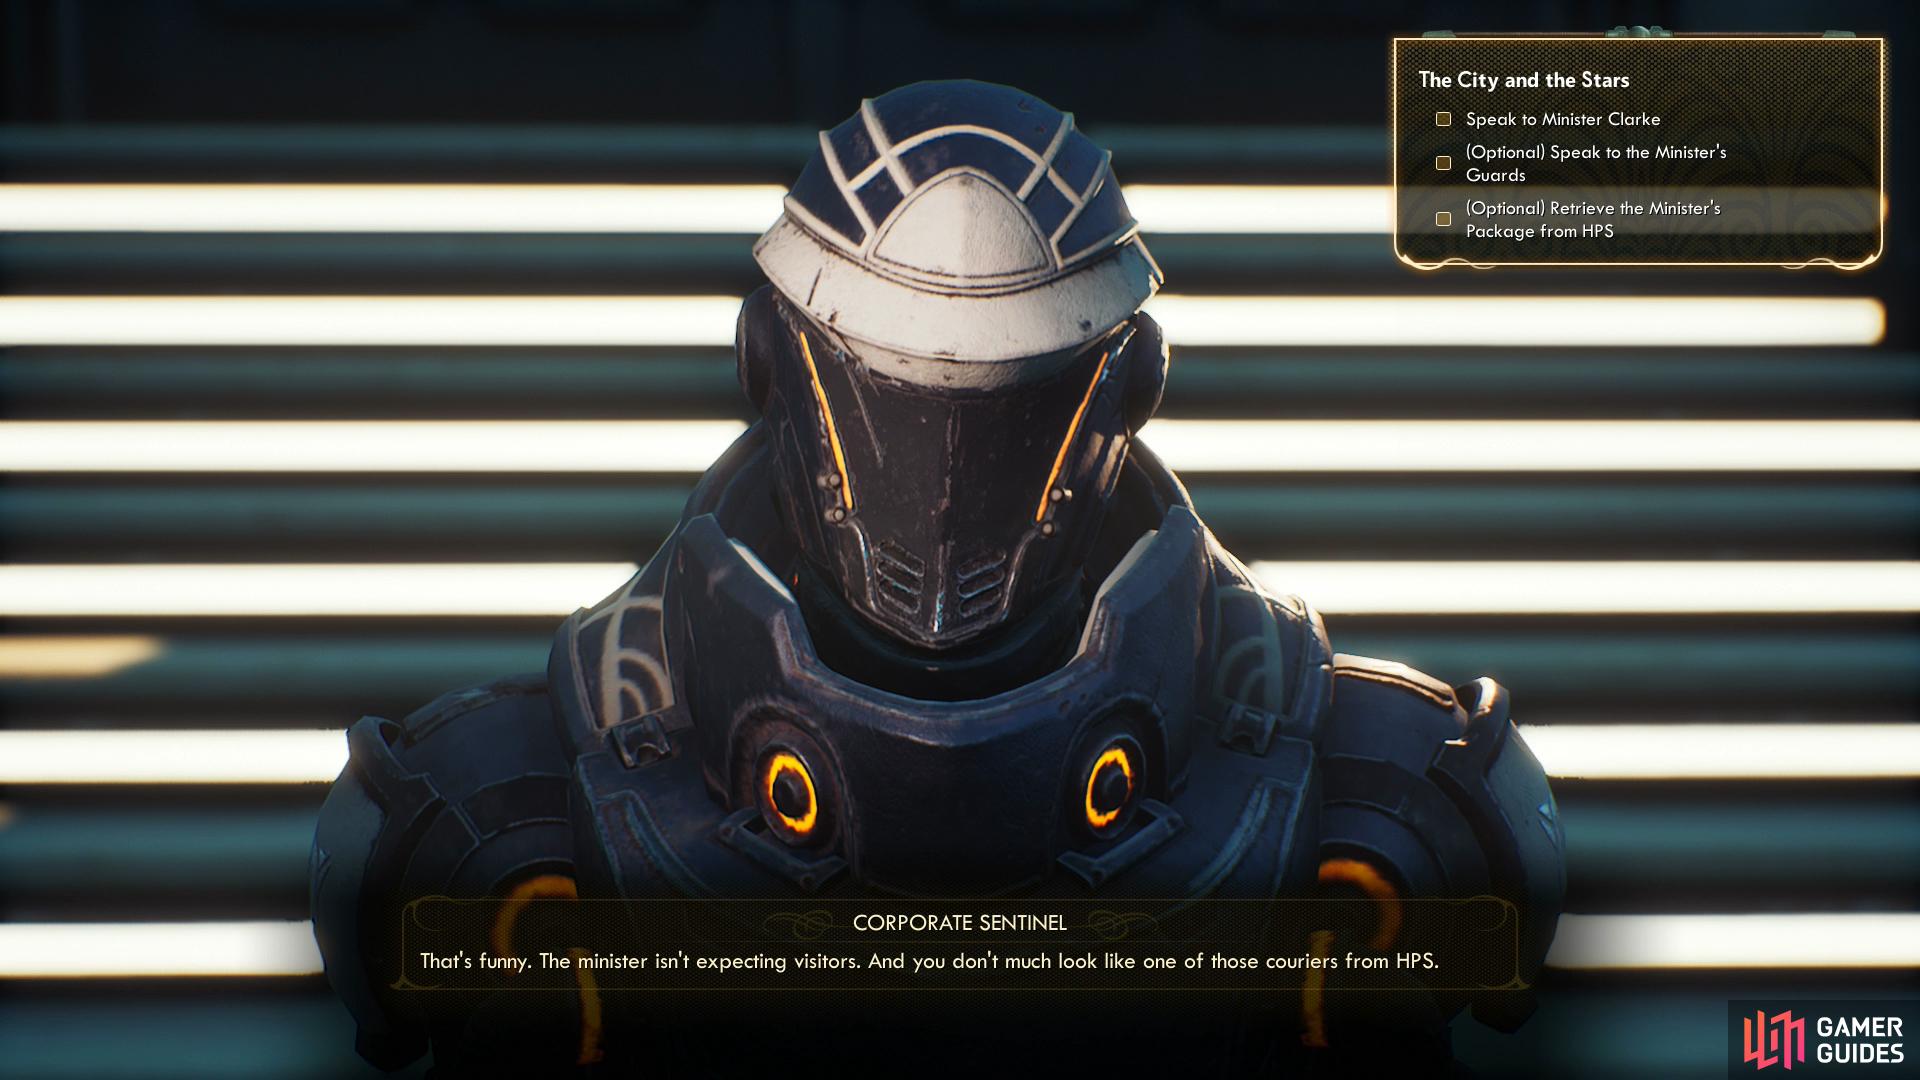
(1 of 3) Talk to the guard guarding the front door and he’ll plant an idea of how to get into the estate.
Meeting Minister Clarke
Minister Clarke’s estate is along the southern end of the Estates District, just head southwest from the elevator you ascended from the landing pad to reach the Prosperity Plaza orrery, then follow the road northwest and up some stairs to reach a four-way intersection, at which turn southwest again, head up some stairs and cross the bridge into the Estates District. From the next fourway intersection just head southeast. Now that we’re all in the same place (just follow the quest marker!), it’s time to discuss how to get in.
First, you can talk to the guard outside and trick the identity of the location out of him with a [Persuade 25] check. Not too bright, this lot. He’ll also mention a delivery from HPS, which will give you an objective - get the minster’s package… err… parcel… from Halcyon Parcel Service (HPS) and you’ll have an excuse to enter his estate. Beats murdering all the nearby guards, at least.
To get to the HPS building (assuming you didn’t do so already while exploring Byzantium) cross the bridge back to the Prosperity Plaza district, continue northeast past Odeon Pictures to reach the nearby intersection, then turn southeast to find the HPS building to your right (southwest). Enter and talk to the teller behind the left-most window and ask for Minister Clarke’s parcel, which will lead to a string of tedious legalese about the trivial task at hand… not that there shouldn’t be safeguards against criminals like you trying to steal the parcels of high-ranking politicians, but… c’mon. Thirty-five years to get a form? How does any legitimate business get done in this colony? Anyways, you can ultimately attempt an [Intimidate 41] or [Persuade 41] check to get the parcel. Much success!
If you can’t talk your way into getting your hands on this parcel (where have you been spending you skill points?!) you can always just steal it. Leave the HPS building and head down the street to the southeast, stopping when you find a tunnel to the right (southwest). Go down this tunnel to find the elevator to the maintenance tunnels, and more importantly, a back door to the HPS building. Enter the HPS building via this door, wait for a guard to pass, then pick a locked door [Lockpick 60] the reach the parcel storage room. Not only will you find a good deal of loot here, but you’ll also find the Parcel for Minister Clarke.
Now that you’ve secured this parcel you should be able to return to the guard at the front of Minister Clarke’s estate, who will now allow you to enter the manor.
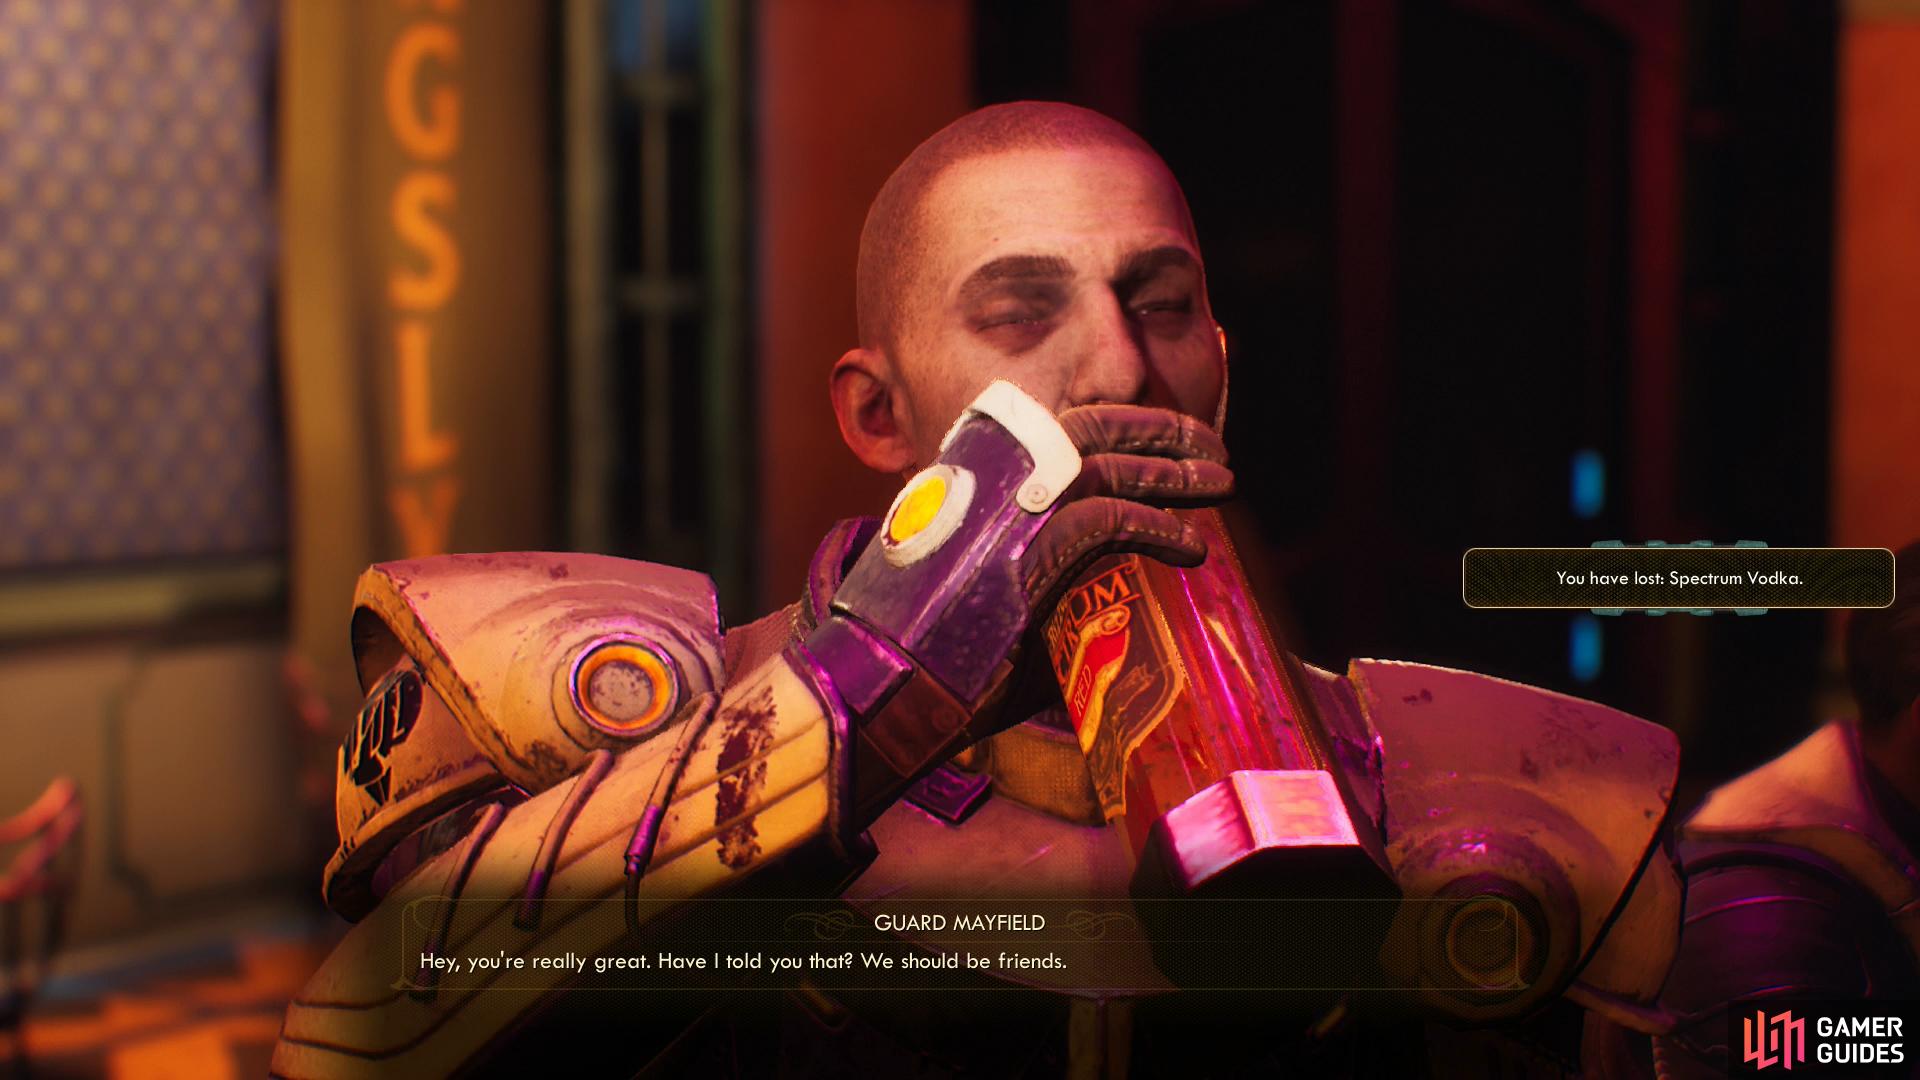
Pour some Spectrum Vodka down Guard Mayfield’s neck
and when he succumbs to inebriation, steal his key.
You don’t need to do anything else, but in case you couldn’t manage to get the parcel for whatever reason, we might as well cover alternative solutions. If you can’t get the parcel, you’re not going through the front door, and to access the side door you’ll need to get past a locked door [Lockpick 60]. If you can’t pick the lock, never fear, you can find a key. Make your way to Billingsly’s House of Inebriation, where you’ll find Guard Mayson. Chat with him and he’ll brag about his new job as one of Minister Clarke’s personal guards, even going so far as to mention that he possesses a key. After he mentions this, pick the dialogue option “How about I buy you a drink to celebrate your promotion?” and pour three bottles of Spectrum Vodka down his throat. If you have Ellie in your party, she’ll interject to keep him drinking, otherwise you’ll need to pass a [Persuade 40] or [Medical 40] check. This is all a bit much for him, and he’ll go lay down. Follow him and when he succumbs to his inebriation, loot him for his Minister’s Estate Key. Bit of work to avoid one rather easy Lockpick check, but there you go.
Getting a key to the side door is all well and good, but you’ve got to cross a good bit of restricted area to get there, and while sneaking past isn’t too hard, why bother if you don’t have to? To this end you should look for some UDL ID Cartridges, and fortunately for you, there are two you can find around Byzantium.
You can find a UDL ID Cartridge under a bench near the canal,

while another can be found in a locker in the maintenance tunnels.
One can be found in the maintenance tunnels under Byzantium, just descend the elevator under Billingsly’s to get there. You’ll find this UDL Identity Cartridge in a locker room near the middle of the area. Another can be found near the canal that divides Prosperity Plaza and the Estates District. From the elevator to the maintenance tunnels head southwest to reach a walkway near the canal. Turn southeast and head through a tunnel and continue past a vending machine to find two guards talking, one of which is sitting. Search under the bench one is sitting on to find a UDL Identity Cartridge.
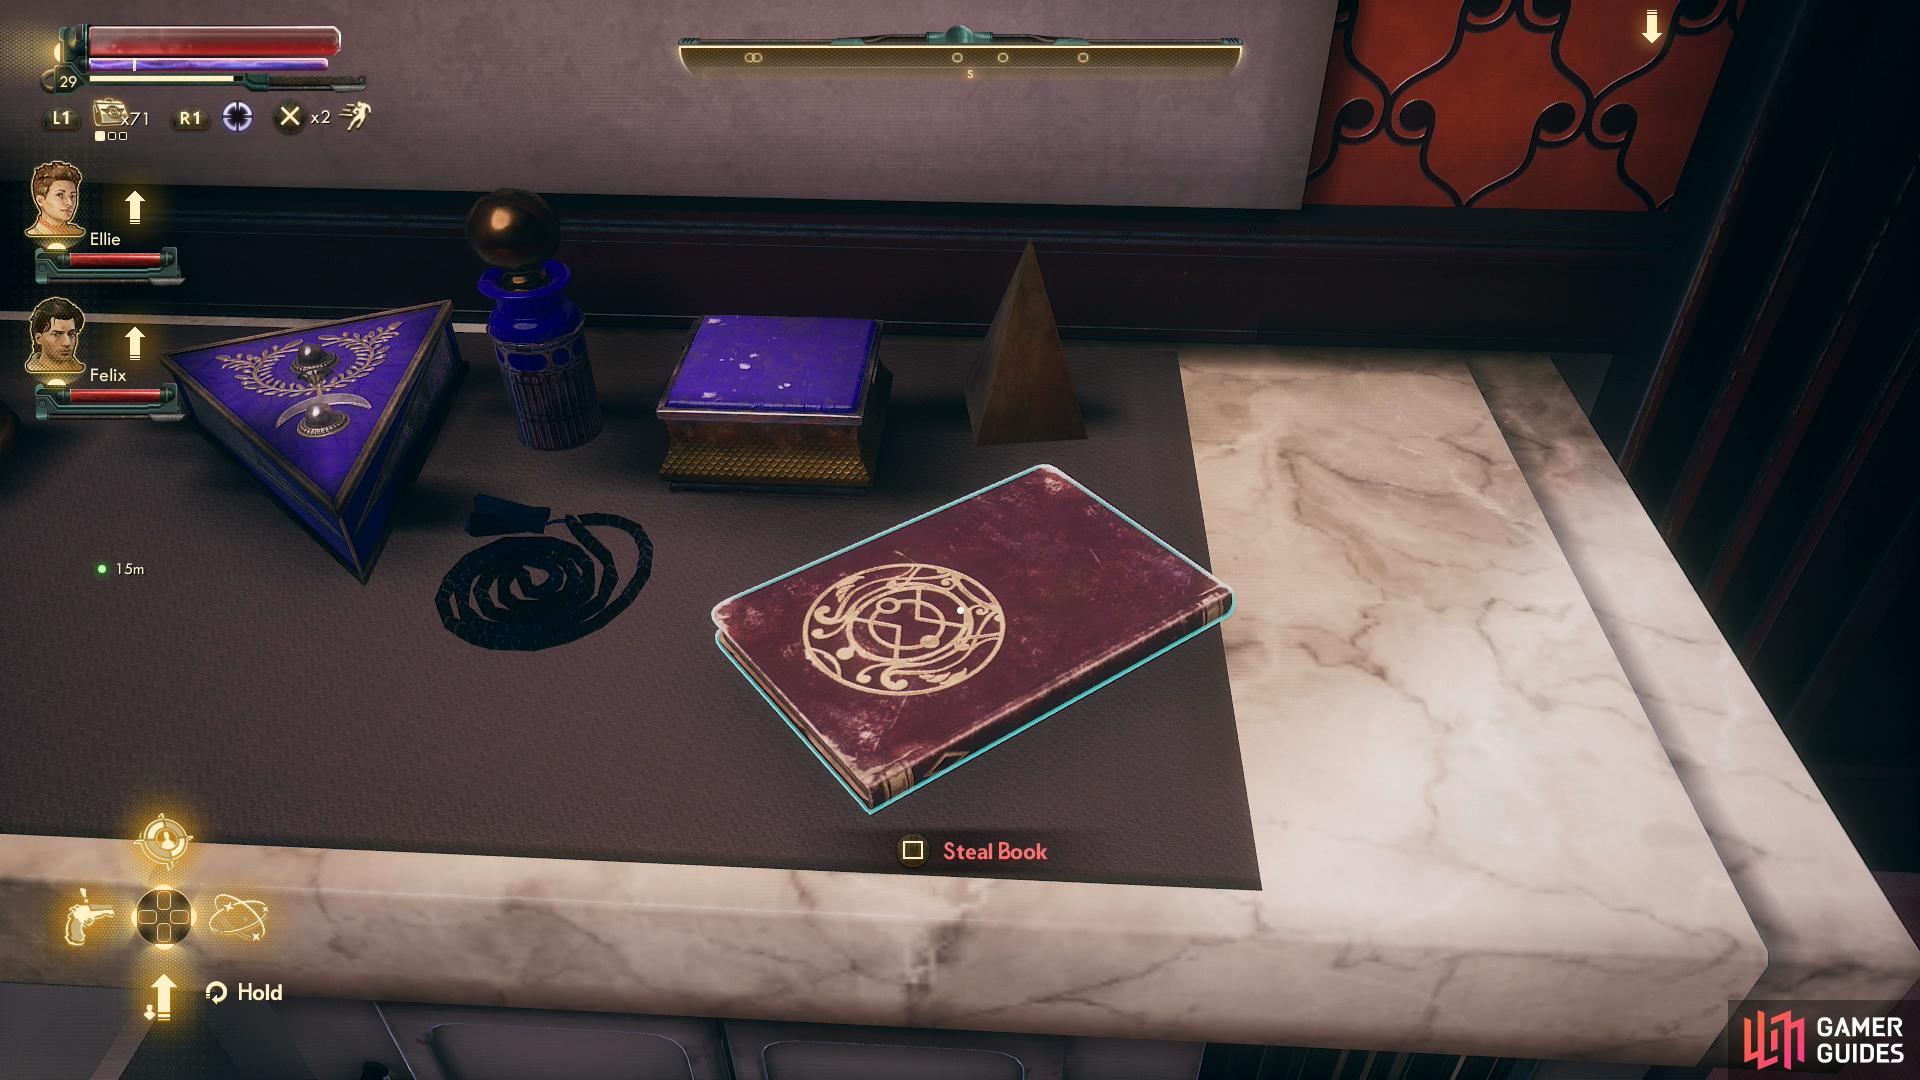
With one of these ID cartridges you should be able to just walk through the restricted area along Minister Clarke’s estate, and with the key you may have obtained earlier you can bypass the locked door [Lockpick 60] to enter the house. Once inside, head upstairs to the second floor (if you came in through the side door you’ll need to go down a hallway to the west, first) and through a door to the left (north). The place is crawling with guards, by the way, albeit surprisingly lightly armored guards, but guards nonetheless. If you’re using your Holographic Shroud, expect to pass at least one dialogue check getting past, and if stealth is necessary… well, it’s going to take some patience. It’s also worth noting that in the northwestern room on the upper floor you can find a decorative Book you can steal on a counter. This is in a room just west of where you’ll find Minister Clark, who, of course, is in the northeastern-most room on the upper floor.
Talk to Minister Clarke and, frankly, it doesn’t matter what you say. You’ll eventually get to the chems that Phineas is looking for, which will cause Clarke to blame Minster Rockwell, who has apparently locked Clarke up in his house and has been conducting business in his name. On the plus side it means Clarke isn’t your enemy, but he’s too impotent to be much of an ally, either. Was it a shameless power grab, or is Rockwell hiding something?
Whatever the case, you need more information, and Clarke will tell you to sneak into Rockwell’s office in the HHC building to see what you can find. To get into his old office, Clarke will give you his Minister’s HHC Access Card, and before you leave he’ll also ask you to use a terminal in the HHC building to transmit data to Earth, giving you Minister Clarke’s Data Cartridge for just this purpose. This starts the task The Lying Earth.
If you got in by getting Clarke’s Parcel, you can just stroll out, otherwise you might want to exit via a door on the northern end of Clarke’s office, which will lead you to a balcony outside. You can drop off the balcony onto lower structures and avoid having to sneak past all the guards again, but you’ll probably take some damage doing so.

You can talk (or bribe) you way past Guard Stallworth
or just walk on past if you have a UDL ID Cartridge.
Breaking into the HHC Building
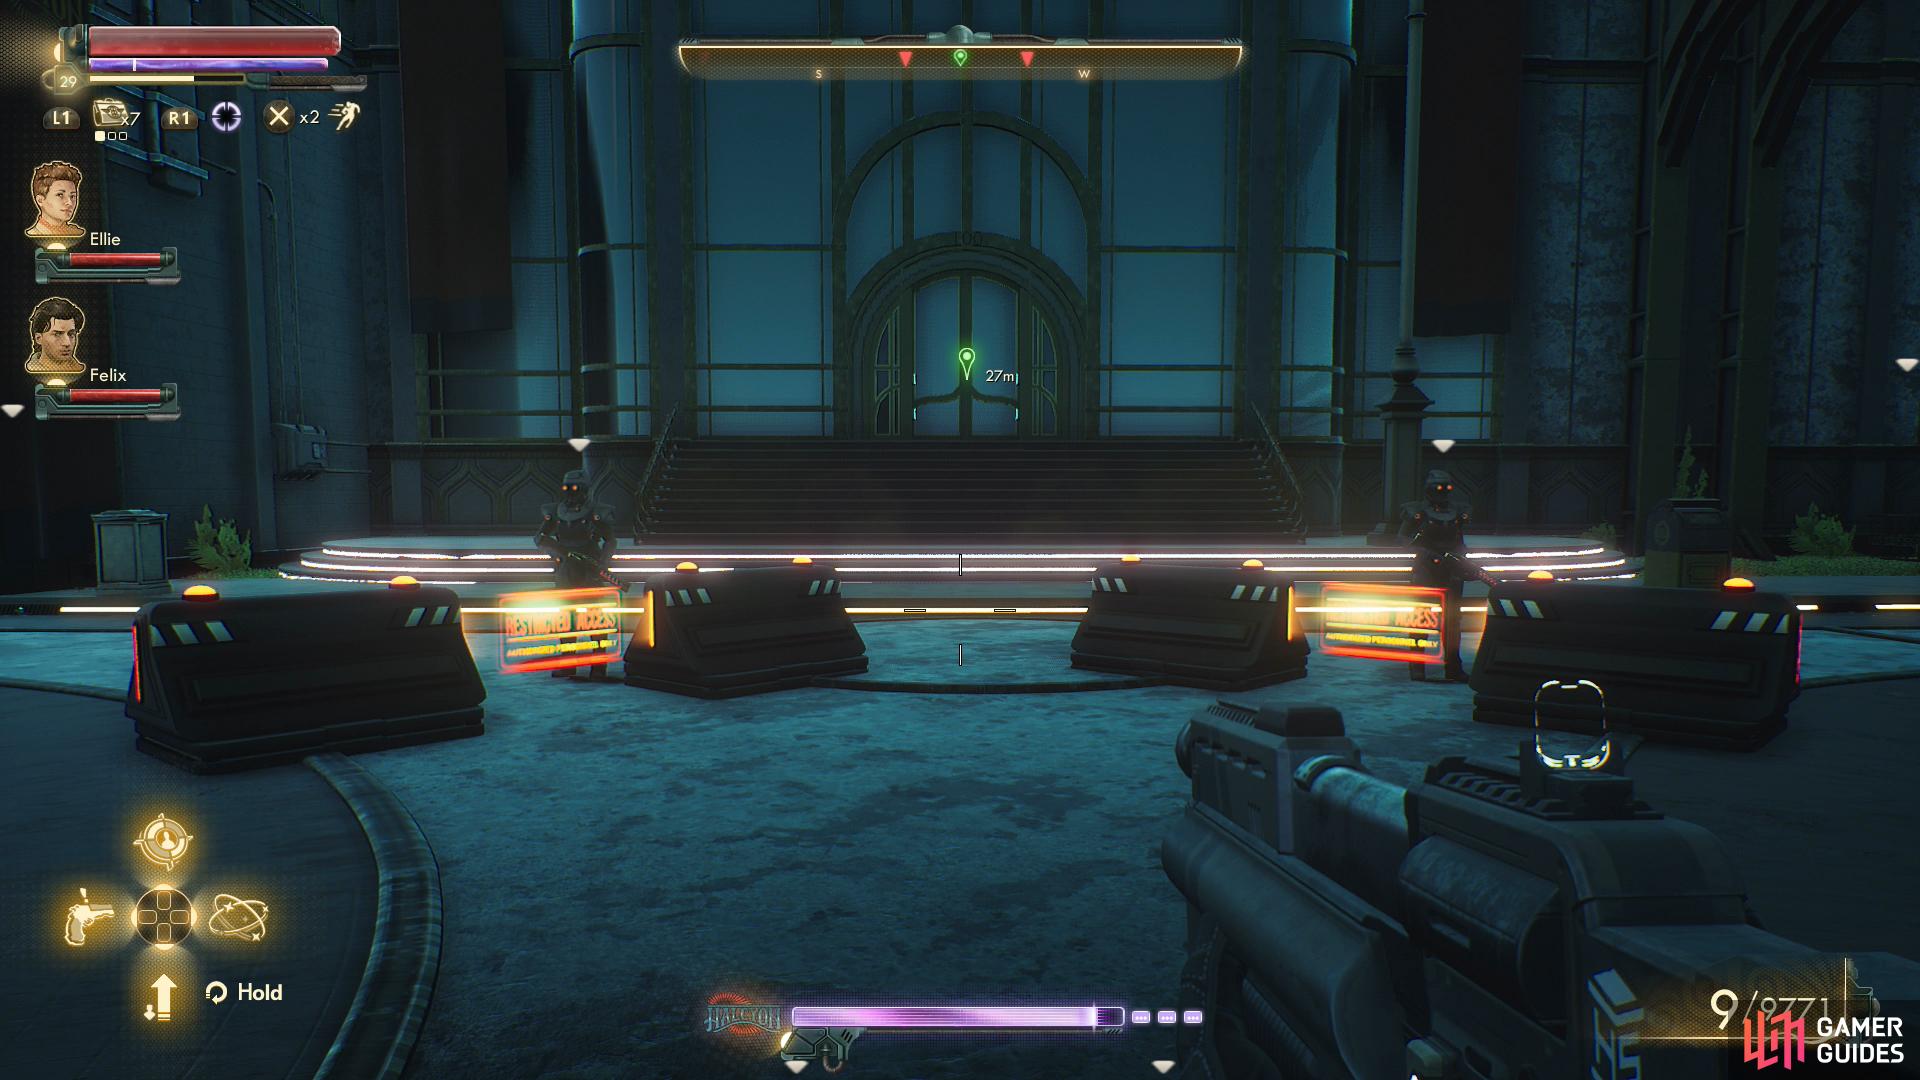
Minister Clarke doesn’t know anything about the dimethyl sulfoxide, as apparently Chairman Rockwell has been making moves in Minister Clarke’s name. Why he’d need to do this is up to debate - one would assume he’d be able to get his hands on whatever chemicals he wanted in his own name, but perhaps he just wants a scapegoat. Either way, you’ll need to break into Chairman Rockwell’s office in the HHC building to find out for sure, and while Minister Clarke was able to point you in the right direction and give you the keycard to his office, obstacles yet remain. You know, like the well-guarded blockade at the entrance to Acropolis District.
As usual, there are numerous way to get past this blockade and into the HHC building, at least one of which Minister Clarke mentioned. First, however, the simpler options. If you completed the quests Balance Due and The Puppet Masters, you’ll have met with Akande and gained access to the Acropolis District already. After all, in this case you’d be entering Byzantium via the HHC building, so you can’t rightly be blocked from returning. In this case, you can just walk on in. That’s it. No fuss, no muss, no sneaking, no worrying about guards. Easy as pie.
If you didn’t complete the aforementioned Board quests, things are slightly more complicated. Having a silver tongue will, as usual, help you make progress with little trouble. From Minister Clarke’s estate head up the street to the northwest to reach the four-way intersection, then head upstairs to the southwest, where you’ll be stopped at the gate to the Acropolis District by Guard Stallworth. There are numerous ways to gain access, the most obvious being by passing a [Persuade 40] check followed by a bribe (this set us back around 2,000 Bits). On the other hand, if you say “I’m not looking for trouble. I just want in.” you’ll eventually come to a [Lie 65] check, which will ultimately get you access to the Acropolis District regardless of what you say afterwards (the following [Science 25] [Lie 1] check is just bonus XP).
Failing any dialogue checks, another solution may already be in hand. If you obtained an ever-useful UDL ID Cartridge earlier, you can just waltz past the guards. Yes, Guard Stallworth will probably still pester you, but you don’t have to achieve anything in your conversation with her. Once done talking, just walk past and the holographic shroud should do its thing. Why they can’t see through this considering they can see you entering the restricted area and changing appearance is subject to debate, but as far as pure gameplay goes, it works. Just walk on through the rather small restricted area (it only cover the entrance to the Acropolis District) and stroll on into the HHC building.
If you didn’t work with the Board and you weren’t able to talk your way past the guards or for some reason can’t just grab a UDL ID Cartridge, stealth is the last option. You’re going to have to make your way through the maintenance tunnels and surface in the Acropolis District, so head on down and follow these directions from the elevator:
- south
- west
- south
- west (down some stairs)
- north
- west
- south (ignore the parcel service room)
- west
- north (up some stairs)
- west
This should take you to the western end of the maintenance tunnels area, where you’ll need to pick the lock to a door [Lockpick 60] to reach a room containing a workbench to the north and an elevator to the south. Go up the elevator and when you surface in the Acropolis District, just make your way west up some stairs to the HHC building. You don’t even really have to sneak, at the restricted area only applies to the barricade and gate - the guards won’t care even if you fire guns nearby.
Now that you’re in the HHC building, head south past a receptionist who has nothing of interest to say and over to a security checkpoint. Talk to the guard to the left, Guard Bachmeyer, and show off the credentials that Minister Clarke gave you to get past. This guard is really only here to prevent people who haven’t done any Board quests from getting access to the depths of the HHC building before talking to Minister Clarke - not a serious impediment. In any event, he’ll threaten to take away your weapons until corporate red tape and incompetence come to your rescue, after which you’ll be allowed to continue past the checkpoint and onto an elevator to the south. If it’s not there, just press a switch to summon it and wait a bit, it’ll show up shortly.
Once upstairs, you’ll find Percival Platt to the north, whom has nothing of interest to say to you whether you’ve met him before (by following the Board questline) or not. To the southwest you’ll find a locked door [Lockpick 100] which you can sneakily open without getting caught, although the only reason to do so is to grab some alcohol, smokes and 450 Bits on the floor under the table. The room to the northwest, on the other hand, is Minister Clarke’s office, which you can just walk up to and open thanks to the keycard Clarke gave you. Percival Platt will complain, but any response you give him will get him to go away - the [Lie 65] check is just for XP.
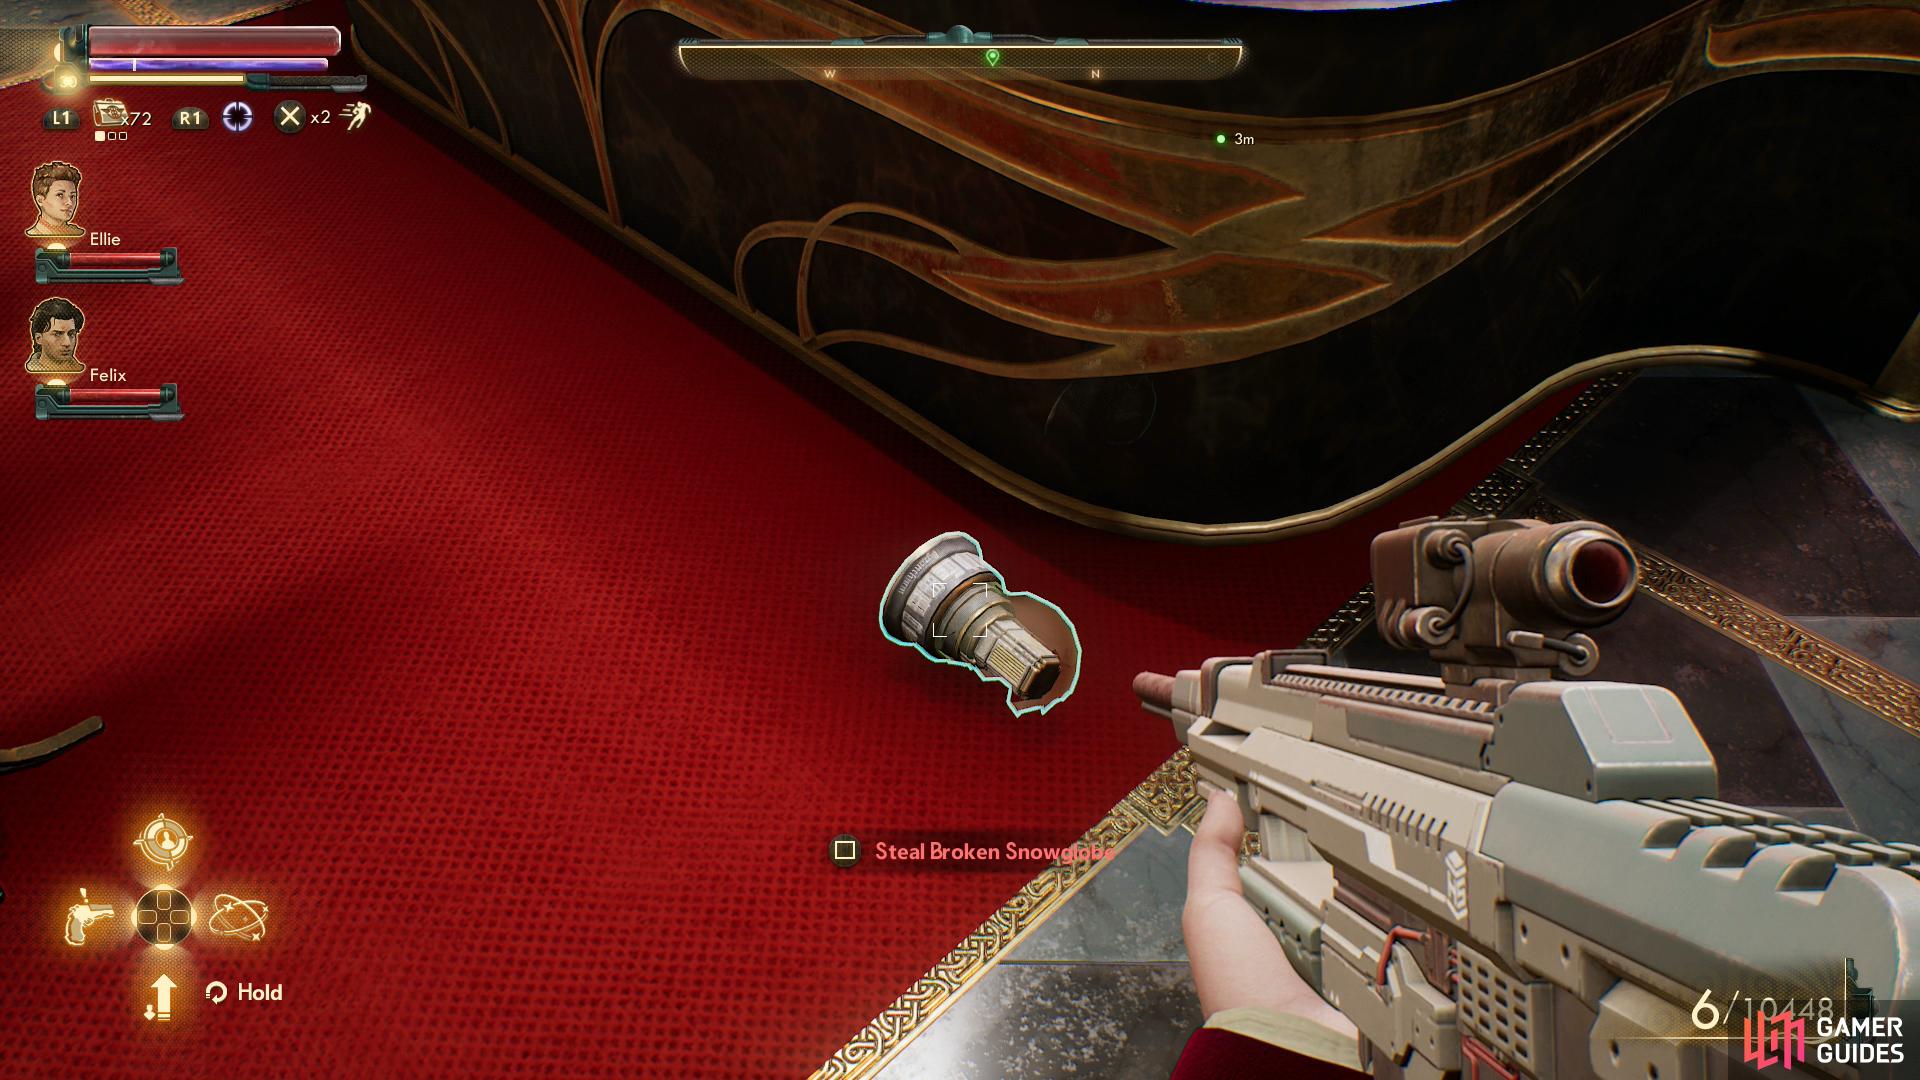
There’s little of interest in Minister’s Clarke’s office, but don’t fret, as more interesting fare awaits nearby in Chairman Rockwell’s office, and fortunately for you, you came during construction. Enter through the hole in the wall to the north and loot Rockwell’s office for its meager goods, including a Broken Snowglobe on the floor, which can decorate the Unreliable. Once that’s done, use Rockwell’s terminal and pick the options [View Priority Message] then [Print Ministry Keycard], after which you’ll be treated to some damning intel about the Board’s incompetence and the dire consequences for the colony. If you’ve also been working for the Board and completed the quest Signal Point in Space you’ll have already seen this courtesy of Akande, and you’ll have the option to view it again here via the option [Replay Presentation Video].
This is sufficient to advance the quest The City and the Stars, but if you want to appease Clarke, pick the option [Send Minister Clarke’s Message to Earth], which will complete the quest The Lying Earth. Doing this will cause you to gain a bit of negative Reputation with the Board, however. Finally, there’s a [Hack 100] check which will reveal some shipments going to the Ministry of Accuracy and Morale. While it might not seem like much, it will unlock an alternate way to reach your destination, so if you can pass this check, do so - it may come in handy shortly.
Now that you know where the dimethyl sulfoxide is and you have the Ministry of Accuracy and Morale Key, all you need to do is go get it. Easier said than done, of course, but leave the HHC building all the same. If you haven’t securing a UDL ID Cartridge yet, you should do so now - it’ll make the upcoming area much easier - trivial even. In case you forgot, you can find one under a bench near the the canal that separates the Estates District and Prosperity Plaza (on the Prosperity Plaza side, a guard sits on this bench) and in a locker in the maintenance tunnels. Also, if you want to open up another option for the quest ahead, complete the quest Cupid of the Laboratory, as the good deed you performed for Giles Molina may be repaid.
There are two ways to get into the Ministry of Accuracy and Morale - through the front door, or by being smuggled in. The latter option is only possible if you passed the [Hack 100] check on Chairman Rockwell’s terminal. Peruse the appropriate header below for the route you want to take - both are fairly easy if you have a UDL ID Cartridge and a guide (hello!), although there are a lot more skill checks possible if you go in through the front door. Whether that’s a good thing or not is really a matter of perspective.
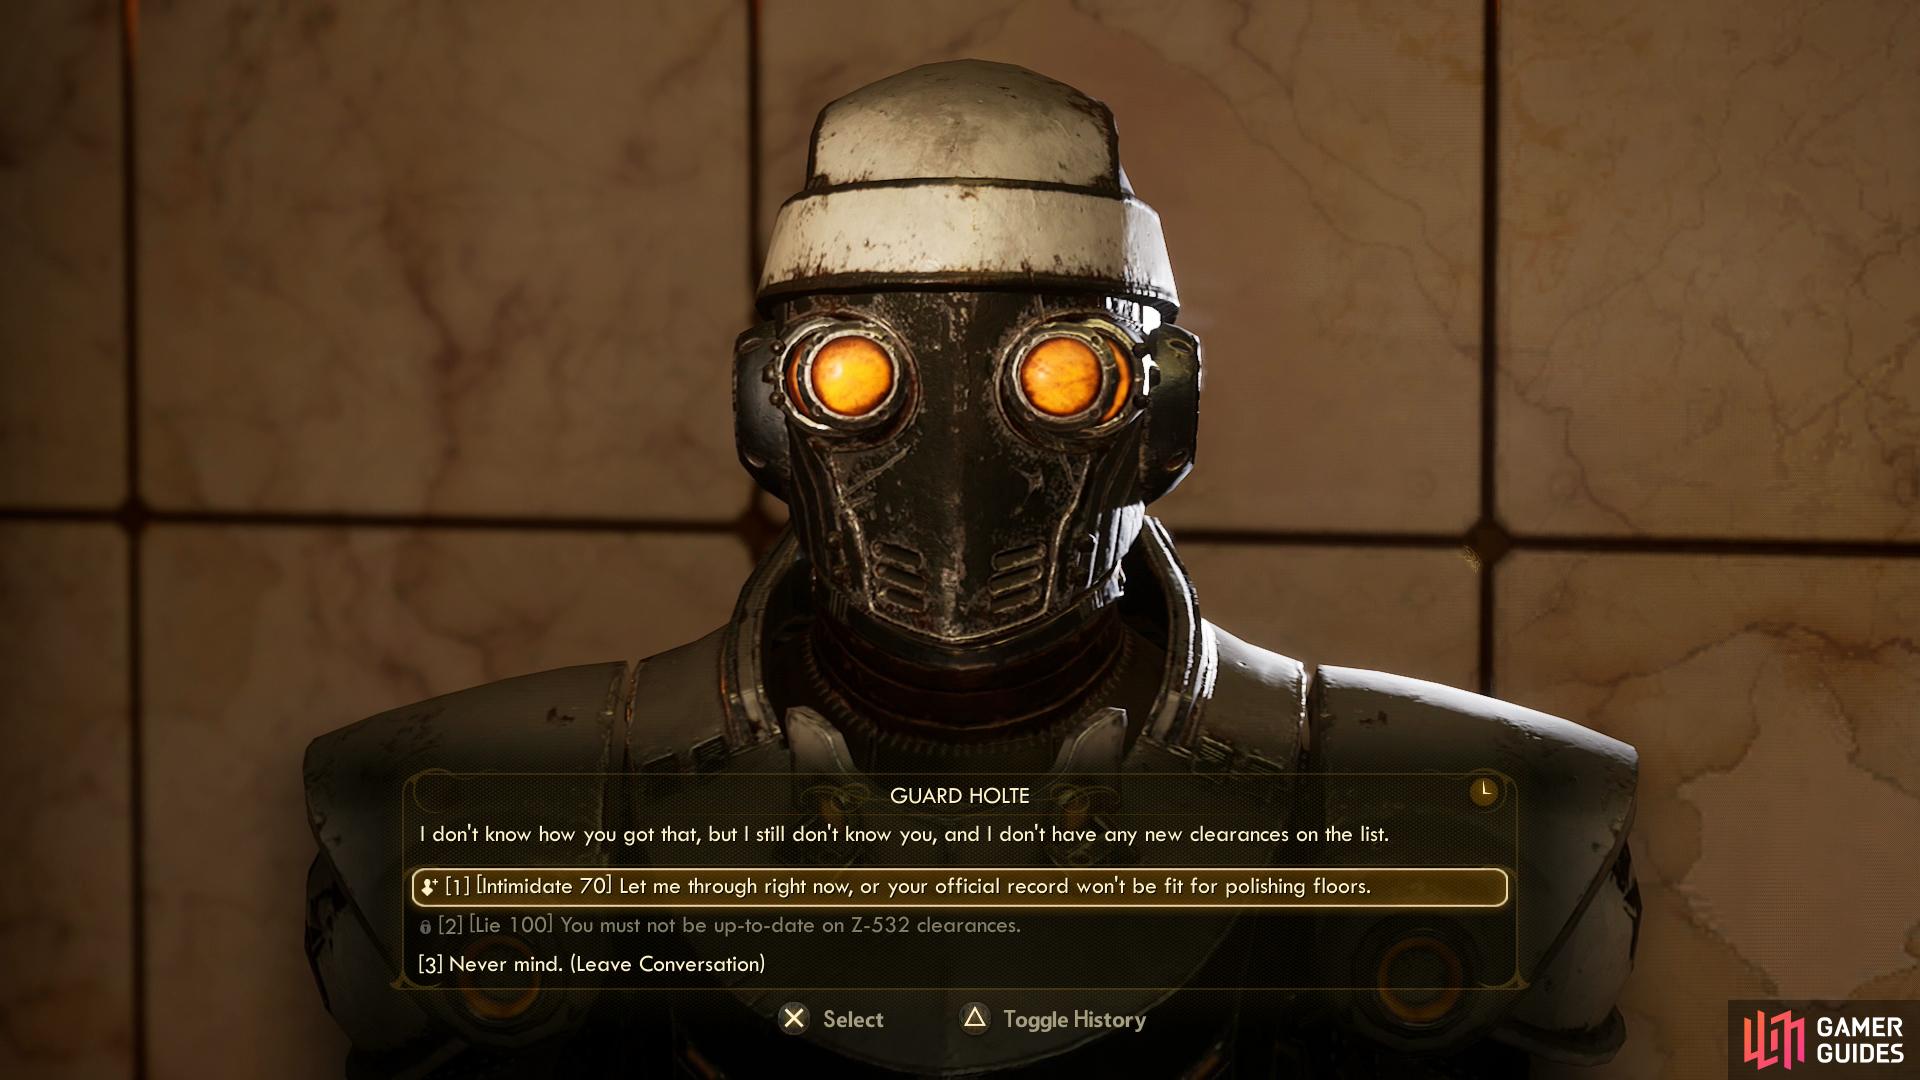
You can try to talk your way past Guard Holte
or just walk through the restricted area if you have a UDL ID Cartridge - sadly the one in this area might be too hard to reach via stealth alone, but previously found ones work fine.
The Ministry of Accuracy and Morale - Through the Front Door
The Ministry of Accuracy and Morale is just outside of the HHC building, along the northern end of the Acropolis District - just head northwest from the HHC building to reach it and go through the front door.
Once inside, look to your right (west) to spot a sealed door. Nothing you can do about it now, as it’s a source of egress, not ingress. Still worth keeping in mind for later. Continue south until you reach some stairs, then turn west to find Guard Holte watching a door. You’ll need to get past this point to access the labs where the dimethyl sulfoxide is being kept, and as usual, your silver tongue can get you past. Pick the option <Show him the Chairman’s keycard.> “How’s this for clearance?”“ and… it won’t work! Not without a followup [Intimidate 70] or [Lie 100] check, anyways.
If you can’t pass those checks, you still have options, the simplest of which is just walking through the door anyways. As long as you possess a UDL ID Cartridge, the guards won’t bother you. Assuming your cover holds, that is. To reach the elevator you’re looking for, just head east and south from the door Holte guards and you’ll find it to the right (west). Press a switch, wait a moment, then take the elevator down into the lab. Too easy.
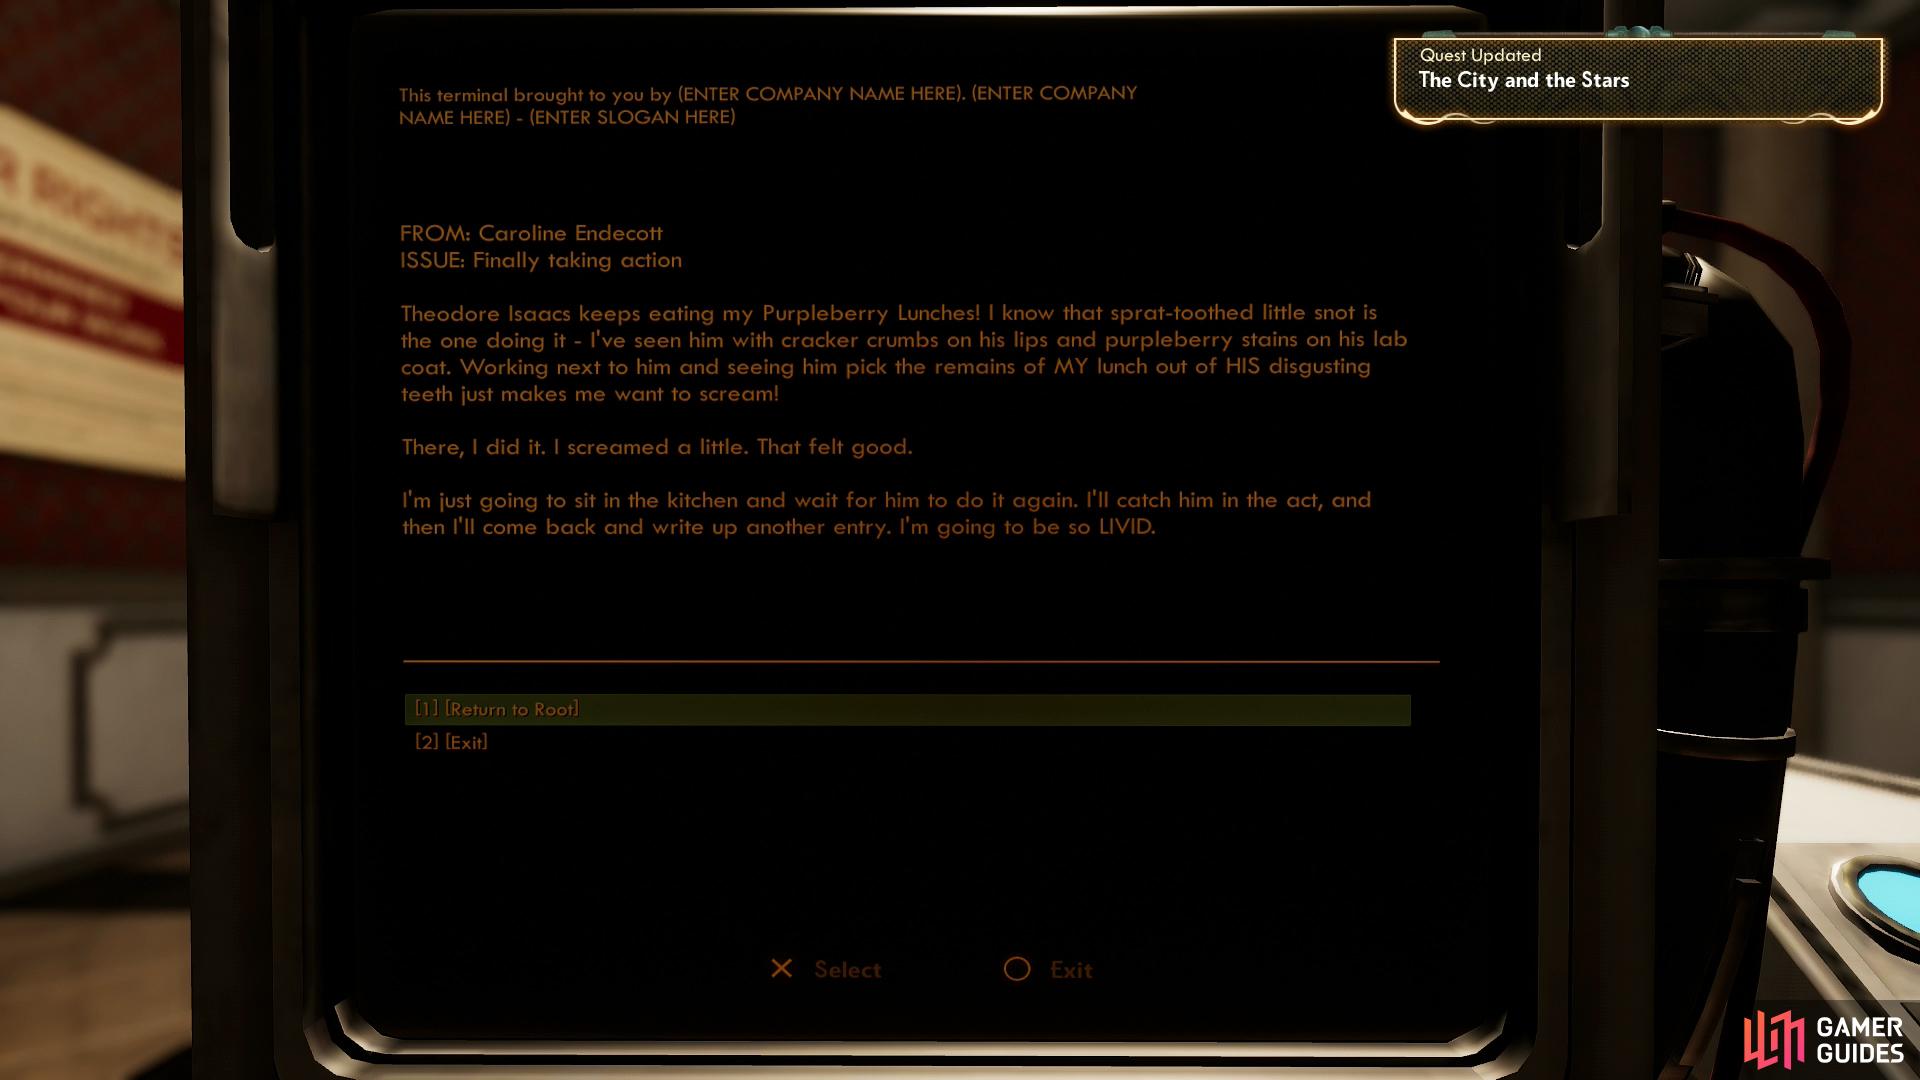
If for some reason that incredibly simple option isn’t available to you, there are other options. You can try getting past Holte another way. From the stairs in the lobby head east, then north to reach a small office, in which you’ll find a terminal [Hack 46]. Access the computer and pick the option [View Employee Complaint] to learn that an employee named Caroline has been having a lunch dispute with one Theodore. Gaining this info isn’t essential, but it gives you… that’s right, more options. Options within options in this quest…
Return to the lobby and head upstairs, then turn west and north to reach the cafeteria, where you’ll find Catherine sitting down. Scoping out the perfidious Theodore, no doubt. If you hacked the terminal earlier, ask “Do you know a Theodore Issacs?” and she’ll vent her spleen. All you need to do is pass a [Lie 1] check, which is basically just a formality, and she’ll offer to help you get into the lab, escorting you to Holte and getting him to let you pass. Failing that, you can pass two [Science 70] checks and a [Lie 1] check to butter Caroline up with interesting banter (interesting to her, anyways) which will end in the same result - her calling in a favor and getting Holte to let you pass.
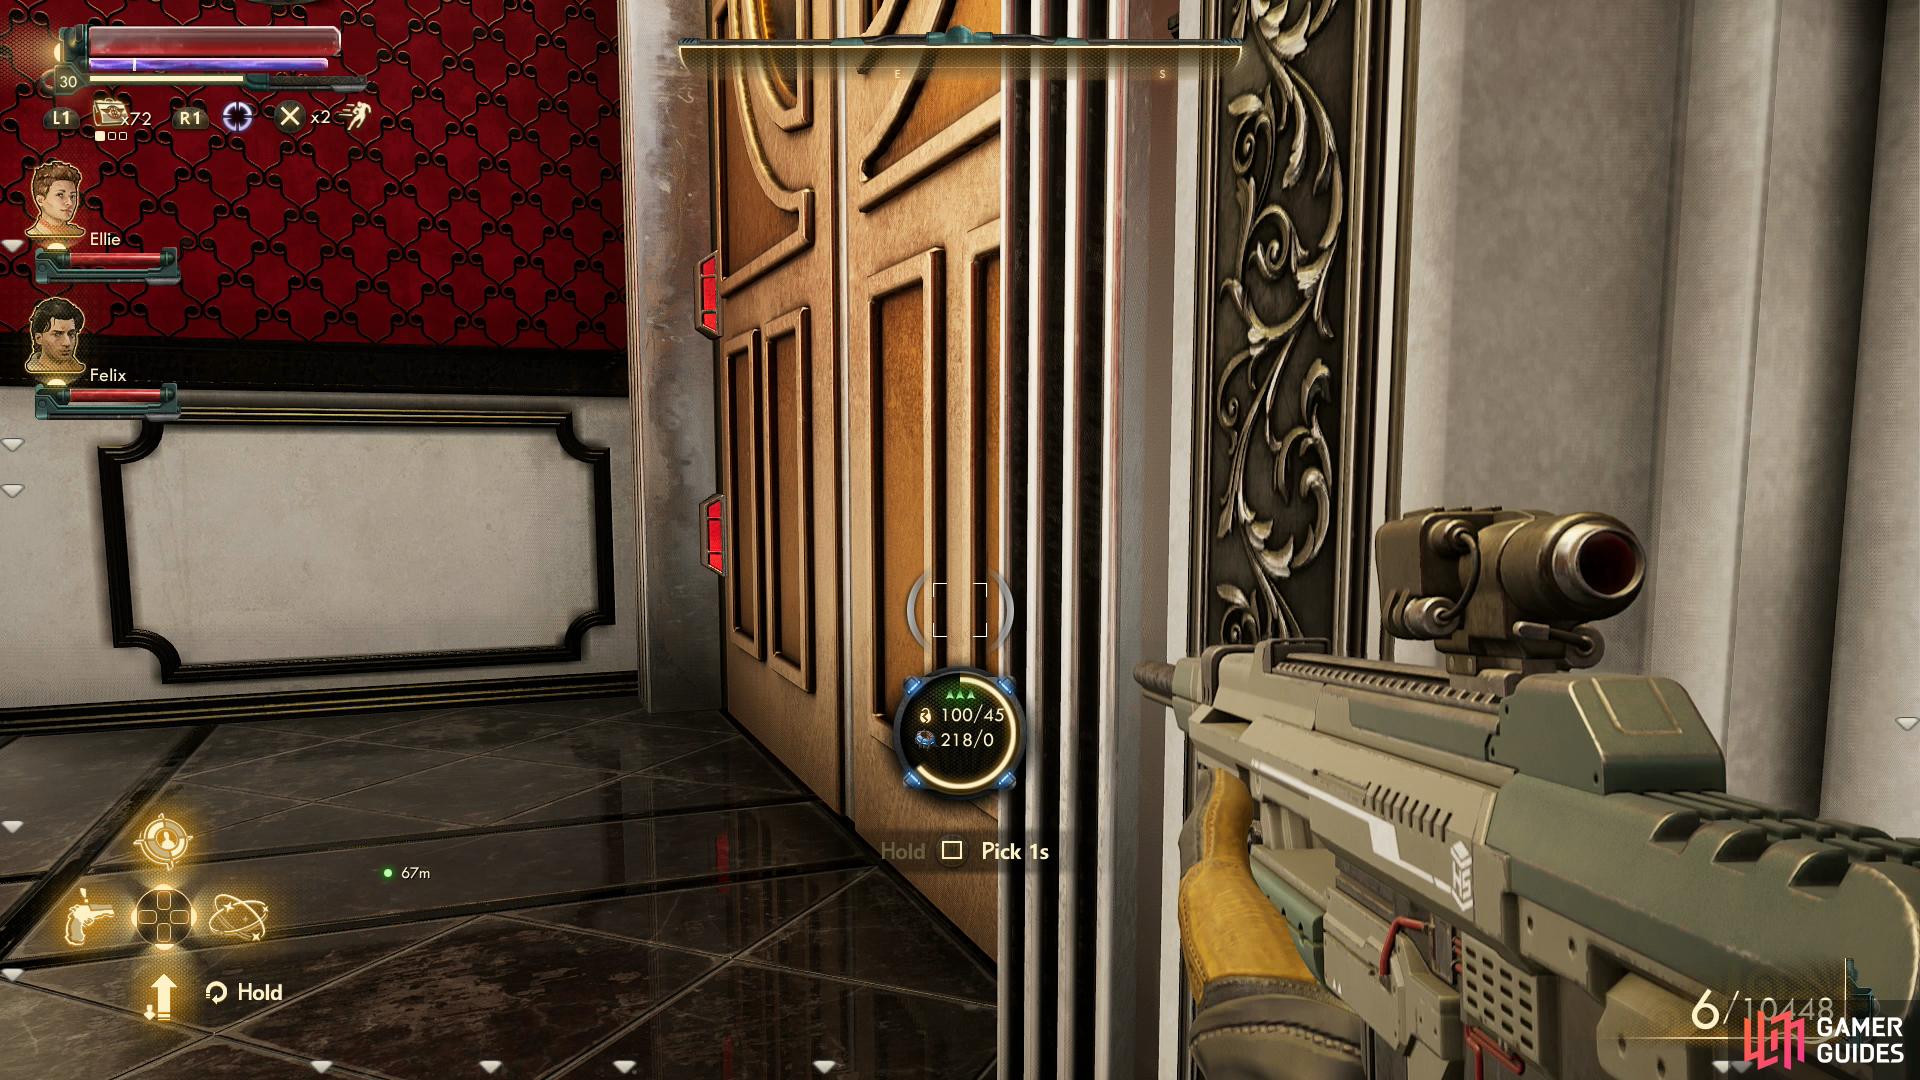
Pick a locked door
then sneak across to the elevator.
Should you exhaust all those options, good, old-fashioned stealth can work. From the stairs in the lobby head east, then south through an unguarded door. Be wary of a patrolling guard, then when the coast is clear sneak over to and unlocked [Lockpick 45] a door across the hallway to the south. The next room is free of guards, so you don’t need to worry much here, especially if you close the door behind you. When you’re ready to press on, go through a door to the southwest and watch out for guards. Two should be permanently facing away from you while one walks back and forth. When the patrolling guard is facing north, sneak over to a sealed door to the west, press a switch, then sneak back into the previous room and wait for the elevator to arrive. When the guard is facing away again, sneak back over and ride the elevator down.
Suffice to say, you have options. Get past whichever way you can. There would potentially be another option at hand, as there’s yet another UDL ID Cartridge on this level, but the sneaking required to get it is… well, if it’s possible, it’s too tedious to bother with, given the other options available. Beyond the door that Holte guards is another locked door [Lockpick 30], beyond which you’ll find a small guard room. While the loot inside makes it worth breaking into on its own (just wait for the patrolling guard to pass - they like to loiter near this door, so patience is a virtue) the real catch is the UDL Identity Cartridge in a locker. If you don’t have a UDL ID Cartridge yet and you somehow made it into this room, you’d be wise to pick it up… although there’s yet another one in the lab below. They’re really too generous in this game.
Ride the elevator down to the lab, which will be discussed under the header “The Ministry of Accuracy and Morale - Dimethyl Sulfoxide Dilemma”.
![Pass a [Hack 100] check while messing with Chairman Rockwell’s computer to open up a new option for entering the Ministry of Accuracy and Morale.](/assets/guides/161/the_outer_worlds_city_and_the_stars_rockwells_terminal_smuggle_hack.jpg)
(1 of 3) Pass a [Hack 100] check while messing with Chairman Rockwell’s computer to open up a new option for entering the Ministry of Accuracy and Morale.
The Ministry of Accuracy and Morale - Smuggled In
If you hacked Chairman Rockwell’s terminal [Hack 100] you’ll have learned about a delivery due to The Ministry of Accuracy and Morale. Return to the Byzantium Freight Port Landing Pad and talk to Carmen and ask her to smuggle you in. After she balks she’ll ultimately comply, just follow her to a shipping pod. All you have to do is climb in and after a loading screen you’ll find yourself in the lab at the bottom of The Ministry of Accuracy and Morale, bypassing… well, everything in the previous header. Not a bad reward for having a high enough Hack skill score.
Grab a UDL ID Cartridge out of a locker
then head to the elevator, from which three lines will guide you through the lab.
The Ministry of Accuracy and Morale - Dimethyl Sulfoxide Dilemma
However you got here you should be in the lab at the bottom of The Ministry of Accuracy and Morale, and if you have a UDL ID Cartridge, you’ll find out you’re disguised. This entire level - with one small exception - requires cover, and not having a UDL ID Cartridge will make getting through this place much, much more difficult.
Time to remedy that.
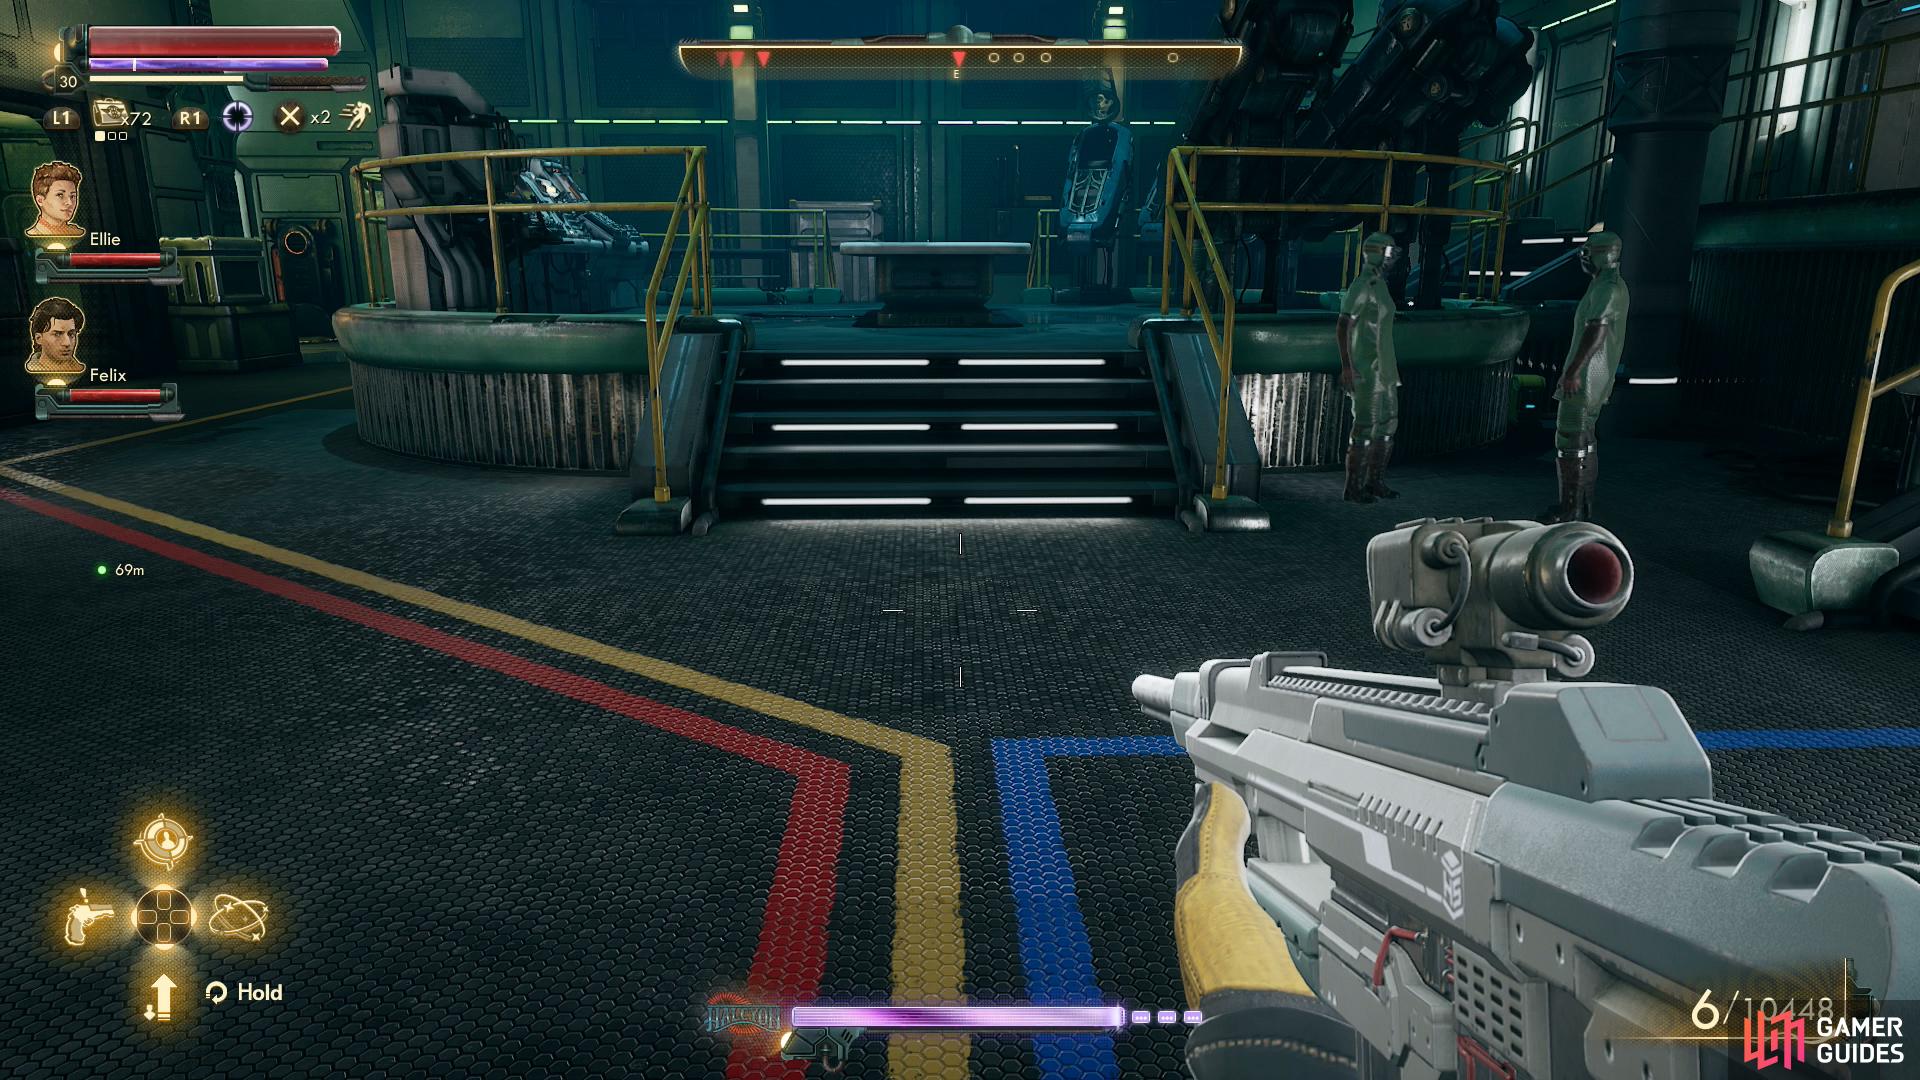
If you were smuggled in by Carmen, head west then south up a ramp and across a walkway, then turn west again and go through a door. In the next room, follow a blue line and turn left (south) at a door and go through it to reach a locker room. If you came down the elevator, note the three colored lines on the floor - they’ll prove invaluable as navigational tool shortly - and follow the blue line east, then south up some stairs (be wary of wandering scientists) then turn right (south) to find a door leading to a locker room.
Ta da! However you reached this lab, we’re all reunited again in the locker room. Don’t make it weird. Anyways, search the the south-facing lockers in the middle of the room to find yet another UDL Identity Cartridge. We know this guide has been pretty flexible about player choice thus far, but… no, we’re done. You’ve had four attempts to get this, no more excuses. You have this card by now and we’re not pretending otherwise.
Loot the locker room, then sneak out the way you came in. Follow the blue line west, north, then west again to reach the elevator you may have rode down. This elevator is a safe zone, no need for cover - you can make forays into the lab from here and return to raise your cover. Very little in this lab can’t be accomplished with one bar of cover and some sneaking, and if you have the paltry stats required to talk your way out of trouble once or twice (dare we hope, thrice?)… well, that’s overkill.
That said, there’s not a lot to see in this lab. You can find the odd terminal informing you that, for all their bluster, the Board is nowhere near Phineas when it comes to reviving people from cryostasis. One might even speculate that Phineas isn’t a criminal for any legitimate crime as much as the Board simply wants his knowledge, although the “dead or alive” bit seems a bit counterproductive to that goal. We’ll discuss some optional objectives, first, which you can skip in favor of a run to the end of the lab.
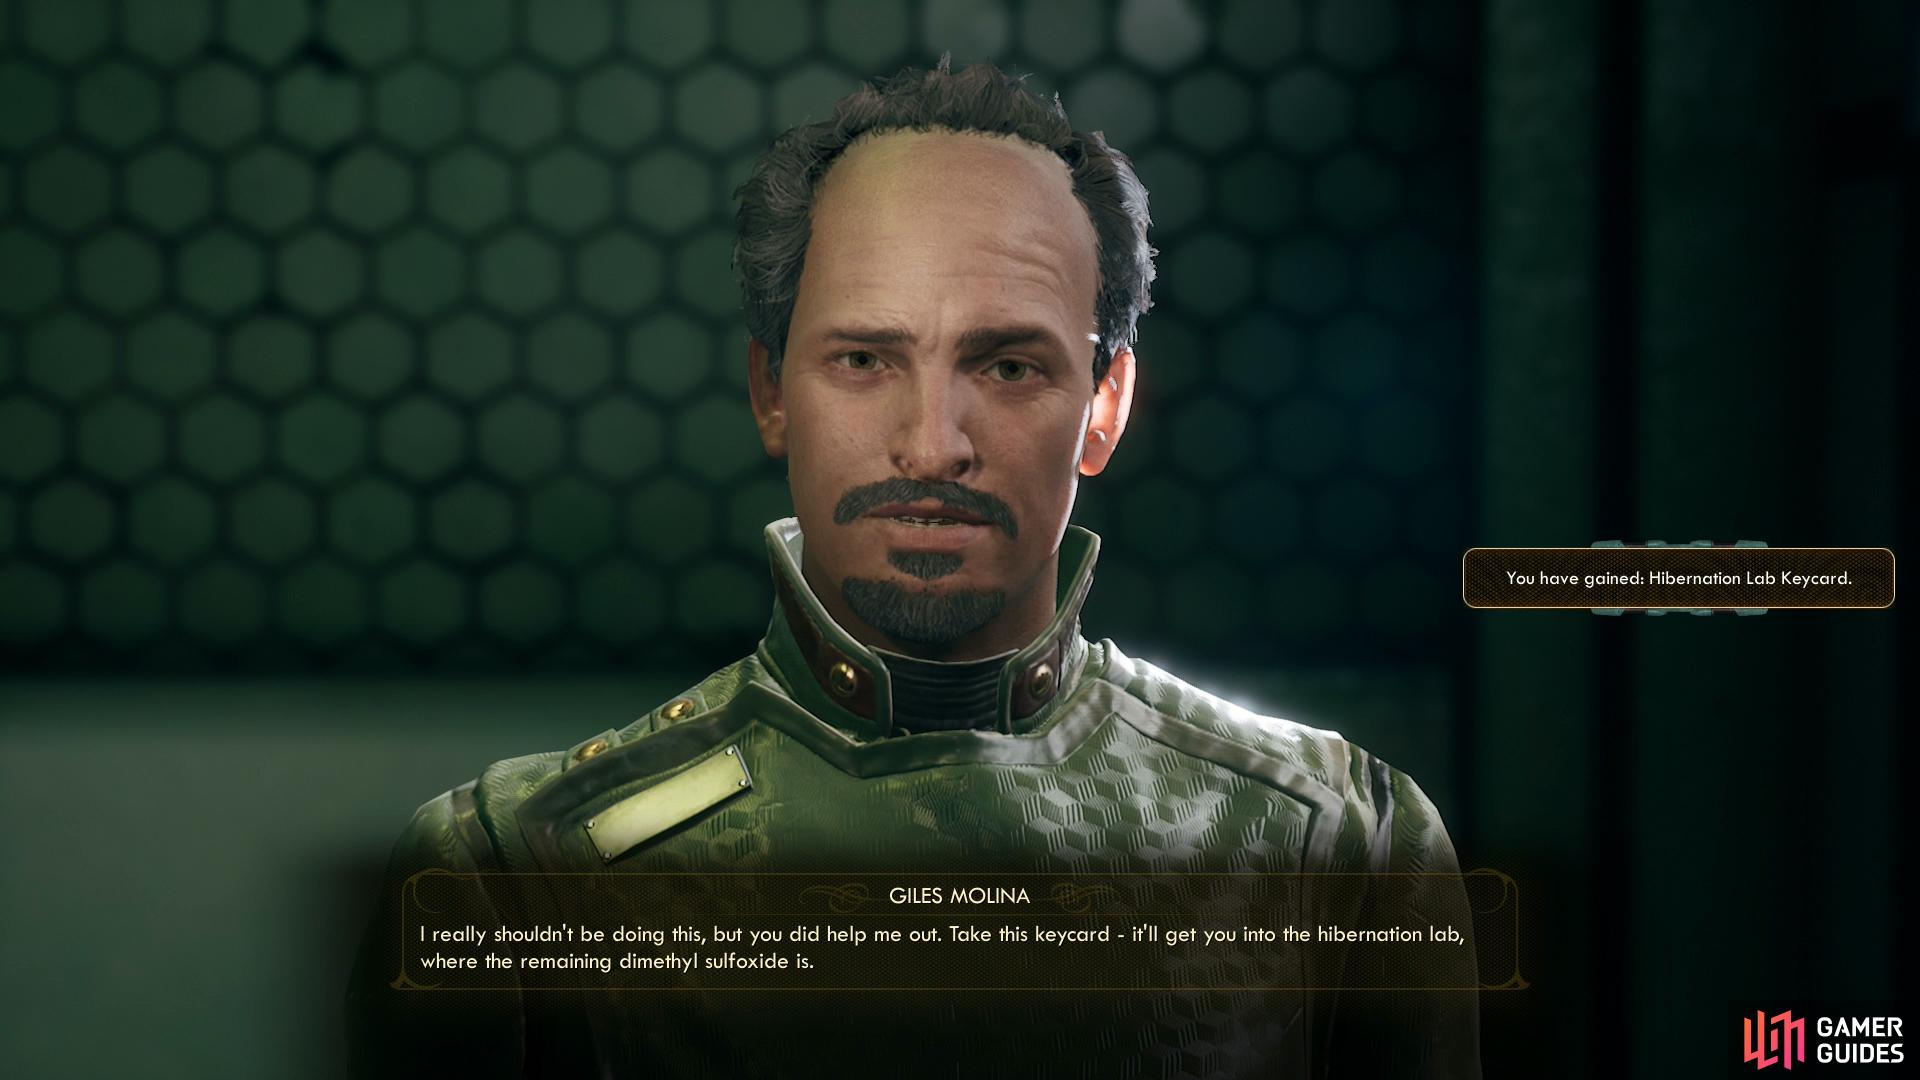
If you completed “Cupid of the Laboratory” earlier, talk go Giles to get a keycard
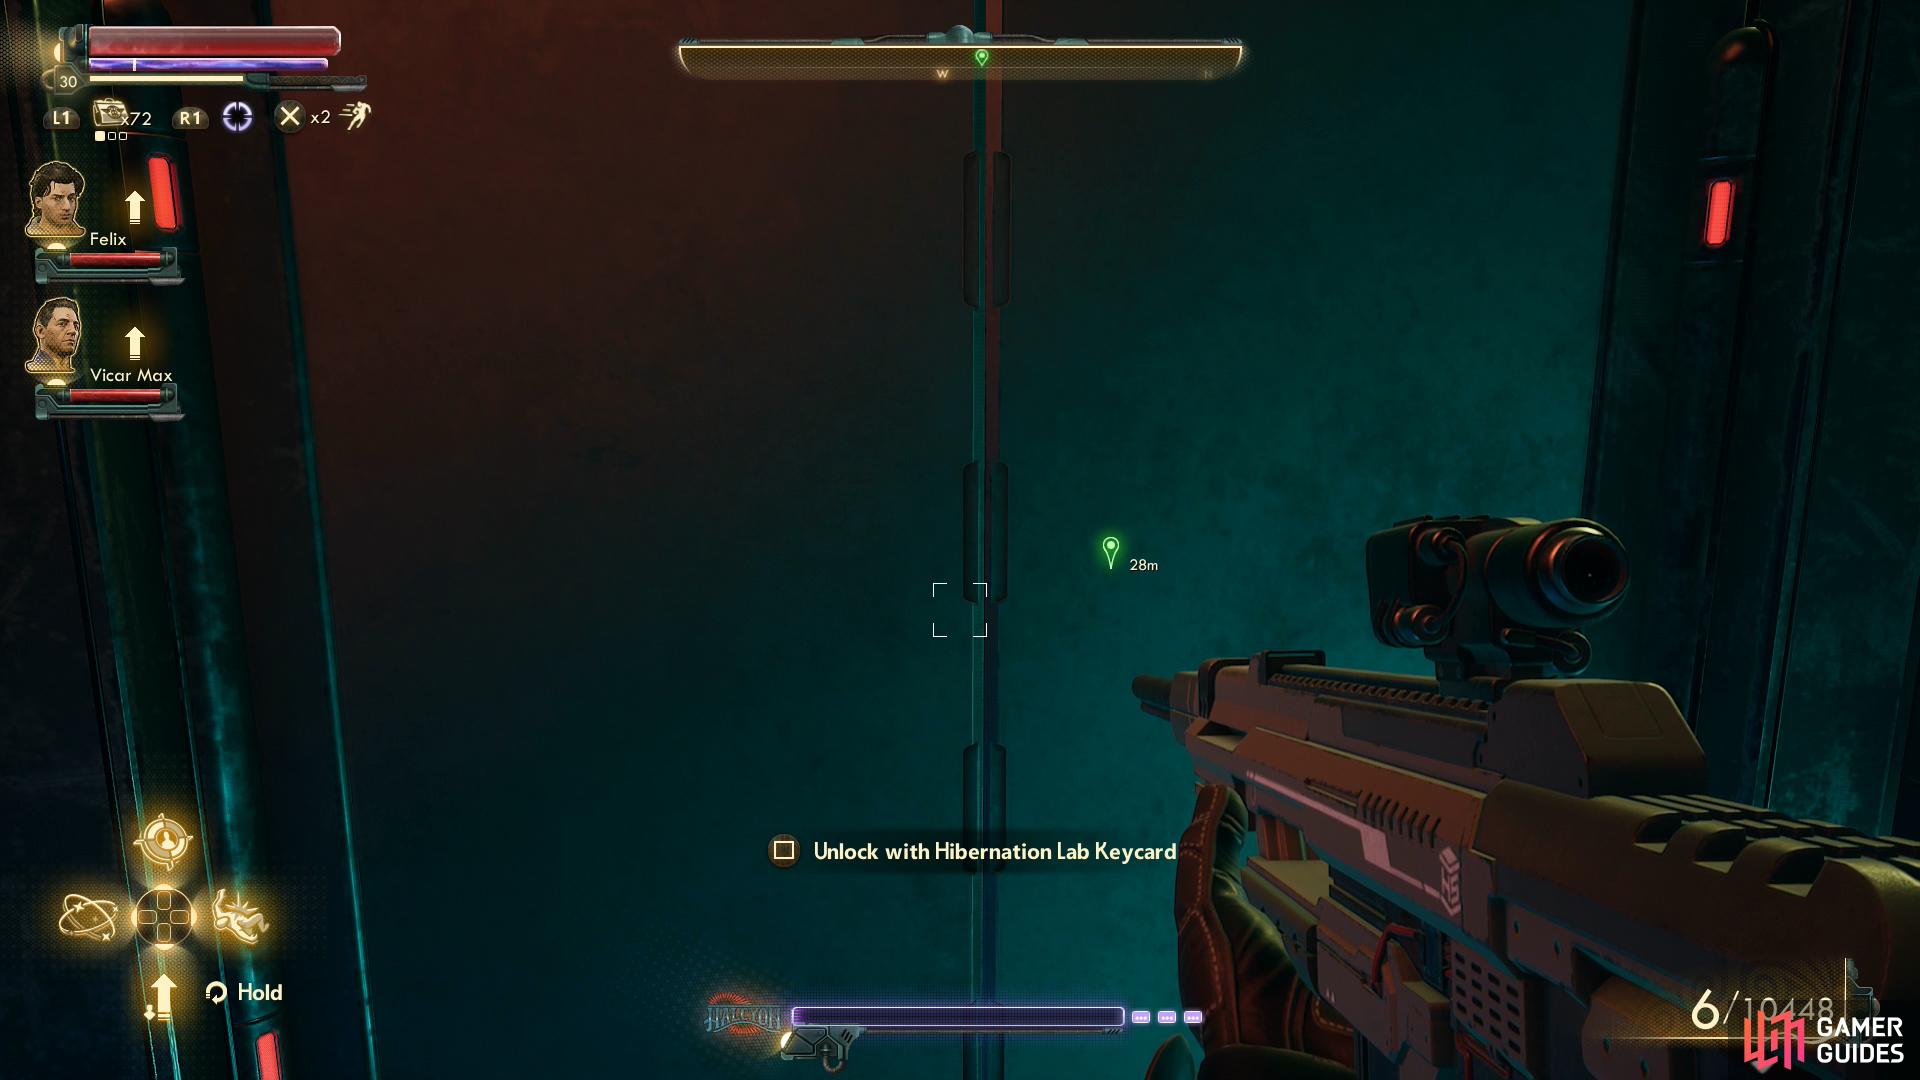
which will open a locked door leading to the Hibernation Lab.
First up, let’s grab a key to bypass a locked door [Lockpick 65] that blocks one of the routes to the Hibernation Lab, which is where the dimethyl sulfoxide is stored. Follow the red line from the elevator east, north, then west and go through the door it leads to. Beyond this door you’ll find a scientist, who turns out to be none other than Giles Molina, the scientist you may have helped during the quest Cupid of the Laboratory. If you saved his sprats, you can say “I need to inspect the dimethyl sulfoxide” and after a bit of doubt he’ll give you the Hibernation Lab Keycard.
Return to the elevator again to restore your cover and, if you want to clear out some of the enemy troopers without getting your hands dirty follow the blue line upstairs, past the locker room and into the storage room where you arrived if you were smuggled in. When the blue line splits, follow it north up a ramp and through a large room, where it’ll ultimately bisect a yellow line. Follow the yellow line north, then go through a doorway to the right (east) to reach a room full of containment cells. If you move wisely you should make it just as your cover fades.
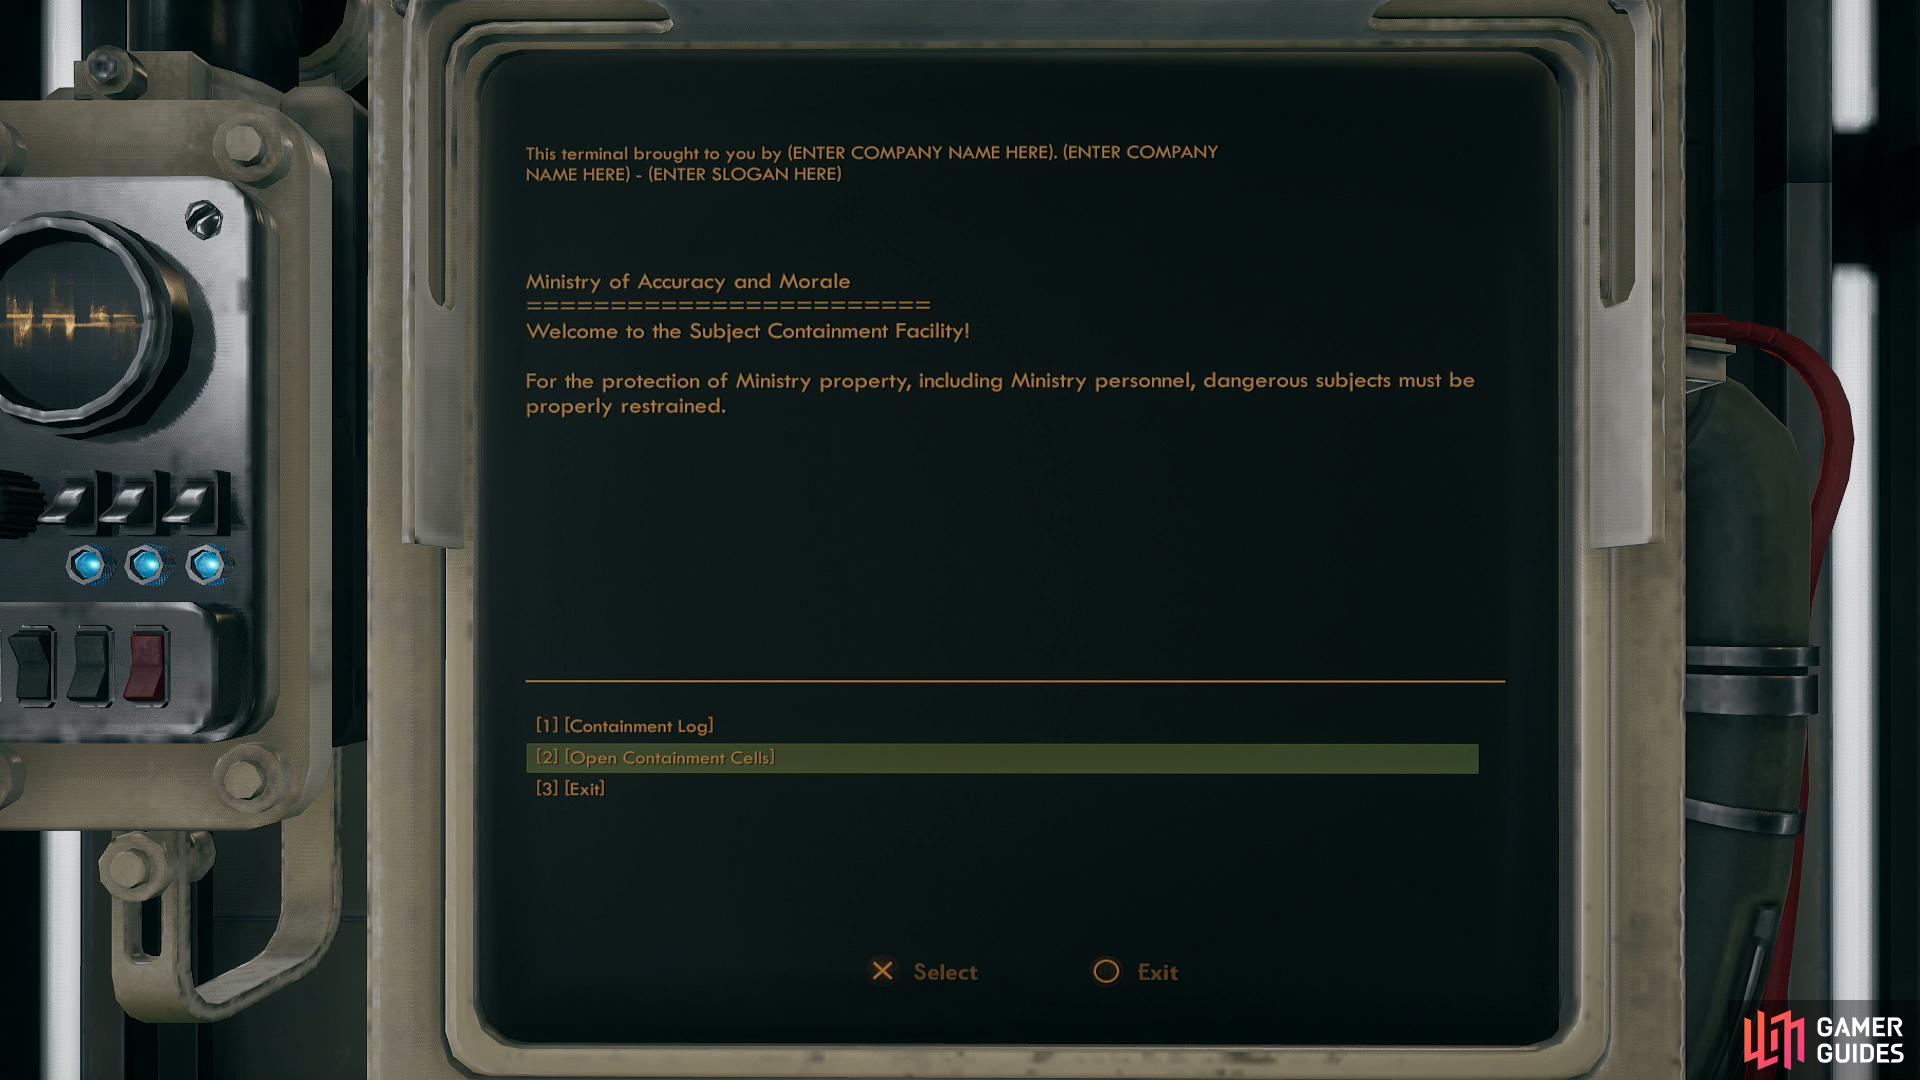
Hack a terminal and release some test subjects
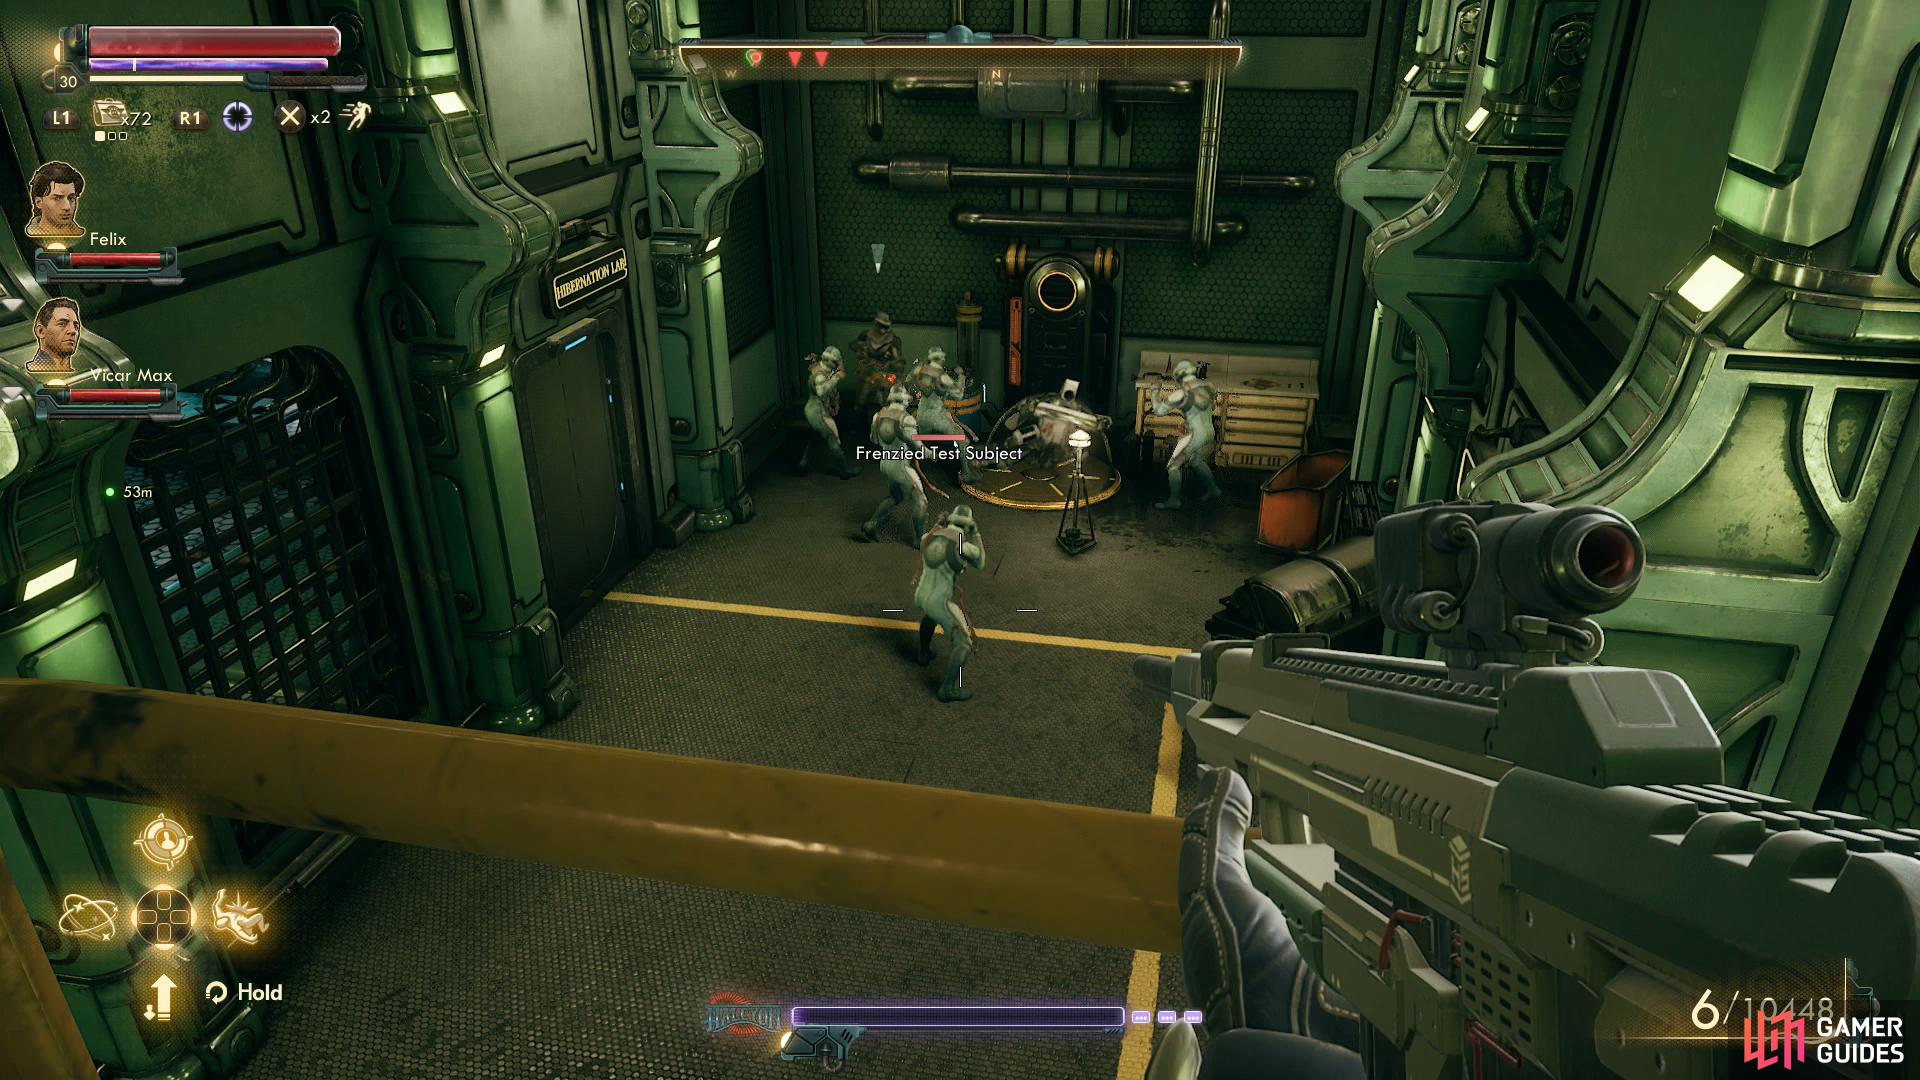
who will attack the corporate minions nearby, reducing the number of foes in your way.
There are no guards or scientists in this room, so just head east up some stairs to reach another room overlooking the containment cells. Hack a terminal [Hack 73] and pick the option [Open Containment Cells]. Stay hidden, as the Adrena-Time’d up Frenzied Test Subjects are freakishly strong, possessing well over 10,000 HP. Their armor is low, but with HP that high it doesn’t matter - they can take a lot of abuse. Fortunately they should all rush to the west and get killed by some guards, inflicting plenty of casualties of their own. Not enough to clear the lab by any means, but enough to thin the herd a bit. Their effectiveness ultimately varies quite a bit, however, so this honestly might not be worth your time.
Finally it’s time to head to the Hibernation Lab and rescue that sweet, sweet dimethyl sulfoxide. There are multiple ways to get to your destination, but for the sake of simplicity, let’s stick to the red route and the yellow route. The meaning behind their names should be obvious.
-
For the red route, just follow the red line from the elevator. When it splits, keep going east and following the solid line, not the segmented line, ride an elevator and you’ll arrive at the locked [Lockpick 65] door to the Hibernation Lab, which you can open with the Hibernation Lab Keycard if you got it from Giles. Beyond this door you can either hop the guard rail (use some junk in the northwestern corner to help you jump over) or follow a yellow line through a door to the south, then head downstairs and through a doorway to the north.
-
For the yellow route follow the yellow line from the elevator. No tricks or splits here, and instead of taking you to the locked door on the red path you’ll instead reach a different door to the Hibernation Lab. You’ll also pass by the containment cells, so if you freed the experiment/captives, there may be fewer guards along the route. Ultimately you’ll reach the same elevated walkway overlooking the Hibernation Lab, and you can get down by either hopping the guard rail (use some junk in the northwestern corner to help you jump over) or by following the yellow line through a door to the south, then downstairs and through a doorway to the north.
Both of these can be completed in one cover bar, especially if you cut corners whenever you can. Just remember, your cover doesn’t deplete if you don’t move, so standing still and waiting for guards to pass is a viable way to reach the end without getting caught if your holographic shroud is nearly depleted.
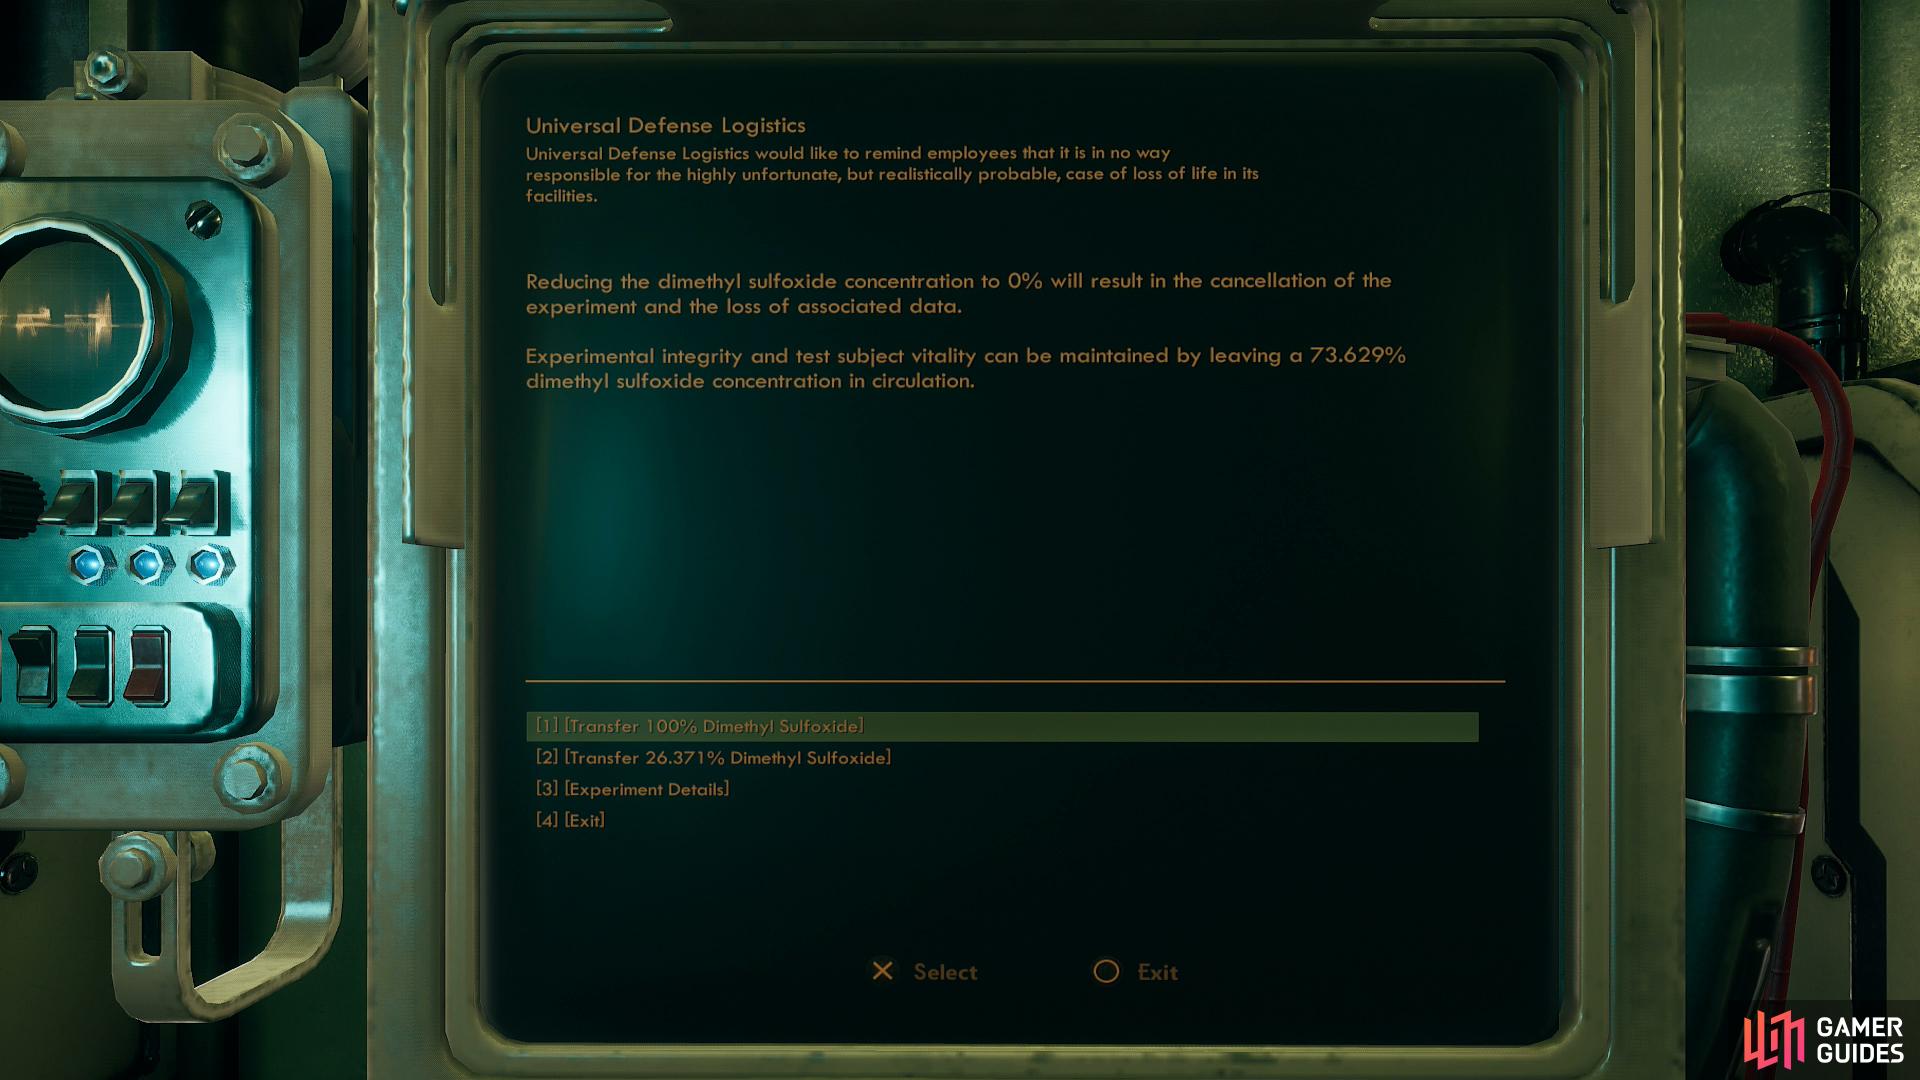
Anyways, once in the Hibernation Lab interact with a terminal on the northern end of the room and pick the option [Transfer Dimethyl Sulfoxide to Canister] and you’ll be interrupted by a warning. While you can indeed take all the Board’s dimethyl sulfoxide, doing so will kill all the test subjects in this lab. On the other hand, if you only take 26.37% of the dimethyl sulfoxide, these experiments will persist, perhaps they can even be revived later. As far as story and gameplay goes, this doesn’t have much of an effect - you’ll get a different ending description depending on whether you take 100% of the dimethyl sulfoxide or merely 26.371%.
This is a purely moral choice on your part as a player, allowing you to explore some fairly typical philosophical ideas. If you take the dimethyl sulfoxide, are you responsible for their deaths, or is the Board? The Board froze them with no expectation they’d be able to revive them, nor are you in control with what happens to them after you take what dimethyl sulfoxide you take. Then again, choosing to take 100% is an action that directly leads to their deaths. On the other hand, the more dimethyl sulfoxide you take, the more colonists on the Hope can be revived. Are the relative handful of lives in this lab worth untold numbers of Hope colonists? Are these experiments of unknown merit and circumstance worth sacrificing people who Phineas believes are some of the best and brightest minds in Halcyon? It’s a bit of the classic “trolley problem” that devolves into unanswerable consequentialism the more you think about it, as it is wont to do.
Make what decision you will - moral imperatives are outside the scope of this humble author - then head to the western end of the room to find a big, beautiful canister of dimethyl sulfoxide. Take it, then head through the doorway to the south, unbar another door to the south and enter the room beyond, then ride up the elevator to the west, which will deposit you in a small room adjacent to the lobby of The Ministry of Accuracy and Morale building. From here just unbar the door to the east, turn north and exit the building.
And just like that, you’re done in Byzantium. At least as far as The City and the Stars is concerned. All you need to do now is return to the Unreliable, fly to Phineas’ Lab and give him his precious dimethyl sulfoxide. You can tell him about the imminent collapse of Halcyon too, something Phineas was aware of and planning for (see also: you), but the timetable of events disturbs him. You can pass a pair of [Science 40] checks and an [Engineering 25] check while talking to Phineas, but these checks only allow you to take the initiative in planning out your next move. Eventually you’ll decide on skipping the Hope to Phineas’ Lab so he can start reviving people who are possibly competent enough to save Halcyon from the Board… and hopefully not too indoctrinated by growing up in a corporate dystopia to repeat the Board’s mistakes.
This ends The City and the Stars and begins Kept Secret But Not Forgotten. Conspiring with Phineas will cause you to gain some negative reputation with the Board, but the amount is trivial and unlikely to affect anything. That said, both Akande and Phineas will ultimately give you Kept Secret But Not Forgotten, and while you’re still not quite there yet, you’re nearing the point of no return when it comes to choosing your allegiance. Phineas wants you to skip the Hope to Terra 2, and Akande wants it skipped to Tartarus. Where you skip the Hope determines who you side with. This is a choice you’ll make at the end of Kept Secret But Not Forgotten, however, so you don’t need to make up your mind quite yet.
No Comments