
Lucky Dice is one of the collectibles that can be found in Tiny Tina’s Wonderlands. They are golden models of D20s used in tabletop gaming and upon finding them, randomly roll a number from 1 to 20, determining the kind of loot you get from them. Finding Lucky Dice will also increase your Loot Luck stat. This page will detail the locations of all the Lucky Dice in Brighthoof.
Lucky Dice Location #1
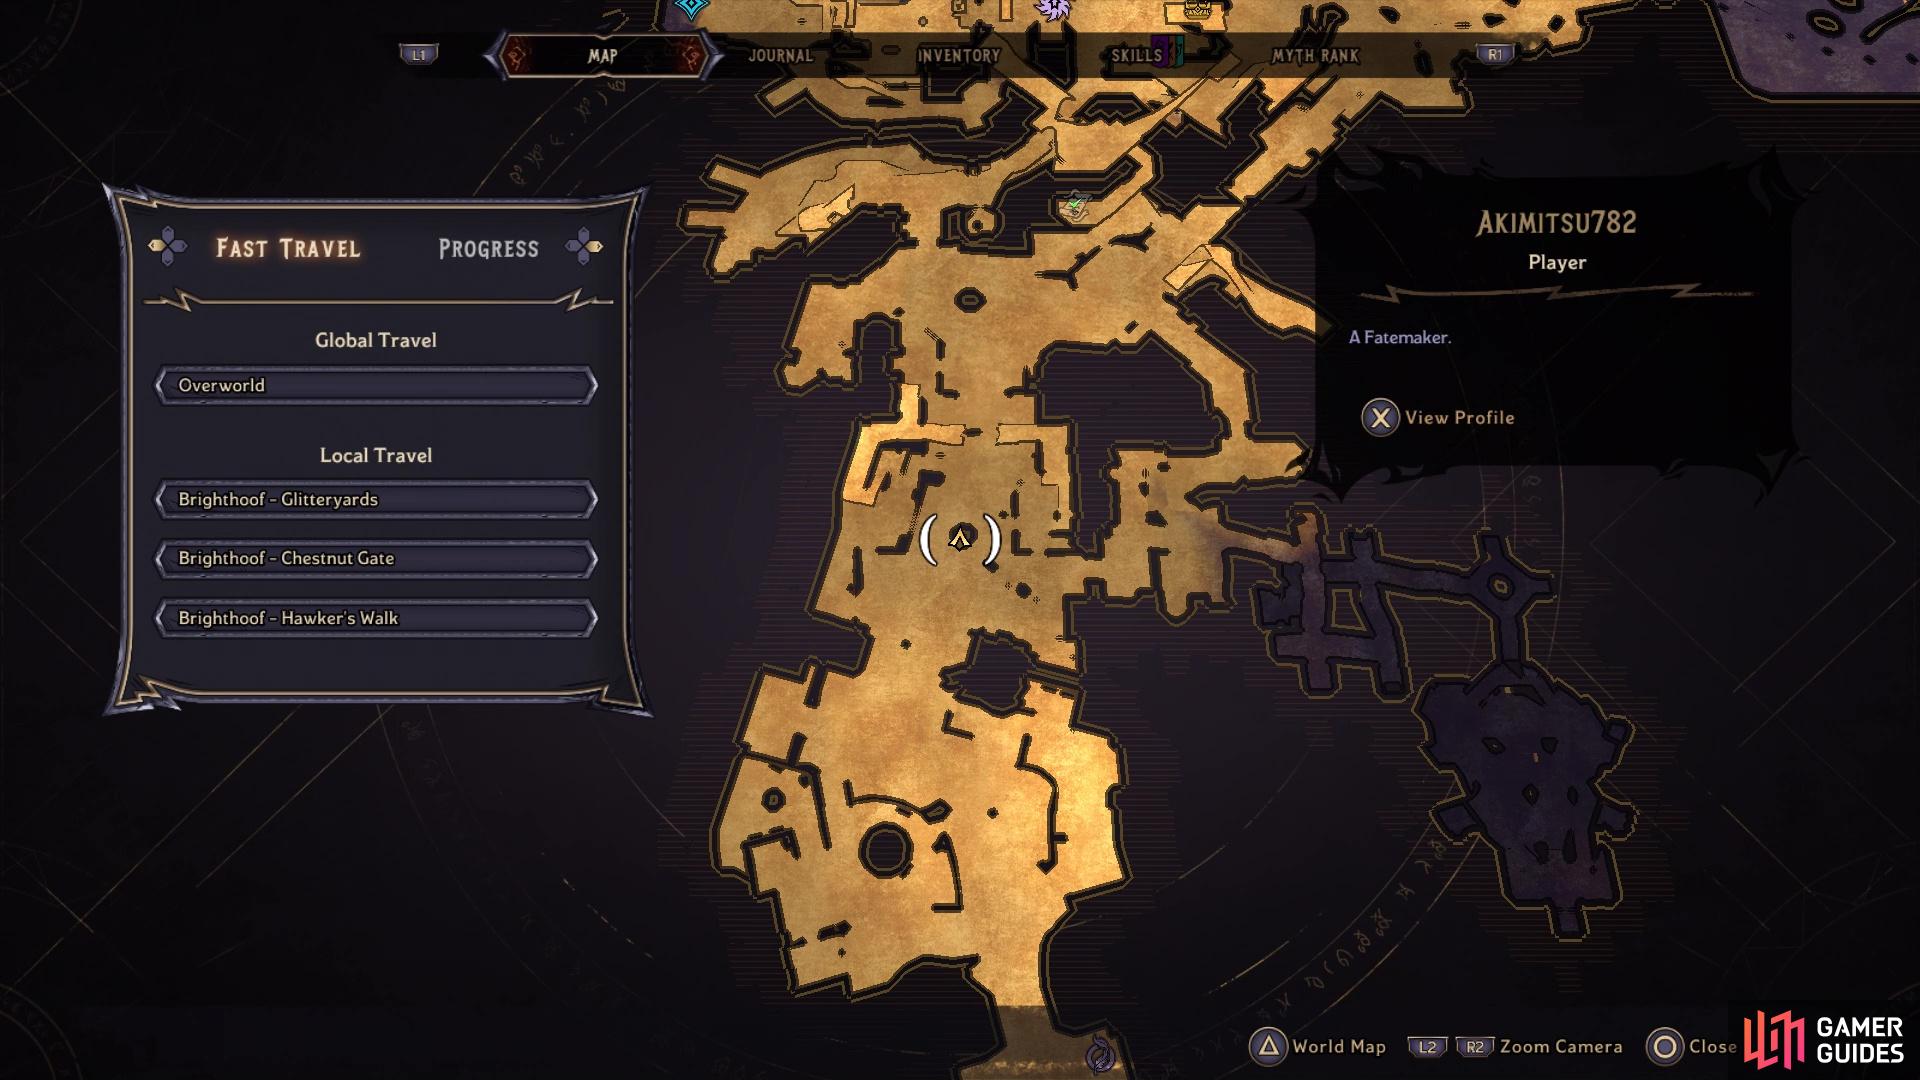
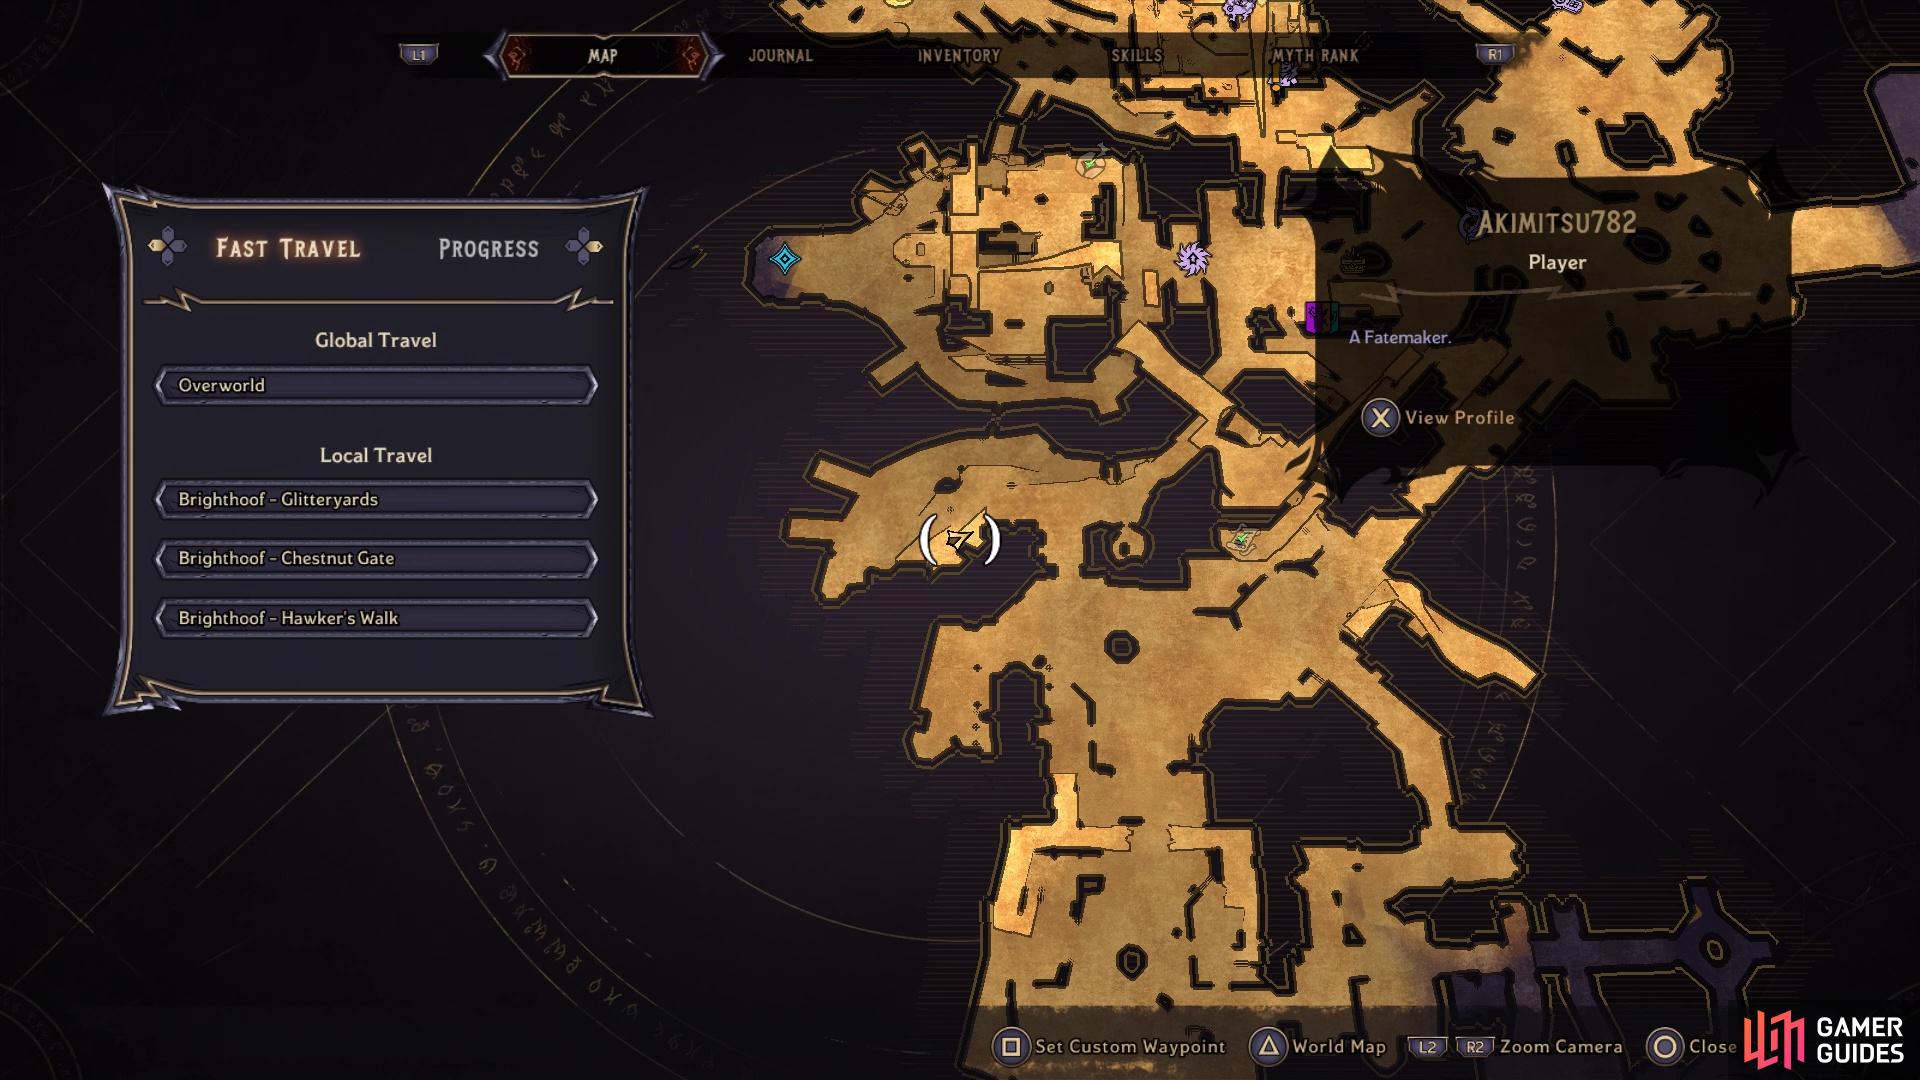
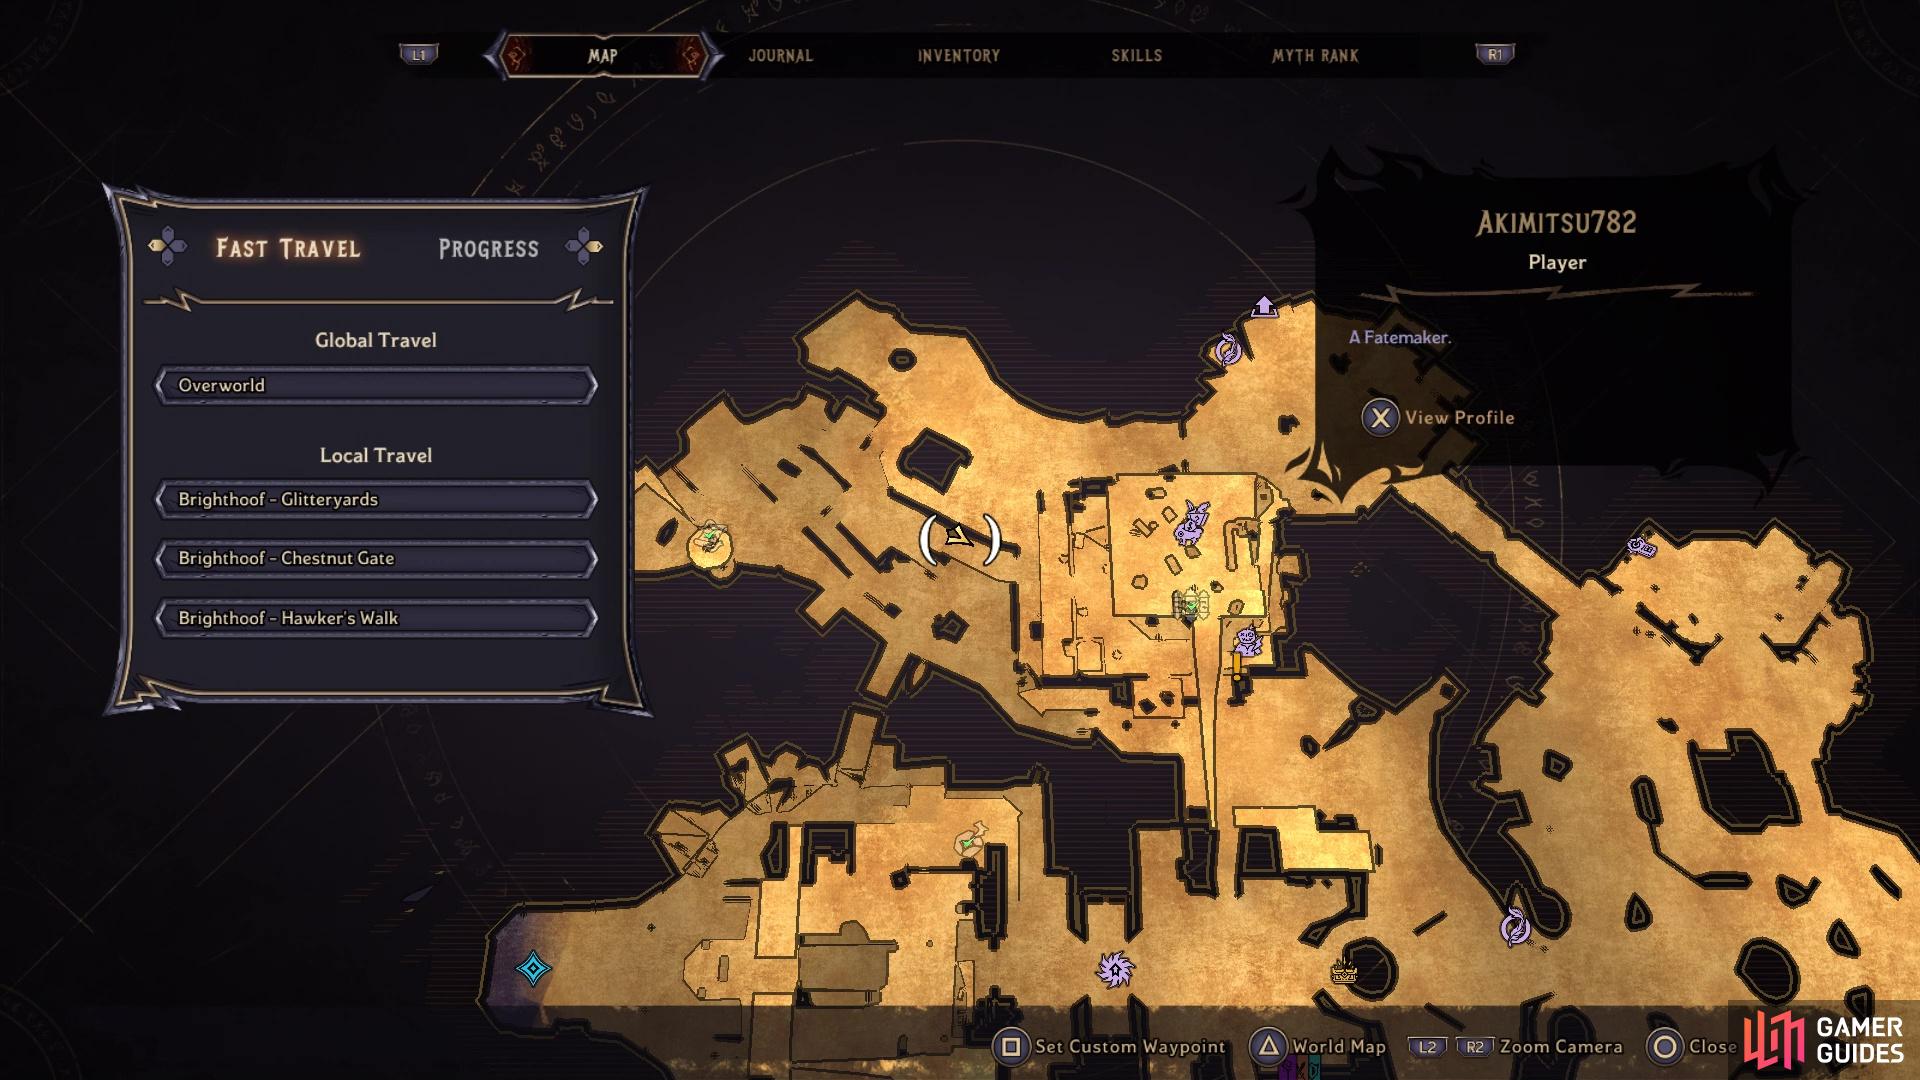
Lucky Dice #1 on the map
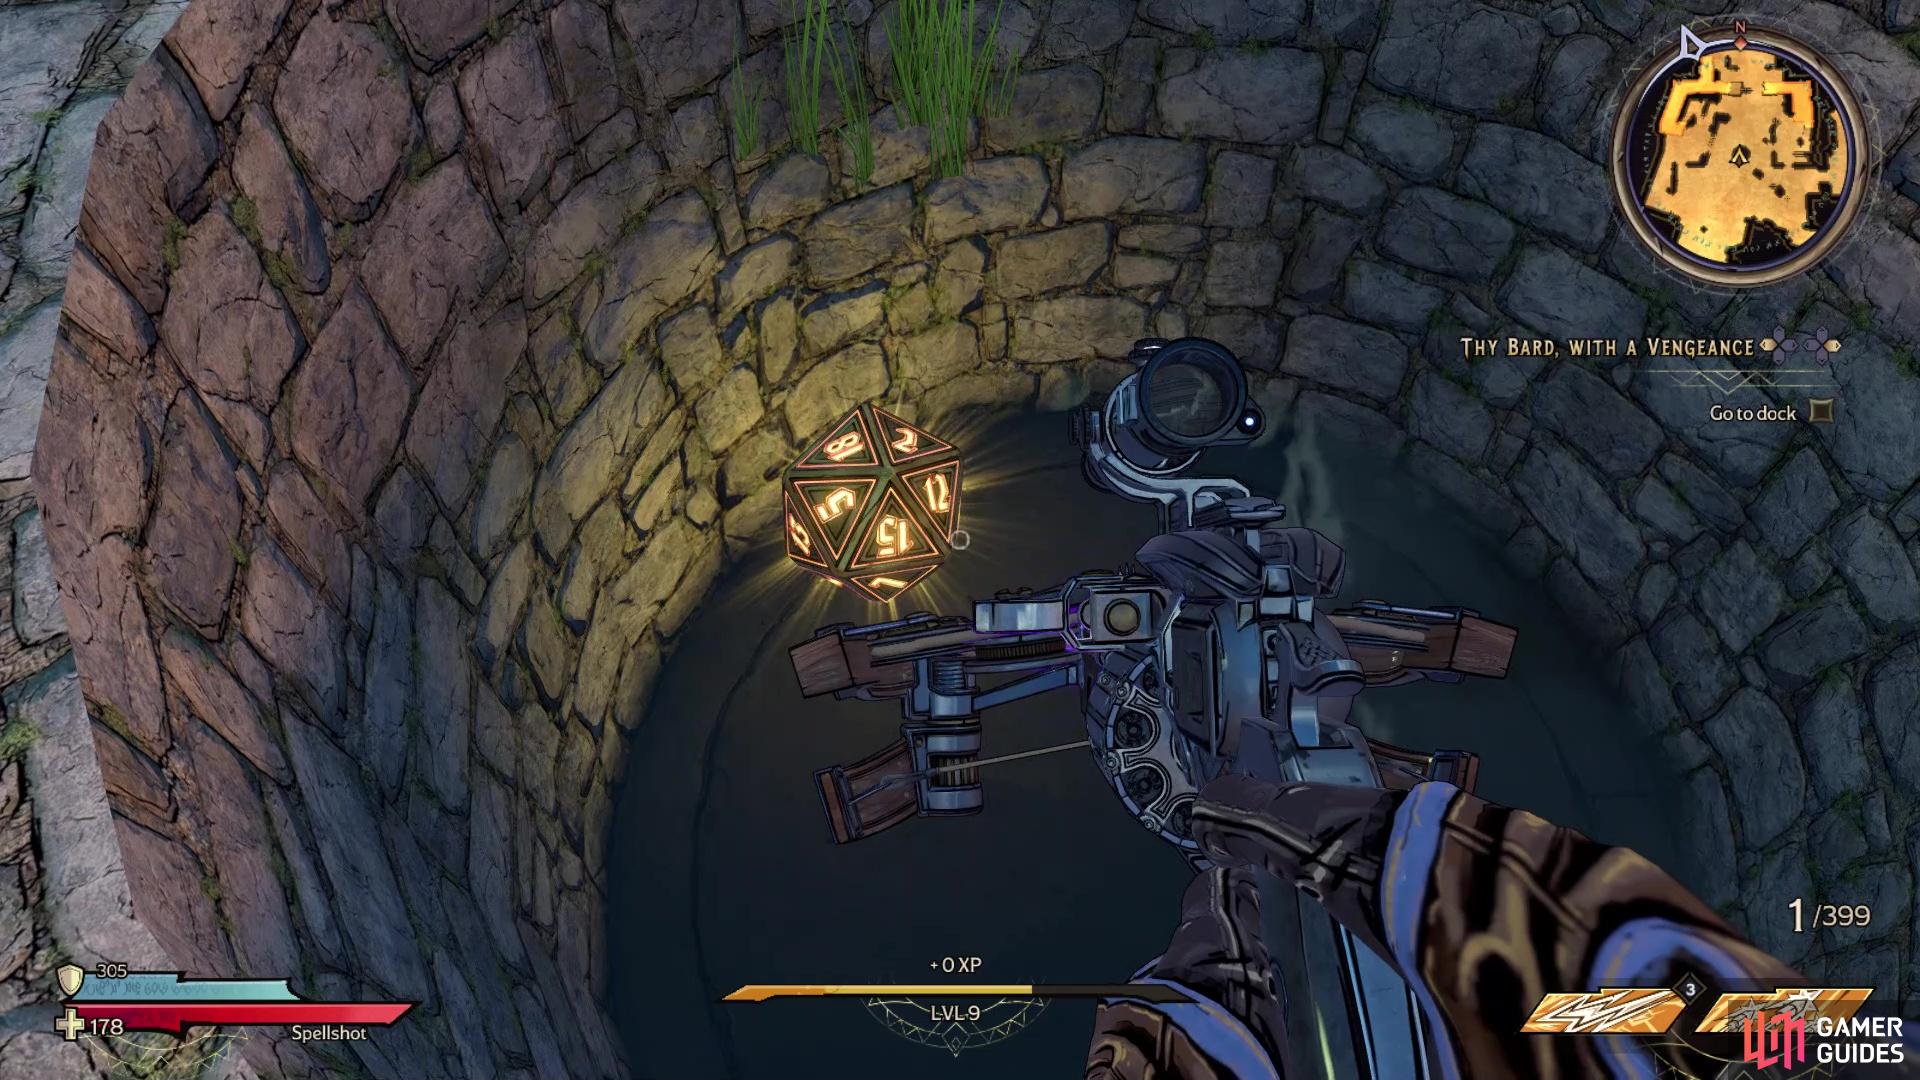
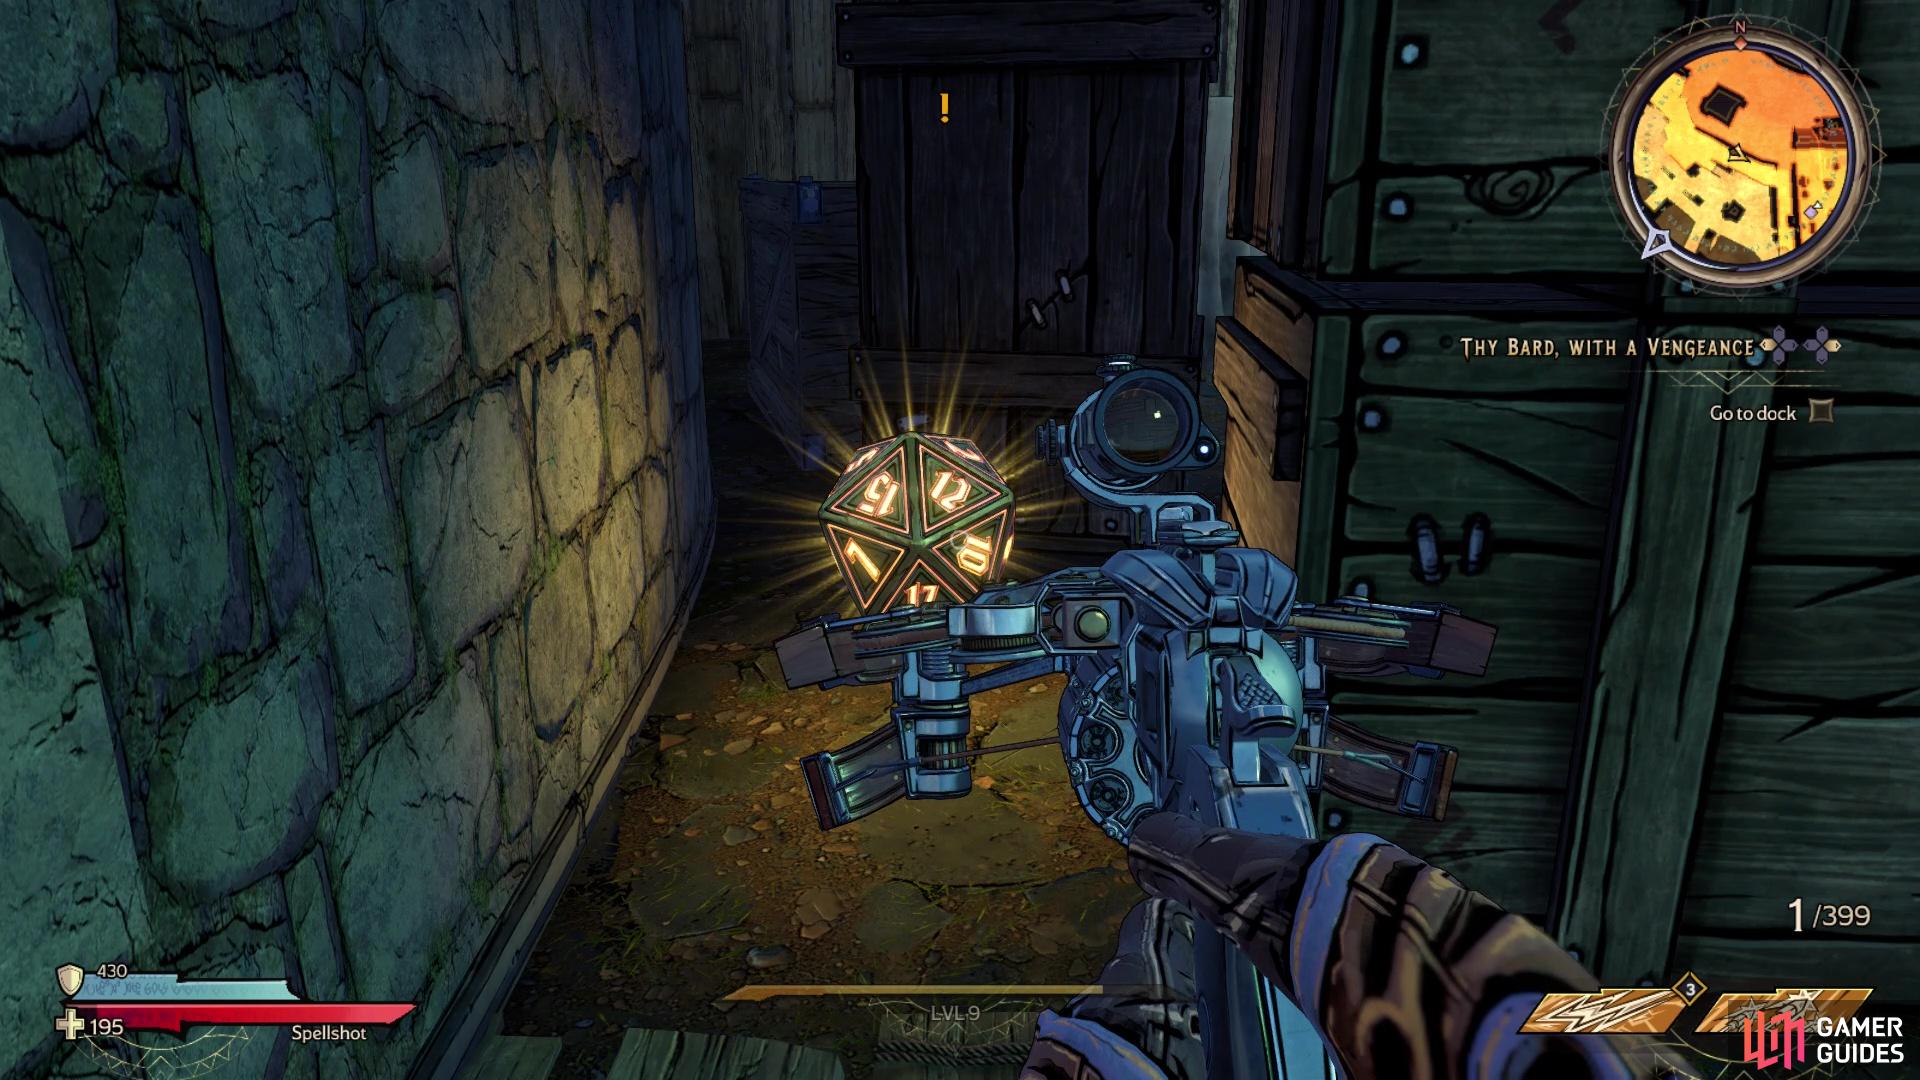
Lucky Dice #2 in the game
Start off by fast travelling to the Glitteryards point, then running north until you reach the Wibblesern Well area. There will be a big well right in the center and the Lucky Dice will be inside that well.
Lucky Dice Location #2
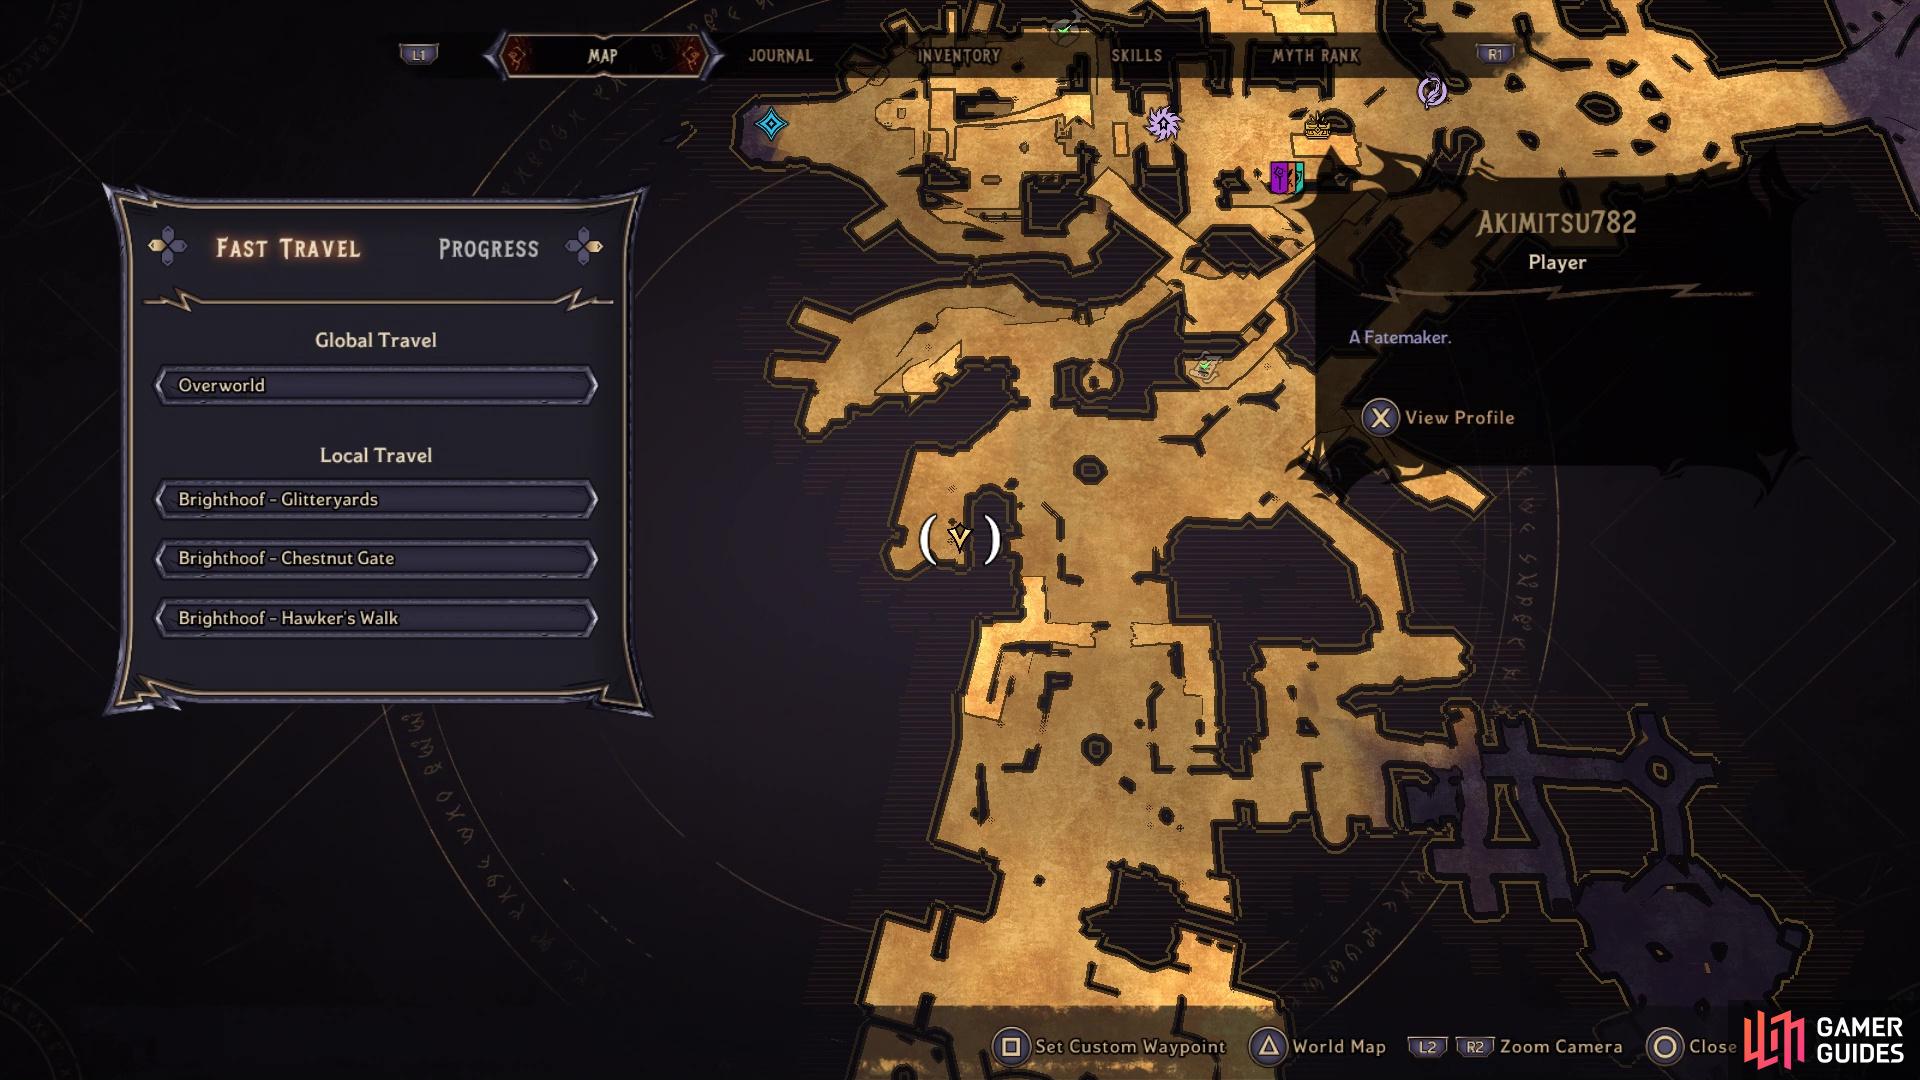
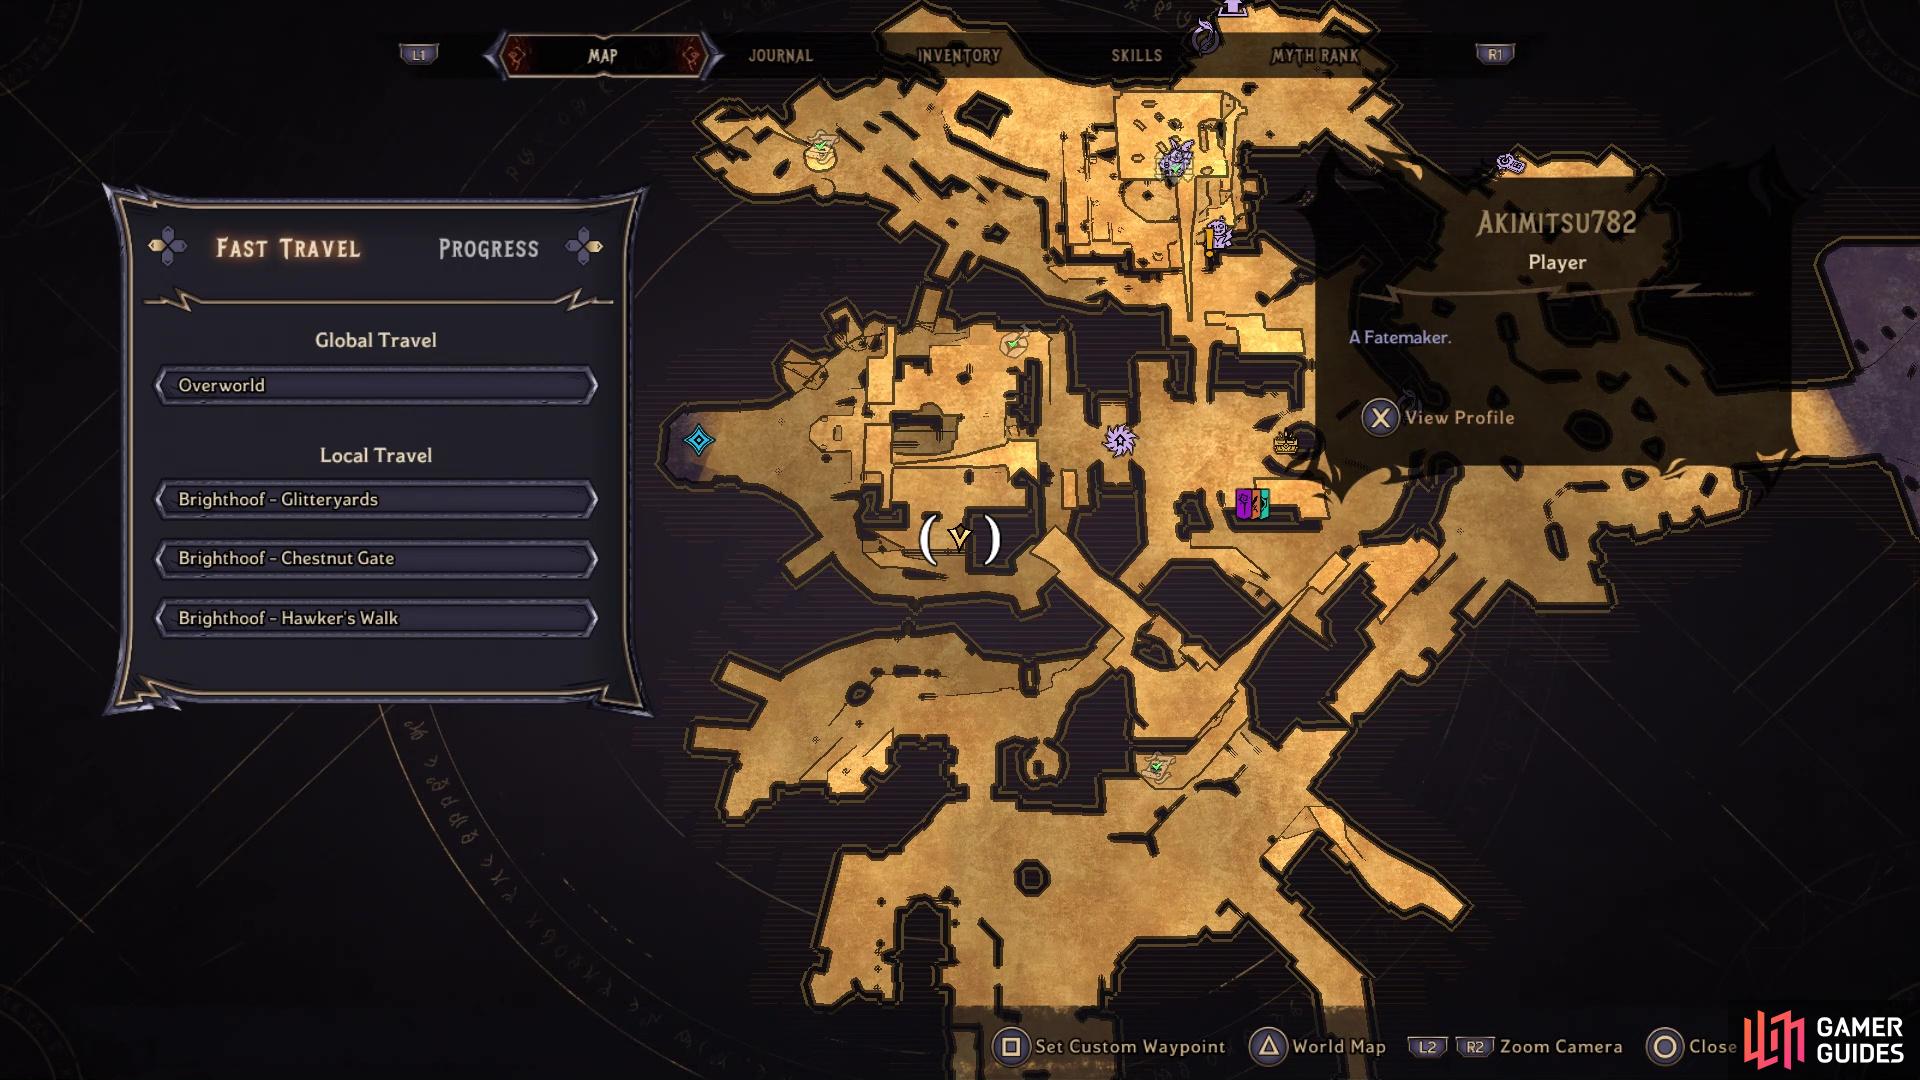
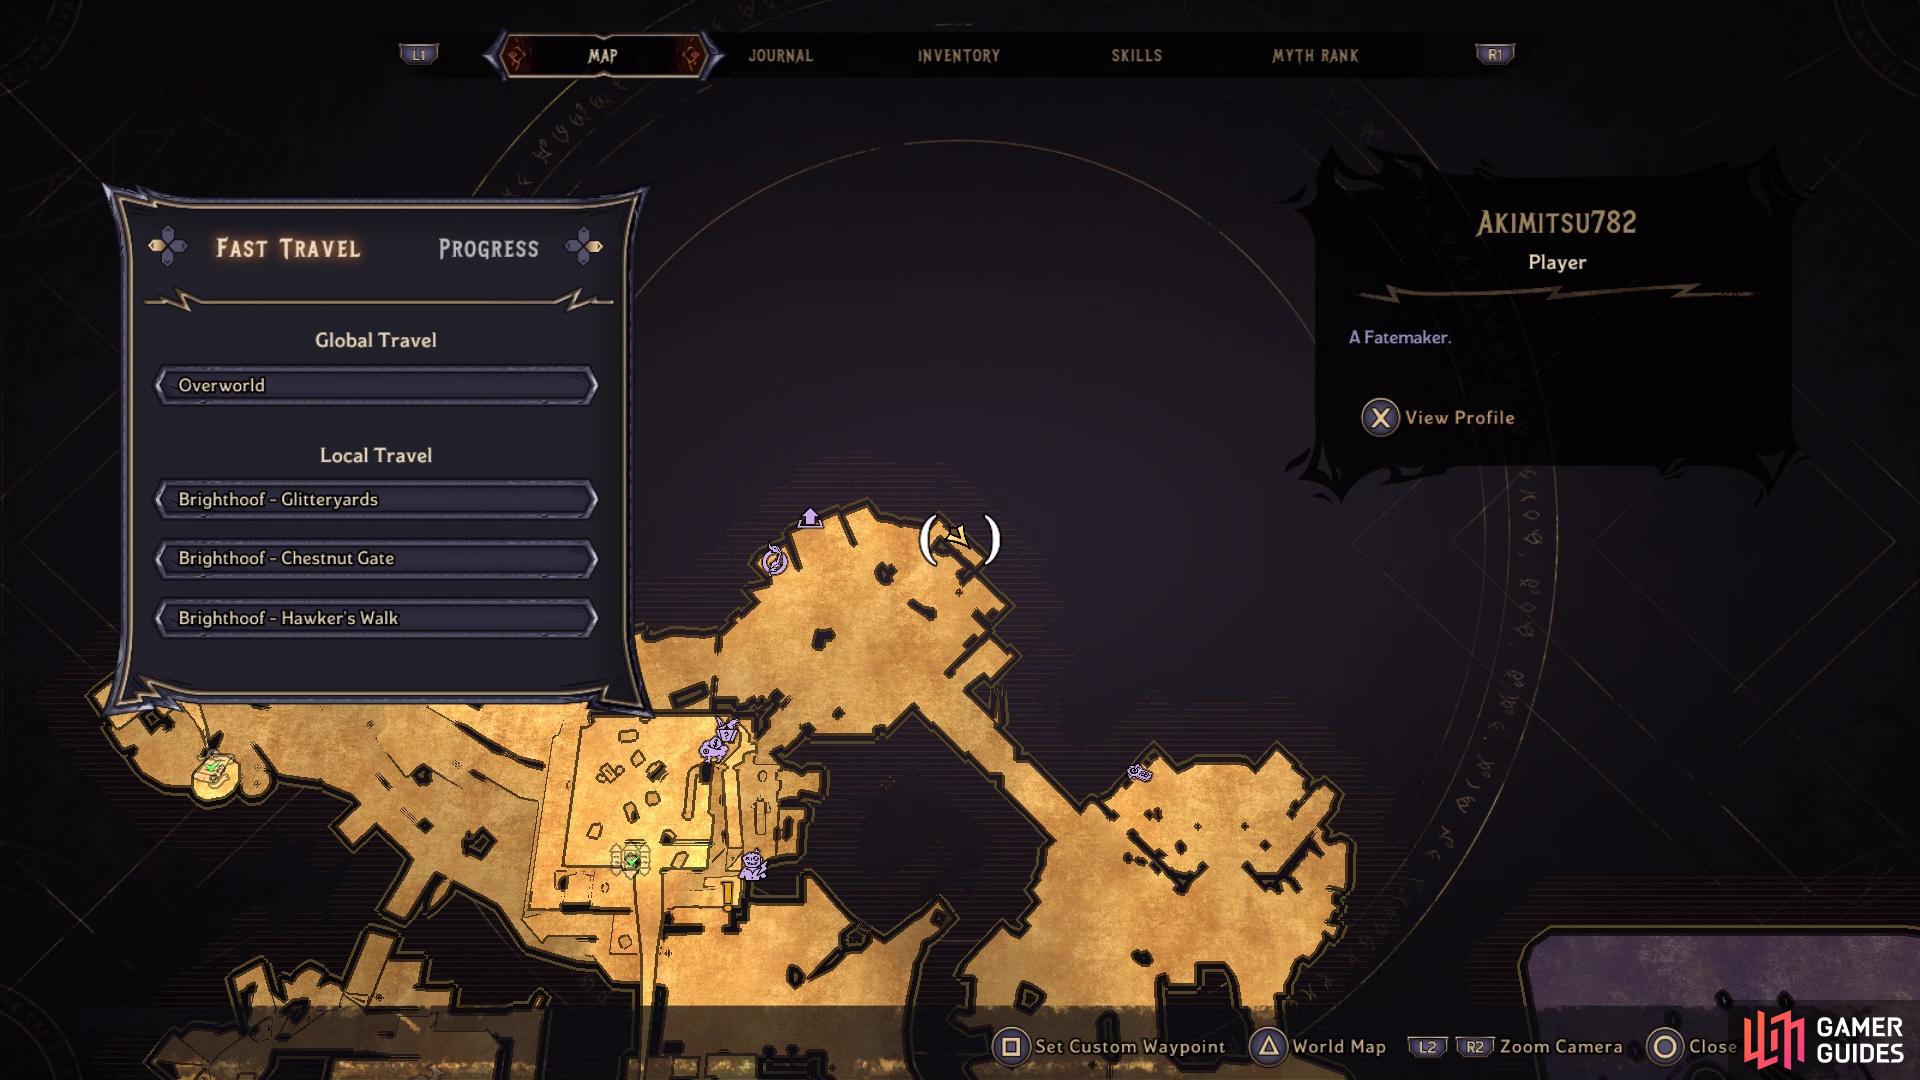
Lucky Dice #2 on the map
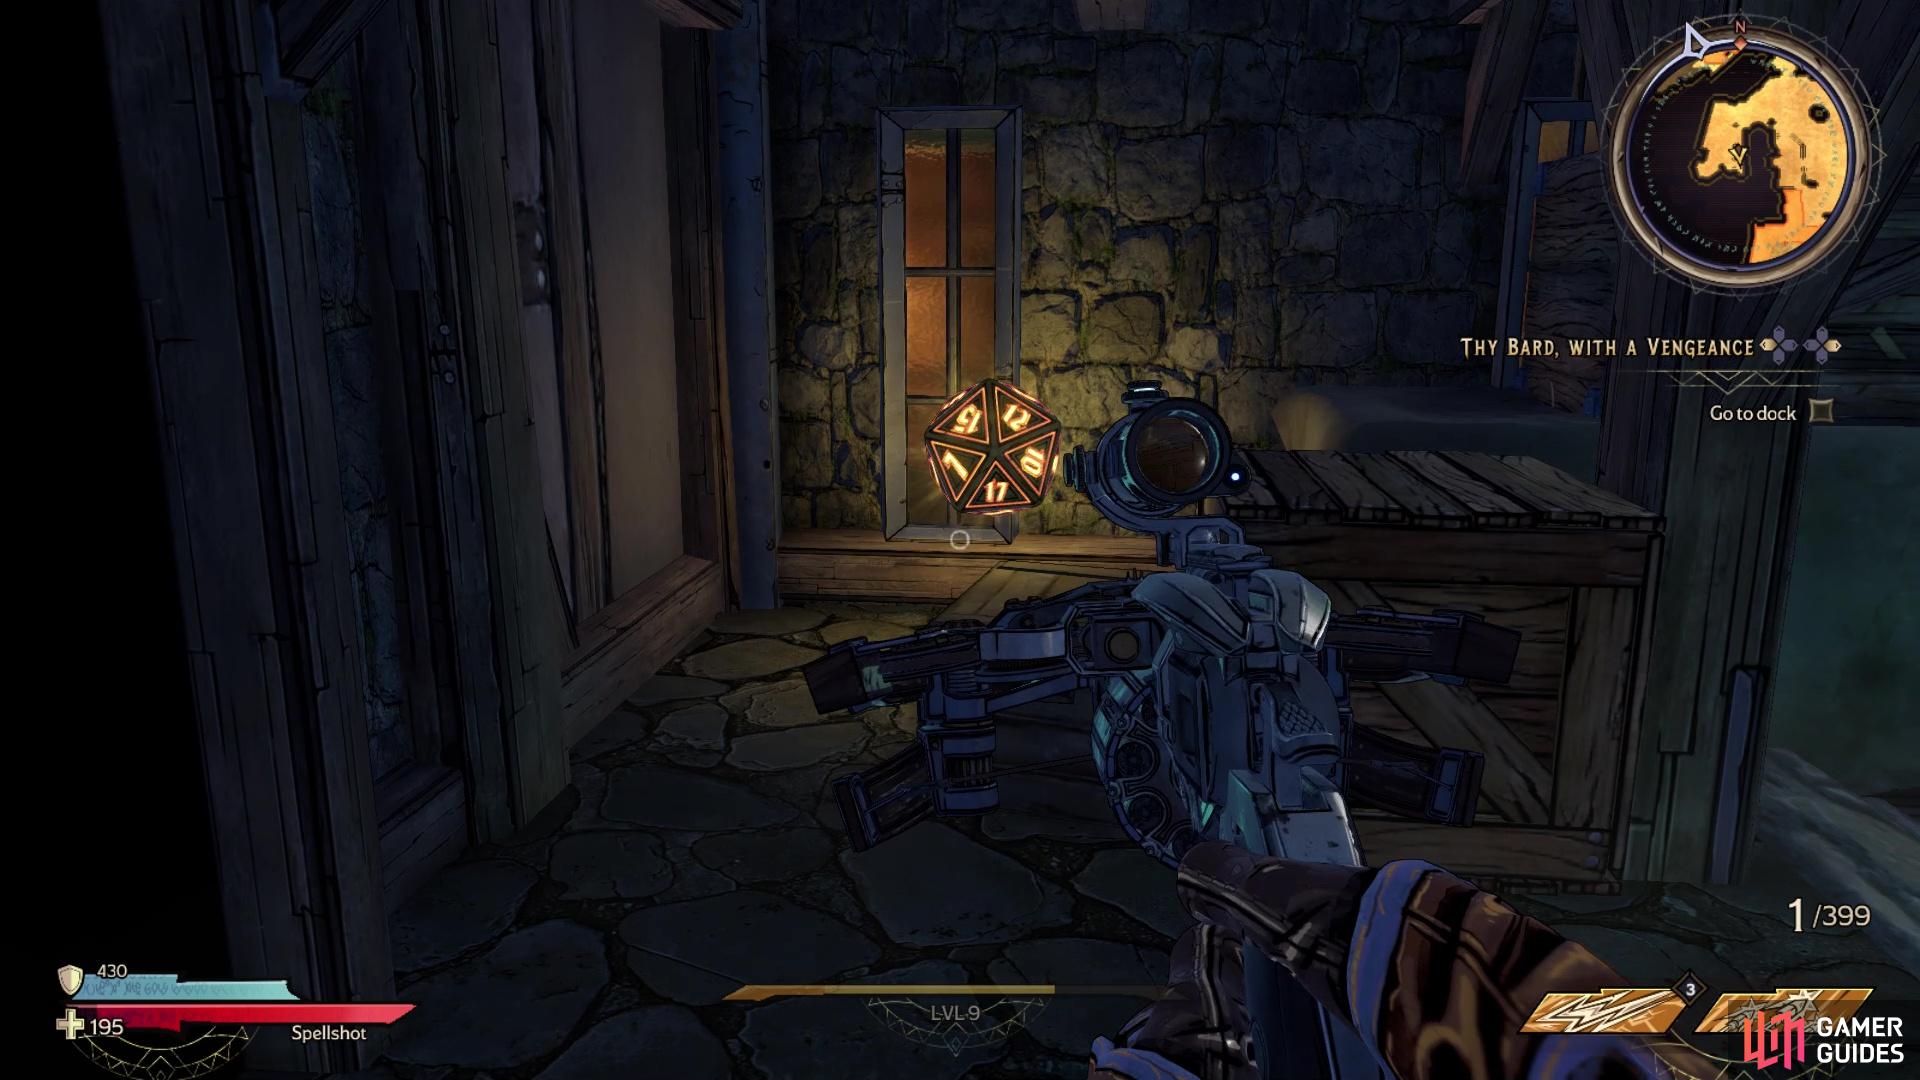
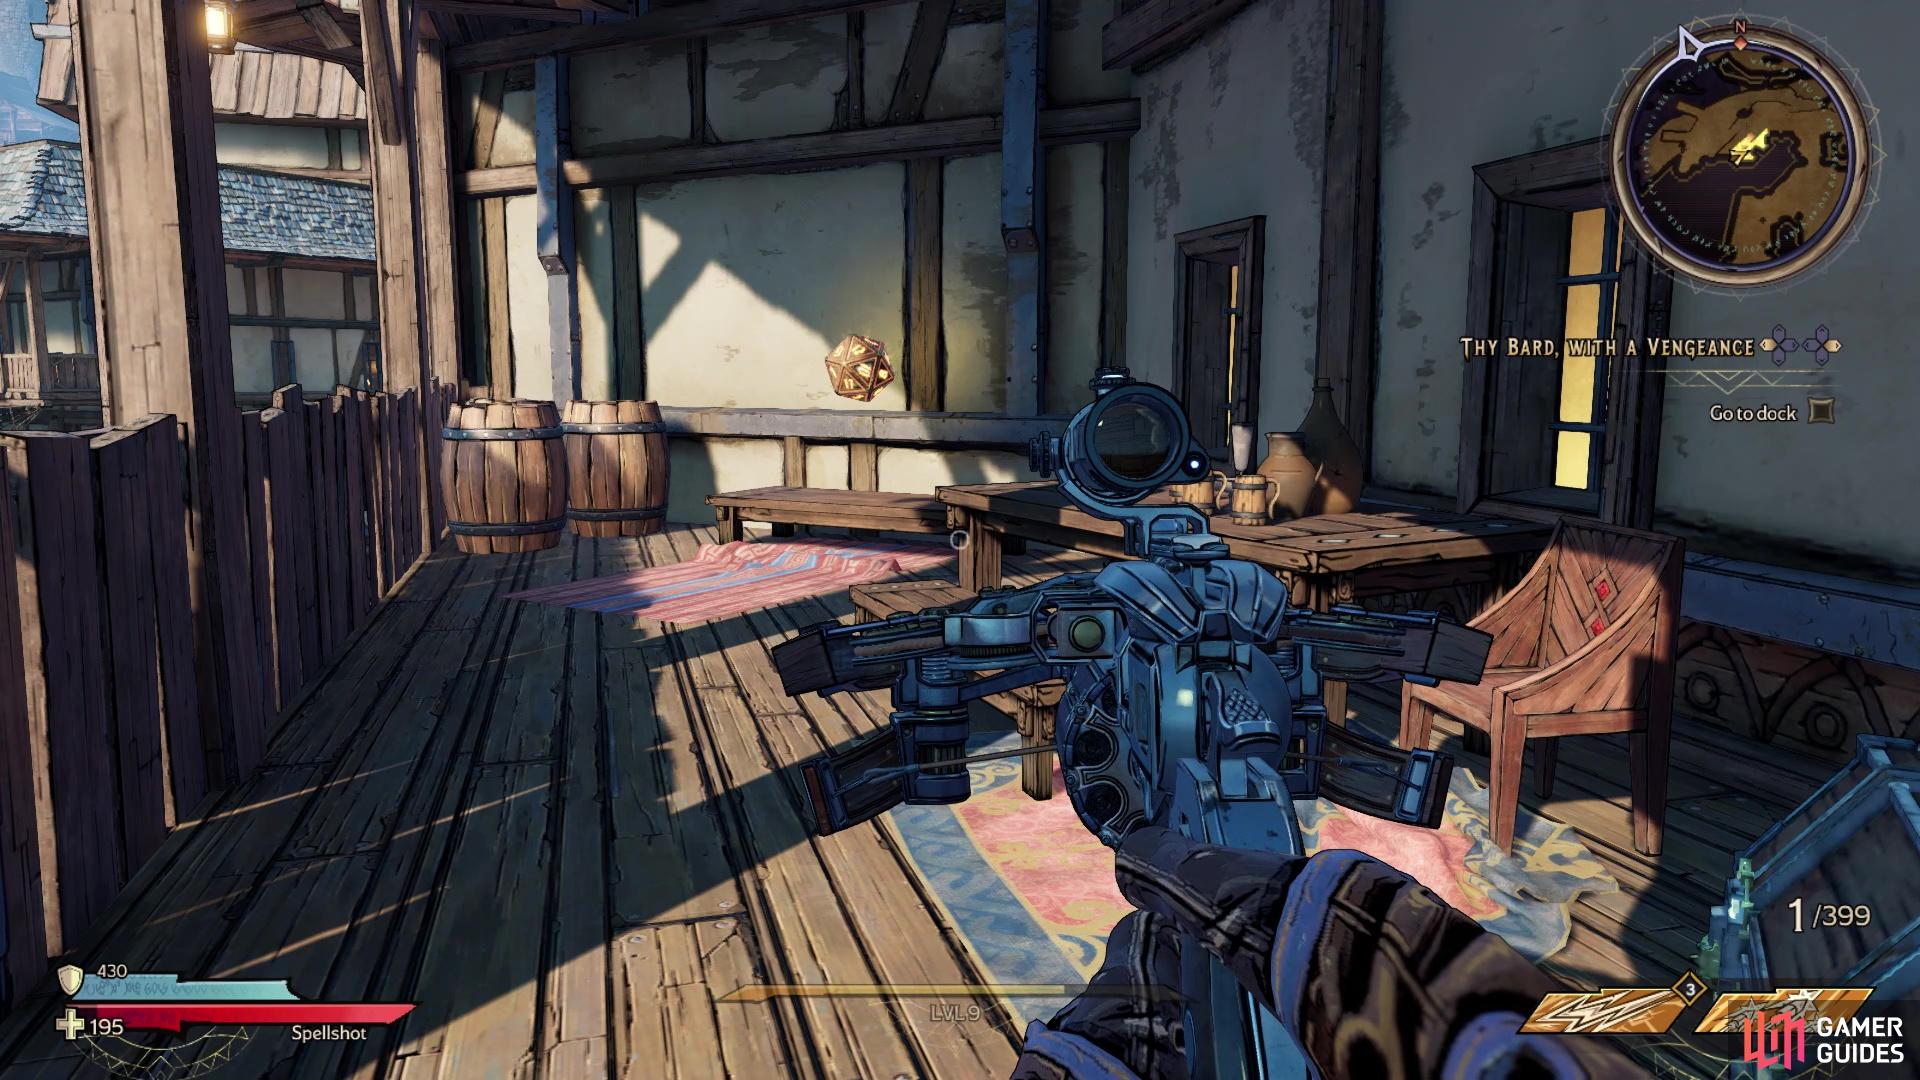
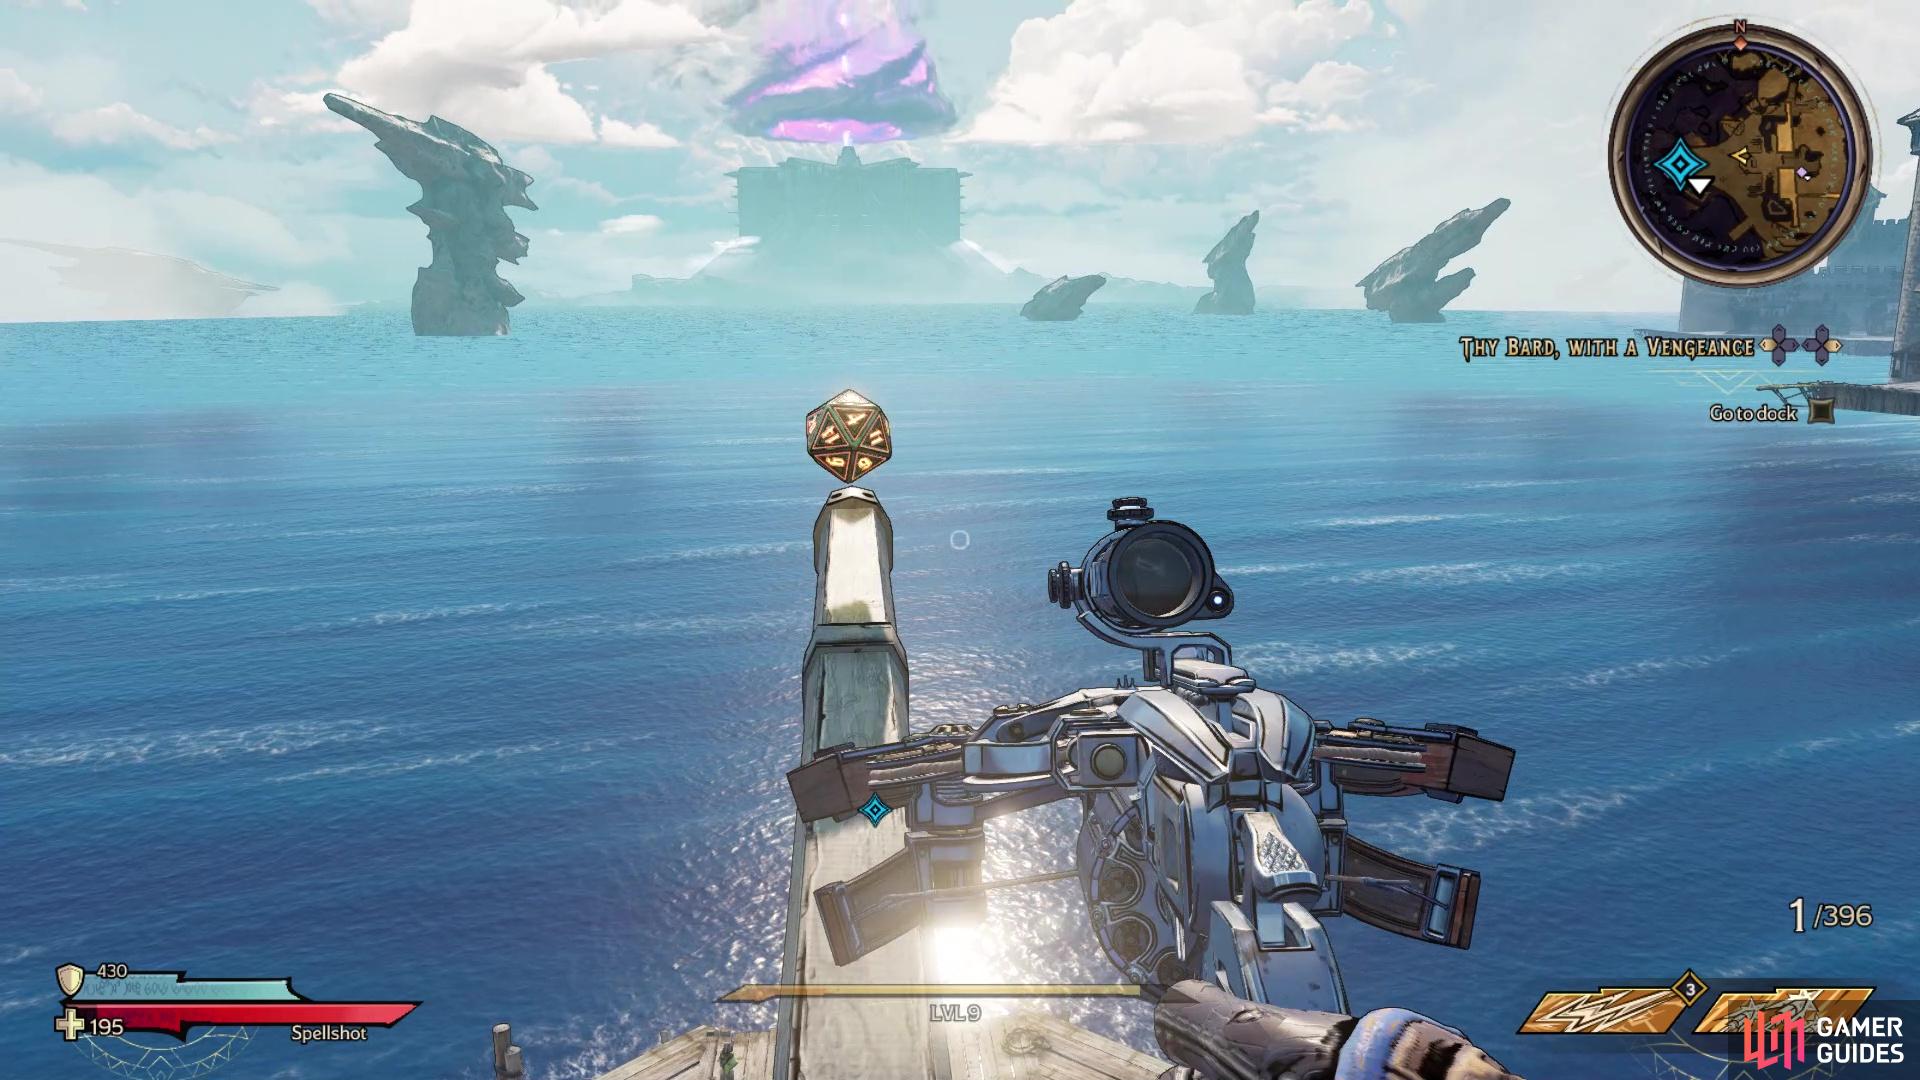
Lucky Dice #2 in the game
From the previous location, climb out of the well and continue north to the statue of your character (happens after a certain point in the main story). At the statue, head west and into the dead end there on your map, where you can find the Lucky Dice behind some crates in the corner.
Lucky Dice Location #3
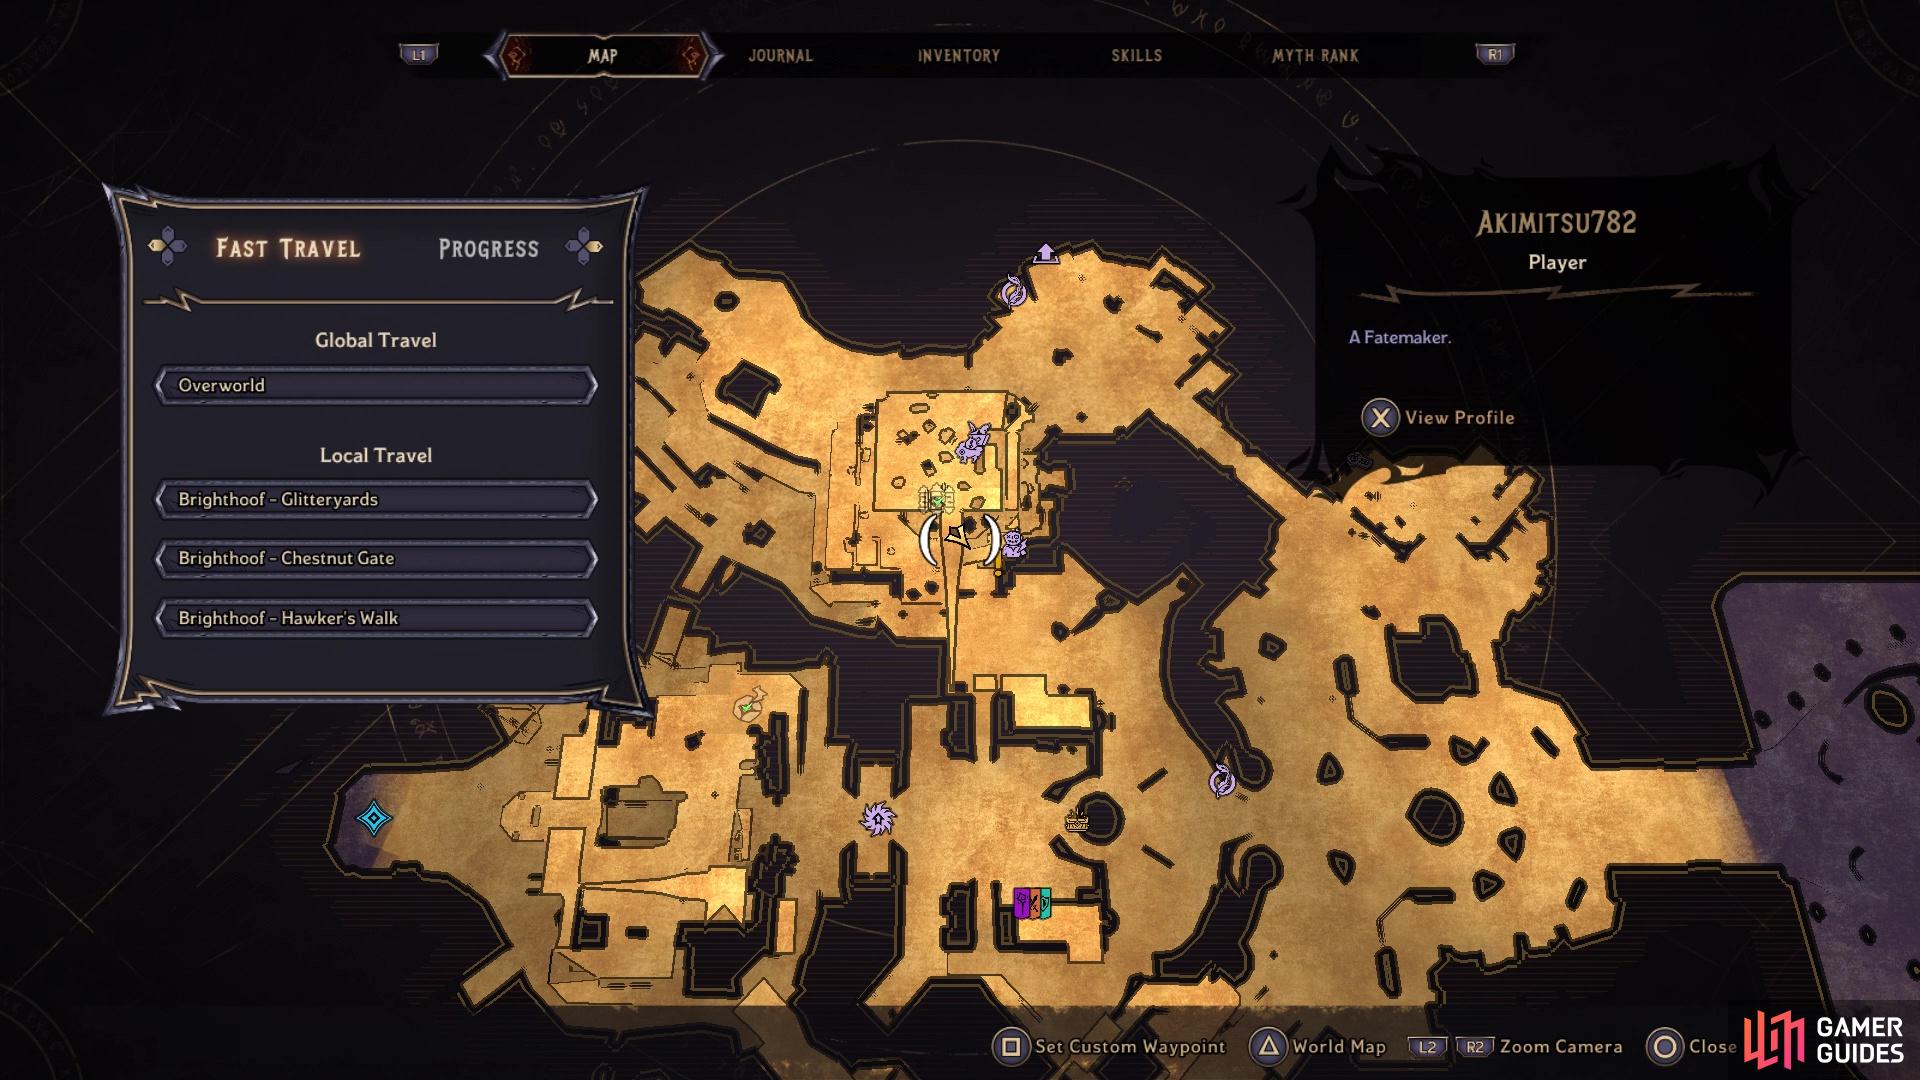
Lucky Dice #3 on the map
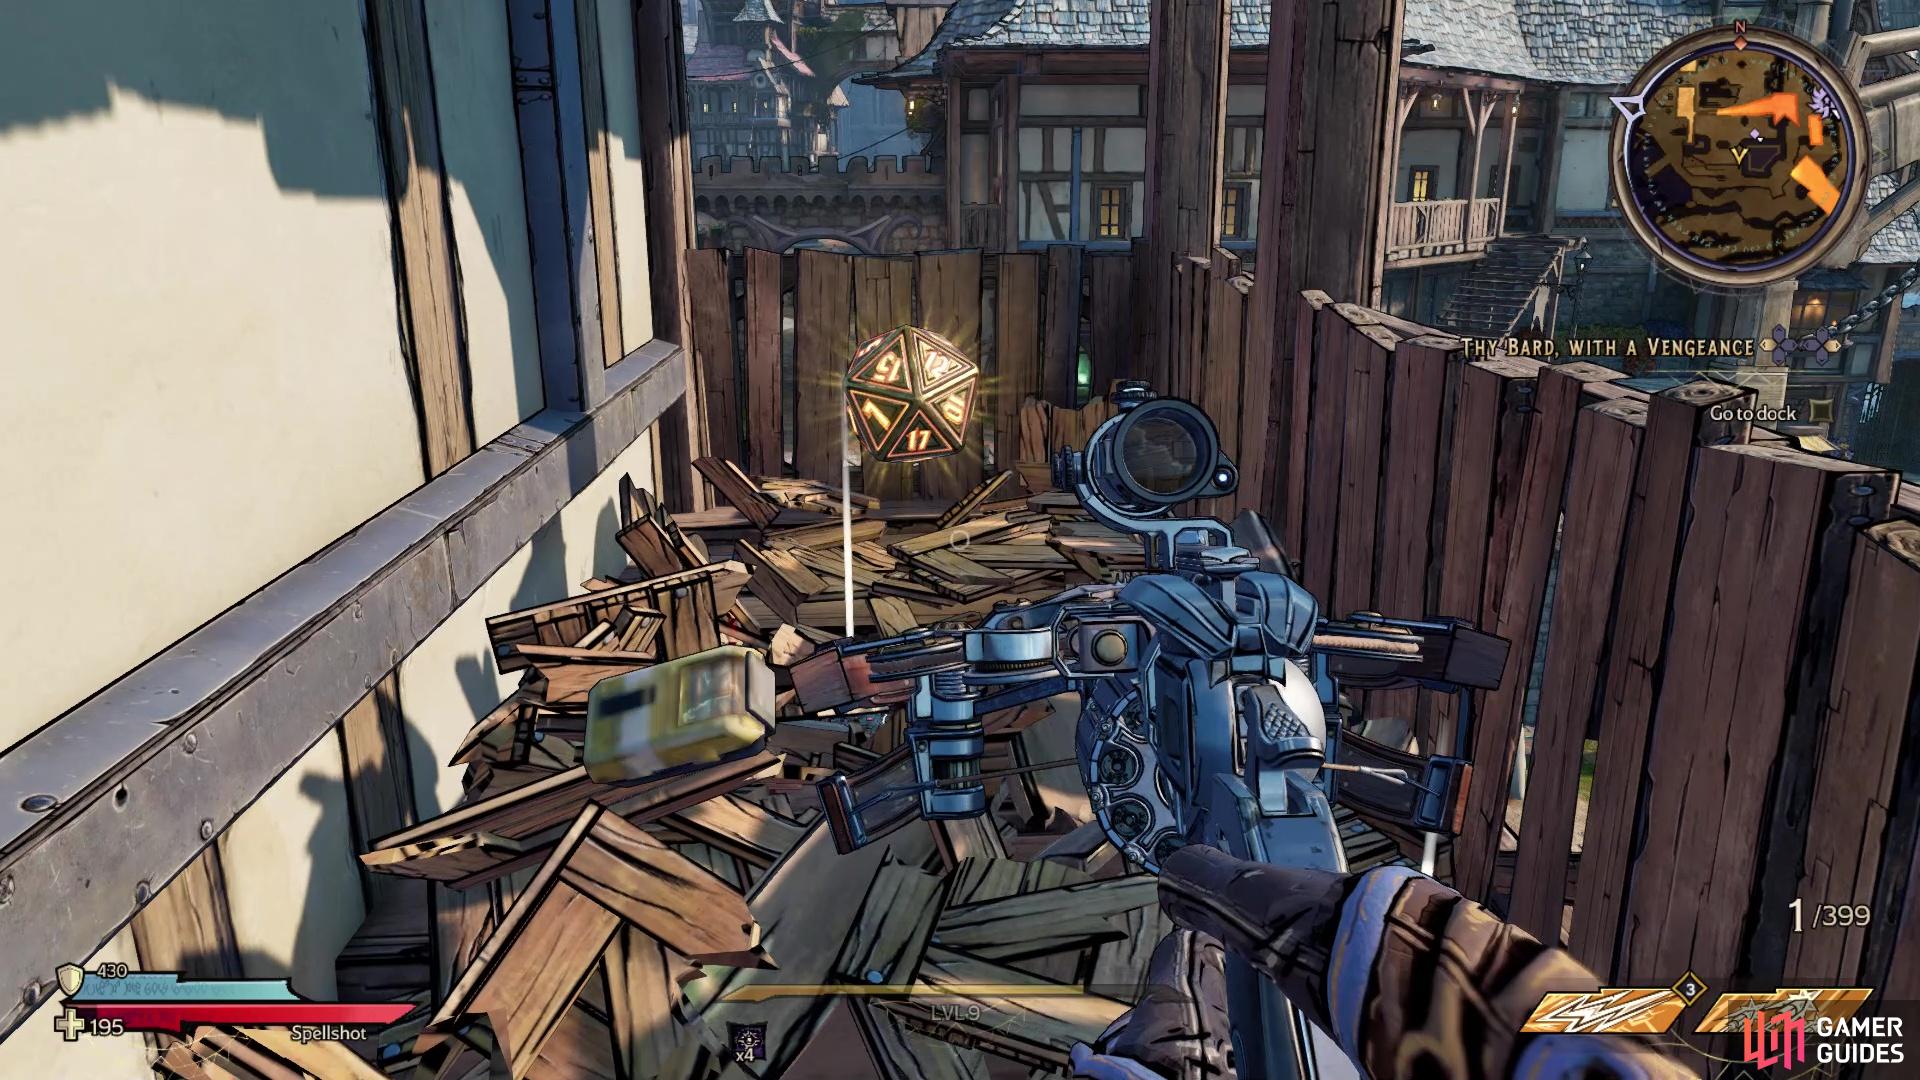
Lucky Dice #3 in the game
A little north of the previous Dice, on the map, you should see two docks sticking out, facing northwest-west. Take the stairs right next to them, then the next set of stairs, leading to a balcony. The Lucky Dice will be on the balcony.
Lucky Dice Location #4
As soon as you grab the previous one, go back down the stairs and head north to find a series of pipes. Next to the one pipe is some crates, so use them to climb onto the pipe. Climb onto the next pipe that curves upwards, then jump to the blue rooftop. At this point, you should see the Lucky Dice on the one pipe above you. Locate the other pipe connected to the rooftop and step foot on it. Turn around, then try to jump to the pipe with the Lucky Dice.
Lucky Dice Location #5
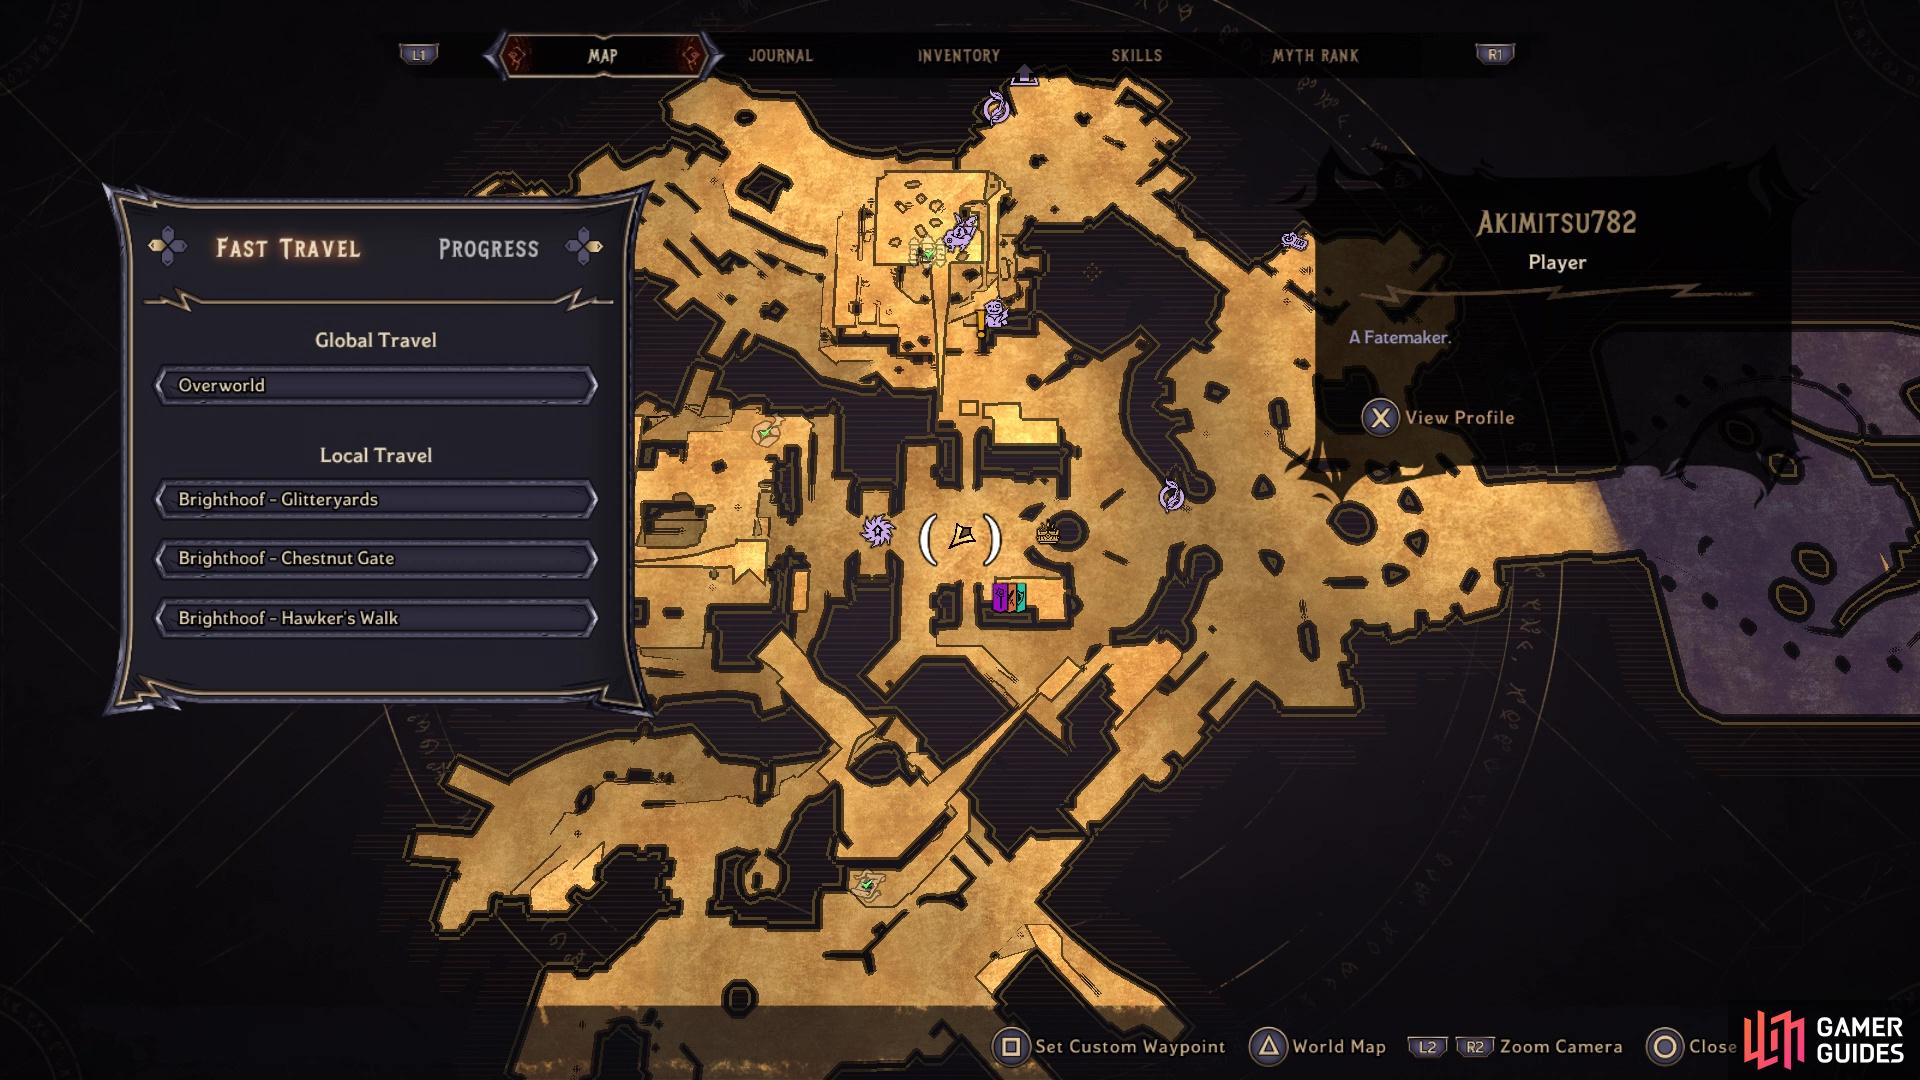
Lucky Dice #5 on the map
Lucky Dice #5 in the game
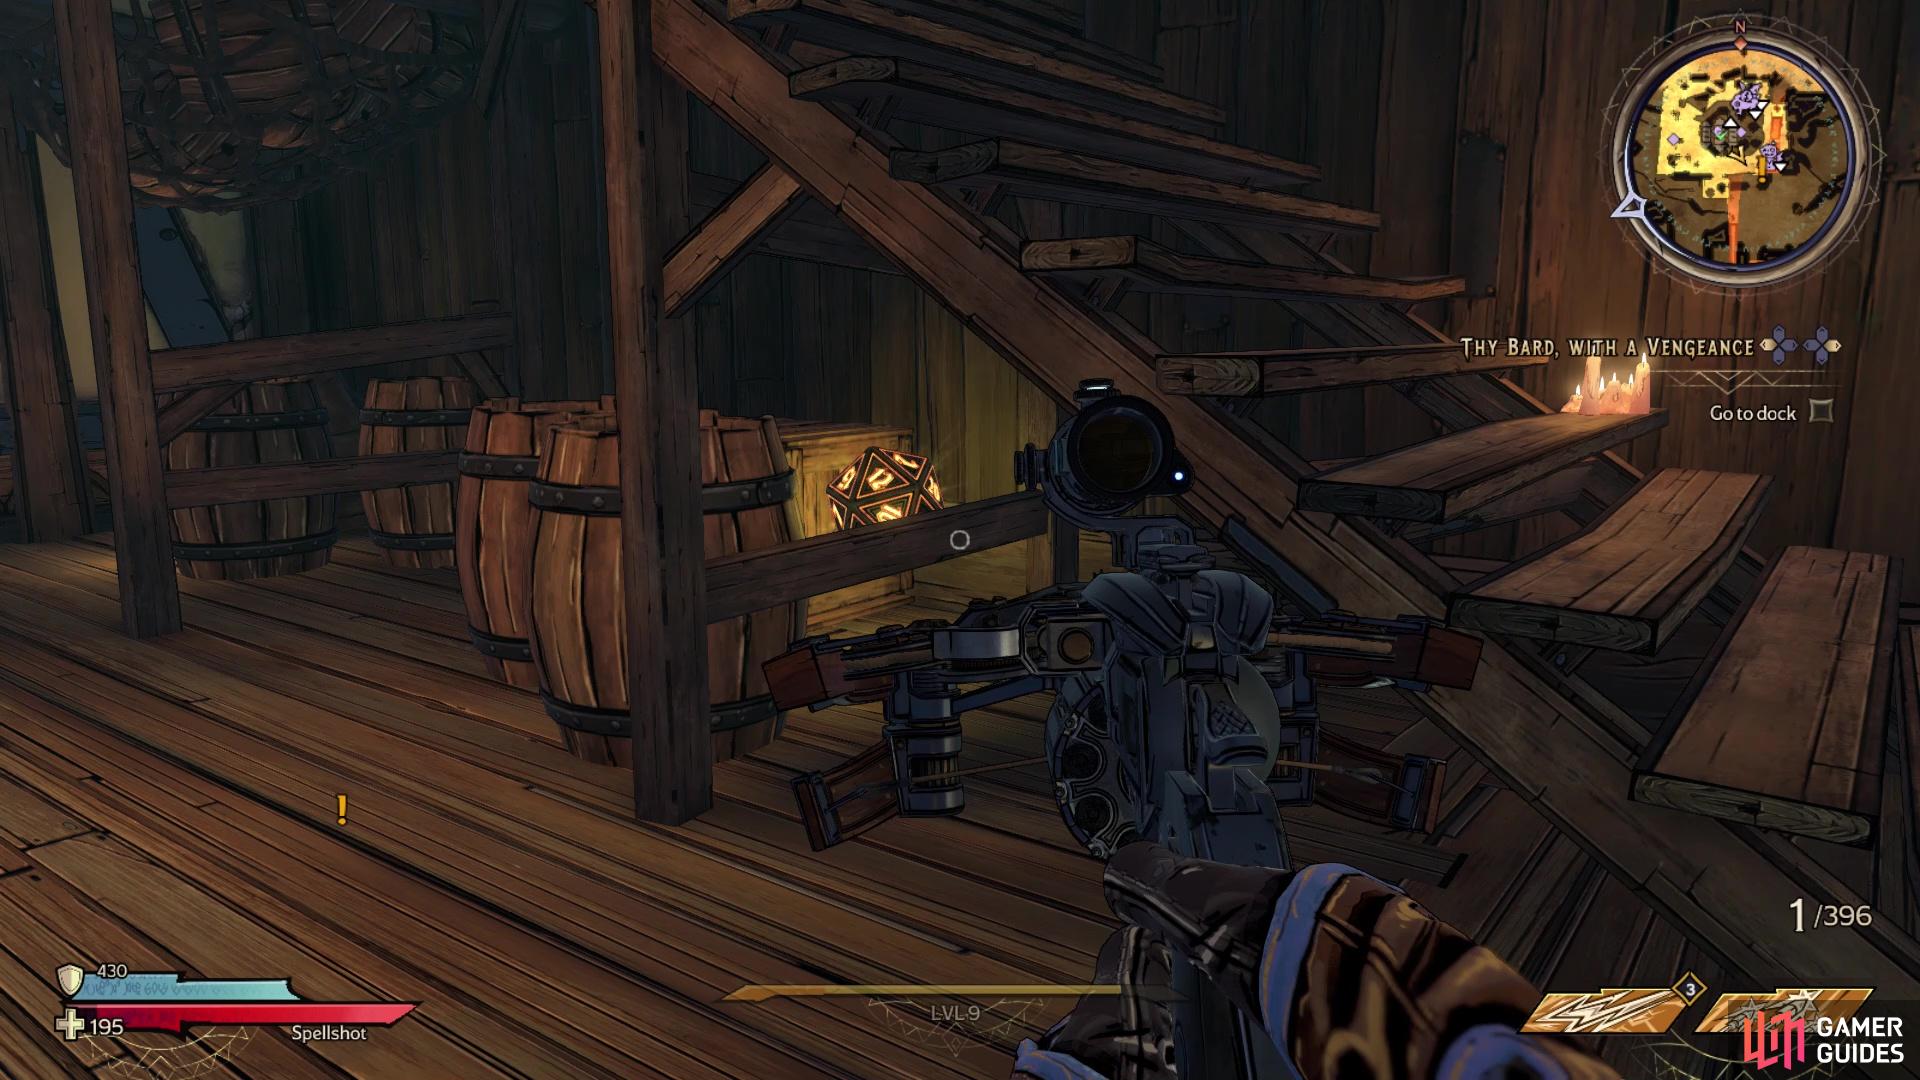
Jump down to the dock by the water, near the two sticking out mentioned above, and locate the little plank of wood sticking out to the other side to the north. Jump across here, then go up the nearby stairs. Look for two crates at the top of the stairs, which are covered with a cloth. Climb onto the crates, then look east to see a ledge you can grab. Get a running start and grab the ledge, then look behind the barrels/crates on the nearby balcony for the Lucky Dice.
Lucky Dice Location #6
The next Lucky Dice requires you to have completed Lyre and Brimstone and either be in the middle of Inner Daemons, or have completed that one, too. There is an area to the northeast of the Glitteryards fast travel that is blocked off by some gates. These gates will be opened during the Inner Daemons side quest, where you get to explore some coven area. Follow the trail downwards and before reaching the hallway intersection with the big statue, go west to find a loot chest in the corner. In that same little corner, there is a ladder that will bring you to the Lucky Dice.
Lucky Dice Location #7
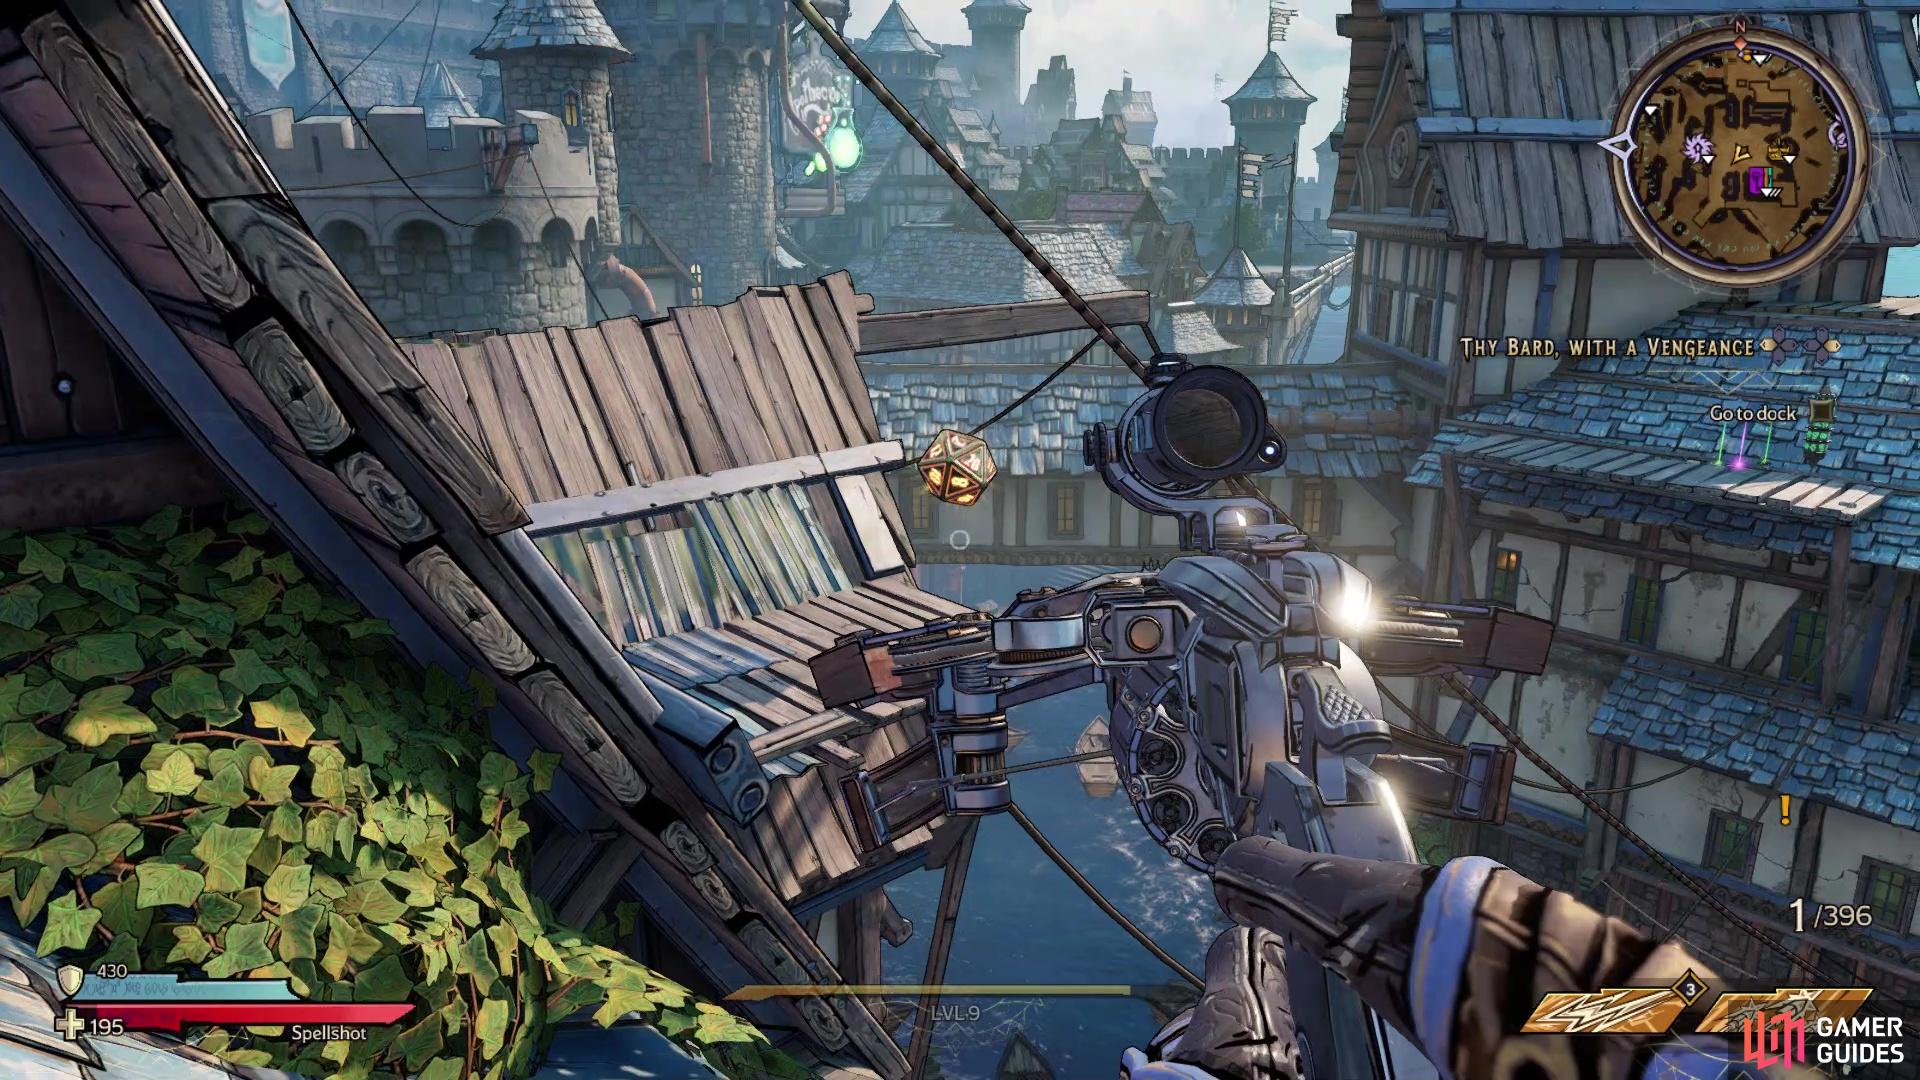
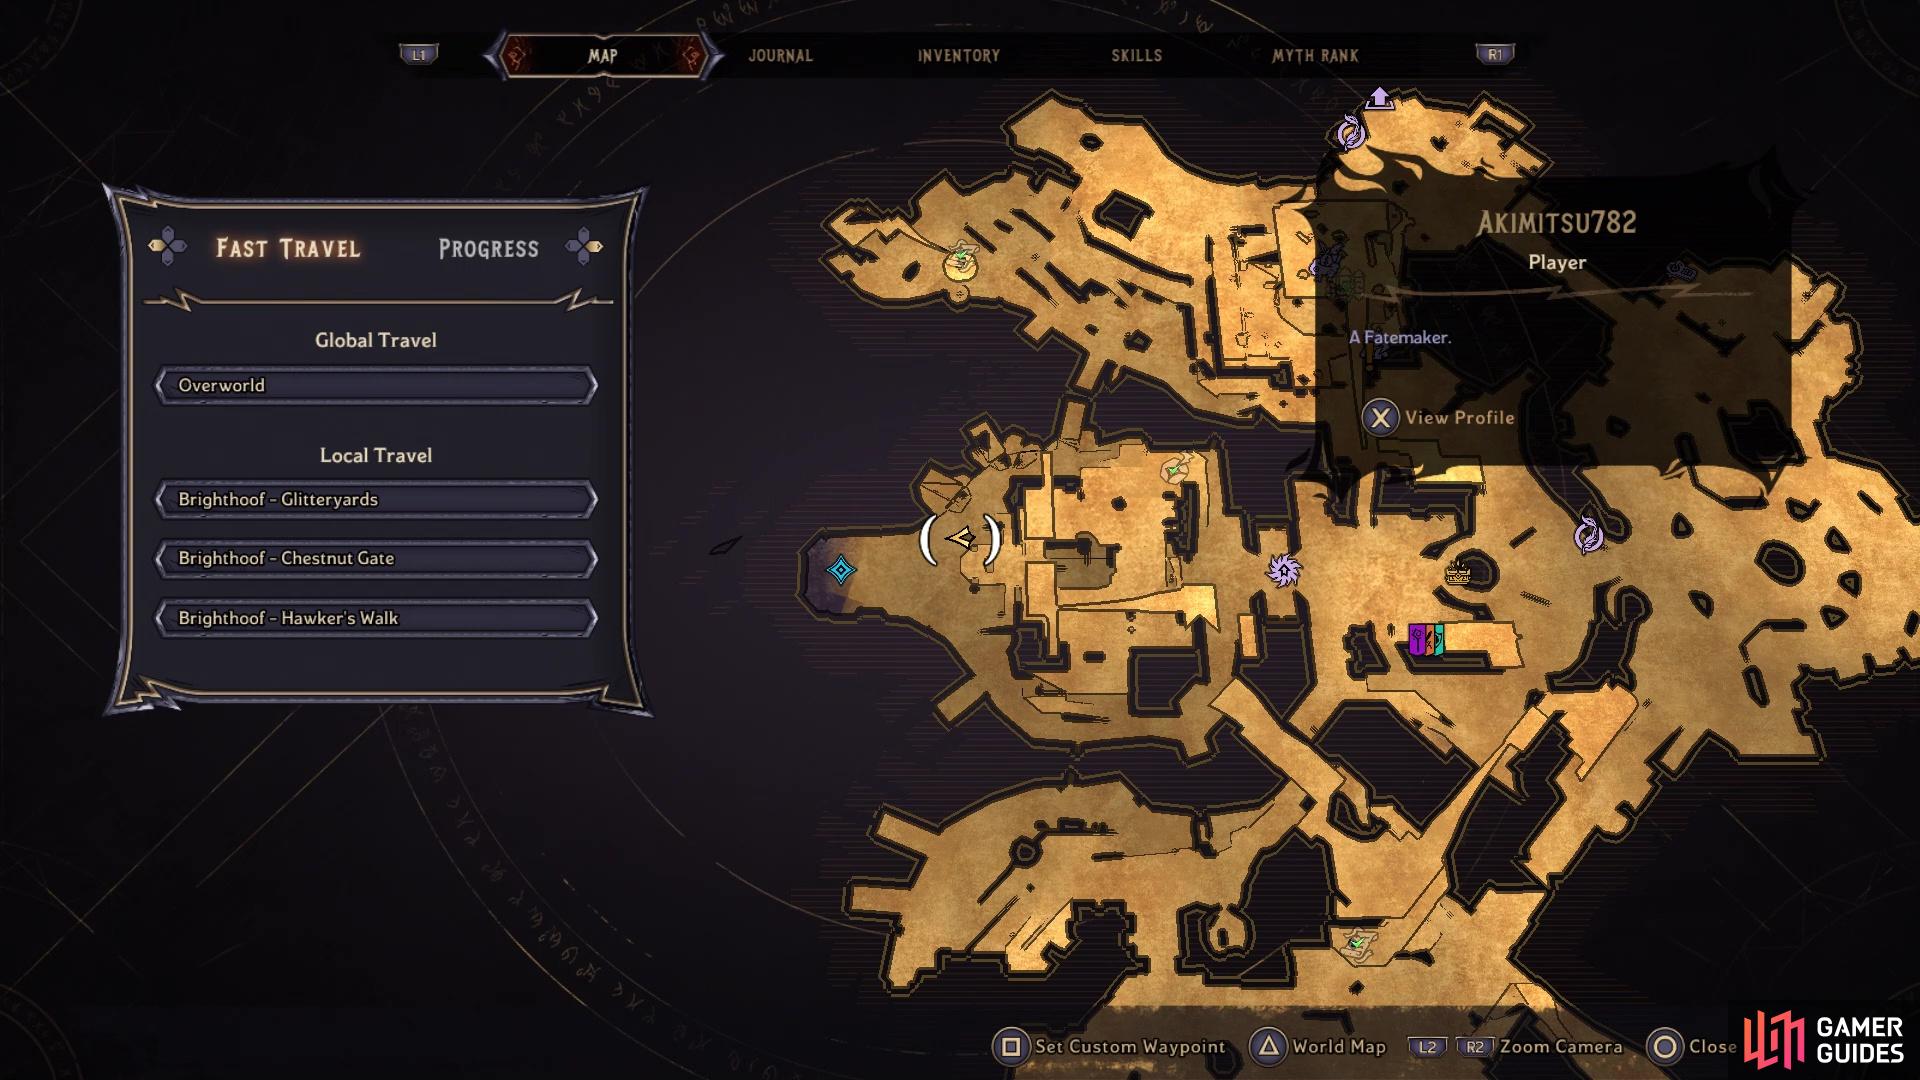
Go to the Hawker’s Walk fast travel point and not too far northwest from it will be a hammerhead shark hanging from a rope, right next to the water. Next to the hanging shark is a crate, so jump on top of it, then jump to the wooden ledge right above it. While on this ledge, turn around and you should notice a wooden beam sticking out of the building. You will be jumping to this beam, but you need a good running start. Once you make it, get onto the rooftop right next to it and you will find the Lucky Dice in a little alcove.
Lucky Dice Location #8
Lucky Dice #8 on the map
Lucky Dice #8 in the game
Take the western exit out of Izzy’s Fizzies and turn south to see a giant water wheel on a building. Go to the docks by the water’s edge just north of that water wheel. There should be some stairs nearby, which will eventually take you back to that western exit mentioned above. At the base of those stairs, you can go behind the crates to find the Lucky Dice.
Lucky Dice Location #9
Go to the Chestnut Gate fast travel point and just east of it will be some stairs. There will be a gate here and the Lucky Dice will be behind it, so you need to find a way to open the gate. At the bottom of the stairs are some targets, some big and some small. The smaller ones, slightly hidden a bit under the walkway, will be the ones you want. Shoot the three small targets to see them retract a bit, to open the gate and get the Lucky Dice.
Lucky Dice Location #10
Lucky Dice #10 on the map
Lucky Dice #10 in the game
Head inside Izzy’s Fizzies and find the stairs to the second floor. When you reach it, continue to the stairs to the third floor, but don’t go up them yet. Look underneath those stairs to find the Lucky Dice behind some crates/barrels.
Lucky Dice Location #11
Lucky Dice #11 on the map
Lucky Dice #11 in the game
From the previous location, climb the stairs and head to the roof of Izzy’s Fizzies. Once there, find the rope bridge leading south (right next to the Rune Switch puzzle) and jump onto the wooden platforms off to the side. Step on the purple jump pad and as you head south on this roof, cross over to the opposite side to see the Lucky Dice on a wooden ledge. Jump to it to easily reach it.
Lucky Dice Location #12
Lucky Dice #12 on the map
Lucky Dice #12 in the game
Stay on the rooftops from the previous location and cross back over to the initial side of the roof. Look south to see another rooftop below you and jump to it. From there, get a running start and jump to the ledge to your south, then cross the rope bridge there. As you round the corner and face northwest, there will be a wooden walkway leading you in that direction. Follow it, then hop over to the wooden platform to your north, then get on the rooftop. There will be one more rope bridge heading west here, so take it and you’ll see the Lucky Dice at the end of a wooden beam. Carefully make your way to it and grab it.
Lucky Dice Location #13
From Mane Square, head southwest and look for the big bridge that would eventually lead to the Wibblestern Well area of Brighthoof. On that bridge, you should see an area you can drop to below, where the water once was. Go southeast and look underneath the one dock to find a wooden ledge with the Lucky Dice.
Lucky Dice Location #14
Stay in the same area as the previous location and look at the dead end to the southeast. In between the rocks there will be the Lucky Dice.
Lucky Dice Location #15
Back at the Chestnut Gate fast travel station, locate the bridge to the southeast, but stop once you’re on it. There is an area where the water used to be below you and at the dead end will be this Lucky Dice.
Lucky Dice Location #16
If you head southwest from the previous spot, while staying on the bottom portion here, you will eventually find a sewer pipe that has a broken grate. Go inside the pipe and at the end will be the Lucky Dice.
Lucky Dice Location #17
West of the Skeleton Key chest is the portal that spawns whenever you fast travel to Brighthoof from the map. Northwest of that portal will be some docks and there is a lone cannon on one of these docks. If you follow the fuse from the cannon, you see if goes underneath that dock and leads to a small explosive barrel. Shoot the barrel to light the fuse, causing the cannon to shoot and open up a hole in a nearby wall. Some enemies will emerge from that spot, so clear them out and look inside to find the Lucky Dice.
Lucky Dice Location #18
Head to the southwest corner of the ocean floor, once it’s drained. This will be southeast of the Harborside fast travel station. If you come from there, you will need to find a way to climb to the upper area, although you could drop down from above. The Lucky Dice will be in the southwest corner.
Lucky Dice Location #19
Go to the Harborside fast travel station and look near it to find a wrecked ship. In the wreckage of that ship will be the Lucky Dice.
Lucky Dice Location #20
The final Lucky Dice in Brighthoof cannot be gotten until you complete the main story. After that is done, there will be a short Epilogue that introduces a few things, one of which is Queen Butt Stallion’s castle being open. In the courtyard of the castle, on the southern side, you will find the Lucky Dice between some bushes.
No Comments