| Optional Objective/s |
|---|
| N/A - There are no optional objective/s in this memory. |
| Reward/s | . | . | . |
|---|---|---|---|
| Money: | 2,000 £ | Bonus: | N/A. |
| XP: | 1,000 XP | Bonus: | N/A. |
| Gear: | Brass Knuckles: Engraved Knuckles |
Part 1: Cashan’s Room Investigation
This memory begins in an alleyway between two sets of buildings along the eastern side of The Strand borough. After speaking with the fellow here to initiate the memory, make your way over to the nearby open building and climb to the top floor until you reach the Cashan’s Room marker. In the search area you’ll find the body on the bed. Inspect it.
After checking the body over, an additional nine clues will be activated in the room for us to find. Activate Eagle Vision to have them appear highlighted in gold to make things easier. You’ll want to inspect the following:
- Candles – On the foot of the bed.
- Editor’s Letter – On the desk next to the bed.
- Gas Lamp – Mounted on the wall to the left of the bed and over the desk.
- Air Vent – On the left hand wall of the room, opposite the window.
- Window – On the right hand side of the room, near the foot of the bed.
- Anonymous Letter – On the desk next to the window.
- Review – On the desk in the corner between the clock and the door.
- Door – The door leading in and out of the room.
- Concert Program – a small note on the filing cabinet next to the door.
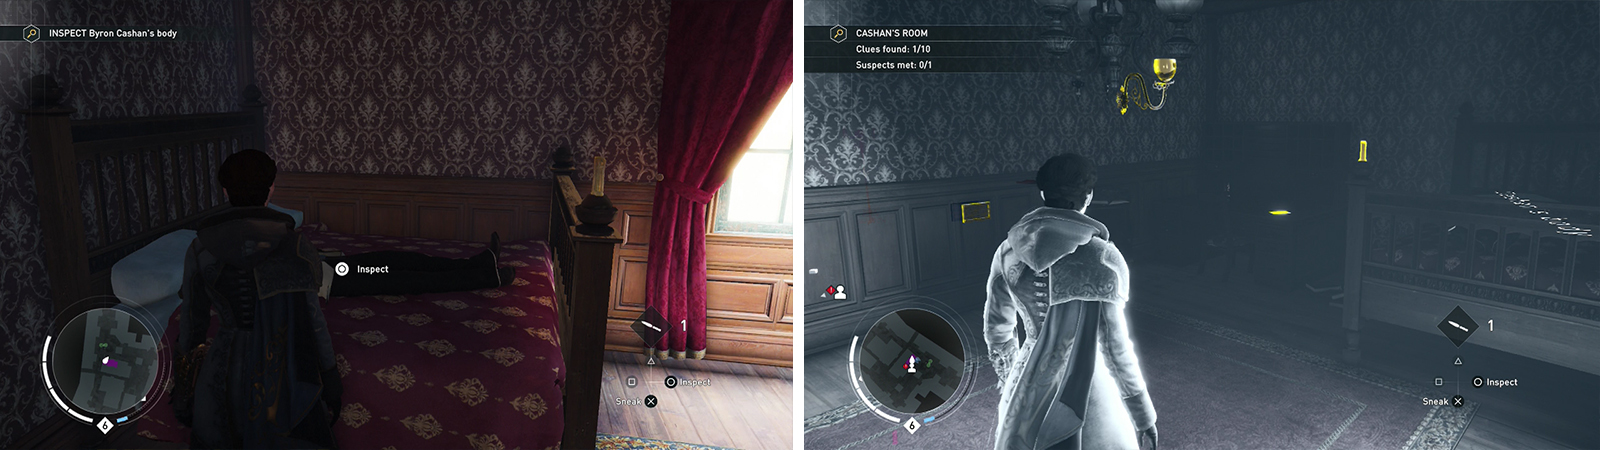
Investigate the body (left) before looting the nearby clues (right).
Speak with Mrs. Henman standing just outside the room (we’ll want to ask her about: Cashan, Last Night, Concert Program). Finding all of the clues and completing this conversation will unlock two additional search areas to examine – Bloomfield’s Room and Henman’s Room. Both of these are located inside the same building so we won’t have too far to travel.
Bloomfield’s room is right next door to Cashan’s Room, so let’s investigate that first.
Part 2: Bloomfield’s Room investigation
The Bloomfield’s Room investigation zone includes a pair of suspects, Mr. and Mrs. Bloomfield, whom we can speak with (although we’ll do that after finding the clues of course) and also features another six clues which we’ll need to discover. Again, activate Eagle Vision to make this task easier. You’ll want to inspect the following:
- Key – On the table just inside the door.
- Gas Lamp – Mounted on the right hand wall of the room opposite the window.
- Air Vent – On the right hand wall of the room, opposite the window.
- Candelabra – along the left hand wall near Mrs. Bloomfield.
- Newspaper – On the desk at the far end of the room.
- Sheet Music – On the desk at the far end of the room.
With all of those clues, it’s now time to speak with the nearby suspects. Speak to Mrs. Bloomfield (Ask about: Cashan, Last night, Candles) and then Mr. Bloomfield (inquire about: Cashan, Last Night and then Experiments). Completing this investigation will unlock yet another investigation area – the Basement.
Exit the room and speak to Mrs. Henaman by Cashan’s Room once again (ask about: Cashan again). This will unlock another search zone – Golden’s Room.
Part 3: Golden’s Room Investigation
Golden’s Room can be found down the next flight of stairs and the search area here has another suspect, Mr. Golden whom we can speak with and also has another seven clues scattered about which we’ll need to find. Again, activate Eagle Vision to make this task easier. You’ll want to inspect the following:
- Clothing – Examine the cloak/hat rack just inside the door.
- Sheet Music – On the desk just inside the door and to the left.
- Gas Lamp – On the right hand wall of the room.
- Candle – Sitting on the mantle above the fireplace on the right hand wall.
- Shavings – On the table by the window in the back right corner from the entrance.
- Box of Candles – On the floor by the windows.
- Violin String Box – On the desk behind Mr. Golden.
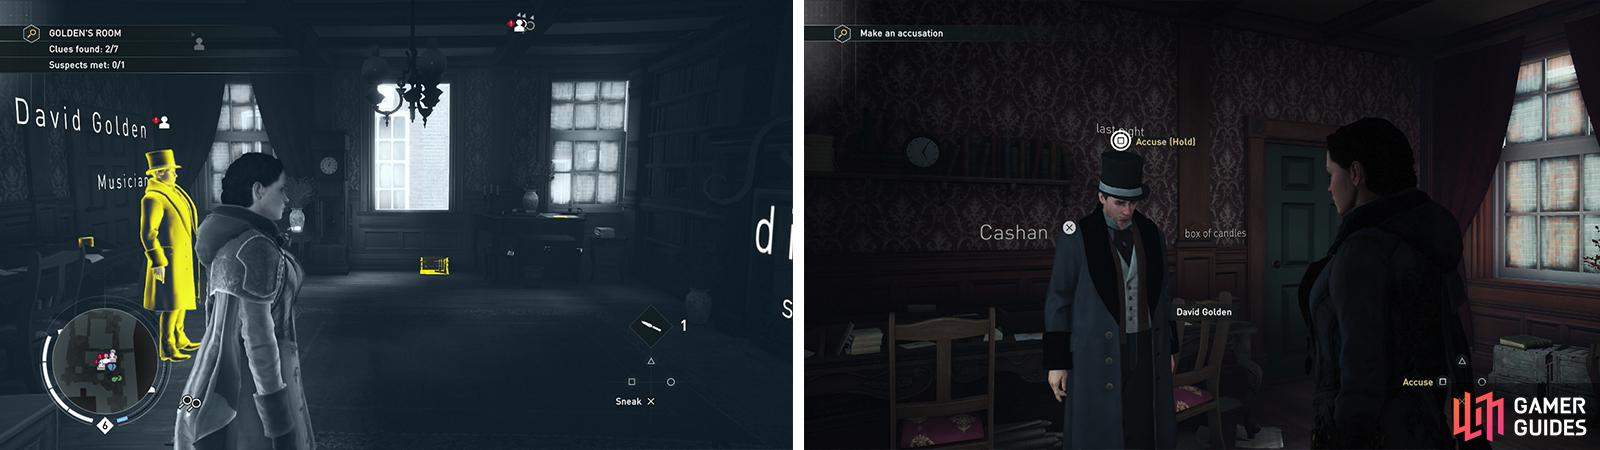
Loot the clues in the Golden’s Room (left) and then chat with the suspect (right).
After acquiring all seven clues, move over to speak with Mr. Golden (we’ll want to talk about: Cashan, Last Night, Box of Candles). With the interrogation out of the way, we’ll need to move onto the next search area, the closest remaining is the Basement so make your way there.
Part 4: Basement Investigation
There are another three clues to find at the Basement and no new suspects, so it’s just a matter of dialogue-free investigating. Activate the Eagle Vision ability to locate the clues. Inspect the following:
- Gas Tank – Against the wall just to the right of the entryway.
- Chemistry Equipment – The large table and lab setup to the left of the entrance.
- Chemical – Examine the bottle on the table opposite the entrance.
Once you have found all three clues, head next door to enter the Henman’s Room investigation zone.
The Basement (left) and Henman’s Room (right) are the final two search areas - be sure to grab all the clues!
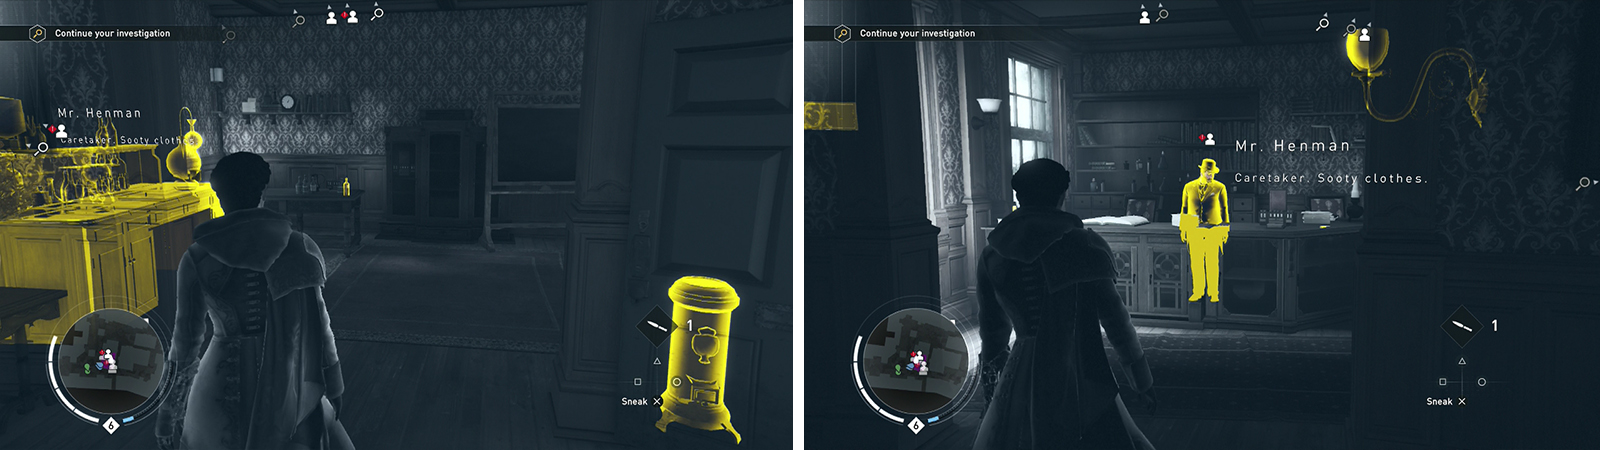
Part 5: Henman’s Room Investigation
The Henman’s Room investigation zone includes another new suspects, Mr. Henman and also houses another four clues which we’ll have to locate. As per usual, activate Eagle Vision to make this task easier. You’ll want to inspect the following:
- Gas Lamp – Mounted on the wall to the right of the entrance.
- Key Holder – Mounted on the wall to the left of the entrance.
- Candles – On the desk near the windows.
- Screwdriver – On the opposite end of the desk from the windows.
After acquiring all of the items of interest walk up and begin your interrogation of Mr. Henman (you’ll want to talk about: Cashan, Clothes, Screwdriver and then Gasline).
Now that we have all the clues in the case all wrapped up, it’s time to re-speak with a few of our suspects for a little additional information. We can speak with Mr. Bloomfield (ask about: Chemical, Sheet Music, Cashan and then Bon Vivant).
At this point you’ll have all the clues at your disposal and will be able to choose and accuse one of the persons of interest. The answer is Mr. Golden in Golden’s Room.
Once you have accused correctly, the memory will be complete.
No Comments