S-Rank Targets
| **Time** | **Deaths** | **Spotted** |
|---|---|---|
| 55 seconds | 0 | 0 |
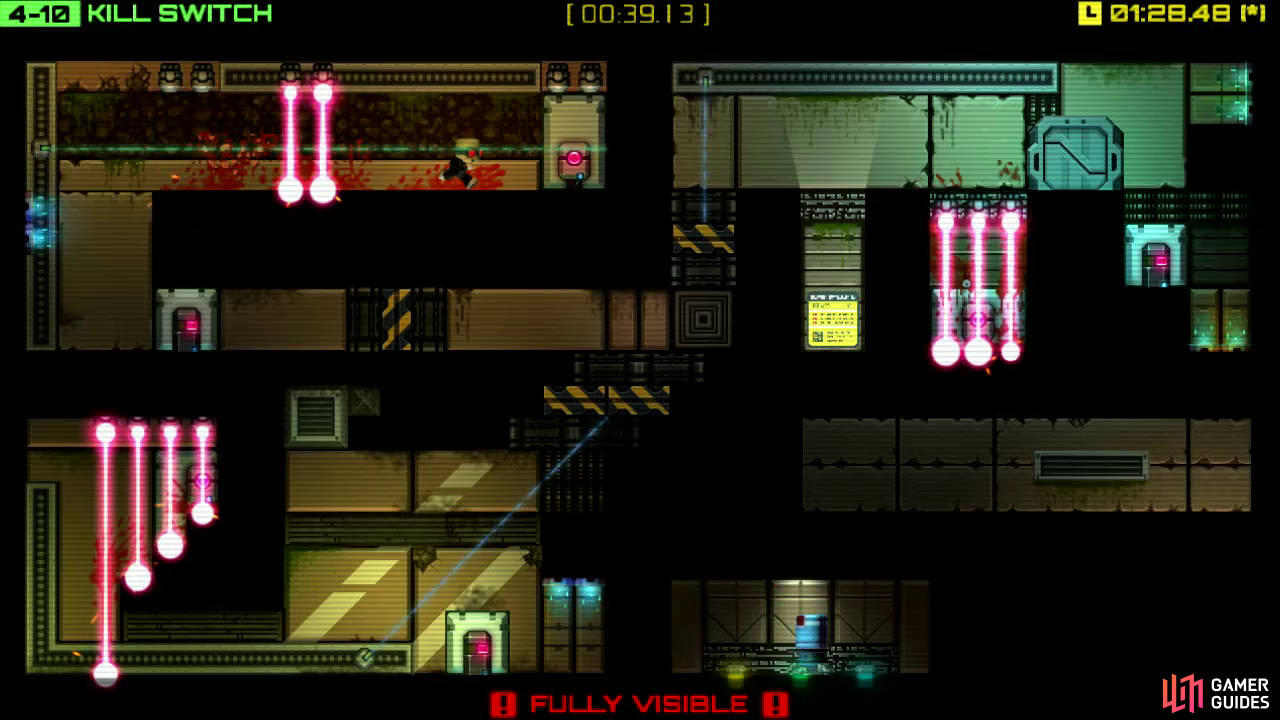
Step 1
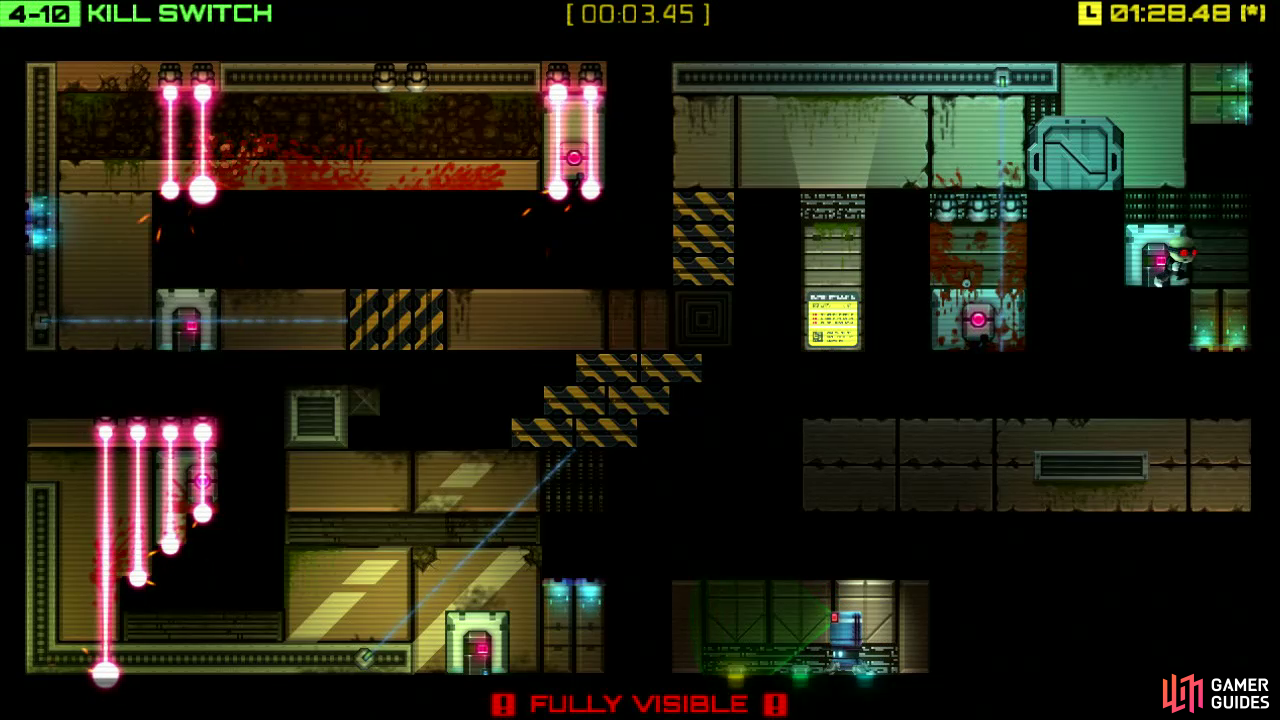
Drop down to the switch to your right and hit it once the sensor beam has just passed the red switch in the laser-packed pit to your left (the walking robot will briefly stand on the switch turning off the lasers helping you to position the sensor beam more easily).
Step 2
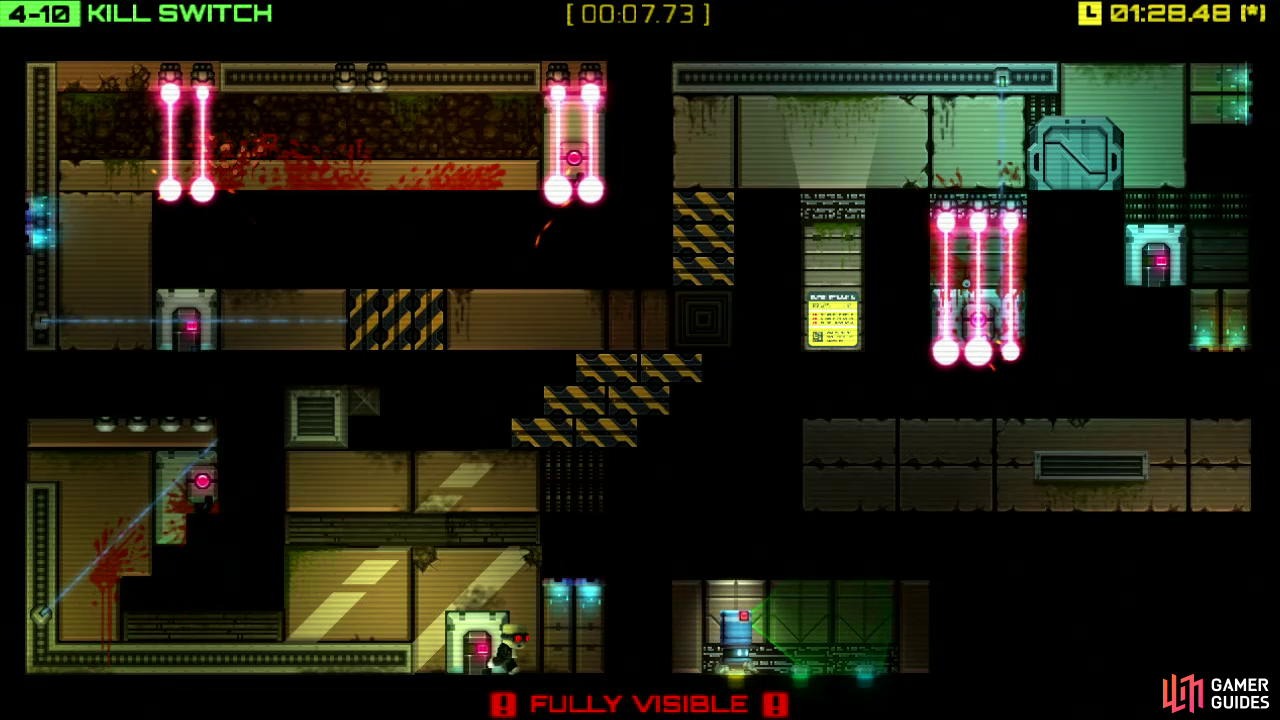
From here, drop down and then hit the next switch to start the second sensor beam. Once it reaches the top of the red switch in the bottom-left corner, stop it. Now very quickly jump back up through the teleporter and drop down into the pit by the entrance.
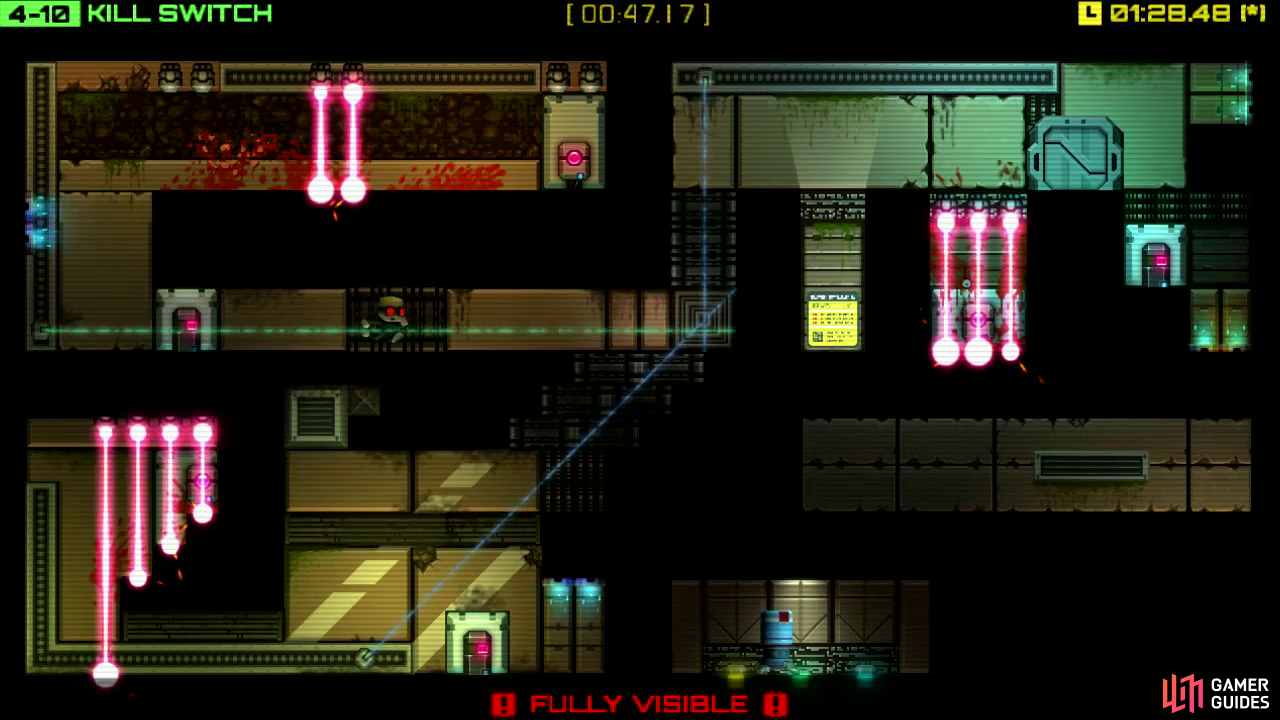
Step 3
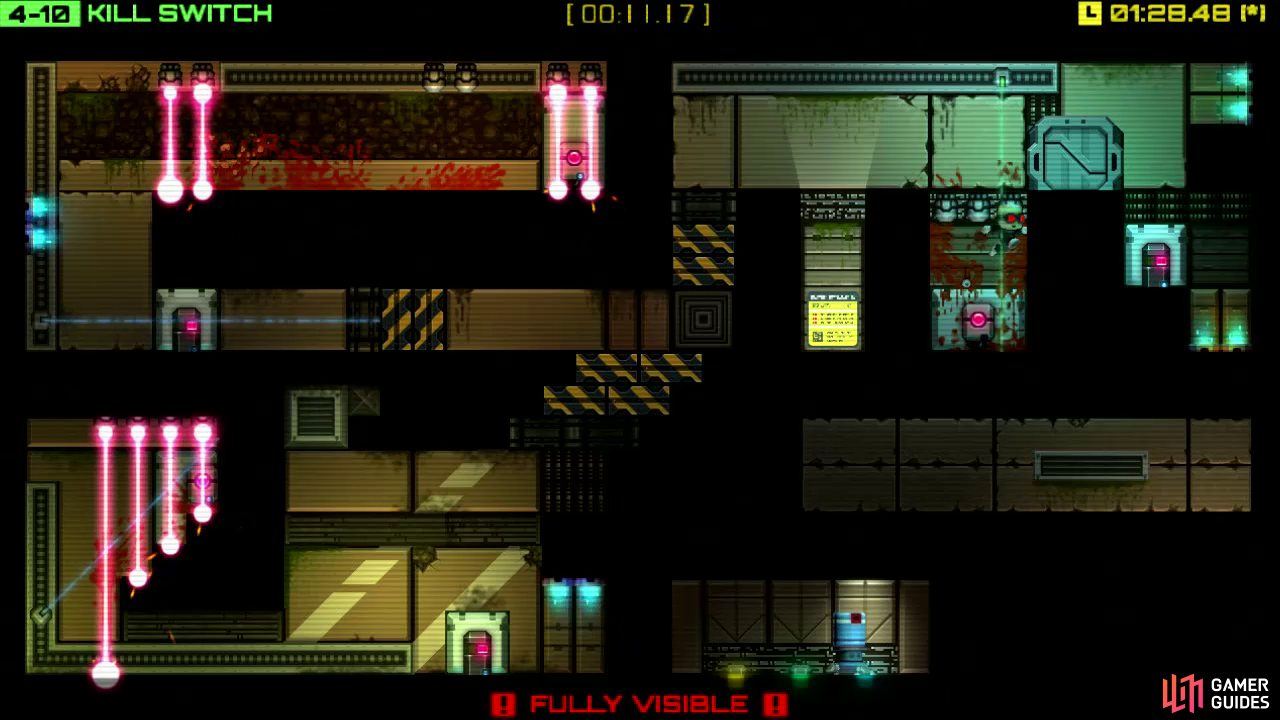
You can hit the switch and stay in the sensor (preventing the lasers from coming back on), so hit it, jump back out to the entrance and then hit the switch one more time. Stop the sensor beam once it passes over the central square block below.
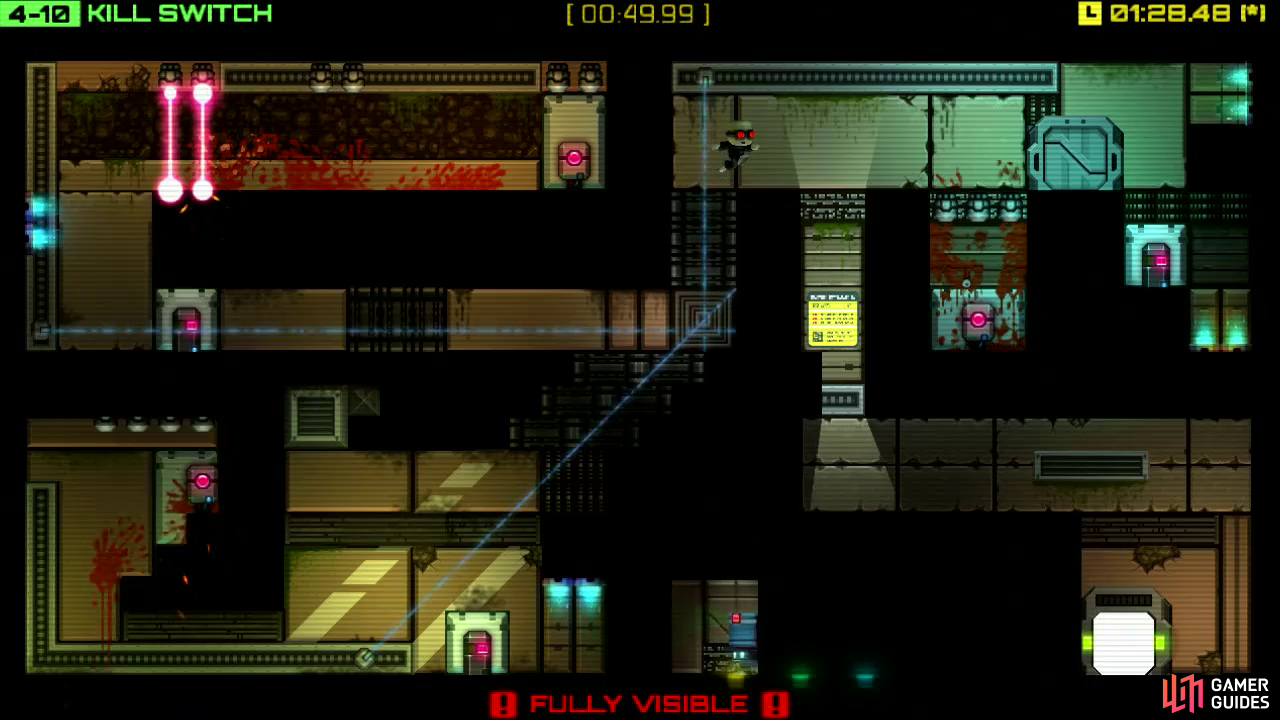
Step 4
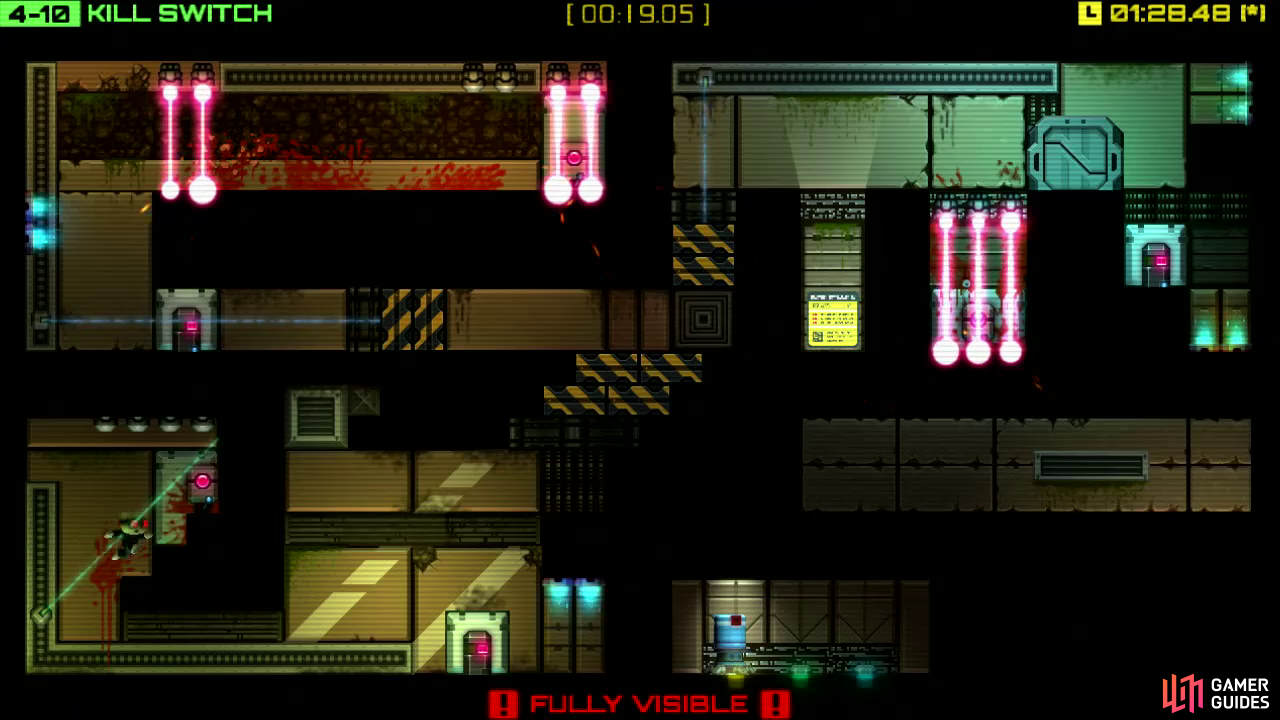
Quickly drop back down to the lower floor and make a dash for the sensor beam parked on the right by the steps. Perform short hops up the steps; now hit the red button, run back down the steps and head over to the sensor switch. Turn it back on and wait for it to line up with the central square block up above you.
Step 5
Leap back up to the entrance, hop through the right-hand teleporter this time, flick the switch to move the sensor back north and stop it once it’s just under the top of the red switch up there. Standing in the sensor will stop the robot from walking and keep the vertical lasers on.
So once you’re close to the vertical lasers, duck down to let them pass by you and stay ducked until the robot passes over the switch that disables the lasers protecting the red button. Once the lasers go off, stand back up to keep the robot still, hit the button then repeat this ducking and running until you make it back down to the switch below.
Step 6
Activate the switch and stop the sensor as it hits the central block directly to your right (where the previous two sensor beams should now also be hitting). If you still need the [Helix] , then we suggest you grab it now before making a beeline for the exit.
$$$item 3276
Step 7
Make your way to the yellow rectangular poster in the middle of the room and this will open up the pathway to the exit below. That’s us exactly half-way done with all the main levels. Congrats!
No Comments