
It’s not a Pokemon Gym, but it’s just as tough!
Pokémon Encounters - Verdant Cavern
| Name | Types(s) | Location (Encounter Rate) |
|---|---|---|
 Zubat Zubat |
Poison/Flying | In the cave itself (70%) |
 Diglett* Diglett* |
Ground/Steel | In the cave itself (30%) |
 Rattata* Rattata* |
Dark/Normal | Darting out of dens (100%, Moon only) |
 Yungoos Yungoos |
Normal | Darting out of dens (100%, Sun only) |
*** indicates Alolan form.**
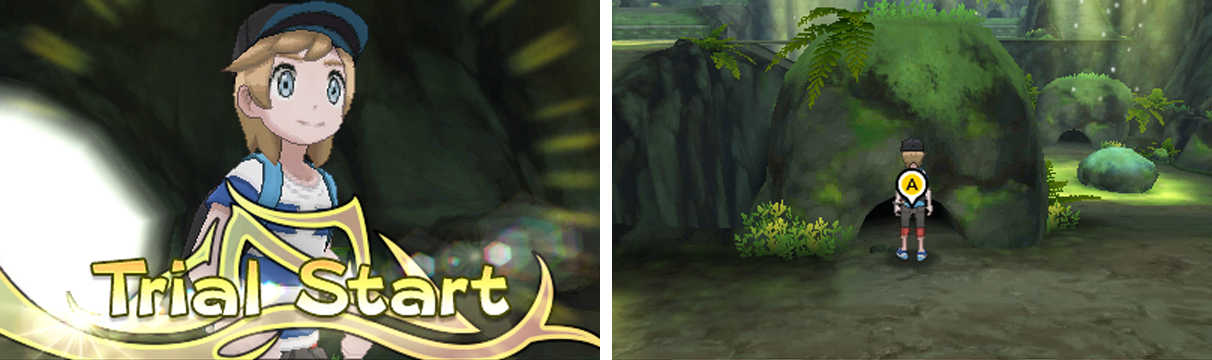
Here goes! It’s your first island trial and the first real test of your capabilities as Pokemon trainer. No pressure there then.
As Ilima explains, your task is to defeat the three Pokemon hiding in their dens–the tiny little holes along the cavern wall–and then retrieve the Z-Crystal in the furthest section of the cavern. You will also have to face off against the cavern’s powerful guardian–the Totem Pokemon.
Alright, enough idling; time to get started. From the entrance, you should notice a TM up ahead and to the left that’s currently out of reach. For now, head in a north-easterly direction towards the first den, where you saw a Pokemon hiding during Ilima’s explanation.
Get up real close and press the A button to take a peek inside. Well, what do you know? There’s an angry Pokemon inside! If you’re playing Pokemon Sun, you’ll encounter a wild Yungoos, while those of you with Pokemon Moon will find a wild Rattata instead.
Either way, you shouldn’t break a sweat if you have well-trained Pokemon, especially a Fighting-type such as  Machop,
  Makuhita or
  Crabrawler. One down, two more to go. From your current location, head east and pick up the Super Potion lurking in the corner.
Next, hurry north towards the boulder being illuminated by the light from above. Carefully search the south side of it to discover a hidden Revive . After that, go around the boulder towards the small den just ahead. Before you reach it, the den-dweller will come out and ambush you!
Again, it’s still a Yungoos or Rattata, so nothing to fear. Moving on, head west from this second den, up the narrow slope and to the higher level. When you reach the part of the floor illuminated by the light, slowly head south. Just before the ledge back to the entrance, pick up TM31 Brick Break .
If you didn’t bring a Fighting-type Pokemon for some reason, you may be in luck. See if any of your party Pokemon can learn this TM, which also has the property of breaking Light Screen, Reflect and similar barrier-like moves. If none of them can learn it, too bad.
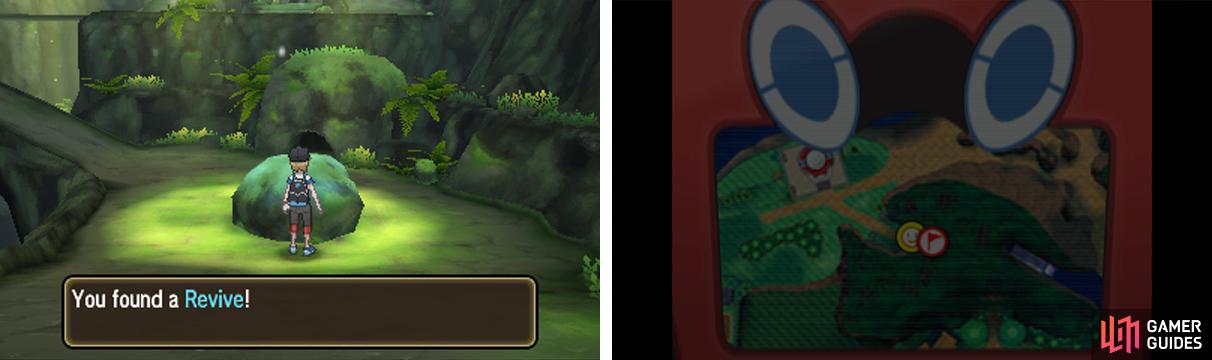
You won’t be able to buy Revives until later on, so any are useful.
Return to the illuminated floor and, this time, head north. When you reach the ledge wall ahead, turn right and cautiously cross the narrow plank bridge to the other side of the cavern. You’ll reach another area illuminated by light. From here, continue east, then go up the slope at the end.
When you reach the top, press the A button near the small gap in the wall to crawl through it to the other side. There, pick up the Super Potion on the floor and hop over the ledge to the left. You’ll land right next to the third small den; as before, go close to it and give it a thorough inspection.
Sneaky! The Pokemon dwelling inside has already escaped. Follow it by hopping over the ledge to the south, then continue south to return to the illuminated part of the floor. After that, head north up the slope west from the empty den. At the top, you’ll bask in the light from above once more.
Before the Pokemon escapes again, hurry and inspect the fourth den immediately to the right. Oh dear, too late again? No problemo. Make your way, towards the exit currently guarded by a trial guide. From his position, carry on south-west, hopping over the ledge along the way.
It can be a bit hard to see, but there’s a small den–the last one–along the north-western side of the cavern wall. Just below it is a X Defence . After pocketing your find, check out the small den to see if you made it in time. Drat! It’s gone back to the first empty den!
Don’t worry, you’re getting warmer. Head south and hop over the ledge to return to the part just before crossing the narrow plank bridge. Cross the bridge against to get back to the eastern side. Before you reach the other side, a pair of no-gooders will come to mess up your trial.
Team Skull Grunt
| Pokemon | Level | Type |
|---|---|---|
 Drowzee Drowzee |
11 | Psychic |
Same strategy as your previous battle in the Berry Fields. Swap out any Fighting-types and use Dark-types if you have them. Steel-types (just  Magnemite for now) will fare OK as well.
Having failed to stop you in a Pokemon battle, the Grunts decide to block off the fourth and fifth dens. Hang on… doesn’t that mean? Before the Grunts figure out their idiocy, head east and crawl through the gap at the top of the slope to return to the fourth den.
This time, make sure your Pokemon are ready, as there’s nowhere for the den’s resident to run! You’ll face a wild  Gumshoos if playing on Pokemon Sun or a wild
  Raticate if playing on Pokemon Moon. Although it’s an evolved Pokemon, it’s not particularly tough.
Succeed in defeating the three den dwellers and you’ll be allowed access to the inner-most part of the cavern. Jump over the ledge to the south and climb the slope to the left to reach the cavern exit, where the trial guide was standing. Approach him and he’ll step aside.
Totems Den
If it wasn’t obvious, this is the lair of Verdant Cavern’s fearsome Totem Pokemon. From the entrance, run up ahead towards the pedestal containing the Z-Crystal. When you’re ready, go up close to it and inspect it. Pull out the Z-Crystal and you’ll be thrust into battle.
Totem Pokemon

As with the Pokemon found in the small dens, the Totem Pokemon you face differs depending on which Pokemon game you’re playing. The general mechanics are still the same, although Moon players have it slightly easier.
When the battle starts, the Totem Pokemon will be surrounded by an aura that boosts its Defence stat by 1 stage. This obviously means your physical moves will do slightly less damage. Every now and then, when it’s alone, the Totem Pokemon may summon an ally Pokemon.
When this occurs, you’ll have to fight both the Totem Pokemon and the ally Pokemon (Yungoos or Rattata) simultaneously, like a Double Battle but you only have one Pokemon. Needless to say, being ganged up on isn’t good, since your lone Pokemon will take up to attacks per turn.
To avoid this being a battle of attrition, you should ideally focus on eliminating the Totem Pokemon ASAP. As with the other Pokemon in the cavern, Fighting-type moves are best. Raticate and Rattata in particular will be shuddering as they’re 4x weak to Fighting.
Another thing you can do, if you’re using the traded Machop is to have the little fella use Focus Energy to boost his critical rate ratio, then let loose a flurry of Karate Chops. Karate Chop already has a high critical rate, which is further boosted by Focus Energy.
Besides dealing more damage than usual, critical hits also bypass the opponent’s stat boosts, which includes the Defence boost from the Totem Pokemon’s aura. By the way, if you defeat the Totem and there’s an ally left, you still need to mop up the ally to clear the battle.
Triumph against the Totem Pokemon and you’ll formally receive the Z-Crystal Normalium Z from Captain Ilima. That also means you’ve successfully passed your first island trial. A hearty congratulations is in order!
Now that the trial is over, you’ll be allowed to capture any of the Pokemon in the cavern. In addition, Ilima will kindly hand you 10 Great Balls and heal your party. By the way, Pokemon will start freely roaming the Verdant Cavern, not just near the dens.
Anyway, to exit the cavern, head south while keeping to the west. You’ll hop over a bunch of ledges before reaching the entrance. Along the way, you’ll probably bump into wild Pokemon, including those of the pouncing variety.
Post-Trial Explanations
Status moves have enhanced effects if used as a Z-Move.
Outside, approach Ilima and he’ll explain the purpose of the captains’ barricades that you may have seen earlier. With Ilima’s trial conquered, the barricade further north will be removed, allowing you to pass to Route 3.
While this is happening, Kukui will arrive on the scene and teach you about Z-Moves. First, you need to give your Pokemon a Z-Crystal as a held item. However, a Pokemon can only hold a Z-Crystal if it currently has a move of the same type. For Normalium Z, you need a Normal-type move.
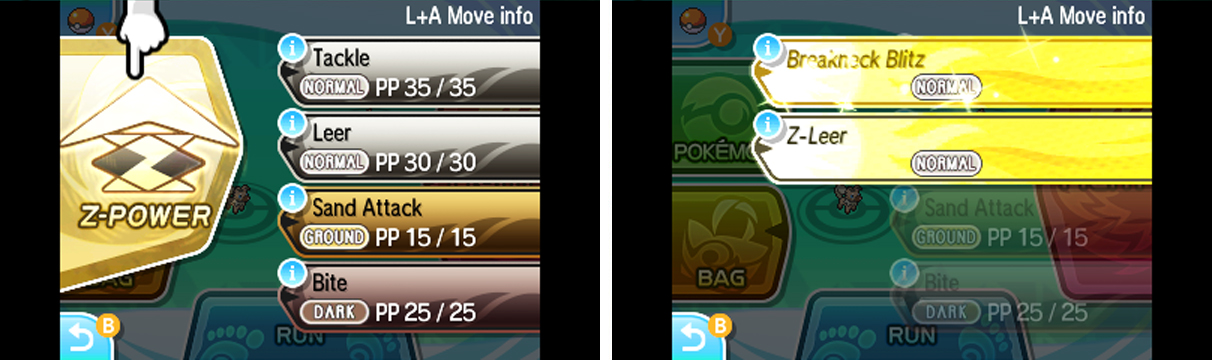
Then during battle, while selecting your Pokemon’s moves, select or tap the big “Z-Power” icon along the left of the bottom screen. This will transform all applicable moves into a powerful Z-Move. The stronger the original move, the stronger the Z-Move.
Finally, each battle, you may only use one Z-Move full stop. This applies for all of your Pokemon. For prolonged battles, be sure to use your Z-Move wisely. By the way, Z-Moves can inflict some damage to Pokemon using Protect etc. Status moves have Z-Move versions as well.
Once the lesson is over, Kukui remembers that… he’s forgotten where Lillie is. Oops. You’d better head on north to Route 3 to see if she’s there. Hint: she is.
No Comments