
Breeding perfect Pokemon takes time, but it’s hugely satisfying!
For those seeking to dive into the competitive battling scene, or those who wish to conquer the Battle Tree and Battle Royale, or those looking for something new to try… or those who want perfect Pokemon just for the sake of having them… Breeding is an absolute must-have tool to add to your arsenal.
Any Pokemon that can be bred should be bred if you are seeking absolute perfection. This section will arm you with everything you need to know about breeding from start to finish and will also provide an example breeding project that will walk you through the steps…and even cap off with EV training as the finisher!
Before you dive in, make sure you know about IVs, natures, and EVs, which were discussed in the previous section, Advanced Trainer Info . Breeding is all about controlling nature and IV spreads, and even moves, to improve your chances of getting a perfect Pokemon.
Perfect , or flawless , means the Pokemon has an optimal (or at the very least, deliberately chosen) nature, select egg moves, and perfect IVs where they are necessary (usually 5 or 6 IVs will be 31).
Terminology to Know
Egg Group: Not every Pokemon can breed with every other Pokemon. For example,  Gastly and
  Dratini cannot breed. Why not? They’re in different Egg Groups. There are several Egg Groups and each contains specific Pokemon.
Gastly is in the Amorphous Egg Group and Dratini is in the Dragon Egg Group (and Water 1).  Ditto can breed with any Pokemon except the ones who are unbreedable, and is thus how you breed genderless or monogender Pokemon such as
  Beldum and
  Tauros.
Some Pokemon are in two Egg Groups. This makes them valuable for doing things like being viable fathers to more Pokemon, and passing down Egg moves that are hard to obtain otherwise.
Compatibility: Just because two Pokemon can breed doesn’t mean they’ll have a high chance of producing Eggs, which can make breeding take longer if you go for long stretches of time with no Eggs to hatch or receive.
Compatibility is at its lowest if the Pokemon are different species from the same Trainer OT, but is at its highest for same species from two different Trainer OTs. Same species from the same trainer and different species from different trainers has the same compatibility level.
Look for the language tag in the top-right corner of the top screen.
Having Pokemon from a different language version will also have a side effect of triggering the Masuda Method , which doubles your chance of randomly hatching a shiny! (it’s like 1 in 2,000 about, but hey it’s something).
Egg Moves: Moves a Pokemon can only learn by being bred with a father who knows them. Almost never learned through TM or level up, so theyre unique, and many Pokemon have some really good ones. For example,  Gible can learn Outrage through Egg move, but can’t get it anywhere else.
Chain Breeding: Related to Egg moves. Chain breeding is often necessary to get specific combinations of multiple Egg moves onto the final offspring. This will be covered later in this part of the guide!
IV Breeding: The process of breeding to get as many perfect IVs as possible. Abuses the Destiny Knot.
Additionally, here is some generic terminology you’ll want to be familiar with. These were discussed in full detail earlier but are here again for the sake of coverage and convenience:
Ability: Special Ability of a Pokemon. Almost all Pokemon have a Hidden Ability only available by SOS Chaining. They are sometimes pretty awesome too. Ability Capsule and Breeding will never give a Pokemon its Hidden Ability if the parents don’t already have it.
Nature: Causes one stat to rise by 10% and another to fall by 10%. Huge modifier! Make sure you pick the right one.
Base Stats and Base Stat Total: Base Stats are the innate numbers of a Pokemon. These never change and are the same by species. Base Stats are the reason  Alakazam has such high Special Attack and Speed, but paltry Defense, and why
  Blissey has the most HP in the game, but terrible Attack.
Alakazam has base 135 Special Attack and Blissey has base 255 HP (the highest base stat possible). Base Stat Total is just adding up all of a Pokemon’s numerical base stats.  Arceus currently holds the highest total for a non-mega evolved Pokemon at 720 (all of its stats are 120 base).
The numbers you see on your end of the game are the base stats being affected by level, nature, IVs, and EVs.
IVs, or Individual Values: Ranging from 0 to 31, these are numbers that just are tacked on flat through addition to Pokemon’s stats. They manifest to their maximum at level 100, and can vastly affect how a Pokemon performs in battle. Generally, aim for 31.
EVs or Effort Values: Earned through defeating Pokemon, 4 EVs = +1 to a stat at level 100. 8 EVs = +1 at level 50. You can have max 252 EVs to a stat (+63 to a stat at level 100) and max 510 EVs total. The most common spread is 252/252/6.
This results in +63 to two stats of choice (at Level 100) and +1 to a miscellaneous stat (usually HP if it’s not being maxed). Totally under player control.
Supplies You Will Need
Breeding the right way requires a pretty hefty investment, so make sure you’re up to the task. To make the job easier, you’re going to want–well, need –the following list of items and Pokemon. These will all help you control the “luck” behind Pokemon breeding so that you can, with precision, aim for your goal.
Pokemon with Synchronize of every nature. Decent natures anyway; you can exclude the neutral natures, as well as Lax and Gentle, since they are almost never used. This will make it easier to catch the base Pokemon (and the next necessary preparation, the Dittos), without depending on RNG.
Our advice? Mass breed  Abra. This will also give the side effect of unlocking the IV Judge if you haven’t.

You can also use your Synchronize Pokemon while hunting for Ditto.
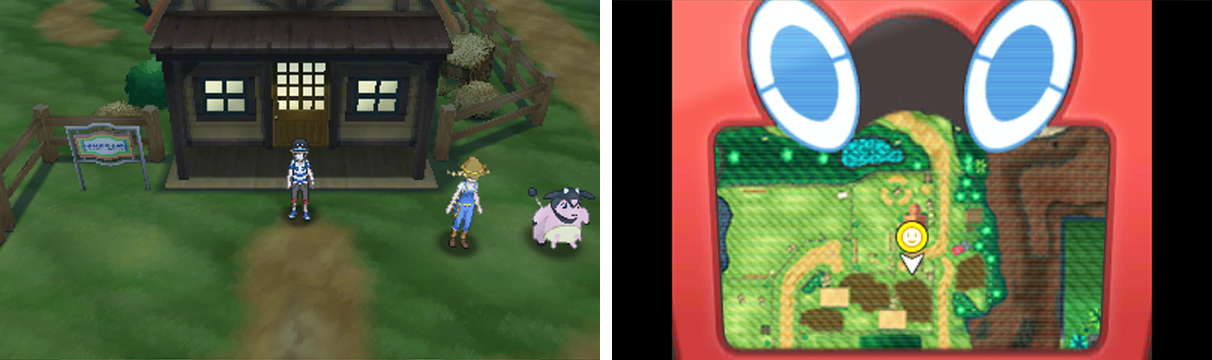
Dittos of every (decent) nature, and some with at least 1 perfect IV. The more perfect IVs, the easier the job is. Ditto is catchable on Mount Hokulani! SOS chain so that you can get Dittos with perfect IVs, up to four (the SOS perfect IV cap).
If you want your offspring to have perfect IVs, you will need someone to have them to pass down, and it might as well be the Ditto because they can breed with any Pokemon, thus passing down IVs and Nature to anyone!
A Pokemon with Flame Body. Catch a  Fletchinder from Route 8 or evolve a
  Fletchling from Wela Volcano Park. Fletchinder and
  Talonflame’s regular ability is Flame Body. The Talonflame you get from an NPC trade outside the Battle Tree won’t work, since it has its Hidden Ability, Gale Wings.
Flame Body will cut in half (a rough estimate) the time it takes to hatch an Egg.
Everstone and Destiny Knot. Hold items that are absolutely critical to breeding. Everstone are a common hold item on wild  Roggenrola. You also get one as a gift from Ilima if you rematch him after completing his trial, and you get several as a common reward from Brilliant-Stone Hunting in Poke Pelago.
Destiny Knot can be found from high-leveled Pokemon with Pickup (get a  Meowth with Pickup and level it up and generally carry it with you until it picks up a Destiny Knot) or, if you’re willing to make the sacrifice, 48 BP at the Battle Royal BP shop.
Power Items. These are less necessary for breeding but useful if you’re trying to be selective about which IVs you are passing down. Regardless of whether or not you use them for breeding, they make EV training the easiest cakewalk ever, so pick them up.
They cost 16 BP each at the Battle Royale BP shop and they will be a worthy investment.
Oval Charm. This increases the chance at which Eggs will spawn in the Nursery. You receive one for completing the main story, so there’s no excuse to go without it!
Time, patience, and a lot of box space. These should be fairly self-explanatory…
Fall in love with Wonder Trade. This is an easy way to get rid of “breedjects”, a community nickname for bred Pokemon that you aren’t going to use and really have zero purpose for other than clogging up box space.
Send them out to people and receive other things in return that you can either release, send back into the system (how rude!), or keep and use (breedjects other people were sending out).
The breedjects other people can potentially give you and easily jump start other breeding projects, since the heavy lifting was already done.
Max developed Isle Avue. This is a luxury rather than a necessity. Since you can pick up Eggs at the Nursery even if your party is full, it’s easy to achieve an Egg backlog where you are earning more Eggs than you can hatch.
Use Isle Avue to hatch the rest, especially if you finish the project with spare Eggs, or if you are a busy person without the time to manually run around to hatch them.
It can take a day or two and if left there for too long they’ll suddenly get farther and farther away from hatching “because of the heat”, but it’s a good way to let Eggs passively hatch without working for it.
How to SOS Chain Ditto
Say “hello” to your new Ditto chaining friends.
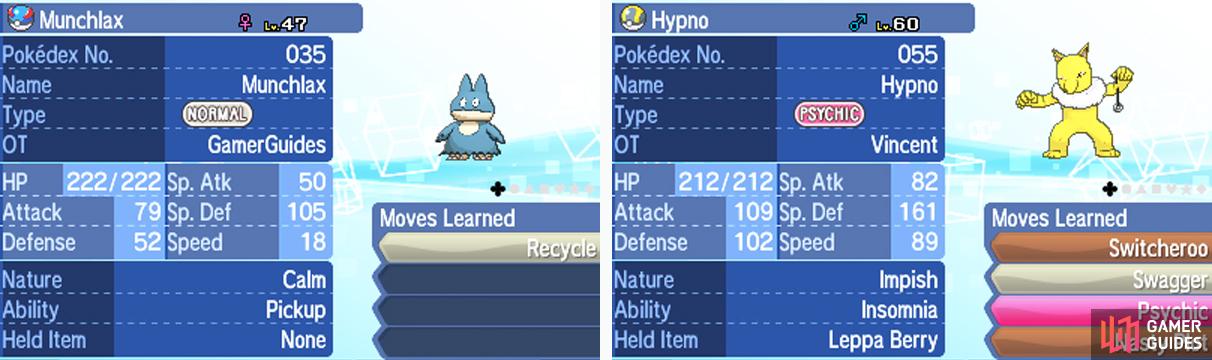
When a Ditto uses Transform they only have 5 PP available for each of their moves, which means they’ll Struggle and kill themselves before long. What are you supposed to do to keep a long Chain? Well, it requires a bit of preparation, but this method is near-guaranteed.
You’ll need a  Munchlax and a
  Hypno . Catch the former in Route 1 or from the Wi-Fi event gift, and the latter in Poni Plains .
Teach Munchlax the move Recycle and delete the other three. Have Hypno remember Switcharoo . The former will allow a Pokemon to use its Berry over and over, the latter switches held items. Have Hypno hold a Leppa Berry. This Berry restores move PP.
If you have a Synchronizer in front, switch immediately to Ditto. The Ditto will Transform into Munchlax and only know Recycle. Switch to Hypno and use Switcharoo. Now the Munchlax-Ditto is holding a Leppa Berry and effectively has infinite PP. Start chaining!
General Breeding Workflow
Here’s a general idea of how the breeding process will usually work. This assumes you are starting from scratch. You don’t have the Pokemon you want to breed caught yet but you’ve got yourself a mountain of Ditto and Abra.
You have all the supplies necessary and you’re ready to start sinking your time into a project. These will all be covered, step by step, in the following sections.
1. Catch the Pokemon you want to breed
Through use of Synchronize, SOS chaining, etc. you can get the Nature you want and maybe even a few perfect IVs. If you want the Hidden Ability, you’ll absolutely need to SOS chain. Use a Pokemon who can learn Skill Swap to swap Abilities and thus see if it has its Hidden Ability or not.
You’ll want to make sure the base Pokemon you start with has the Ability you will want . You can never fully lock in an Ability but you can sway the RNG one way or another, and especially for Hidden Abilities you will want to start off right.
2. Lock the nature
Through use of Everstone, this is a ridiculously easy step. Do this as soon as you can! Either you’ve already Synchronized a Pokemon to start with, or you can use your mountain of Ditto with Everstone. In all subsequent steps you will want to make sure the nature you want always has Everstone held.
3. Breed Egg moves
Egg moves are extremely easy to lock and should be done after or alongside Ability selection. Once they’re there, as long as the Pokemon with the Egg moves is being bred, the offspring will always, always have them. Convenient!
4. Perfect the IVs
Use Destiny Knot and begin improving IVs. You will be swapping out parents a lot here. If Pokemon-incest isn’t for you, you might want to…not think about it for a while! This is the last step done after everything else has been chosen and the nature and Egg moves are locked. P
erfecting your IVs is mostly up to chance, but Destiny Knot usage makes it a pretty high one that something will come out perfect.
5. EV train and level up and you’re finished!
No Comments