
This is a walkthrough for Da’at: Minato of Shin Megami Tensei V, taking place in the Tamachi area. How to complete every objective, find every chest and locate every Miman.
You begin your journey in Tamachi, Minato.
Demons
Items
| Name |
|---|
| 500 Macca |
| Revival Bead |
| Preta’s Essence |
| Medicine x2 |
| Slime’s Essence |
| Fire Shard |
Quests
| Subquest | Location | Reward |
|---|---|---|
| A Preta Predicament | Northwest Tamachi | Haunt Talisman |
Welcome to the Netherworld
You’ll awake to find yourself in a barren wasteland and, what appears to be landmarks from Tokyo such as street signs and Takanawa Tunnel itself. Once you regain control, there’s naught but to press forward through the sands until you trigger a scene. As you’re attacked by Demons, and all hope seems lost, a curious being appears to give aid and you’ll be given a choice. It doesn’t matter what you choose here, you can’t decline his aid (nor would you want to) and you’ll both fuse together to become a being known as a Nahobino and you’ll be thrust into your first battle.
You’ll get a rundown of how the Press Turn battle system works in Shin Megami Tensei V. If you take a look at the top right of your screen, you’ll notice a blue icon, this indicates how many turns you have available to you. All Demons, both ally and enemy, have weaknesses and resistances and striking a weakness will cause one of your turns to pulsate. This in turn will grant you an extra turn however a pulsating icon can never be extended, this means once you have a party of four, you can have up to 8 turns a round provided you hit a weakness four times.
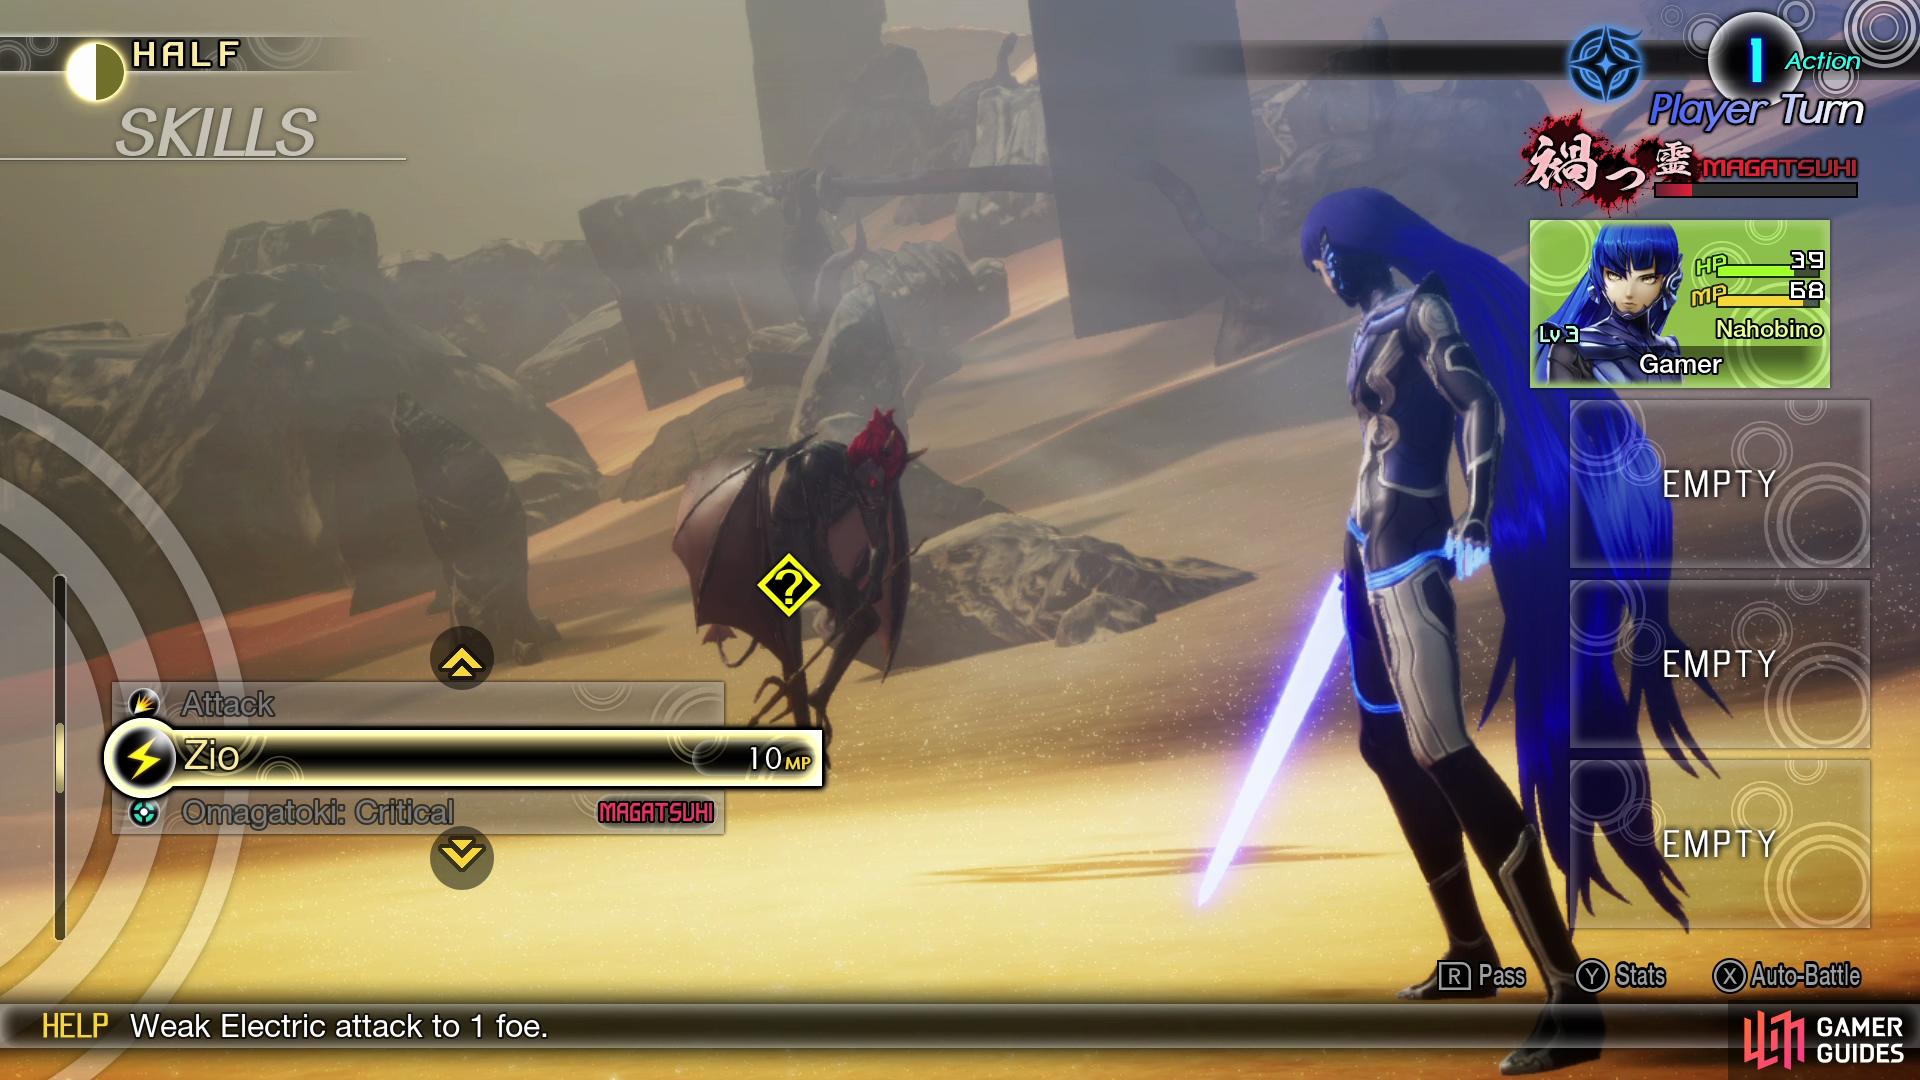
This remains true for the enemy, should they hit a weakness of any of your party, they will gain an extra turn, so it’s important to always pay attention to your resistances and weaknesses. If an enemy should Null, Absorb, Repel or you miss an attack, you will lose two turns so be sure to make sure you’re using the correct elements at all times. For now, you only have the Attack command available to you for the first round. The second round will allow you to use Zio, the weakness of this Demon and grant you an extra turn. You’ll need to keep a close eye on your MP as the last thing you’ll want is to deplete all of it in one battle.
Following the battle, you’ll gain your first Level Up and when it comes to the Nahobino, you’ll have points randomly distributed to your stats save for one that you’re free to play around with. This is, effectively, how you decide on what kind of build you’ll want to go with for your Nahobino. Although you don’t have as much freedom as in the other mainline titles, over time, focusing on a stat with your points will allow you to focus on either a Strength or Magic Build (and you should select Skills that accompany that playstyle).
Although in Shin Megami Tensei IV, magic was arguably the best stat to focus on, and Shin Megami Tensei III: Nocturne, Physical, here both are extremely viable. You can always make up for any shortcomings with Demons for your other party members, so try not to fret over it too much and just stick with whichever stat you focus on. Once you reach the later stages of the game, the Best Physical Build and Best Magical Build pages will help point you towards which skills you should set with that in mind.
You get the chance to ask more questions following the battle, answer how you will and will reveal his name as Aogami, the Proto-fiend. You’ll gain access to the Map screen at this point which will be a vital tool as you explore the Netherworld. Press onwards and the game will inform you on how to dash around the world and then finally, about Magatsuhi. As you traverse the Netherworld, you’ll see crystalized forms of Magatsuhi and they come in the following types:
| Color | Effect |
|---|---|
| Green | Restores HP |
| Yellow | Restores MP |
| Red | Fills Magatsuhi gauge (needed for Special Skills) |
It’s important you make use of these, as you’ll need to manage your HP and MP between save points and these will be handy indeed. Collect the Magatsuhi as you press onwards and then learn how to leap over obstacles. You will need to make use of the Jump button to access all manner of locations throughout your journey, the areas are open, and there are many secrets to discover. As you continue north, you’ll locate a red platform, these are known as Climbing Points and you’ll be able to jump and climb up, these will also be marked on your map.
As you reach the top of this area, you’ll come across a Treasure Box, these contain any number of useful items, but often contains Essences, a feature you’ll be introduced to shortly. As you climb the hill, you’ll learn that this was once known as Tokyo (as evident by Tokyo Tower in the distance) but time has passed since then. Aogami suggests heading to Tokyo Tower to reclaim his memory so he can better answer your questions, thus beginning The Lay of the Land.
The Lay of the Land (1)
This is a good time to open the Menu, you’ll be able to check out and use any Items you have, look at and use your Skills or check the Status of your Party. You’ll also find the Quests screen; this will display both your Main Quests and your optional Subquests. Once you’re ready, head down the slope and you’ll spot a glowing pillar of light, this is known as a Leyline Fount and as you go to make contact with it, you’ll be whisked off to another location. This is Cadaver’s Hollow, and you’ll meet Gustave, the boss of the Mimans who will act as the merchant in Shin Megami Tensei V.
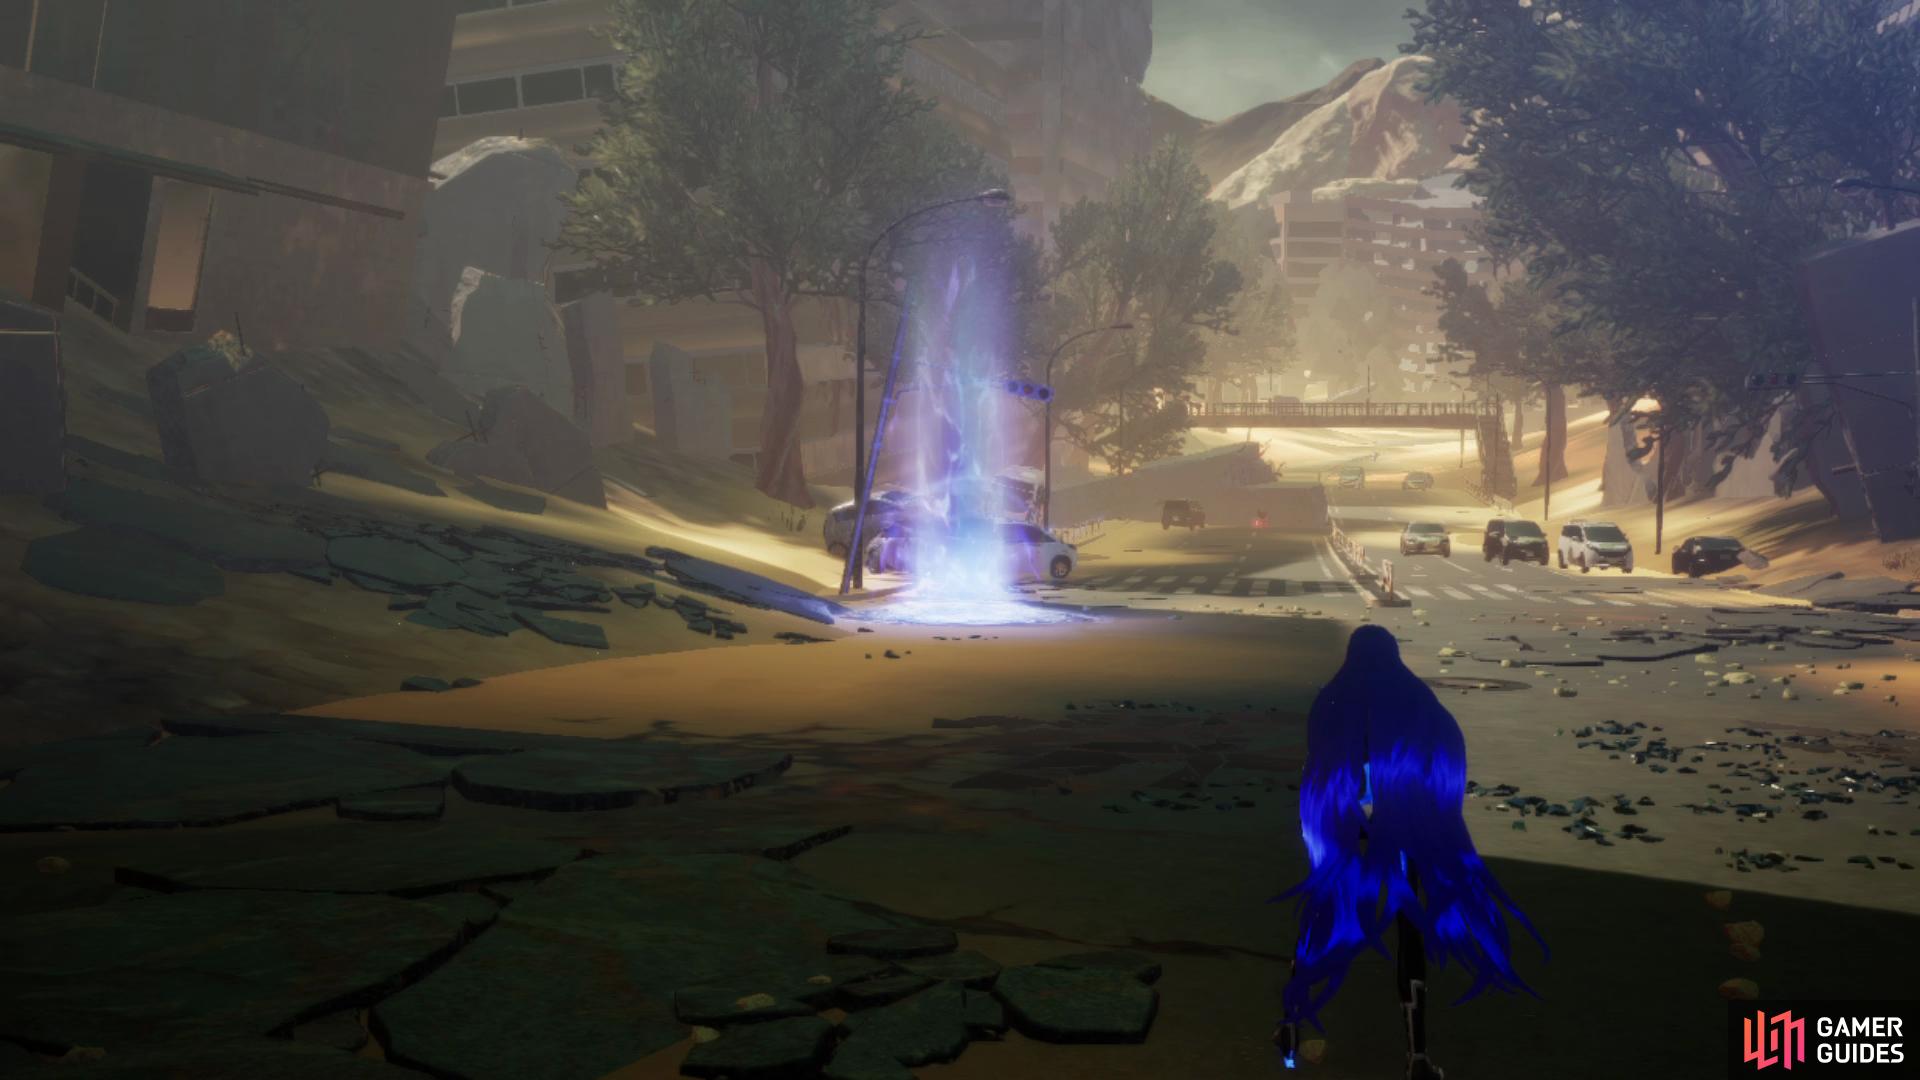
Leyline Founts offer respite from the harsh wastelands of the Netherworld
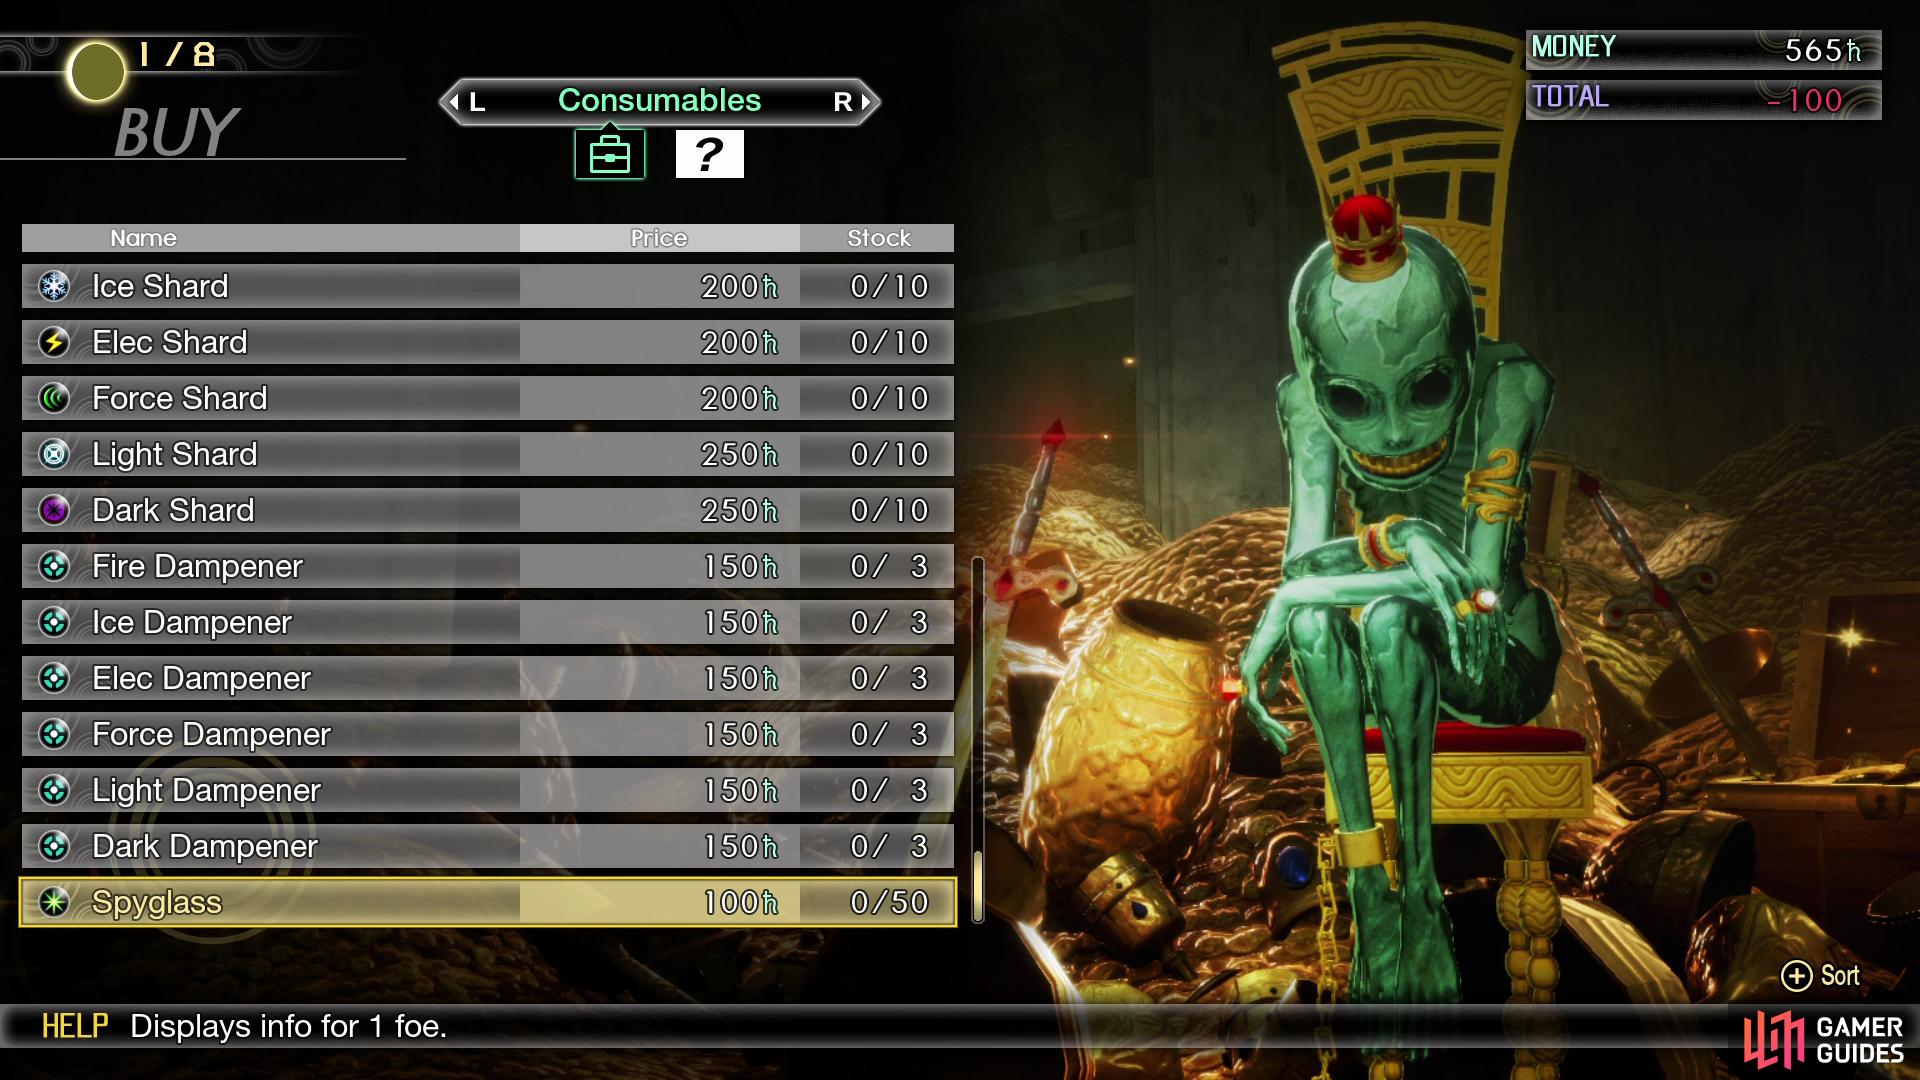
consider purchasing some Spyglasses at Gustave’s shop here.
| Name | Effect | Price |
|---|---|---|
| Medicine | Slight set HP recovery to 1 ally. | 50 |
| Amrita Soda | Cure status ailments on 1 ally. | 80 |
| Revival Bead | Revive 1 ally to half HP. | 400 |
| Fire Shard | Weak Fire attack to all foes. | 200 |
| Ice Shard | Weak Ice attack to all foes. | 200 |
| Elec Shard | Weak Electric attack to all foes. | 200 |
| Force Shard | Weak Force attack to all foes. | 200 |
| Light Shard | Weak Light attack to all foes. | 200 |
| Dark Shard | Weak Dark attack to all foes. | 200 |
| Fire Dampener | Nullifies a Fire attack against all allies for 1 turn. | 150 |
| Ice Dampener | Nullifies a Ice attack against all allies for 1 turn. | 150 |
| Elec Dampener | Nullifies a Electric attack against all allies for 1 turn. | 150 |
| Force Dampener | Nullifies a Force attack against all allies for 1 turn. | 150 |
| Light Dampener | Nullifies a Light attack against all allies for 1 turn. | 150 |
| Dark Dampener | Nullifies a Dark attack against all allies for 1 turn. | 150 |
| Spyglass | Displays info for 1 foe. | 100 |
You don’t have many funds at your disposal right now, but consider buying a few Spyglasses, they’re worth their weight in gold should you encounter some rare Mitamas on the field. As you go to take your leave, Gustave asks for your assistance in tracking down his missing Mimans, and you’ll find 200 of them throughout the Netherworld in all manner of places. Gustave will, of course, reward you for the first one you find, then at 5 you find (1, 5, 10, 15, and so on) and the rewards are very much worth your time. This walkthrough will point them out throughout, or you can head over to the Miman section to find them sorted by area.
Once you’re back in the Netherworld, you’ll gain access to the Chronicle Deeds (Save your game), Cadaver’s Hollow (Gustave’s Shop), and Recovery (recover HP and MP at a cost of Macca) options. Shin Megami Tensei V can often be a brutal game at times so be sure to make frequent trips to these Leyline Founts to save your game or recover your MP. For now, Gustave gave you a task and you’ll find Miman #1 just in front of the Leyline to the north and speaking to it will award you with 5 Glory, a currency you’ll find out more about soon.
Return to Gustave to deliver the news and he’ll hand over Onmoraki’s Essence. This is something else you’ll learn more about shortly so put it out of your mind for now. You’ll receive your next reward from Gustave for 5 Mimans and then a reward for every 5 following that. As you leave the Leyline, head north and look to the walkway and climb the stairs on the right, Miman #2 is waiting here. Look to the western wall now and you’ll find a lit-up vending machine, examine this to receive a Relic. You may recall Gustave mentioning these, and he’ll buy them from you and act as your primary means of acquiring Macca in Shin Megami Tensei V, with that in mind, aggressively seek these out whenever possible.
As you approach the Pixie in front of you, Aogami will inform you that you can recruit Demons to fight for you by talking to them in battle. A tutorial follows where you’ll learn that you need to answer questions based on a Demon’s personality to get them to a negotiation. If you fail in your questions, you’ll lose your turn and the enemy turn will begin (in some cases, they may leave the battle). Once you impress them enough to get them to negotiate, they’ll ask you for items, Macca, HP and MP in a random order. Appeasing them will cause them to join your party and add them to your Demon Stock (of which you have a limit of 6 to begin with).
Pixie will join your party following this battle, she’s useful because she has access to Dia that can heal you. It’s in your best interest to always try to recruit new demons you encounter, these can be registered later and be recalled for a fee. Don’t get too attached to your Demons however, you should be looking to change them up every 2-5 levels with newer Demons unless one specifically stands out, Levels make a huge difference in the damage formula.
As you continue forward, you’ll find two Slimes up ahead and Aogami informs you that it’s in your interests to begin battles by striking them, this gives you a chance to start the battle first. Slimes are weak Demons, and you can use almost any element however for now, consider Talking to it and recruiting it, you’ll want to get a full party of 4 as quickly as possible. Once the battle is over, hug the eastern edge of the map and head back south to find a Treasure Box containing a Revival Bead.
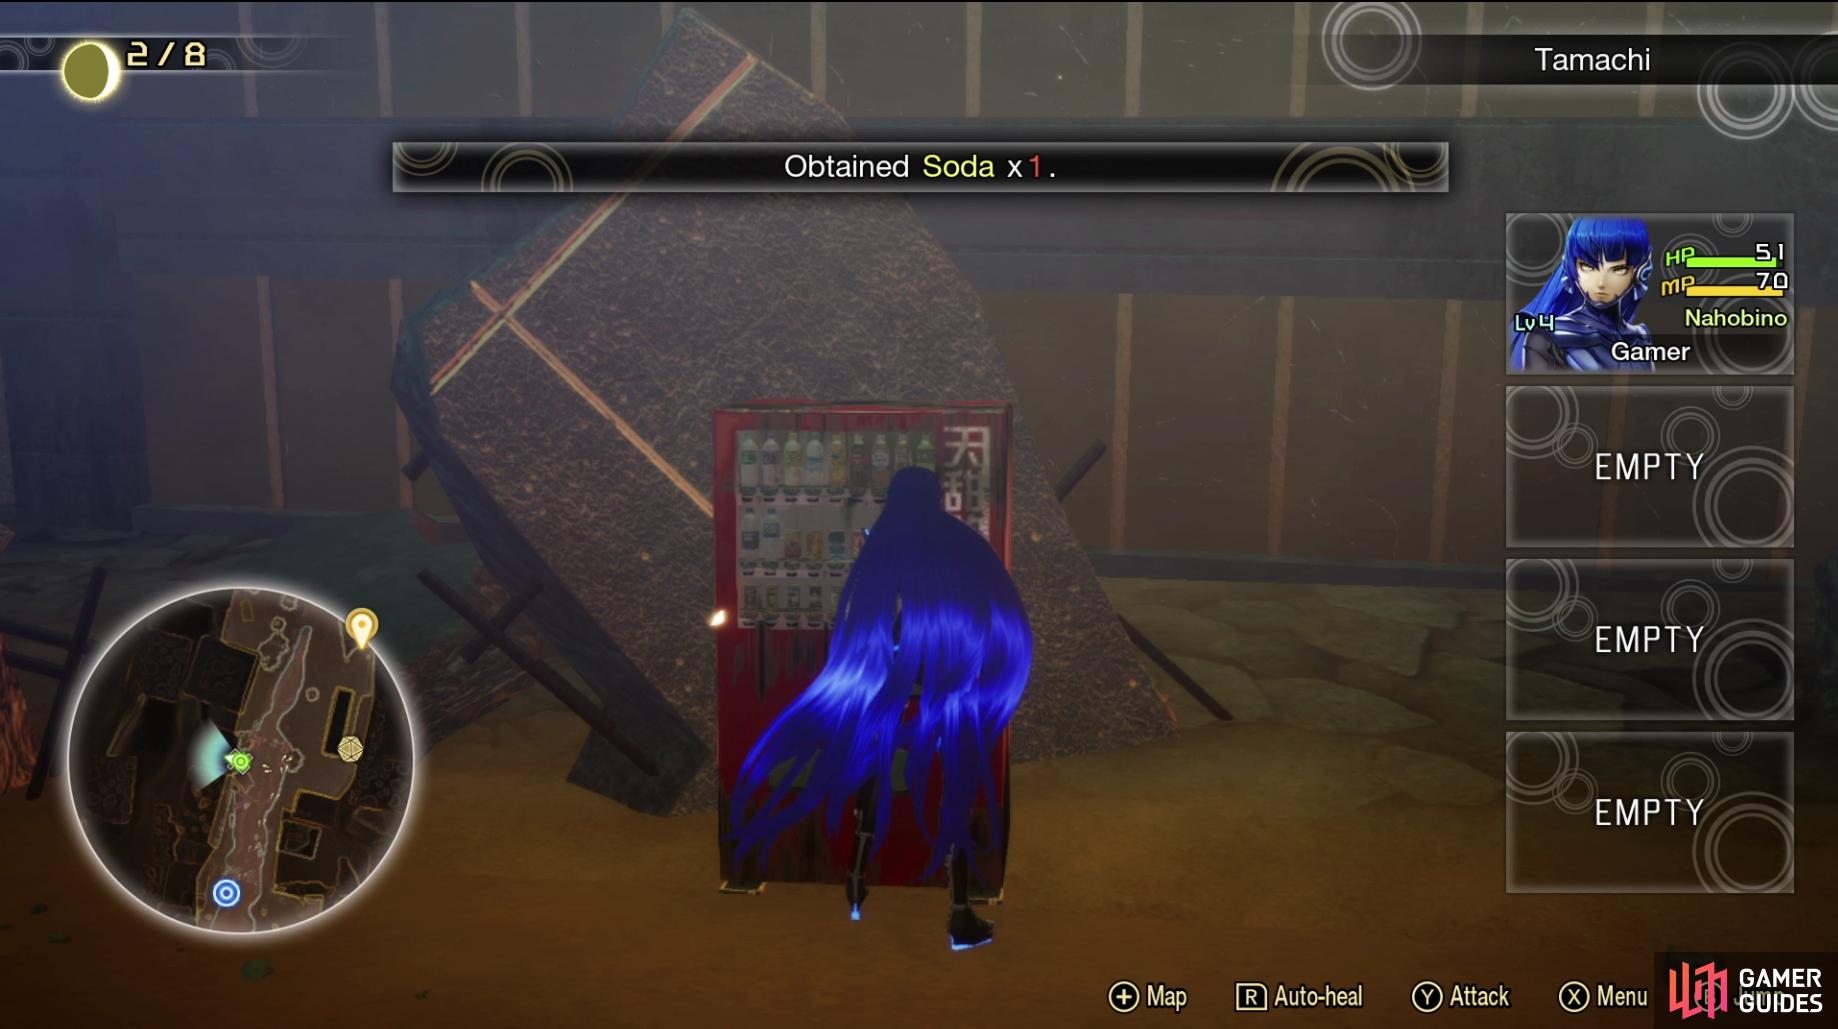
(1 of 6) Be sure to ransack all vending machines you find for relics to sell to Gustave
Continue north to a crossroads and you’ll find two vending machines in the center. Your objective is to the northeast, but first, head northwest while keeping to the east side of the path and you’ll be able to pass under a building to find Miman #3. Just beyond this you’ll encounter some Pretas on the road, these are weak to Fire and can be troublesome if you only have just the Pixie still but with a Slime in your party, you’ll have enough Demons to take one down and hopefully recruit the other so you finally have a full party.
Once the battle’s over, head to the west up the hill and then go south to reach the ruins and discover a Treasure Box containing Preta’s Essence. Head back down to the main road and cross over to the east to find Miman #4 sat by a fallen building. Run up this building now and jump off at the end to reach the inside of a building housing another Treasure Box containing Medicine x2. Up ahead are some Pixies near a tree and if you look to the west, you’ll find two more vending machines.
As you cross back over to the main road, you’ll find another ruined building on the west side and inside, Miman #5, this is enough for your next reward once you visit Gustave. Break the Treasure Box up to the north to obtain Slime’s Essence and then duck into the cave to discover a group of Preta’s you can interact with and begin the Subquest A Preta Pedicament. All manner of Demons will offer Subquests in the Netherworld and not only will you obtain plenty of EXP for completing them, but often Talismans that unlock skills or the ability for Special Fusions. This particular Subquest tasks you with finding a missing Preta, he’s not located in Tamachi however, so you’ll need to wait on finishing this for now.
If you search the east side of this cave, you’ll spot a Treasure Box surrounded by a large group of Slimes. Dash in, obtain the Fire Shard then dash away to avoid a nasty encounter. You’ve fully scoped out the northwest of Tamachi for now, so head northeast at the crossroads now and you’ll trigger a scene with a curious Demon before being thrust into battle against three Pretas.
You’ll be taught about Magatsuhi skills here, as evident by the Magatsuhi gauge in the top right of the battle menu. This raises a little each turn, or by collecting Red Magatushi Crystals out in the world. Once the gauge is full, you can access these Skills at the bottom of Nahobino or a Demon’s skill list. When using it, they won’t use up a turn either, so they’re very powerful tools you should make use of. You only have access to Omagatoki: Critical for now, but it’s arguably one of the more useful ones in the game, you’ll have to wait until you find Talismans to unlock more. This Magatushi skill will cause every attack you use to be Critical (including Magic which usually can’t Critical) and thus, giving you an extra turn for each of your attacks unless you miss or have an attack Null.
Regardless of how you answer the Demon following your battle, Aogami suggests you ignore her and she leaves. Continue pressing onwards and you’ll find more Pretas and a vending machine on your right. Just beyond this are Onmorakis which are weak to Ice and Force Skills and are a good replacement for Slime in your party should you manage to recruit one. Just up ahead from here is the next Leyline Fount and the Mita region, you’ll trigger a scene and unlock a powerful new feature, which is discussed in greater detail in the next page.
No Comments