
The Blood Surge Necromancer build isn’t new to Diablo 4, nor is it a build with newly found endgame prominence. The Blood Surge Necromancer has been potent for a while now, and while perhaps not strictly top-tier, boosts to minions and Overpower have changed how this class plays a bit and made the Necromancer herself - and not her minions - definitively the primary source of damage… and that’s assuming you keep minions around at all. With an outrageous damage output and the ability to heal from the most grievous of damage rapidly, this “caster” is capable of going toe-to-toe with the strongest enemies in the game and emerging victorious. This page will provide a full build guide for the Blood Surge Necromancer in Season 2, including the best skills, a level-by-level skill point allocation guide, minion options from the Book of the Dead, where to allocate your Paragon Points, and which Paragon Glyphs and Paragon Boards to use and, of course, what gear you want to equip, including legendary aspects, uniques, and stat priorities.
The Blood Surge Necromancer is a tanky, potent, simple build that’s great for new players and mindless grinding.
Blood Surge Necromancer Playstyle and Overview
The Blood Surge Necromancer is fairly unorthodox, at least for Diablo veterans. The Necromancer is most at home casting curses from a distance, using the odd spectral bone spell to pick off enemies to provide corpses from which to create a small army of skeletons to harass enemies and protect their master, using excess corpses to unleash devastating corpse explosions. That’s how it works, right? Well… the Blood Surge Necromancer has no patience for all that backfield nonsense, instead aspiring to waltz straight into combat, drain the blood of their enemies, and then shoot it back at them as a bloody nova surge. It’s not a subtle skill and it forces the Necromancer to mix it up with enemies, using their stolen blood to sustain the Necromancer and fuel their offense.
Blood Surge is a powerful spell, healing the Necromancer and dealing heavy AoE damage to all surrounding foes. This would make it appealing enough as an offensive tool, but its passive, Paranormal Blood Surge, grants stacks of Overwhelming Blood if cast while the Necromancer was healthy (above 80% Life), and after five such stacks guarantee an Overpower. Stack enough Overpower and max Life and the Necromancer’s Blood Surge will regularly decimate enemies, albeit only once every five casts, on average. You’ll see a lot of chip damage in the meantime, but when Blood Surge Overpowers, everything nearby will just… melt. Since Blood Surge leeches and you’re encouraged to have a high Life score, you’ll also be incredibly tanky. Throw in some support curses like ![]() Decrepify to further reduce enemy effectiveness and only Uber Lilith and the worst damage spikes found in Tier 50+ Nightmare Dungeons can cause the Blood Surge Necromancer any concern.
Decrepify to further reduce enemy effectiveness and only Uber Lilith and the worst damage spikes found in Tier 50+ Nightmare Dungeons can cause the Blood Surge Necromancer any concern.
Unfortunately, Blood Surge isn’t free, in fact, it’s one of the most expensive Necromancer skills in the tree, behind only Bone Spirit. This wouldn’t be a problem, save for the fact that it needs to be cast repeatedly, so you’ll be pouring your entire Essence orb into spamming Blood Surge to get that one glorious Overpower. To compensate we keep ![]() Hemorrhage handy for when we need to recover spent Essence and the Skeletal Mages passive that recovers Essence whenever they land a hit. Other sources of Essence recovery will largely come from equipment, but this build will never be completely free from the need to stop and use basic attacks to recover Essence. With some luck, however, this will become an increasingly infrequent occurrence as the build matures.
Hemorrhage handy for when we need to recover spent Essence and the Skeletal Mages passive that recovers Essence whenever they land a hit. Other sources of Essence recovery will largely come from equipment, but this build will never be completely free from the need to stop and use basic attacks to recover Essence. With some luck, however, this will become an increasingly infrequent occurrence as the build matures.
Now that you know generally how this simple, tanky, and powerful build works, let’s look at its pros and cons:
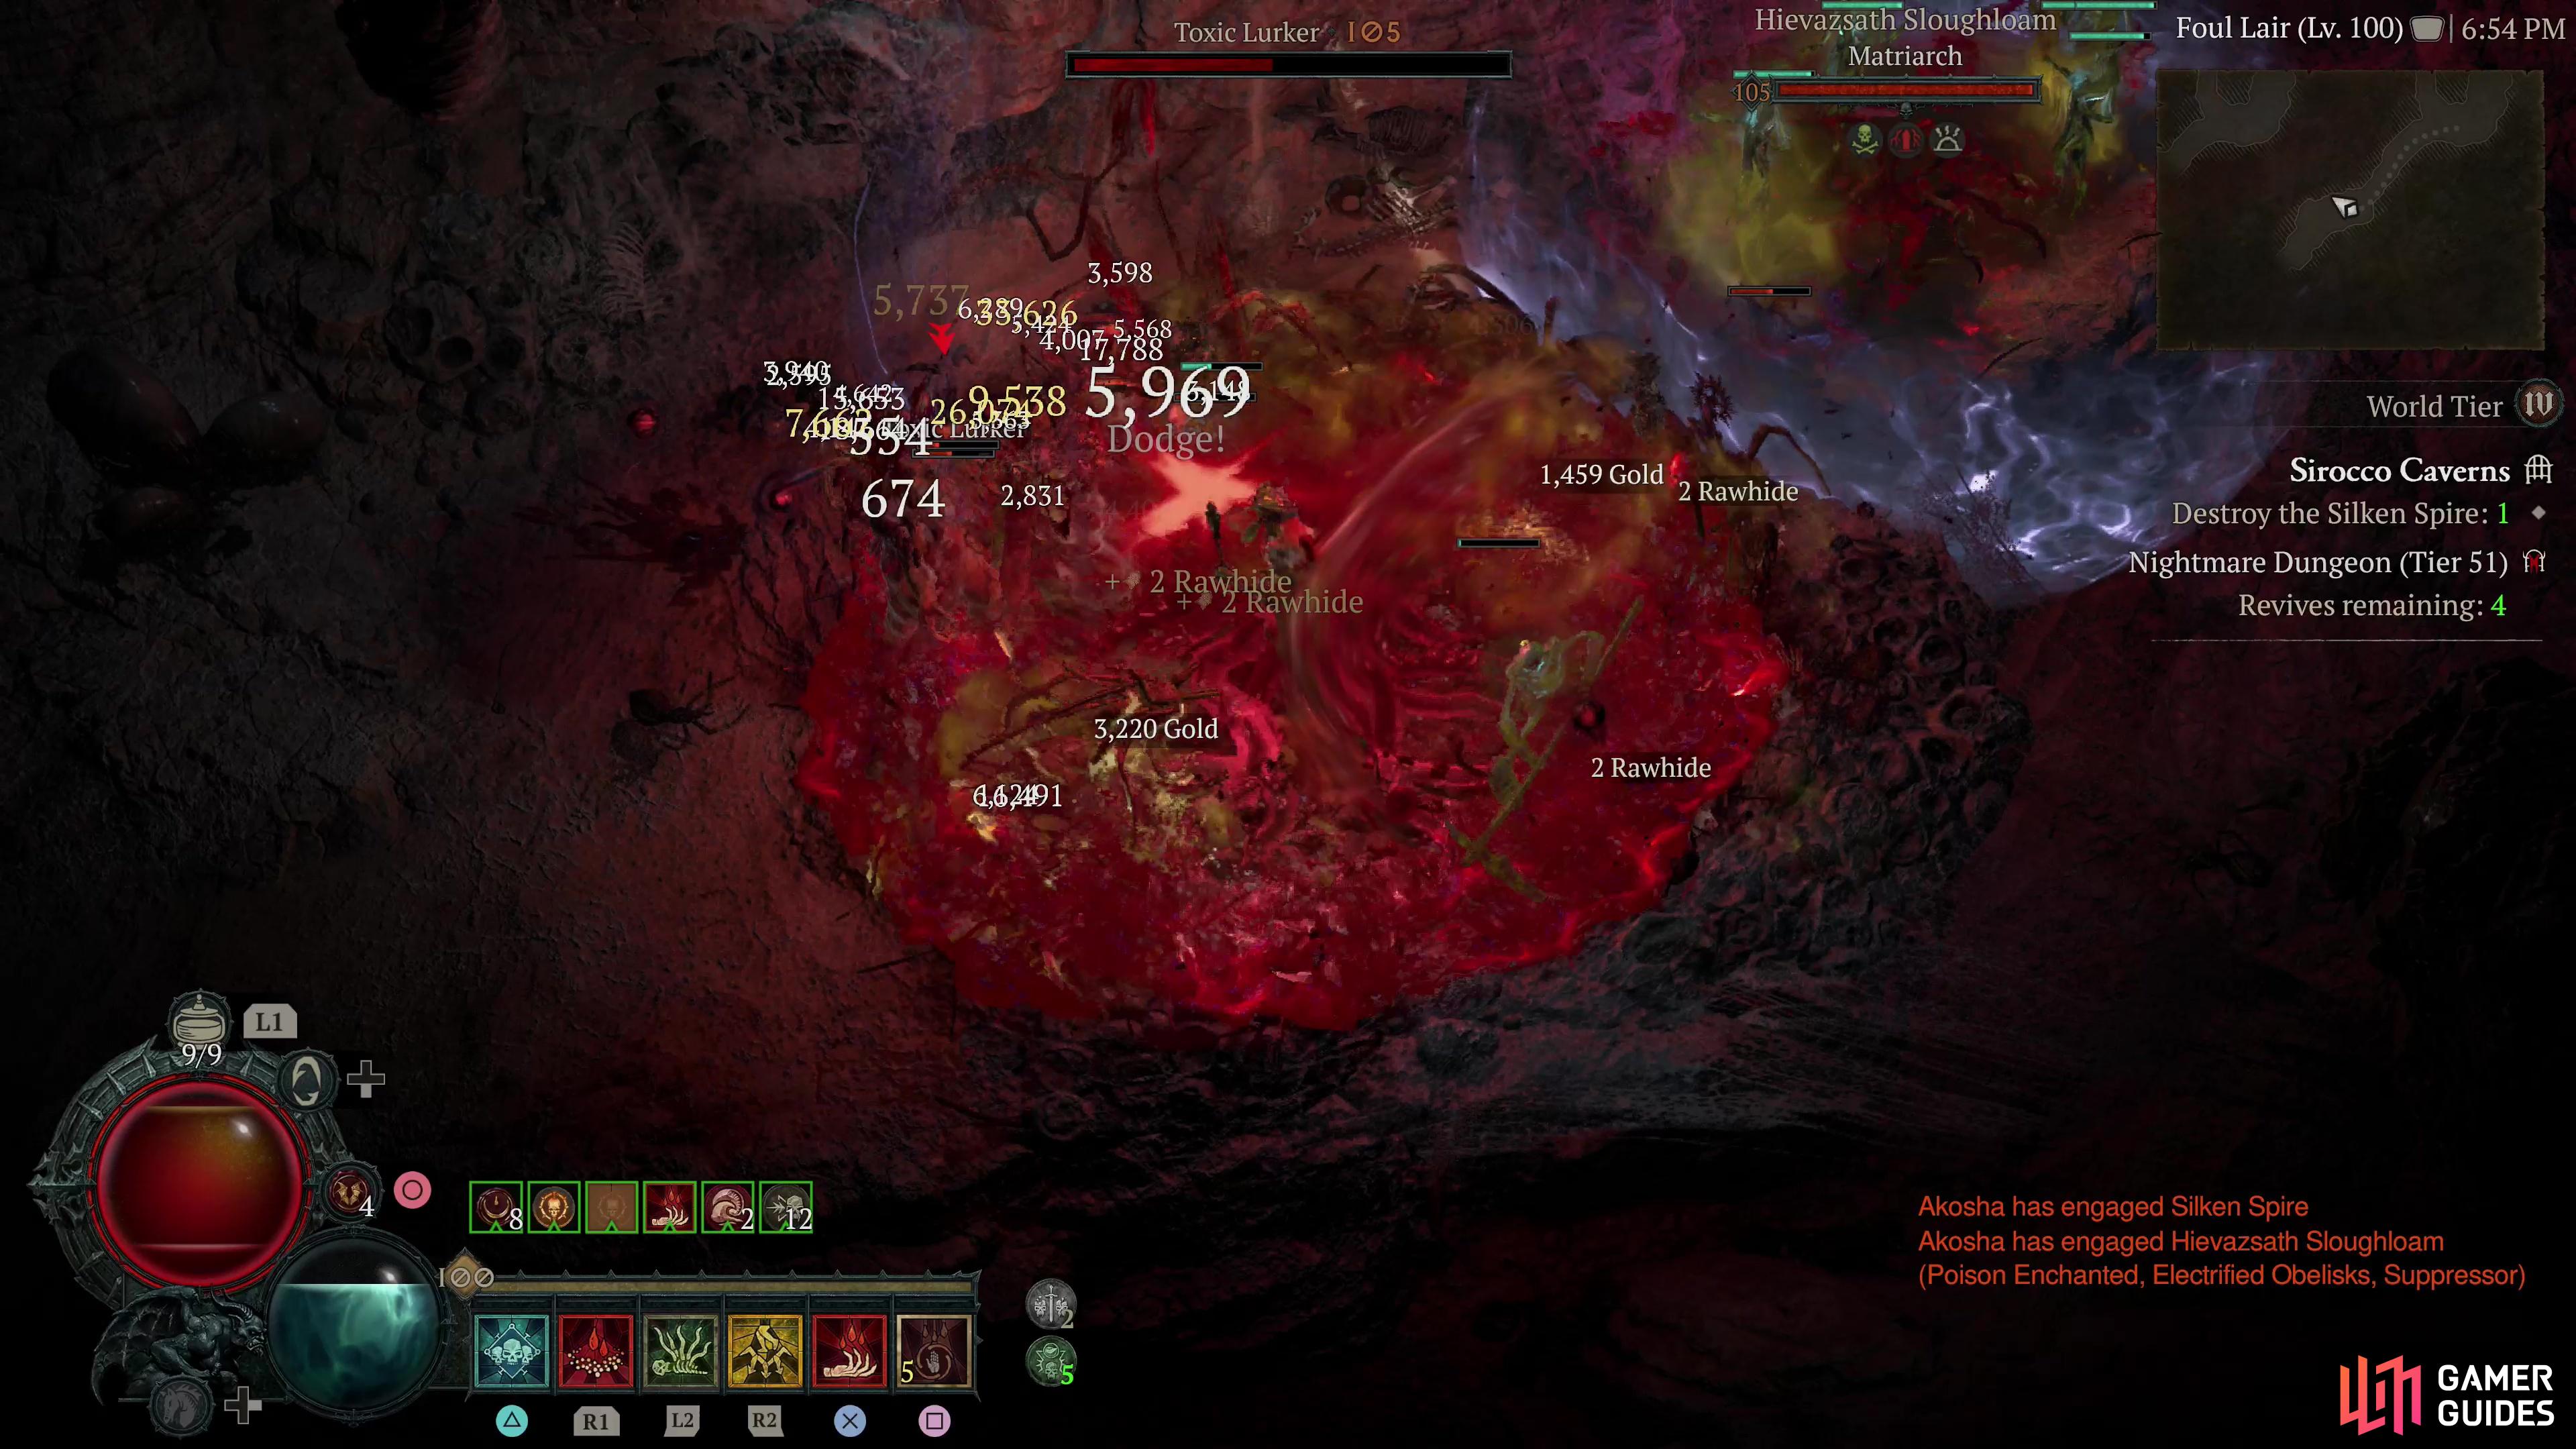
The playstyle is simple - run into a horde of enemies and blast them with Blood Surge until everything dies.
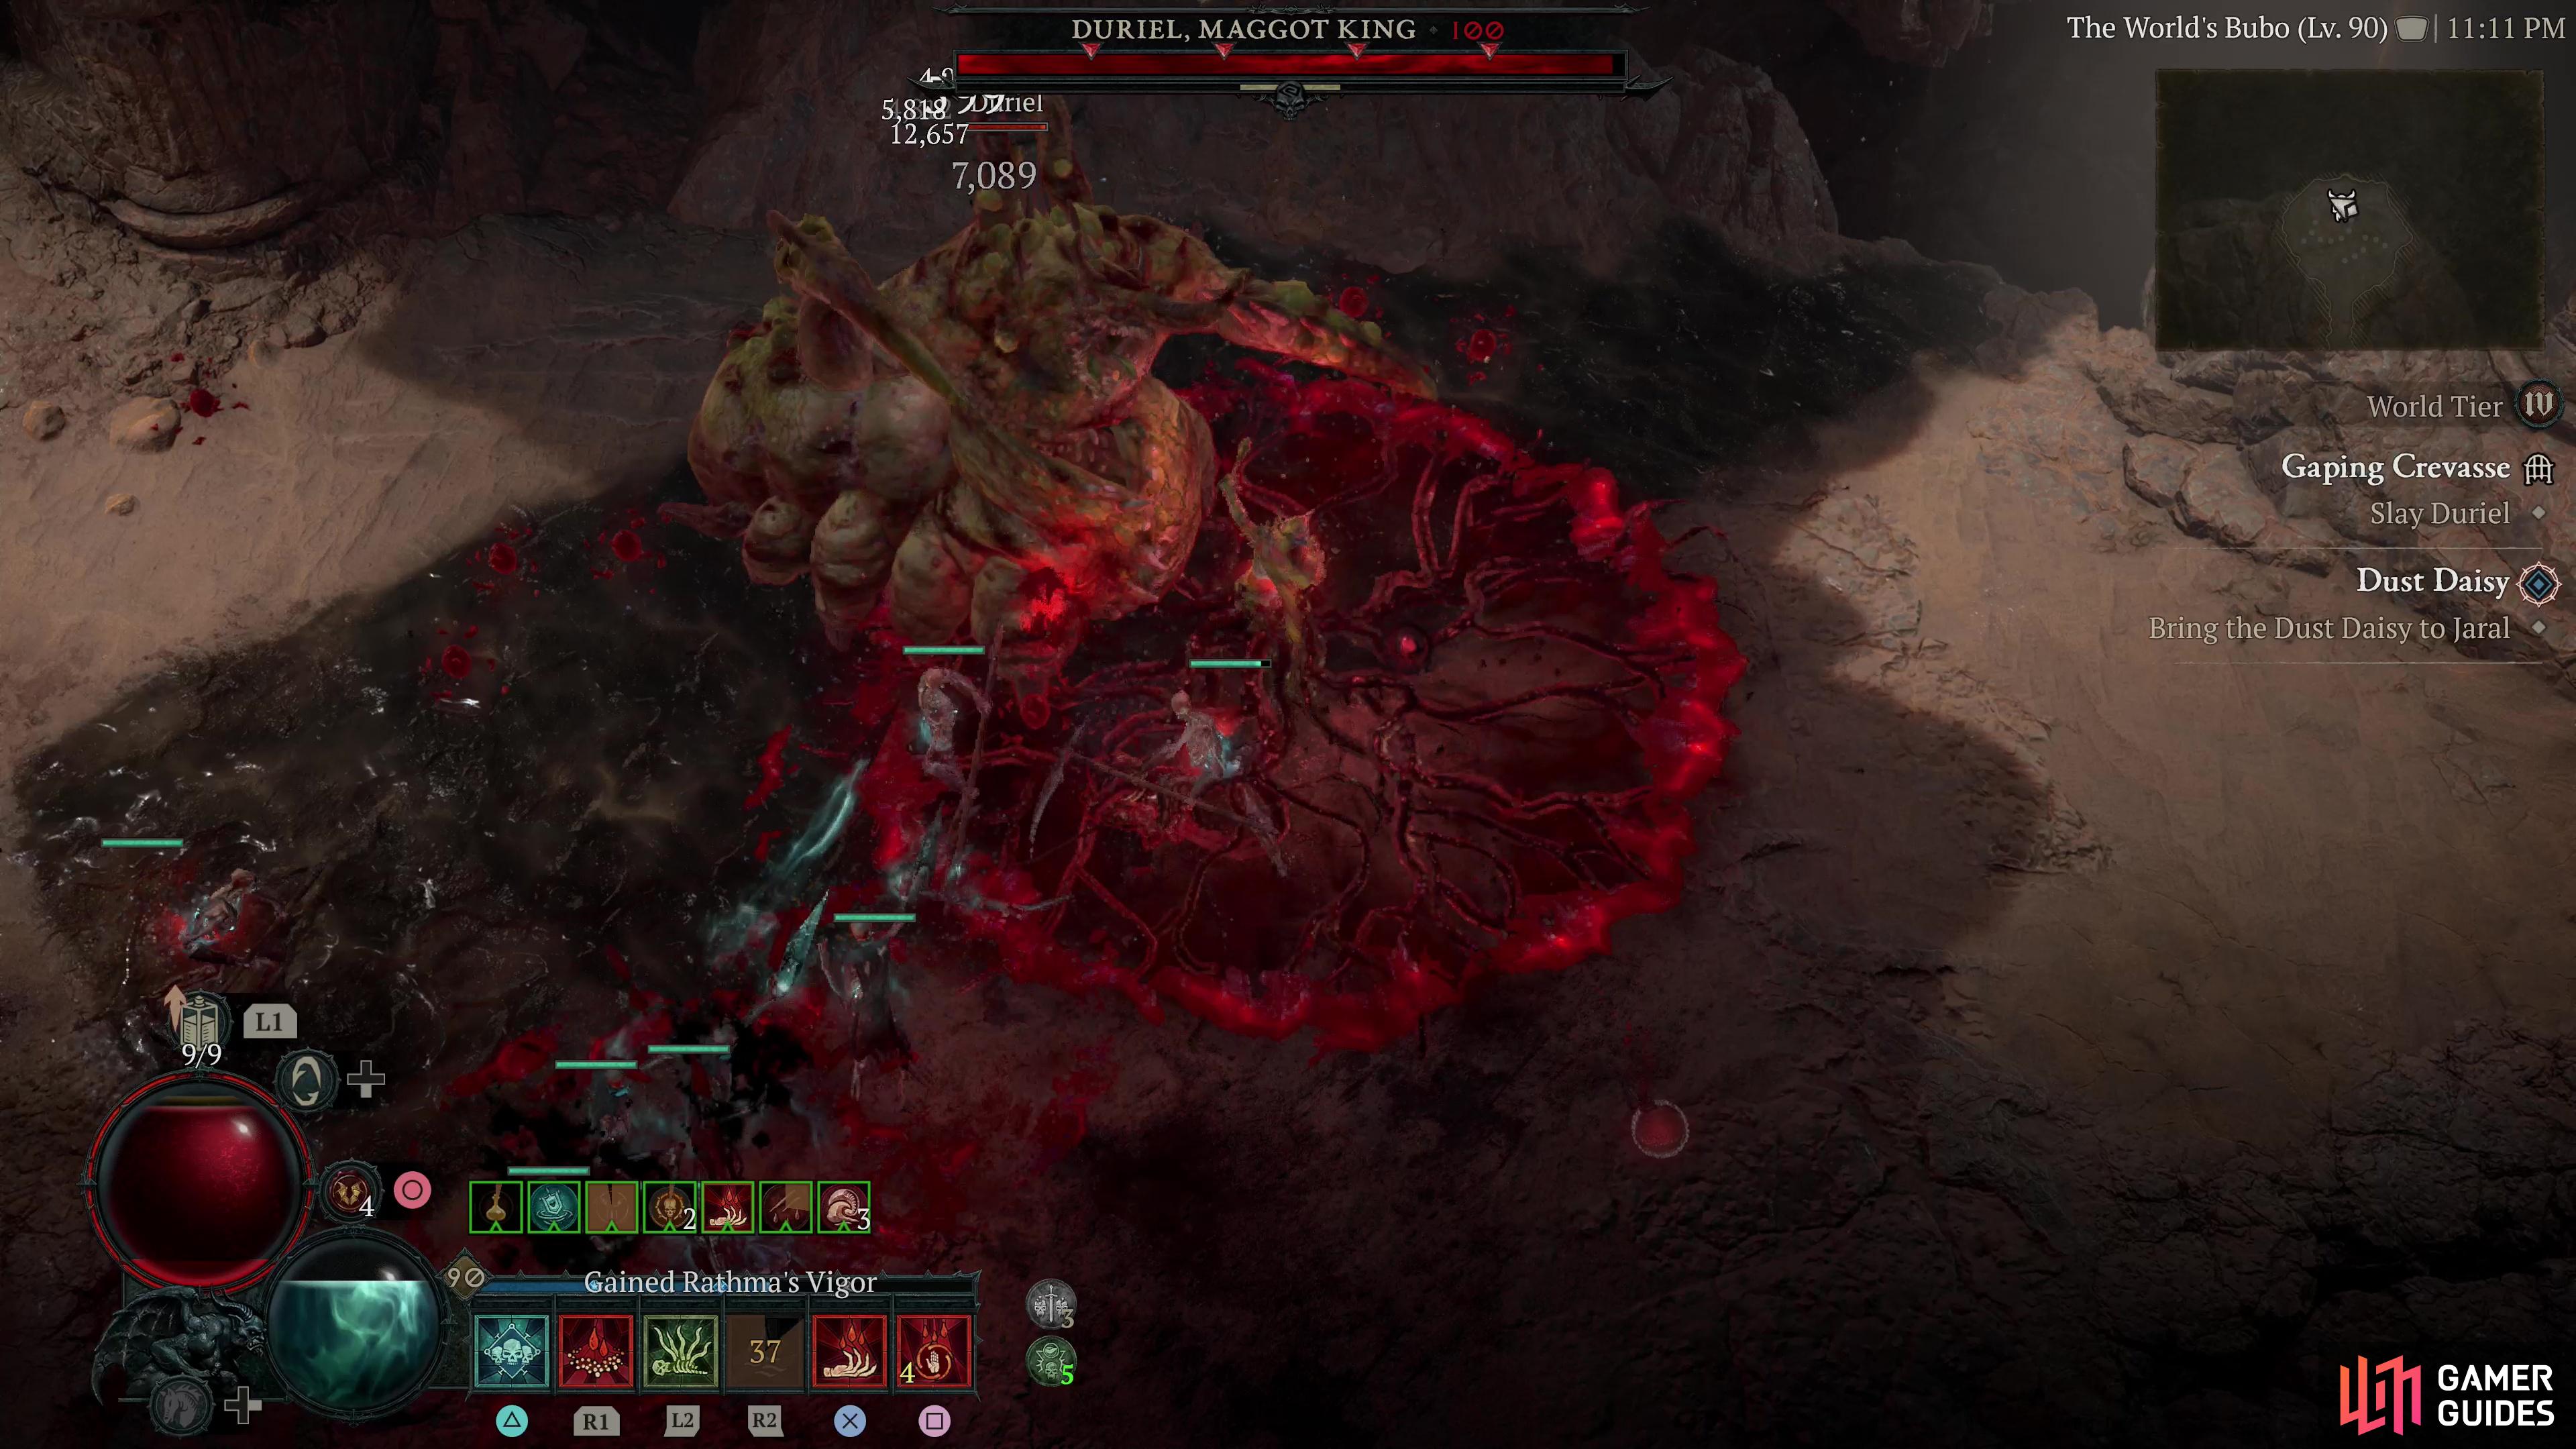
Against uber bosses and higher tier Nightmare Dungeons you’ll have to play a bit smarter, but the core concept is the same - and the Blood Surge Necromancer can stand toe-to-toe with the worst enemies the game has to offer.
Blood Surge Necromancer Build Pros and Cons
| Pros | Cons |
|---|---|
| Massive Overpower damage. | Have to be in melee range. |
| Tanky. | No long-range attacks. |
| Simple playstyle. | Very Essence hungry. |
| Requires easily obtained gear. | Have to keep minions alive for peak efficiency. |
| Same playstyle from Lv1 - 100. | – |
Blood Surge Necromancer Leveling Guide
One of the highlights of the Blood Surge Necromancer is that it plays virtually the same from Lv1 to Lv100. Grab Hemorrhage with your first skill point and work your way to the ![]() Acolyte’s Hemorrhage passive, then grab Blood Surge and work towards Paranormal Blood Surge. You’re already cooking with the two attacks you’ll be using for the rest of the playthrough. After that, you’re just picking up passives and support skills as you burn your way down towards Rathma’s Vigor. The only significant change between early game (before World Tier 3) and the endgame build is with ultimate skills. We used Blood Wave to bolster our offense before eventually dropping it in favor of Decrepify; in the early game our Essence recovery and Overpower damage aren’t quite as dominating as they will later be, and our enemies aren’t as dangerous as the worst of World Tier 4, so shifting the scales a bit towards offense makes sense. That said, the ultimate you use doesn’t really matter too much,
Acolyte’s Hemorrhage passive, then grab Blood Surge and work towards Paranormal Blood Surge. You’re already cooking with the two attacks you’ll be using for the rest of the playthrough. After that, you’re just picking up passives and support skills as you burn your way down towards Rathma’s Vigor. The only significant change between early game (before World Tier 3) and the endgame build is with ultimate skills. We used Blood Wave to bolster our offense before eventually dropping it in favor of Decrepify; in the early game our Essence recovery and Overpower damage aren’t quite as dominating as they will later be, and our enemies aren’t as dangerous as the worst of World Tier 4, so shifting the scales a bit towards offense makes sense. That said, the ultimate you use doesn’t really matter too much, ![]() Army of the Dead is also a fine choice that fits thematically with this build.
Army of the Dead is also a fine choice that fits thematically with this build.
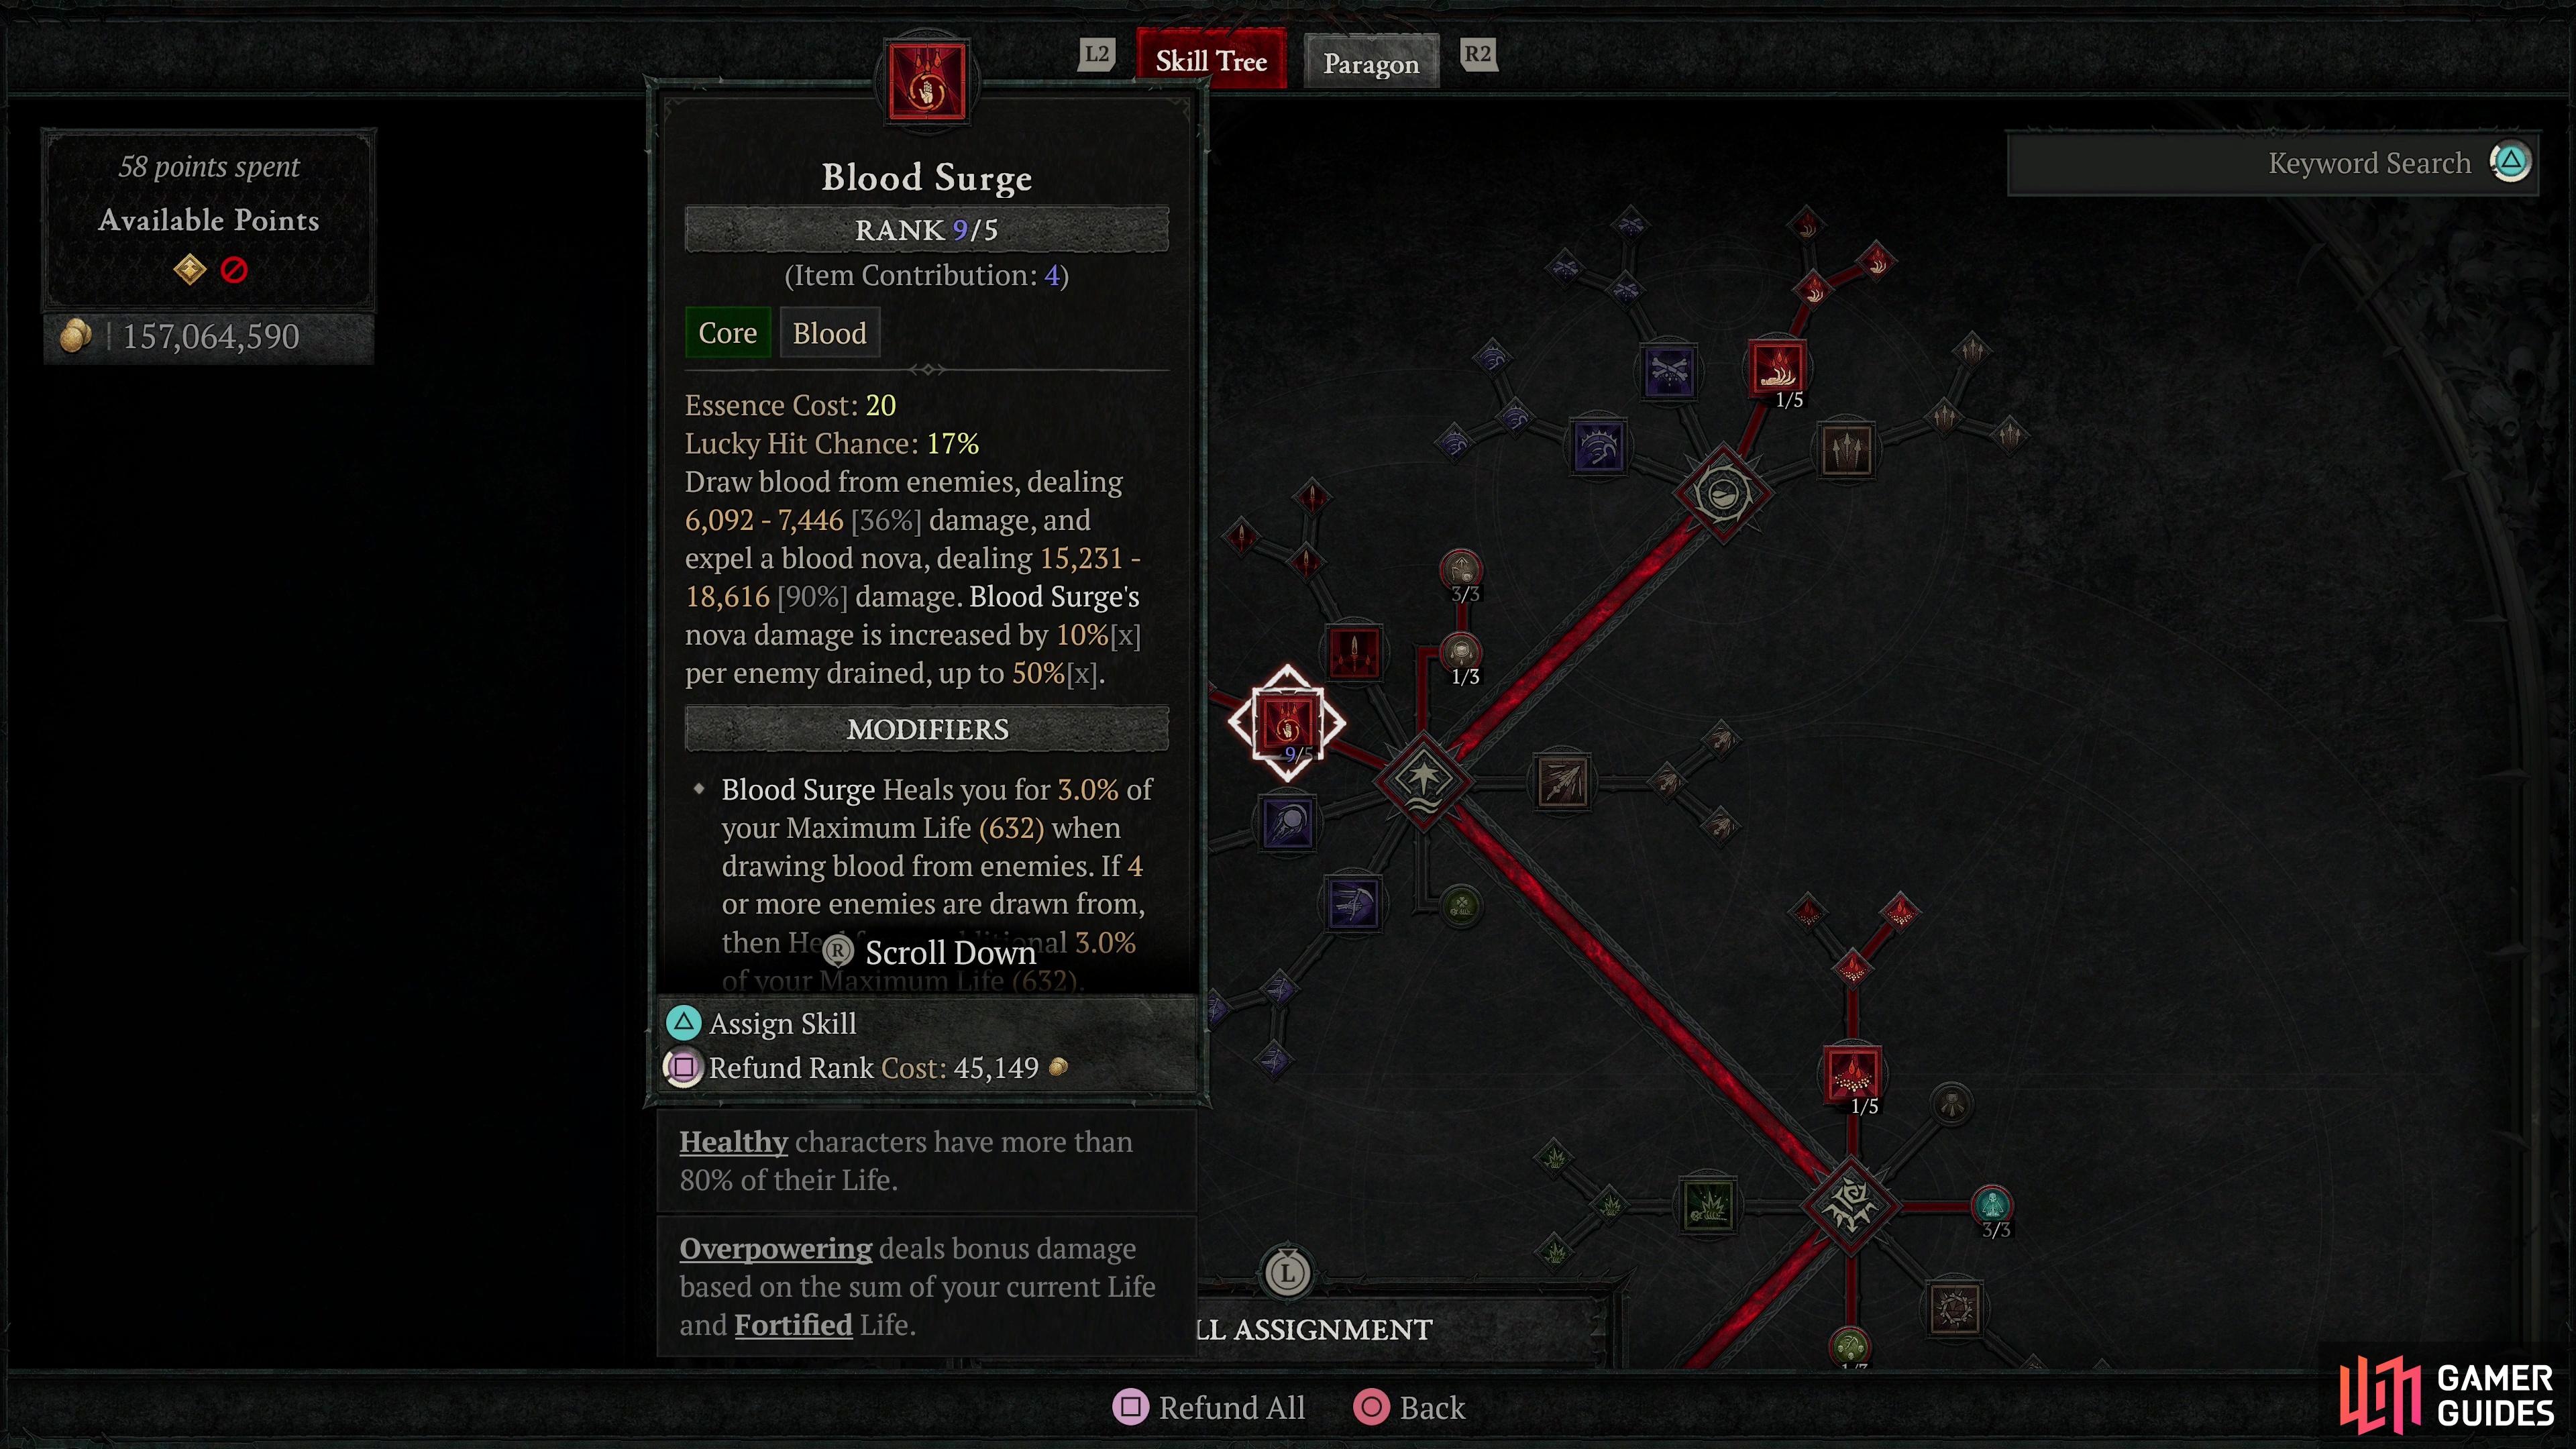
As the name of the build suggests, Blood Surge is our primary skill.
Blood Surge Necromancer Skills
![]() Below you’ll find a list of all the skills used by the Blood Surge Necromancer, and the order in which we select them. Again, simplicity is one of this build’s strengths, and you really can get by with just Hemorrhage, Blood Surge, and your minions for most of the game. Blood Mist and Corpse Tendrils are picked up early just for a bit of control and damage mitigation, but after that, we’re largely grabbing passives that boost our damage output or keep our minions alive. If you want an ultimate skill, grab one (and its passives, if you wish) around the time we invest into Inspiring Leader. This will push things back a bit, but it shouldn’t matter, nothing before World Tier 3 really challenges this build. When you find that your offense is humming along just fine without an ultimate skill, spec out of it and grab Decrepify, instead.
Below you’ll find a list of all the skills used by the Blood Surge Necromancer, and the order in which we select them. Again, simplicity is one of this build’s strengths, and you really can get by with just Hemorrhage, Blood Surge, and your minions for most of the game. Blood Mist and Corpse Tendrils are picked up early just for a bit of control and damage mitigation, but after that, we’re largely grabbing passives that boost our damage output or keep our minions alive. If you want an ultimate skill, grab one (and its passives, if you wish) around the time we invest into Inspiring Leader. This will push things back a bit, but it shouldn’t matter, nothing before World Tier 3 really challenges this build. When you find that your offense is humming along just fine without an ultimate skill, spec out of it and grab Decrepify, instead.
Minions are useful enough, especially Skeletal Mages (Cold), who can recover Essence for you.
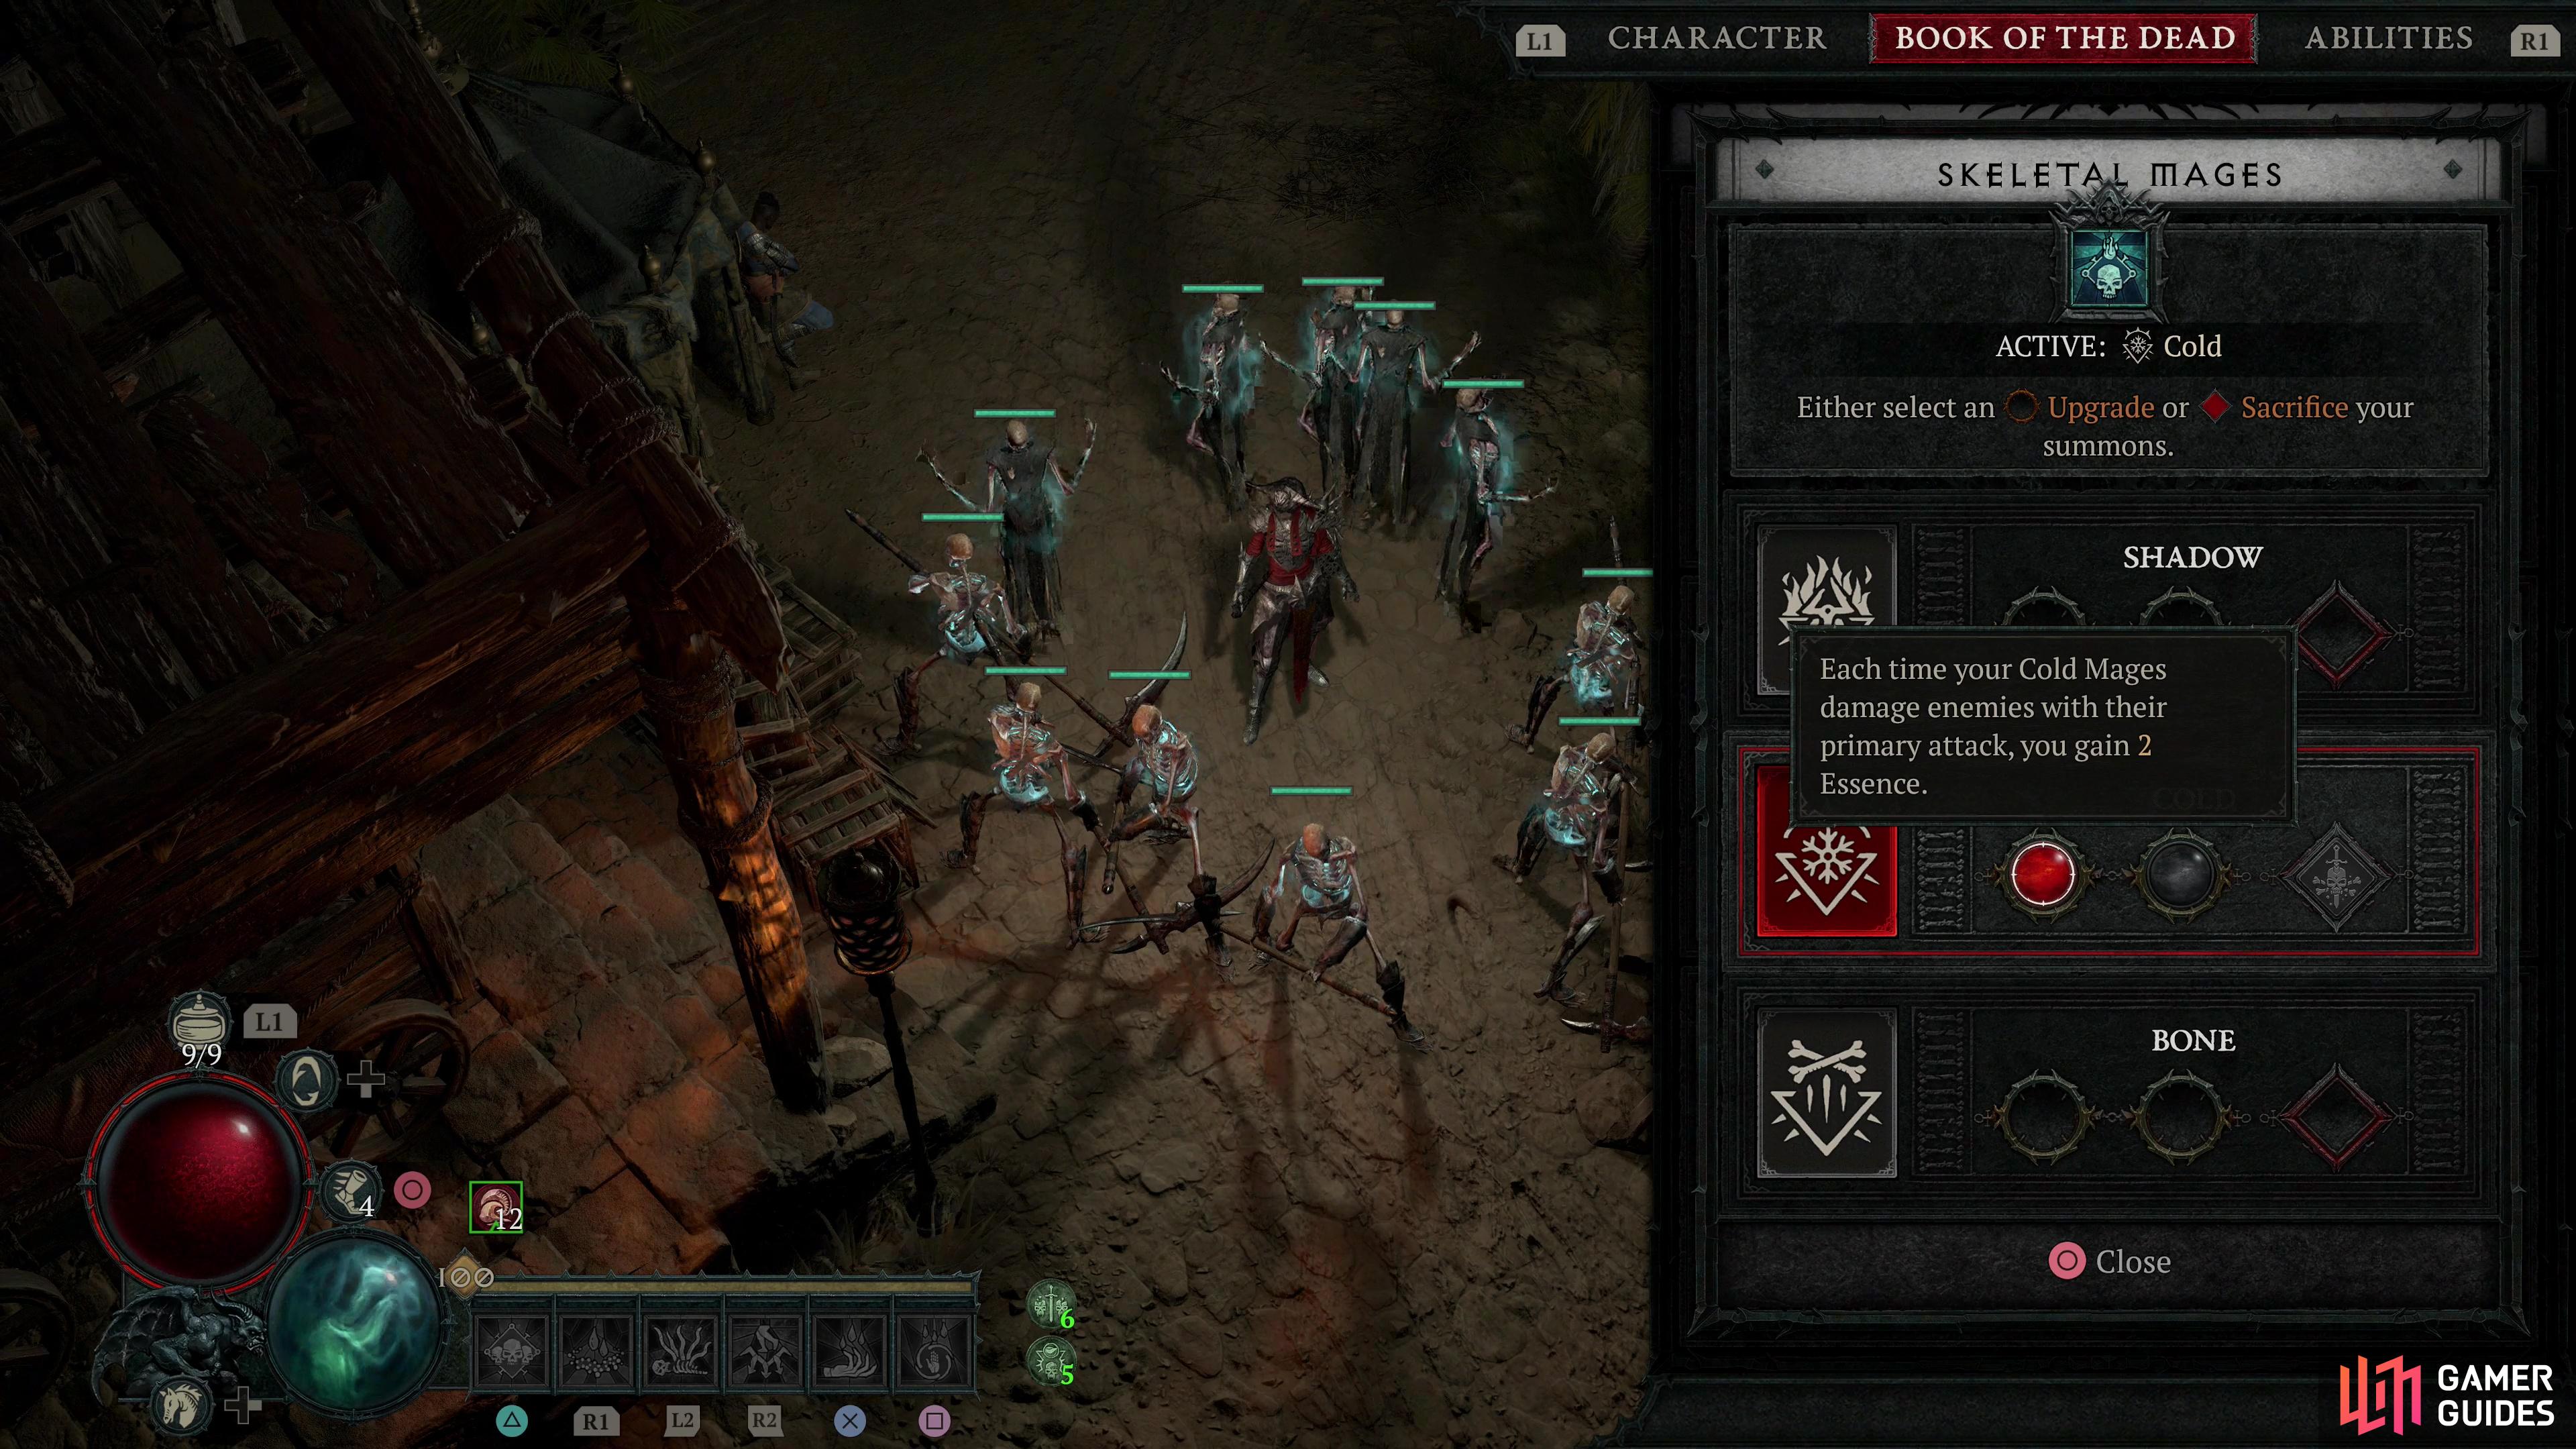
Blood Surge Necromancer Book of the Dead
You can technically run this as a non-minion build if you want to grab the passives for sacrificing your minions, but bringing around skeletons helps us generate corpses and Essence, the former of which is nice and the latter is quite helpful. We select the following minions to assist us in our campaign against the evils of Sanctuary:
- Skeletal Warriors: Reapers - Reapers have a 15% chance to carve the flesh off enemies, forming a Corpse.
- Skeletal Mages: Cold - Each time your Cold Mages damage enemies with their primary attack, you gain 2 Essence.
- Golems: Blood - Your Maximum Life is increased by 10%[x], but you lose the ability to summon a Golem.
Losing the golem isn’t anything to sweat - one strong mob isn’t going to swing a fight, but giving yourself a health boost to max Life (and hence, Overpower damage) will regularly pay off. The Skeletal Mages are the most important minions, generating Essence for you and helping to fund your offense, while the Skeletal Warriors mostly just help keep your mages alive and create corpses for you. Other than those aforementioned boons, you shouldn’t expect your minions to deal too much damage or draw aggro, especially not from bosses. They’re there for corpses and Essence, and on the off-chance that they actually soak damage for you, all the better.
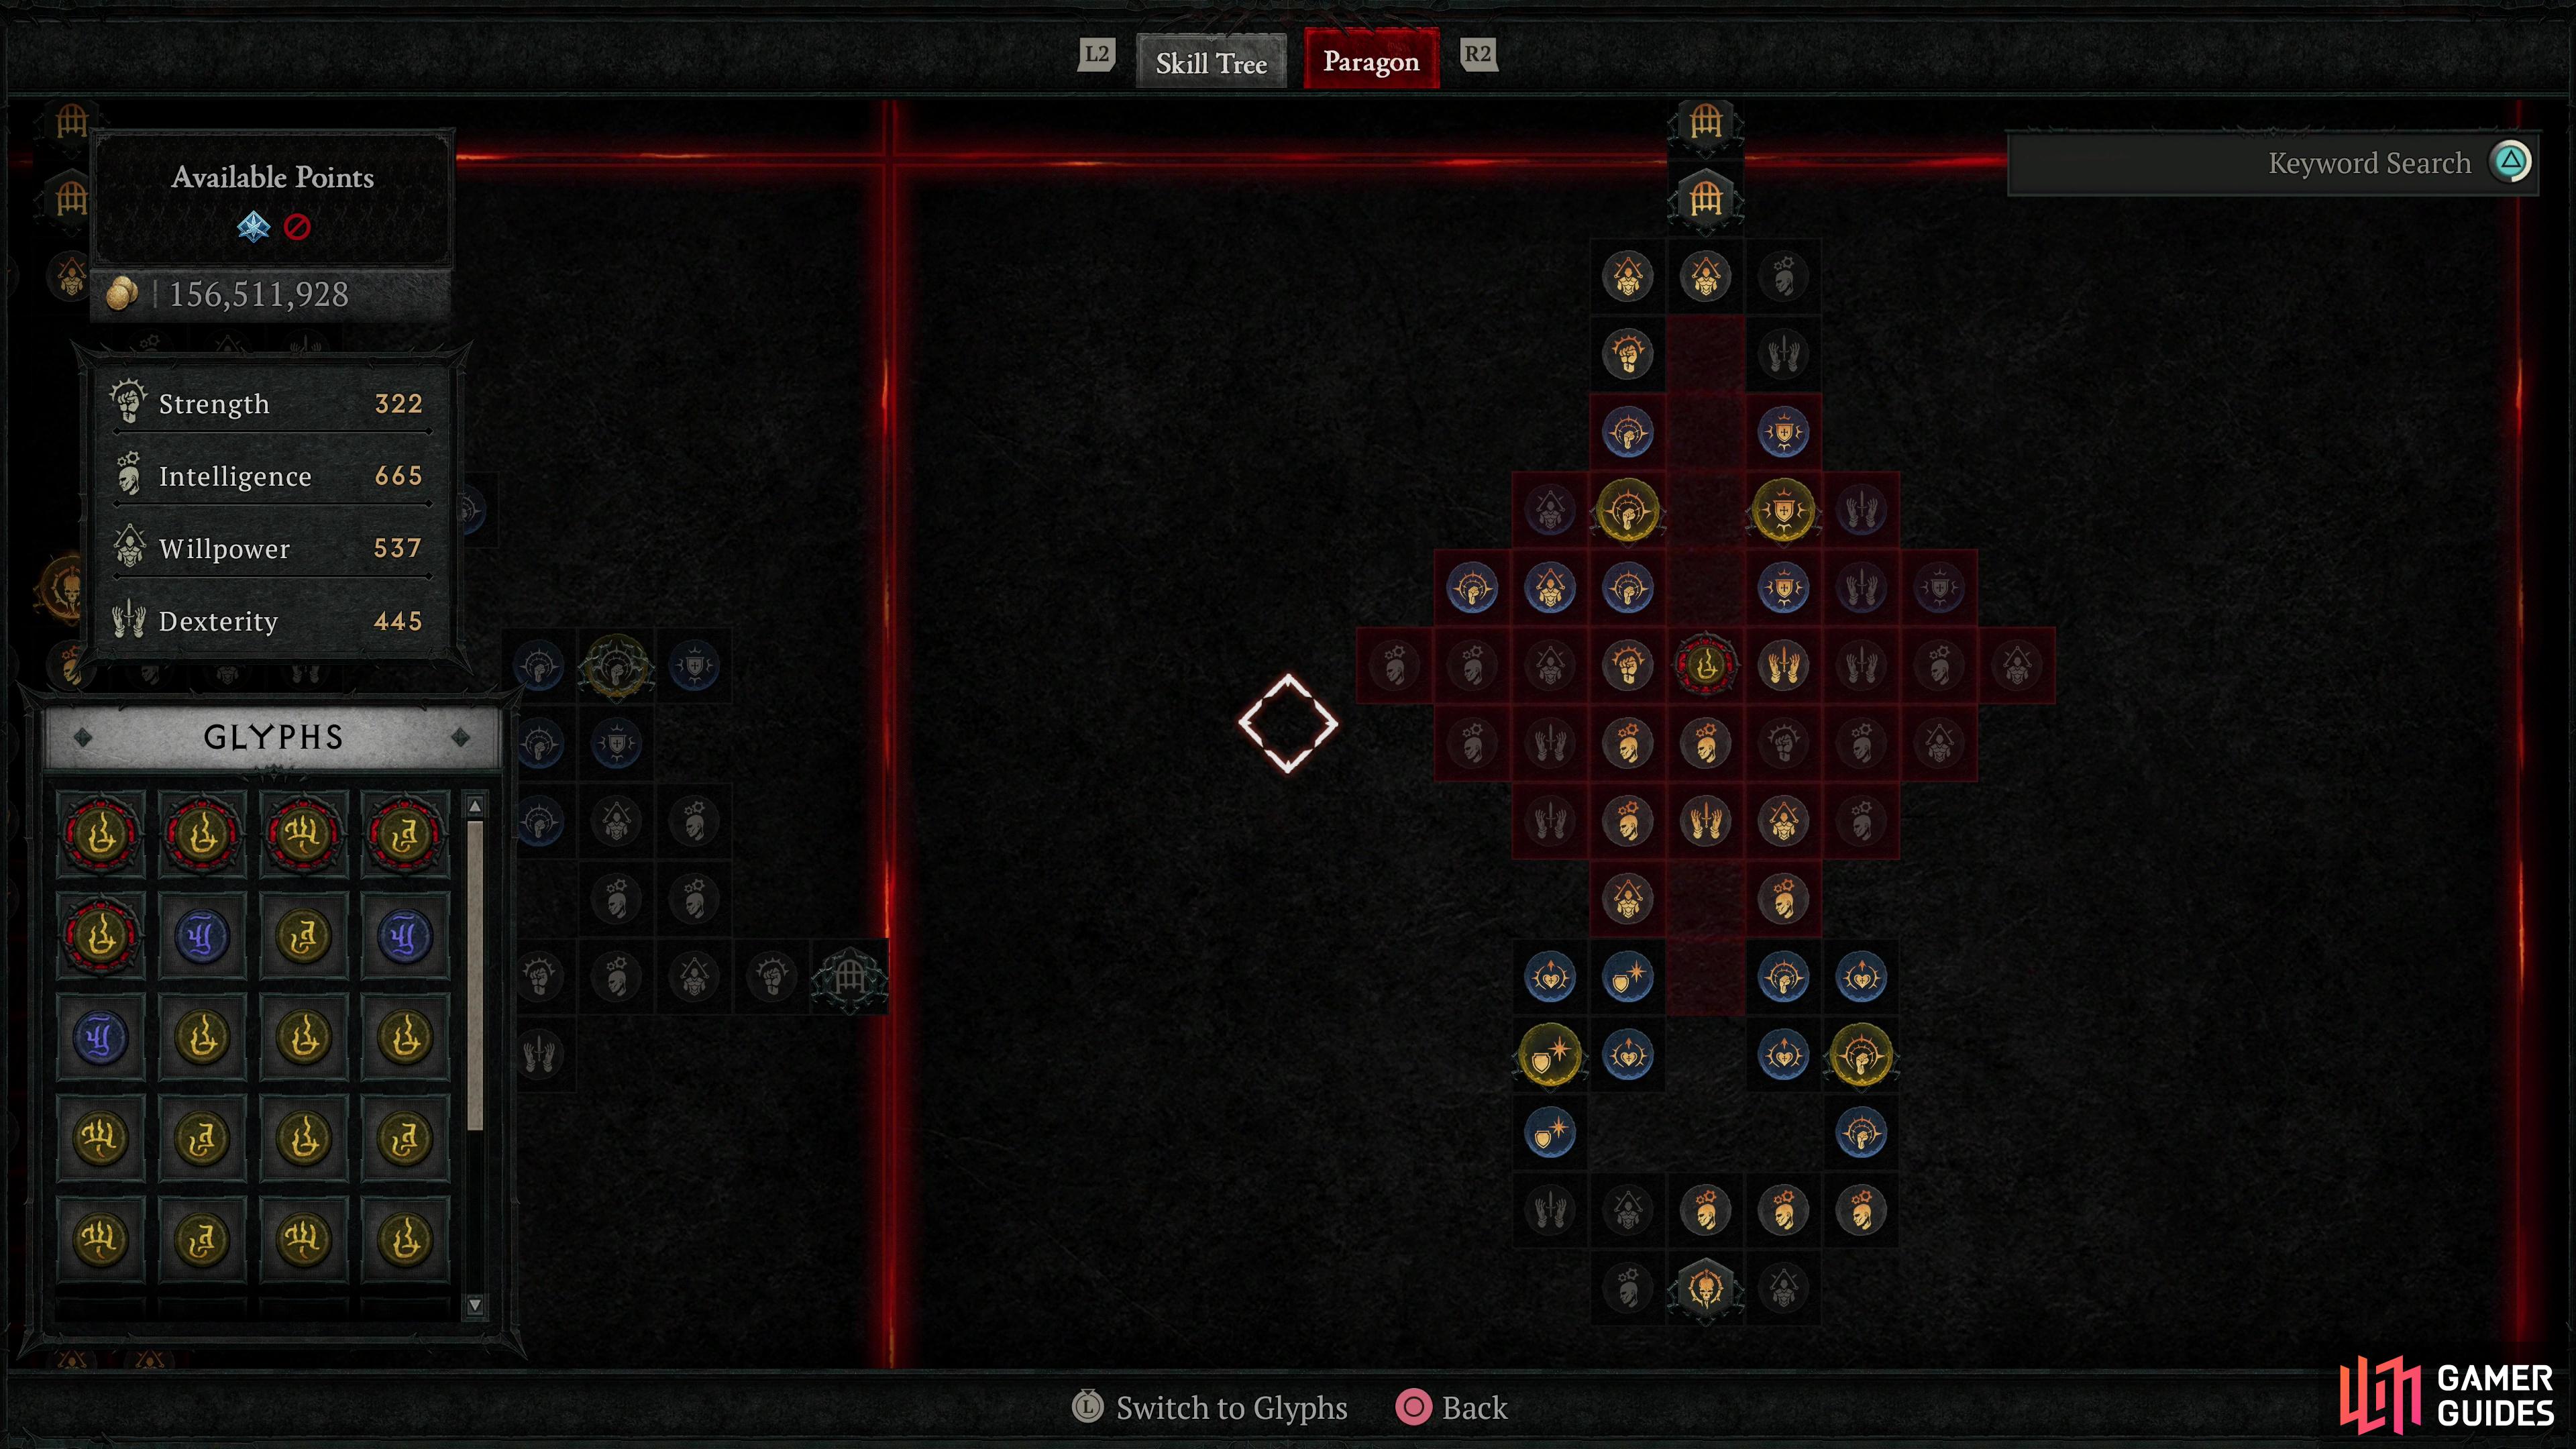
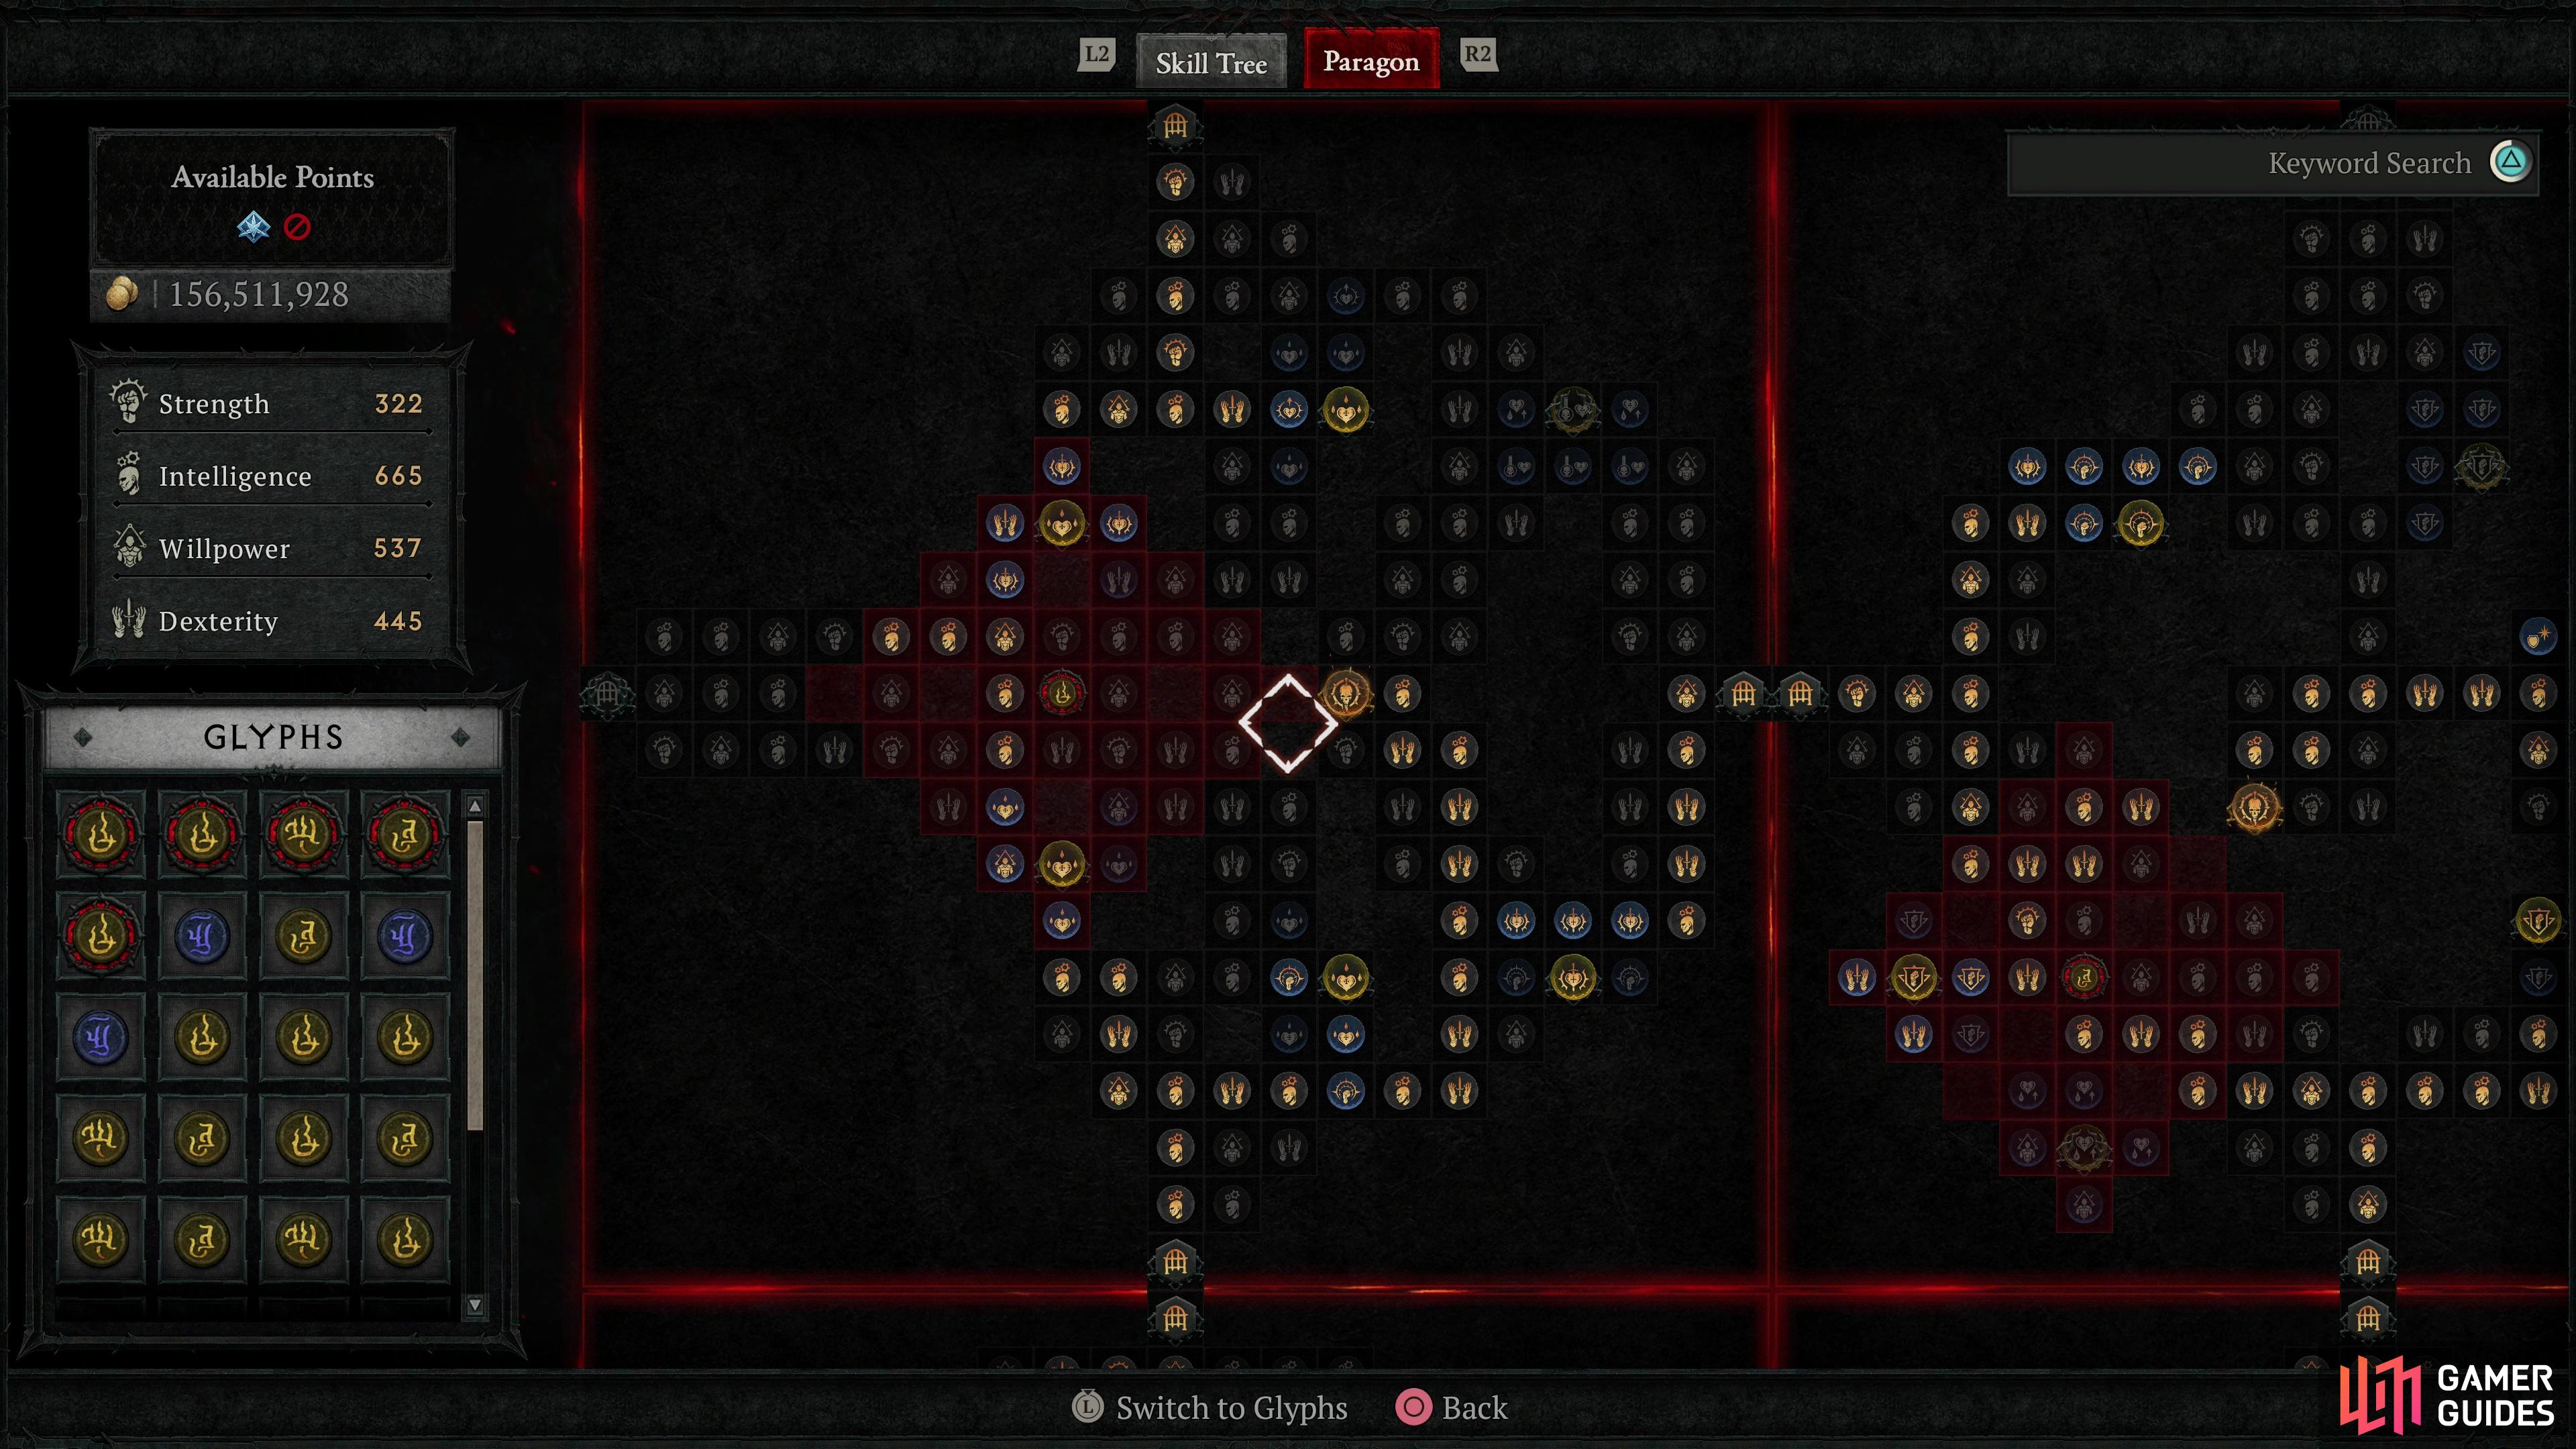
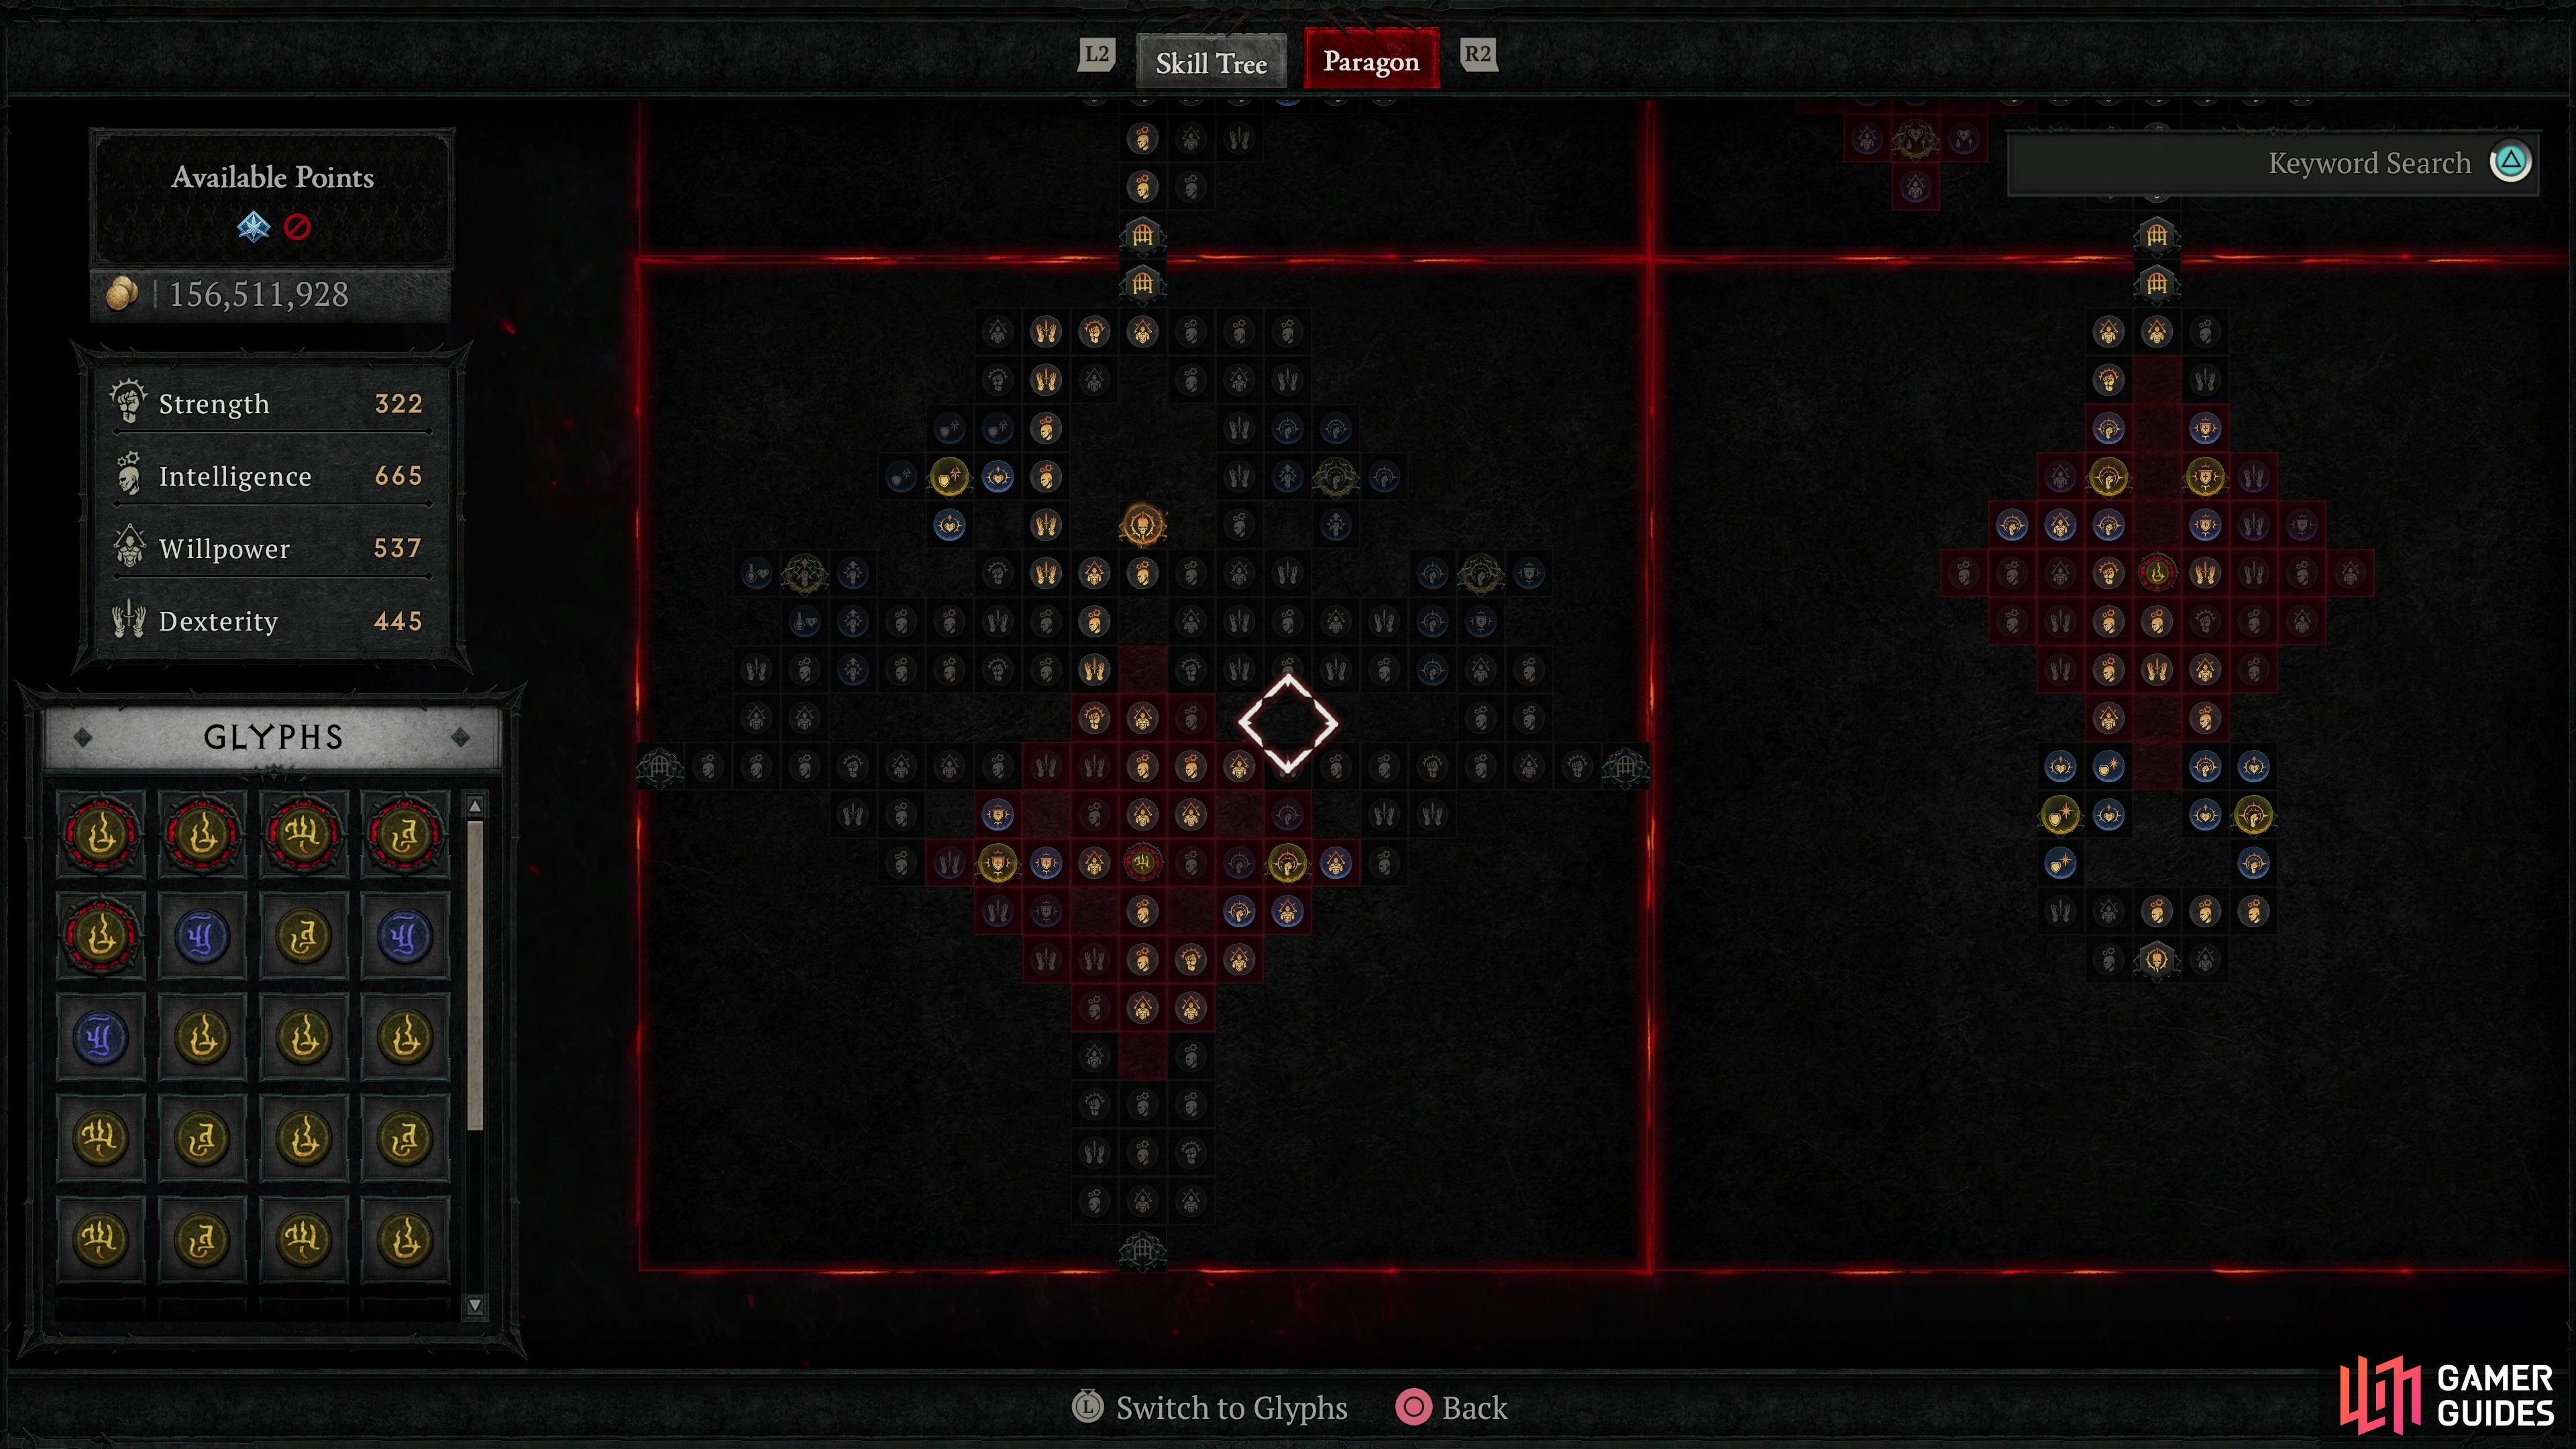
Blood Surge Necromancer Paragon Boards and Paragon Glyphs
The Blood Surge Necromancer deals close-range physical damage with blood skills but mostly relies on Overpower procs to induce massive damage spikes, with mechanics like Fortify and Lucky Hit playing secondary roles. Not only do we deal most of our damage via Overpower, but we also gain significant boons when we’re Healthy, and some of our skills generate Blood Orbs, which provide further buffs. All of these are considerations when it comes to what Glyphs and Paragon Boards we want. Minions and Curses are, by comparison, tertiary considerations, but even they get attention as time wears on and we’ve had our pick of the best Boards and Glyphs. Below you’ll find a list of the Paragon Boards we chose, the rare nodes we target, and the Paragon Glyphs we use, with explanations:
The Necromancer’s Starter Board is full of good, if generalized, nodes.
Necromancer Starter Board
| Tile | Necromancer Starter Board |
|---|---|
| Glyph | Blood-Drinker |
| Rare Node | Prime |
| Rare Node | Resilience |
| Rare Node | Preservation |
| Rare Node | Knowledge |
The starter board is usually a banger, with lots of generous, general-use rare and magic nodes that really help players hit the ground running once they hit World Tier 3. The Necromancer doesn’t deviate from this trend, and we buy every rare node on the board and most of the magic ones, too. In fact, we only skip one +7 Willpower node, two +7 Dexterity nodes, and one +50 Armor node. Otherwise, we grab the normal modes required to get between this, making diversions to ensure there’s 40 Intelligence in range of the Blood-Drinker Glyph we socket on this board… at least, once the glyph’s radius is expanded at Lv15.
Blood-Drinker gives us bonuses to the magic nodes in range (boosting our Armor, +% Damage, and Willpower) and gives us the bonus “Blood Orbs Fortify you for 7% of your Maximum Life”, which will help keep us Fortified - just pick up those Blood Orbs that will spawn during combat. Other bonuses gained on this board include Max Life and Resistance to All Elements, the former of which is very useful and the latter becomes important in World Tier 4. Great board all around.
![The Bloodbath legendary node gives a whopping 35%[x] Overpower Damage.](/assets/media/17/301/diablo4_season2_blood_surge_necro_bloodbath_board-155d972a.jpg)
The Bloodbath legendary node gives a whopping 35%[x] Overpower Damage.
Bloodbath Board
| Tile | Bloodbath Board |
|---|---|
| Glyph | Territorial |
| Legendary Node | Bloodbath |
| Rare Node | Hardened |
| Rare Node | Powerhouse |
| Rare Node | Suffused Resilience |
| Rare Node | Thick Hide |
The main draw here is the 35%[x] Overpower damage bonus that the namesake of this board, the Bloodbath Legendary Node, gives us. It’s obviously a key part of our build, but we take a roundabout way of getting to it, also picking up Thick Hide (Max Life, Damage When Fortified) and Suffused Resilience (-% Damage Taken Over Time and Resistance to All Elements)… the former because it’s on the way, the latter because another flat +9% resist all is too good to ignore.
Branching to the left we ignore the Remedy rare node (Healing Received, but you’ll leech well enough without it), and socket the Territorial Glyph into the empty socket, then get the rare node Hardened to the left, which gets us +% Damage while Fortified, but more importantly, the +% Damage to Close Enemies magic nodes. This is useful for a build where most of the damage we deal will be against close enemies! As for the Territorial Glyph, it gets us +7.5% Damage to Close Enemies per 5 Dexterity within range, so take sensible detours to at least unlock the bonus “You gain 10% Damage Reduction against Close enemies” property (requires 25 Dexterity).
Finally, we go up to the Powerhouse node, which is lowkey one of the best nodes on this board, as it boosts our Damage while Healthy and Overpower Damage. Like Close Damage, Damage while Healthy is very useful for this build - when it matters, fights are a very feast-or-famine affair. Either we’re going to be in full health (hence, Healthy) or in trouble, with little time spent in between. This means Healthy Damage effectively counts as flat damage, which is good. It’s also worth noting that between the rare node and magic nodes, you’re adding another +90% Overpower damage to your build, which is just excellent.
On the Blood Begets Blood Board we want the Aggression rare node and we’ll use the Corporeal Glyph to further boost our Overpower Damage.
Blood Begets Blood Board
| Tile | Blood Begets Blood Board |
|---|---|
| Glyph | Corporeal |
| Legendary Node | Blood Begets Blood |
| Rare Node | Aggression |
| Rare Node | Invigorated |
| Rare Node | Blooddrinker |
| Rare Node | Blood Empowered |
| Rare Node | Vampiric |
Exit from the Bloodbath board and rotate Blood Begets Blood until the Aggression rare node is nearby, then beeline to it. Obvious why we want this, +% Damage and Overpower Damage, and we grab up all the Overpower we can get, for a silly +157.5% Overpower Damage, and combined with the Powerhouse node from the last board, that’s +247.5% Overpower Damage, or roughly 10% of the total Overpower damage an endgame Blood Surge Necromancer will have.
The eponymous Blood Begets Blood legendary node and Invigorated rare node will boost your damage after picking up a Blood Orb (the former is multiplicative, hence fairly potent) and more damage when healthy. Keep pushing left from Invigorated to find a Board Attachment Gate to the south, which you’ll get to later, and work your way up to the Blooddrinker rare node, the Glyph socket (install Corporeal here), and next the Blood-Empowered rare node. Blooddrinker is just on the way and Blood-Empowered is nothing special, but the magic nodes around it boost Overpower damage. See a theme? Corporeal on its own isn’t great, but it does boost magic nodes within range, but it needs a radius increase to reach two of the three Overpower magic nodes. Make leveling this a priority, as each node will give +48.2% Overpower Damage when influenced by a Lv15 Corporeal Glyph - another +144.6% Overpower Damage boost.
March up to the top of the board, taking a detour to unlock the Vampiric rare node and its nearby +2.0% Maximum Life magic node. Not a great haul, but three nodes for 6.0% Max Life isn’t bad, and we need to unlock the Board Attachment gate up here, anyway.
The Dominate Glyph can be used on the Scent of Death Board to massively boost Overpower Damage.
Scent of Death Board
| Tile | Scent of Death Board |
|---|---|
| Glyph | Dominate |
| Legendary Node | Scent of Death |
| Rare Node | Shadow Resilience |
| Rare Node | Preservation |
| Rare Node | Deathmarked |
There are two main draws on this board - the Scent of Death legendary node, which will give us Damage Reduction if there are corpses nearby, or a health 15%[x] damage boost if not. Either way, we’re doing good. After that, steam down to the other point of interest here, the Glyph socket, where we’ll install the potent Dominate Glyph. This Glyph adds Overpower Damage for every 5 Willpower within range, so spread out and grab the Willpower nodes nearby, and be sure to level this Glyph second, after Corporeal. If you snag every bit of Willpower within the expanded (Lv15) radius of this Glyph you’ll be adding over +300% Overpower Damage to your already stacked build.
In addition, detour to grab the Shadow Resilience rare node and the two +2.0% Max Life magic nodes nearby, then get Preservation and Deathmarked adjacent to Dominate. This will get you Armor and Damage to Injured Enemies, which is fine, but you really want to grab the Willpower nodes next to Deathmarked, as they’ll yield heavy Overpower Damage once everything is upgraded.
![Using the Amplify Glyph on the Bone Graft Board will cause your curses to deal 10%[x] damage. You can also score some resistances on this tree.](/assets/media/17/301/diablo4_season2_blood_surge_necro_bone_graft_board-42af4828.jpg)
Using the Amplify Glyph on the Bone Graft Board will cause your curses to deal 10%[x] damage. You can also score some resistances on this tree.
Bone Graft Board
| Tile | Bone Graft Board |
|---|---|
| Glyph | Amplify |
| Rare Node | Erudite |
| Rare Node |
We’re running on fumes now, as far as Paragon Boards go, and while this is a bone-skill-oriented one, there are a few worthwhile pickups we can make with the last of our Paragon points. First head over to the Glyph socket and insert Amplify, which gives you a boost to magic nodes within range and, more importantly, 10%[x] more damage when enemies are afflicted by Curse skills. This is a nice damage boost and one of the reasons (aside from survivability) that we start using Decrepify more late-game. Grab as much Intelligence as you can within range to unlock this, but you’ll probably need to hit Lv15 with the Glyph before it’s up and running.
We also grab the Erudite rare node nearby, as it gives us Intelligence (useful for unlocking Amplify) and Resistance to All Elements. It also has three resist all magic nodes nearby, and when Amplify’s radius has been maxed out these will all get a buff, netting you around 15% resist all when all is said and done. Not bad for a short detour. Finally, on the right side of the board, you can score Tenacity, which will get you Maximum Life and Armor. Not the greatest, but with the last few points we have it’s not a bad way to finish up.
This build uses Vampiric Powers to inflict the Vulnerable debuff and further bolster Overpower procs, Essence recovery and life leech.
Vampiric Powers
Unique to the Season of Blood are Vampiric Powers, which can be earned by completing season quests, earning Hunter Acclaim and by purchasing them with Potent Blood. There are 22 Vampiric Powers and you can have up to 5 equipped at once, assuming your armor has sufficient Pacts. These are the best powers for the Blood Surge Necromancer build:
-
Blood Boil: When your Core Skills Overpower an enemy, you spawn 3 Volatile Blood Drops. Collecting a Volatile Blood Drop causes it to explode, dealing 60% Physical damage around you. Every 20 seconds, your next Skill is guaranteed to Overpower. We like to Overpower. It’s where all our damage lives. Getting a free Overpower every 20 seconds isn’t going to make or break the build, but it’s not nothing, either. The Volatile Blood doesn’t really do much of interest.
-
Feed the Coven: Lucky Hit: Conjuration, Companion, Minion, and Bat Familiar attacks have up to a 30% chance to restore 10 Primary Resource to you and increase your Damage by 10% for 4 seconds. Your minions already exist to generate Essence for you. Now they all have a chance to generate more. Doubling down on what our build always does is a good thing, in this case.
-
Hemomancy: Your attacks deal 40% of your Maximum Life as Physical damage to nearby enemies. This can only occur once every 4 seconds. You heal for 1% of your Maximum Life for each enemy damaged this way. Gives us a bit of range (the “nearby enemies” thing here is a bit of a lie) and more Life leech. Not bad.
-
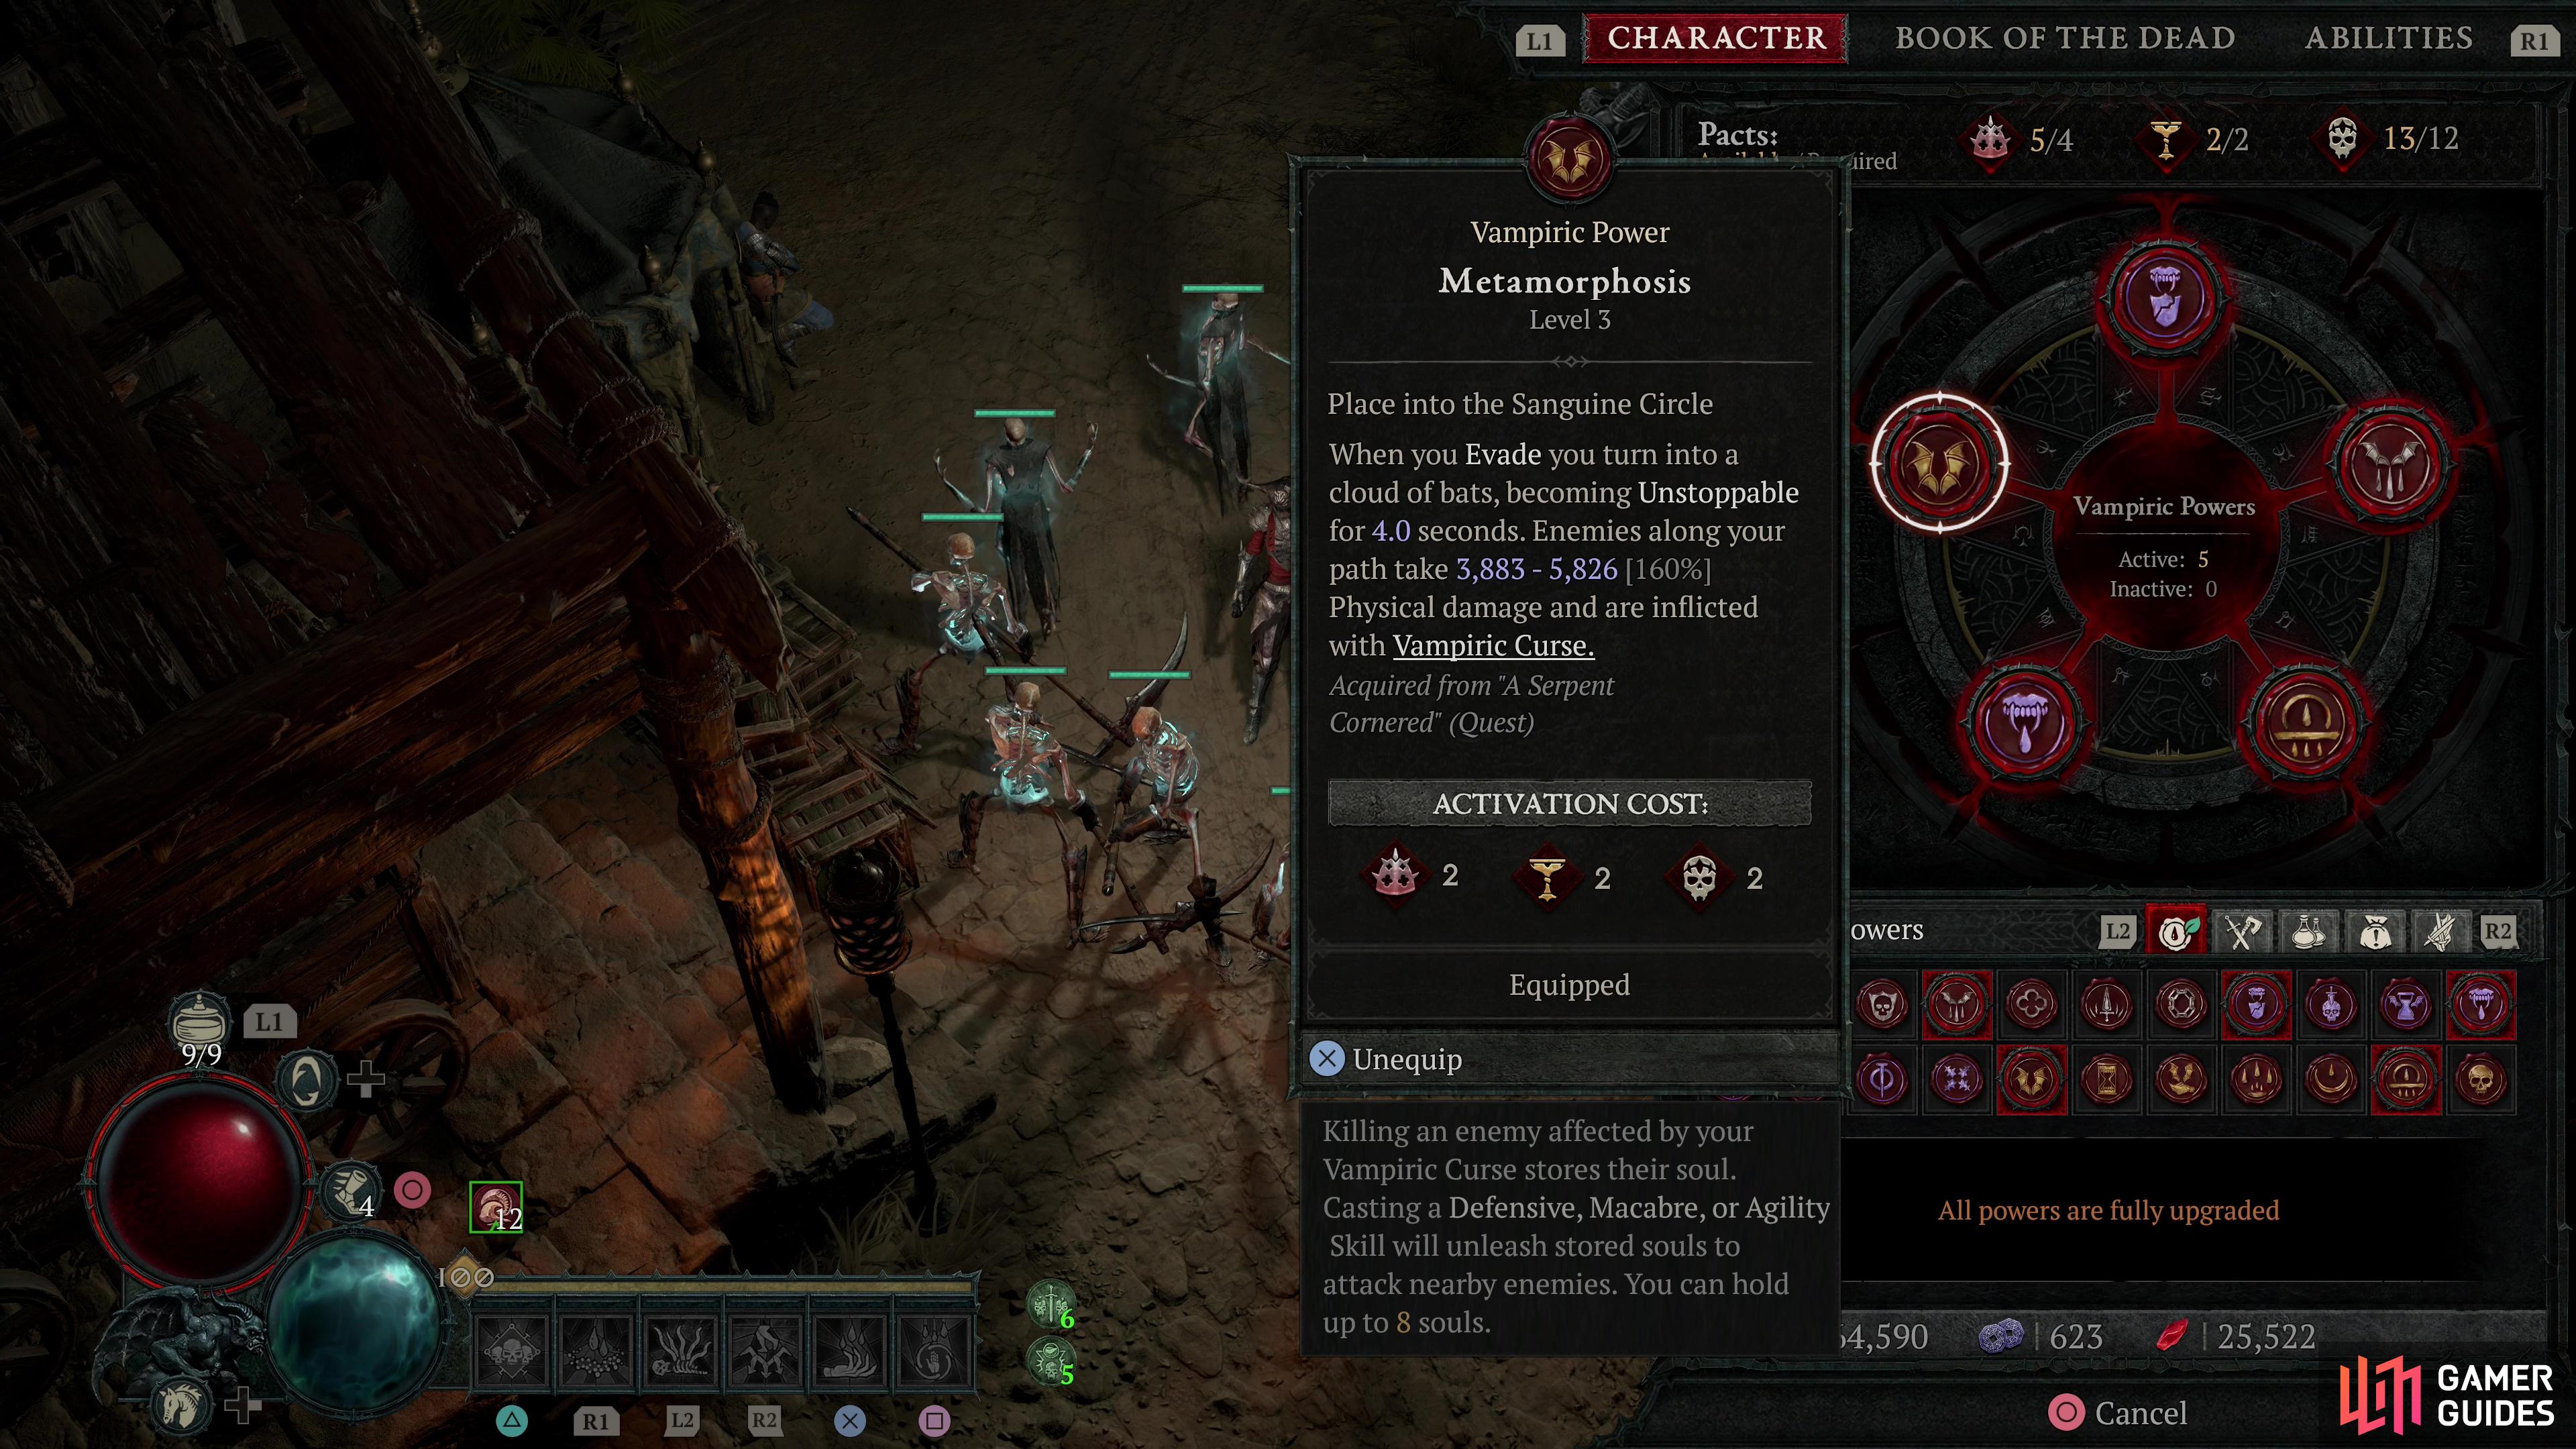
Metamorphosis: When you Evade you turn into a cloud of bats, becoming Unstoppable for 2 seconds. Enemies along your path take 80% Physical damage and are inflicted with Vampiric Curse. This build doesn’t have a lot of ways to inflict Vulnerable, and this gives us a great means of adding this debuff to our damage pool. What’s better is it has 100% uptime.
-
Prey on the Weak: You deal 8% increased damage to Vulnerable enemies. Enemies are Vulnerable while affected by a Vampiric Curse from your other Vampiric Powers. On its own, not that great, but when paired with Metamorphosis isn’t a nice damage buff.

(1 of 3) The Blood-Bathed aspect is the core of the build, giving a solid bonus to Blood Surge damage.
Blood Surge Necromancer Unique Gear and Aspects
In line with being a simple build that plays the same from the start of the game until the end, it’s also a relatively cheap build to obtain. At the end, you only really require two uniques (and “require” is pretty soft on both of these - good legendaries could easily replace them both, as you prefer). The core of the build is the Blood-Bathed aspect which causes Blood Surge to fire twice, albeit at 60-50% less damage on the echo. Other than that you generally want aspects that increase your skeleton counts (Blood Getters for Skeletal Warriors and Occult Dominion for Skeletal Mages), both of which are rather common drops. As the build enters the endgame you’ll want Rathma’s Chosen to give you attack speed every time you Overpower, Starlight to recover Essence as you heal, and Untimely Death to boost your Overpower Damage when you overheal. A full list follows:
| Gear | Legendary Aspect | Effect |
|---|---|---|
| Legendary Helm | Disobedience | You gain 0.6-1.1%[+] increased Armor for 4 seconds when you deal any form of damage, stacking up to 36.0-66.0%[+] |
| Legendary Chest Armor | of Might | Basic Skills grant 20% Damage Reduction for 2.0-6.0 seconds. |
| Legendary Gloves | of Occult Dominion | Your maximum number of Skeletal Mages is increased by 2. |
| n/a | Your Minions have a 3-7% chance to curse enemies. Enemies affected by at least 1 of your curses take 70%[x] increased Overpower damage from you. | |
| Legendary Boots | Blood Getters | Your maximum number of Skeletal Warriors is increased by 2. |
| Legendary Dagger | Blood-Bathed | Blood Surge’s nova echoes again after a short delay, dealing 60-50%[x] less damage. |
| Legendary Focus | of Rathma’s Chosen | Whenever your Blood Skills Overpower you gain 20-50%[+] Attack Speed for 4 seconds. |
| Legendary Ring | Starlight | Gain 20-40 of your Primary Resource for every 25% of your Life that you Heal. |
| Legendary Ring | of Untimely Death | Each percent of your Maximum Life you Heal beyond 100% grants you 0.5%[+] bonus Overpower damage on your next Overpowering attack, up to a 20-60% bonus. |
| n/a | Blood Surge casts a mini nova on your Minions, dealing [X] damage. Damage is increased by 10% per target drained by the initial cast, up to 50%. |
Just remember, don’t let the perfect be the enemy of the good. If you find an 850 Item Power rare wand that has most of the stats you need, there’s no need to turn down what could be hundreds of Attack Power just because it’s not perfect. That said, if you get a perfect roll on a legendary aspect (say, 50% Blood Surge nova damage on a Blood-Bathed aspect), keep that item or aspect handy so when you do find an endgame-worthy item, you’ve got a high-quality aspect to imprint on it.
Blood Surge Necromancer Gear - Gems
Now that Armor doesn’t reign supreme as far as defensive stats go, there’s a bit more variety in our gem choices. First, we put Rubies in every piece of armor we have - helm, chest x2, pants x2 - to boost our Maximum Life, which keeps us alive and allows us to deal more Overpower damage. Our weapon and focus also get a ![]() Ruby each, to boost Overpower damage directly. As for jewelry, we socket in an
Ruby each, to boost Overpower damage directly. As for jewelry, we socket in an ![]() Emerald, a Ruby, and a
Emerald, a Ruby, and a ![]() Topaz to boost our resistance to poison, fire, and lightning. These are the most dangerous, damage-spikey elements out there, and with fully upgraded jewelry and our Paragon boards contributing, we should be able to reach 70% resistance in all three of these. We found this kept us alive better for general gameplay than using
Topaz to boost our resistance to poison, fire, and lightning. These are the most dangerous, damage-spikey elements out there, and with fully upgraded jewelry and our Paragon boards contributing, we should be able to reach 70% resistance in all three of these. We found this kept us alive better for general gameplay than using ![]() Skulls, but you should tailor your resistances to the enemy(ies) you’re fighting - unsocketing gems isn’t that expensive.
Skulls, but you should tailor your resistances to the enemy(ies) you’re fighting - unsocketing gems isn’t that expensive.
| Gear | Gem | Effect |
|---|---|---|
| Helm | +4.0% Maximum Life | |
| Chest Armor | +4.0% Maximum Life | |
| Pants | +4.0% Maximum Life | |
| Weapon | +24.0% Overpower Damage | |
| Focus | +24.0% Overpower Damage | |
| Ring | +30.0% Fire Resistance | |
| Ring | +30.0% Lightning Resistance | |
| Amulet | +30.0% Poison Resistance |
Blood Surge Necromancer Gear Stat Priorities
Finding legendaries with the right aspect and simply equipping gear with the higher Item Power will suffice to get you to World Tier 3, but once you’re in Nightmare difficulty you’ll need to start searching for gear that has stats that compliment your build. Different types of gear can have different stats, and finding/buying/enchanting gear to do just what you need it to do takes up a lot of time and effort, but it’s the only way to get strong enough to reach the endgame.
Keep in mind, finding a rare or legendary with three of the four stats you need is great - you can roll the missing one at an Occultist. Heck even drops with two out of three stats are fine for a short-term upgrade, especially new weapons and focuses found after jumping World Tiers - don’t sweat if it isn’t perfect, and take the damage boost! When it comes to rolling the perfect stats on an item, beware of the sunk-cost fallacy - it can get easy to burn millions of gold and ![]() Forgotten Souls trying to roll that one stat you really need.
Forgotten Souls trying to roll that one stat you really need.
Generally, this build is looking for Overpower Damage, Maximum Life, Essence Cost Reduction, Cooldown Reduction, Maximum Minion Life, Lucky Hit Chance, and Damage to Close Enemies, in no particular order. Below you’ll find a list of all the stats you should shoot for in each item slot.
| Gear | Stat Priority |
|---|---|
| Helm | Cooldown Reduction, Maximum Life, Total Armor, Intelligence |
| Chest Armor | Maximum Life, Damage Reduction, Total Armor, Maximum Minion Life |
| Gloves | Overpower Damage, Ranks of Blood Surge, Lucky Hit Chance, Intelligence |
| Maximum Life, Damage Reduction from Enemies Affected by Curse Skills, Ranks of All Curse Skills, Ranks of the |
|
| Boots | Ranks of Corpse Tendrils, Movement Speed, Essence Cost Reduction, Intelligence |
| Weapon | Overpower Damage, Core Skill Damage, Damage to Close Enemies, Intelligence |
| Focus | Lucky Hit Chance, Maximum Minion Life, Essence Cost Reduction, Intelligence |
| Ring | Overpower Damage, Maximum Life, Lucky Hit Chance, Maximum Minion Life |
| Ring | Overpower Damage, Maximum Life, Lucky Hit Chance, Maximum Minion Life |
| Blood Skill Damage, Summoning Skill Damage, Essence Cost Reduction, Ranks of the Coalesced Blood Passive |
No Comments