
Strongholds are subregions that have fallen to hostile forces, functioning like a mix between an overworld dungeon and a side quest. To begin a Stronghold, just enter the subregion and complete the objectives, the first of which is usually to headhunt some elite enemies or destroy some defended object, after which you’ll need to find and defeat the Stronghold’s boss monster. Strongholds are unique, one-time events, and once cleared the subregion may become a safe area, populated with merchants and a Waypoint. Even without that incentive, some Dungeons cannot be accessed until the nearby Stronghold is cleared, and you gain a whopping 100 points of Renown for each Stronghold you conquer. On this page you’ll find a walkthrough for the ![]() Temple of Rot, a Stronghold in the Dry Steppes region in Diablo 4.
Temple of Rot, a Stronghold in the Dry Steppes region in Diablo 4.
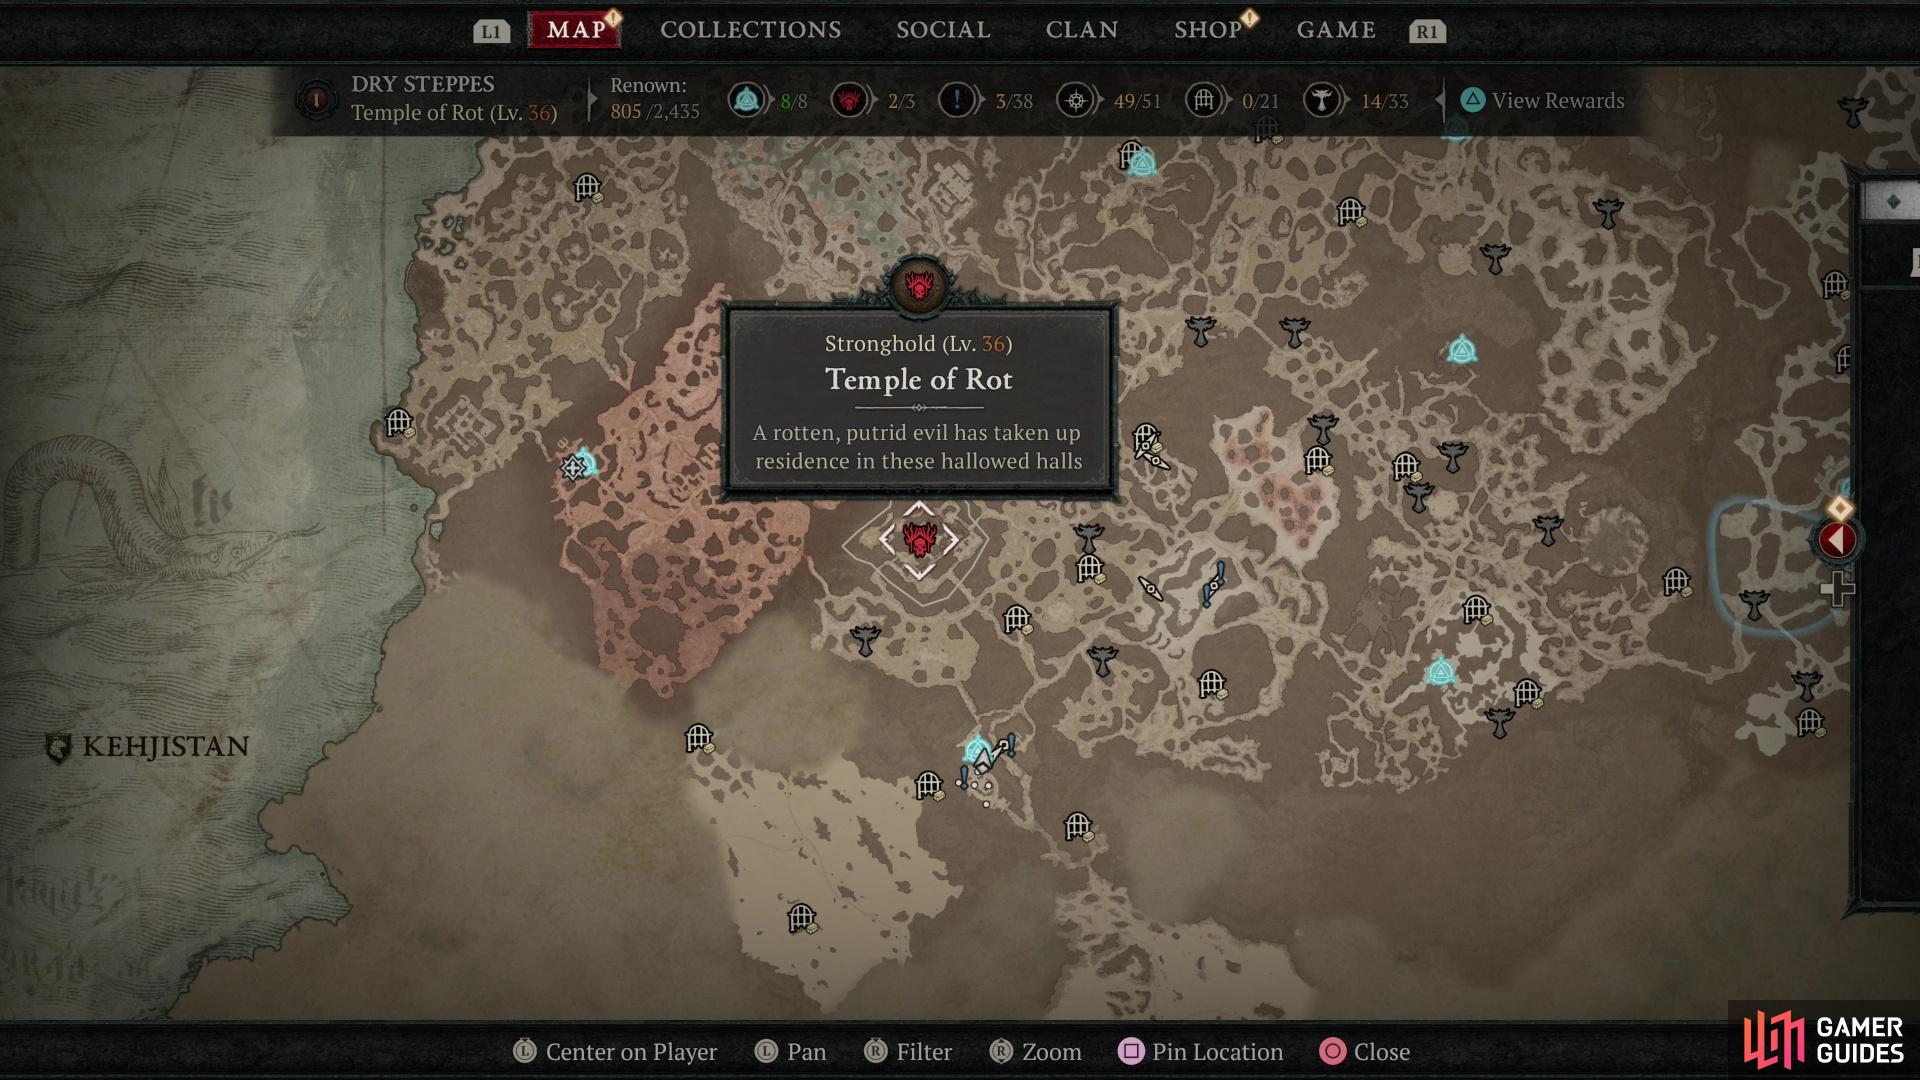
The Temple of Rot can be found along the southwestern edge of the Dry Steppes, enveloped by the Untamed Scarps subregion.
How to Find the Temple of Rot Stronghold in Diablo 4
The Temple of Rot is nestled into the southwestern corner of the Dry Steppes, almost complete surrounded by the Untamed Scarps subregion. From Nevesk in the Desolate Highlands (Fractured Peaks), head northeast to reach The Pallid Glade, then turn south and west to reach The Accursed Wastes (Dry Steppes). The Accursed Wastes completely surrounds the Qara-Yisu subregion, which you can circumvent to exit to the west to reach the adjacent Untamed Scarps. The Temple of Rot is nestled into the western edge of the Untamed Scarps, but you may want to head to the southwestern edge of this subregion first to discover Jirandai - a town with a Waypoint. There are three entrances to the Temple of Rot, and it really doesn’t matter which one you pick, although the southeastern route takes you to the “main” entrance while the southwestern route allows you to sneak in.
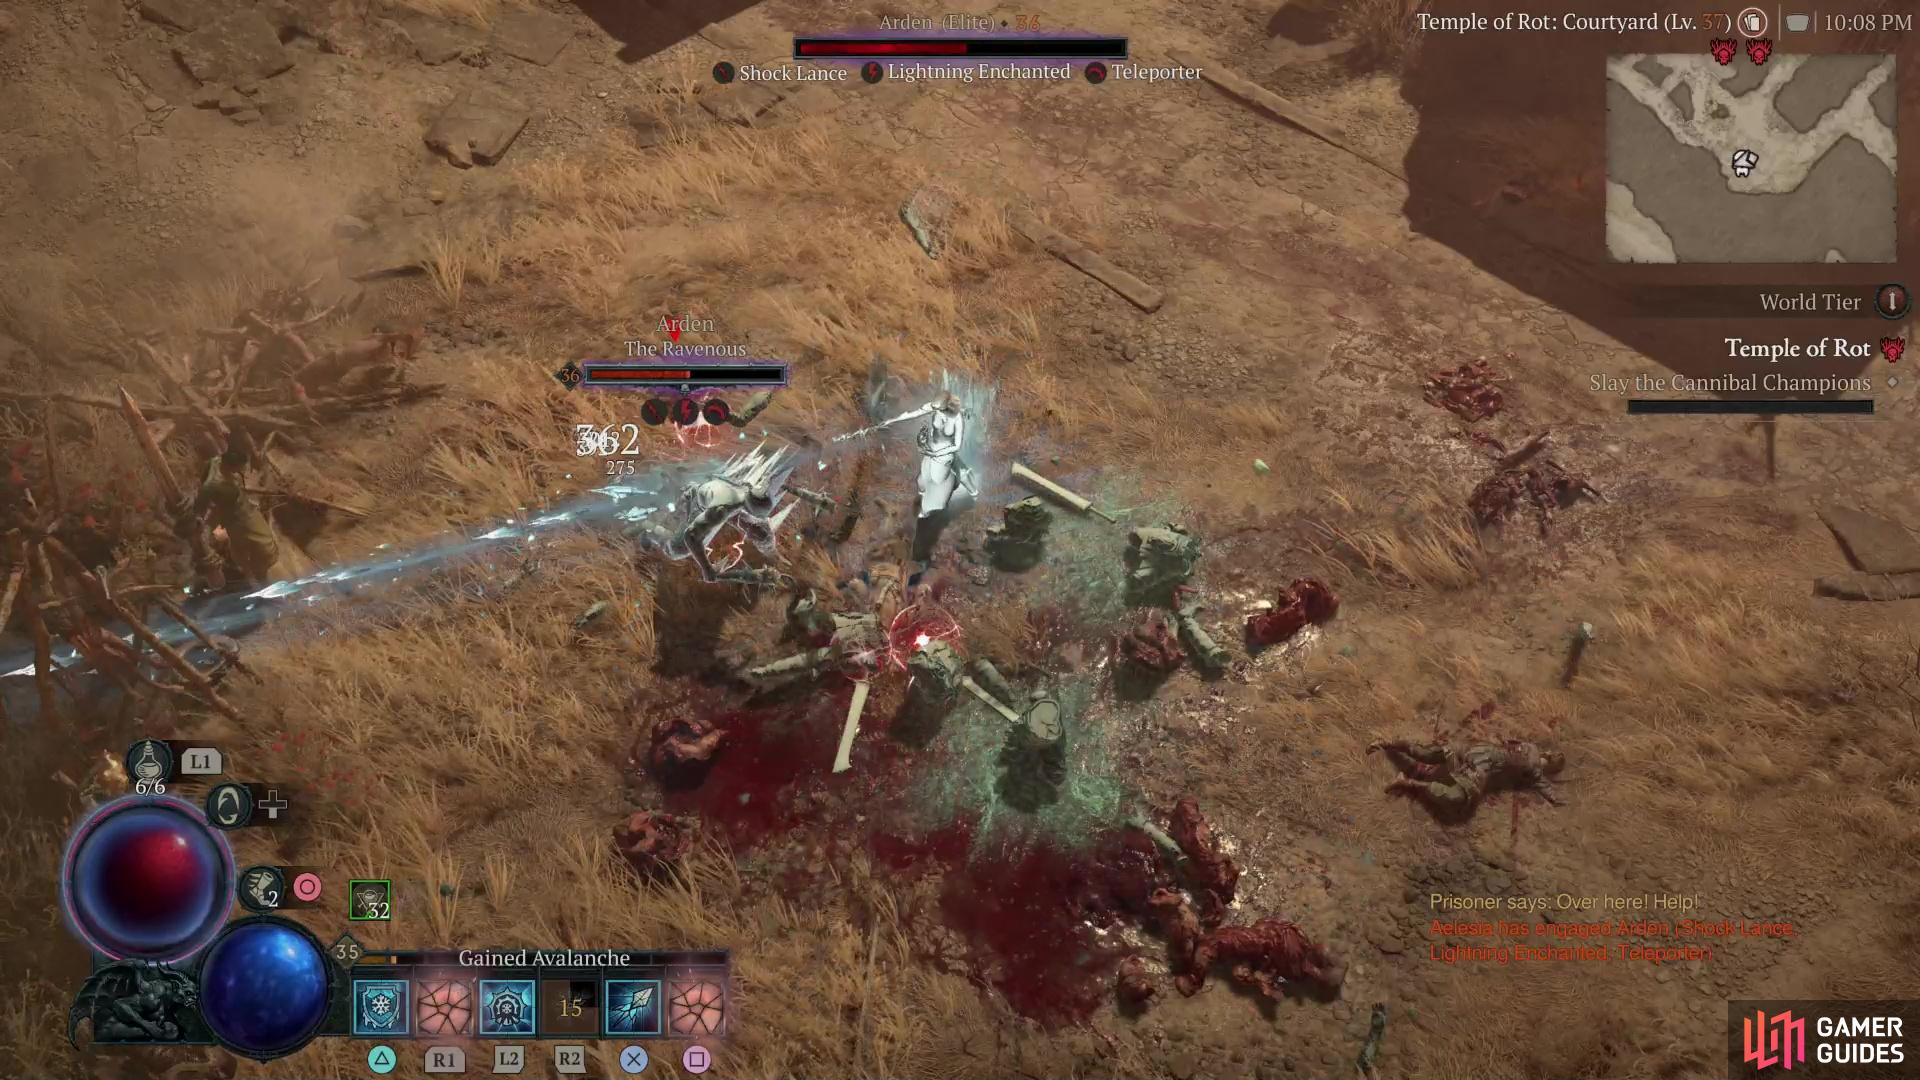
(1 of 4) Your first objective in the Temple of Rot is to hunt down for cannibal champions - Arden the Ravenous,
How to Defeat the Cannibal Champions
After you infiltrate the Temple of Rot, explore until the objective updates, tasking you with killing several Cannibal Champions. There are four of these elites lurking in the temple, and while they present some challenge, the average cannibal is worthy of consideration, too. All cannibals are glass cannons, to a degree, dealing considerable damage but with wanton disregard for their safety. Especially be cautious of Executioners, whose leap attacks are incredibly powerful, and ![]() Gorgers, who can stun you, and getting stunned in a horde of cannibals is… not a good career move. The mobs here are capable of surprising damage spikes, so you should play somewhat conservatively.
Gorgers, who can stun you, and getting stunned in a horde of cannibals is… not a good career move. The mobs here are capable of surprising damage spikes, so you should play somewhat conservatively.
As for the Cannibal Champions, their locations and stats are as follows:
- Arden, The Ravenous: In the southern corner of the temple. He possessed the Shock Lance, Lightning Enchanted and Teleporter mods.
- Corpse Spawn, Child of the Devourer: In the west-center of the temple, surrounded by Eggs that spawn Fly Swarms, which are quite a nuisance. It has the Poison Enchanted, Plaguebearer and Terrifying mods.
- Razorface, The Carrion Zealot: In the north-center of the temple, his combination of mods (Waller, Frozen, Explosive) makes him surprisingly rangey.
- Bostar, The Breaker: Locate him in the east-center of the temple. A large brute, be wary of his ability to stagger on hit. His Elite mods include Shadow Enchanted, Terrifying and Suppressor.
Arden, the Ravenous is the only truly isolated cannibal champion, and he should be pretty easy to dispatch. The other three can all be found in the center of the temple, albeit in their own little chambers. If you don’t go out of your way to draw them together you should be able to fight them one at a time, but if things go awry and you flee the wrong way, things can get messy. Fortunately doors usually keep them separated, and cannibals are known for being polite, so if you don’t open any doors you should be able to keep them apart.
Kill each Cannibal Champion, preferably one at a time, then you’ll hear the voice of one Molqarth commanding his minions to offer you some particular cannibal hospitality. Well, with an invitation like that…
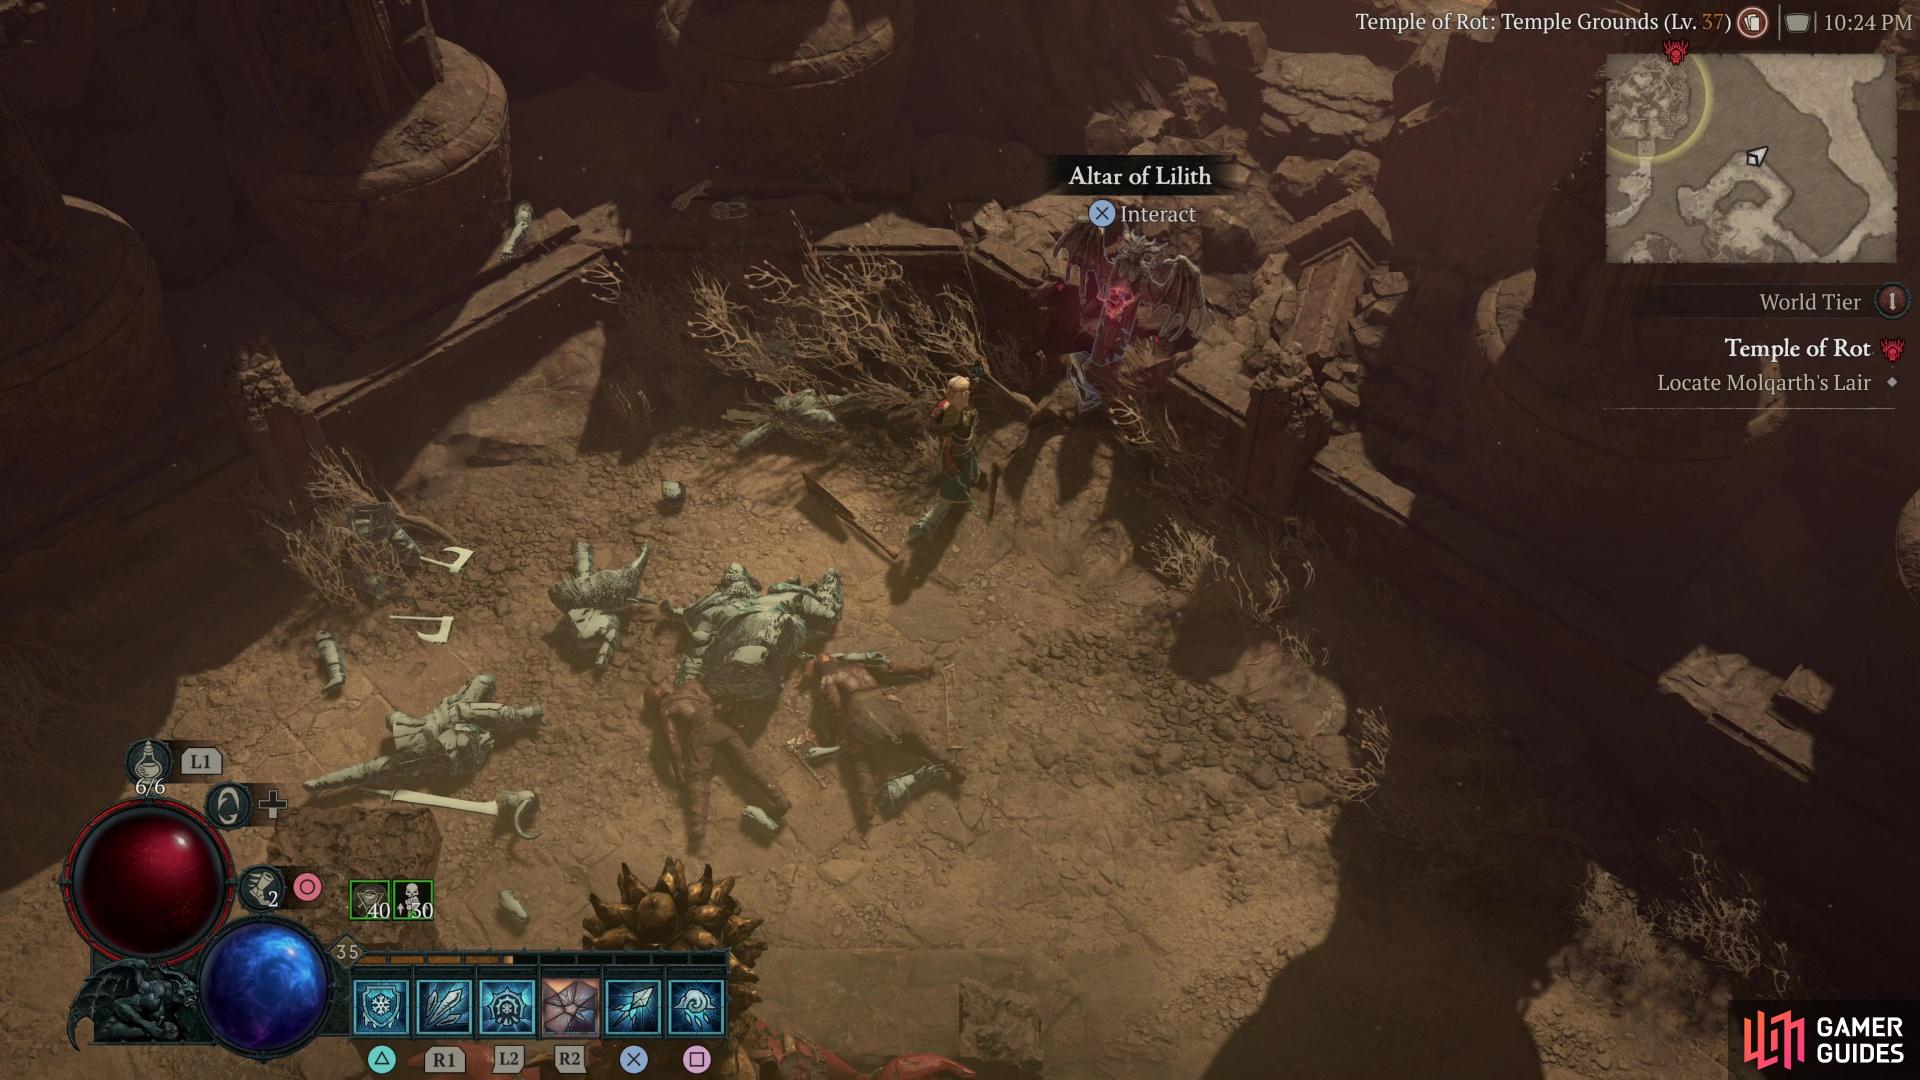
(1 of 3) Before you accept Molqarth’s invitation, seek out a Lilith Statue along the northeastern edge of the temple.
How to Locate Molqarth’s Lair
Despite your pressing dinner date with Molqarth, reaching the cannibal chief isn’t a simple matter of walking to the dining room. You’ll have to make your way to the northwestern corner of the temple, then head northeast to reach Molqarth’s demesne, and there are many hungry mouths along the way.
Consider sweeping the temple, as there are numerous “Bound Prisoners” you can rescue .This is optional, and not an objective for this Stronghold, but they will often reward you with potions and other loot - a useful boon if you find yourself chugging down a lot of healing while facing these cannibals.
You can also search the northeastern edge of the temple to find an Altar of Lilith sitting out in the open. You might as well claim it for the +1 Paragon Point and +10 Renown it yields.
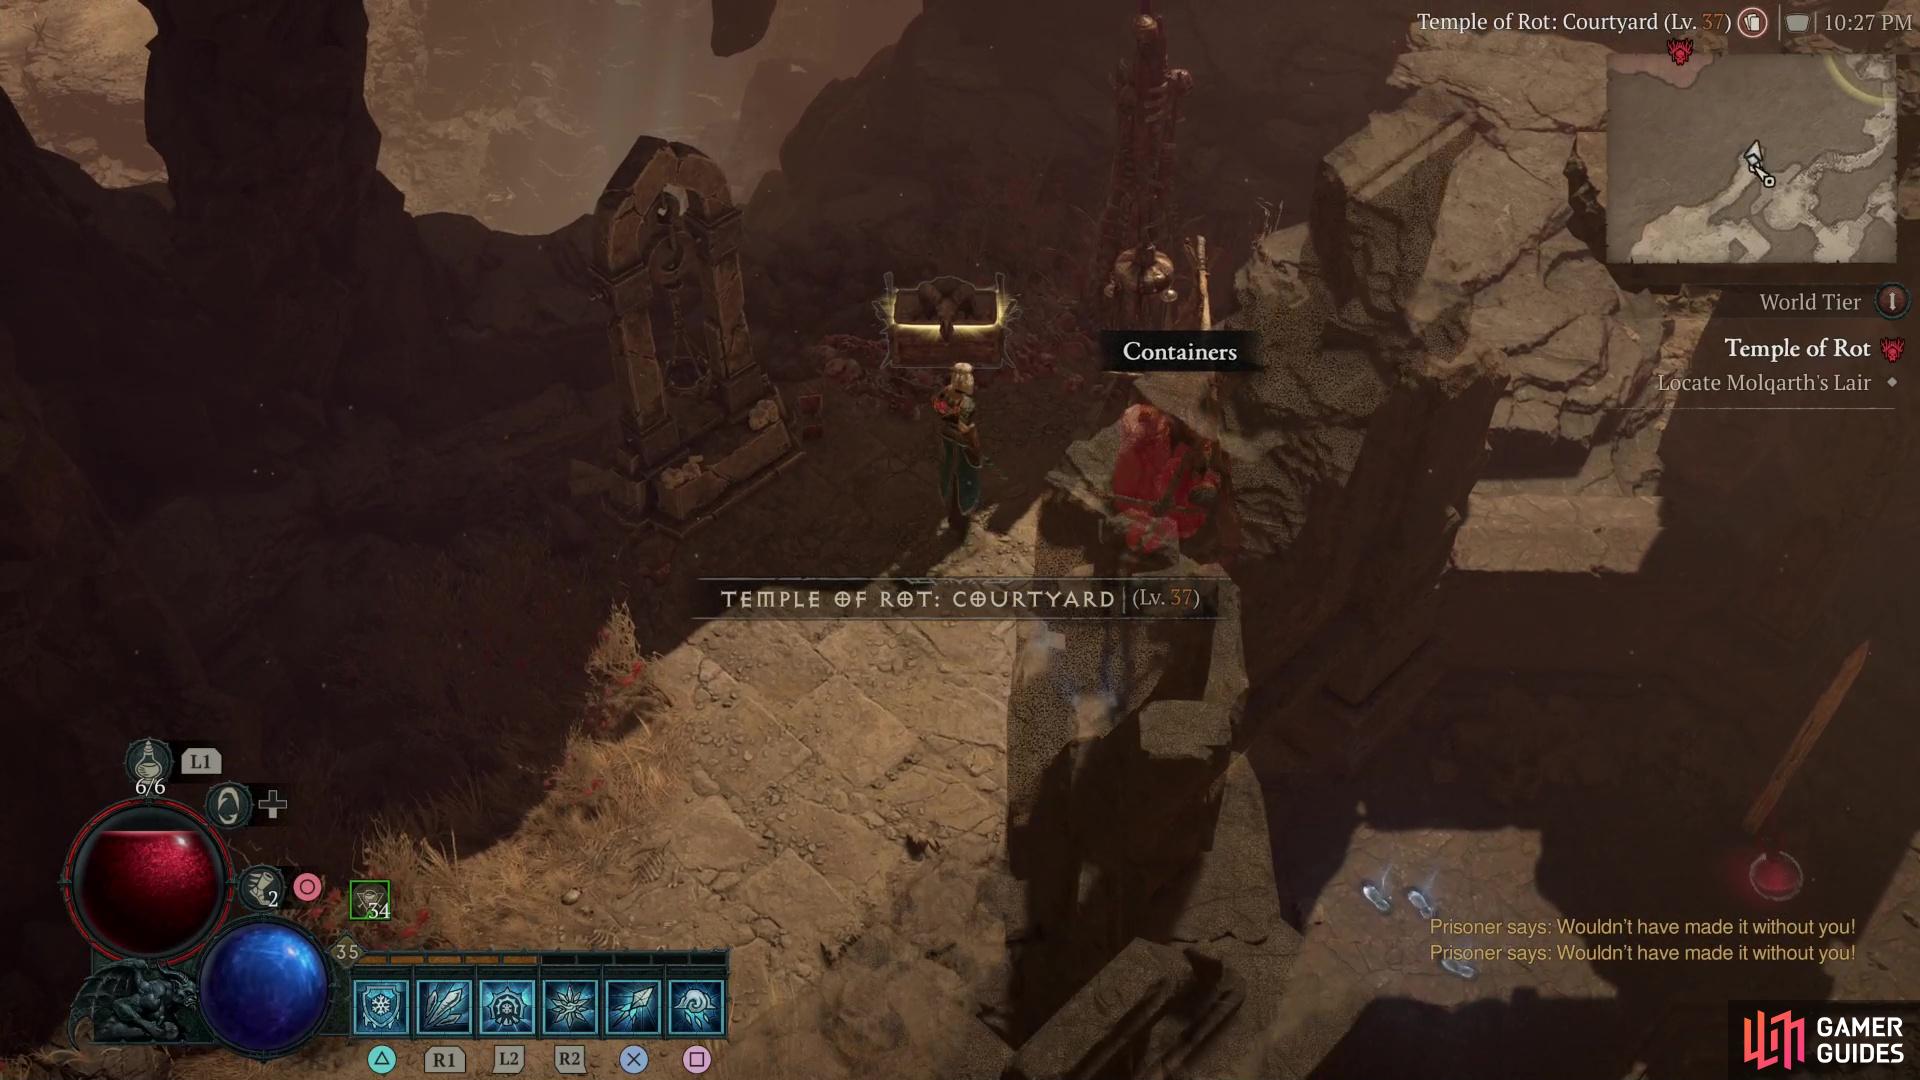
Crawl through a hole in a wall to find a Resplendent Chest,
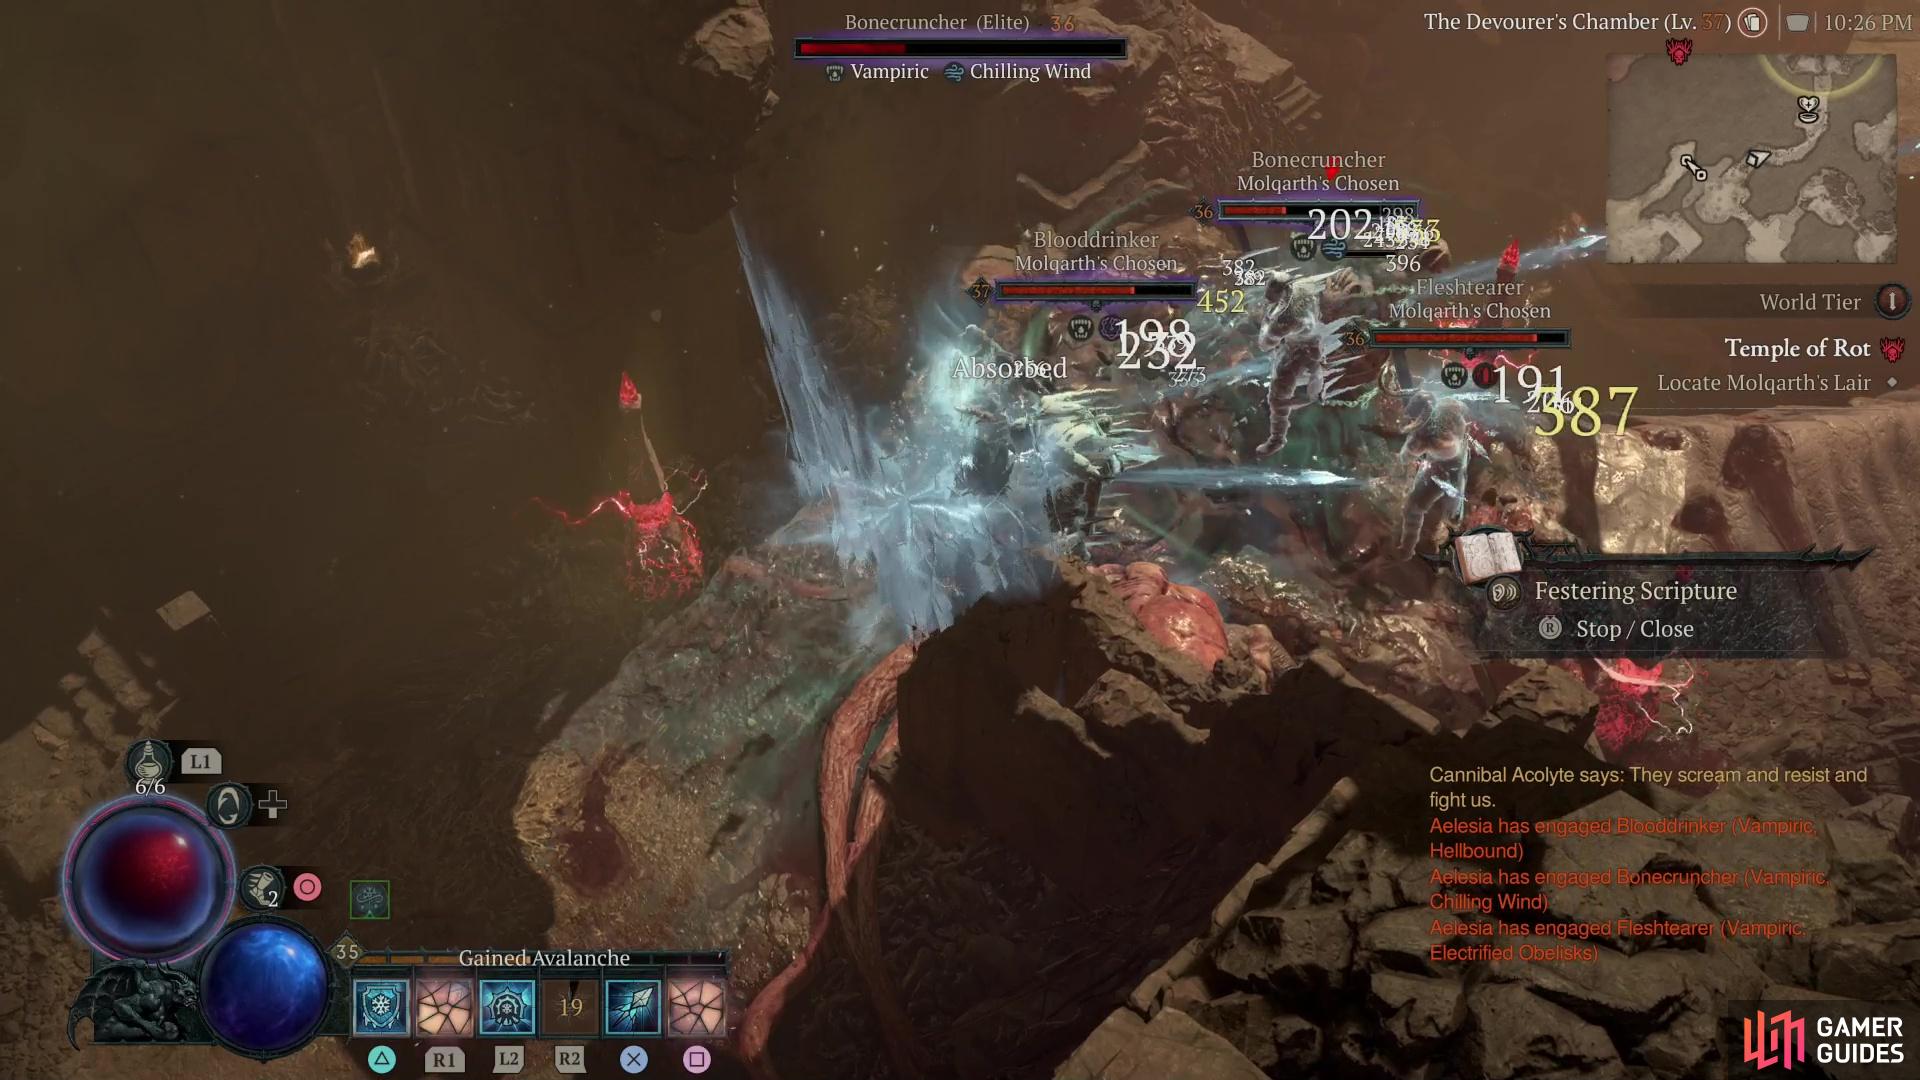
then defeat a trio of elites, collectively known as “Molqarth’s Chosen”.
When you’re ready to move on, head to the room just northwest of where you fought Corpse Spawn, Child of the Devourer, where you’ll be ambushed by a collection of cannibals. Kill them and note a hole in the wall you can crawl through just beyond two Bound Prisoners. Free them if you wish, then crawl through the hole and you’ll likely find a Resplendent Chest tucked away.
Backtrack to the previous room and head northeast only to find your progress thwarted by several elites. No hope of keeping these separate, so don’t be afraid to throw the kitchen sink at them. Fortunately they’re individually weaker than the three cannibal champions, likely possessing fewer mods, but they still shouldn’t be taken lightly. Defeat this last line of defense and you’ll be free to meet with Molqarth.
How to Defeat Molqarth the Hungerer
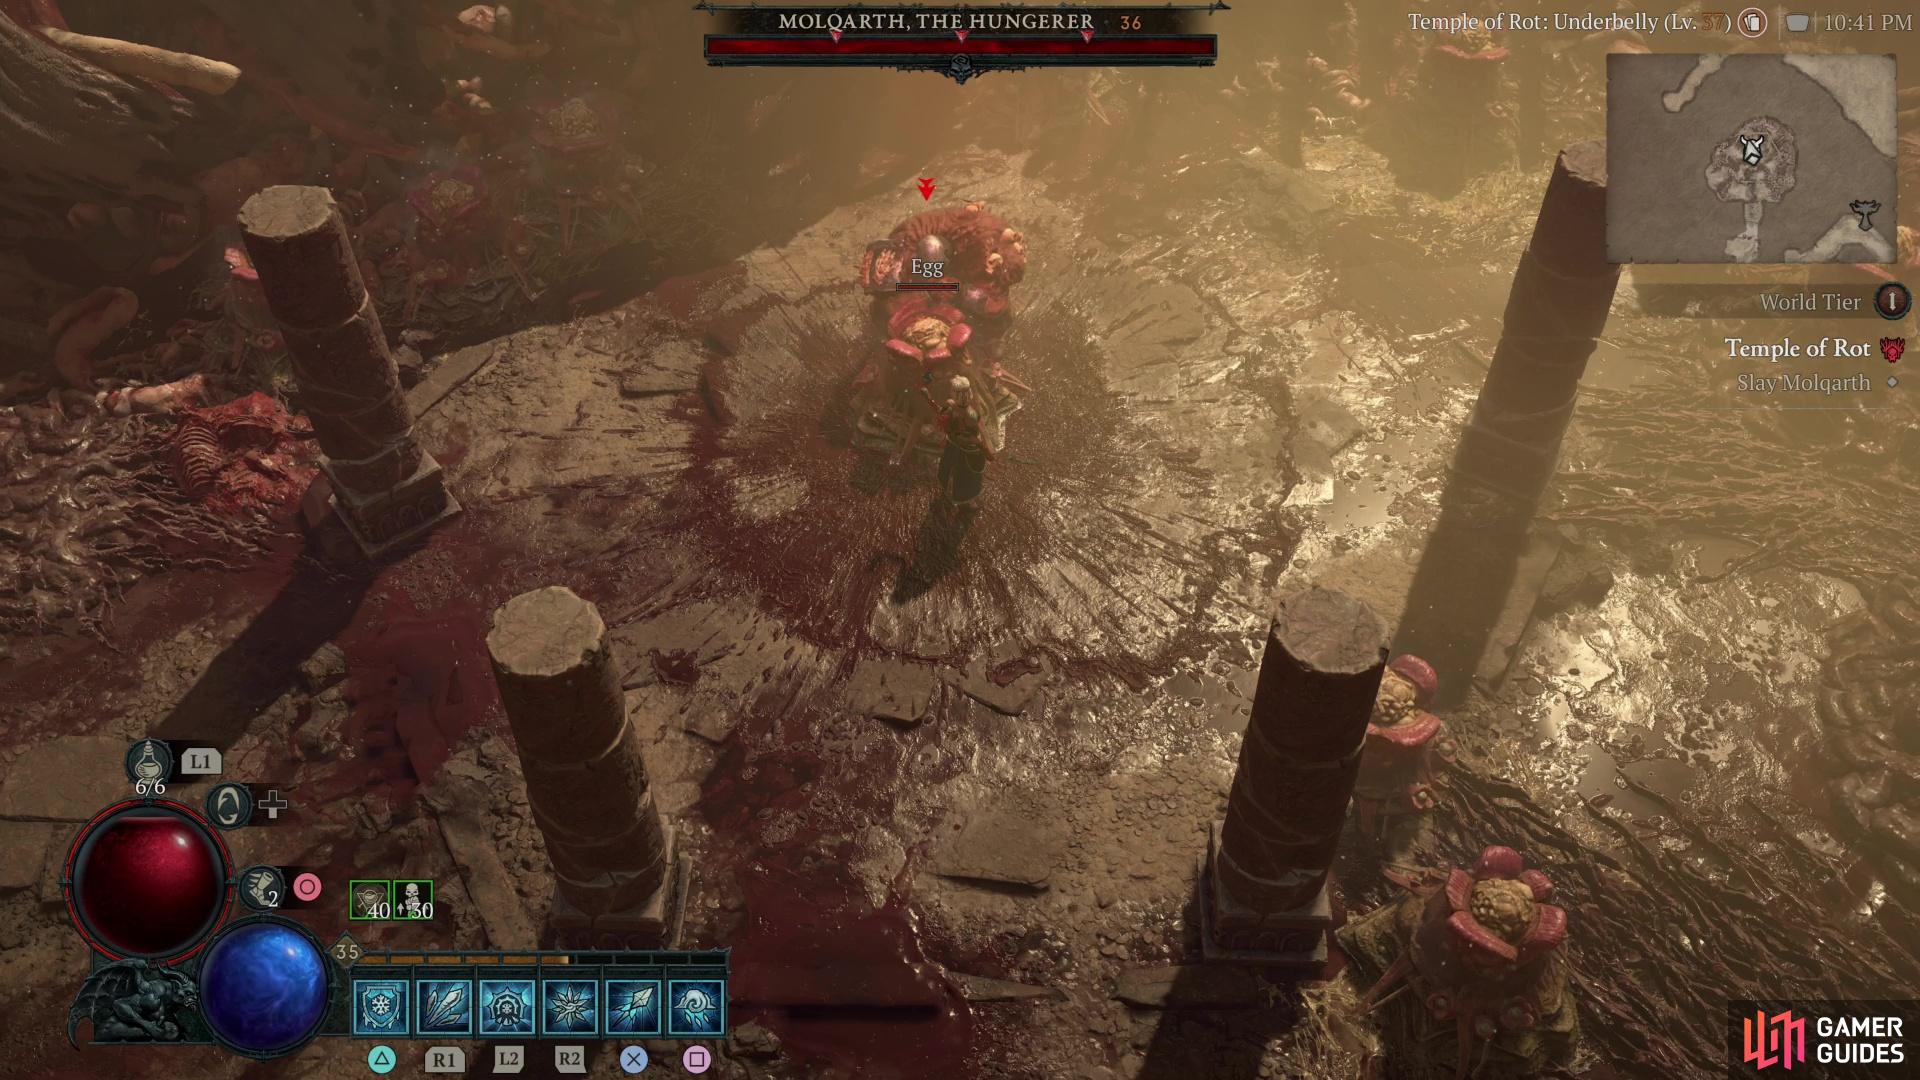
Enter the chamber where Molqarth, the Hungerer feasts and… he’ll be content to just ignore you, preferring to feast on the pulsating egg in front of him. No really, he won’t attack as long as you don’t. See? He’s not evil just because he’s a bloated, bloody, cannibalistic monstrosity! You can even destroy the pillars, the eggs, and the flies that spawn from them, just so long as you don’t lay a finger on Molqarth himself! Sadly, you’re stuck in the boss arena until somebody emerges victorious, so you’ll eventually have to pick a fight.
Molqart’s appetite for sketchy eggs is clearly greater than his hunger for battle, as he’s an uninspiring combatant, to say the least. He’s only two two attacks:
-
Morningstar Smash: Molqarth swings his heavy morningstars at you, and while these deal moderate damage, he doesn’t move any faster than you do, so you can just run away from him to keep him out of range… not an inspiring long-term solution, sure, but it can buy you time to recover your primary resource and let cooldowns refresh.
-
Shockwaves: When Molqarth grows weary of chasing you, he’ll smash the ground with both morningstars, somehow sending out two linear waves in a V formation. If you’re standing in front of him, these should pass by your sides harmlessly, but be wary, as Molqarth isn’t entirely devoid of cunning - he’ll smash the ground and send out shockwaves three times per attack and the third pair of shockwaves travel much closer together than the first two, so be sure to dodge to the side after the second set of shockwaves pass.
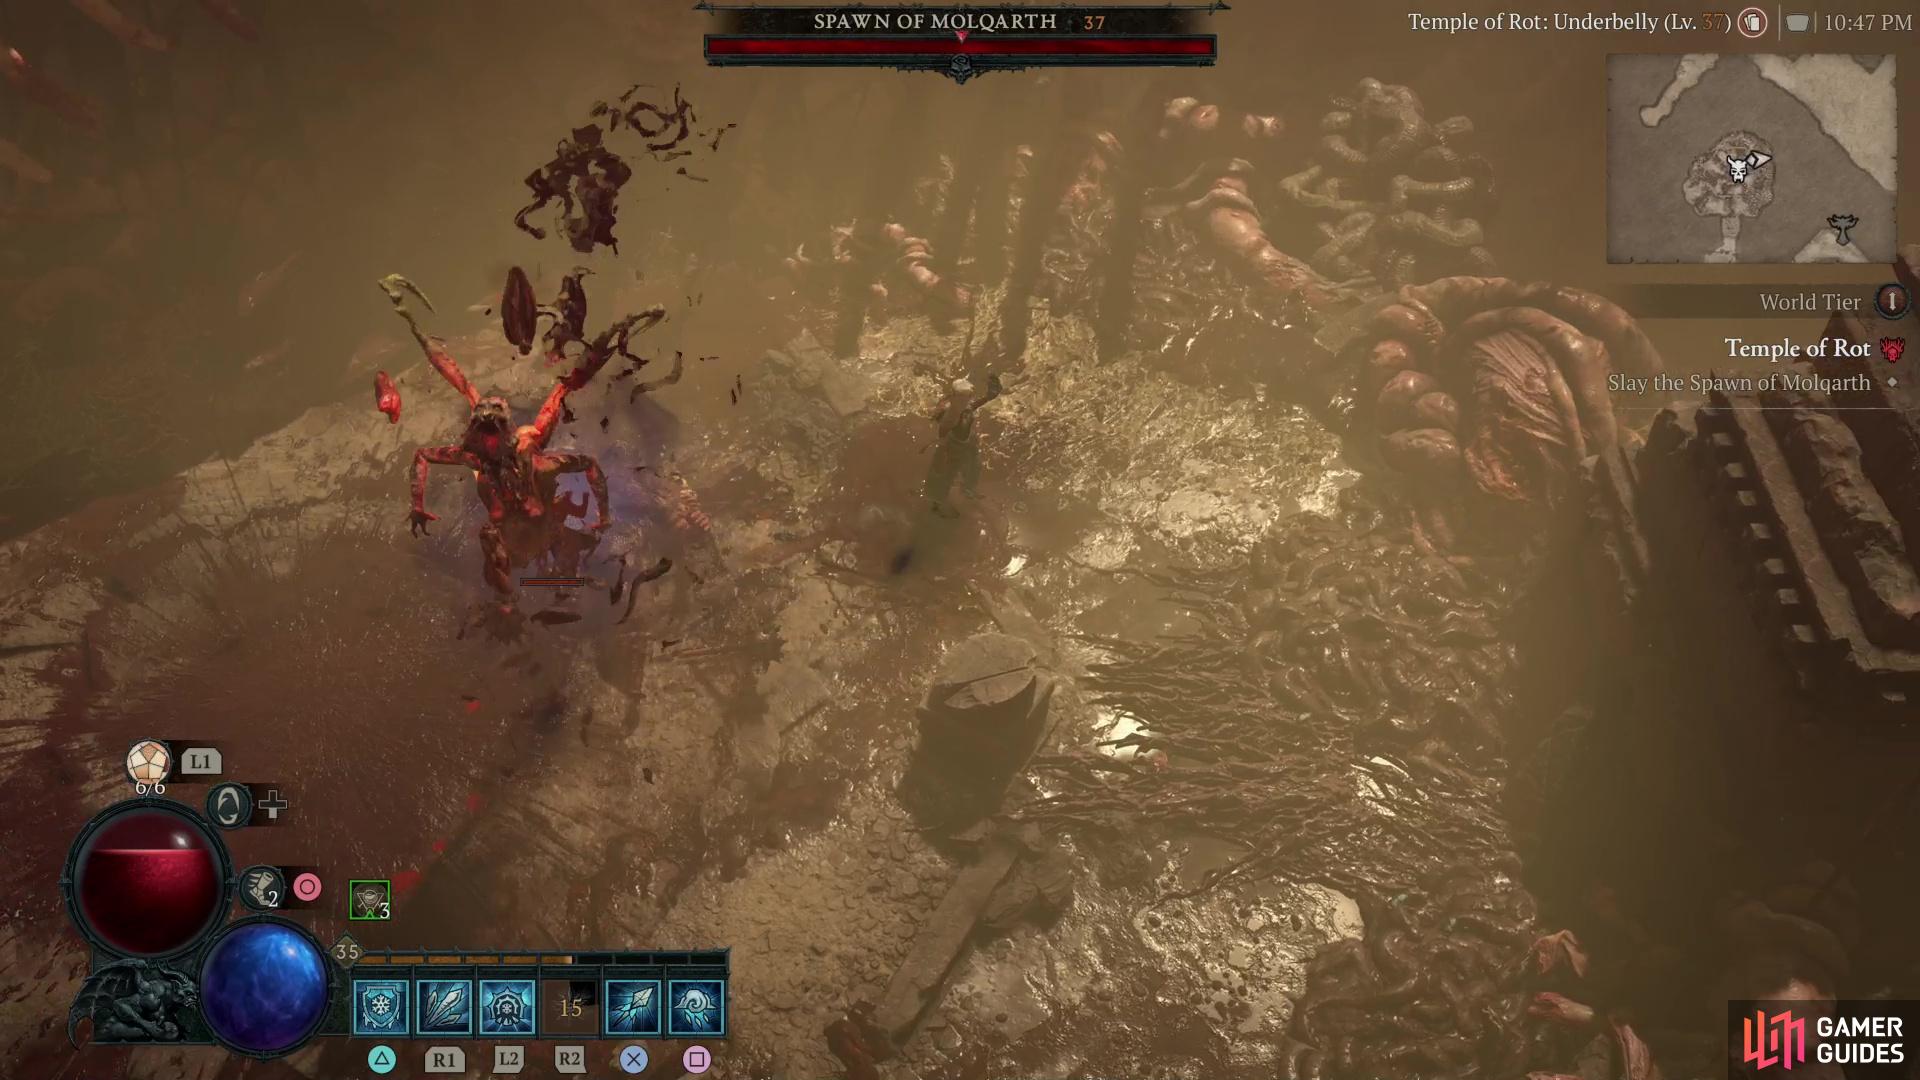
Whittle down Molqart’s health bar, and while Molqarth is indeed an easy foe, don’t get too complacent, as when Molqarth dies a new foe will tunnel itself out of his remains - the Spawn of Molqarth! Knew those eggs were sketchy!
How to Defeat the Spawn of Molqarth
The Spawn of Molqarth is a more worthy foe, than its sire, with one caveat - it’s health is, for a boss, incredibly low. It has only one breakpoint - at 50% - so this is a two-phase boss battle. This beast’s attacks are as follows:
-
 Claw Scythes: Like its daddy, the Spawn of Molarth is fond of chasing prey and attacking with its primary weapon - two scythe-claws. You can outrun the Spawn of Molqarth, but its penchant for leaping, covering the ground in persistent plague and spawning fly swarms makes doing so more difficult this time around.
 -
Spread Pestilence: To start the fight, the Spawn of Molqarth will infect numerous patches of ground, which will bear a persistent toxin effect for a lengthy duration. To make matters worse, the Spawn of Molqarth also summons several swarms of flies to slow you down and distract you when it performs this attack. If you avoid the toxic pools on the ground, it’s not much of a bother, but by the time the effect fades the Spawn of Molqarth will be quick to use this attack again. Expect to have large bits of the arena blocked off by this during the entire fight.
-
Scythe Leap: The Spawn of Molqarth is definitely more athletic than its predecessor, a point it makes clear by leaping to attack periodically. This does massive damage if it connects, and there’s an AoE effect when the Spawn of Molqarth lands, so you need to move perpendicular to the direction of the boss’s leap to avoid this - dodging towards or away might not suffice. Worse still, in phase two (when the boss’s health is under 50%) it’ll perform this three times in succession, so be prepared to spend a bit of time dodging.
Meet offense with offense - the Spawn of Molqarth can deal a lot of damage and is dogged in its pursuit, but it’s fragile, too. In fact, it’s weak enough that it may not survive a single stagger period, and if it does, it may be so weakened afterwards that the fight will be all but over.
Once you defeat Molqarth and its spawn, make your way back to where you found the Resplendent Chest earlier to find the Wander’s Shrine. Interact with it to conquer this Stronghold, earning 100 Renown and… surprisingly little else. No town pops up in this wretched temple, there’s no Waypoint to claim, and no new Dungeons to access.
No Comments