
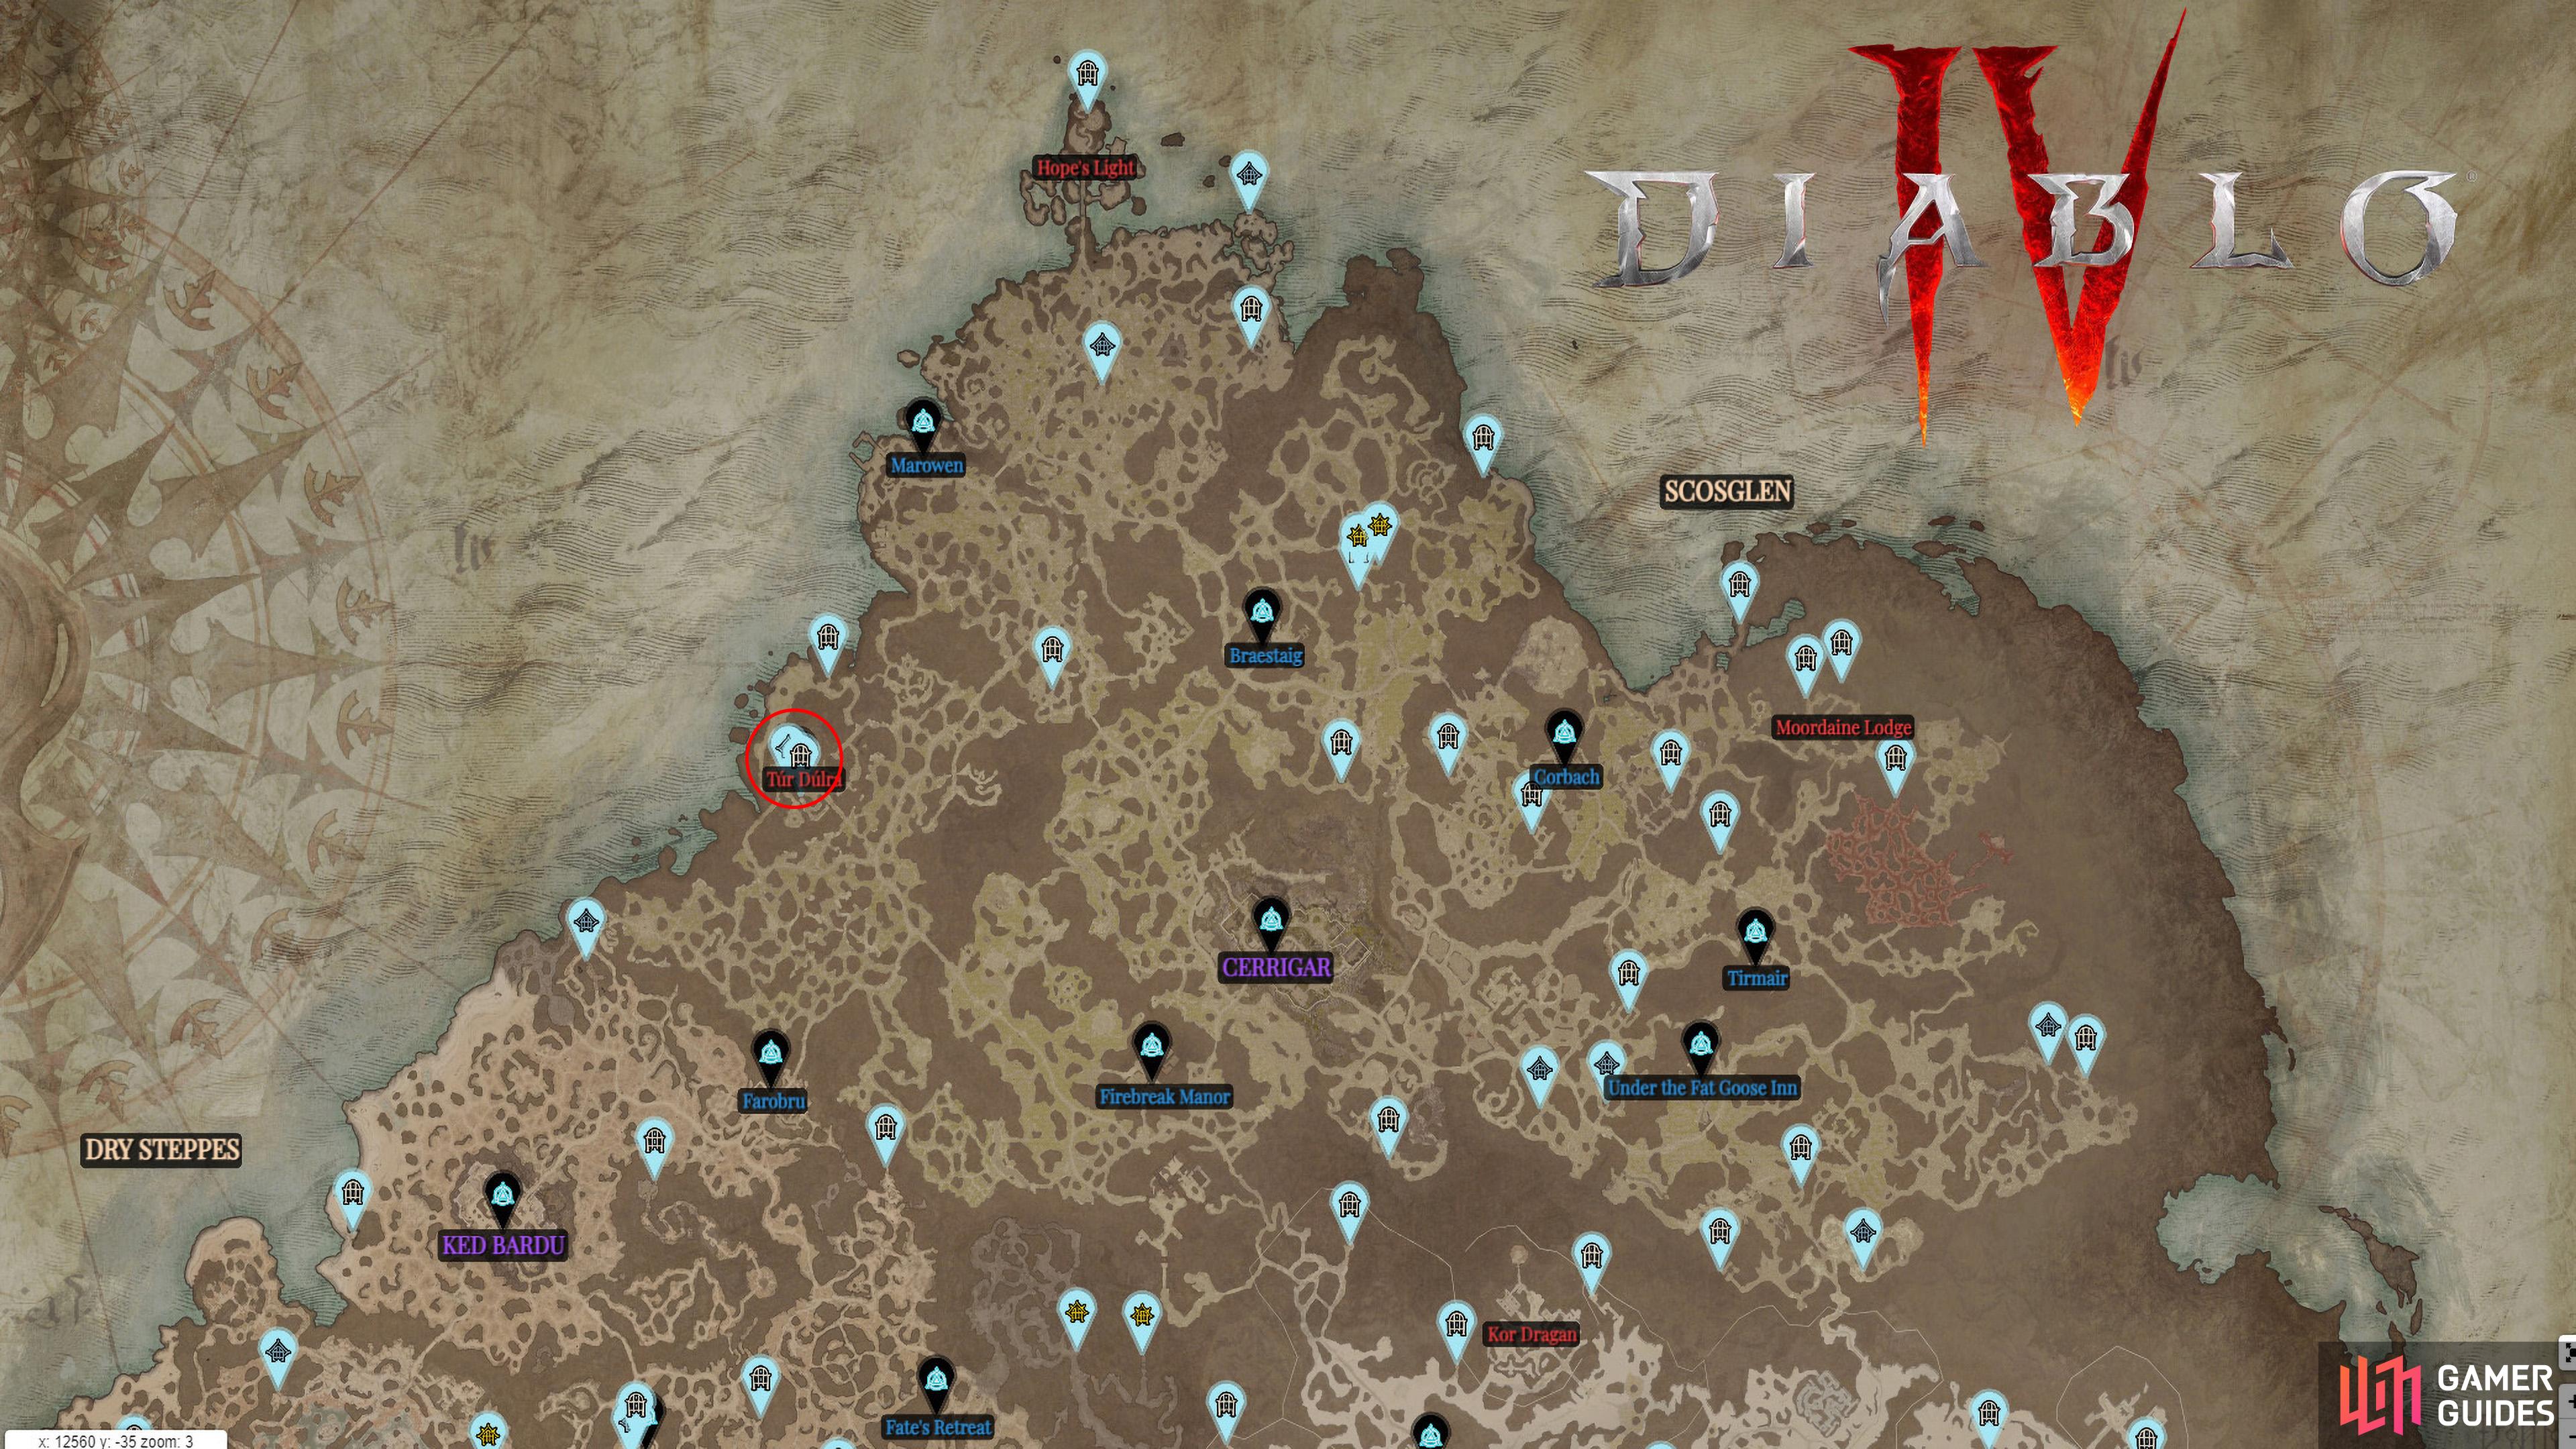
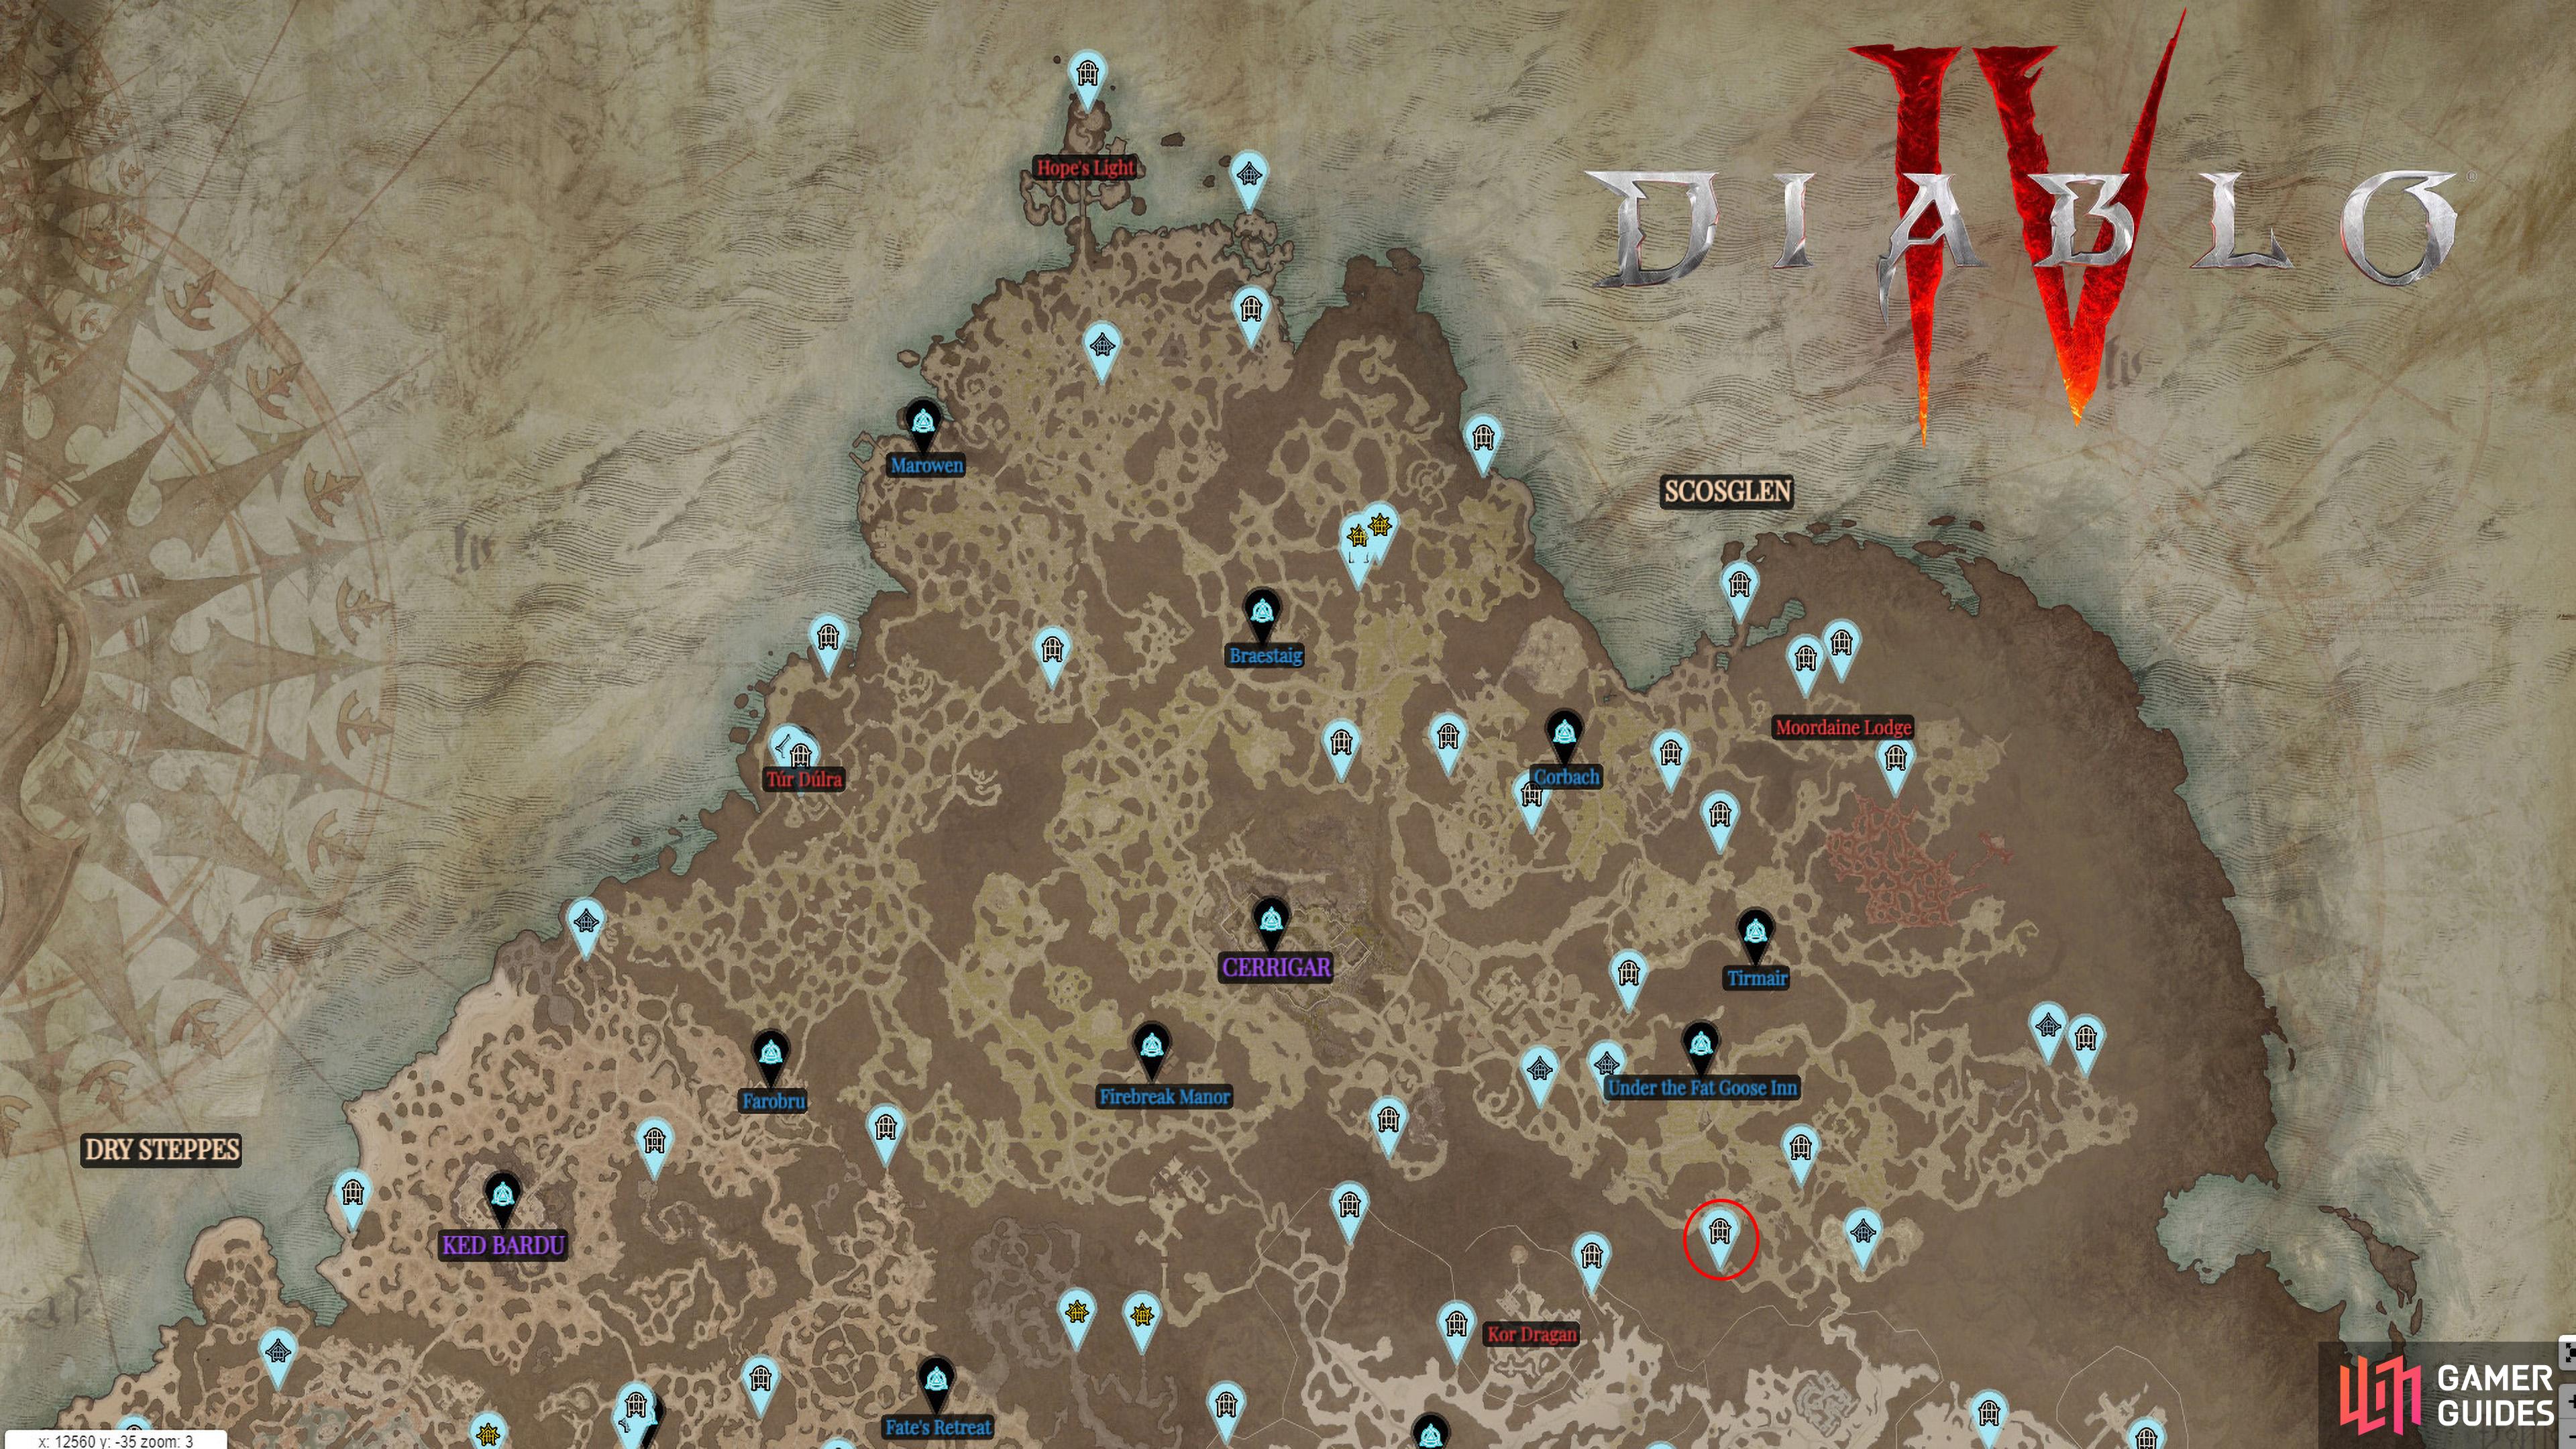
Diablo 4 features a massive open world, and within it are dungeons some of which will reward an Aspect for completing it the first time. Not only are these a great source of loot, but they also reward you with Renown, which is used for map completion and has its own rewards. This page will list all the dungeons in the Scosglen region including all the Aspects they reward.

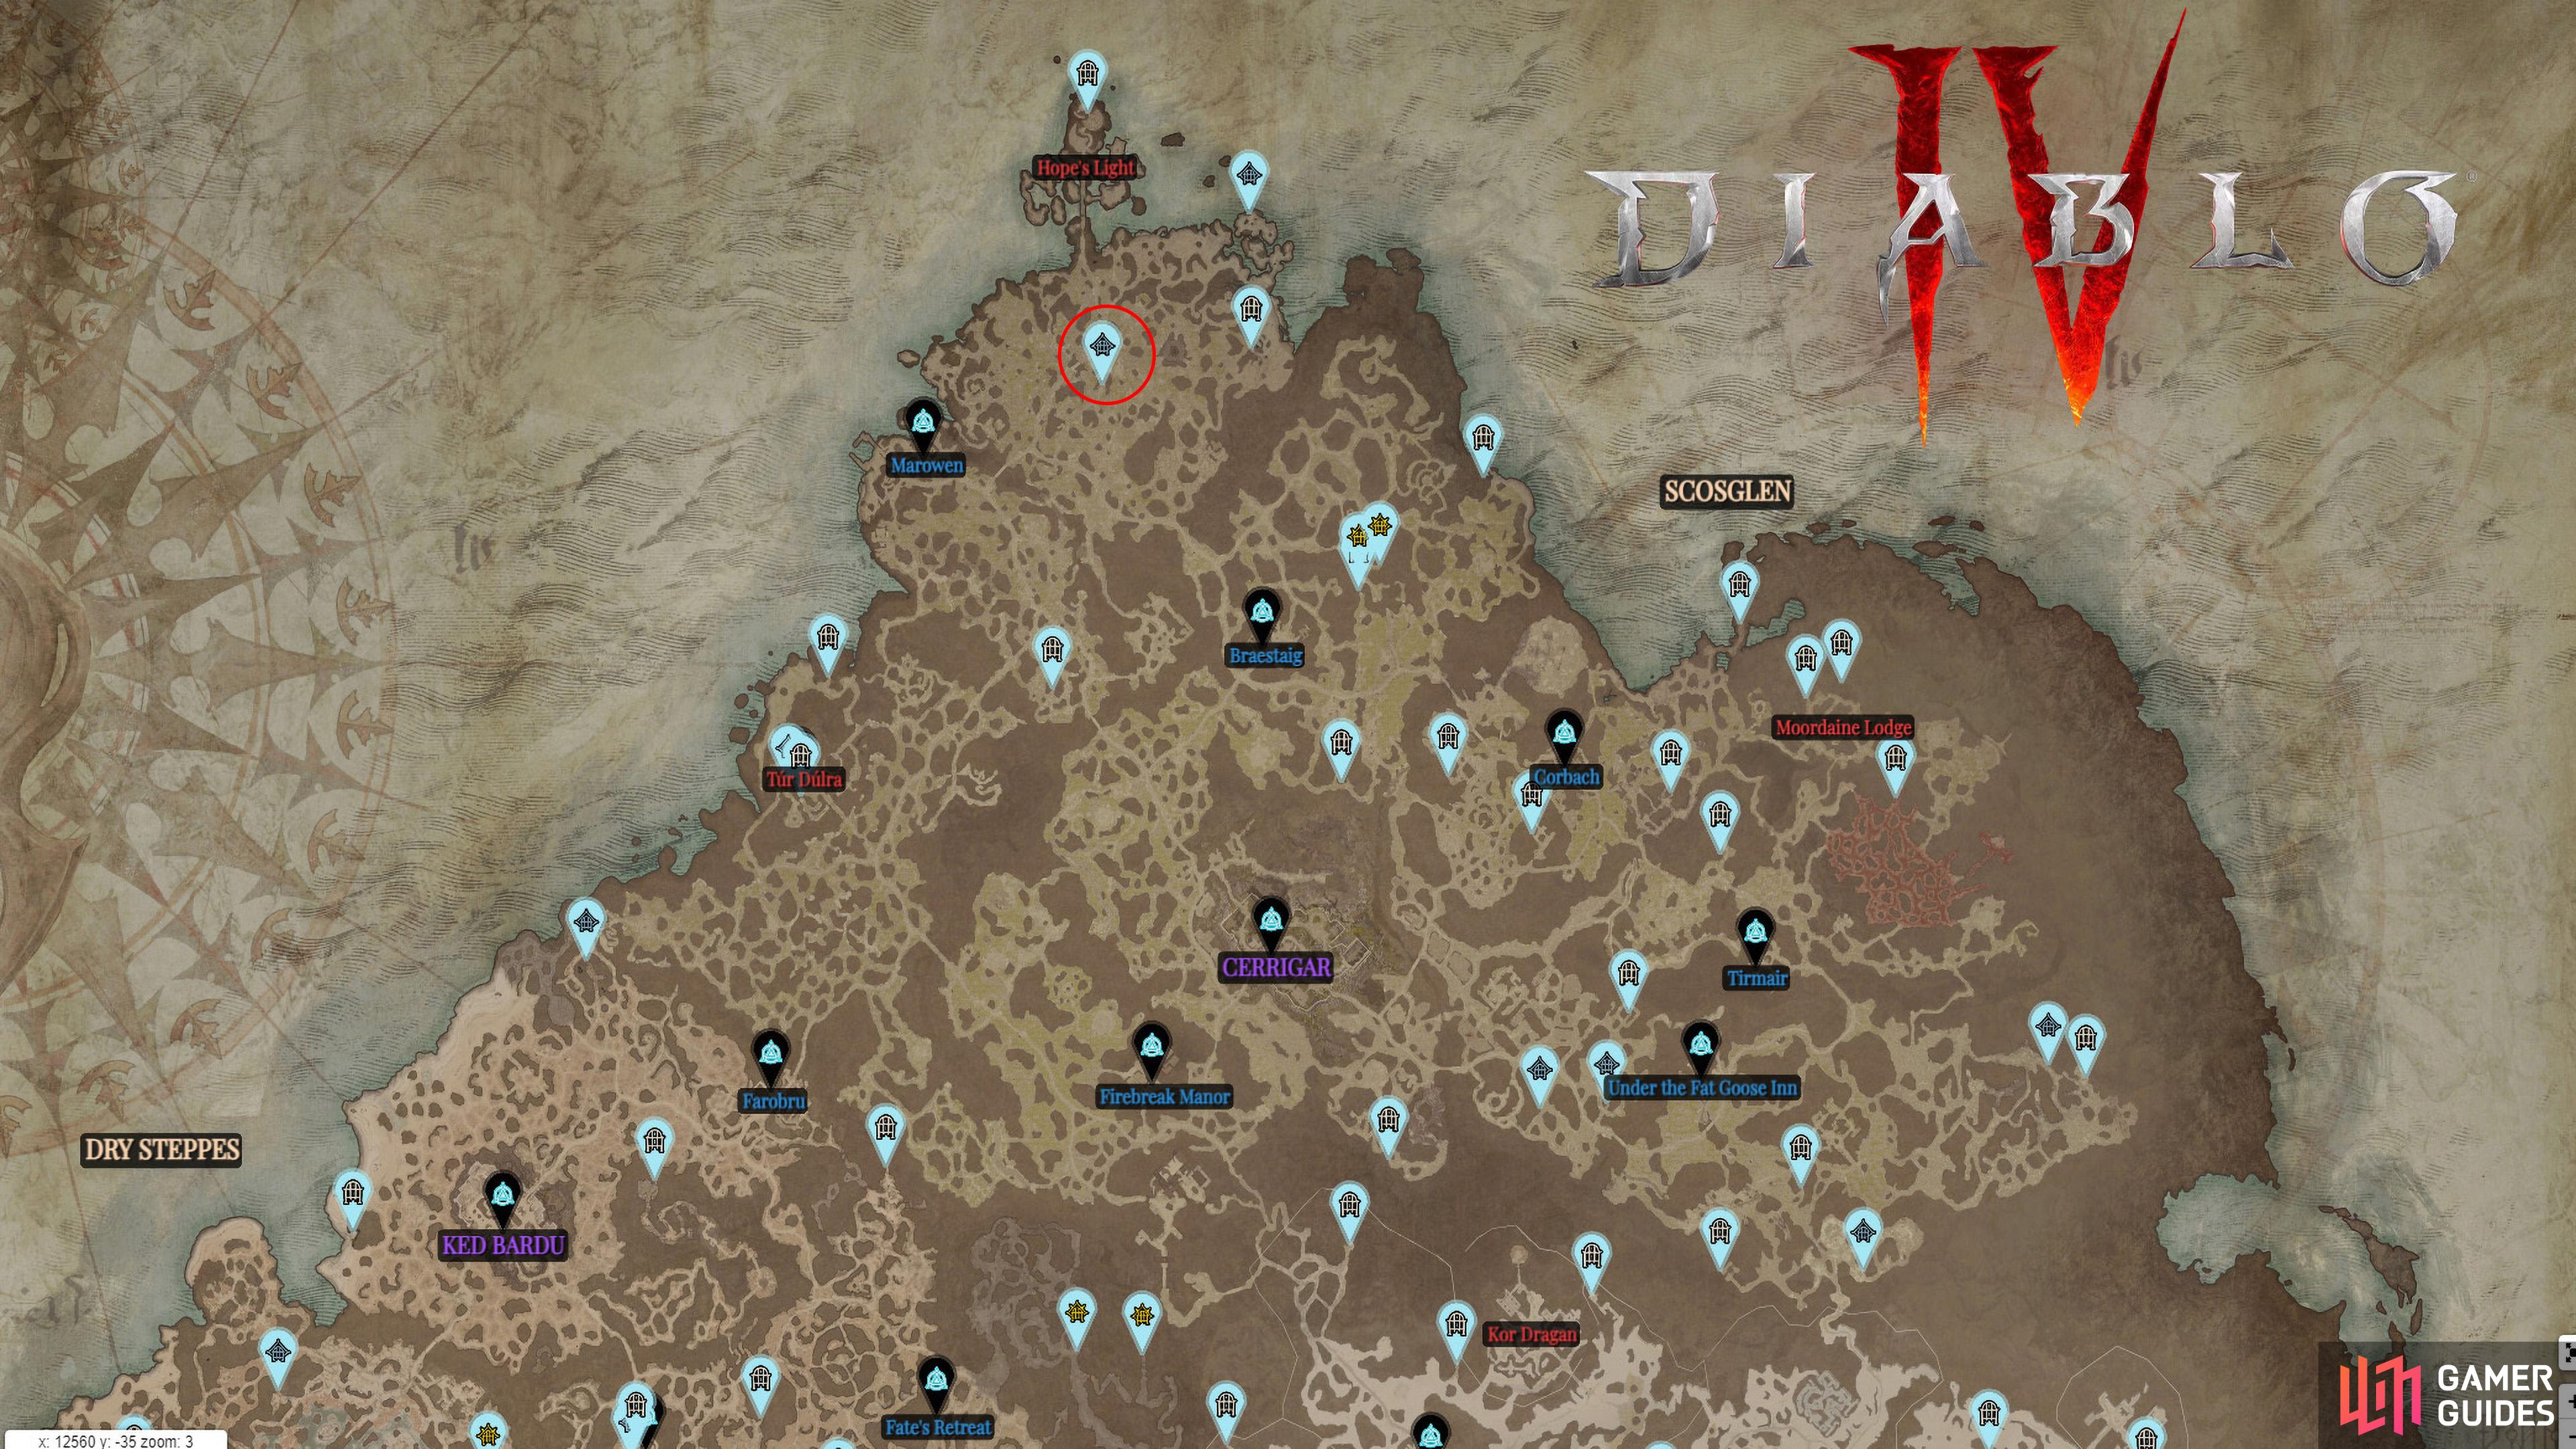
All Dungeons in Scoslgen.
Overview
Dungeon 1 - Underroot


to find the Underroot dungeon.
Start at the ![]() Farobru Waypoint and head north to the Tur Dulra Stronghold, then after completing it you’ll gain access to the
Farobru Waypoint and head north to the Tur Dulra Stronghold, then after completing it you’ll gain access to the ![]() Underroot Dungeon! You will receive +30 Scosglen Renown and the
Underroot Dungeon! You will receive +30 Scosglen Renown and the ![]() Aspect of the Expectant for completing the dungeon.
Aspect of the Expectant for completing the dungeon.
Dungeon 2 - Lair of the Despoiler
Head to this location on the map
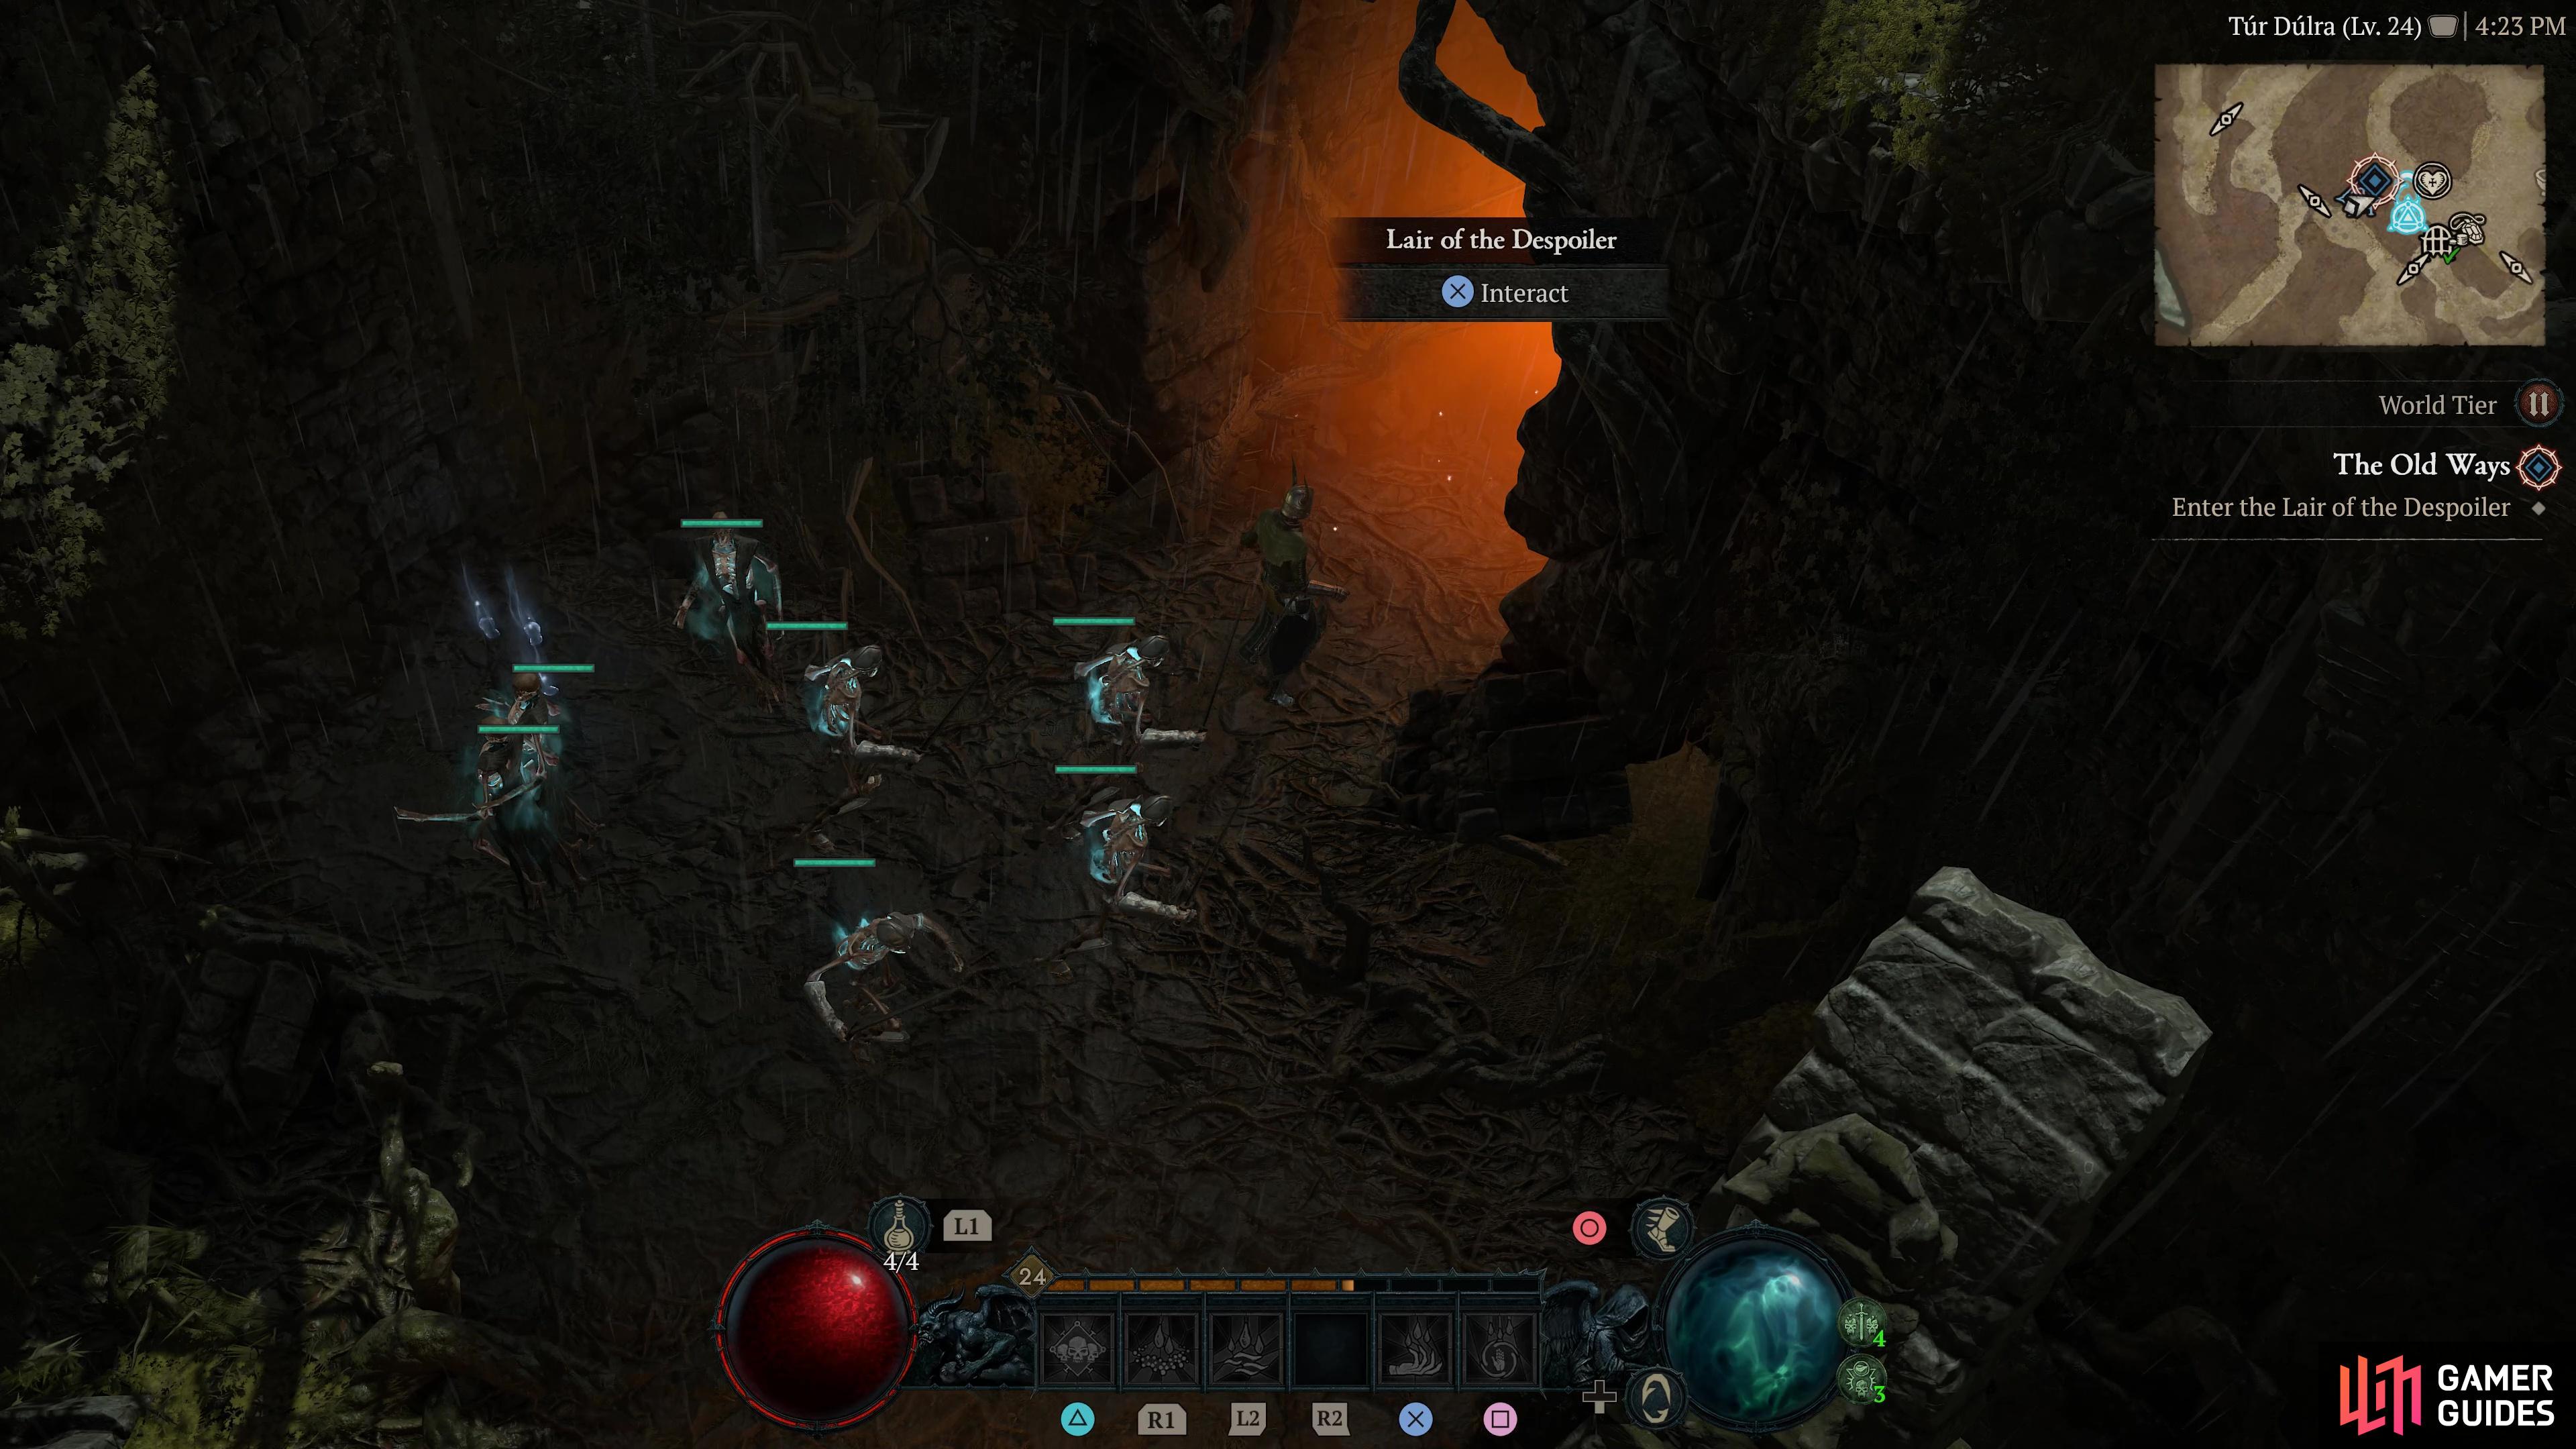
Lair of The Despoiler dungeon
Start at the Farobru Waypoint and head north to the Tur Dulra Stronghold. Here you’ll need to activate the Side Quest ![]() The Old Ways which can be done by speaking with Yuein, then you’ll gain access to the
The Old Ways which can be done by speaking with Yuein, then you’ll gain access to the ![]() Lair of the Despoiler Dungeon. You will receive +30 Scosglen Renown for completing the dungeon.
Lair of the Despoiler Dungeon. You will receive +30 Scosglen Renown for completing the dungeon.
Dungeon 3 - Wretched Delve

Head to this location on the map
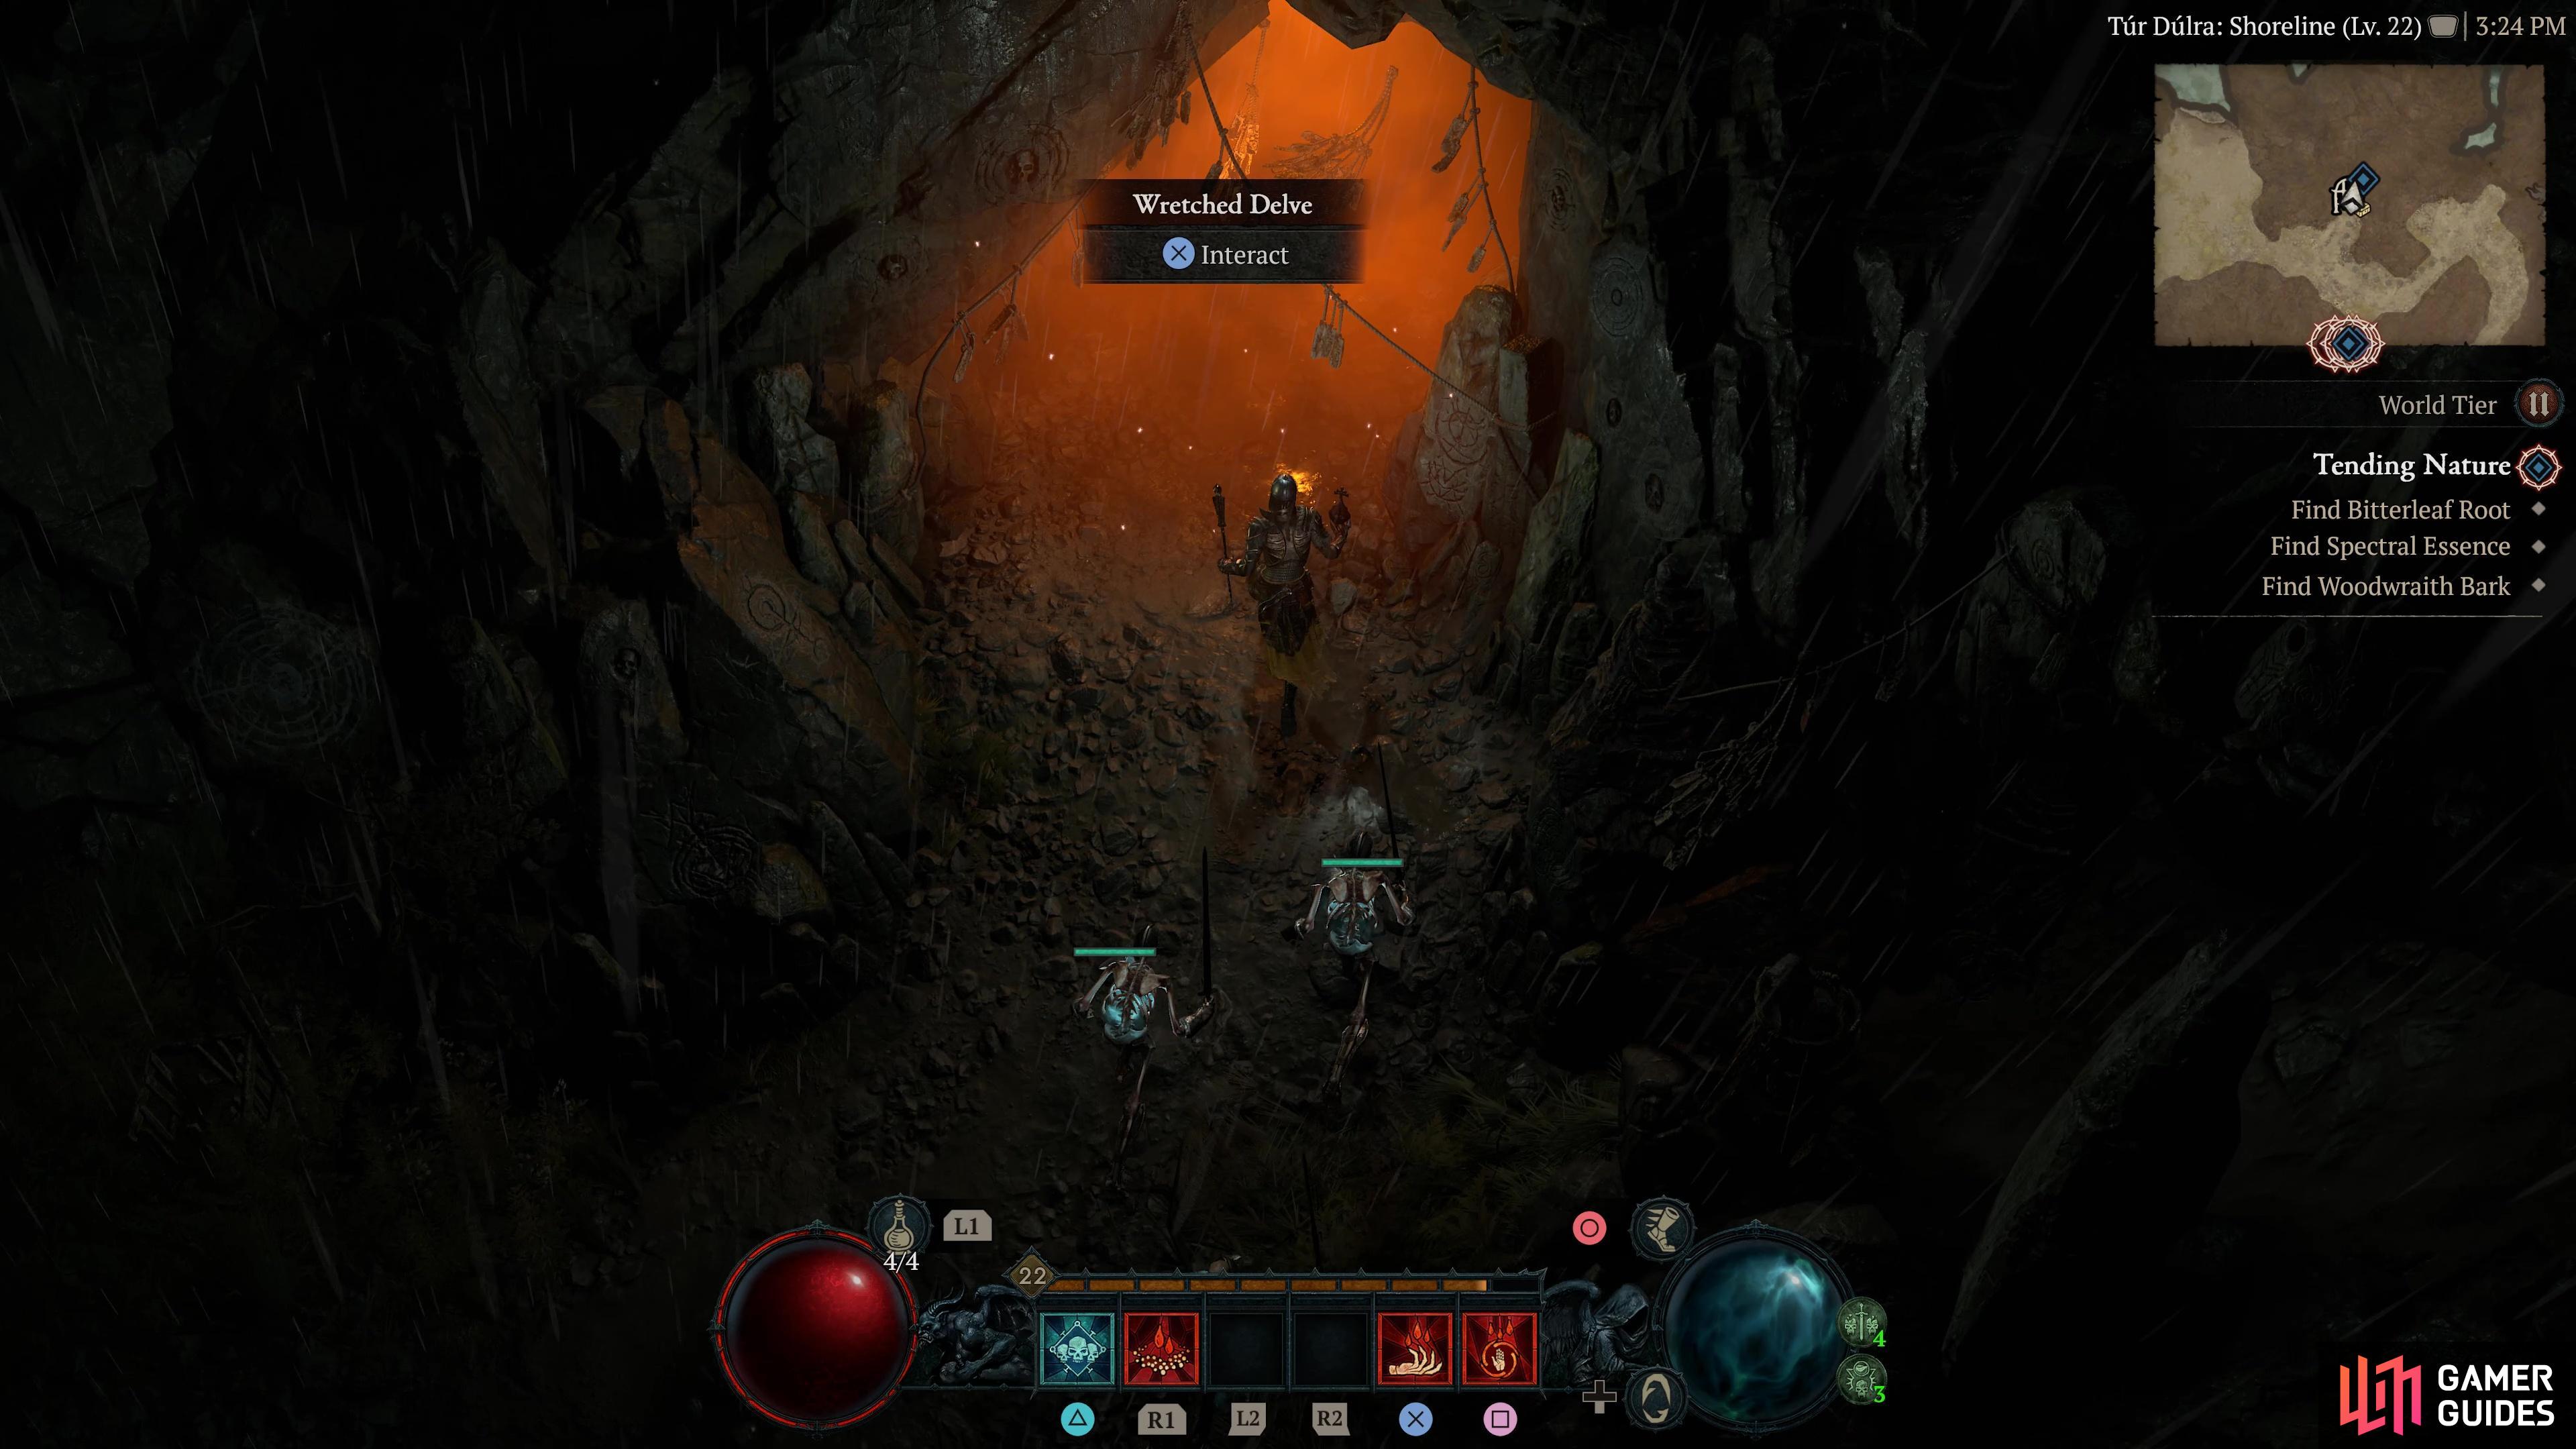
to find the Wretched Delve dungeon.
Start at the Farobru Waypoint and head north to the Tur Dulra Stronghold, then after completing it you’ll gain access to the ![]() Wretched Delve Dungeon! You will receive +30 Scosglen Renown and
Wretched Delve Dungeon! You will receive +30 Scosglen Renown and ![]() Aspect of Static Cling for completing the dungeon.
Aspect of Static Cling for completing the dungeon.
Dungeon 4 - Howling Warren

Head to this location on the map
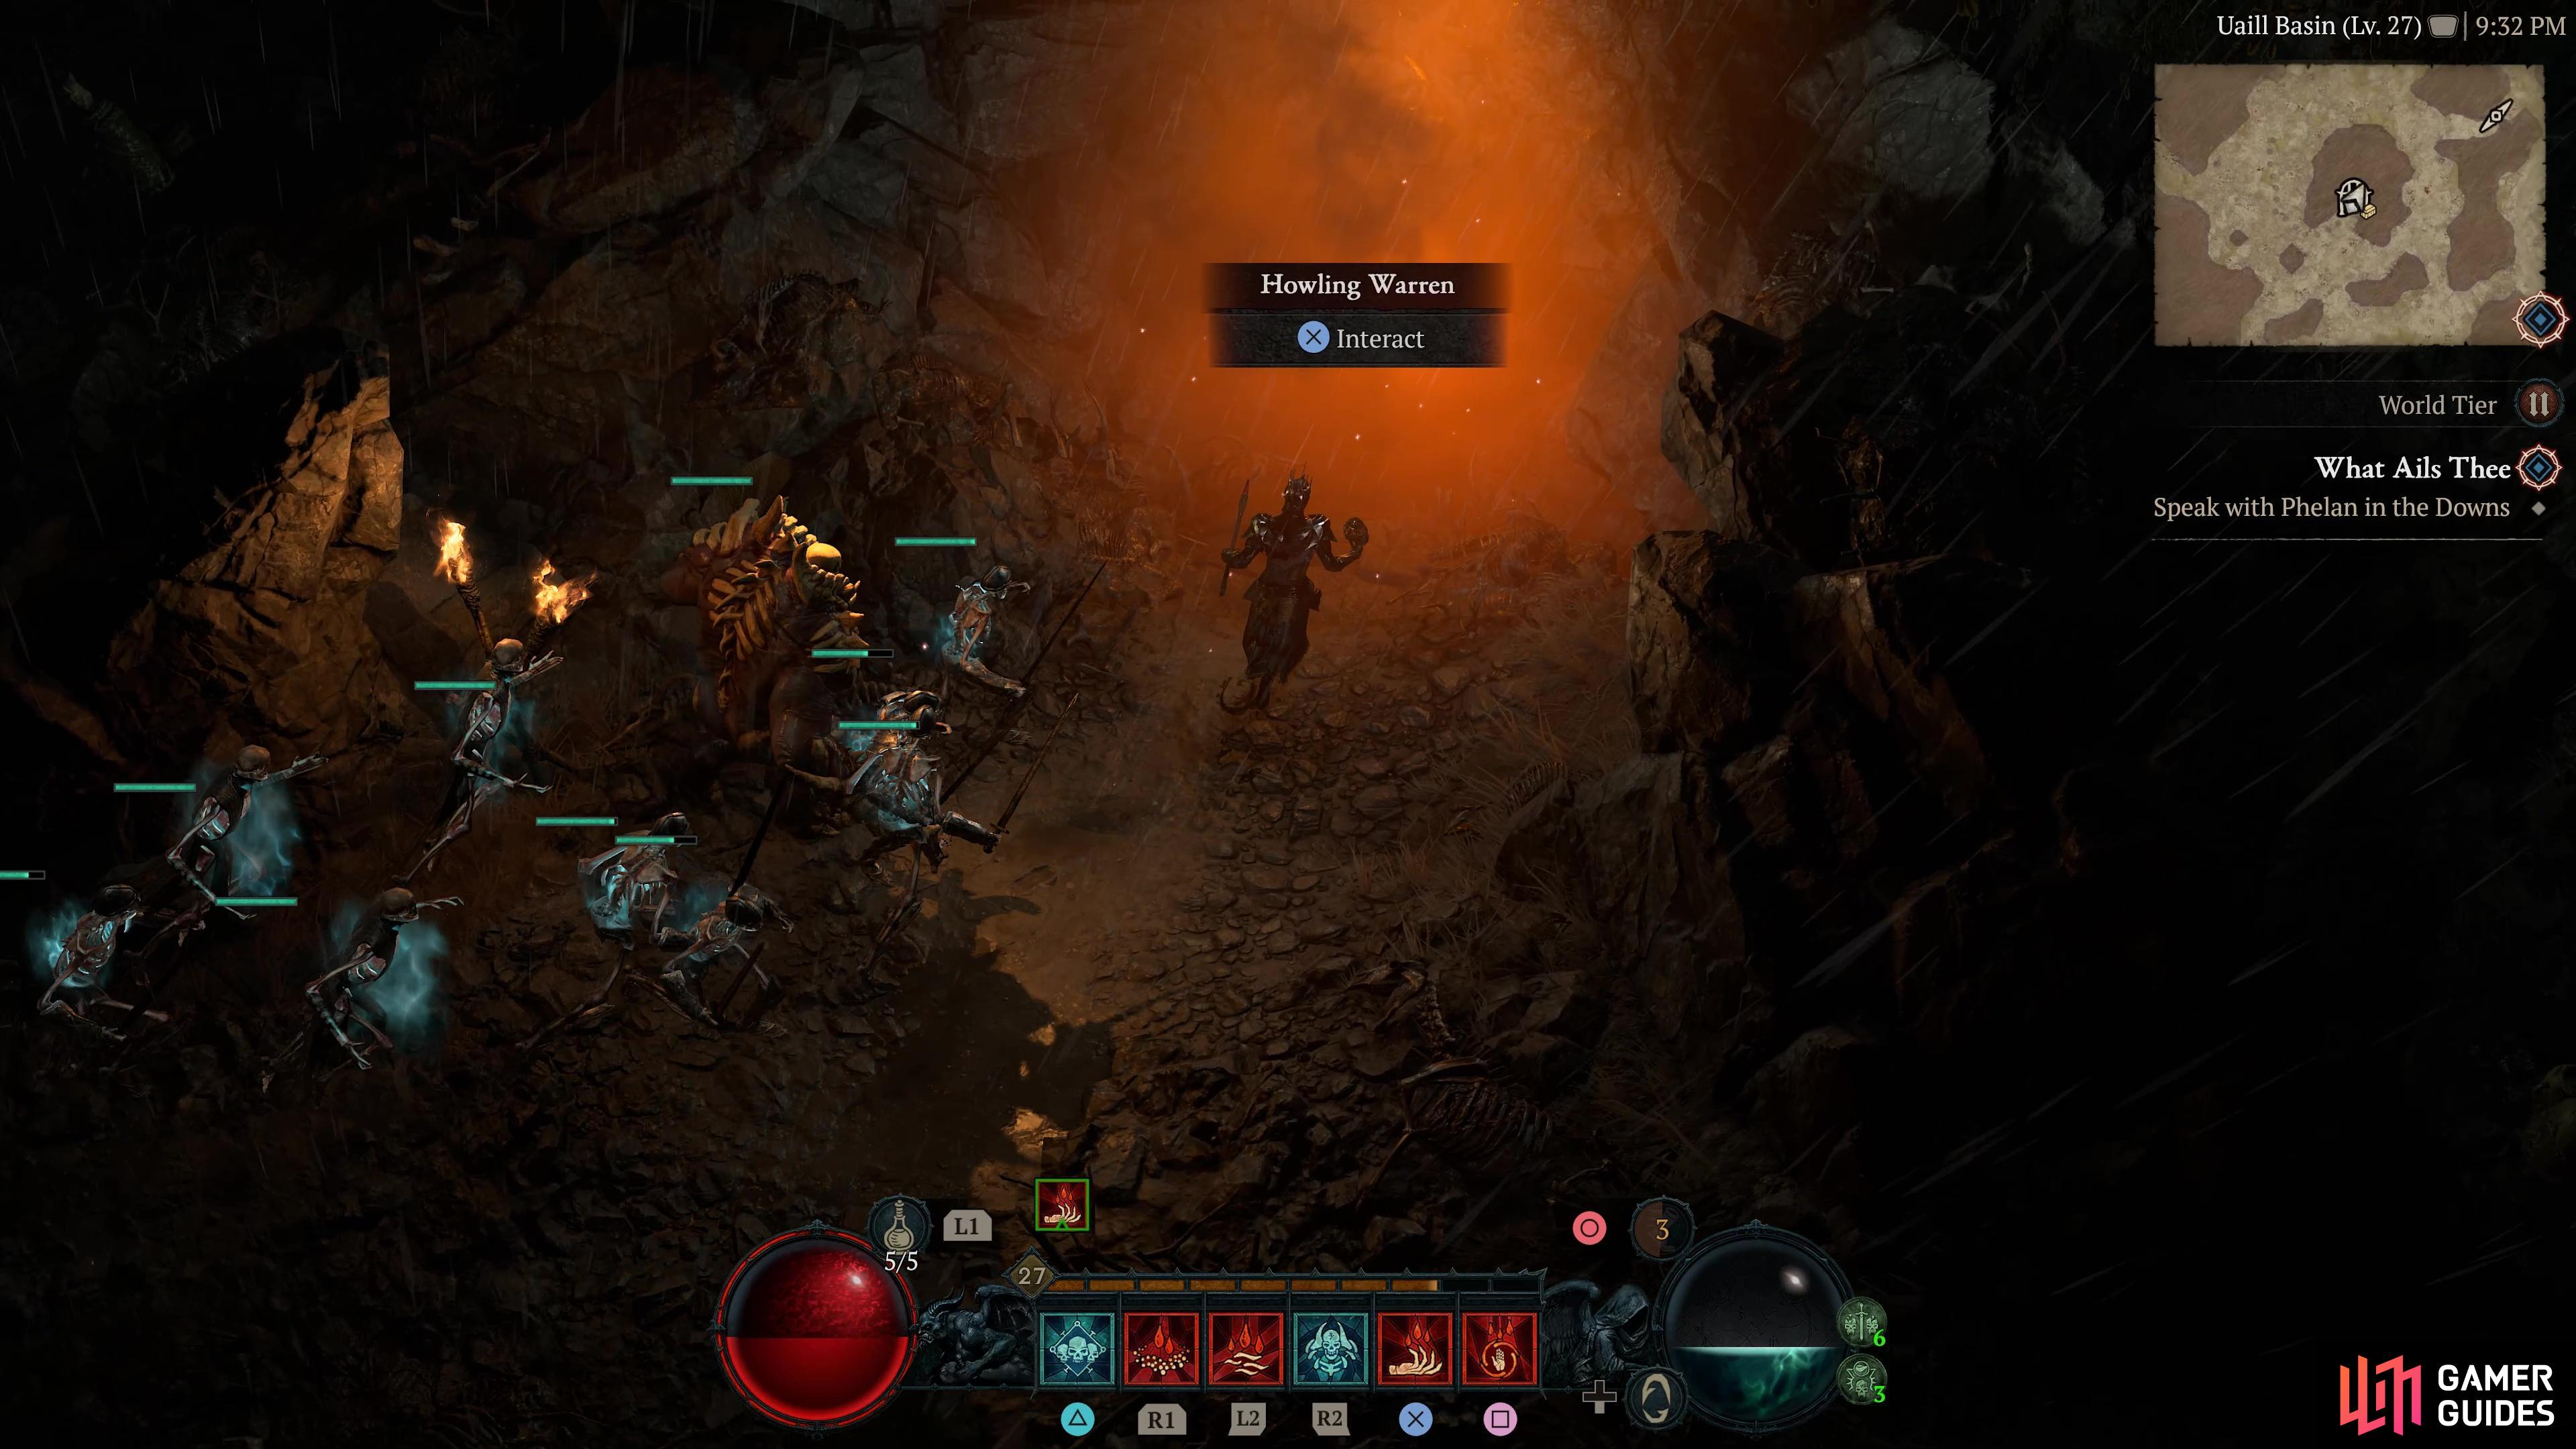
to find the Howling Warren dungeon
Start at the Braestaig Waypoint and head west until you reach the Uaill Basin Area, then you’ll come across the ![]() Howling Warren Dungeon. You will receive +30 Scosglen Renown and the
Howling Warren Dungeon. You will receive +30 Scosglen Renown and the ![]() Aspect of Arrow Storms for completing the dungeon.
Aspect of Arrow Storms for completing the dungeon.
Dungeon 5 - Calibel’s Mine
Head to this location on the map
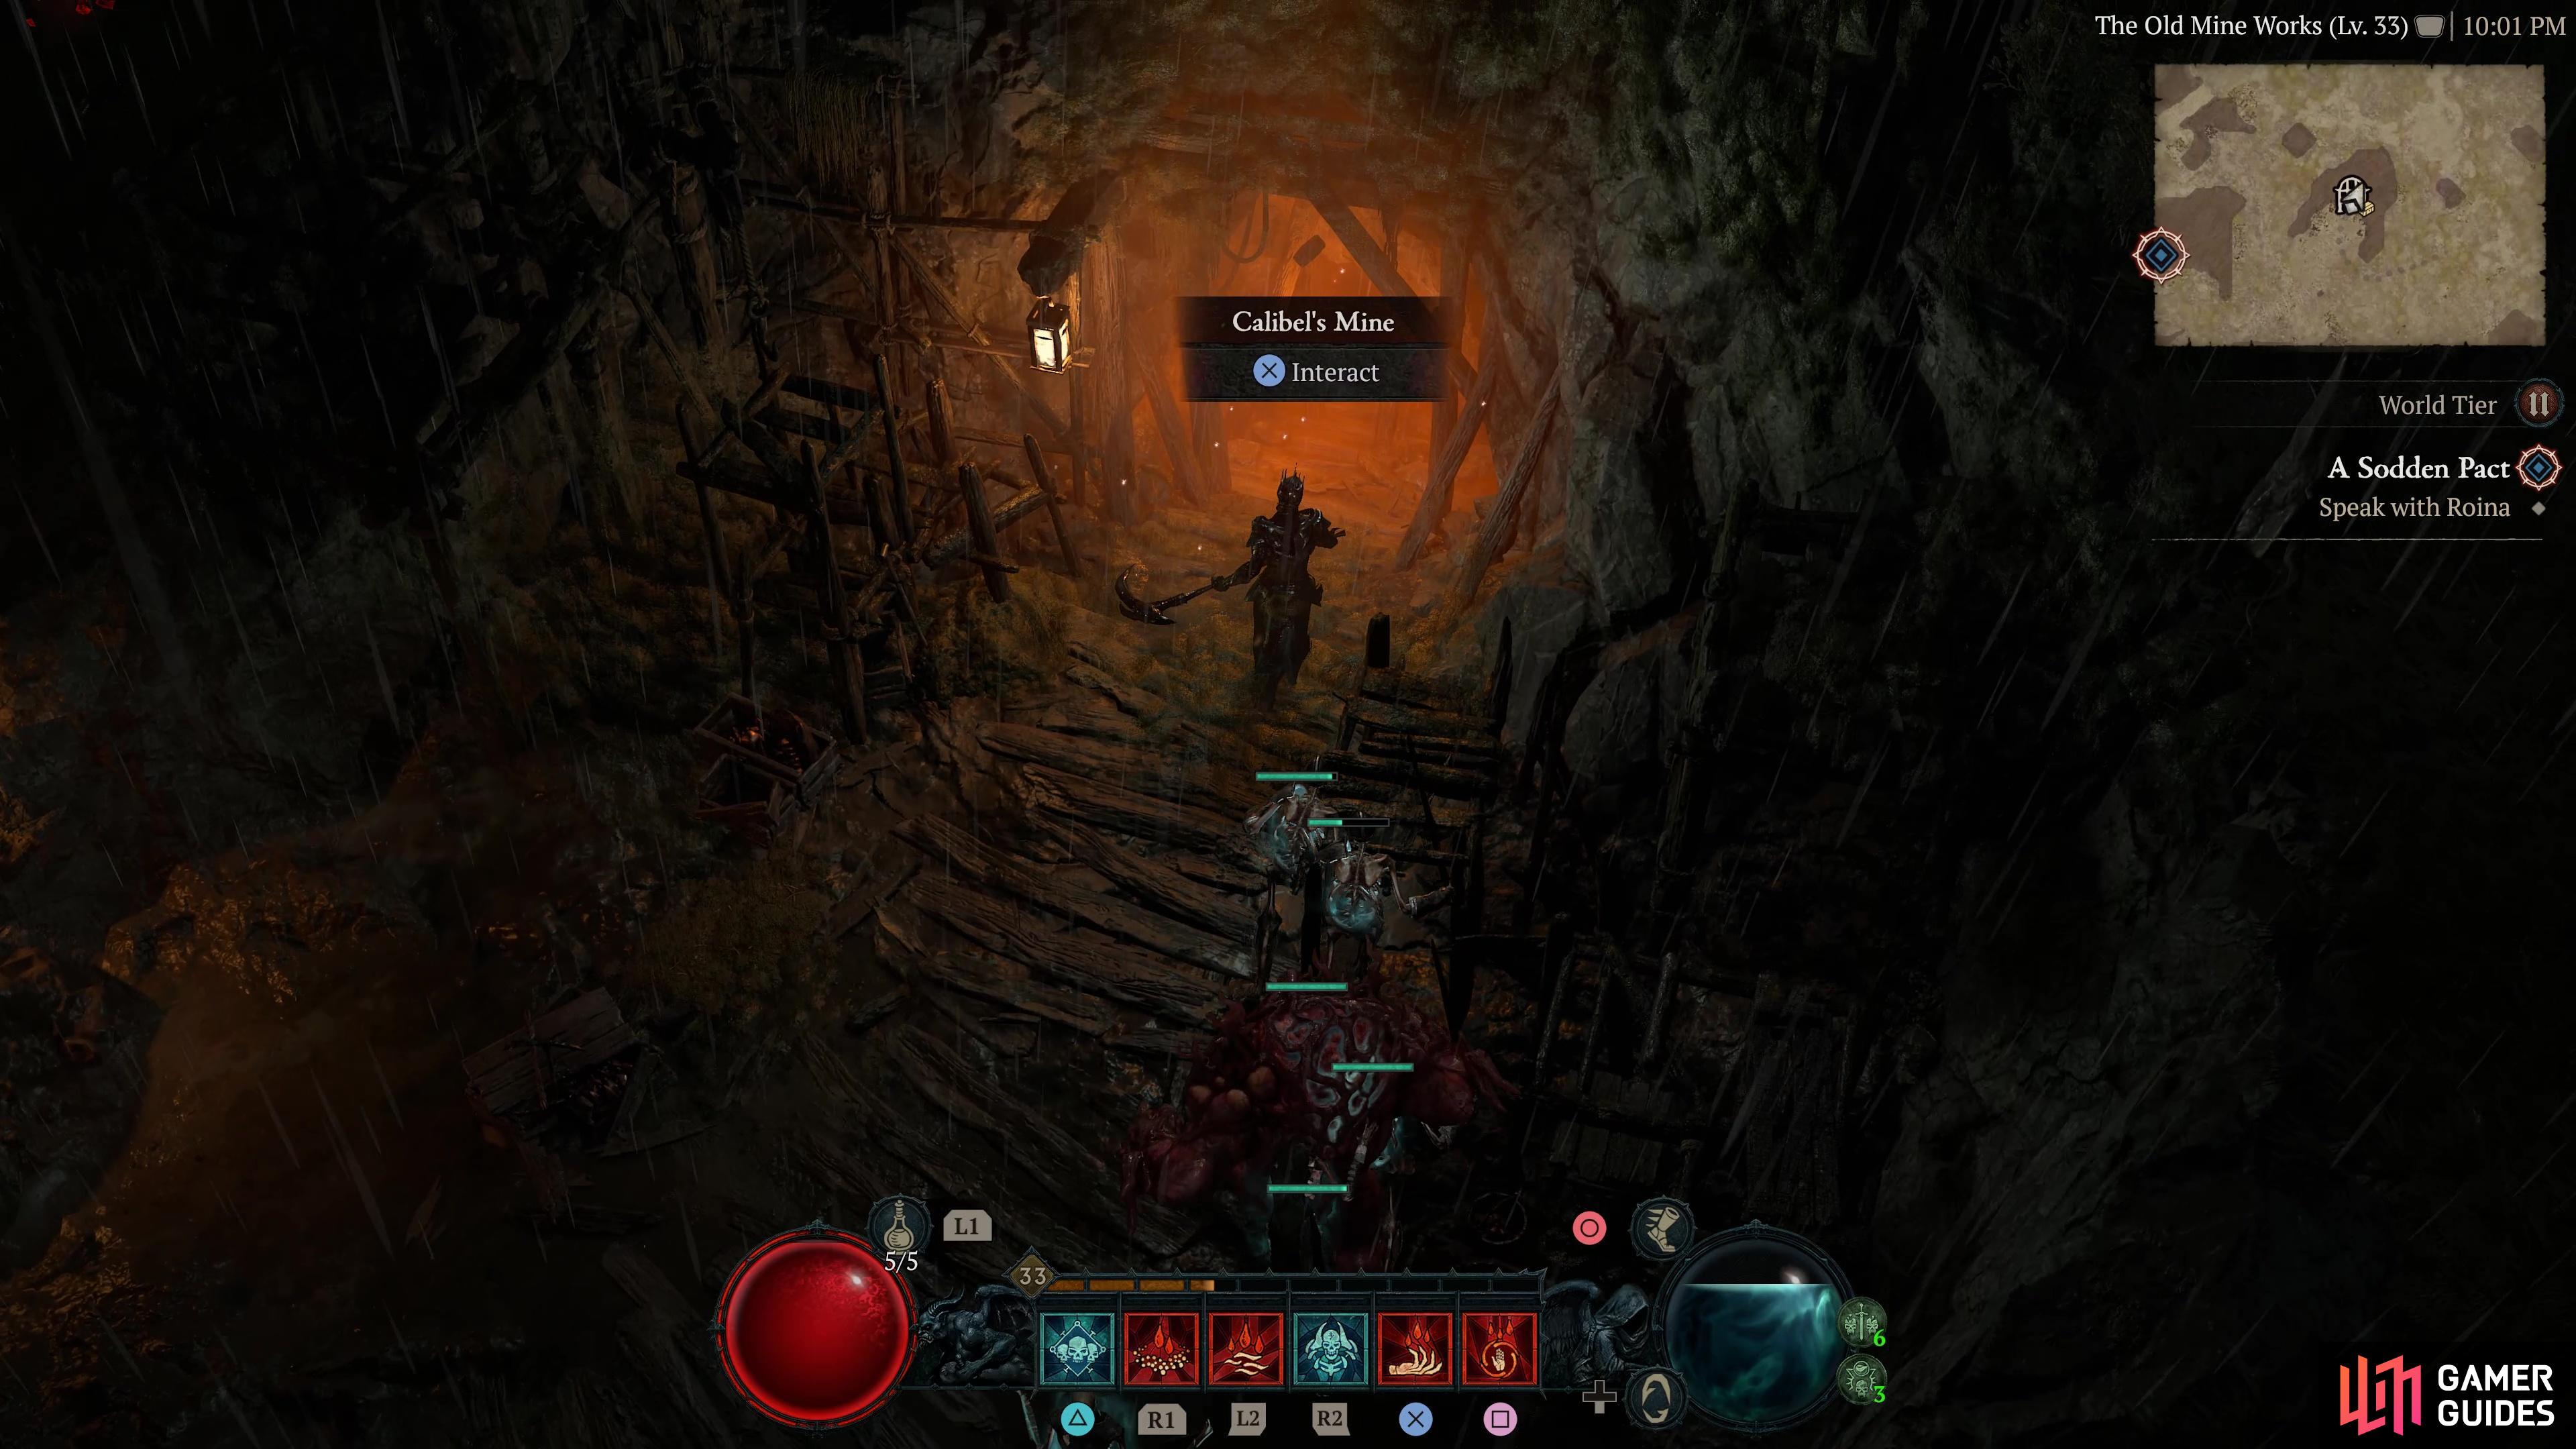
to find the Calibels Mine dungeon
Start at the ![]() Calibel’s Mine Waypoint and head east until you reach The Old Mine Works Area, then you’ll come across the Calibel’s Mine Dungeon. You will receive +30 Scosglen Renown and the
Calibel’s Mine Waypoint and head east until you reach The Old Mine Works Area, then you’ll come across the Calibel’s Mine Dungeon. You will receive +30 Scosglen Renown and the ![]() Aspect of the Relentless Armsmaster for completing the dungeon.
Aspect of the Relentless Armsmaster for completing the dungeon.
Dungeon 6 - Sunken Ruins

Head to this location on the map
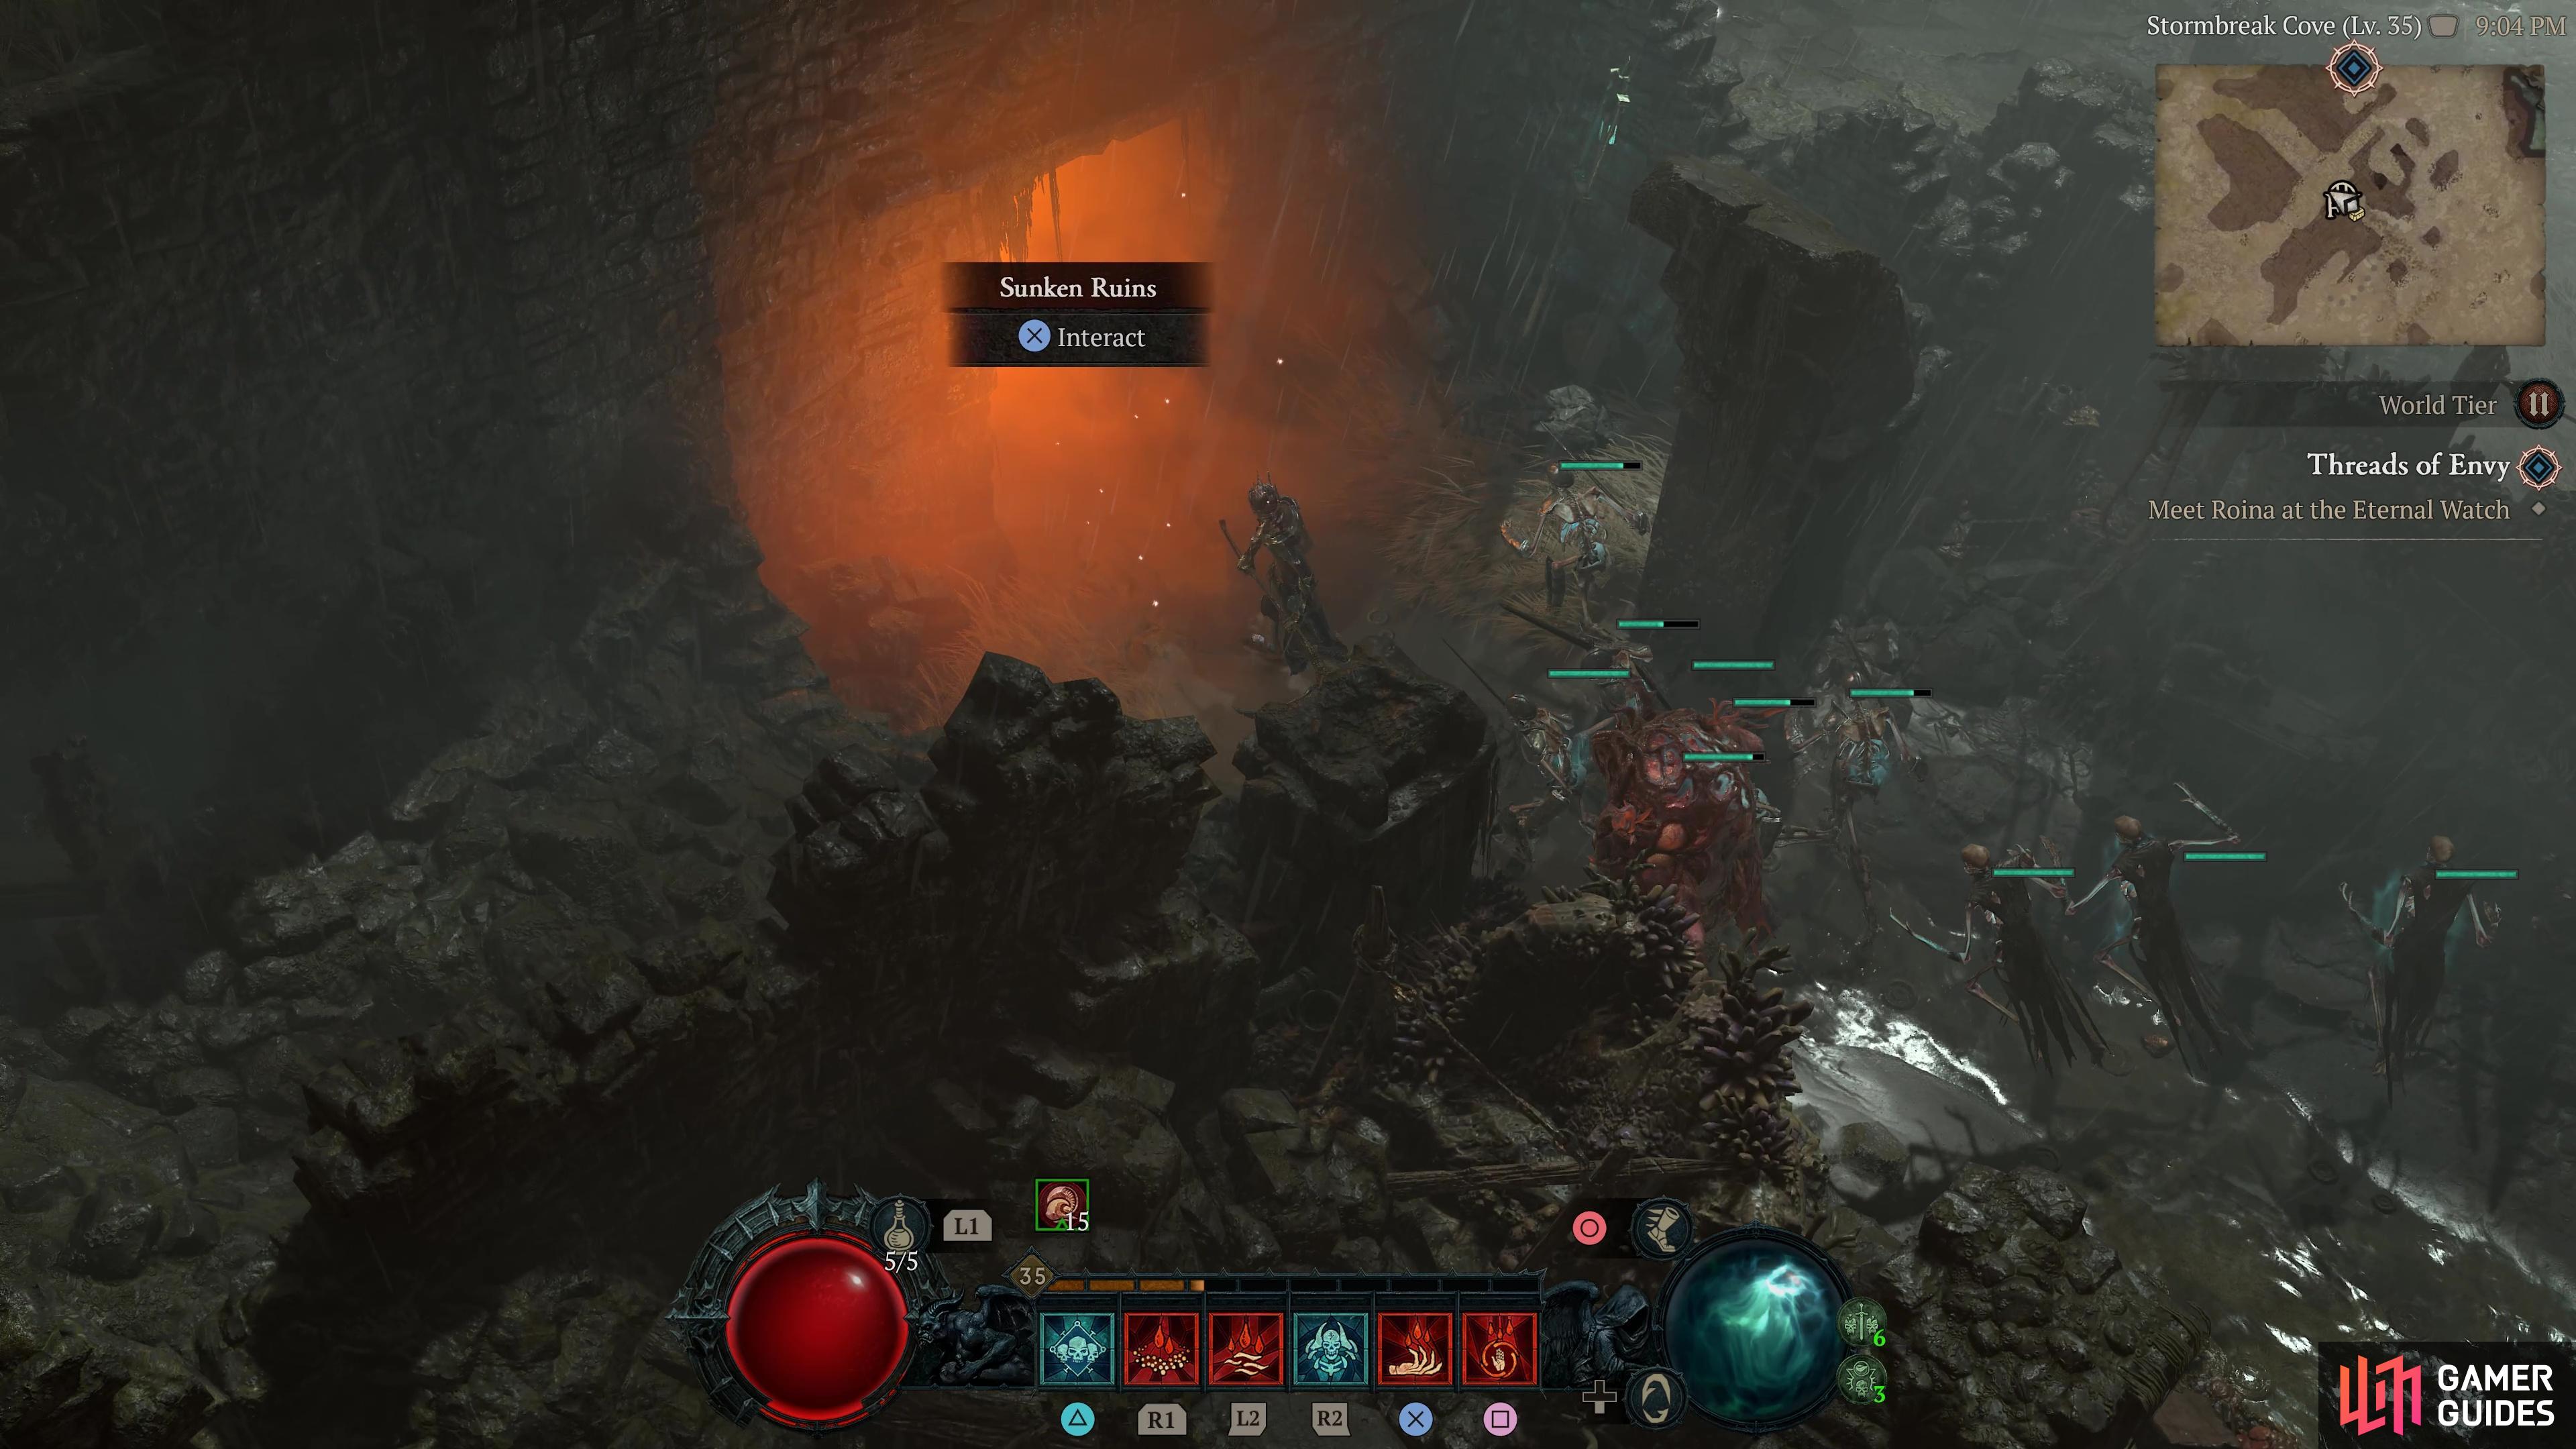
to find the Sunken Ruins dungeon
Start at the Calibel’s Mine Waypoint and head east until you reach the Stormbreak Cove, then you’ll come across the ![]() Sunken Ruins Dungeon. You will receive +30 Scosglen Renown and the
Sunken Ruins Dungeon. You will receive +30 Scosglen Renown and the ![]() Aspect of Ancestral Force for completing the dungeon.
Aspect of Ancestral Force for completing the dungeon.
Dungeon 7 - Mithering Descent

Head to this location on the map
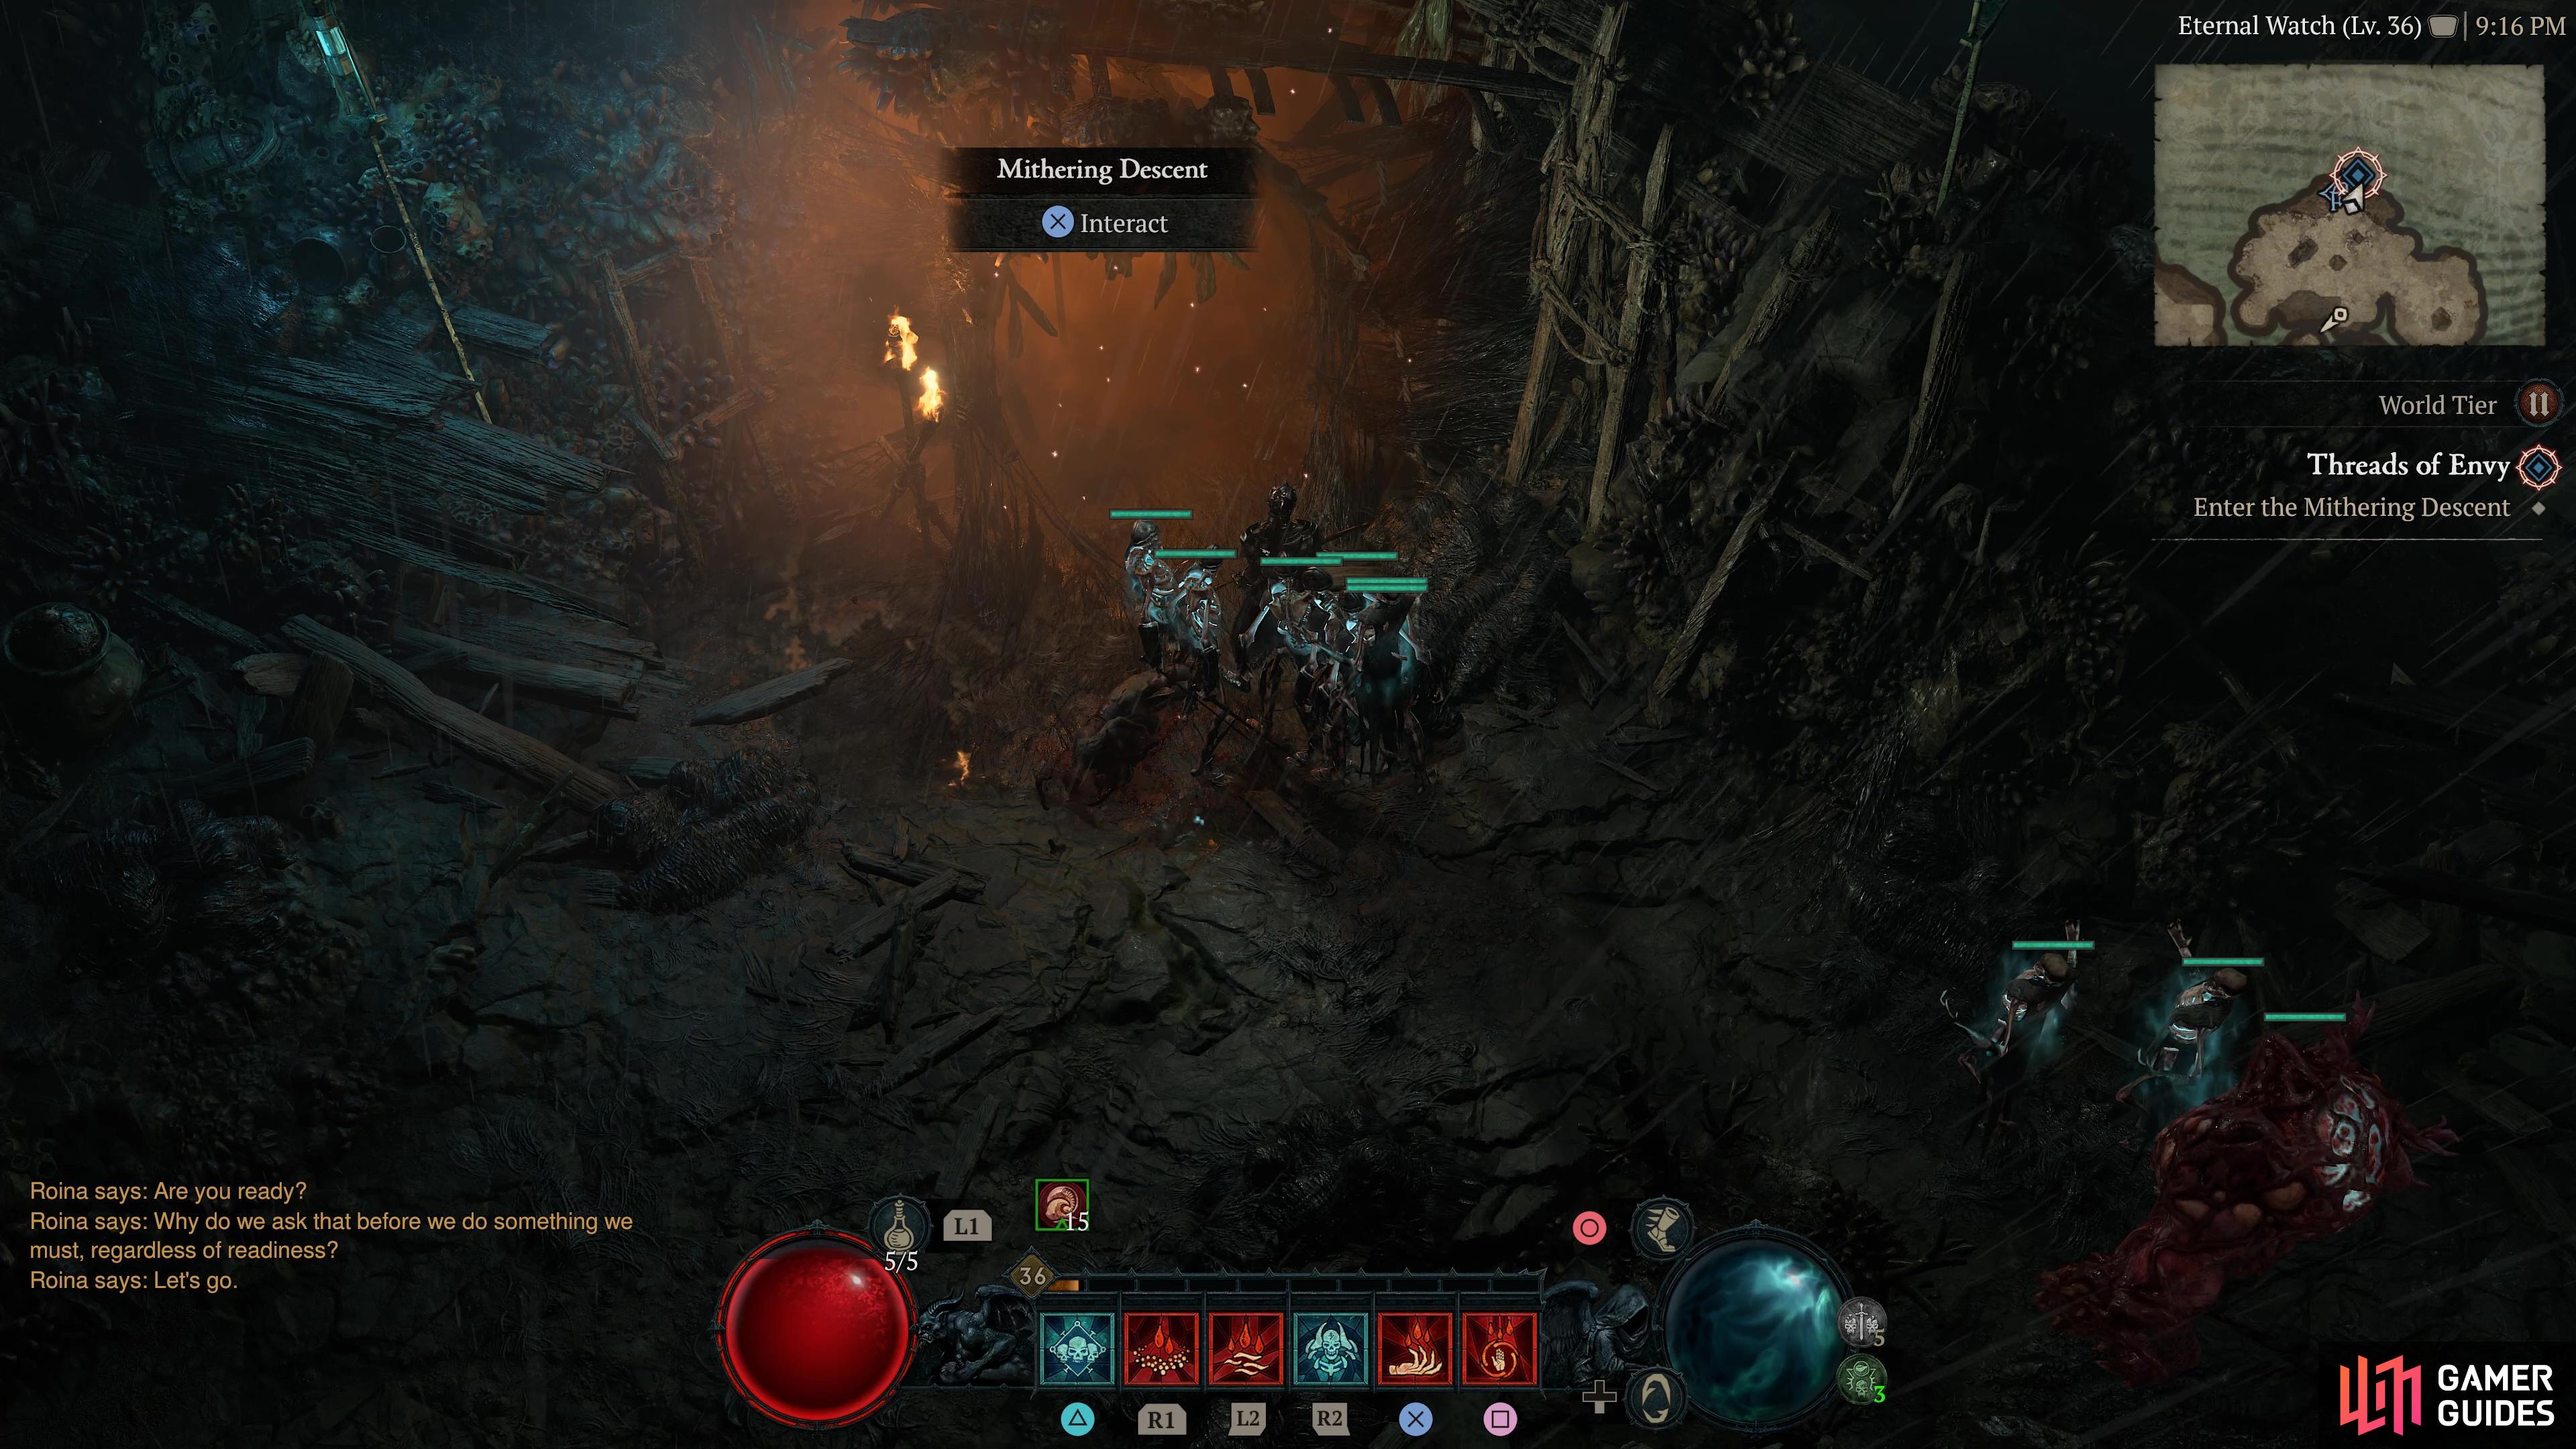
to find the Mithering Descent dungeon
Start at the Calibel’s Mine Waypoint and head northeast until you reach the Eternal Watch Area, then you’ll come across the ![]() Mithering Descent Dungeon. However, you won’t be able to access this dungeon without activating the
Mithering Descent Dungeon. However, you won’t be able to access this dungeon without activating the ![]() Threads of Envy Side Quest. In order to start this Side Quest you’ll need to go to Marowen and complete other quests for Roina first. You will receive +30 Scosglen Renown for completing the dungeon.
Threads of Envy Side Quest. In order to start this Side Quest you’ll need to go to Marowen and complete other quests for Roina first. You will receive +30 Scosglen Renown for completing the dungeon.
Dungeon 8 - Flooded Depths

Head to this location on the map

to find the Flooded Depths Dungeon.
Start at the Marowen Waypoint and head northeast until you reach ![]() Hope’s Light, then after completing the stronghold you’ll unlock the
Hope’s Light, then after completing the stronghold you’ll unlock the ![]() Flooded Depths Dungeon! You will receive +30 Scosglen Renown and
Flooded Depths Dungeon! You will receive +30 Scosglen Renown and ![]() Aspect of Empowering Reaper for completing the dungeon.
Aspect of Empowering Reaper for completing the dungeon.
Dungeon 9 - Penitent Cairns

Head to this location on the map
to find the Penitent Cairns Dungeon.
Start at the Braestaig Waypoint and head east until you reach the Wailing Coast Area, then you’ll come across the Penitent Cairns Dungeon. You will receive +30 Scosglen Renown and ![]() Death Wish Aspect for completing the dungeon.
Death Wish Aspect for completing the dungeon.
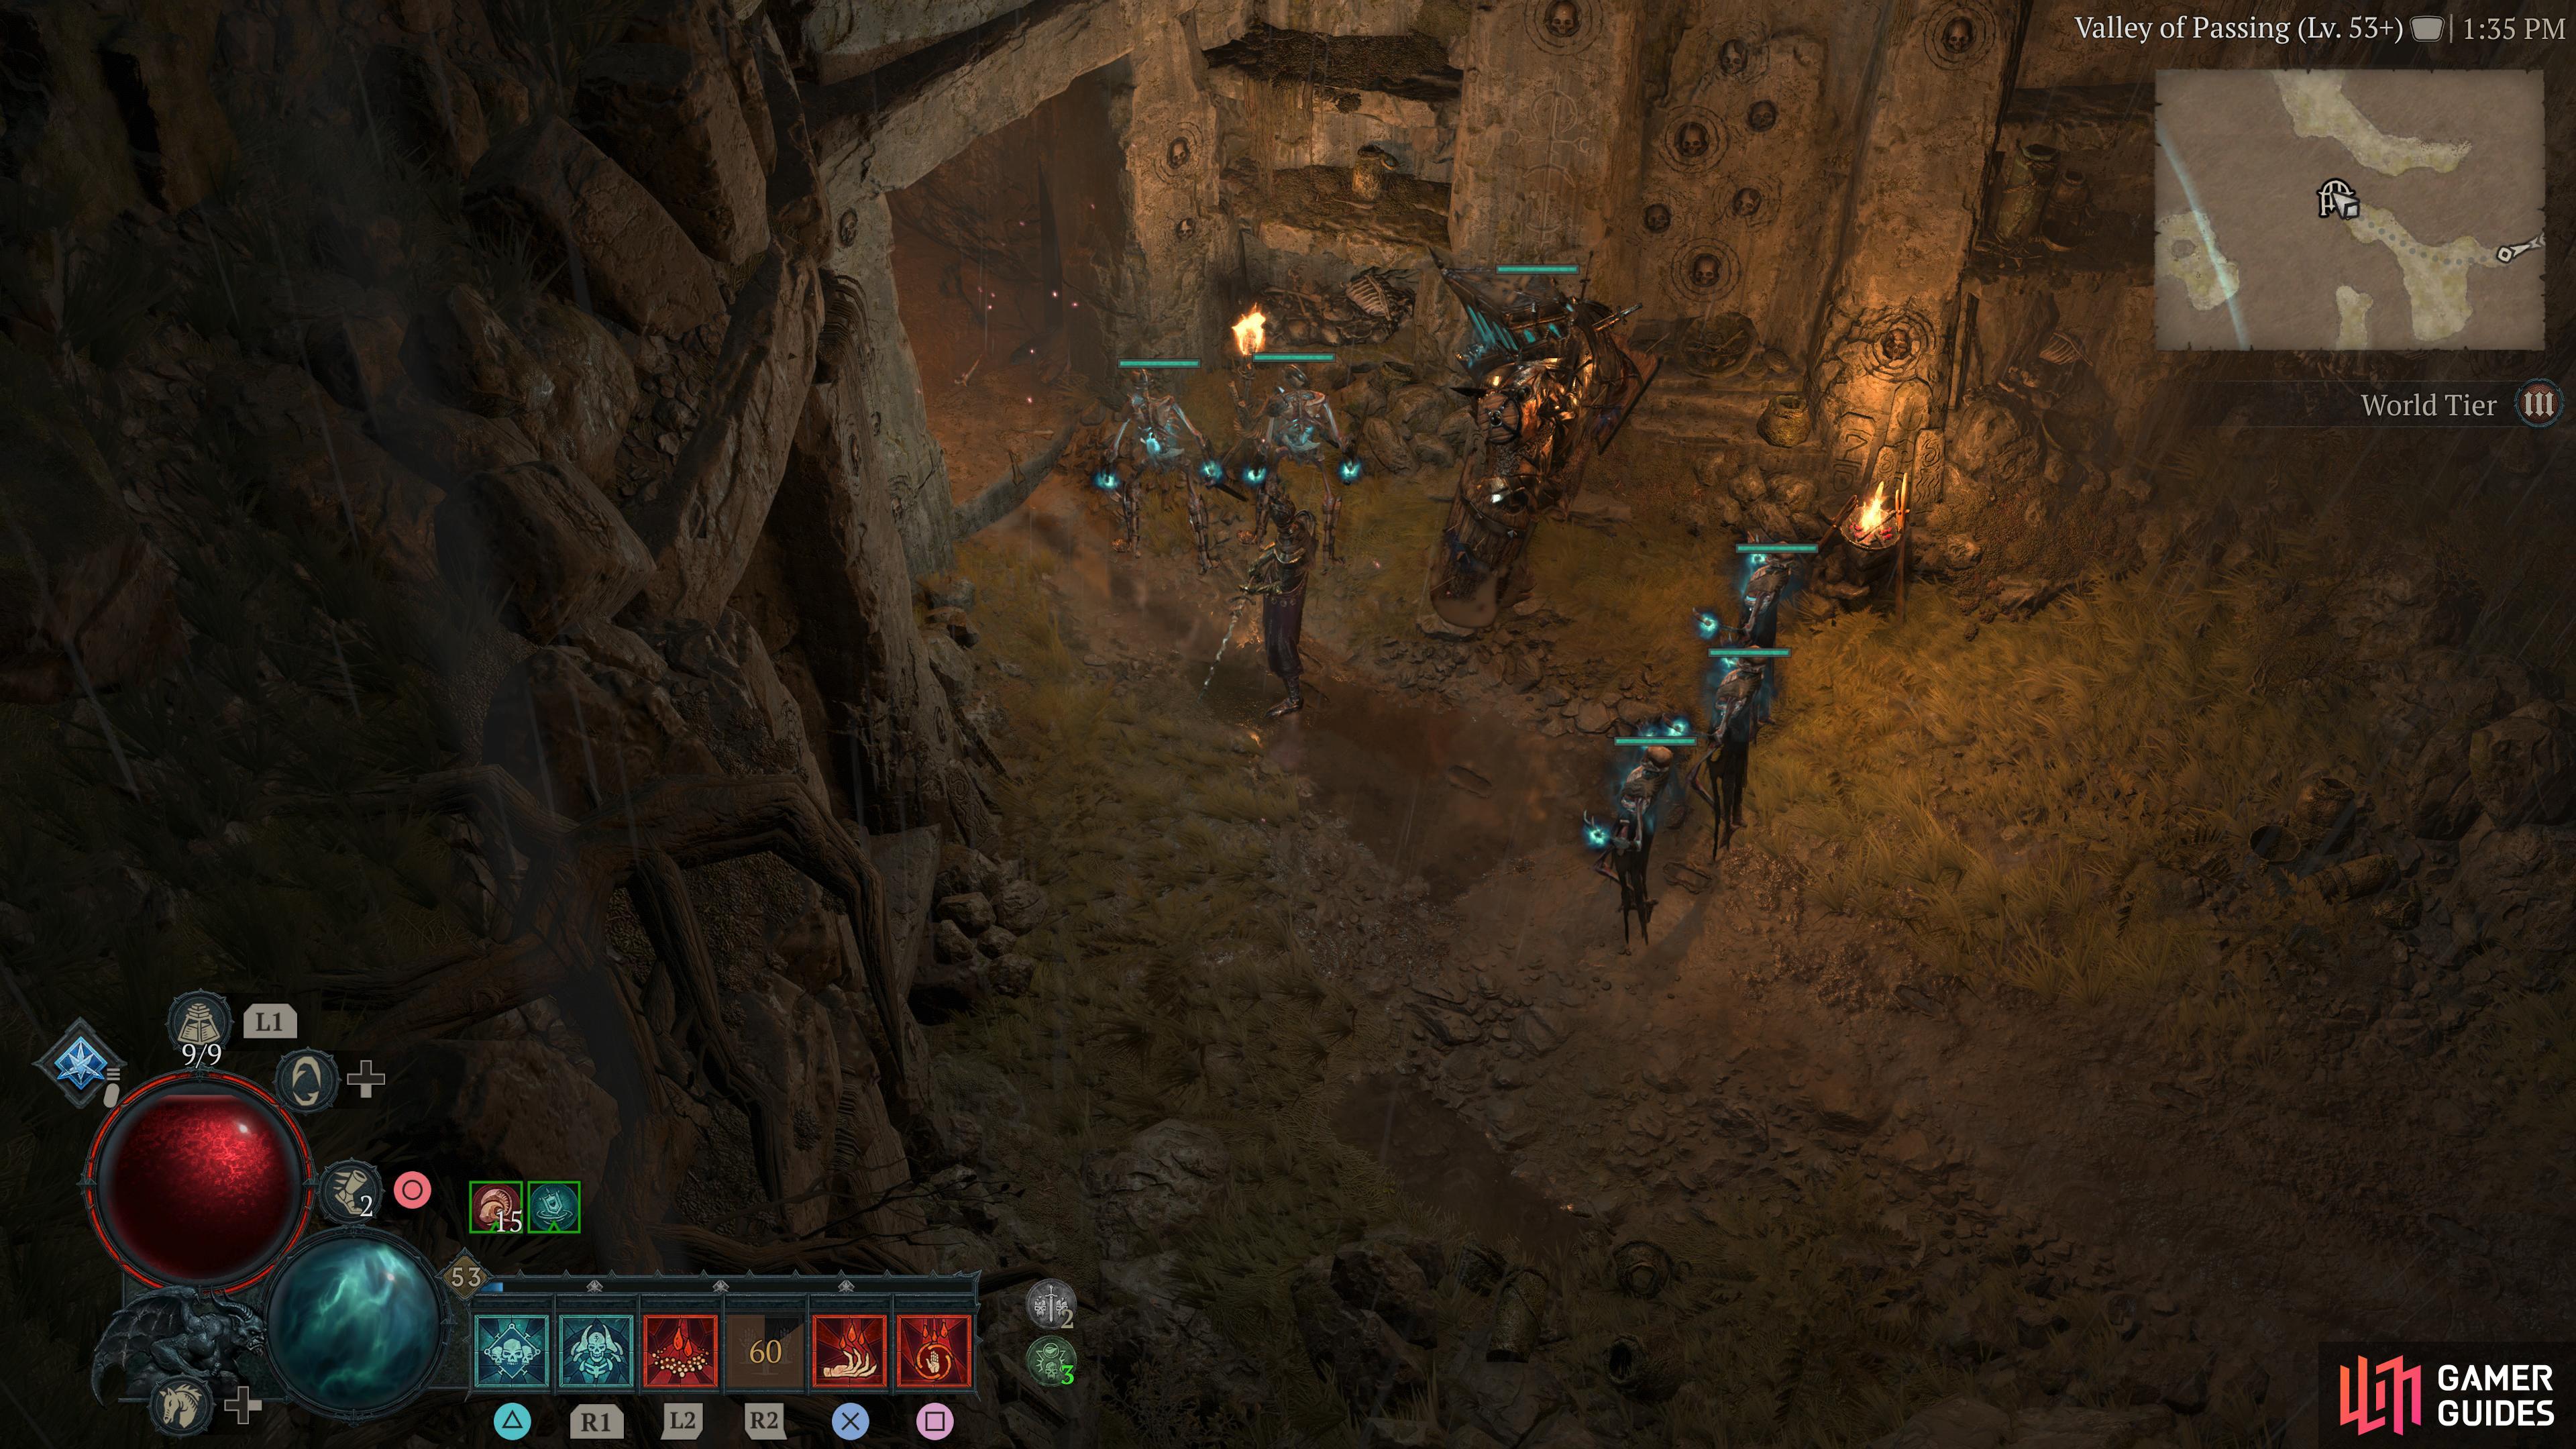
Dungeon 10 - Weeping Cairns

Head to this location on the map
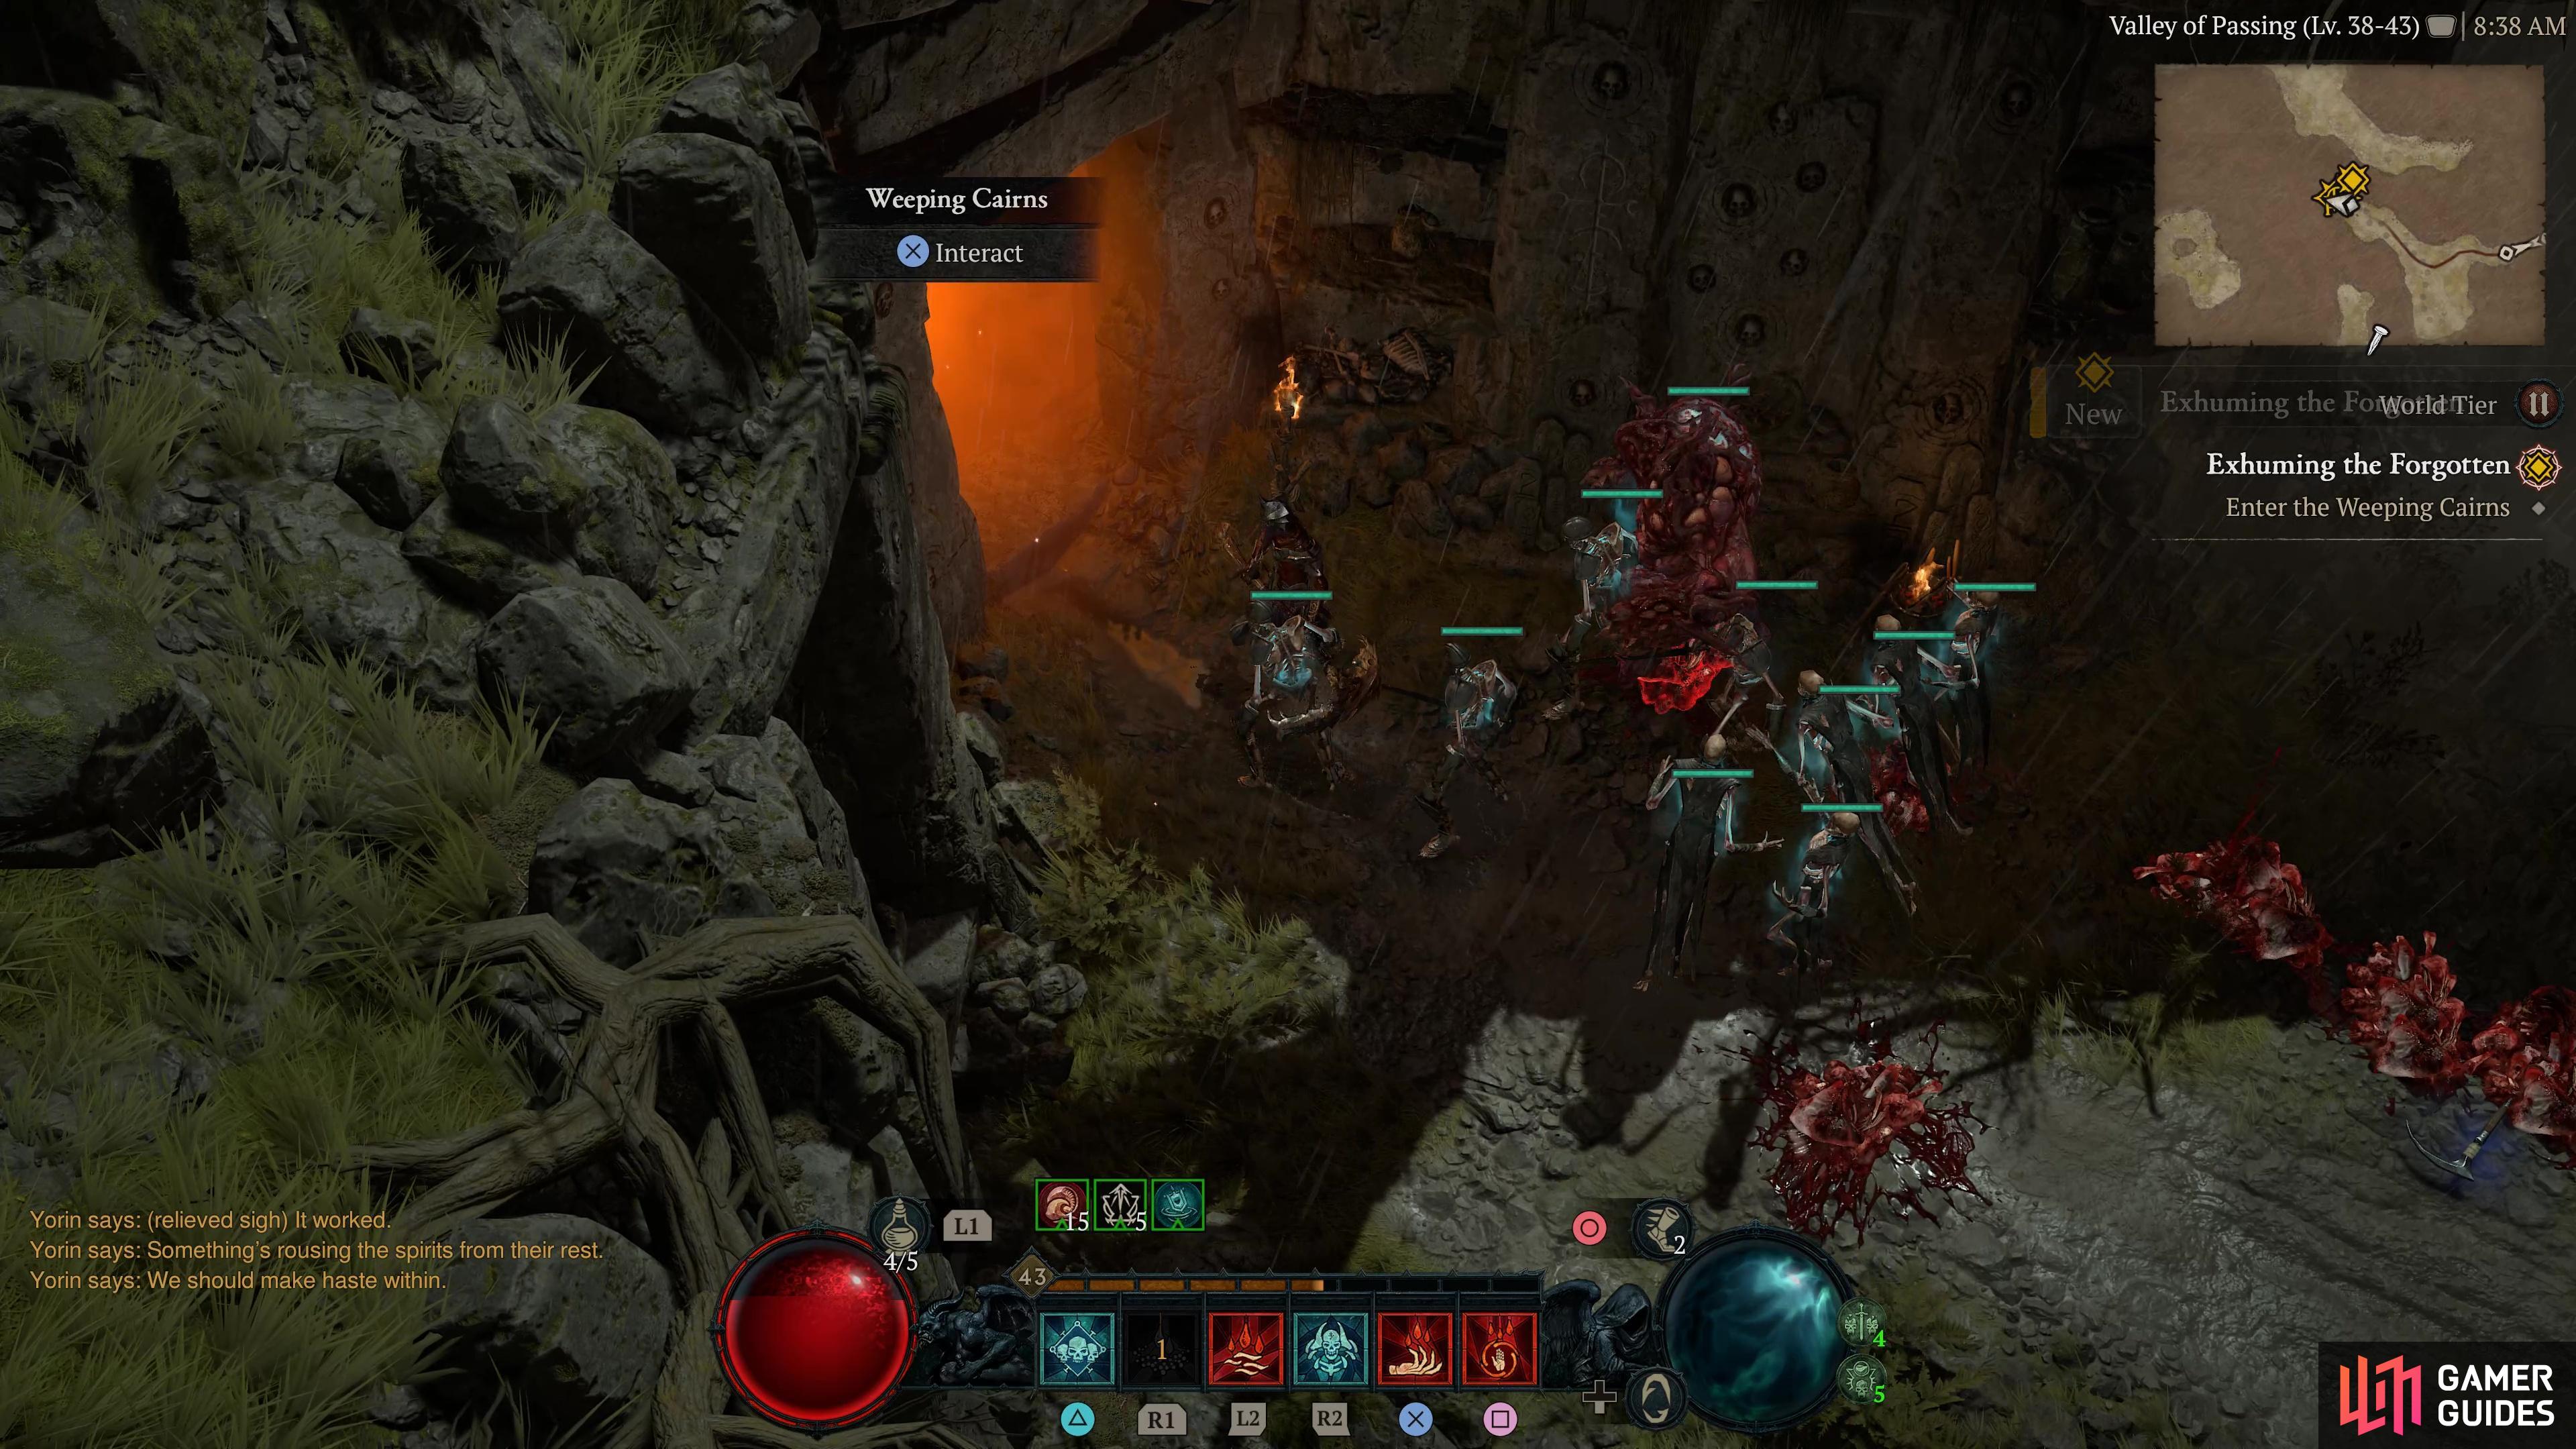
to find the Weeping Cairns Dungeon.
Start at the Braestaig Waypoint and head east until you reach the Valley of Passing Area, then you’ll come across the ![]() Weeping Cairns Dungeon. However, this dungeon can only be accessed during the
Weeping Cairns Dungeon. However, this dungeon can only be accessed during the ![]() Exhuming the Forgotten Main Quest. You will receive +30 Scosglen Renown for completing the dungeon.
Exhuming the Forgotten Main Quest. You will receive +30 Scosglen Renown for completing the dungeon.
Dungeon 11 - Vault of the Forsaken

Head to this location on the map
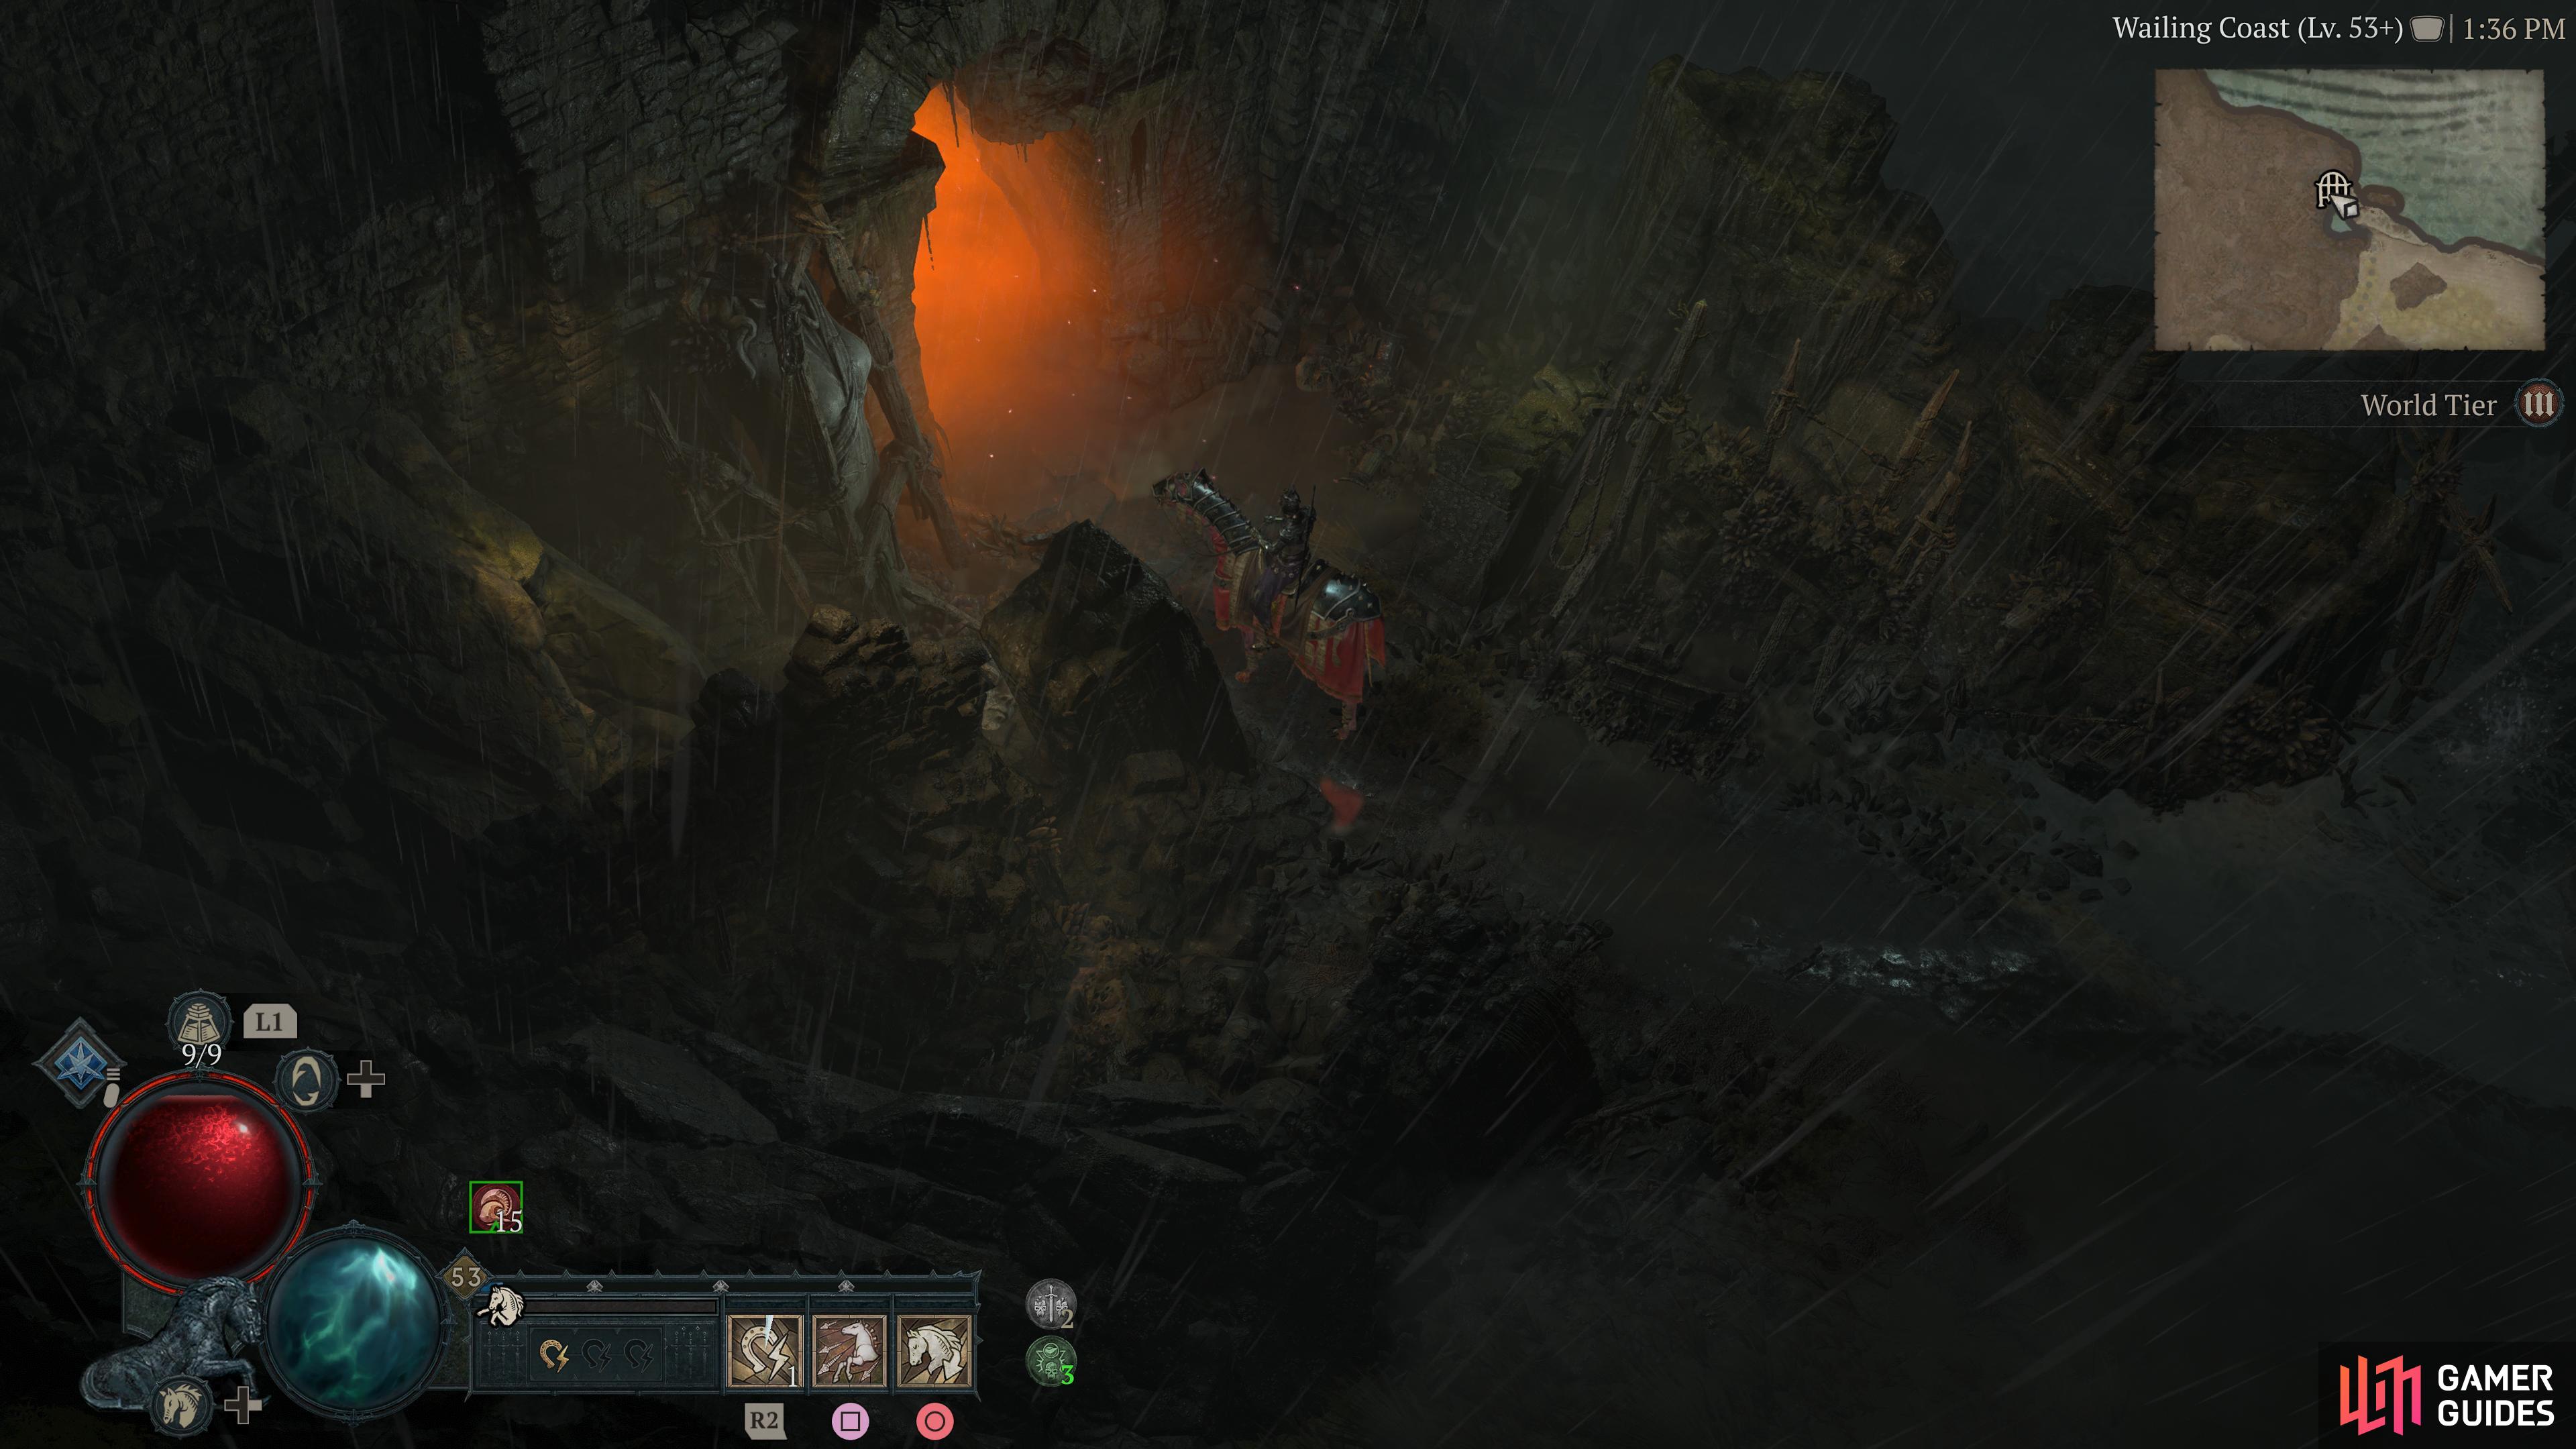
to find the Vault of the Forsaken Dungeon.
Start at the Braestaig Waypoint and head east until you reach the Wailing Coast Area, then you’ll come across the Vault of the Forsaken in the corner to the east. You will receive +30 Scosglen Renown and ![]() Requiem Aspect for completing the dungeon.
Requiem Aspect for completing the dungeon.
Dungeon 12 - Raelthwind Wilds

Head to this location on the map
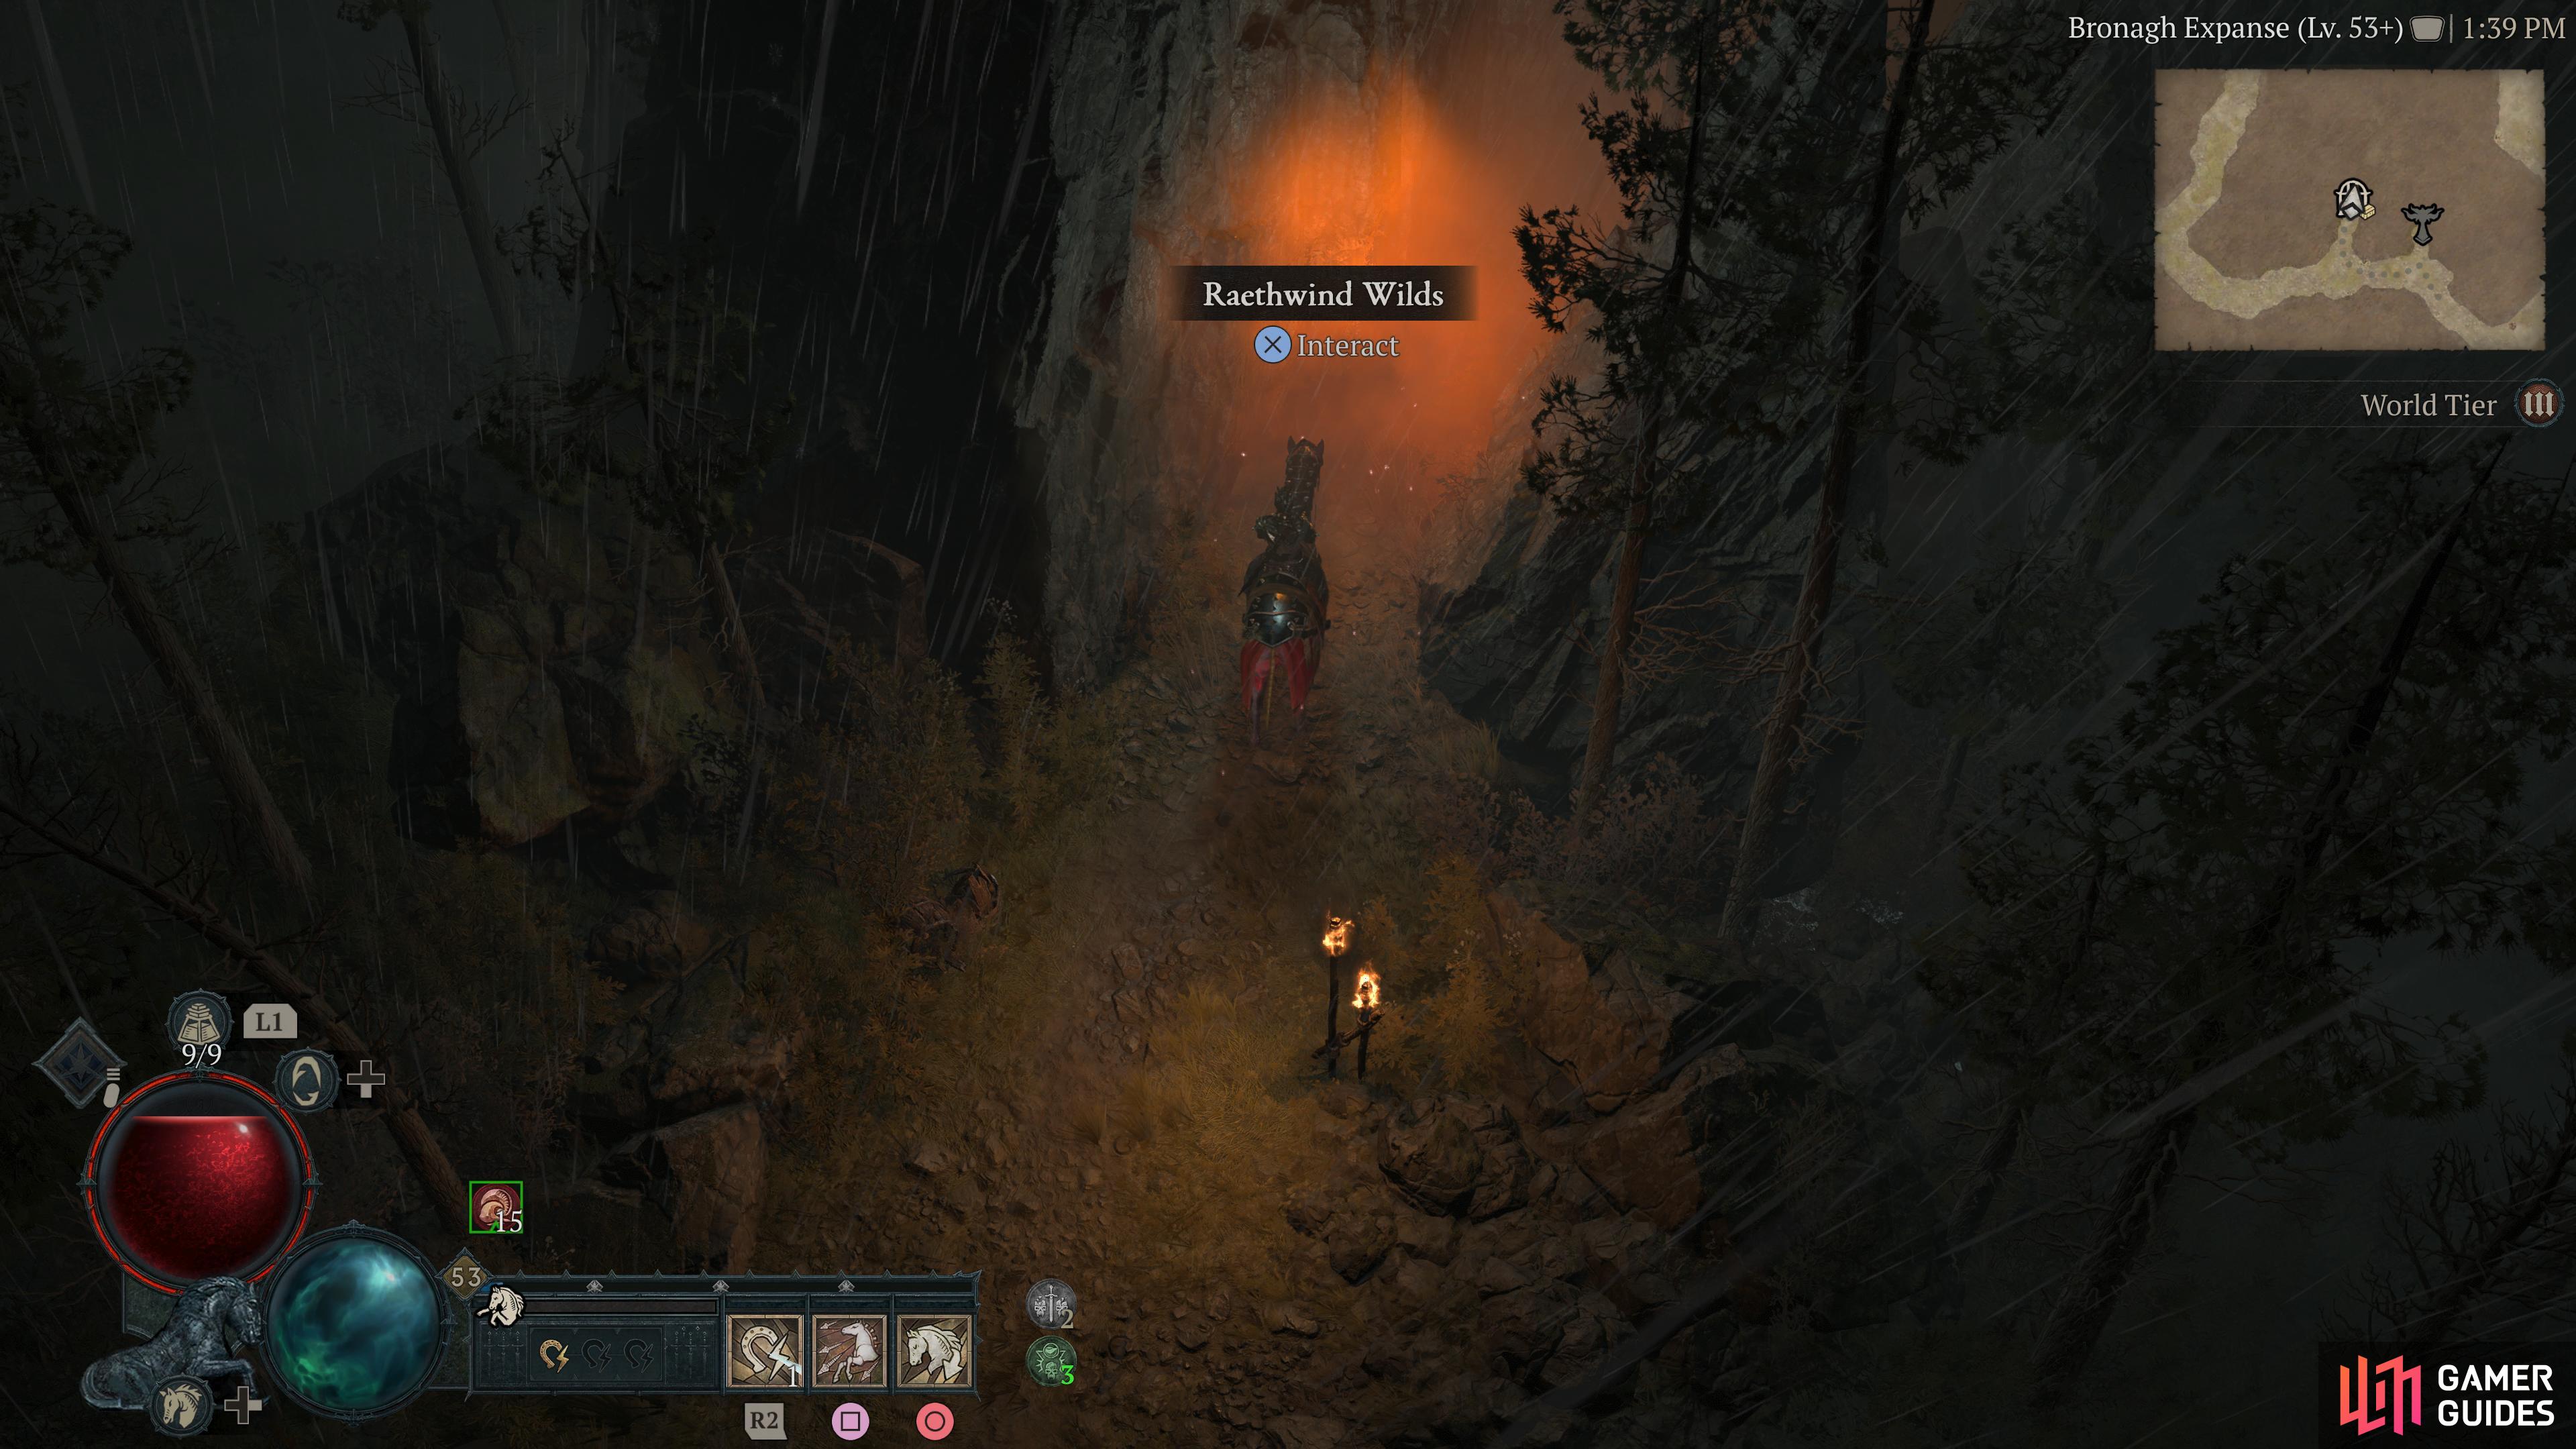
to find the Raelthwind Wilds Dungeon.
Start at the Braestaig Waypoint and head southeast until you reach the southernmost portion of the Wailing Hills, then you’ll come across the Raelthwind Wilds Dungeon. You will receive +30 Scosglen Renown and ![]() Aspect of Inner Calm for completing the dungeon.
Aspect of Inner Calm for completing the dungeon.
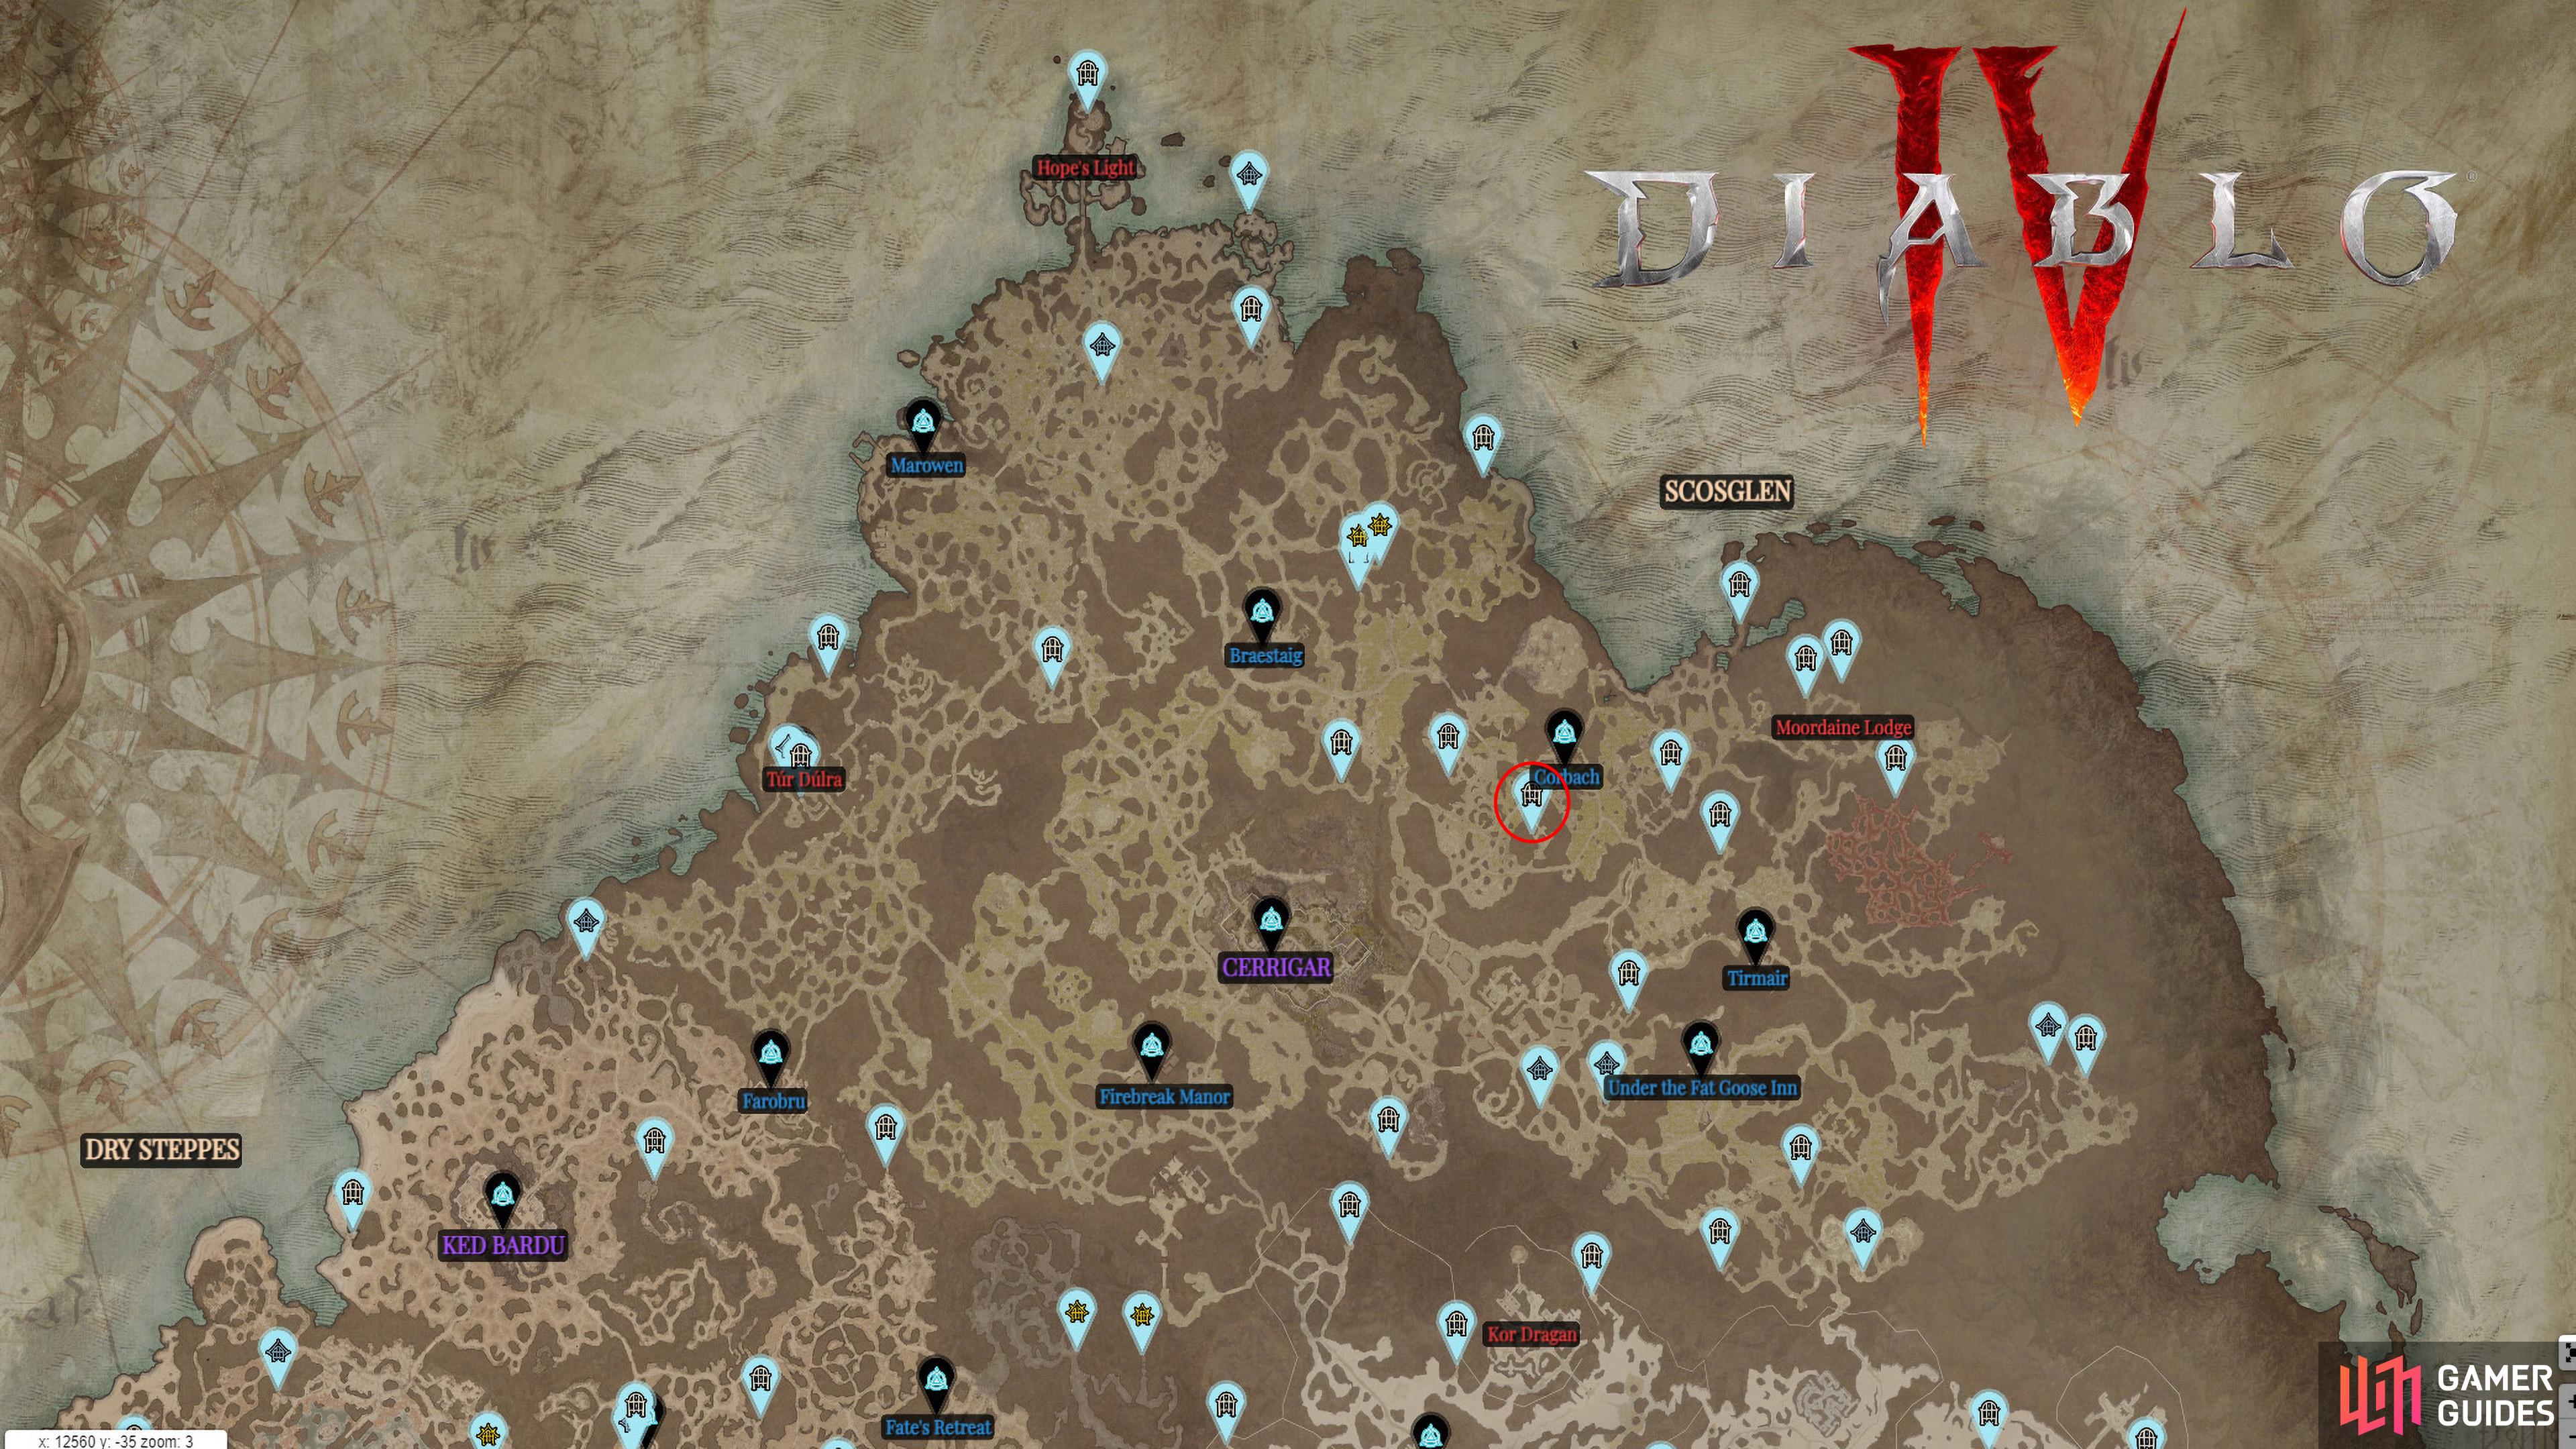
Dungeon 13 - Domhainne Tunnels

Head to this location on the map
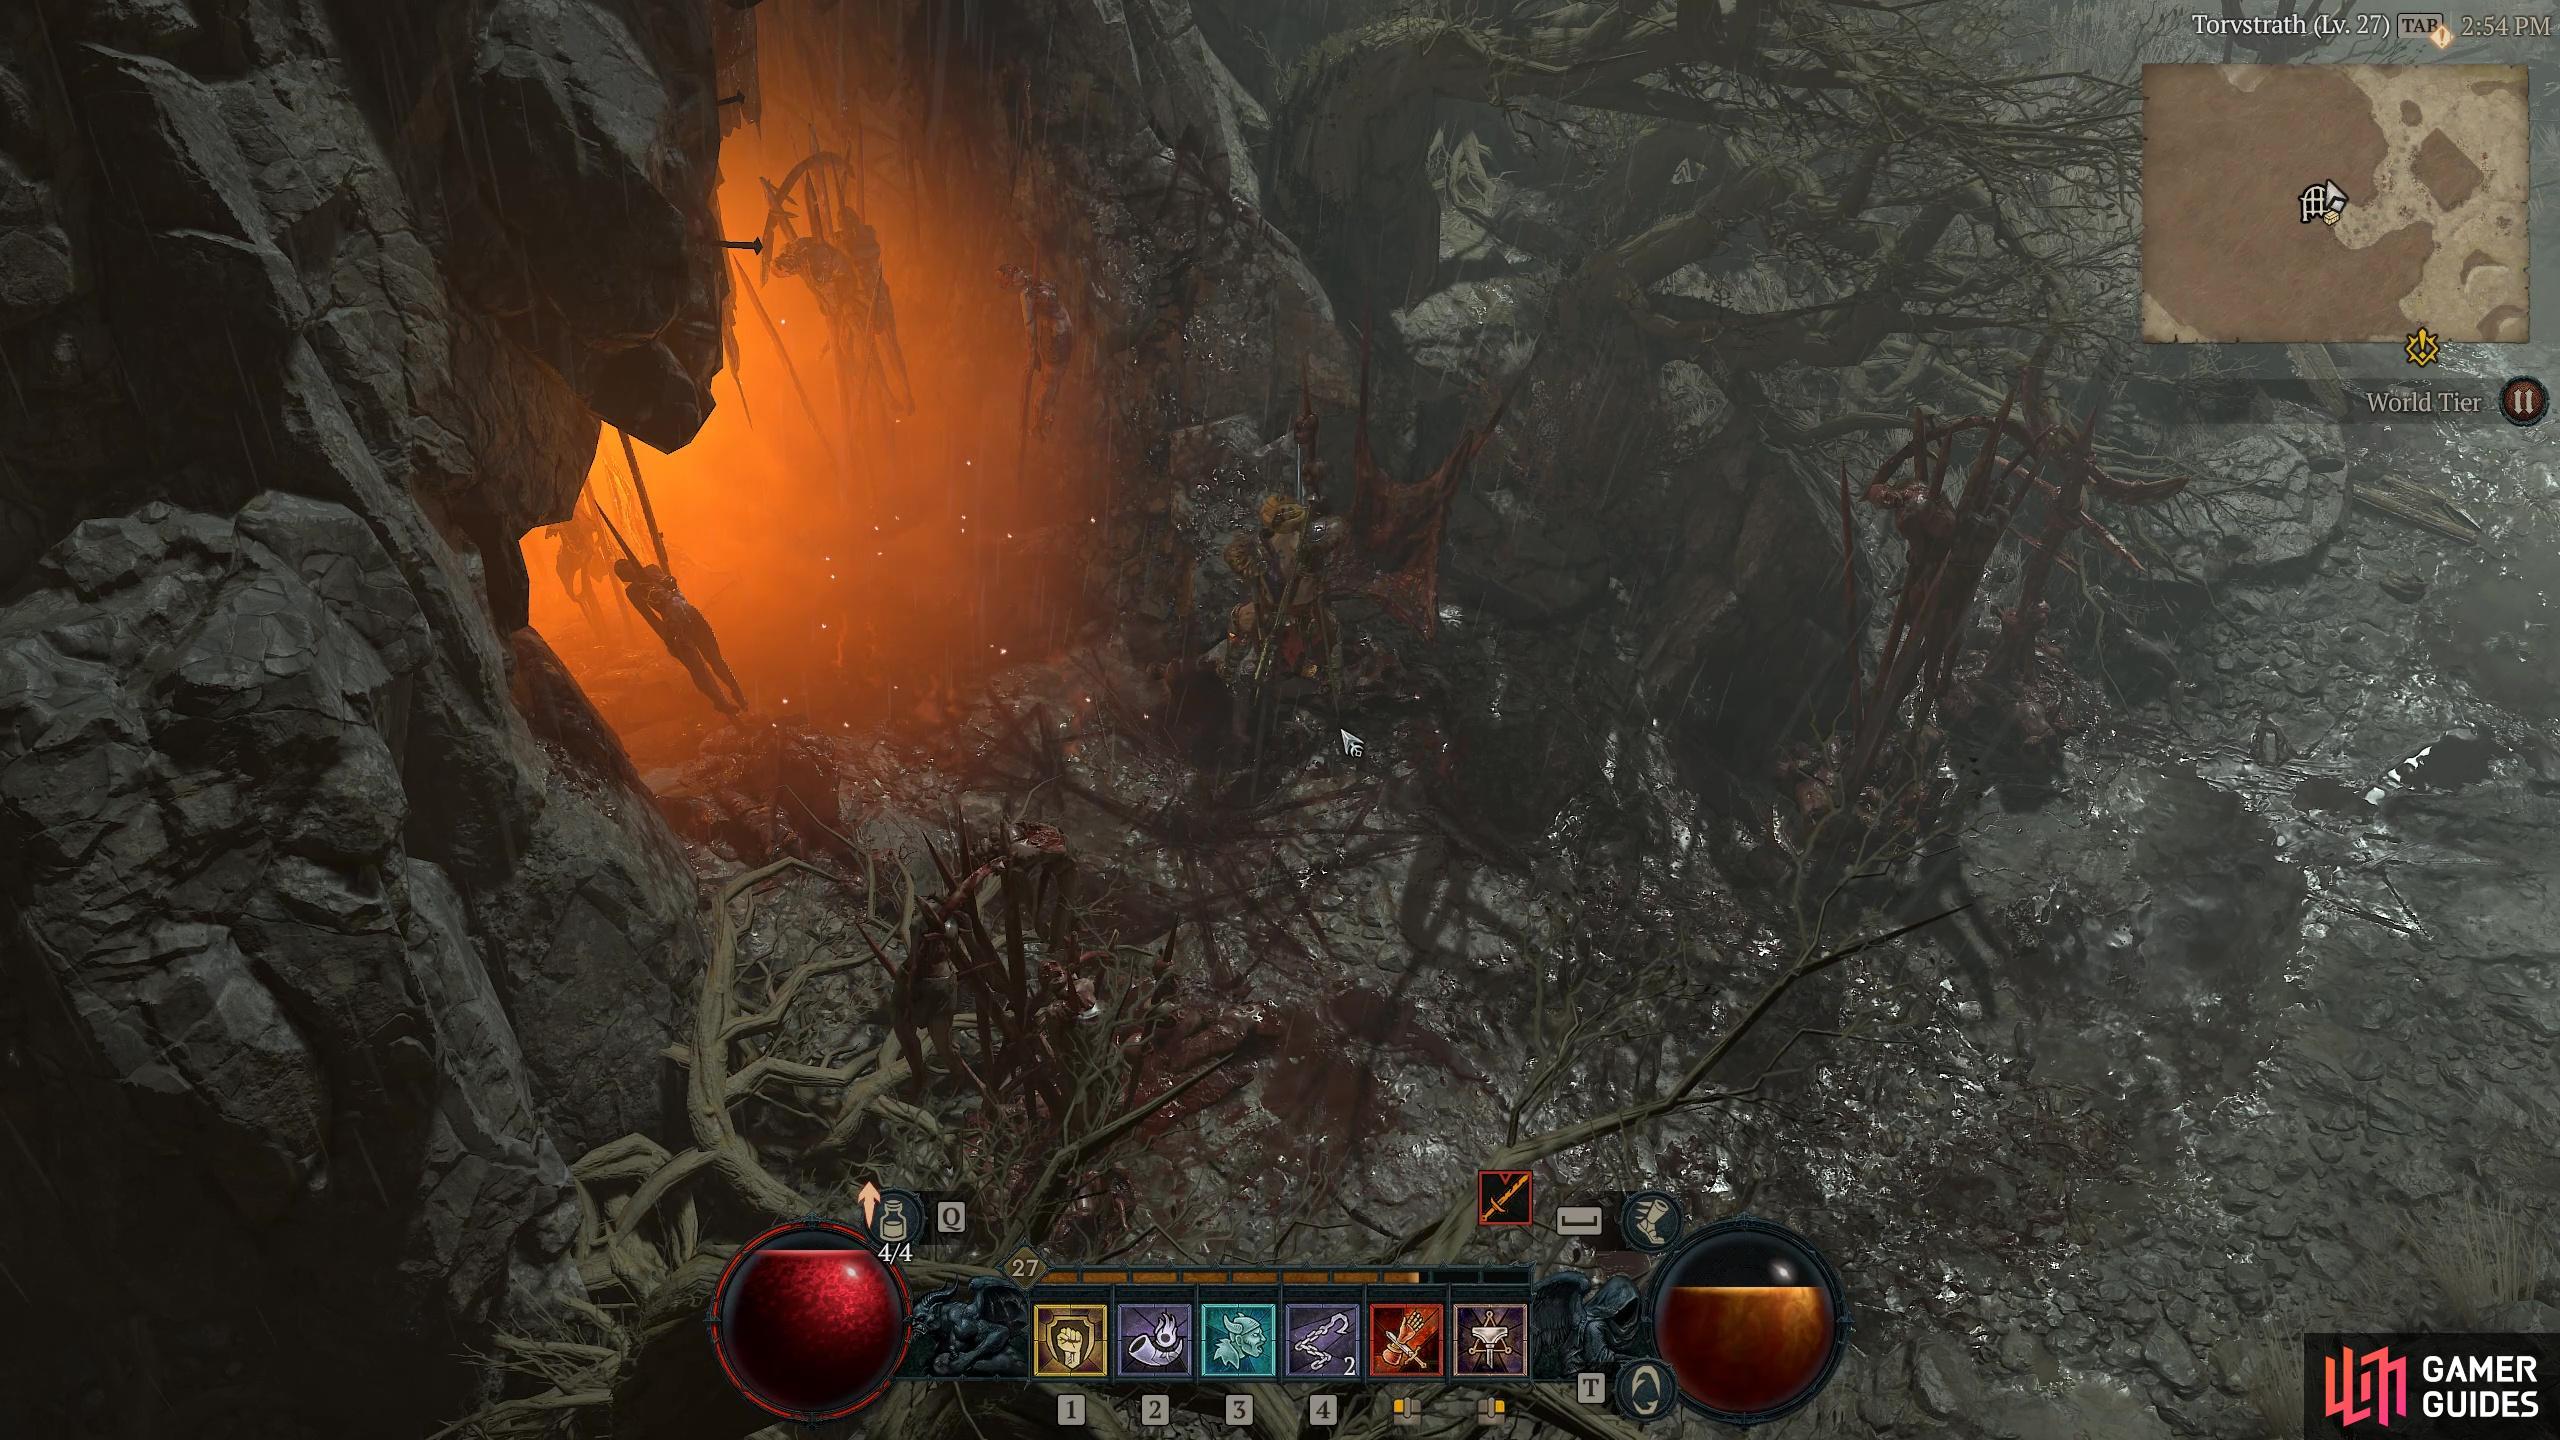
to find the Domhainne Tunnels Dungeon.
Start at the ![]() Corbach Waypoint and head west until you reach the Torvstrath Area, then you’ll come across the
Corbach Waypoint and head west until you reach the Torvstrath Area, then you’ll come across the ![]() Domhainne Tunnels Dungeon. You will receive +30 Scosglen Renown and the
Domhainne Tunnels Dungeon. You will receive +30 Scosglen Renown and the ![]() Aspect of Efficiency for completing the dungeon.
Aspect of Efficiency for completing the dungeon.
Dungeon 14 - Luban’s Rest
Head to this location on the map
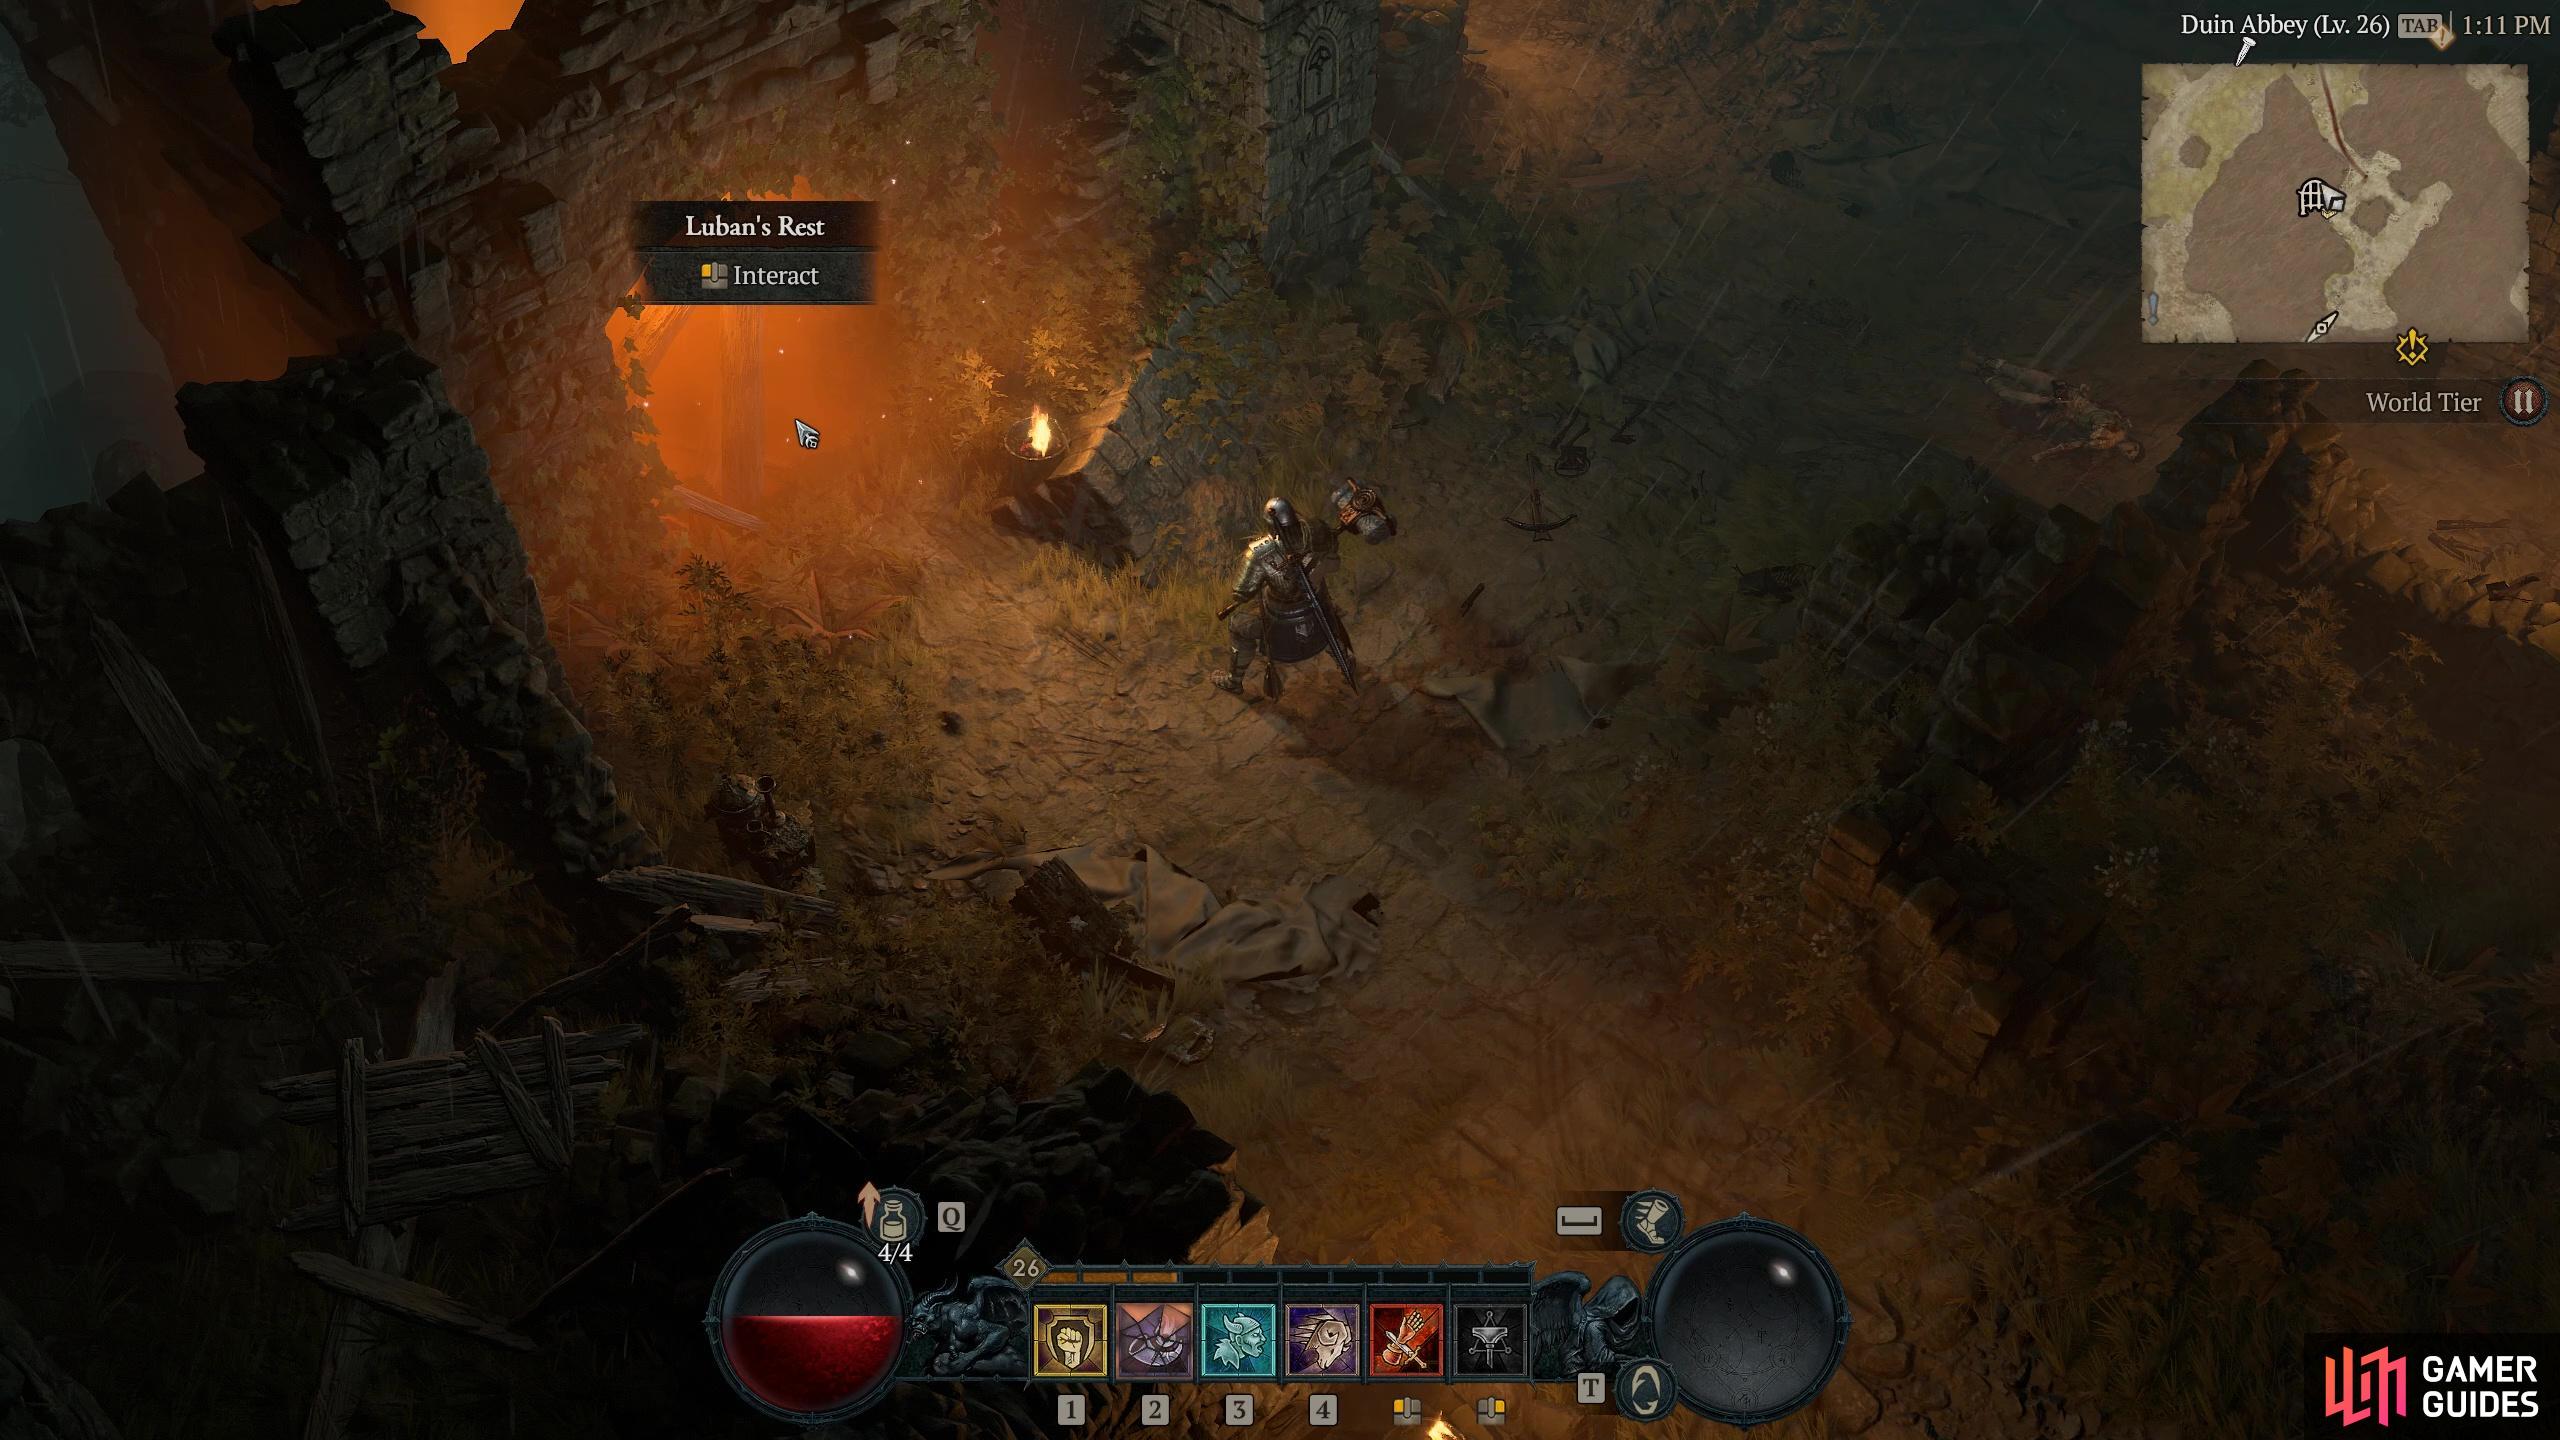
to find the Luban’s Rest Dungeon.
Start at the Corbach Waypoint and head south until you reach the Duin Abbey Area, then you’ll come across the ![]() Luban’s Rest Dungeon. You will receive +30 Scosglen Renown and the
Luban’s Rest Dungeon. You will receive +30 Scosglen Renown and the ![]() Cheat’s Aspect for completing the dungeon.
Cheat’s Aspect for completing the dungeon.
Dungeon 15 - Garan Hold

Head to this location on the map
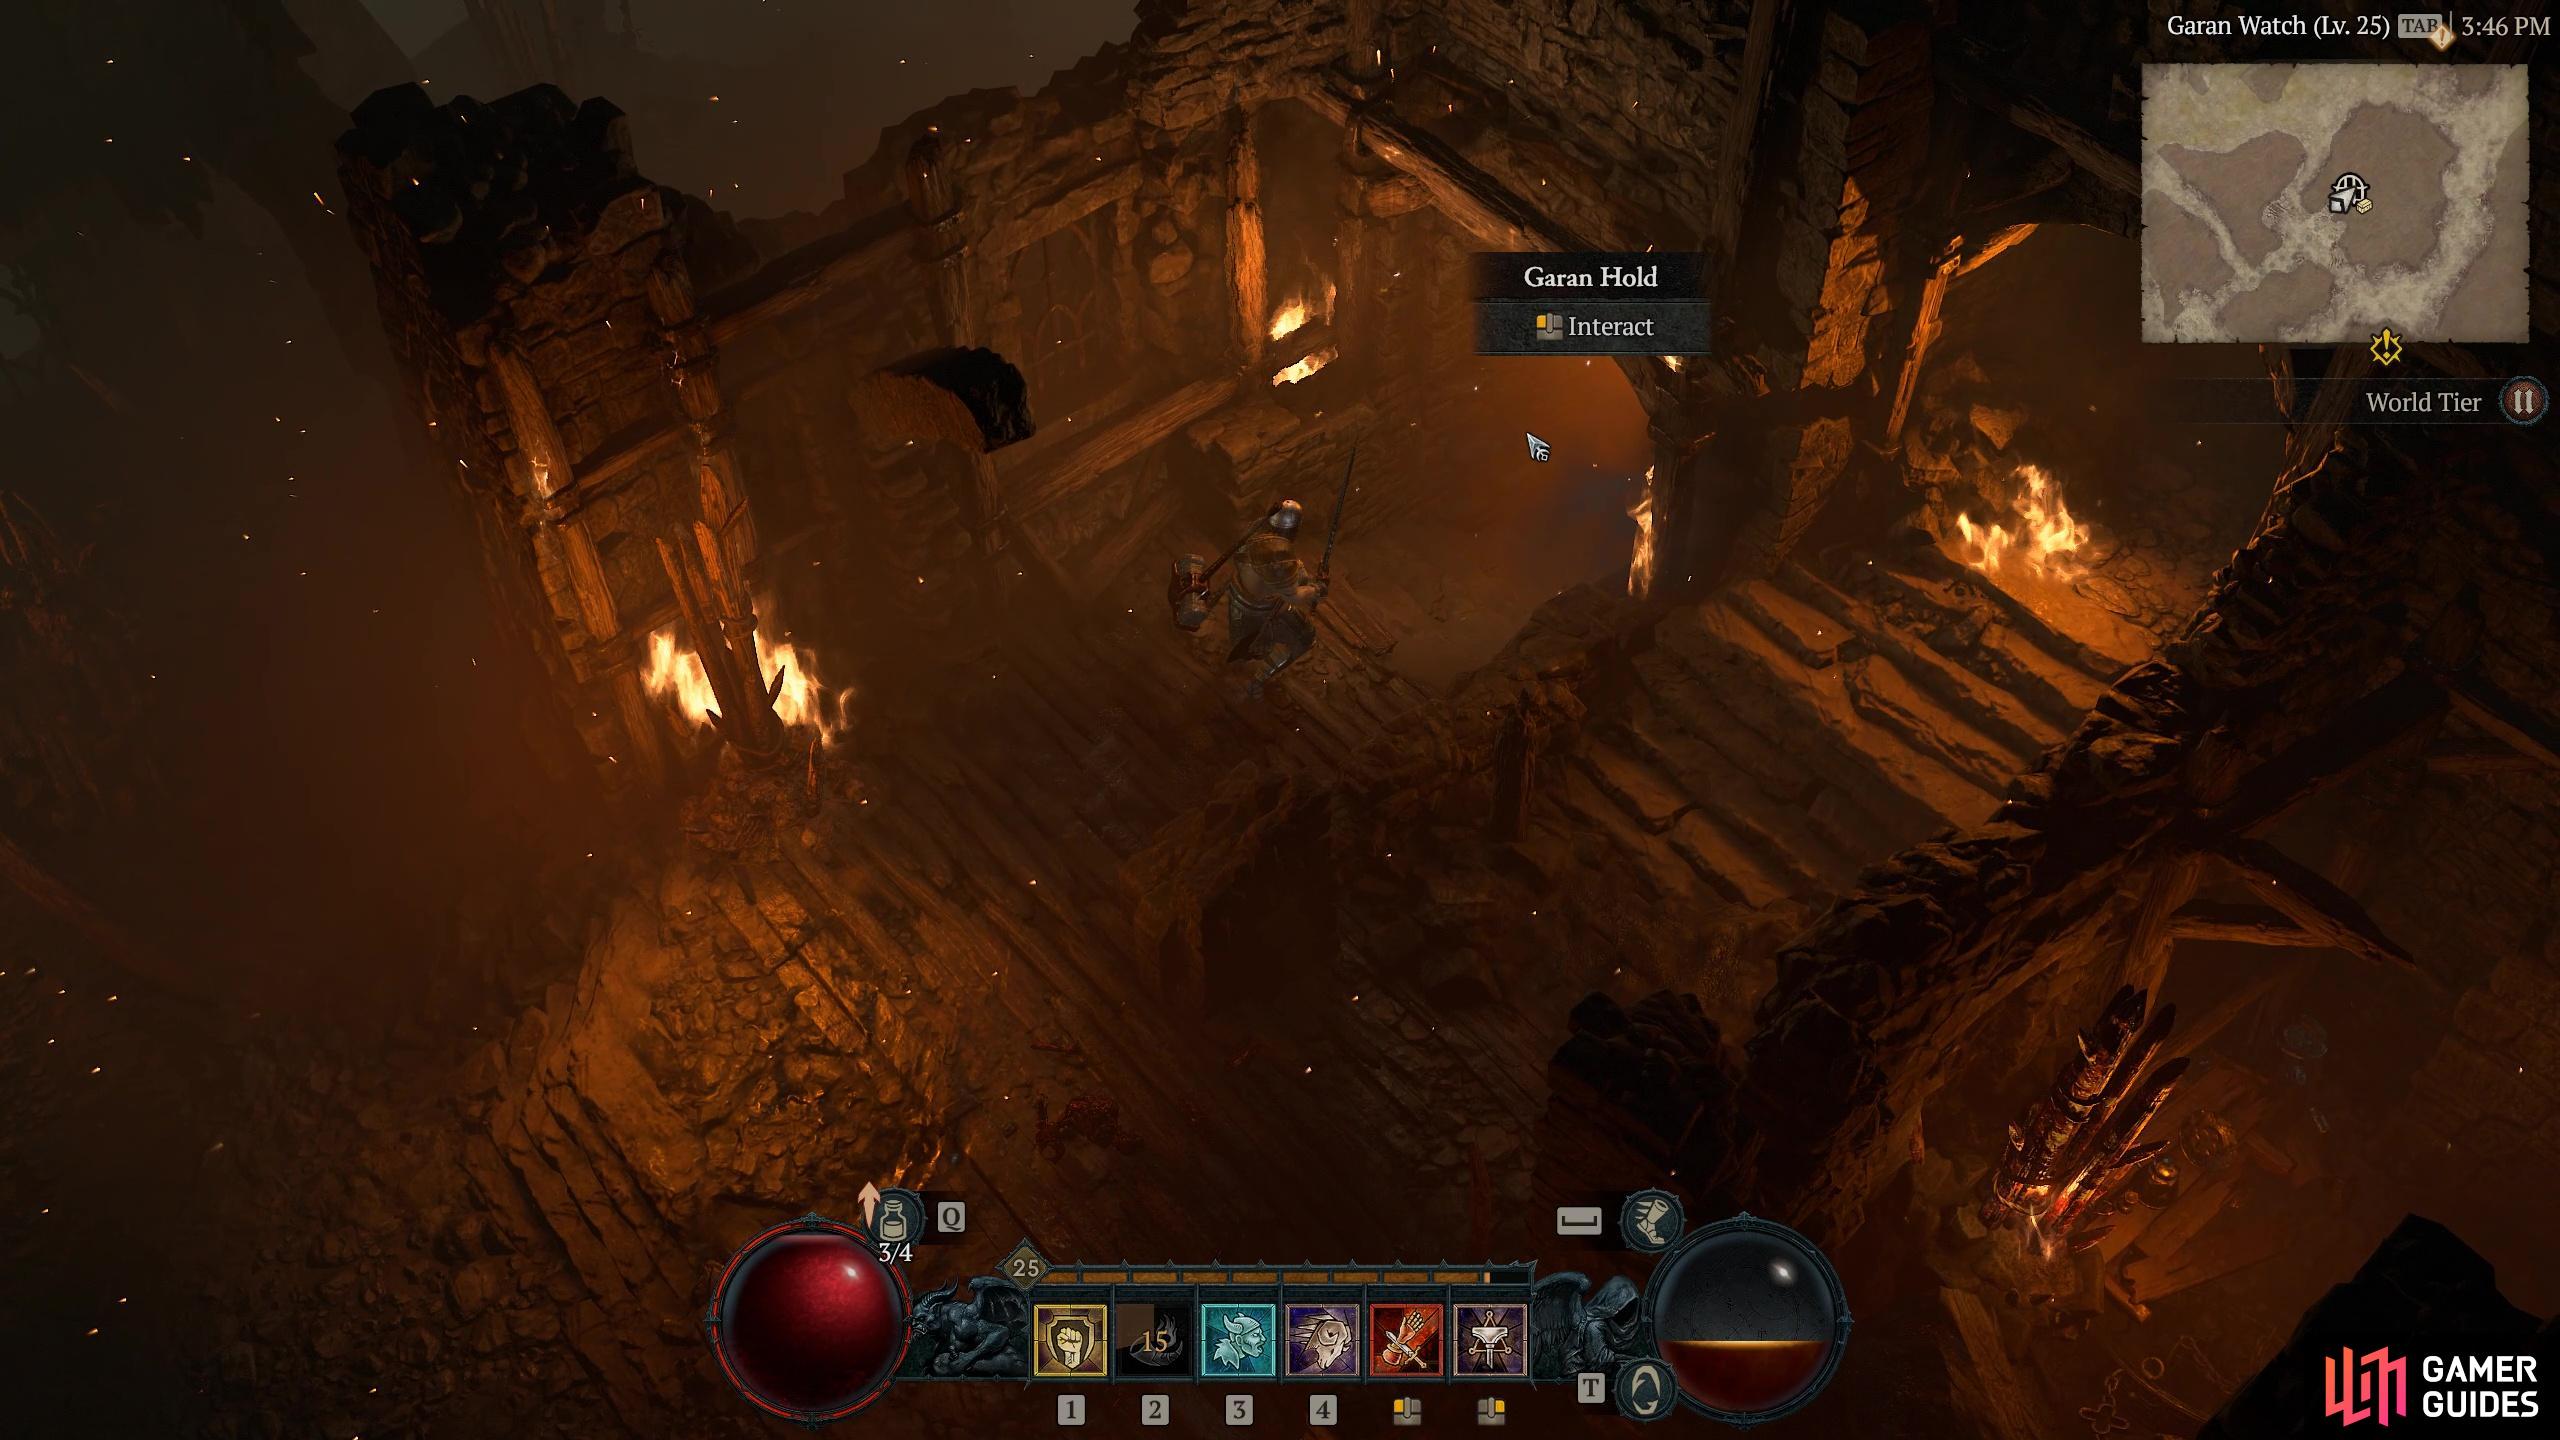
to find the Garan Hold Dungeon.
Start at the Corbach Waypoint and head east until you reach the Garan Watch Area, then you’ll come across the Garan Hold Dungeon. You will receive +30 Scosglen Renown and the ![]() Aspect of the Dire Whirlwind for completing the dungeon.
Aspect of the Dire Whirlwind for completing the dungeon.
Dungeon 16 - Mariner’s Refuge

Luban’s Rest
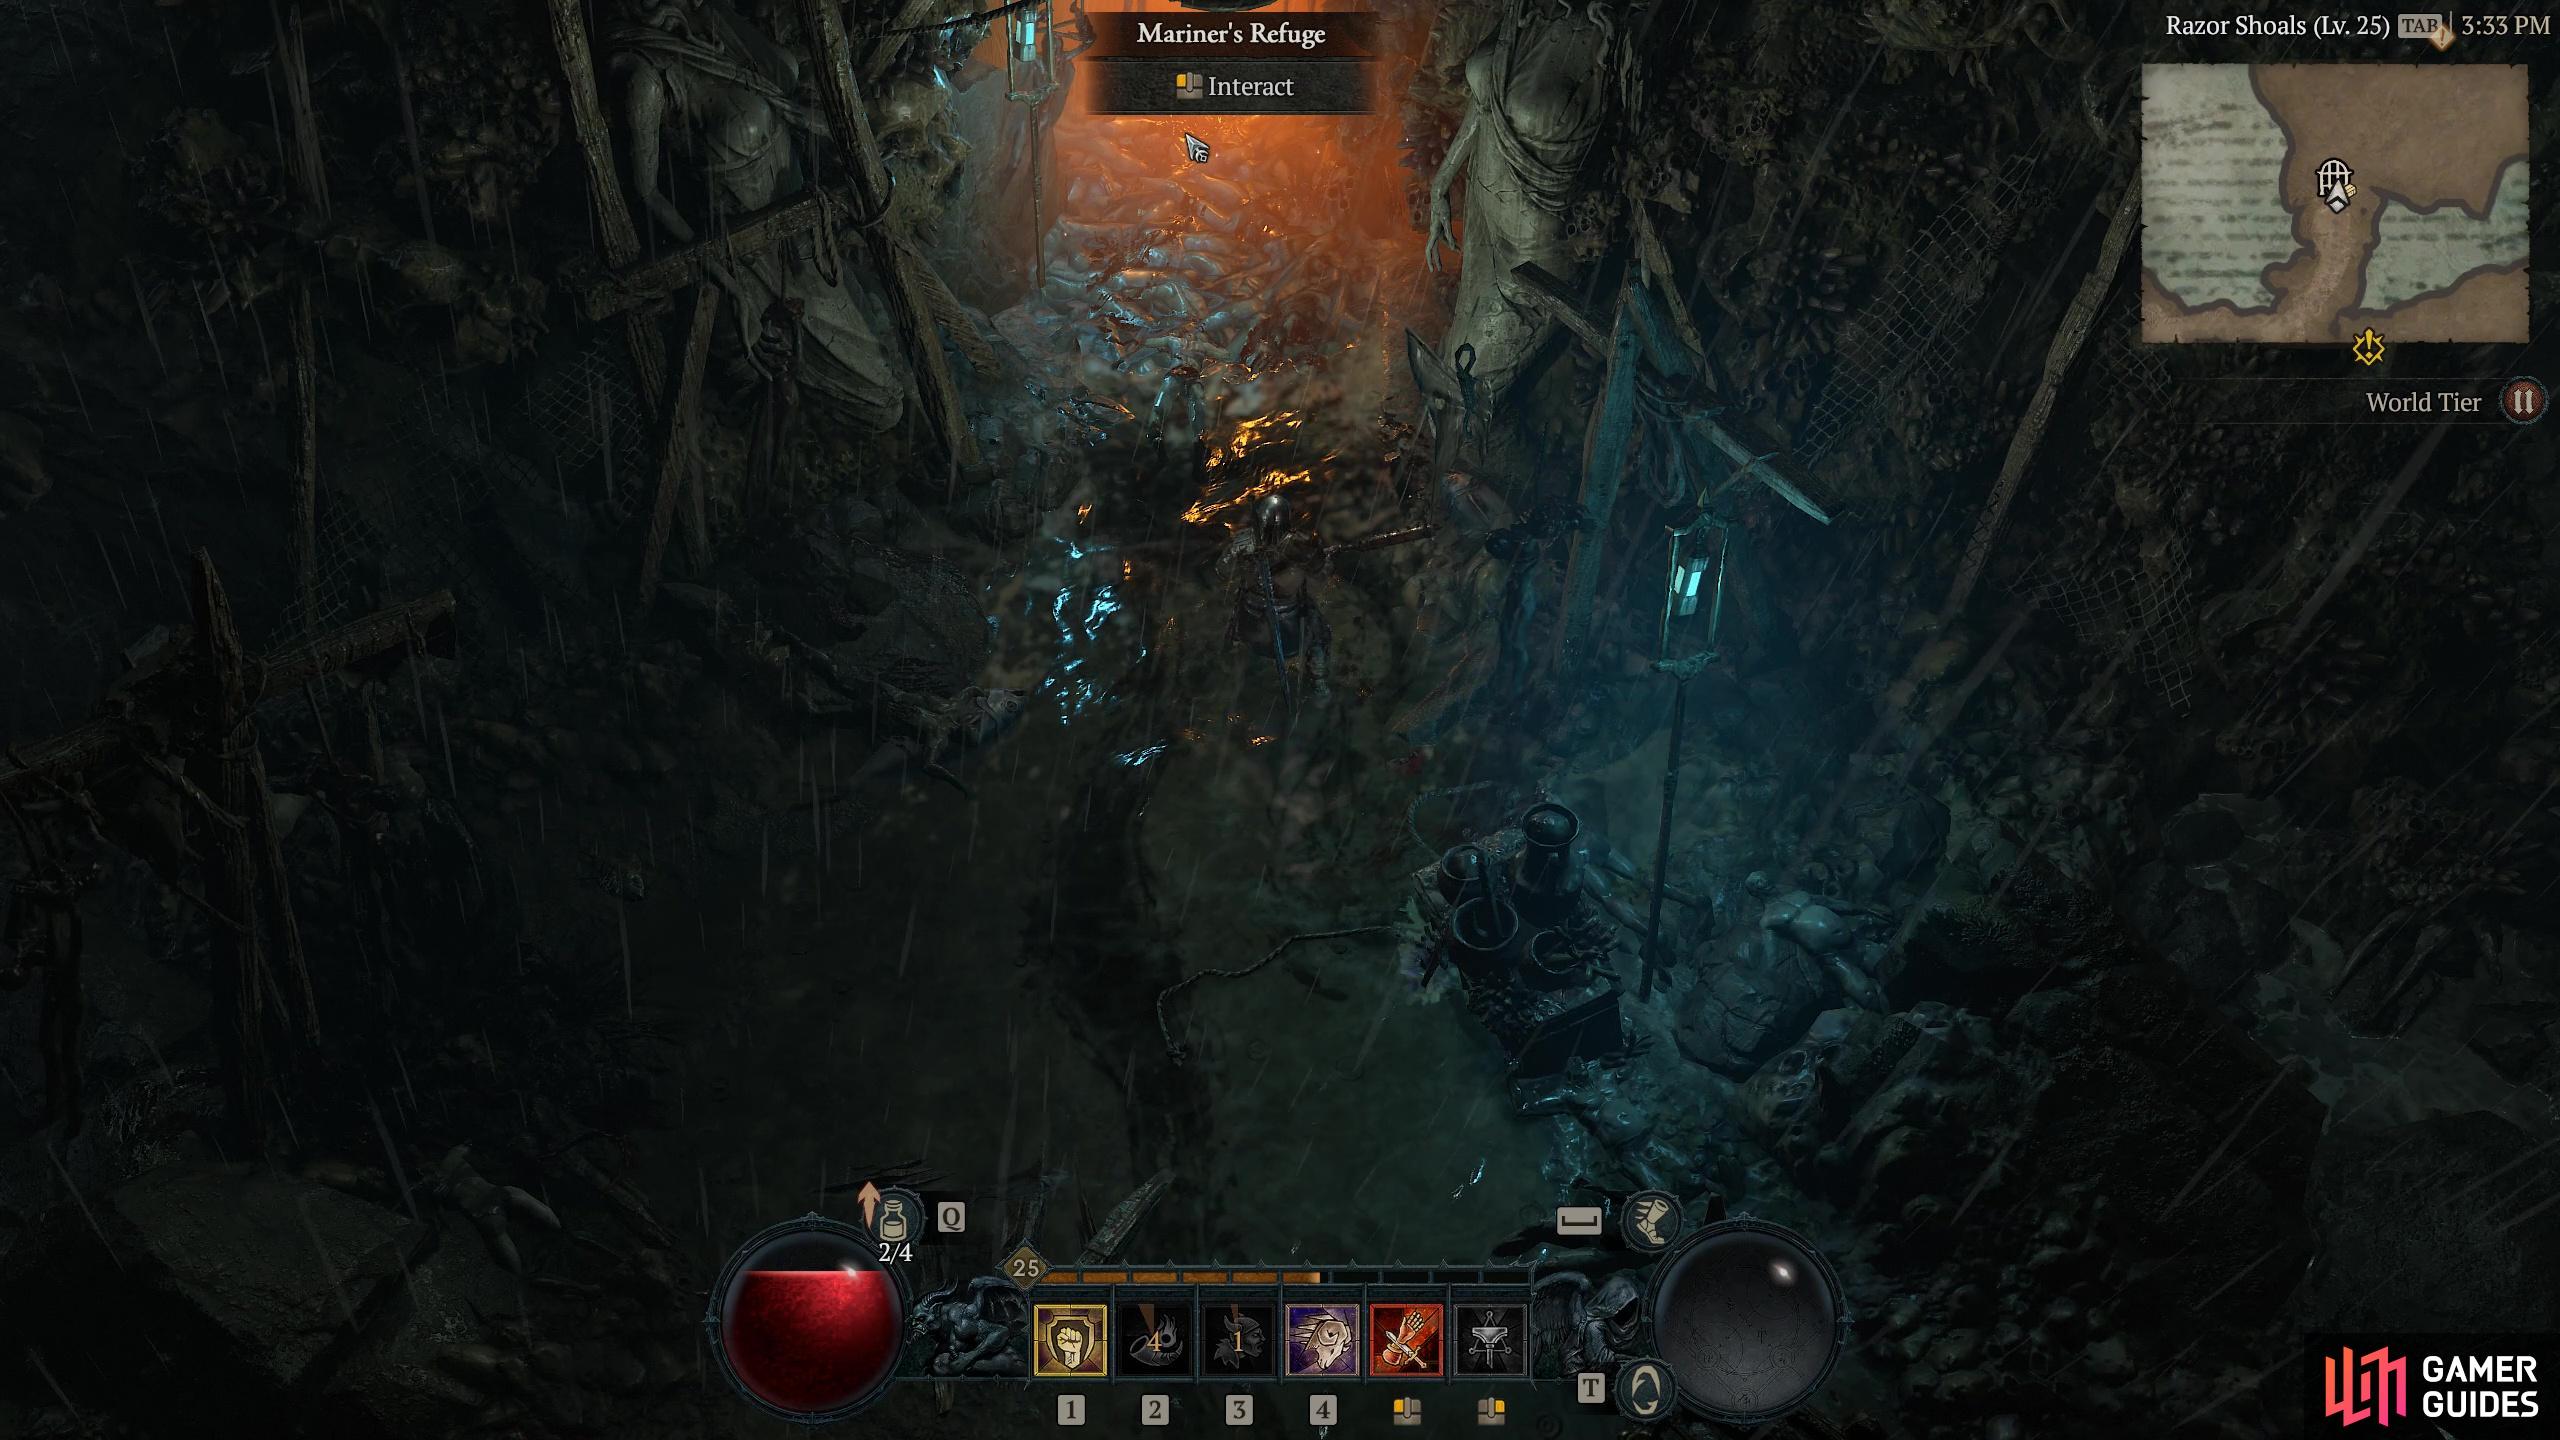
to find the Mariner’s Refuge Dungeon.
Start at the Corbach Waypoint and head northeast until you reach the Razor Shoals Area, then you’ll come across the Mariner’s Refuge Dungeon. You will receive +30 Scosglen Renown and the ![]() Overcharged Aspect for completing the dungeon.
Overcharged Aspect for completing the dungeon.
Dungeon 17 - Aldurwood

Head to this location on the map
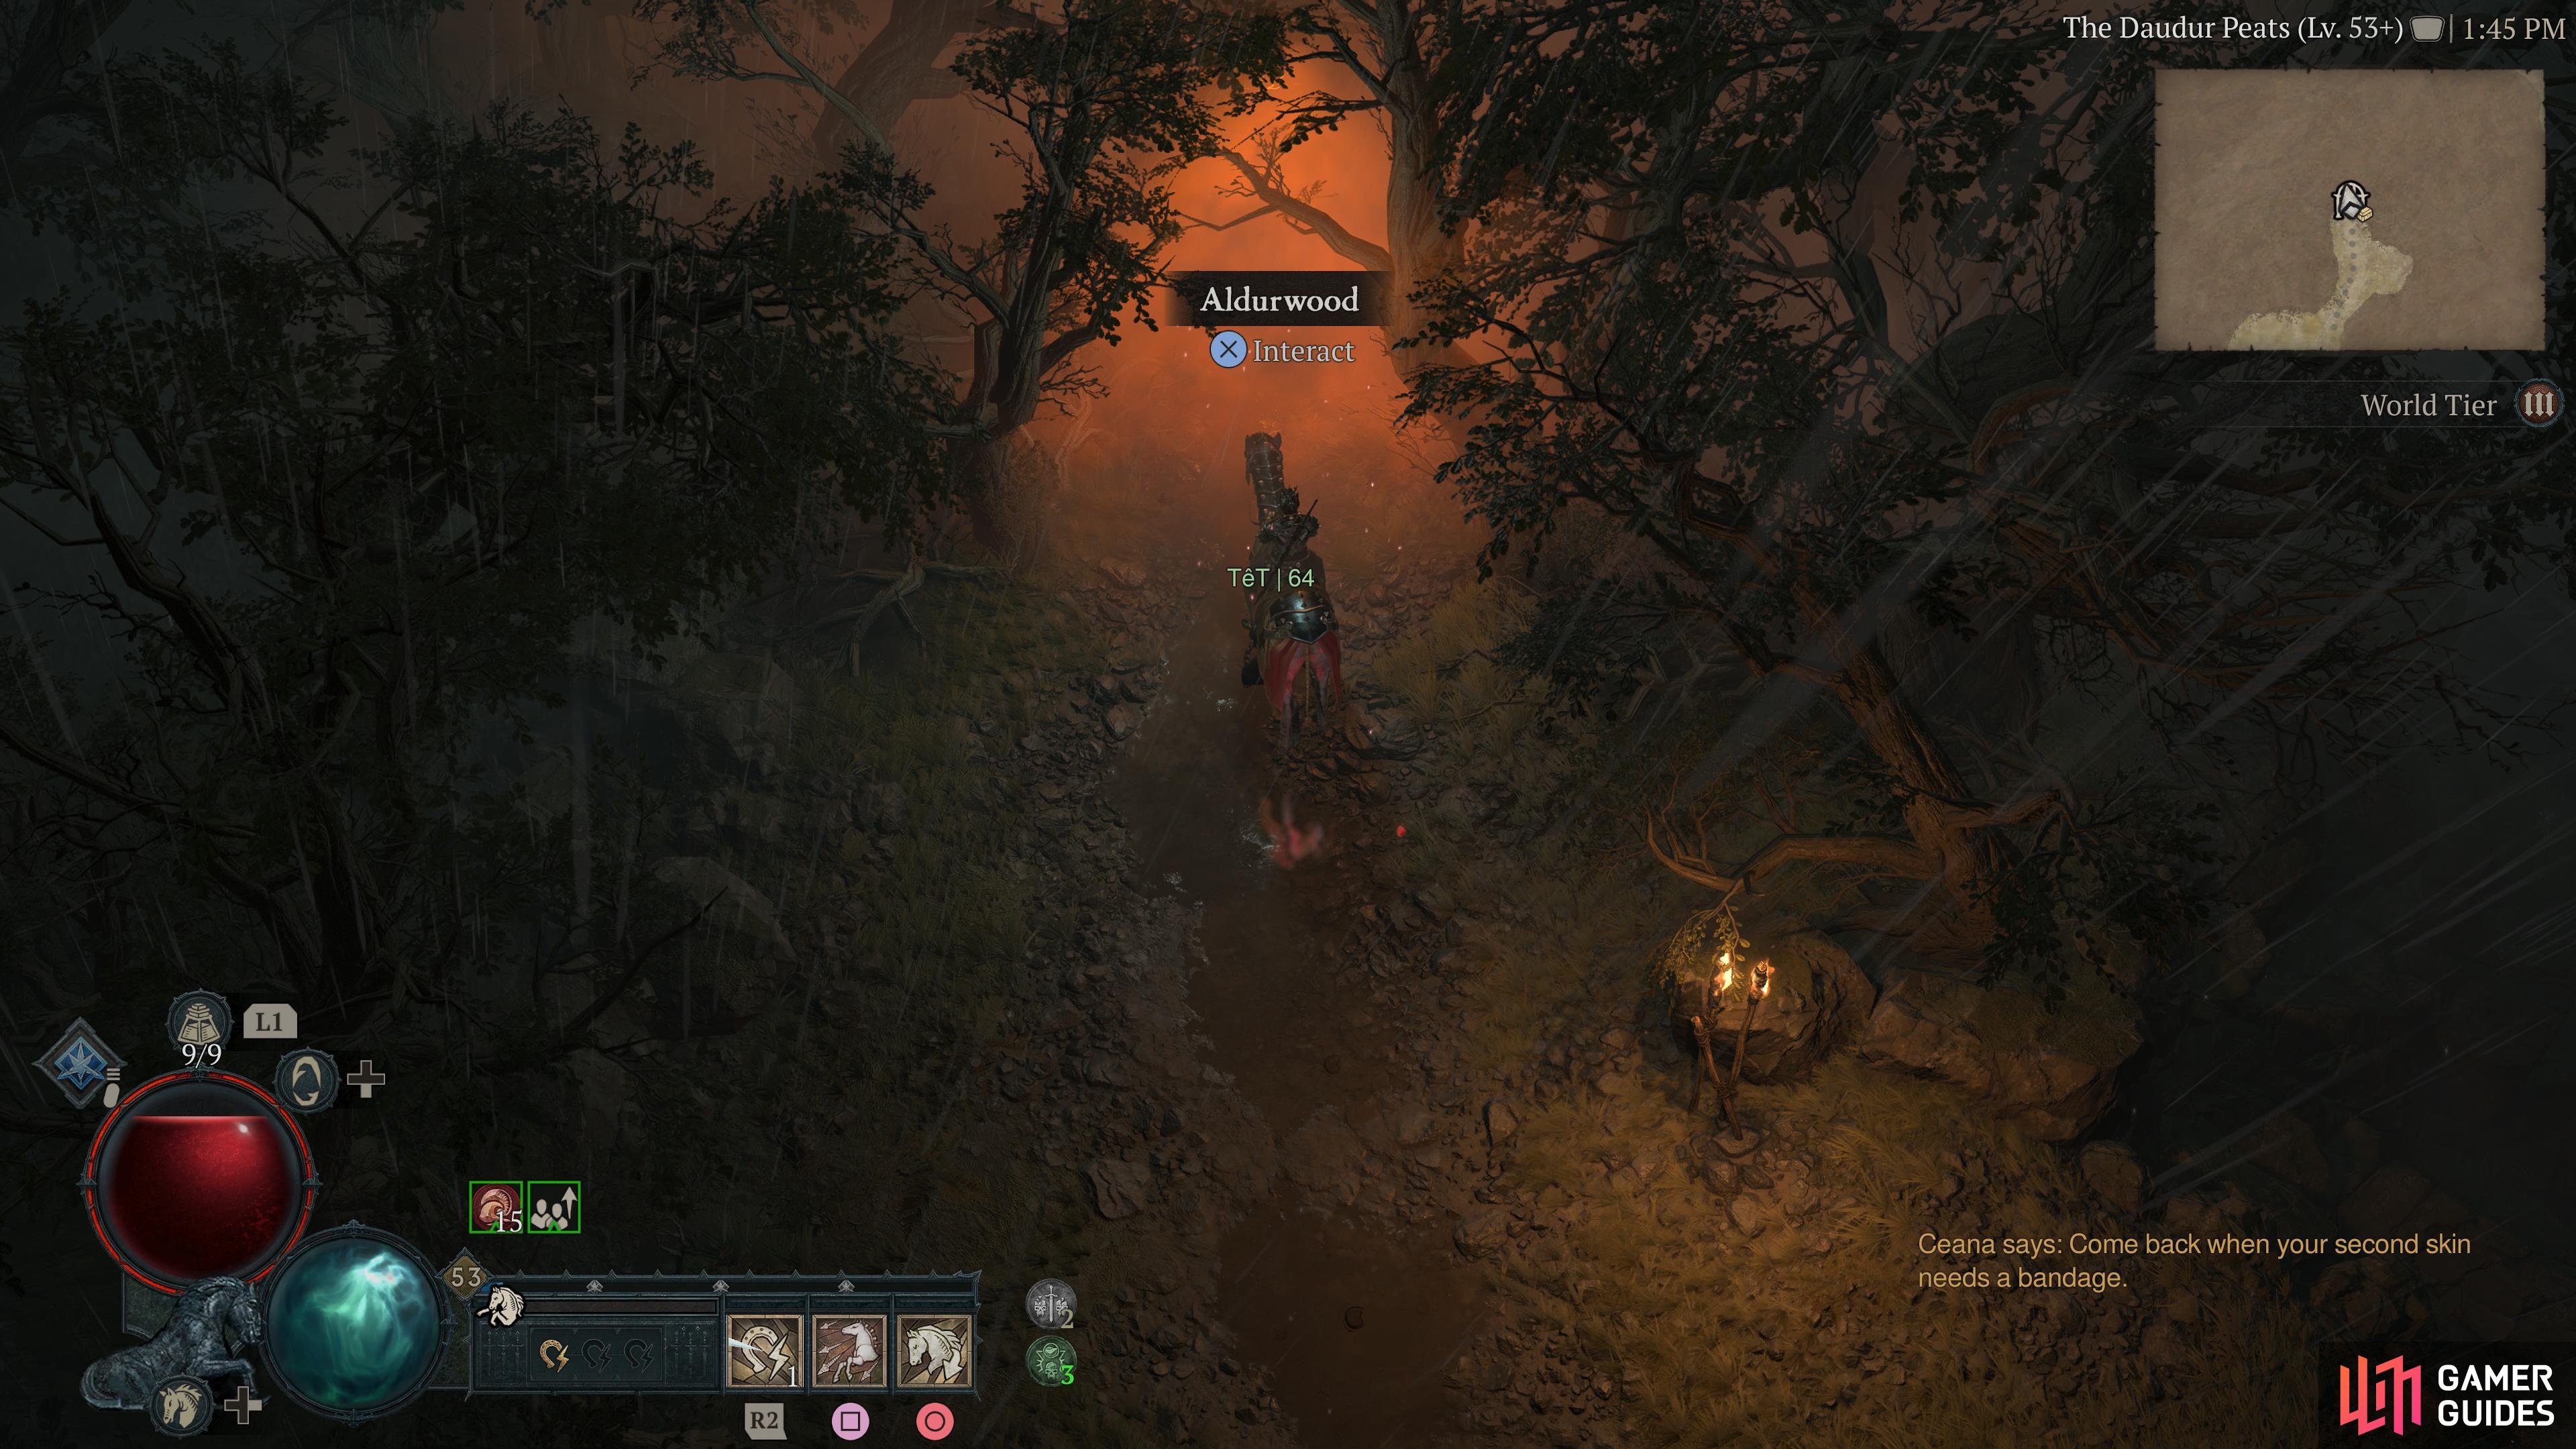
to find the Aldurwood Dungeon.
Start at the ![]() Tirmair Waypoint and head up to the northwest of The Shrouded Moors Area, then you’ll come across the
Tirmair Waypoint and head up to the northwest of The Shrouded Moors Area, then you’ll come across the ![]() Aldurwood Dungeon. You will receive +30 Scosglen Renown and the
Aldurwood Dungeon. You will receive +30 Scosglen Renown and the ![]() Aspect of Reanimation for completing the dungeon.
Aspect of Reanimation for completing the dungeon.
Dungeon 18 - Jalal’s Vigil

Head to this location on the map
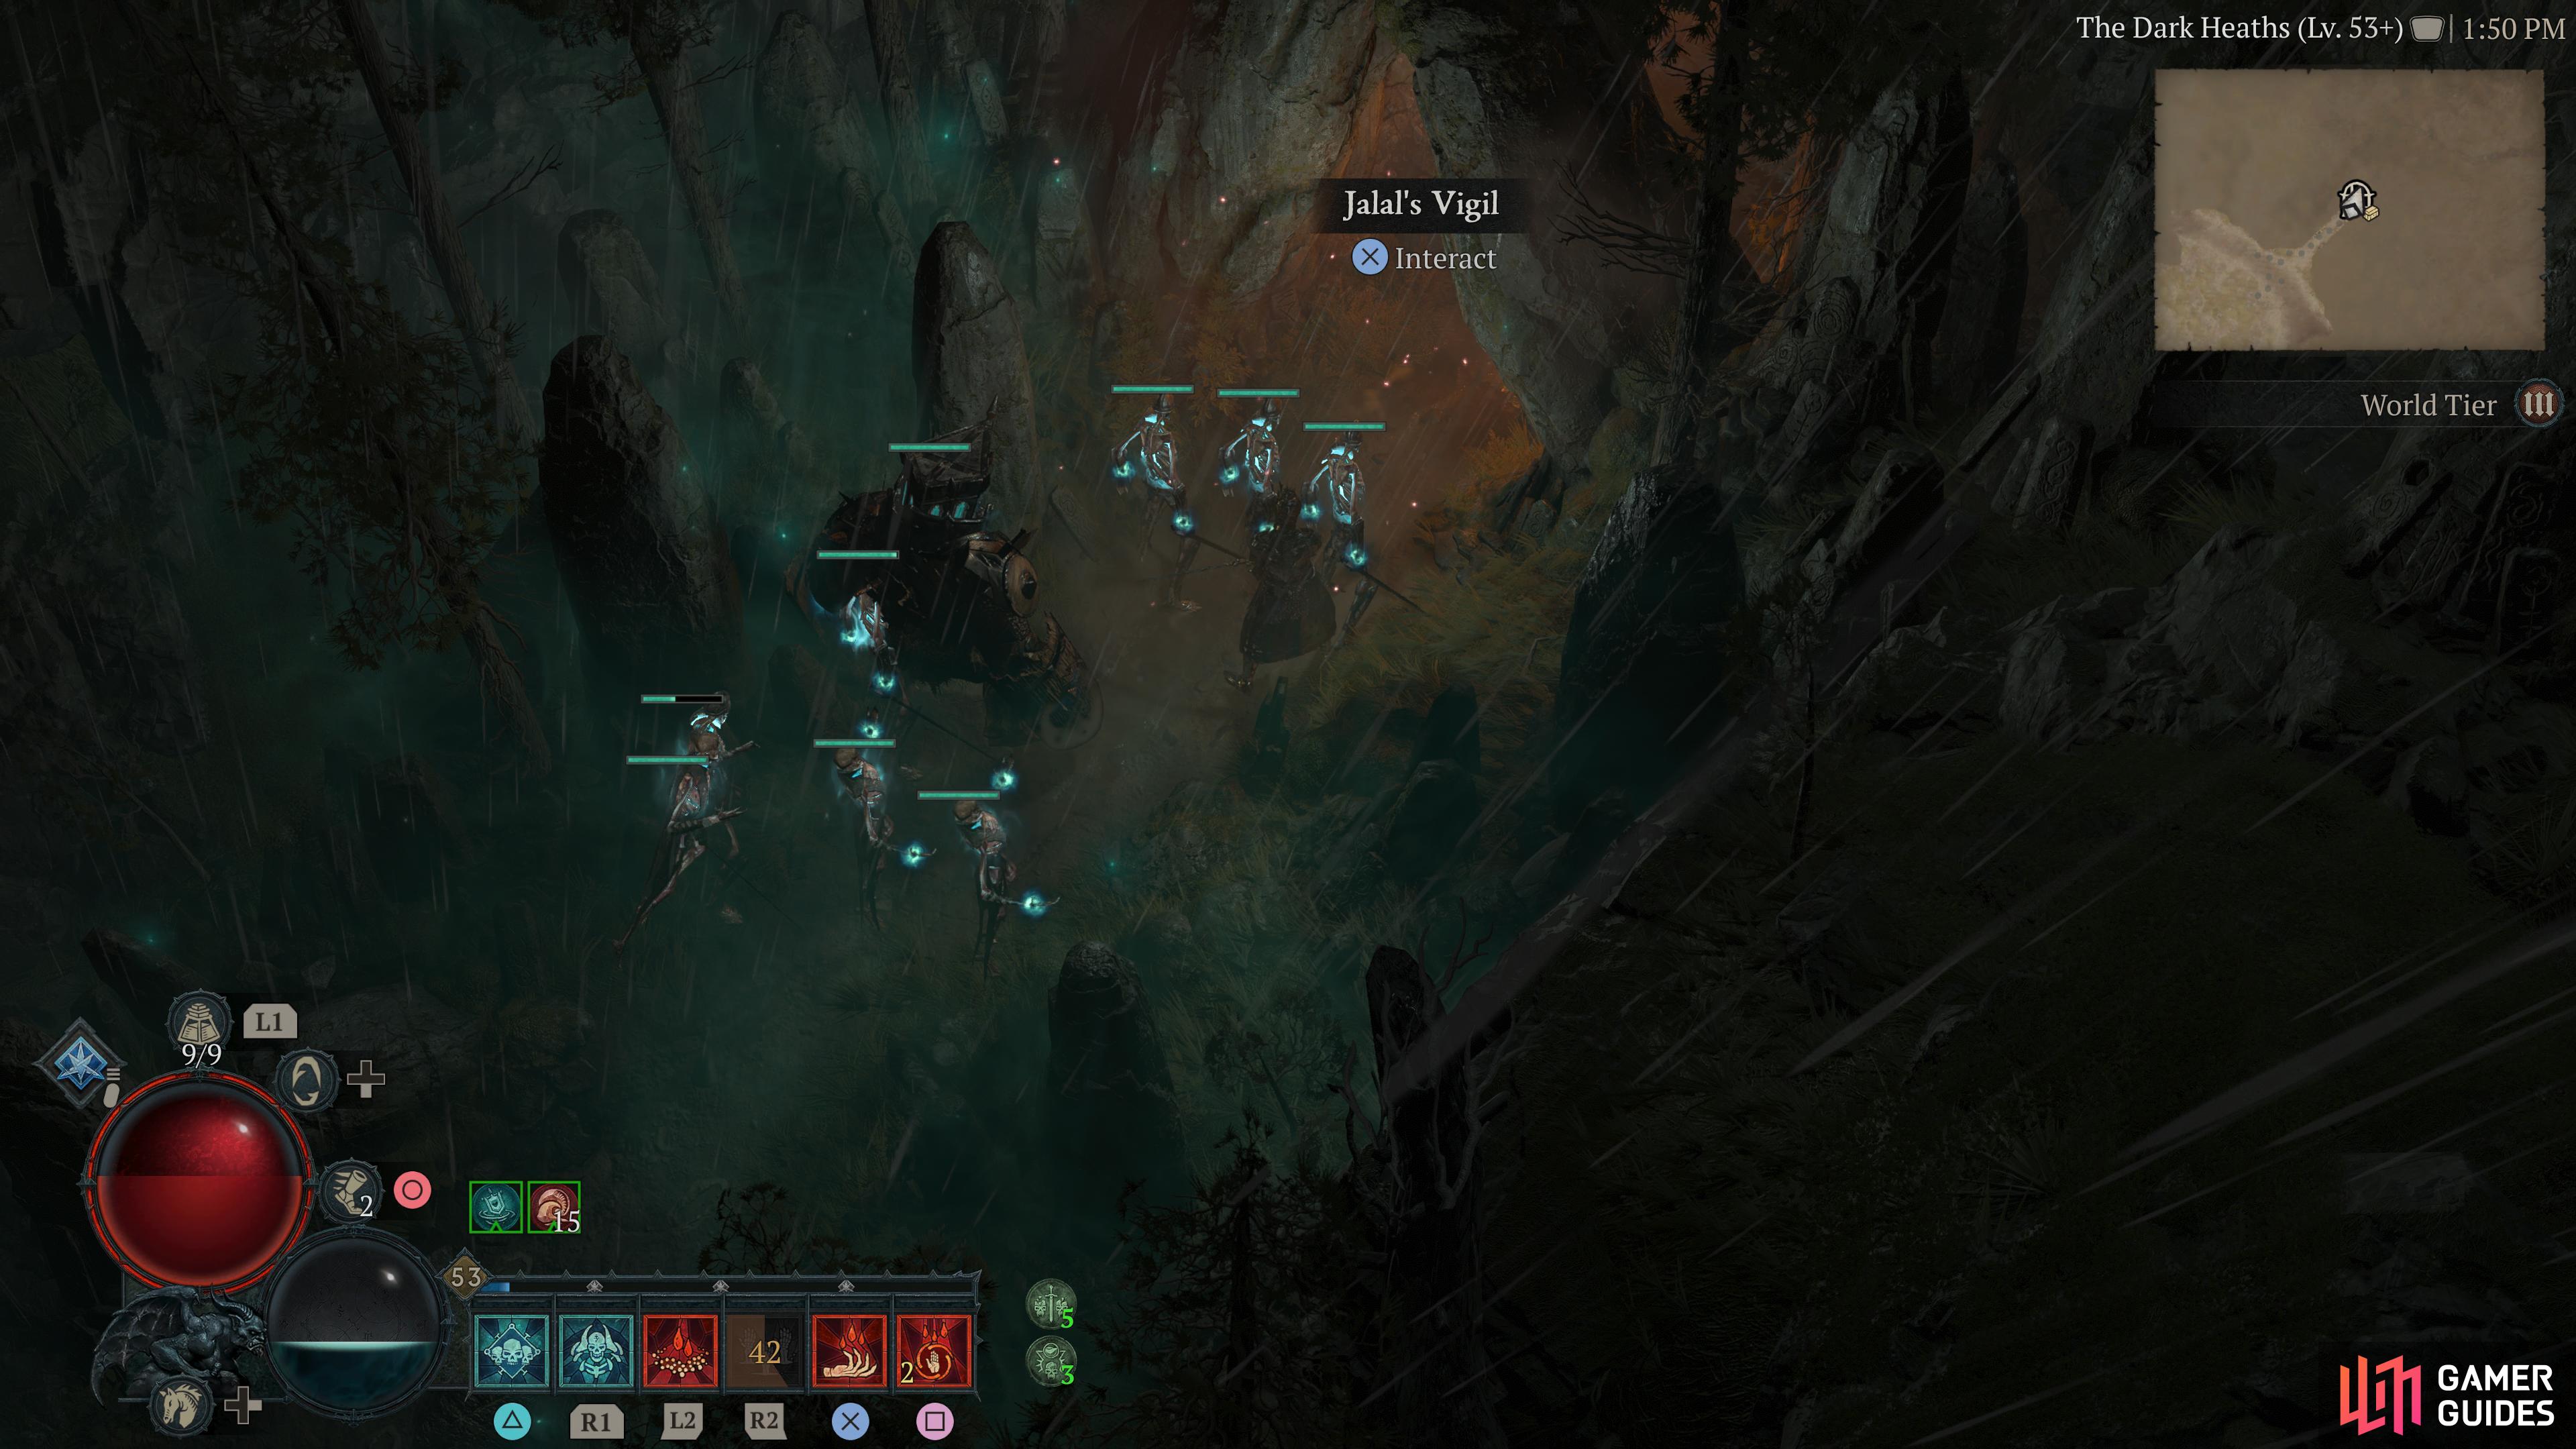
to find the Jalal’s Vigil Dungeon.
Start at the Tirmair Waypoint and head up to the northeast corner of The Shrouded Moors Area, then you’ll come across the ![]() Jalal’s Vigil Dungeon. You will receive +30 Scosglen Renown and the
Jalal’s Vigil Dungeon. You will receive +30 Scosglen Renown and the ![]() Bladedancer’s Aspect for completing the dungeon.
Bladedancer’s Aspect for completing the dungeon.
Dungeon 19 - Twisted Hollow

Head to this location on the map
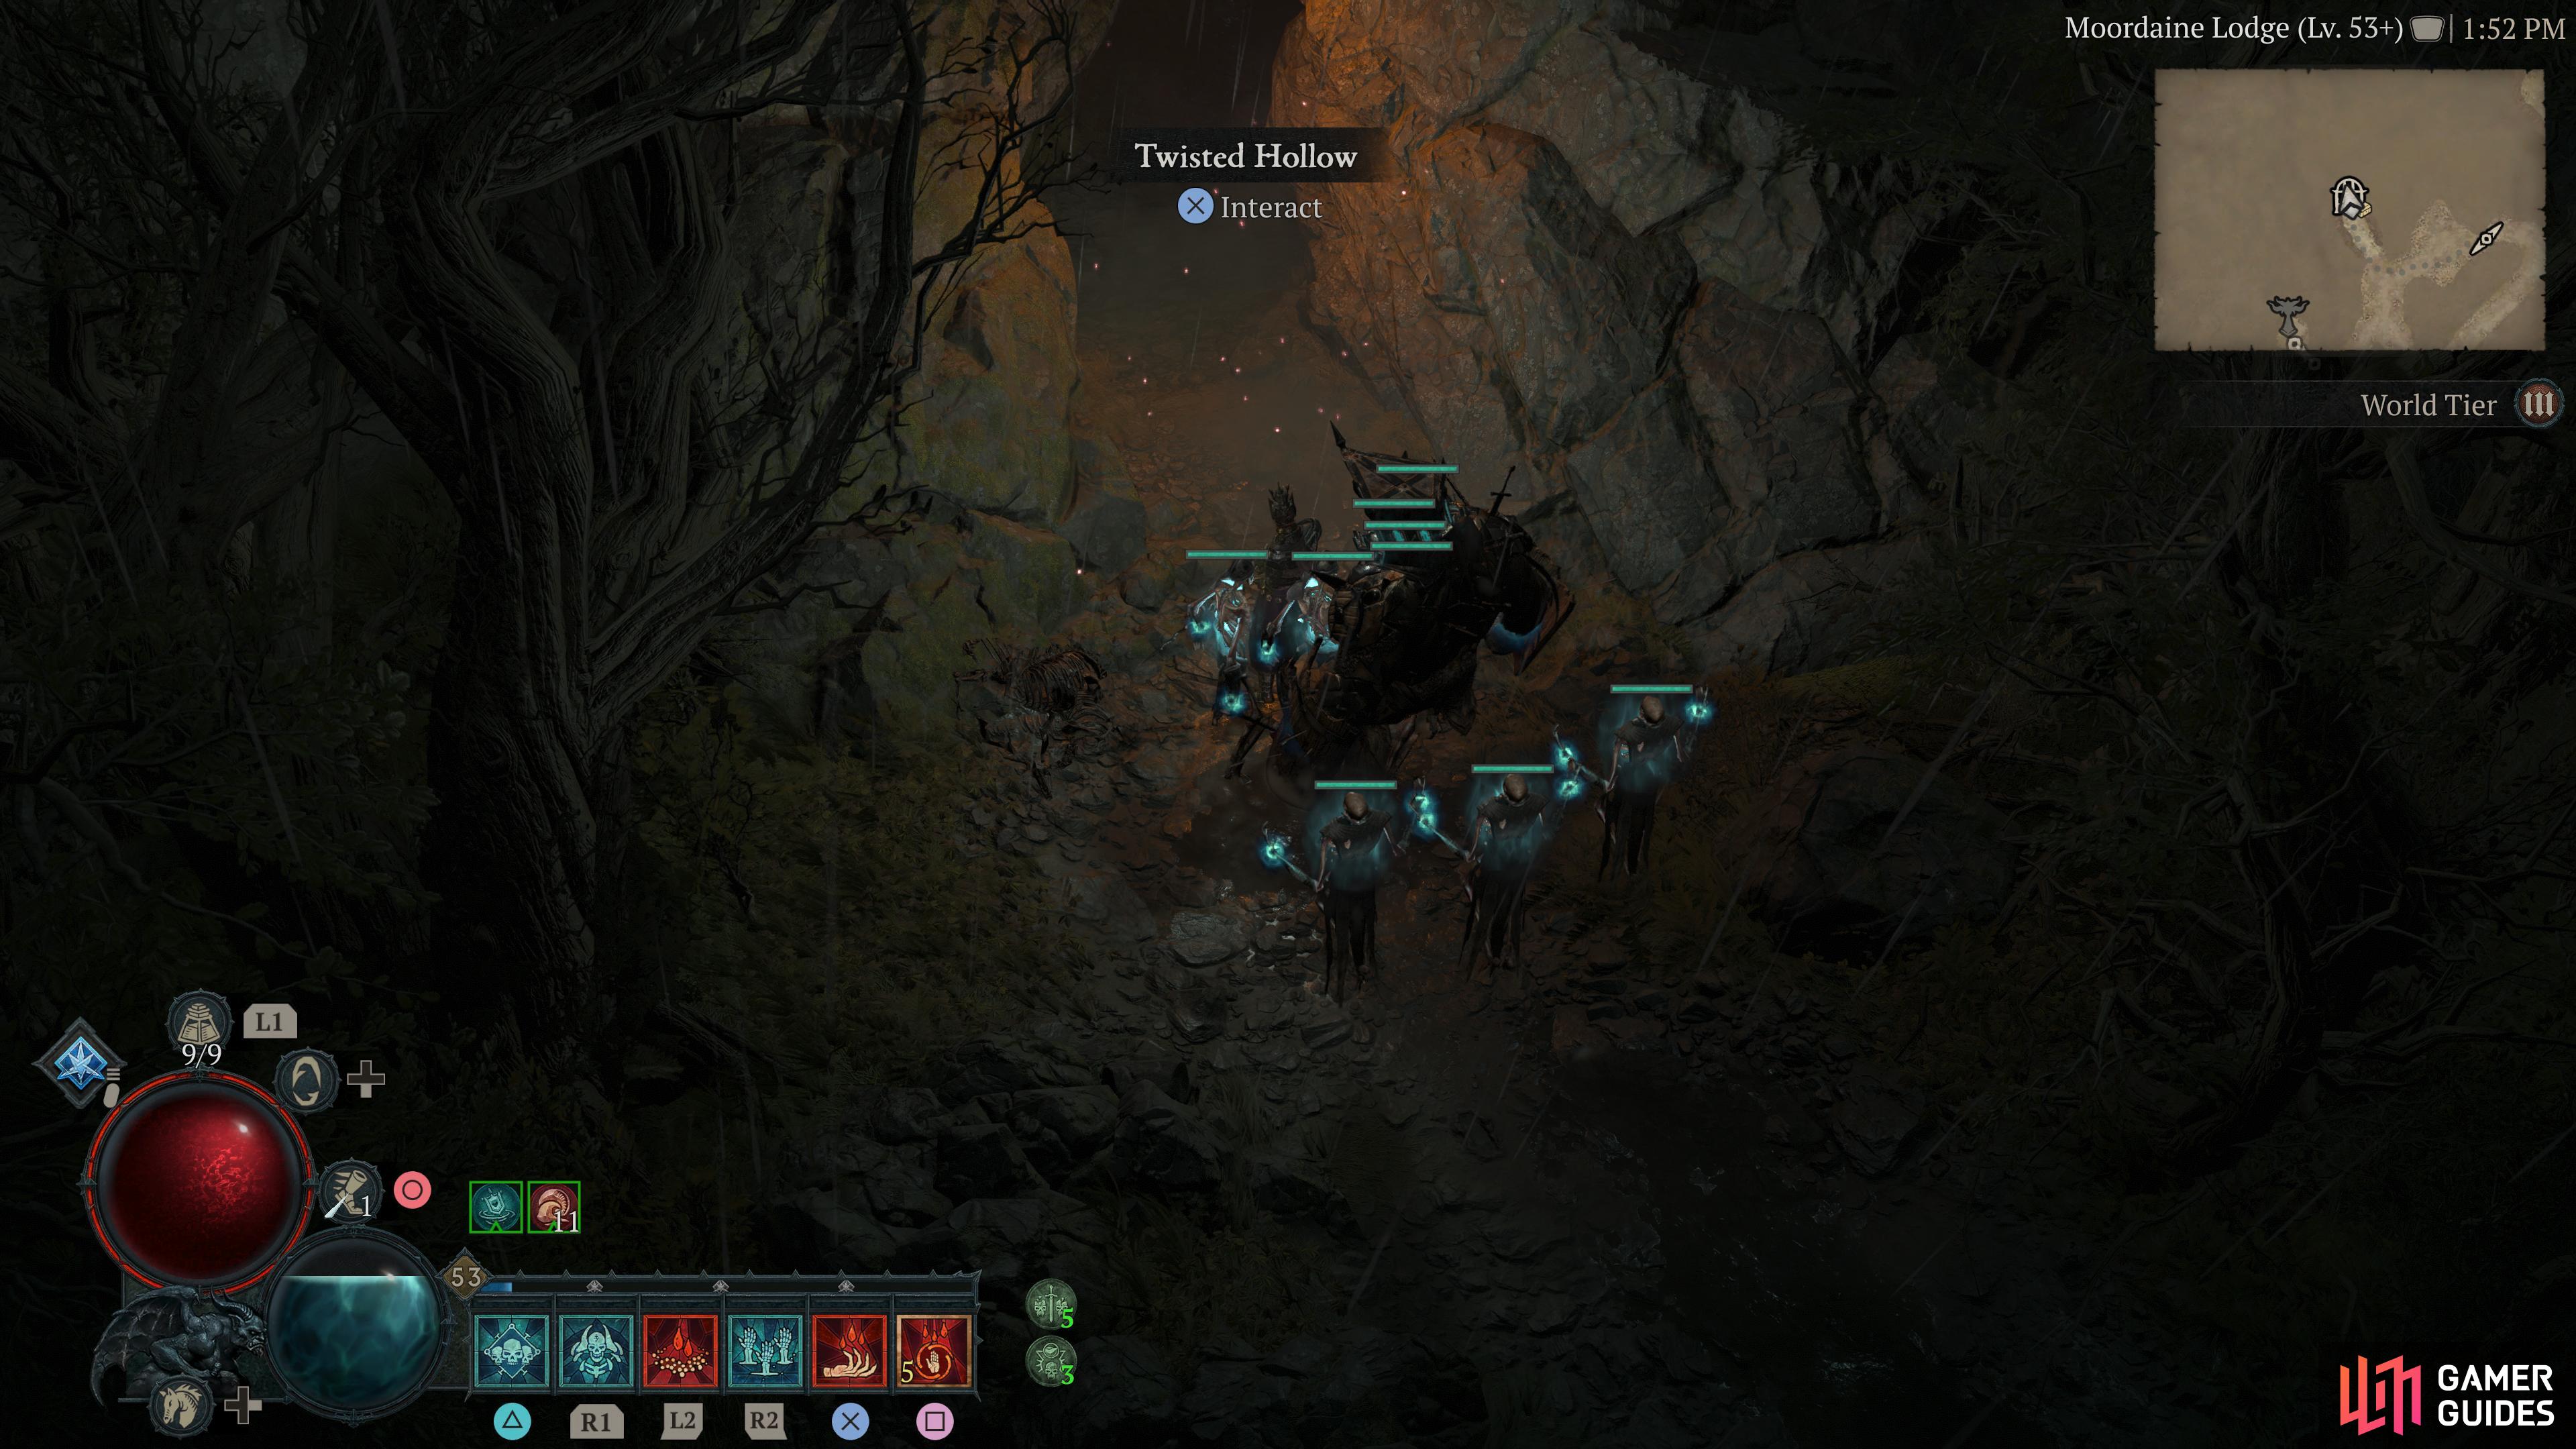
to find the Twisted Hollow Dungeon.
Start at the Tirmair Waypoint and head northeast until you reach the ![]() Moordaine Lodge Area, then you’ll come across the Twisted Hollow Dungeon after completing the stronghold here. You will receive +30 Scosglen Renown and the
Moordaine Lodge Area, then you’ll come across the Twisted Hollow Dungeon after completing the stronghold here. You will receive +30 Scosglen Renown and the ![]() Shadowslicer Aspect for completing the dungeon.
Shadowslicer Aspect for completing the dungeon.
Dungeon 20 - Ferals’ Den

Head to this location on the map
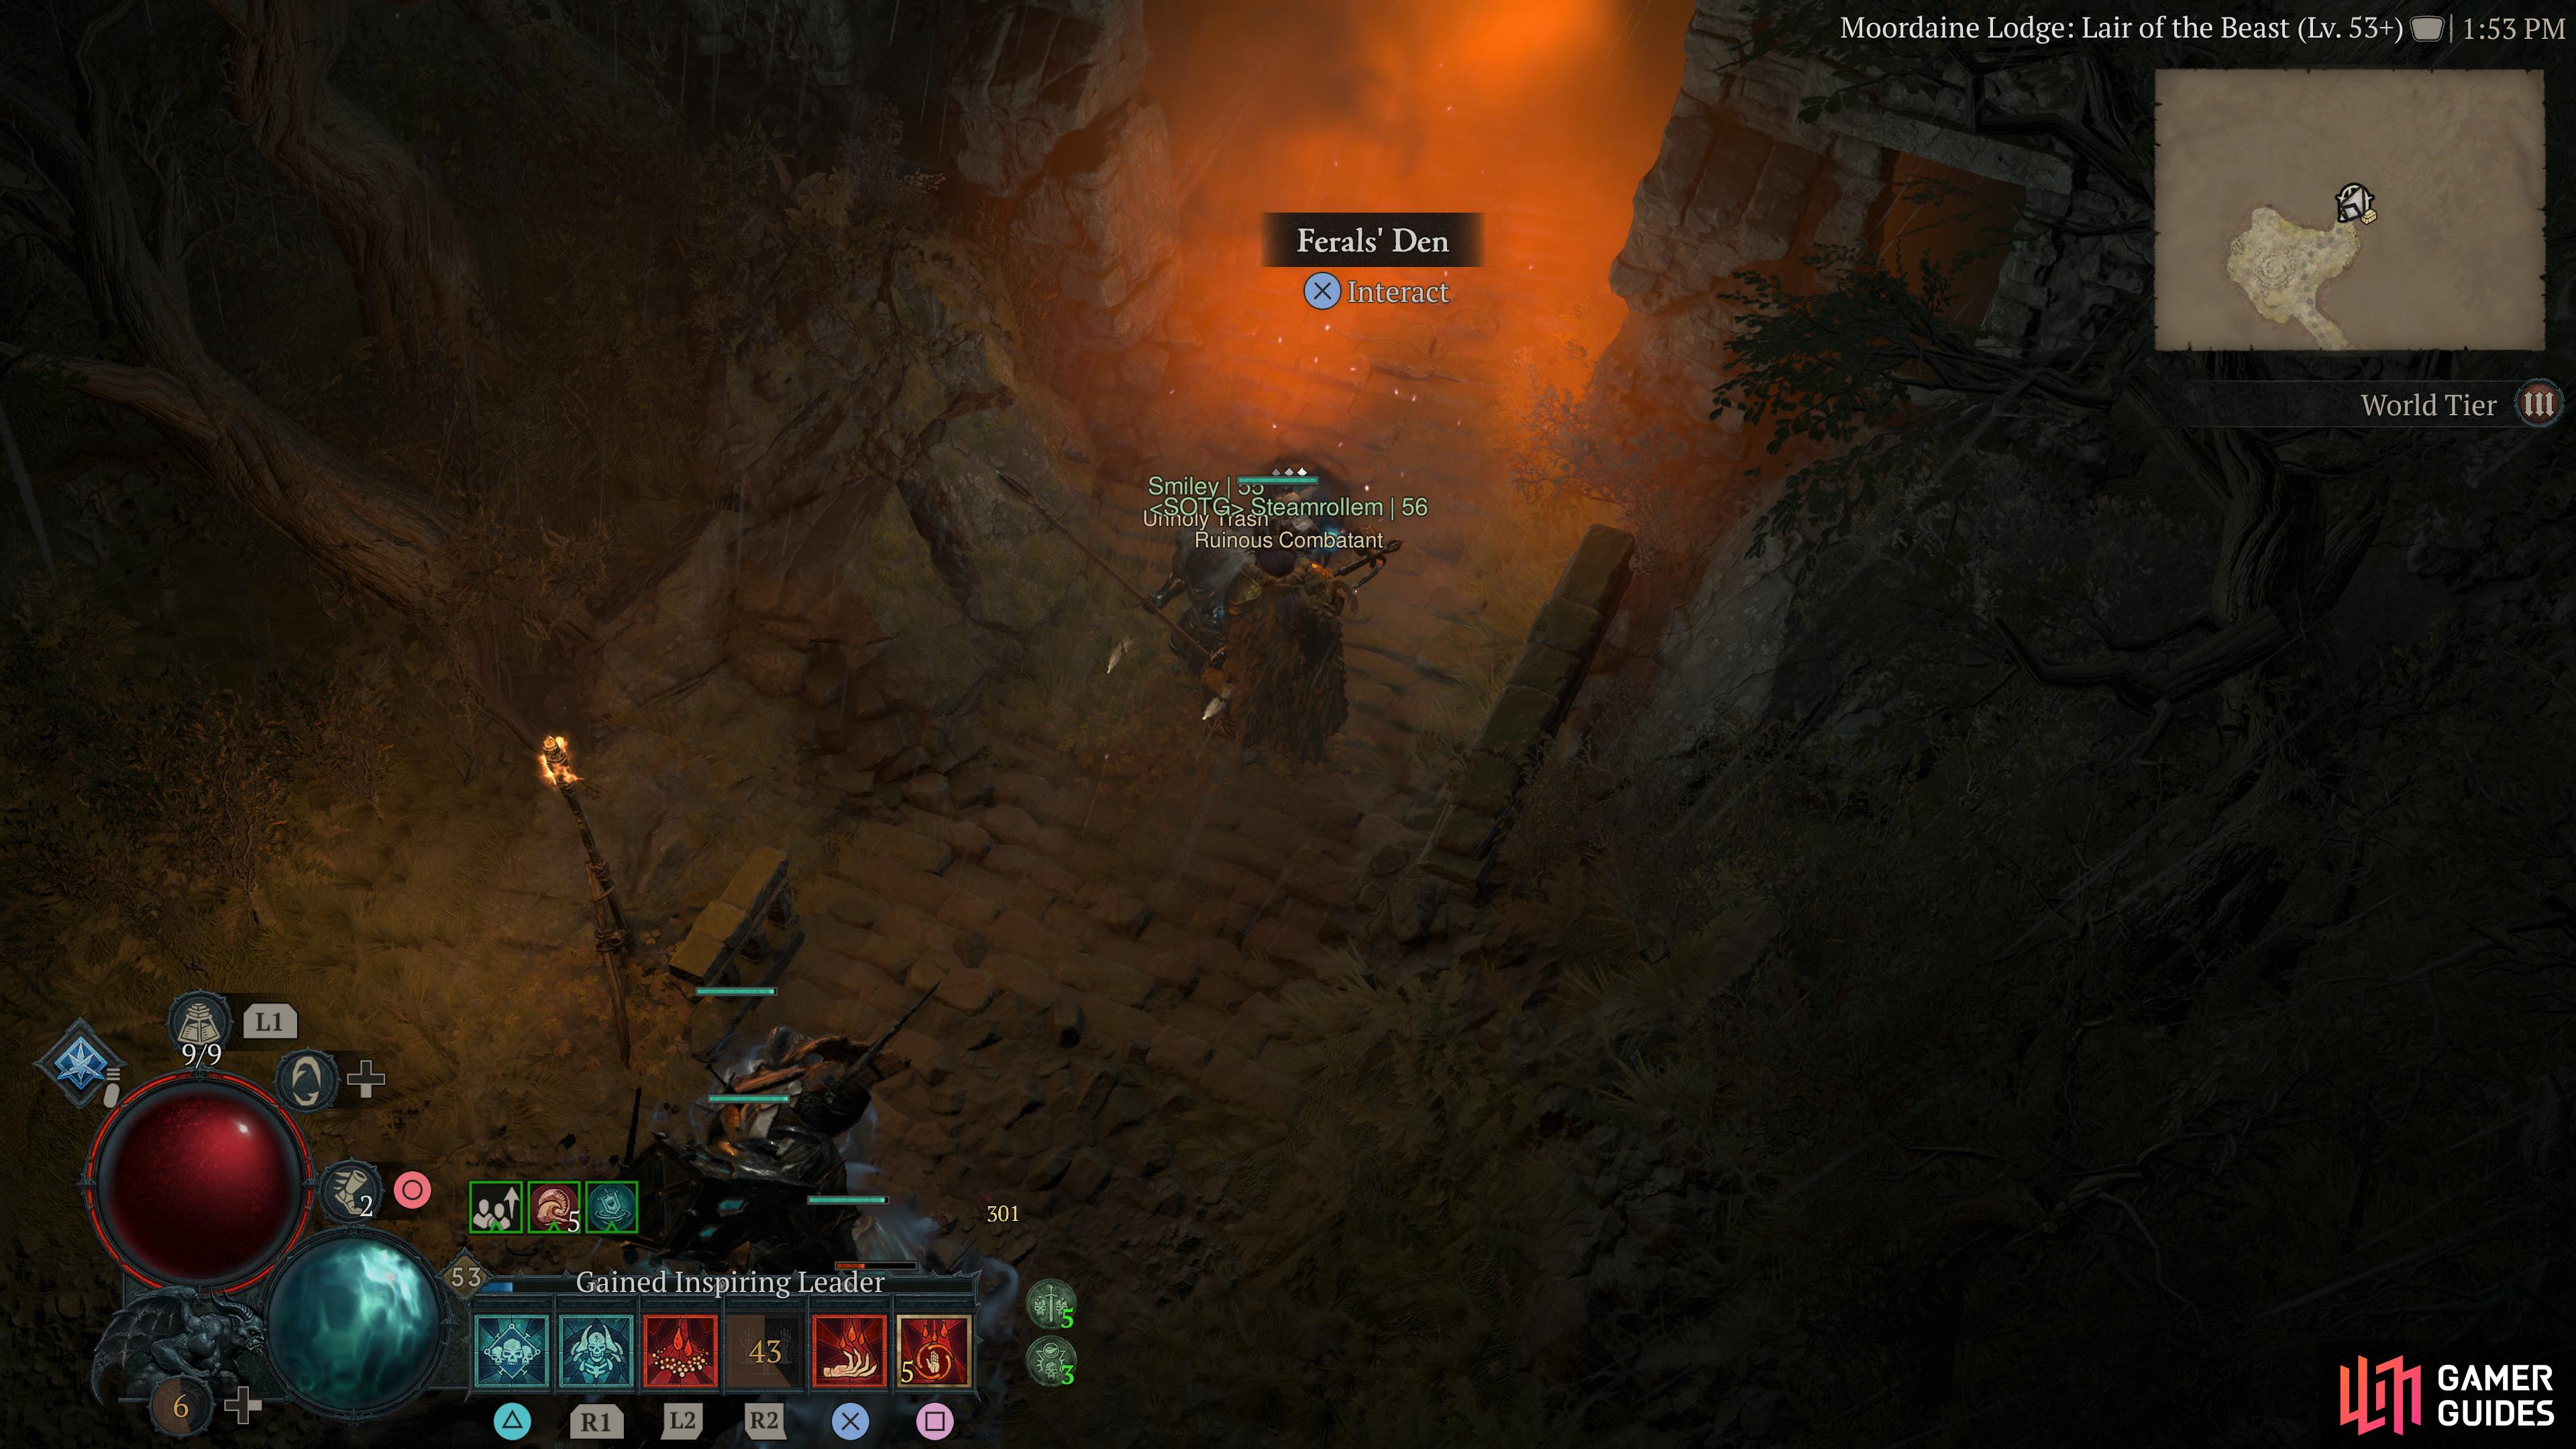
to find the Dungeon.
Start at the Tirmair Waypoint and head northeast until you reach the Moordaine Lodge Area, then you’ll come across the Ferals’ Den Dungeon after completing the stronghold here. You will receive +30 Scosglen Renown and the ![]() Aspect of Quicksand for completing the dungeon.
Aspect of Quicksand for completing the dungeon.
Dungeon 21 - Hive

Head to this location on the map
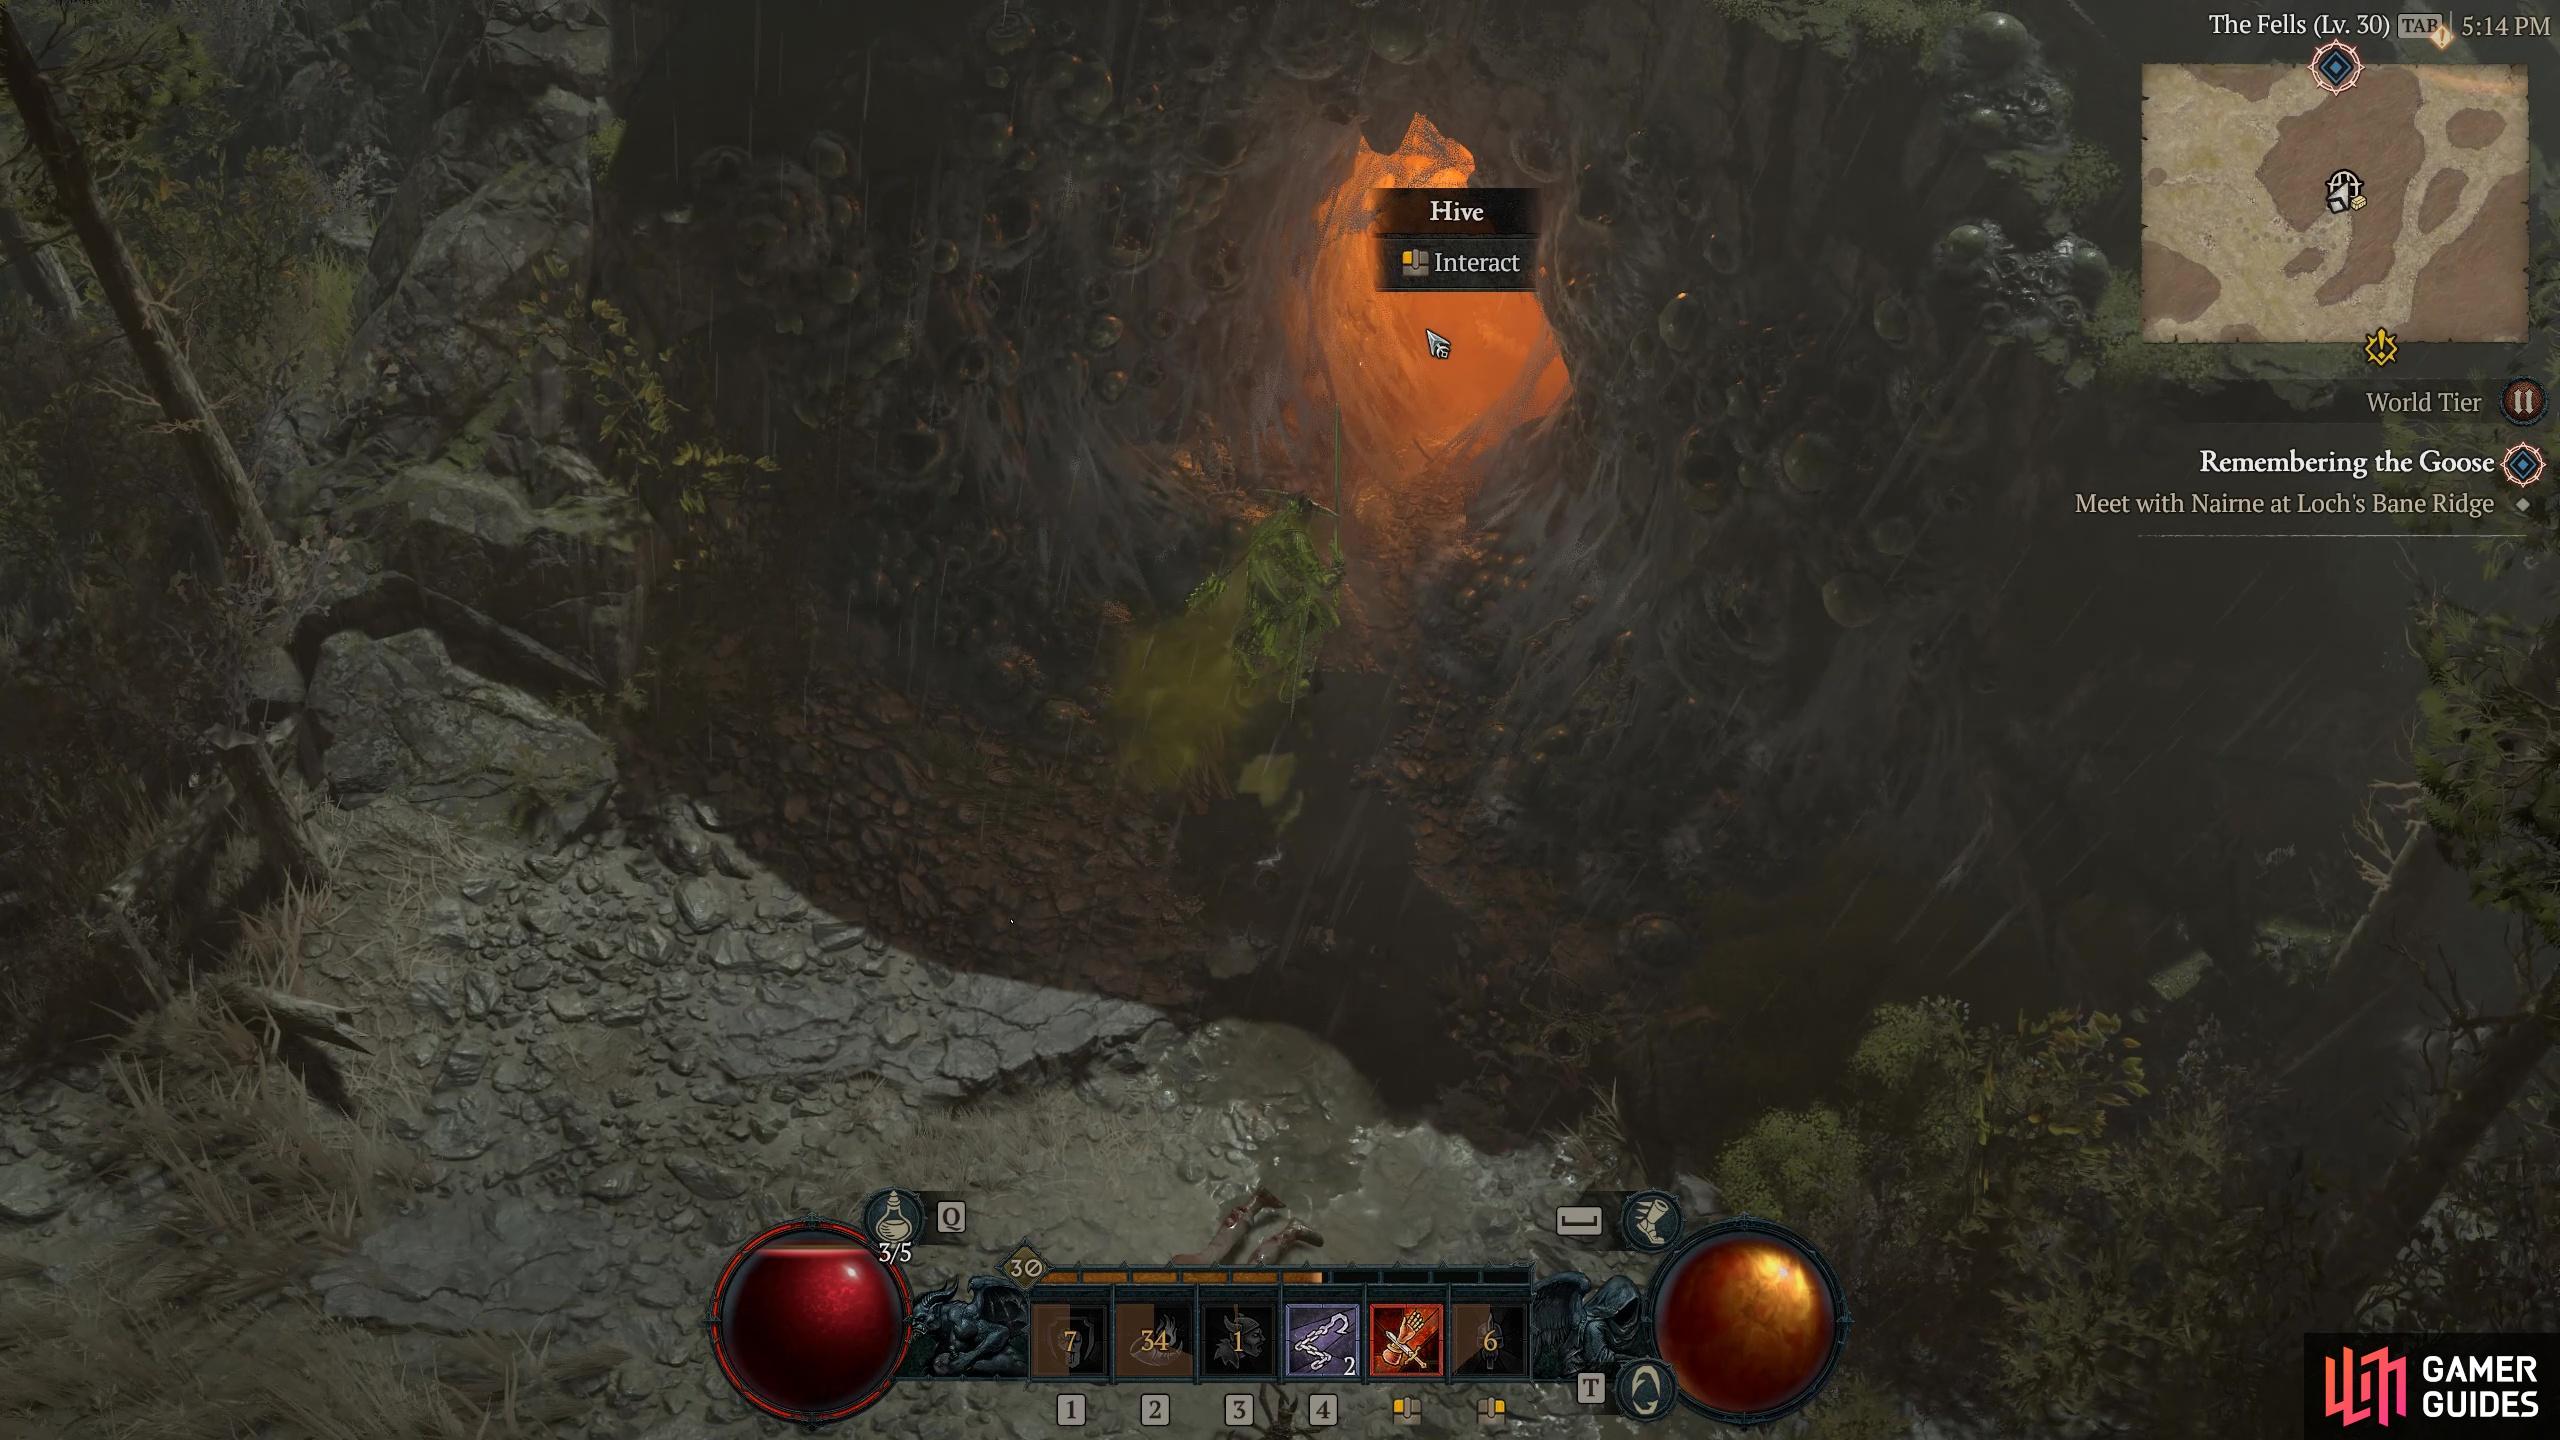
to find the Hive Dungeon.
Start at Under the Fat Goose Inn and head southeast until you reach The Fells Area, then you’ll come across the ![]() Hive Dungeon. You will receive +30 Scosglen Renown and the
Hive Dungeon. You will receive +30 Scosglen Renown and the ![]() Aspect of Swelling Curse for completing the dungeon.
Aspect of Swelling Curse for completing the dungeon.
Dungeon 22 - Maddux Watch
Head to this location on the map
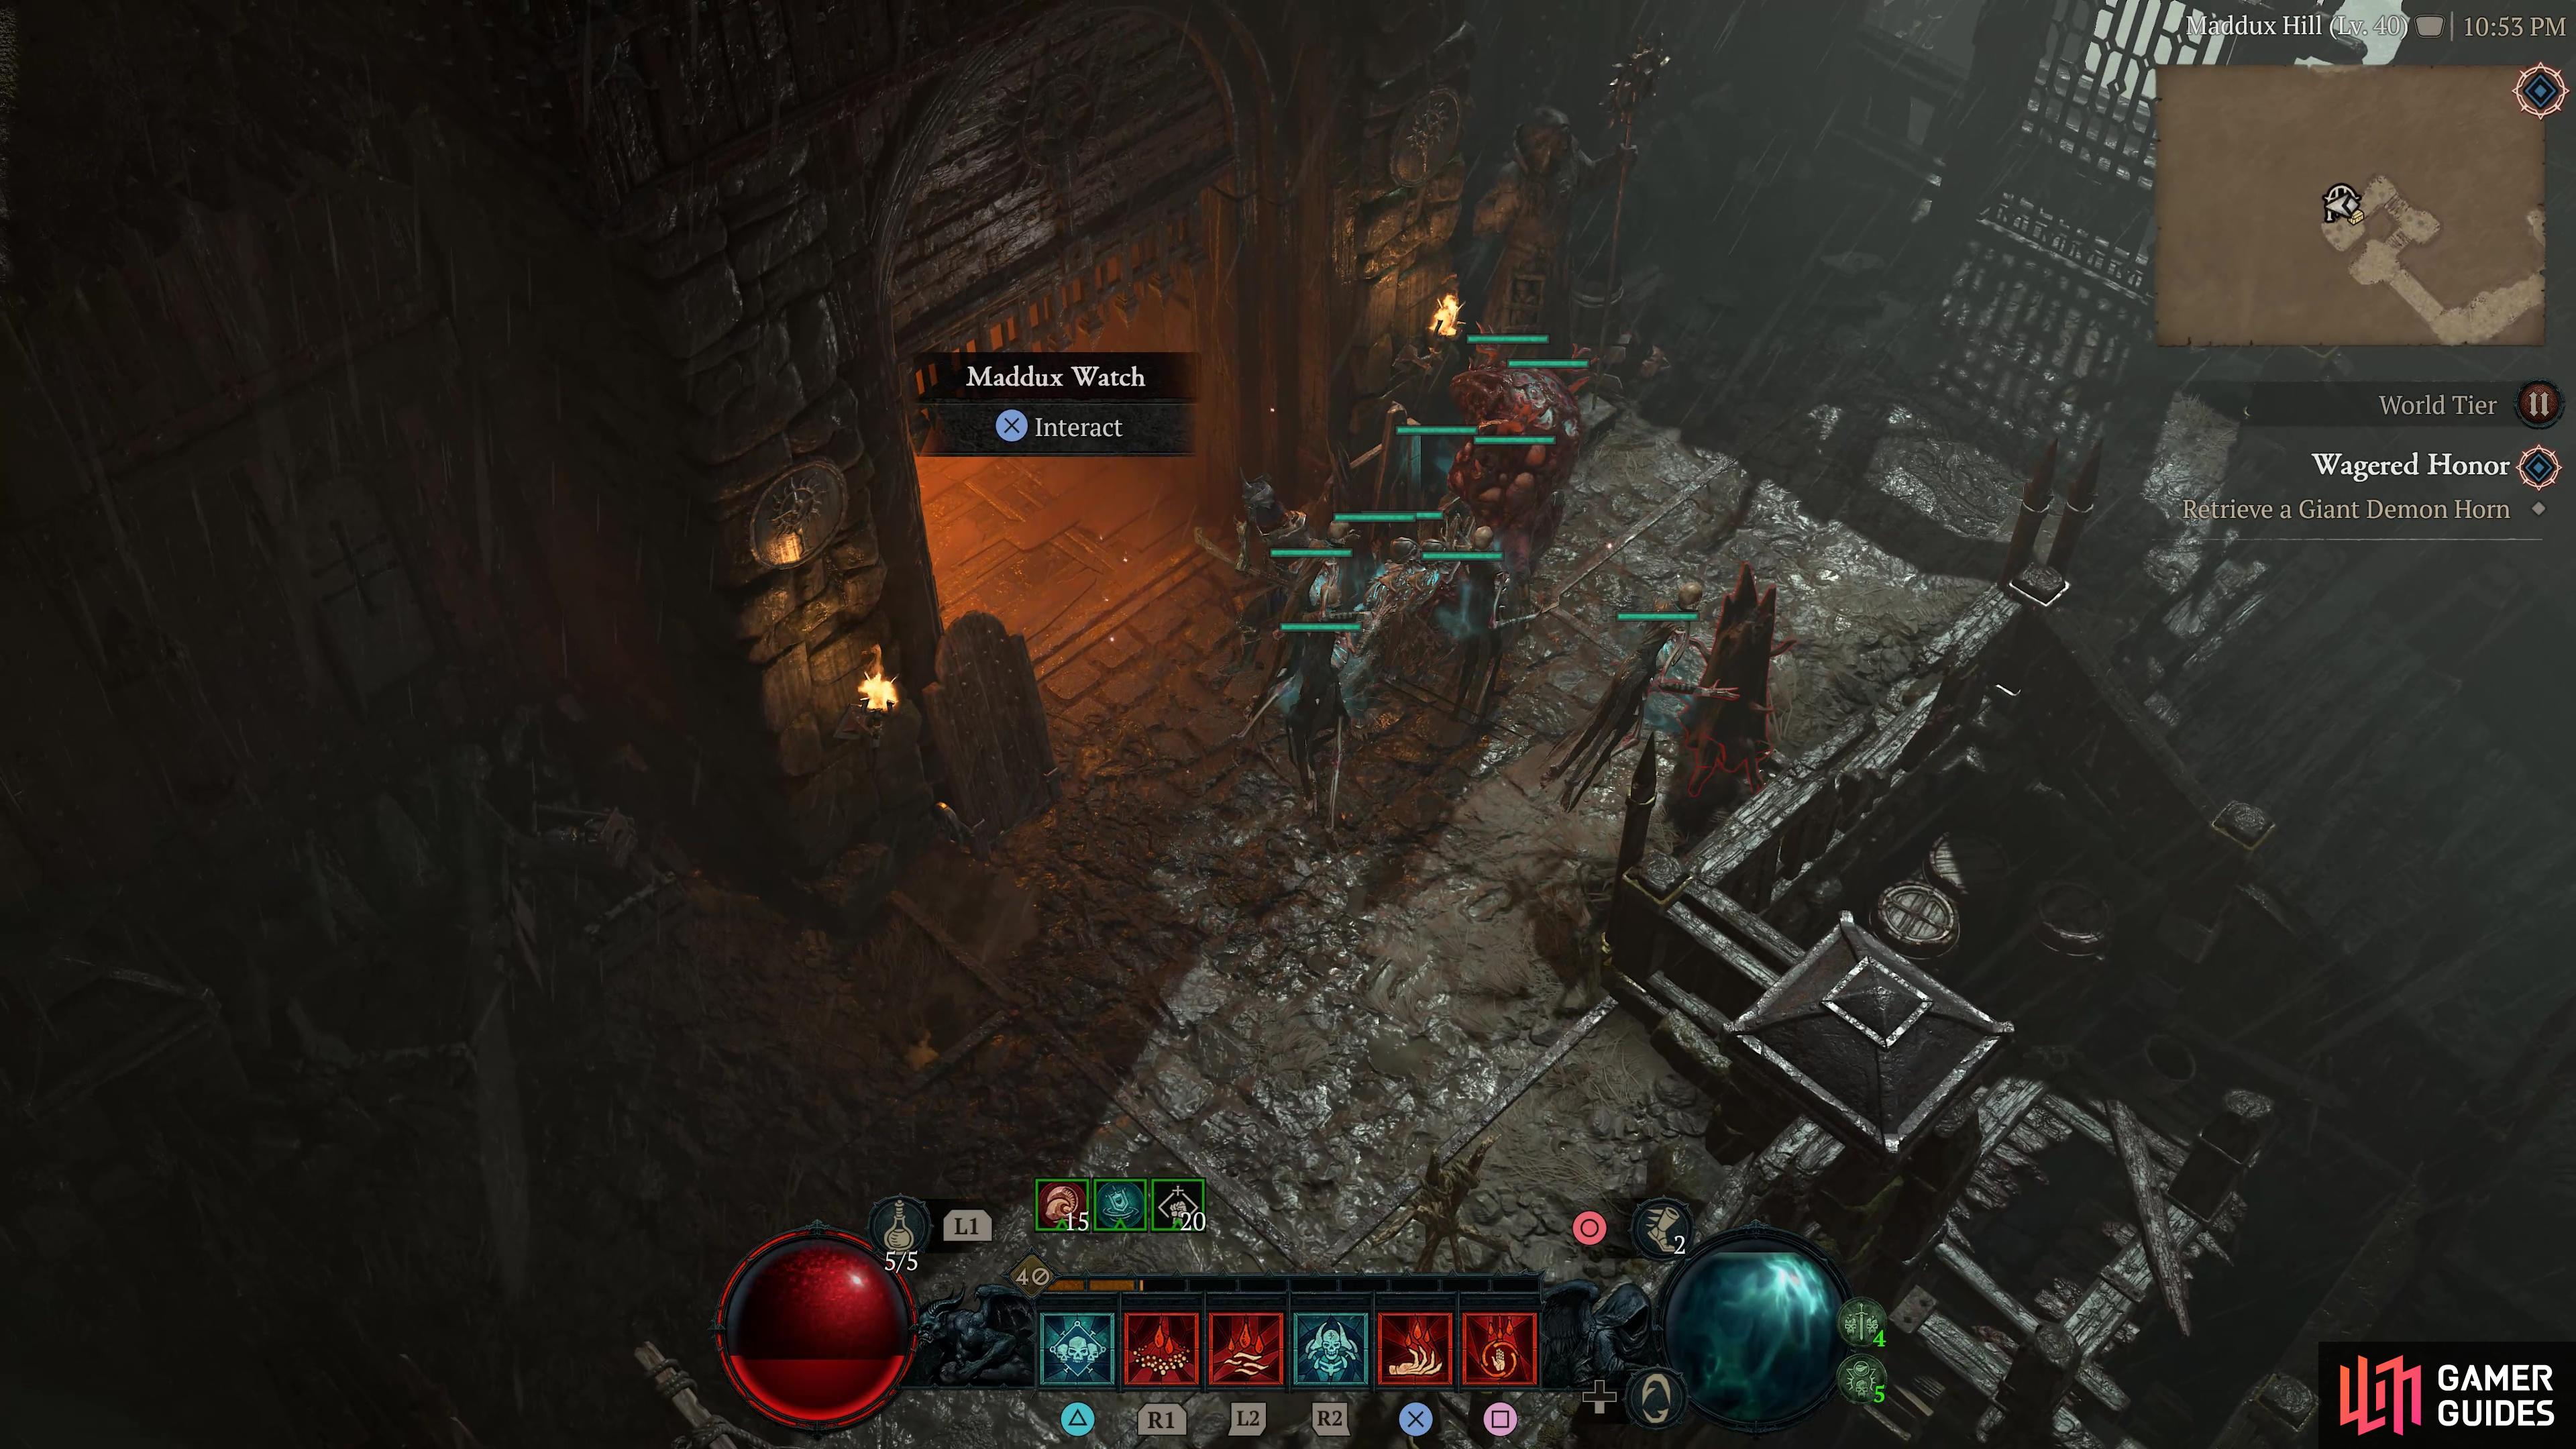
to find the Maddux Watch Dungeon.
Start at Under the Fat Goose Inn and head south until you reach the Maddux Hill Area, then you’ll come across the ![]() Maddux Watch Dungeon. You will receive +30 Scosglen Renown and the
Maddux Watch Dungeon. You will receive +30 Scosglen Renown and the ![]() Charged Aspect for completing the dungeon.
Charged Aspect for completing the dungeon.
Dungeon 23 - Embered Recess

Head to this location on the map
to find the Embered Recess Dungeon.
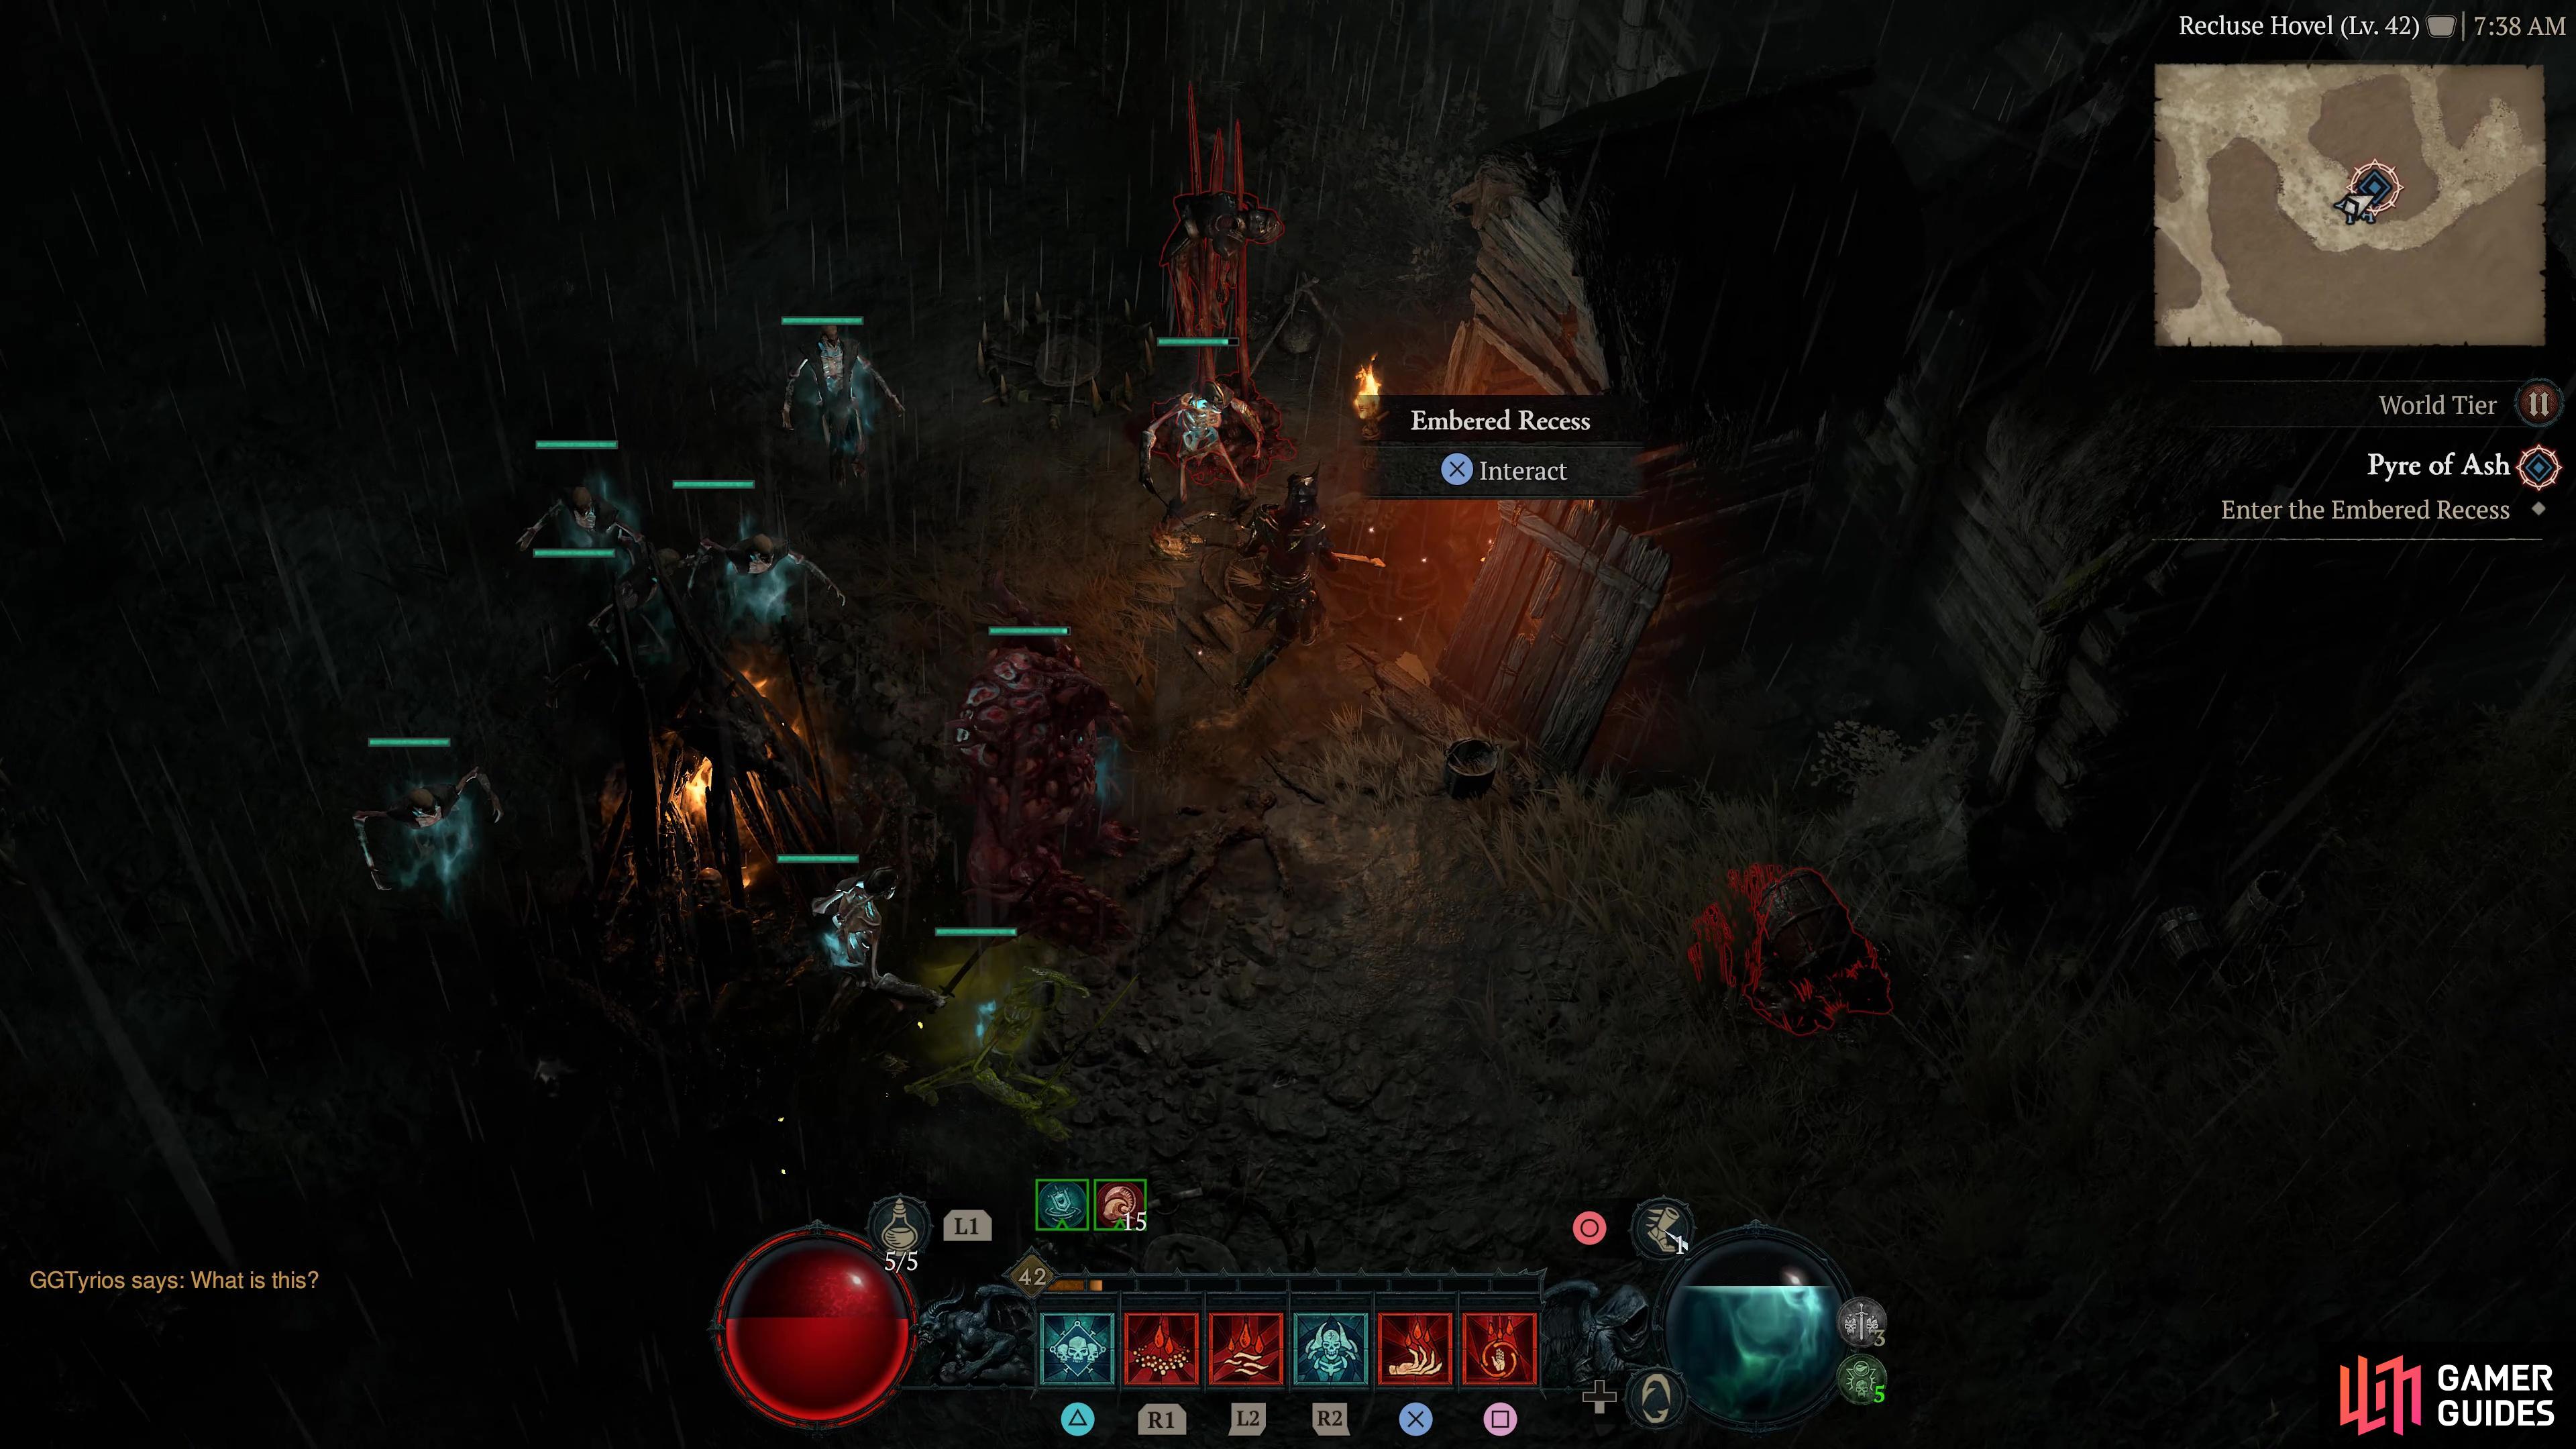
Start at Under the at Goose Inn and head southeast until you reach Recluse Hovel Area, then you’ll come across the ![]() Embered Recess Dungeon. However, you can only access this dungeon during the
Embered Recess Dungeon. However, you can only access this dungeon during the ![]() Pyre of Ash side quest. You will receive +30 Scosglen Renown for completing the dungeon.
Pyre of Ash side quest. You will receive +30 Scosglen Renown for completing the dungeon.
Dungeon 24 - Seared Hollow

Head to this location on the map
to find the Seared Hollow Dungeon.
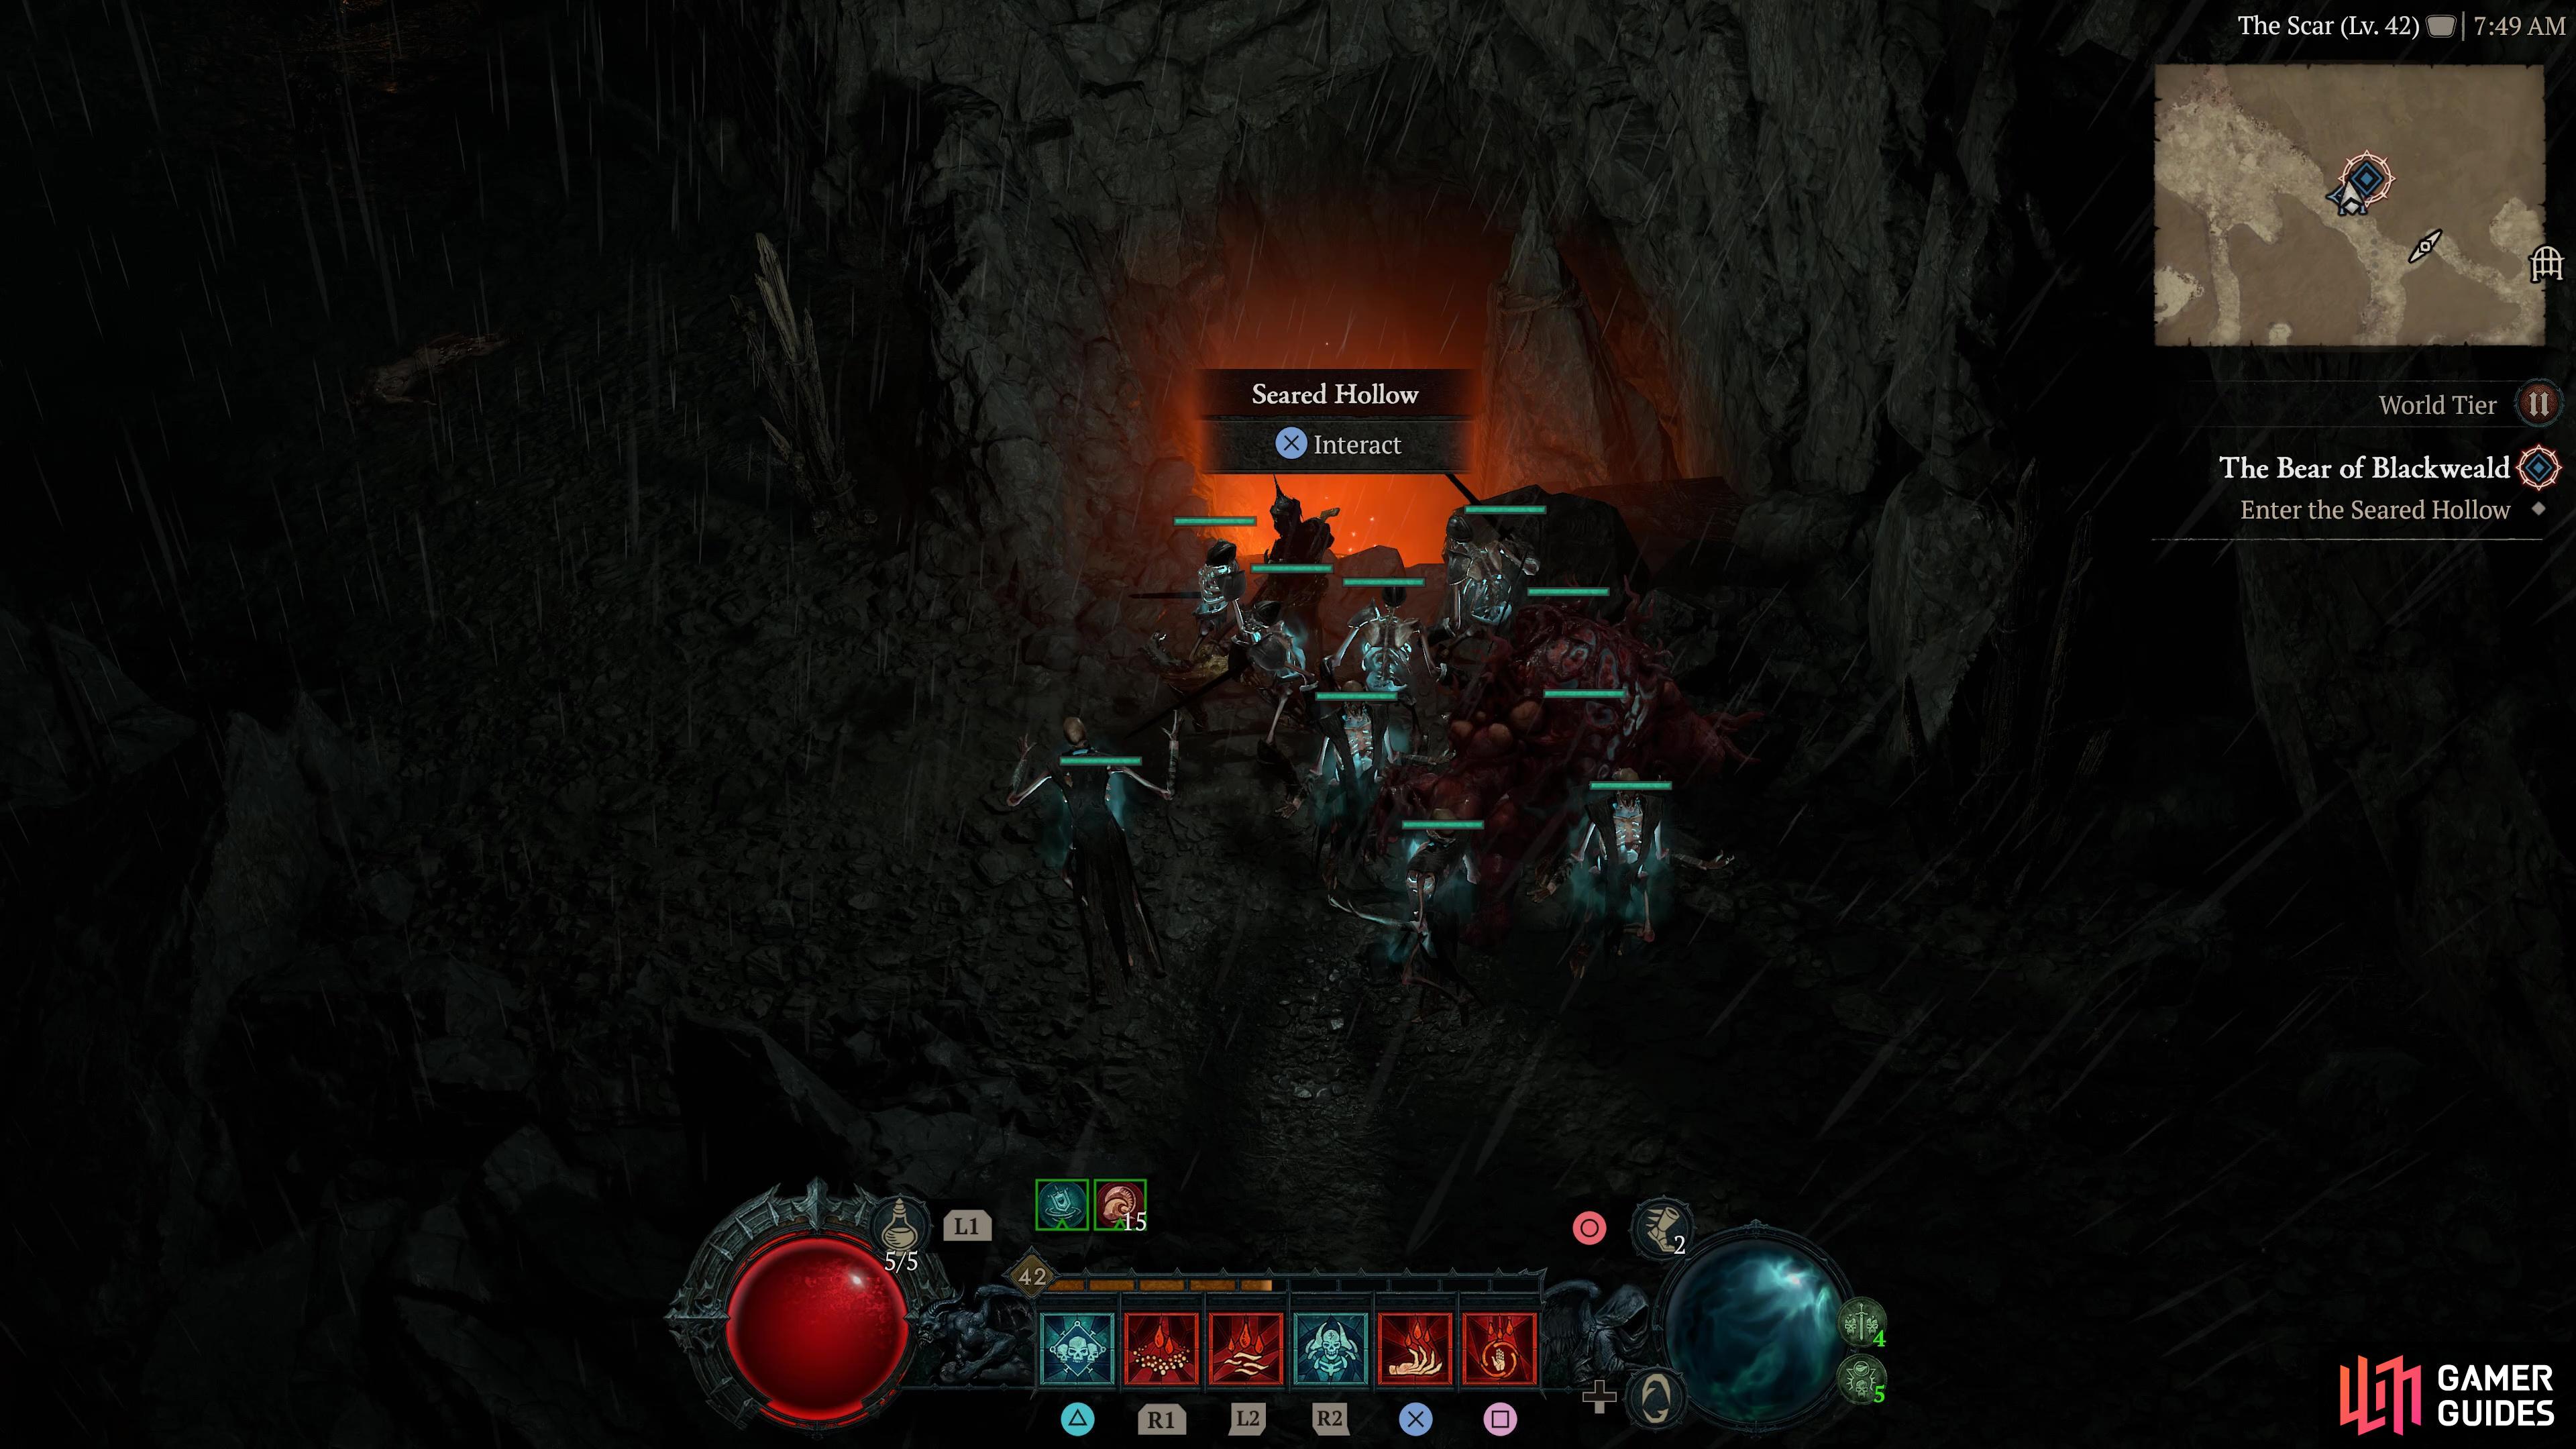
Start at Under the at Goose Inn and head east until you reach The Scar Area, then you’ll come across the ![]() Seared Hollow Dungeon. However, you can only access this dungeon during
Seared Hollow Dungeon. However, you can only access this dungeon during ![]() The Bear of Blackweald side quest. You will receive +30 Scosglen Renown for completing the dungeon.
The Bear of Blackweald side quest. You will receive +30 Scosglen Renown for completing the dungeon.
Dungeon 25 - Whispering Pines

Head to this location on the map
to find the Whispering Pines Dungeon.
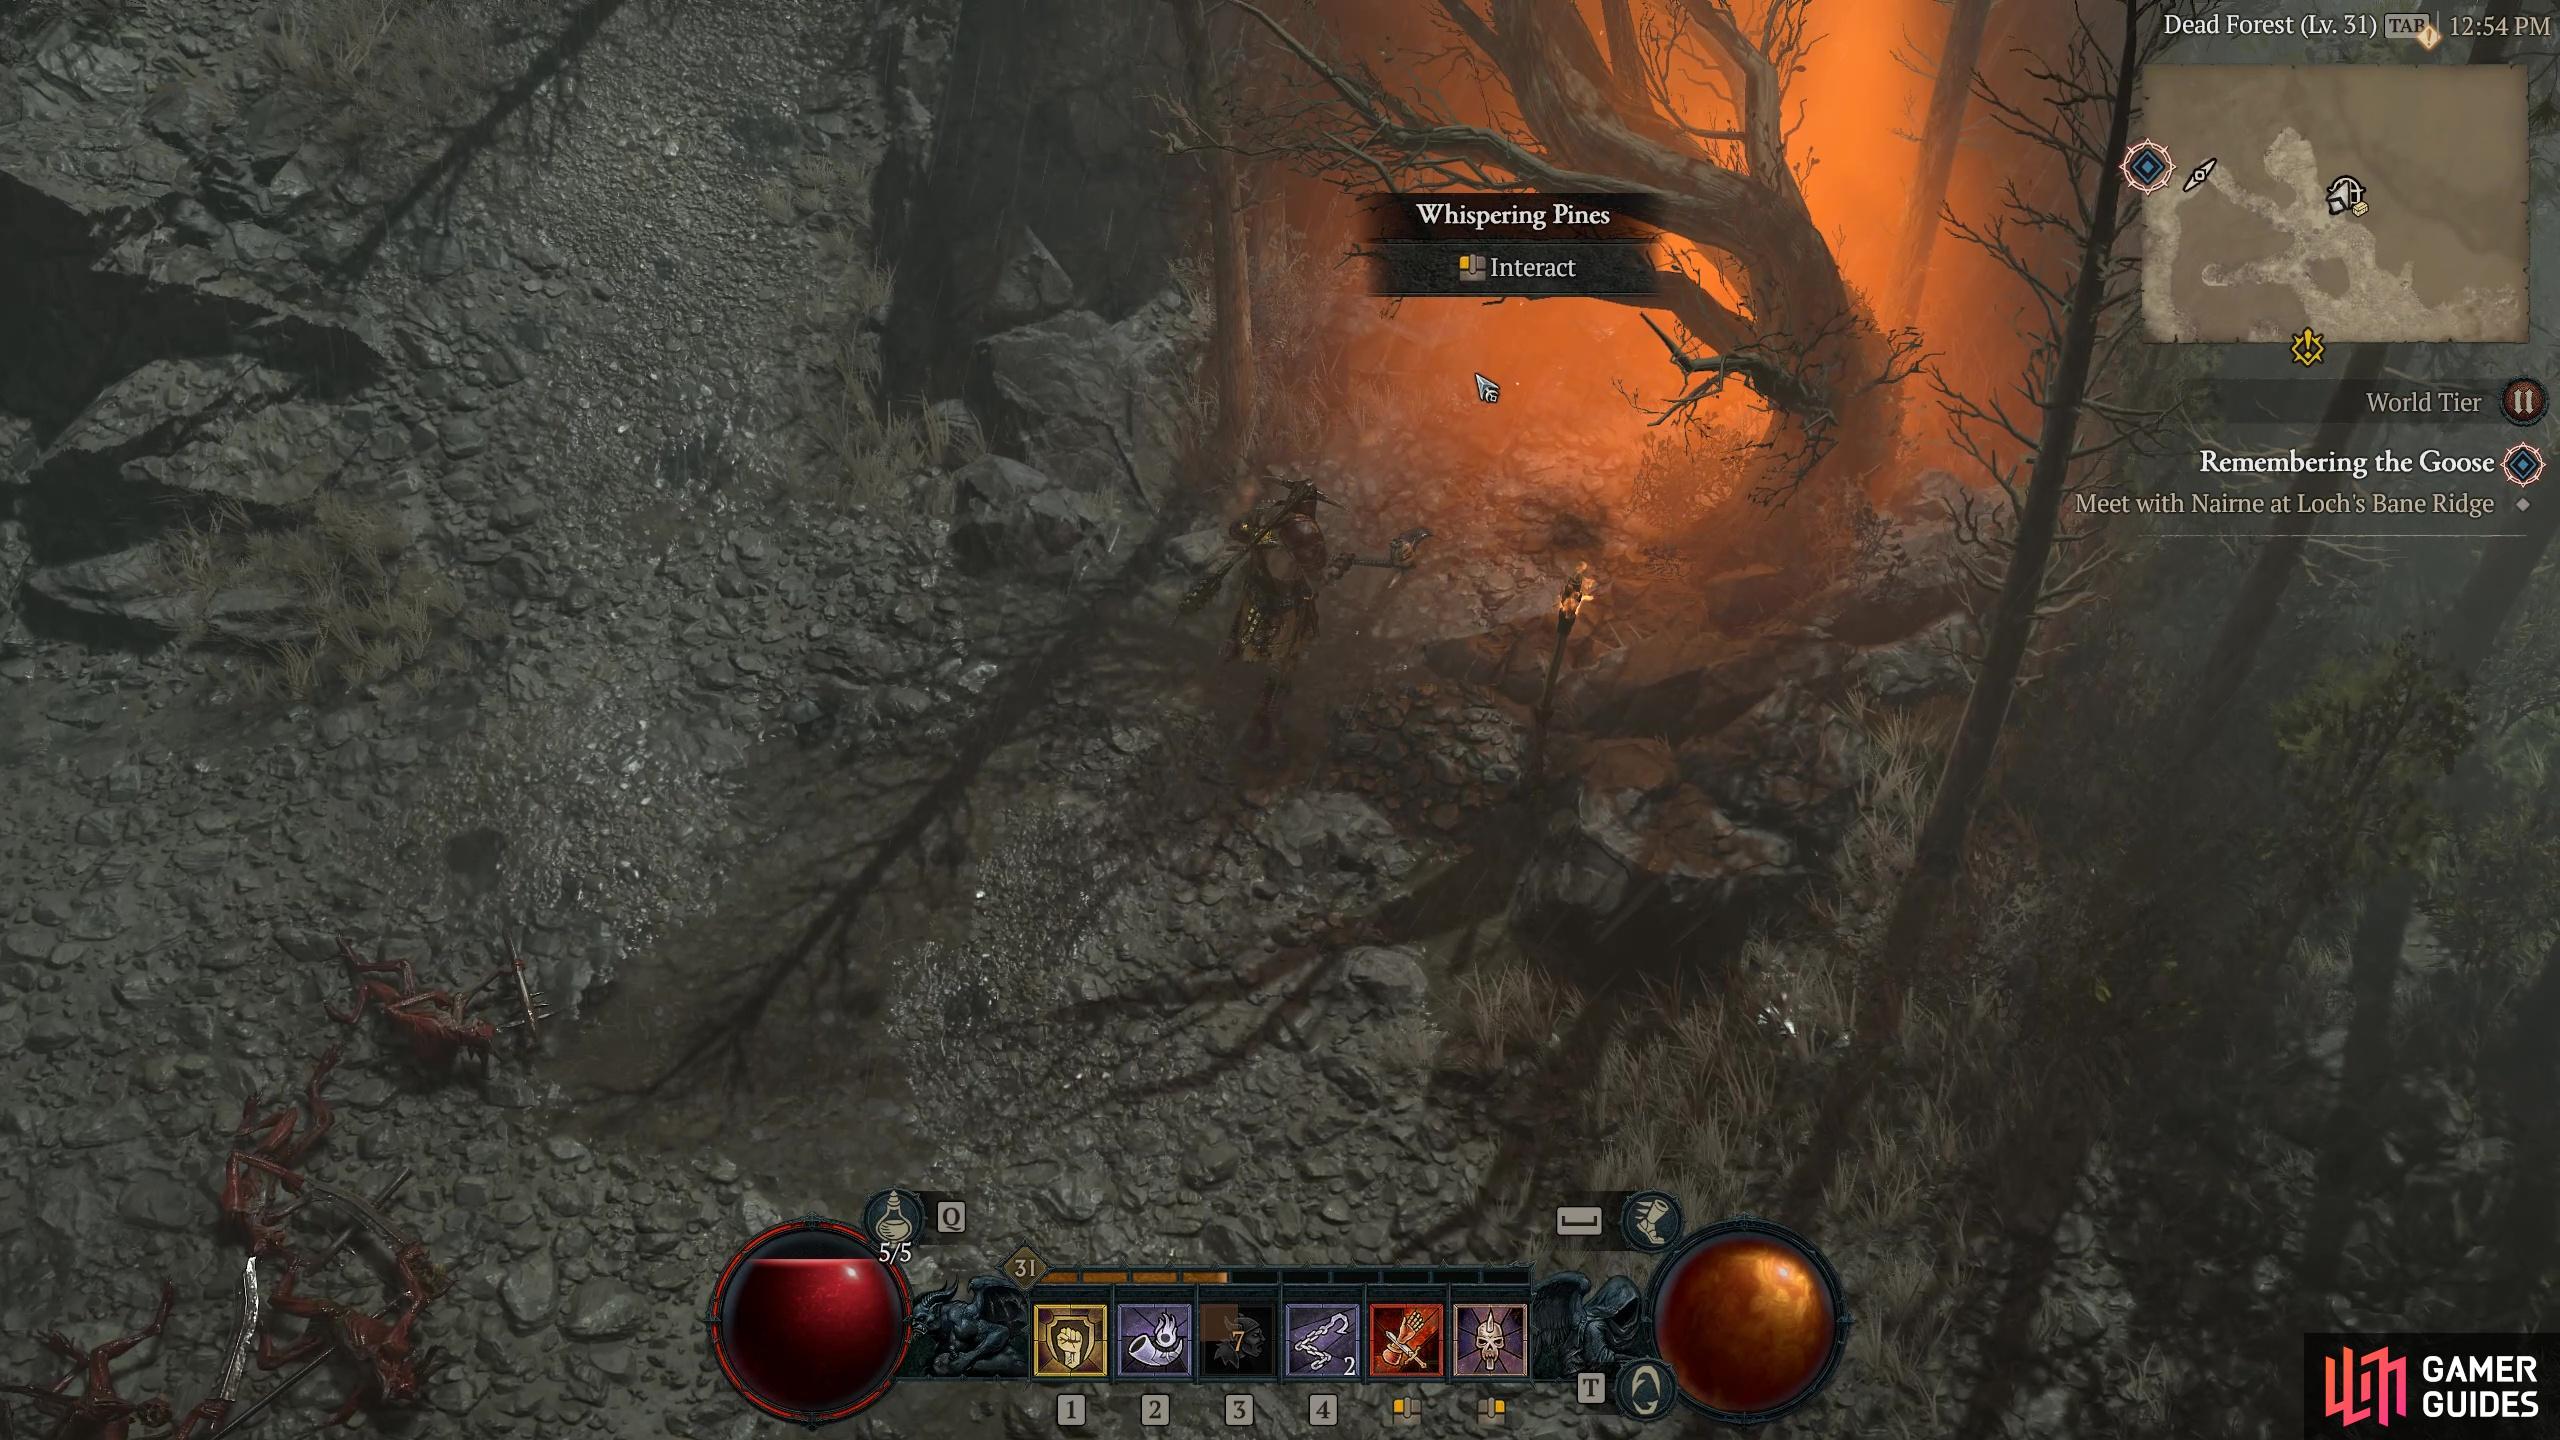
Start at Under the at Goose Inn and head east until you reach the Dead Forest Area, then you’ll come across the ![]() Whispering Pines Dungeon. You will receive +30 Scosglen Renown and the
Whispering Pines Dungeon. You will receive +30 Scosglen Renown and the ![]() Ballistic Aspect for completing the dungeon.
Ballistic Aspect for completing the dungeon.
Dungeon 26 - Abandoned Barrow

Head to this location on the map
to find the Abandoned Barrow Dungeon.
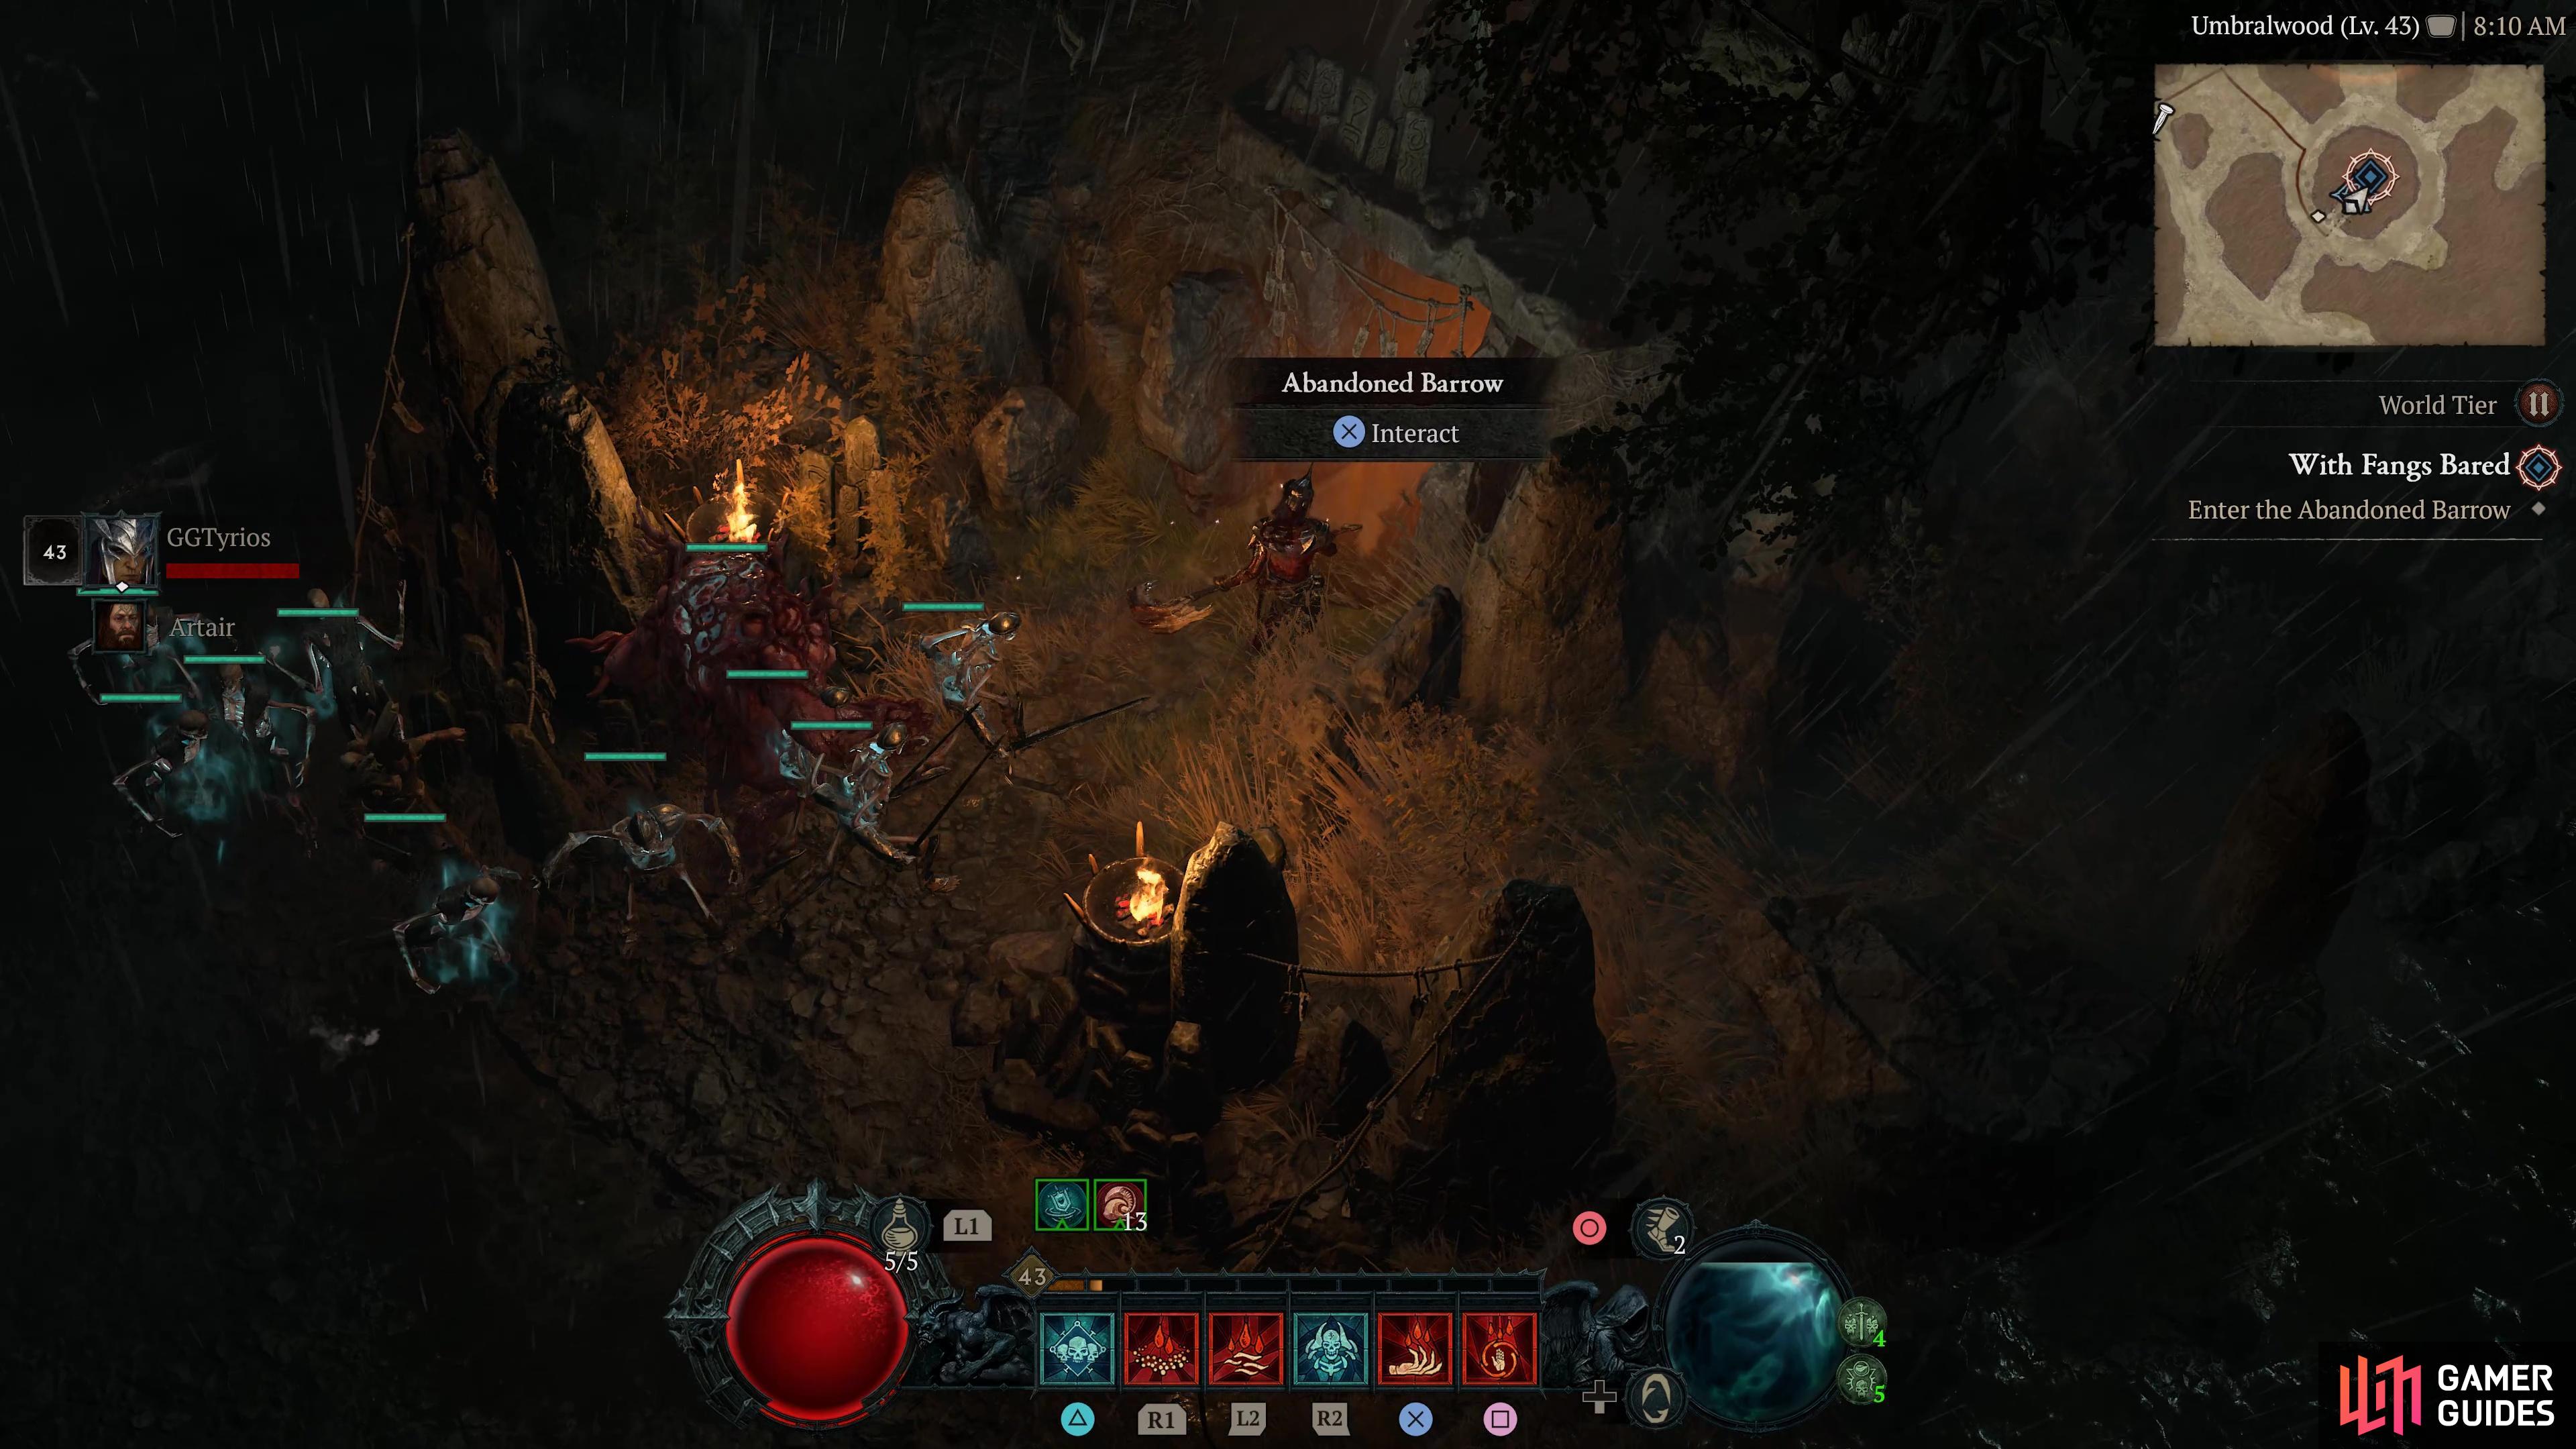
Start at Under the at Goose Inn and head west until you reach the Umbralwood Area, then you’ll come across the ![]() Abandoned Barrow Dungeon. However, you can only access this dungeon during the
Abandoned Barrow Dungeon. However, you can only access this dungeon during the ![]() With Fangs Bared Side Quest. You will receive +30 Scosglen Renown for completing the dungeon.
With Fangs Bared Side Quest. You will receive +30 Scosglen Renown for completing the dungeon.
Dungeon 27 - Oldstones

Head to this location on the map
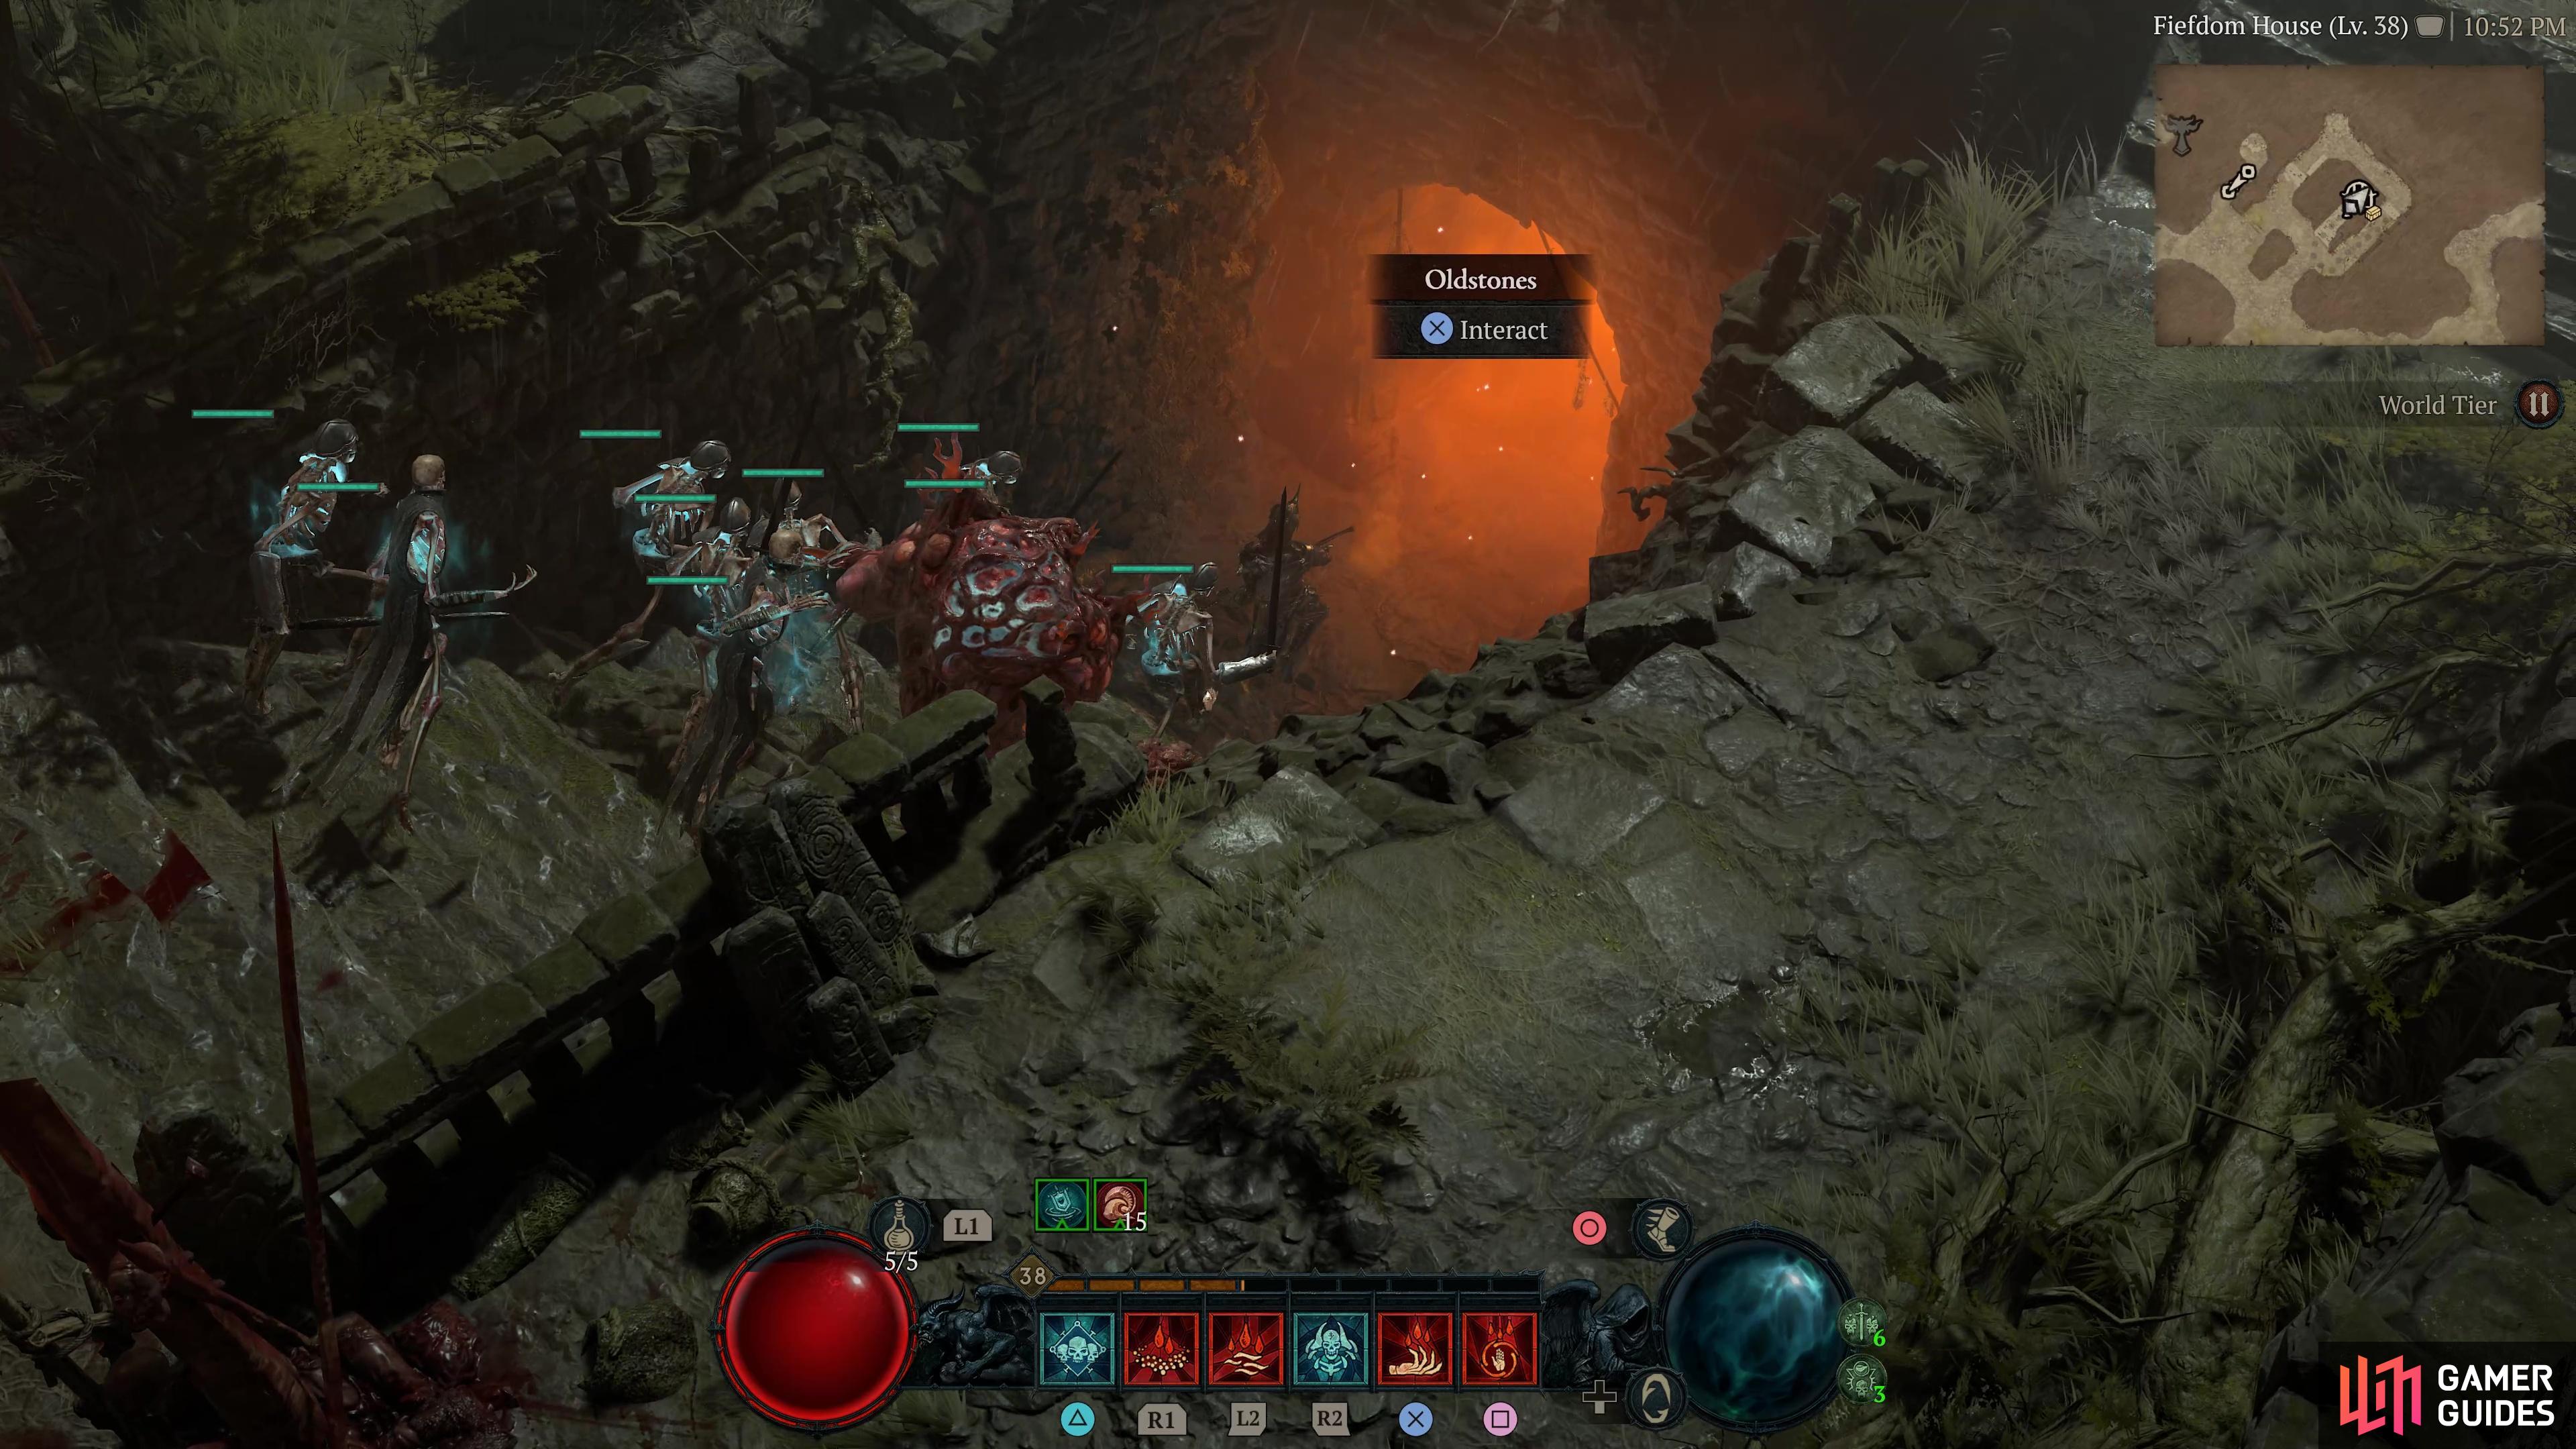
to find the Oldstones Dungeon.
Start at Under the at Goose Inn and head west until you reach the Fiefdom House Area, then you’ll come across the ![]() Oldstones Dungeon. You will receive +30 Scosglen Renown and the
Oldstones Dungeon. You will receive +30 Scosglen Renown and the ![]() Edgemaster’s Aspect for completing the dungeon.
Edgemaster’s Aspect for completing the dungeon.
Dungeon 28 - Abandoned Smuggler’s Den

Head to this location on the map
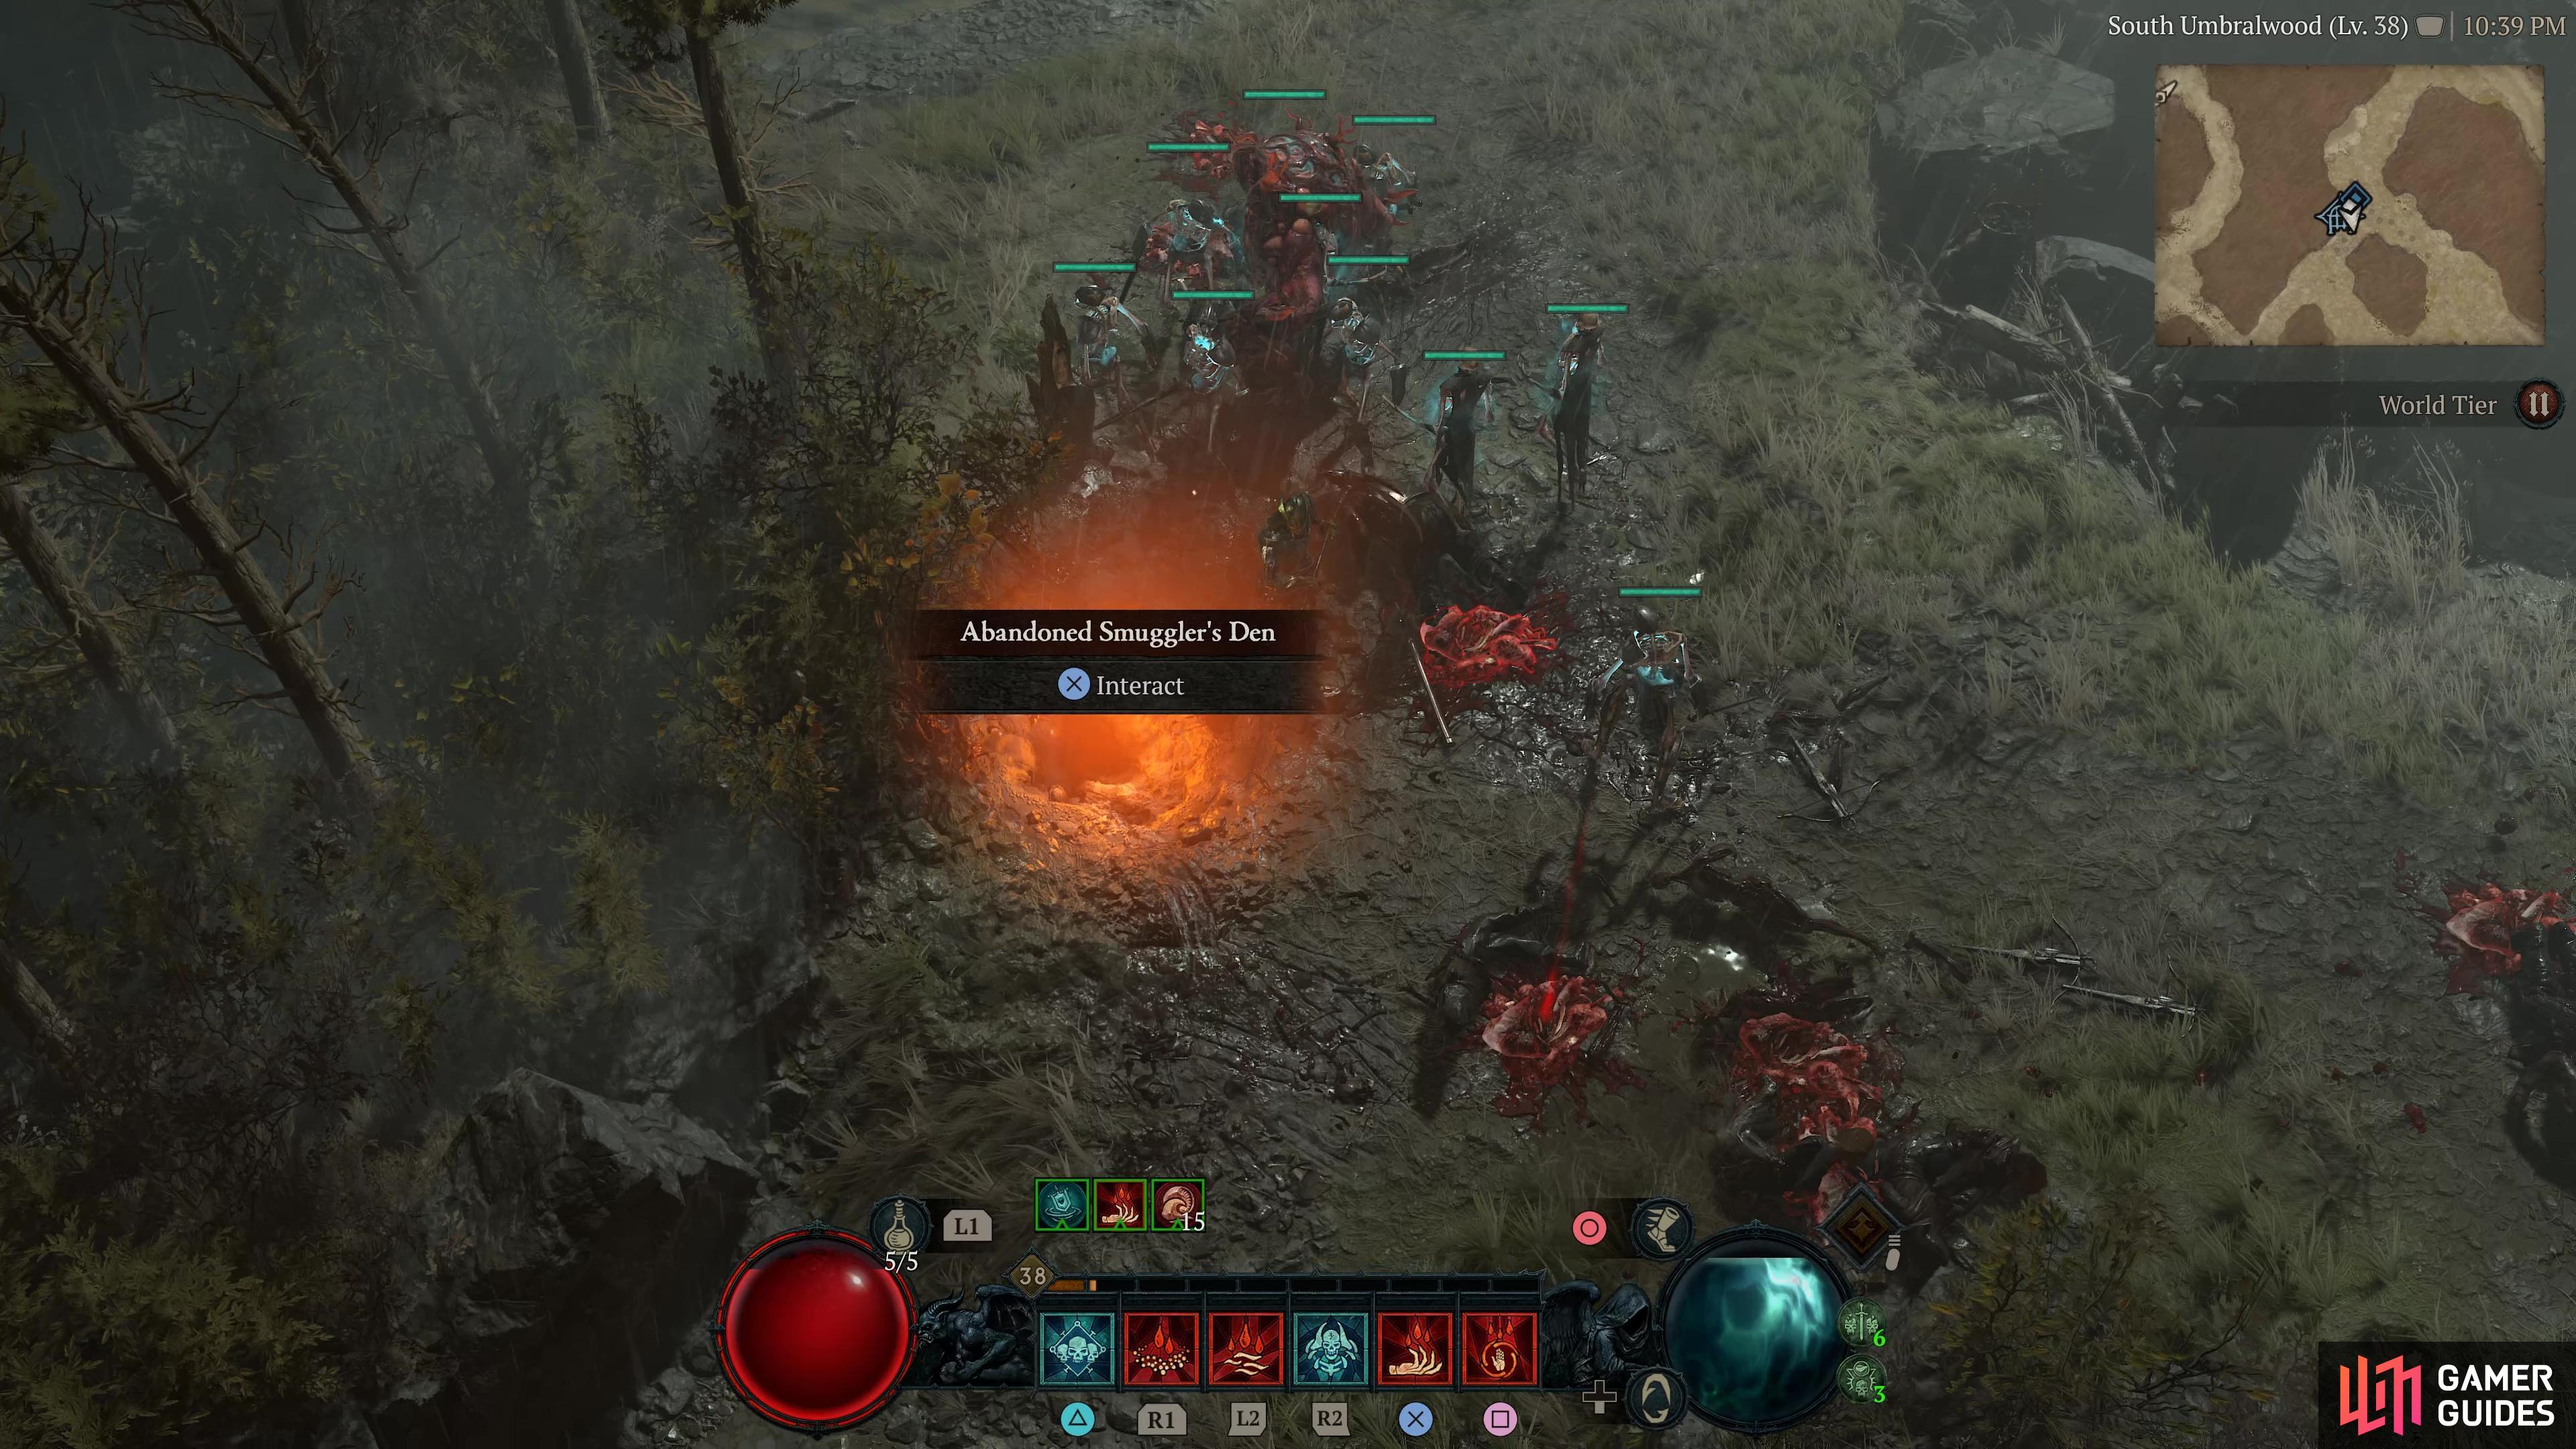
to find the Abandoned Smuggler’s Den Dungeon.
Start at Under the at Goose Inn and head west until you reach the South Umbralwood Area, then you’ll come across the ![]() Abandoned Smuggler’s Den Dungeon. However, you can only access this dungeon during the
Abandoned Smuggler’s Den Dungeon. However, you can only access this dungeon during the ![]() Ever Faithful Side Quest. You will receive +30 Scosglen Renown for completing this dungeon.
Ever Faithful Side Quest. You will receive +30 Scosglen Renown for completing this dungeon.
No Comments