

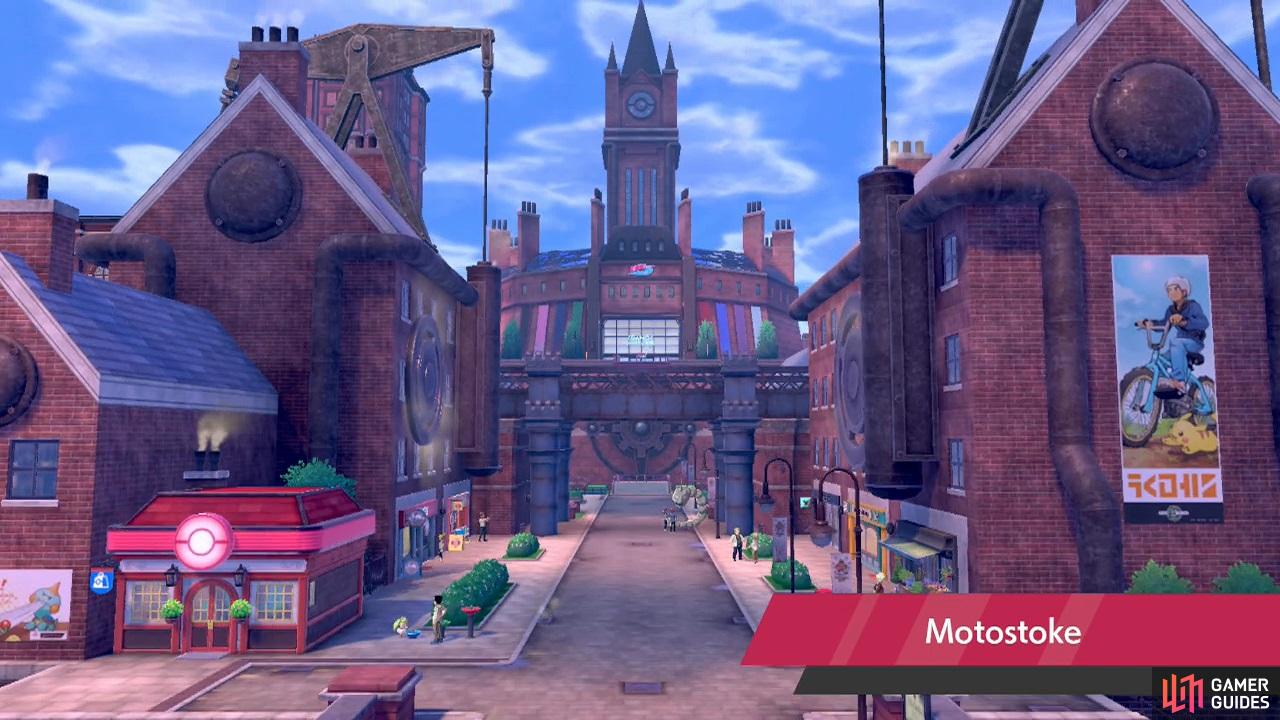
Motostoke appears to be based on the city of Manchester.
Head north to begin with. As you approach the crossroad, Sonia will wave to you from the Pokémon Center on the left. She’ll lead you inside and tell you about the Card Maker feature found in the PC, which lets you create League Cards. You’ll also be given Leon’s League Card as a sample.
Sonia will step outside for a moment. Before chasing after her, rest up your Pokémon if they’re tired from exploring the Wild Area. Also, check out the Poké Mart on the right. This time, there are two clerks. The one on the left is the default one. Meanwhile, the right clerk sells special Poké Balls and Battle Items that temporarily boost stats.
Below the Poké Mart, there’s a Lass who wants to trade her  Skwovet for your
  Bunnelby. You can find Bunnelby pretty easily in Rolling Fields. They’re found wandering the tall grass during most weather–and can be found randomly in the tall grass during all weather. However, Skwovet can be found just as easily. So there’s little point to making this trade.
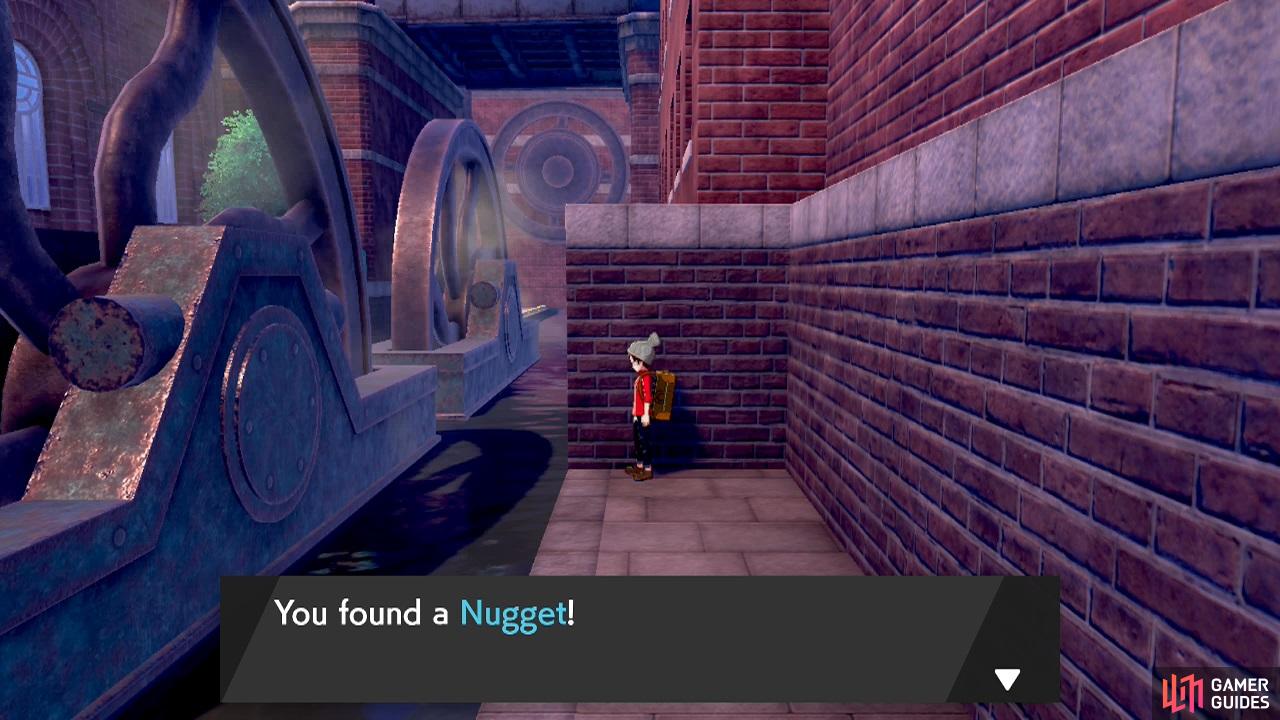
Here’s our nugget of advice: sell yer nuggets.
Back outside, go over to Sonia who’s waiting on the right. Actually, if you want, you can go left, down the steps. There will be a steel bridge going across a canal. If you cross the bridge, there will be two excited chaps blocking the way. Instead, head north before the bridge, along the side of the canal. At the end, there’s a sparkling spot that yields a Nugget. Ooh, shiny!
Sonia will tell you that the Gym Challenge opening ceremony will be held at Motostoke Stadium tomorrow morning. That’s the big building with the steeple directly ahead. Oh, by “tomorrow”, she means in-game tomorrow. Also, you should probably register at the stadium ahead of time. Otherwise, they’ll hold the ceremony without you!
Right, time to explore the city! Go right from the crossroad. There will be a second set of stairs–these ones going right. Head down them. At the far end of this area, there’s a Poké Ball shaped target practice. Next to it, in the corner, is a teeny tiny bin. Inspect it to find a disposed, but still usable Poké Ball. Go back to the crossroad and start heading north.
There will be rows of shops on the left and right. Of note, the first shop on the left is the Battle Café. Each day, you can battle the owner here to receive a random food-related hold item. Sweet!
Café Master Dwight
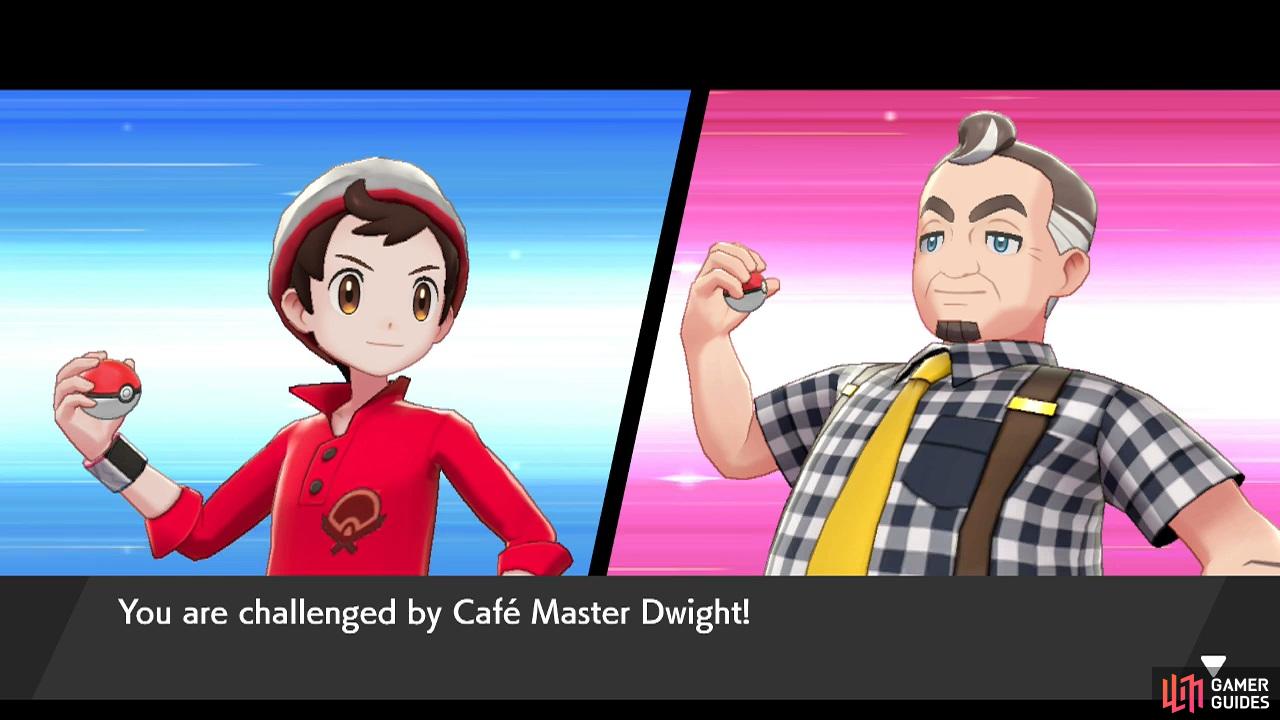
| Pokémon | Level | Type |
|---|---|---|
 Combee Combee |
10 | Bug/Flying |
This honeycomb-shaped critter is weak to Fire, Electric and Flying-types. So the likes of  Scorbunny,
  Yamper and
  Rookidee are recommended. Otherwise, anything that’s not Grass (sorry
  Grookey) should work.
The next shop on the left deals with Technical Records. Unfortunately, there are none for sale (you’ll have to get them from the Wild Area). But the shop owner will give you TR13 Focus Energy for free.
Meanwhile, along the right, there’s a flower shop that’s just there as window dressing. Next is the hair salon. If you want a new hairdo or makeup (this includes the ability to change your eye colour), get yourself in there! Finally, there’s a boutique, which stocks a different range of clothing items. Maybe it’s time for a makeover before you make your Gym Challenge debut…
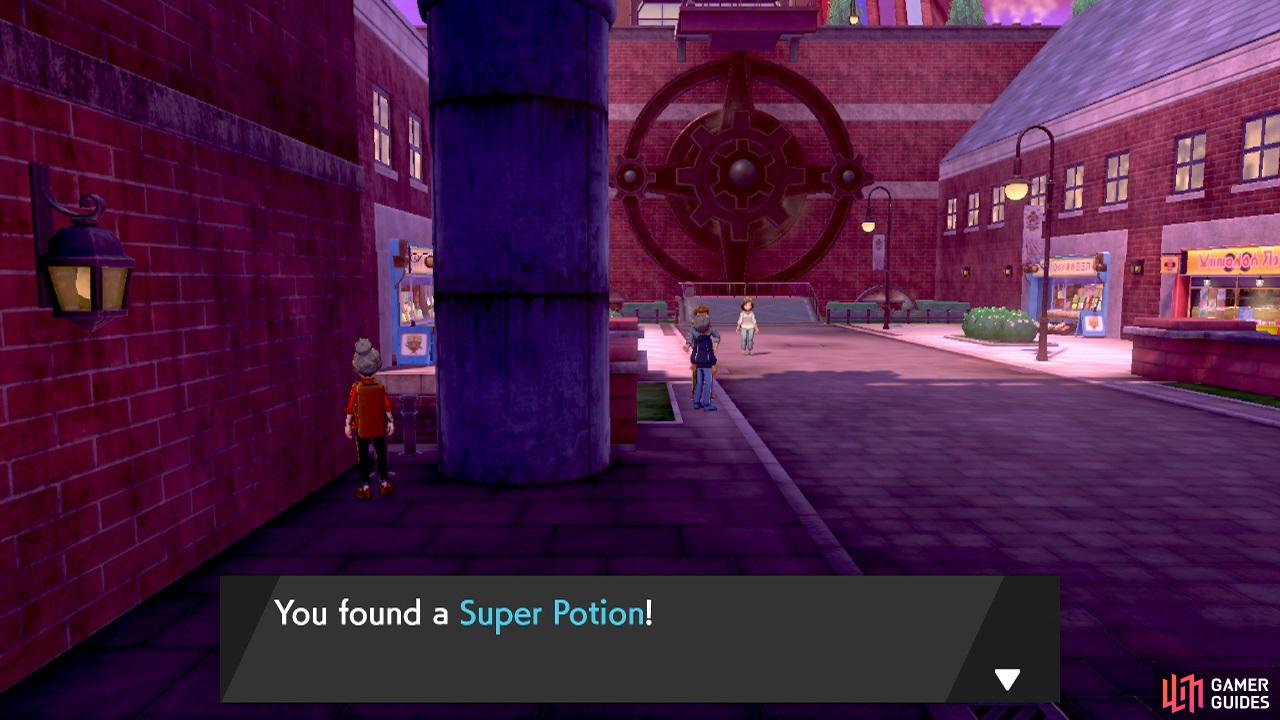
Super Potion. Better than a Potion.
Audiophiles will appreciate this little gadget!
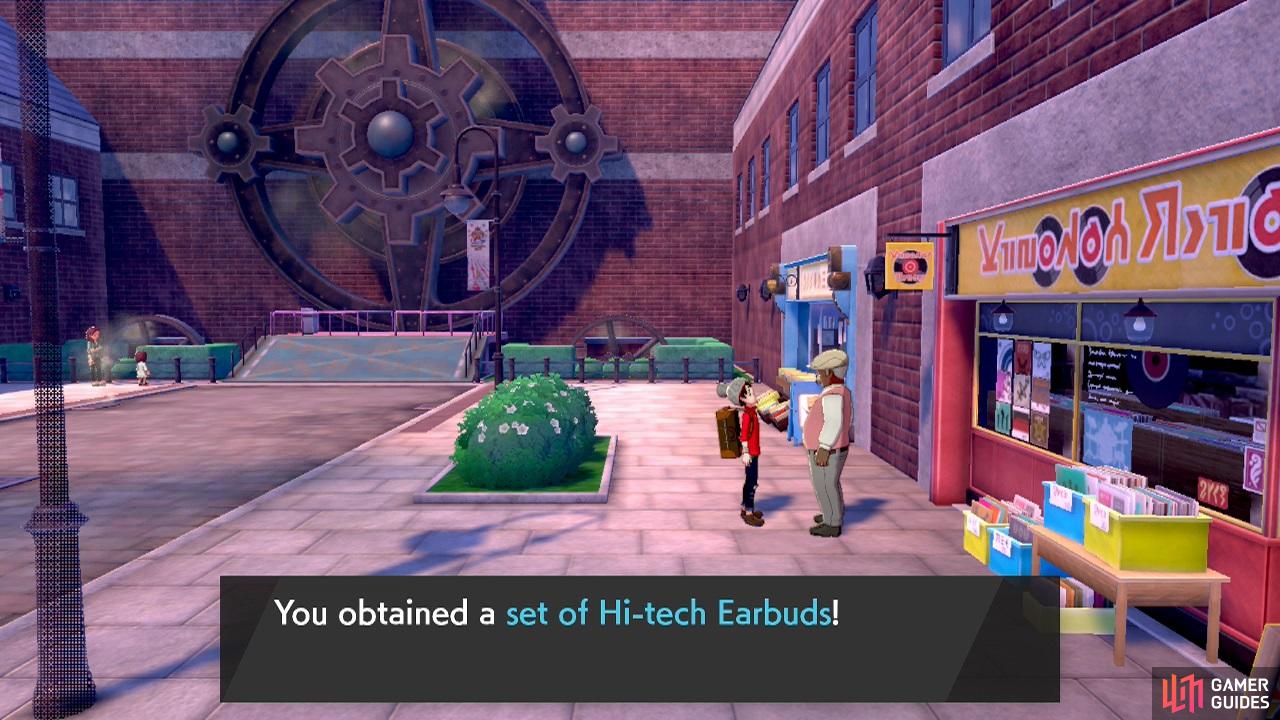
Continue along towards the people admiring the  Onix. When you reach the Onix, go left. In the corner, next to the pillar, there’s another of those sparkling spots. Search it for a snazzy Super Potion. On the other side, there are more shops, although they’re less interesting. That said, go over to the first shop on the right. You can receive some Hi-tech Earbuds from the bloke there.
While you’re there, go over to the next shop on the right. This appears to be a book store, but nobody is in front and you can’t go inside. Boo. But go over to the corner and check out the sparkling spot. You should find 2 Paralyze Heals. The shops on the left are boring, but if you’re curious, the first one is another book store, while the second one is another flower shop.
Go towards the ramp leading to the gear-shaped lift. Leon and his  Charizard partner will catch up with you. He’ll give you a hold item that boosts the power of your starter’s STAB moves: Miracle Seed for Grookey, Charcoal for Scorbunny or Mystic Water for
  Sobble. Unless you’ve given them something better, give this to your starter to hold onto.
Step onto the lift platform, between the railings. Woosh! You’ll be taken to the upper floor. Directly ahead will be the entrance to Motostoke Stadium, with Hop standing by the sliding doors. You can’t really go anywhere else right now–the paths to the left and right are currently blocked by NPCs. So you might as well say “hi” to Hop. Afterwards, follow Hop inside the stadium.
Motostoke Stadium
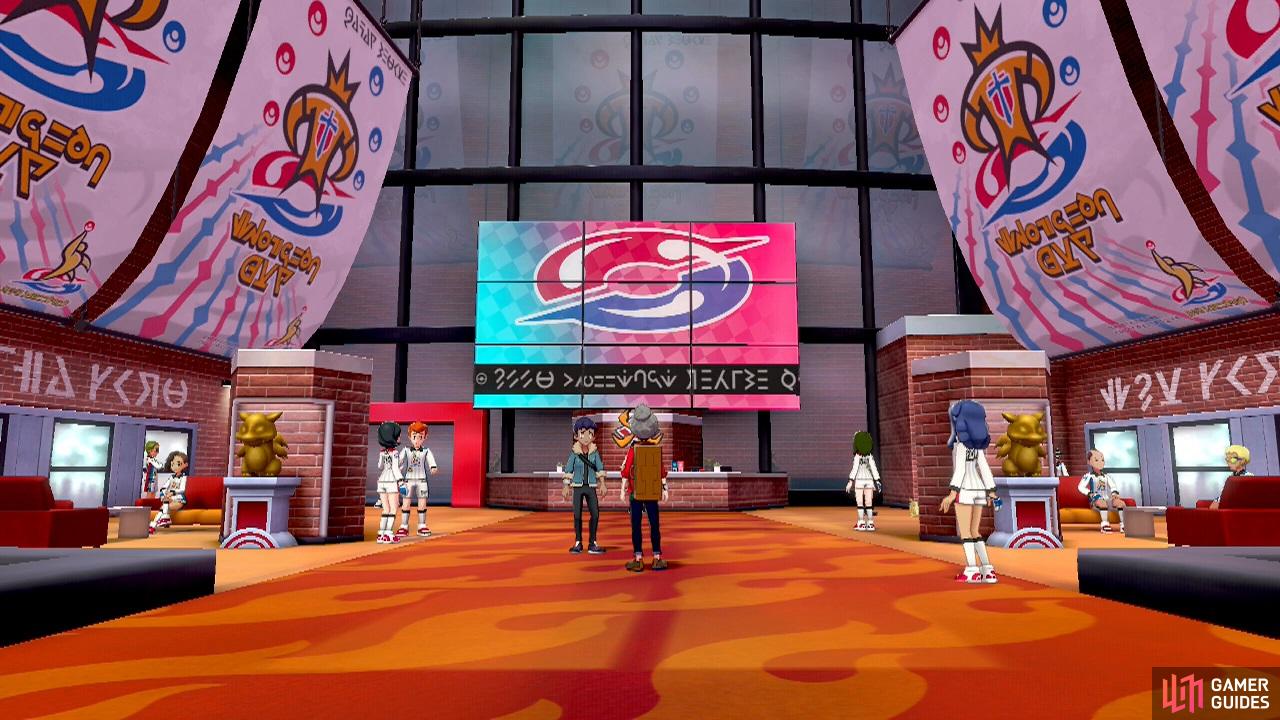
You’ll be returning to this stadium to battle the Fire-type Gym Leader.
Hop will lead you to the front desk to register for the Gym Challenge. To complete your registration, you’ll be asked to choose a number for your uniform. Your uniform number can be up to 3 digits long. You’ll see this number on the uniform you use during the Gym Challenge, as well as on your League Card. As far as we know, you can’t change this number, so choose carefully!
Having registered your details, you’re free to go. Your next destination is the  Budew Drop Inn, located west from the stadium. When you’re ready, exit the stadium. Before that though, feel free to chat to the trainers inside. Two of these trainers (the obvious ones who aren’t wearing the white uniform) you’ll be seeing a lot more of soon…
Outside, a League staff member will show you the way to the Budew Drop Inn. Go west and follow him. You’ll find him standing in front of the inn. Afterwards, you can enter the inn to rest up for the day. Or, you could keep going and explore the rest of the city. Does that sound good to you? Continue west for a while. Stop when you reach a place that looks like a warehouse, with a closed shutter.
This area is very easy to miss!
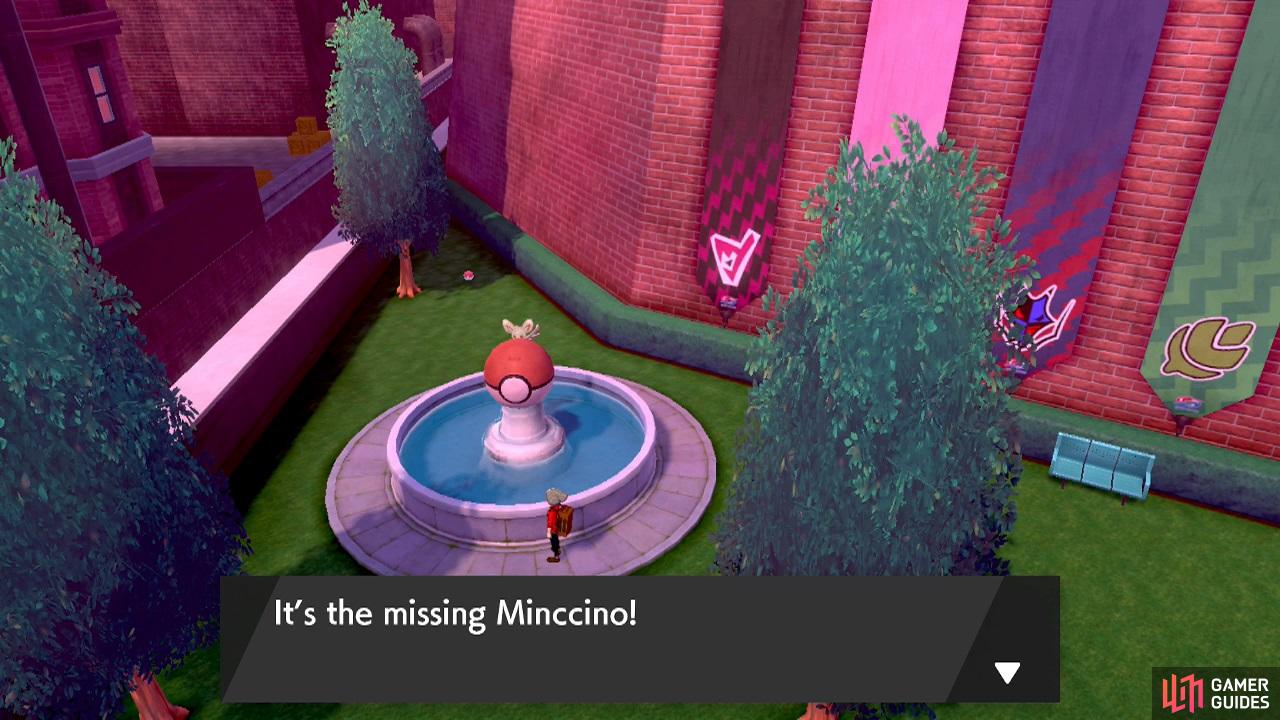
Speak to the young boy on the left-hand side. He’ll mention his  Minccino has gone missing. If you’re feeling kind, agree to help him. Now go back to the entrance to Motostoke Stadium, towards the east. Approach the sliding doors, but don’t go inside. Go left, past the nearby League staff member. You’ll reach a Poké Ball fountain. Get close and whistle to find the lost Pokémon.
The Minccino will run back home. Next, go and grab the 3 Burn Heals in the corner, next to the tree. Make your way back to the stadium entrance. Now, go right to the opposite side. There’s another fountain here. Search the sparkling spot at the bottom of the fountain for a Repel. OK, you can run back to the boy now! You’ll receive some Throat Spray.
From the warehouse, there’s a path leading south, next to a guy standing by an iron fence. This path will take you through a short tunnel. On the other side, go right, then take the stairs along the south. Keep following the metal stairway until you reach the bottom level. Over here, there’s a guy who will teach a powerful move, but only after beating the game. Right now, you can grab TM02 Pay Day.
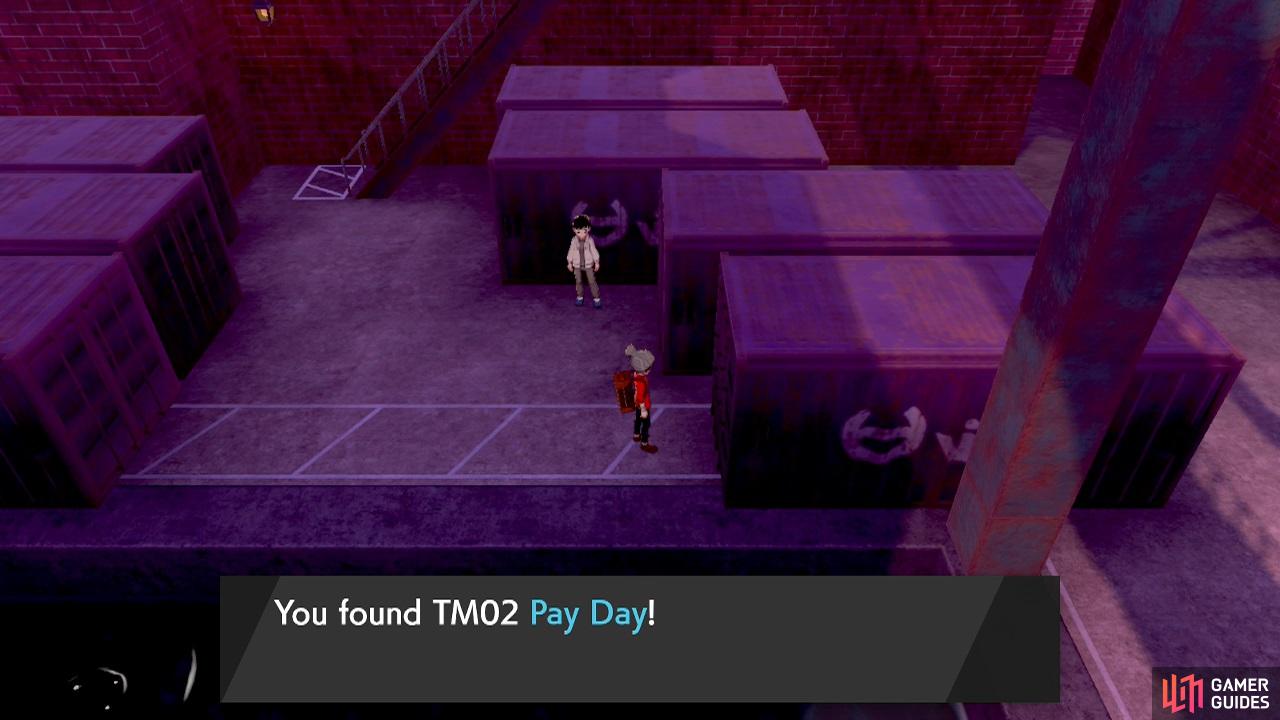
Pay Day gives you free money at the end of a battle. Cha-ching!
This luxurious accessory boosts the power of Normal-type moves when held by a Pokémon.
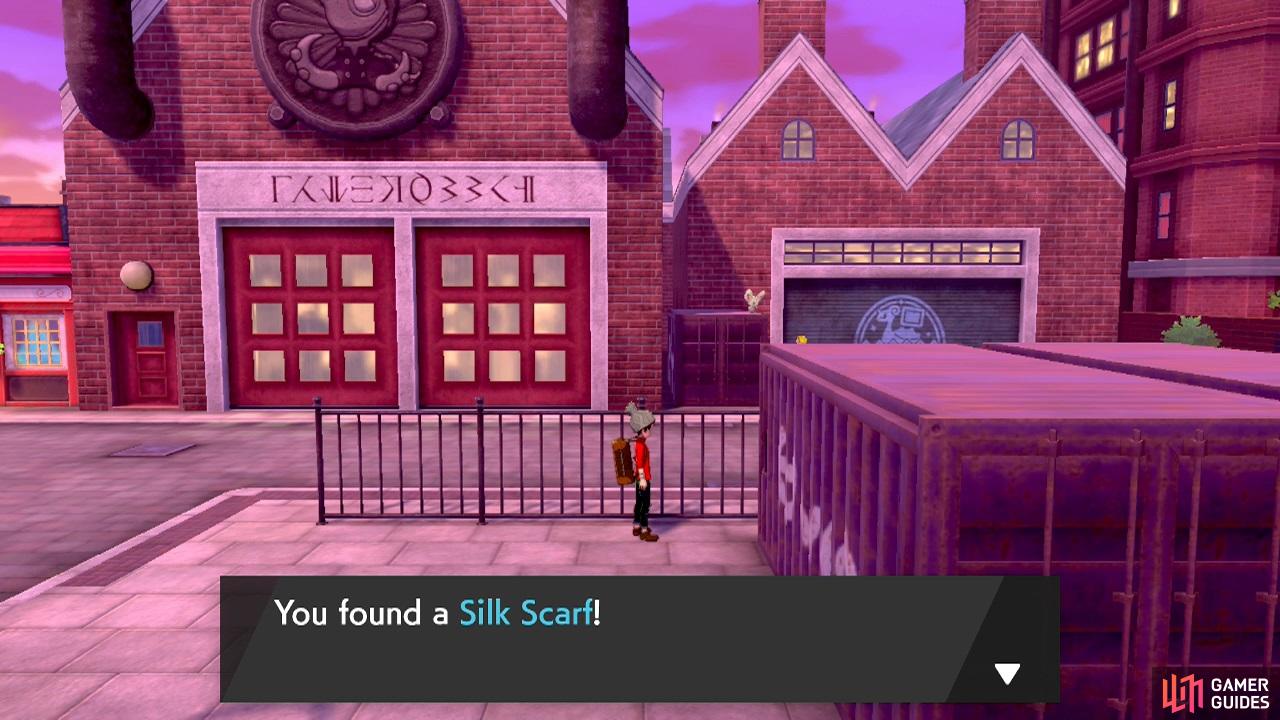
Return to the warehouse and carry on heading west. Stop when you reach the T-junction before a second Pokémon Center. See the iron fence along the bottom of the path. Go around the iron fence and pick up the Silk Scarf next to the cargo container. After that, you might as well visit the second Pokémon Center. Inside, you can buy some cool TMs from the right clerk.
Back outside, begin heading south from the T-junction. After you go past the first lamppost on the right, search the corner above the bench, where there’s sparkling spot for a Poké Doll. From here, head all the way south, past the  Wynaut playing hopskotch. After the next corner, you’ll find Motostoke’s train station on the right. Check it out if you like. You can use it to go back to Wedgehurst or the Meetup Spot.
Otherwise, continue south from the train station. Step on the lift platform to descend to the lower floor. You’ll be in a park area of sorts. Head south, down the steps, towards the canal’s edge. Next, go left, then all the way up the narrow path. Pick up the 3 Great Balls at the very end. Return to the park and head east. Over here, there’s a shop selling gym uniforms.
Outside the shop, go around to its east. In the corner, next to the building, there’s a sparkling spot where you can find a Revival Herb. If you continue east from here, you’ll return to the first Pokémon Center, near the entrance via the Wild Area. That means you’ve pretty much seen everything here. When you’re done, make your way back to Budew Drop Inn, along the north side of the city.
Budew Drop Inn
These lodgings are provided to Gym Challengers free of charge. How generous!
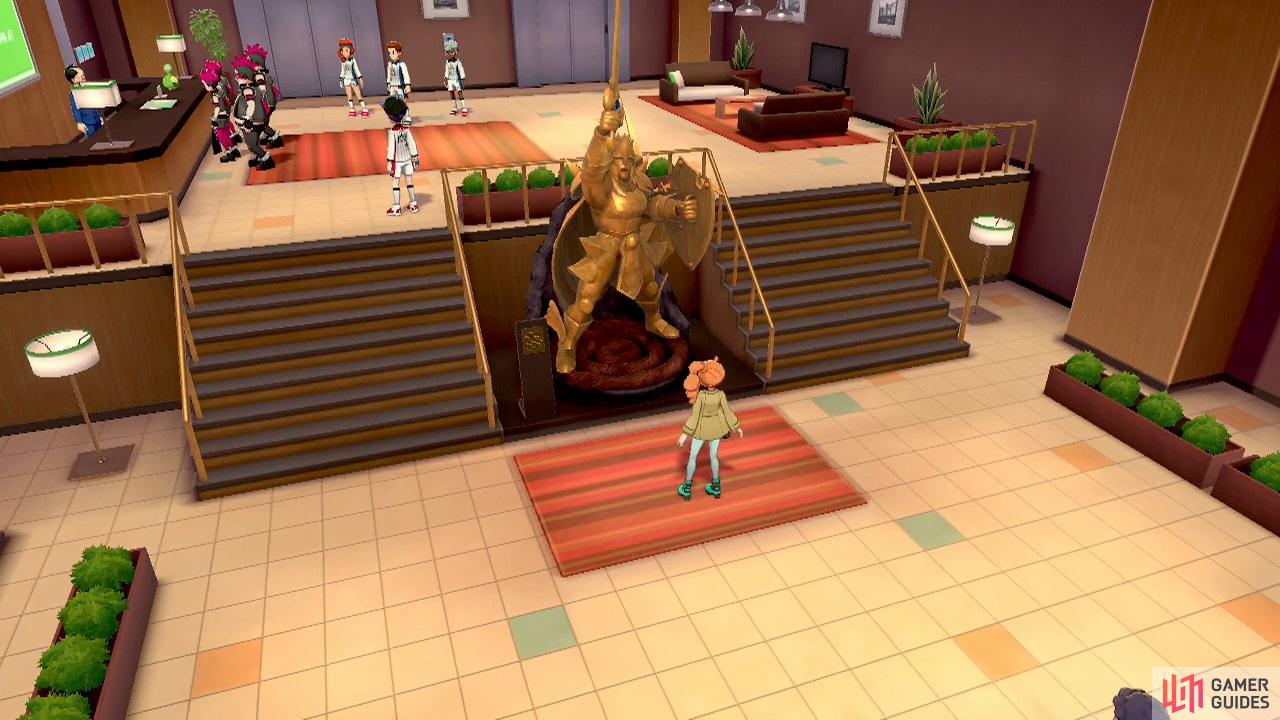
Inside, you’ll find Sonia admiring a golden statue wielding a sword and shield. She’ll give you a history lesson. Afterwards, you’ll need to check in for the night. Go up the stairs towards the reception. There will be a bunch of unruly-looking folk gathered there. Go up to them and agree to battle them. But be careful as you’ll have to do multiple battles in succession.
Team Yell Grunt
| Pokémon | Level | Type |
|---|---|---|
 Zigzagoon (Galarian) Zigzagoon (Galarian) |
9 | Normal/Dark |
This Zigzagoon is a Galarian breed. It’s Normal and Dark, so it takes quadruple damage from Fighting-types. If you caught a  Pancham from the Wild Area, that’ll really make it feel the pain.
Team Yell Grunt
| Pokémon | Level | Type |
|---|---|---|
 Nickit Nickit |
9 | Dark |
Hmm, it seems like Team Yell favour Dark-types. Fighting, Bug and Fairy-types are its bane. It’s possible you have none of those, but no need to panic, as its bark is worse than its bite.
Team Yell Grunt and Team Yell Grunt
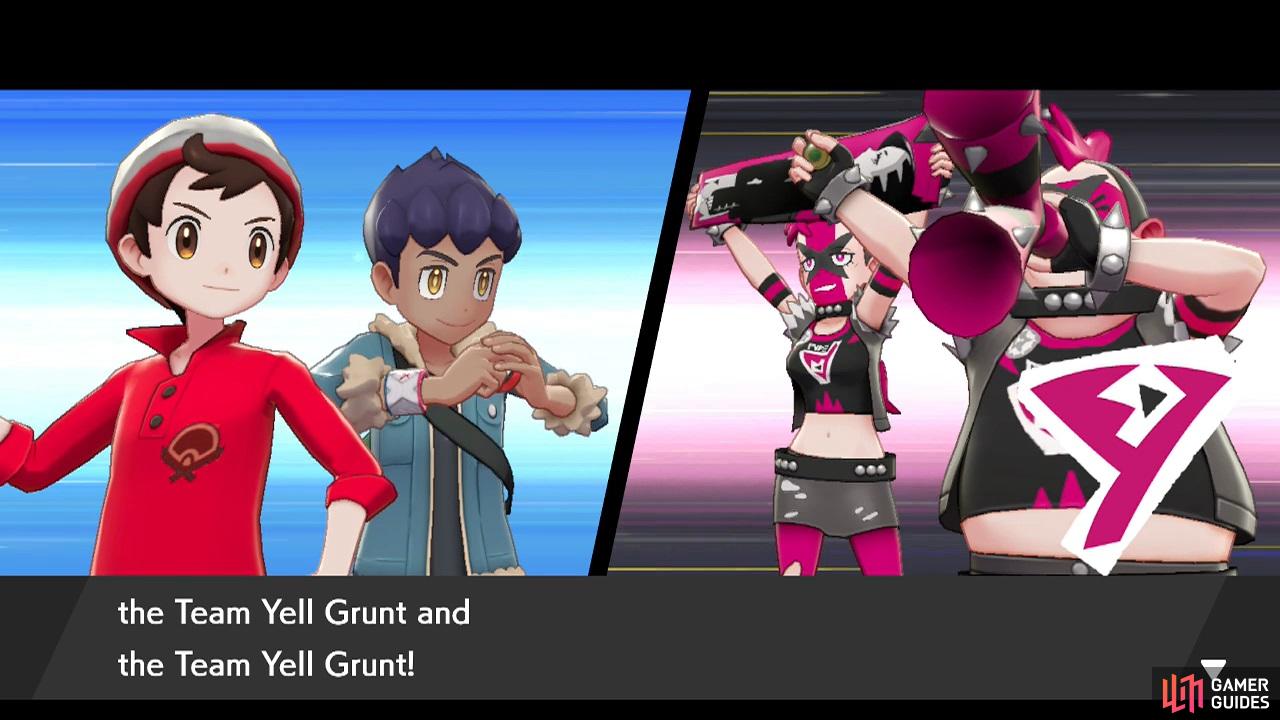
This is a Multi Battle, with you and Hop teaming up to battle two Team Yell Grunts. Hop will send out his  Wooloo first. Your opponents use the same Pokémon as the previous two fights, so you should be ready for them. Hop will also have healed your party.
After your amazing display of strength, Team Yell will scarper off. Now you can go to the reception to check in! The next day, Hop will run off ahead to Motostoke Stadium. Before you follow him, go up and enter one of the nearby elevators. You’ll arrive in the guest rooms. Head over to the room farthest to the left. Inside, there’s a chap who’ll give you a free Star Piece.
Soon as you’re ready, exit the Budew Drop Inn. A League staff member will arrive to escort you. If you want, you can let him take you straight to the stadium entrance. Or you can walk there yourself, if you’d. In any case, enter Motostoke Stadium through the sliding doors. Inside, speak to the man at the reception. You’ll don your gym uniform and participate in the opening ceremony.
Well, how’d you like that? After the ceremony, you’ll run into Leon and Chairman Rose. You’ll learn that your next destination is Turffied, accessible via Route 3. Exit the stadium. Outside, a League staff member will give you the ability to use the Flying Taxi service.
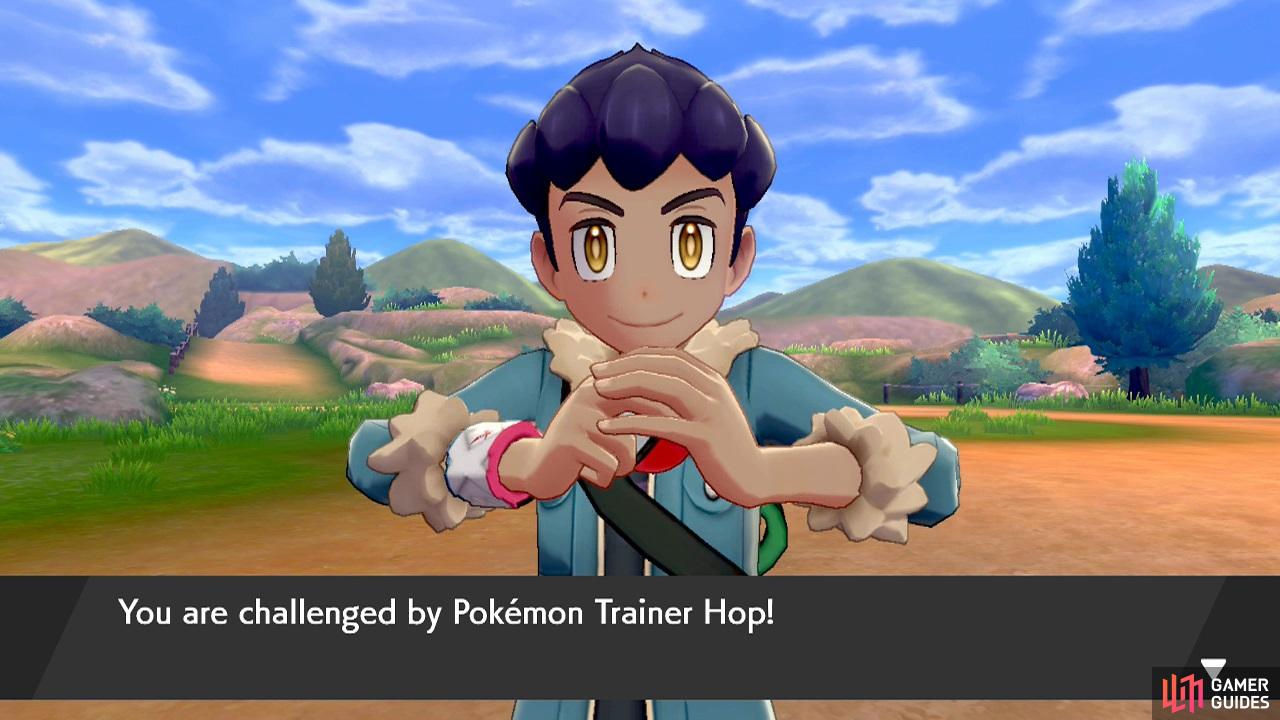
Moving on, head all the way west, back towards the city’s second Pokémon Center. Just past the Pokémon Center, Hop will be waiting for you. Waiting for a battle, that is! Let’s do this.
Pokémon Trainer Hop
| Pokémon | Level | Type |
|---|---|---|
| Wooloo |
11 | Normal |
| Rookidee |
12 | Flying |
| Sobble (if you picked Grookey) |
14 | Water |
| Grookey (if you picked Scorbunny) |
14 | Grass |
| Scorbunny (if you picked Sobble) |
14 | Fire |
Hop has the exact same team as before, but they’re all slightly stronger. Still, your team should be stronger as well. If you need help, Wooloo is weak to Fighting, Rookidee is weak to Electric and Hop’s starter is weak to your starter. For the most part, you can rely on your starter, except Grookey doesn’t want to fight Rookidee.
Despite a crushing defeat, Hop takes it in stride. Good lad. You’ll also be given Hop’s League Card. From here, continue west to exit Motostoke and reach Route 3. This is where the road to completing the Gym Challenge properly begins!
No Comments