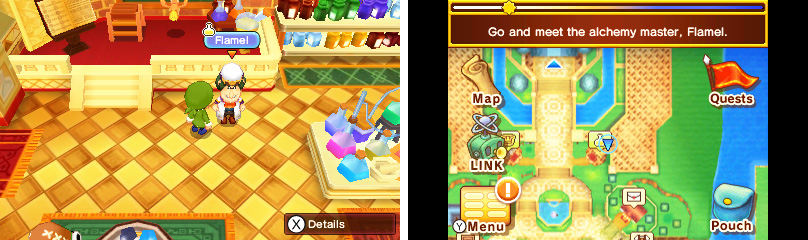
Go and meet the alchemy master, Flamel
Allowing chemical explosions near a library is a bit odd.
Turning lead into gold… is that really possible? You can find out by meeting with Flamel the Alchemy master in the Royal Castele Library . If you just came out of the castle, continue south for a few paces, then turn right after the nameless Paladin.
If you left the Guild Office instead, head north across the central plaza. Then carry on up the steps, past the Goddess’s fountain–the same route to reach the castle–and the Royal Library is the big building to the right, facing opposite the Paladin’s Hold.
Inside the library, head into the room to the right of the reception counter. Flamel is the man in the white lab suit; speak to him to find out if alchemy is the real deal.
As you’d expect of an alchemist, Flamel is… rather eccentric, but he seems to know what he’s doing. He’ll give you an Experimental Flask and ask you to make a simple HP Potion.
Talk to Beaker, the alchemy assistant
So Flamel’s assistant, Beaker, is a bird and a genius too… Well, this “lead into gold” thing is starting to sound less ludicrous already.
Try to befriend Beaker, who’s flapping in front of the indecipherable blackboard, and he’ll teach you Compound Alchemy plus the recipe for a HP Potion .
Search for Fizz in South Castele
You’ve got the knowledge to make a HP Potion, but knowledge by itself is useless in this case; you need the ingredients too!
Leave the Royal Library and head back towards the central plaza, then take the south exit into South Castele . Apparently you’ll find Fizz the Alchemist somewhere here.
Well, if the red arrow on your map is any clue, run all the way south, past the crossroads, and follow the path as it bends to the east.
After crossing the second wooden bridge, you should notice somebody’s presence to the north east. Hey, could that be Fizz?
Go back to the library and talk to Beaker
Shiny spots near water and weeds are common gathering spots for Alchemists.
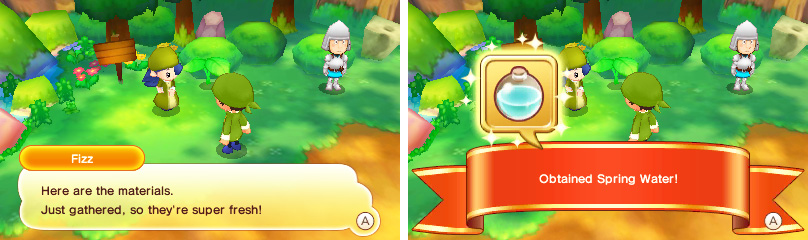
Fizz is very helpful and gives you some Spring Water and Healweeds . When you have free time, you can get more Spring Water by inspecting the nearby spring and Healweeds by pulling the weeds (or just buy them from shops).
With all the ingredients obtained, make your way back to the Royal Library, using the same route you came. Whew, you’ll probably need to make yourself a SP Potion after all this running… Once you’re back, show Beaker what you (or Fizz, rather) found.
Use your skills to make a HP Potion
You’ll learn the Alchemy skill from Beaker, which allows you to perform alchemy!
Before you get ahead of yourself, open the Menu and navigate to the “Gear” section, then select the Experimental Flask as your tool. It’s experimental, but still safe to use…. hopefully!
Next, do as Beaker suggests and inspect the workbench near the bottom-right corner of the room to begin. You can only make a HP Potion right now, so select that as your recipe from the Medicines section.
Alchemy can potentially have dangerous results, but it’s still crafting and follows the same procedures. However if you’ve never tried crafting before, carefully read the instructions.
Your workbench is separated into three distinct sections:
- Left: Hold the A button to stir with your stick .
- Centre: Mash the A button to shake your test tube .
- Right: Press the A button when the moving cursor is in the centre (over the A button icon) to swivel your flask .
At the beginning of each new project, you’ll start in the centre and you can move to different sections by pressing Left or Right on the D-Pad or the L or R buttons.
To create your concoction, you must follow the instructions outlined in the bottom-left corner of the top screen, going from left to right. The instructions are random and typically look something like Flask, Test Tube, Test Tube.
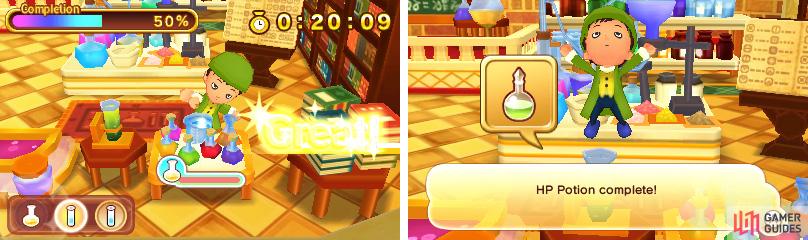
HP Potions are easy to make and commonly used to treat light wounds.
In the above example, you would first move right and press the A button with the correct timing. Once that’s done, move left and mash the A button twice. This might sound complicated, but it’s easy in practice.
Initially, there may be only one set of instructions to complete your project. However as the potions and whatnot get more logic-defying, there will be more and more steps that you must complete before you’re done with your mixture.
To view your progress, refer to the Completion gauge in the top-left corner. Once it reaches 100%, your item will be ready for general consumption!
But it’s not a stroll in the park as you have a time limit to contend with, as shown by the timer in the top-right corner. Fail to reach 100% completion before time runs out and you won’t have anything to show. You won’t lose any materials; maybe just a little sanity.
If all of this sounds as ludicrous as actual alchemy, just give it a spin and you’ll probably find it easier than you imagined.
Speak to Flamel
Nice! You created a HP Potion! It’s not gold, but you’ve got to start somewhere and HP Potions are always useful to have. Don’t forget to show Flamel.
Talk to Rupert outside Castele General Goods
It’ll take more than a HP Potion for Flamel to recognise you as a bomb-maker… ahem, Alchemist. For your next task, you’ll be helping a luckless lad by the name of Rupert.
Right now, he’s at Castele General Goods in Castele Square. Exit the library and head south to the central plaza, then move towards the direction of the east exit.
Castele General Goods is the first building along the south and Rupert’s diligently standing outside. Rupert needs help from an Alchemist to make a Lucky Charm –that’s you, by the way.
Speak to the merchant in the Artisans District
Easy answer for everything: “It’s for science!”
Rupert teaches you the recipe, but you still need the ingredients of course. According to the ever-so-slightly nosy Fizz, you can buy some of the ingredients from the merchants in the Castele Artisans’ District.
Go around behind the building and turn into the east exit, into the Artisans’ District. From there, head directly south into the merchants’ street.
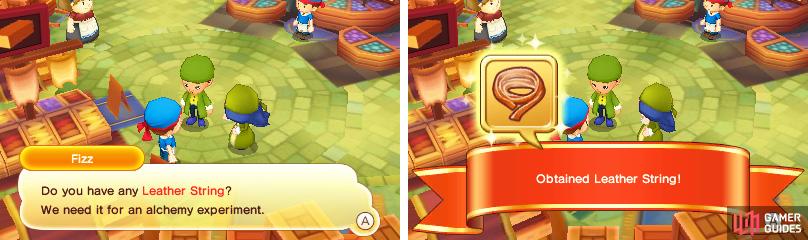
To begin with, you need some Leather String , which can be gotten from “Fine Woods and Leather” in the bottom-left corner. Since you’re a newbie, there’s no need to pay the shopkeeper.
See the Shady Shop Clerk in the Artisans District
Next, find your way to the right-most stall, “Material Wonders”, and interrogate the so-called “Shady Shop Clerk”. The shop doesn’t have a Dangerous Object for sale, but Suspicious Objects on the other hand are aplenty. Those will have to do…
Search for the dangerous person in Castele
We couldn’t make this up; apparently a Suspicious Object can be turned into a Dangerous Object in the presence of a “dangerous person”.
Even better, a “dangerous person” has been spotted in Castele recently. This sounds totally dangerous, but let’s go look for this person anyway.
In a case like this, where it’s not obvious where you should go, follow the red arrow on the bottom screen. This will involve returning west to Castele Square then approaching the suspicious individual by the Goddess’s statue in the plaza.
Go and see Flamel
We’re surprised nobody got badly hurt, but you managed to acquire your Dangerous Object . That’s two out of two ingredients found, so hurry back to Flamel in the library to get his valuable opinion.
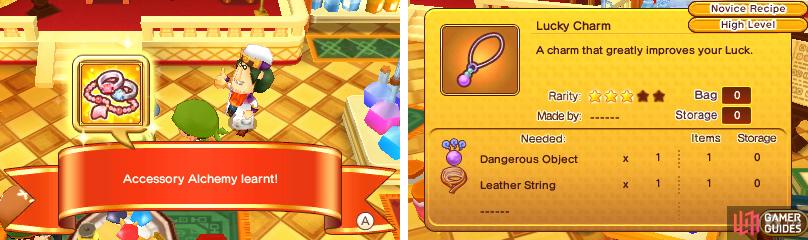
Use your skills to make a Lucky Charm
Later you can even make Diamond Rings; that’s pretty much gold, right?
Flamel teaches you Accessory Alchemy ; it’s not just chemicals you can make, you can make jewellery and trinkets too! Whoa, this is crazier than gold from lead!
The stars have now fully aligned and the only thing left to do is approach the workbench and select the Lucky Charm as your recipe from the Accessories section.
Because the Lucky Charm is slightly more complex than a HP Potion, there are more steps to making it, but nothing you’re not prepared for. Just give it your all and you should make the charm and not an explosion.
See Rupert outside Castele General Goods
Somehow you made the Lucky Charm and nothing blew up. Rupert’s probably waiting agitatedly outside Castele General Goods, so hurry outside and give it to him.
Rupert doesn’t quite know how to express his gratitude, but then he remembers the universal form of expression: dosh and 500 Dosh at that.
Fizz is super-pleased with you too, but where’s Flamel to congratulate you? It’s a bit unorthodox but Fizz does the honours for her master and acknowledges you as a Fledgling Alchemist !
No Comments