Go to Flutter
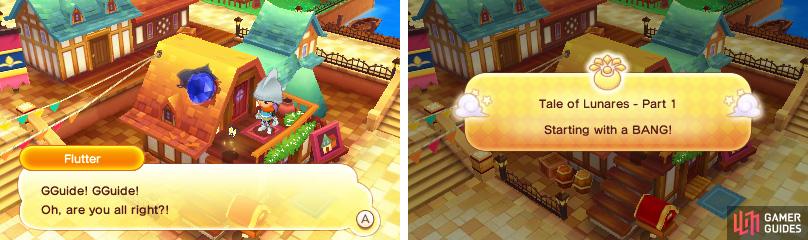
More exciting than your usual morning.
The story literally starts off with a bang as a piece of space rock crash lands in your roof. Fortunately nobody seems to be hurt, yourself included. However, just to be safe, go downstairs to the left to check up on Flutter.
Talk to Pam
Apparently the rock in your roof is a “Doom Stone”, but before you can so much as take a glance at it, it’s shipped away by Professor Hughes and his research assistants. Well, so much for that.
At the same moment, Pam comes rushing back home. You must be eager to fill her in on the details, right?
Go to the East Grassy Plains
According to Pam’s intel, another Doom Stone was found in the East Grassy Plains . Not wanting to miss the chance to properly see a Doom Stone, Flutter drags you off in the direction of the plains.
You’ve already been to the East Grassy Plains once to fulfill one of Flutter’s Requests so you can’t have forgotten the directions. From Castele Square where you are, run south into South Castele. Then follow the path south, past the crossroads, and east after the path bends.
As soon as you cross the second bridge, a boy in blue will come running, asking you to hide his identity and, hot on his heels, a group of royal paladins. Talk about suspicious…
After Flutter hapzardly diverts the paladins aways, the mystery boy confesses he’s searching for the Doom Stone too. So to make matters easier, the two of you decide to tag along.
Go and see the Doom Stone
He means you should sharpen your daggers.
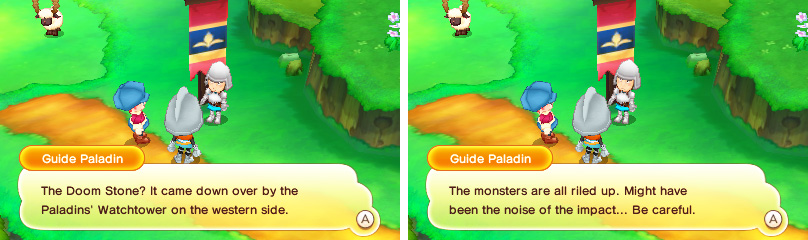
Somewhere in the vast East Grassy Plains is a Doom Stone, but where do you even begin to find it? Luckily, there’s a Guide Paladin stationed just past the entrance who may know a thing or two–the same paladin who gave you his spare Healweeds earlier.
According to him, the Doom Stone fell past the Paladin’s Watchtower towards the north-west . So without further ado, set a course north-west, across the beautiful plains!
Upon reaching the watchtower, a snoozing paladin will reaffirm that the Doom Stone fell in the lands beyond.
Continue north-west, over the bridge, and you’ll soon meet another paladin, standing guard over the impact crater. But where’s the Doom Stone itself? Hmm, we wonder…
Search for the crooks
Obviously, those no-gooders who robbed you earlier took off with the Doom Stone. You could wander the plains aimlessly in search of them, or you could follow the red arrow on the bottom screen, which points in the direction of Haniwa Cave , along the west of the plains.
You’ll know you’ve found the right place when you catch sight of a,,, rather “artistic” signpost, warning you to keep away. Let’s do that… not.
Proceed further into the cave
Totally disregarding the warning sign, enter the cave just ahead. Inside, follow the cavern path east, then south. Soon you’ll bump into the crooks, but all they’re doing is panicking over something deeper within.
Pluck up your courage and continue further into the cave. Once you near the subterranean stream, cross the small wooden bridge and head east towards…
Smash the Doom Stone!
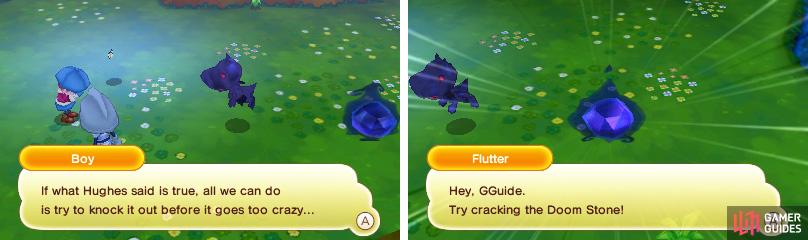
Both of their methods are correct, so choose one and make it quick!
Before your eyes is a shadowy monster and a Doom Stone lying on the ground.
You’ve got two choices here: attempt to defeat the monster or try to break the Doom Stone. Should you defeat the monster, you will still have to break the Doom Stone.
Attacking either first works, although if you’re in a non-combat Life, you might want to avoid fighting the thing that fights back if you can. Good thing you’ve got the boy to act as a decoy during the battle!
If you end up targeting the wrong thing, remember you can press the Y button to swap targets.
Report back to Pam
After that very exciting battle, the last thing you need to do is report to Pam back home. For your efforts, you’ll receive 1000 Dosh from Hughes too. Score!
No Comments