Go and meet the Blacksmith master, Vulcan

The Royal Workshop is a busy place with the sounds of hammering, threading and sawing.
To become a recognised Blacksmith you first have to impress your new Master, Vulcan, who’s waiting for you inside the Castele Royal Workshop in the Castele Artisans’ District .
As they say, “strike while the iron’s still hot”, so promptly head east from Castele Square towards the Artisans’ District. From the entrance, you’ll find the Royal Workshop immediately to your north–it’s the unmistakably big and grand-looking building.
Inside the workshop, head forward, then down the stairs to your left. Vulcan is the burly man standing in front of the furnace; pluck up your courage and let him know why you’re here. After hearing your story, he’ll give you a Fledgling’s Hammer to get you started.
Speak to Vulcans assistant, Fyra
Having gotten a hammer, head for the bottom-left corner of the room and speak to Fyra, Vulcan’s trusty assistant to learn how to be a Blacksmith.
Seeing as you’re just a Novice, Fyra teaches you the simple Bronze Ingot recipe and tasks you with finding the materials to make it.
Speak to Daniel the Miner in East Castele
Normally you can buy Castele Copper from “Ores and Mine” in the Artisans’ District or mine it yourself as a Miner, but for this task you’re just going to ask a Miner for some.
Head outside, back to the Artisans’ District, and run east along the streets to East Castele . Once there, continue east, then follow the trodden path south until you reach the minecart tracks near the south east.
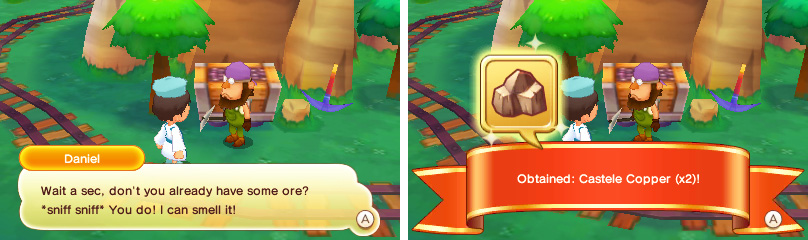
Daniel will give you Castele Copper even if you already have some…
Walk in the direction of the tracks and you’ll find Daniel the Miner halfway along. Blacksmiths and Miners help each other and Daniel doesn’t mind giving you two pieces of Castele Copper.
Go and see Fyra
Now that you have the necessary materials, return to the Castele Royal Workshop, going back the same way you came. Then show Fyra your newly acquired Castele Copper.
Impressed with your quick work, Fyra teaches you the Smithing skill and encourages you to try it out.
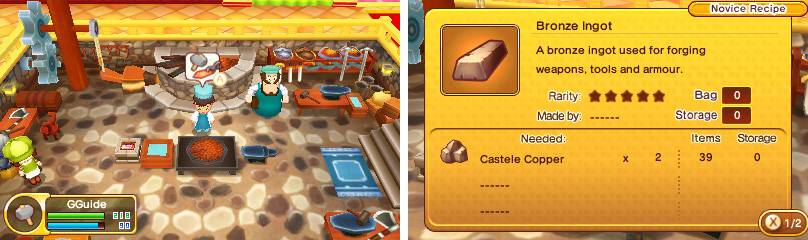
Use your skills to craft a Bronze Ingot
To begin with, equip your Fledgling’s Hammer by opening the Menu and navigating to the “ Gear “ section. You can’t pound things without a hammer in your hand, after all.
Next, inspect the crafting table in the middle of the room to begin your work. You’ve got exactly enough ingredients to make a Bronze Ingot, so select it as your recipe by going to the Materials section.
At this stage, if you’ve never made an item before, listen up!
Your crafting table is separated into three sections:
- Left: Hold the A button to cool your metal bar .
- Centre: Press the A button when the moving cursor is in the centre (over the A button icon) to hold your tongs and apply heat.
- Right: Mash the A button to pound with your hammer .
At the beginning of each new project, you’ll start in the centre and you can move to different sections by pressing Left or Right on the D-Pad or the L or R buttons.
It’s almost impossible to fail a Bronze Ingot, so relax and get used to your workspace.
To forge your item, you must follow the instructions indicated in the bottom-left corner of the top screen, going from left to right. The instructions are randomised and typically look something like Hammer, Hammer, Metal Bar, Tongs.
In this example, you would move right, Mash A twice, then move left twice and hold A, before finishing by returning right and pressing A with the correct timing. If this sounds a bit ridiculous, it will make a lot more sense when you try it.
During the early stages of your career, there may be only one set of instructions to complete your project. However as the items get more complex, there will be more and more steps that you must complete before you’re finished.
To view your progress, refer to the Completion gauge in the top-left corner. Once it reaches 100%, your item will be wielded to perfection!
However there’s a slight catch as you’re crafting against the clock, as shown by the timer in the top-right corner. Should you fail to reach 100% completion within the allowed time, you will fail to make anything. Fortunately, no materials are lost; only your time and effort.
Now that’s a lot to explain, but just try your best to make that Bronze Ingot and everything should become clear.
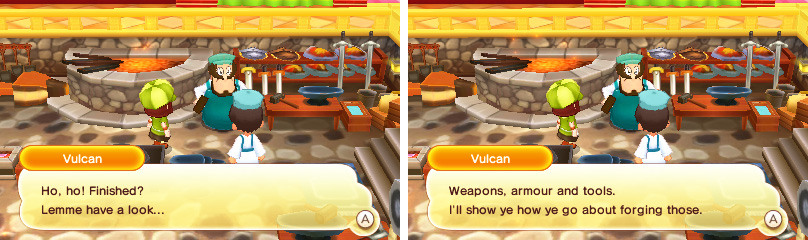
Speak to Vulcan
Once you’ve made the Bronze Ingot, show it to Vulcan to see what he thinks.
Head to Steeles house in the Artisans District
Vulcan is slightly… or mightily impressed with your work and gives you your next challenge: to help Magmia, Steele’s granddaughter, craft something special.
You’ve completed the first step, but you’ve still got one more step to go.
You won’t learn anything just standing around, so return to the Artisans’ District and this time head south, through the merchants’ street, then head east after the corner. Steele’s House is the first house after crossing the bridge.
Head to the Artisans District
Steele didn’t seem too enthusiastic, but nevermind him for now. Magmia will teach you the recipe for the Custom Bronze Sword and offer to accompany you in search of the materials. With Magmia in tow, leave Steele’s House.
Talk to the shopkeeper in the Artisans District
The first place you must visit is Ores and Mine, which sells ores and other things that Miners dig up. Return west to the merchants’ street and speak to the second shopkeeper along the north.
Unfortunately, he doesn’t have any Red Ingots, but he does have two Bronze Ingots for you and hints that you can turn them into Red Ingots.
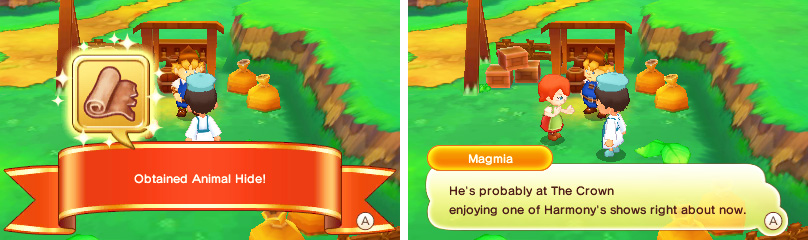
Speak to the Hunter, Pete, in South Castele
Next, you need some Animal Hide, which Hunters often find. Exit the Artisans’ District via the west back to Castele Square, then make your way south into South Castele .
Continue south down the road until you reach the crossroads with a handy Save crystal nearby, then alter course and head east.
After passing Giles’s Farm and just as the road begins to bend, head south into the nearby sheep pen. Huntin’ Pete is standing in the corner and he’s probably got an Animal Hide to spare, if you ask nicely.
Head to The Crown in the Shopping District
Searching for materials isn’t always easy; think of this as a preview.
Well, you’ve got all the materials… kind of. You still need some Red Ingots, however, and there’s probably only one man who knows how to make one–Steele, who’s usually at The Crown at this time of day.
It’s a long way to The Crown, so prep those running legs. Head back to Castele Square, where it all began, and turn left into the Castele Shopping District.
From here, head in a south-westerly direction, past the grocery stalls, then turn south into the back alleys. The Crown is the building immediately to your right, as soon as you enter the alley.
Search for Steele
Steele isn’t in The Crown; apparently he left midway. There’s no point sticking around, so leave The Crown in search of Steele. If you’re lucky, he may be closer than you think…
Go and see Vulcan in the workshop
You didn’t find Steele, but you did find the legendary Ironsmith! Hang on, didn’t the Ironsmith look just like… Anyway, to the issue at hand!
Now that you’ve got some Red Ingots, you should report back to Vulcan in the Royal Workshop to let him know your progress.
Use your skills to forge a Custom Bronze Sword
Vulcan teaches you the Weaponsmithing skill, which means you’re all set to make that Custom Bronze Sword!
Inspect the crafting table like you did earlier and select the Custom Bronze Sword from the Weapons section. Forging this unique weapon requires more steps compared to a Bronze Ingot, but the crafting process is essentially the same.
Report back to Vulcan
When you’ve successfully made the Custom Bronze Sword, hurry and show it to Vulcan to see what he thinks of it.
No surprise; Vulcan is rather pleased with your work and Magmia is more than delighted. The big surprise is that Steele comes barging in, saying your work isn’t too shabby. That’s not all, as he teaches your the Armoursmithing skill to round off your skill set.
To seal the deal, Magmia gives you 500 Dosh in acknowledgement of your services. Now everyone ’s happy! Finally, to end it on a happy note, Vulcan hereby promotes you to a Fledgling Blacksmith . Keep up the good work!
No Comments