
Don’t worry: there’s an easier way to get to Port Puerto now!
It’s another round of Flutter’s Aftercare! Today, we’re going to see how our friends at Port Puerto are faring even though it’s just been a day since we last saw them.
For those feeling extra adventurous, the road to Al Maajik is now open too. To get there, instead of entering Port Puerto while in the West Grassy Plains, follow the path south towards the Desertward Ravine.
The Wild Blue Yonder!
This is a great request to begin with, as it will make travel to Port Puerto much easier.
At long last, the airship in West Castele is ready to take passengers. From Castele Square, head west into the Castele Shopping District, then continue all the way west.
Upon arrival, you’ll find the Airship Dock immediately to your left, although you will have to go south a bit to find the entrance.
Once there, speak to the Staff in the far end corner to learn all the details. In short, you can travel straight to Port Puerto from here, by paying a small fee, naturally.
After clearing the Al Maajik Story Quest, you can use the airship to travel to Al Maajik too.
As compensation for unable to provide free travel, the Minister will shove a Portrait of Erik in your face. Hmm, where can we sell this priceless piece of art? Just kidding!
Pro Pirate: Olivia Pescado!
Pirate Princess Olivia is waiting in the Pirate Ship’s Cabin , along the west end of the Marina, where you first had a proper conversation with her.
Like any good pirate, you can’t keep Olivia away from an adventure and she kindly lets you invite her to your party whenever you’ve a free moment.
By day, you’ll find her in her noble outfit in the Palace Parlour, while by night she’s rocking her pirate outfit in the Pirate Ship’s Cabin.
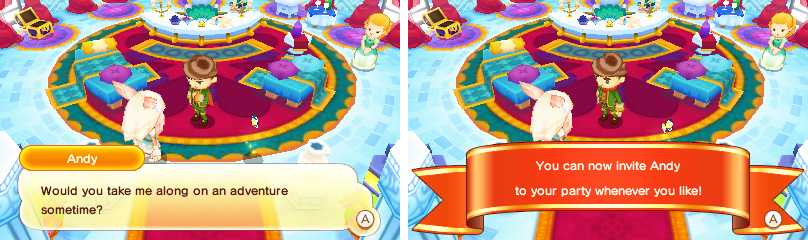
Pro Assistant: Andy Pescado!
Should we be worried about a guy who couldn’t fend off a pack of Coyotes?
If you’re looking for Assistant Governor Andy, he’s nowhere else but at the Palace Parlour where you first discovered his true identity.
Not wishing to be outdone by his sister, Andy also welcomes you to invite him to your party during any of your adventures.
During the day, he’s standing towards the south of the Parlour, while at night he’s casually strolling around the Beach District, a few paces away from the bar.
Land-Ho!
Remember the gang of pirates who harrassed Olivia at the beginning, but were actually just showing tough love? These goons are lingering where you’d expect them to be: at the Pirate Port , along the west side of the Marina.
You won’t be sent home empty-handed either, as the pirates give you a Pirate Ship Wall and Pirate Ship Floor to fashion your home into a pretend pirate ship. Ahoy, mateys!
Elises Lighthouse
This is the place where Olivia finally decided on her future path and it was thanks in part to Ahab. Speaking of which, Ahab is right inside.
At the top of the lighthouse, you’ll get to enjoy the ocean scenery with Ahab and receive his freshly caught Sweet Fish Pastry . Seriously?
Holiday Home: Port Puerto
You may have noticed the intriguing letter about a holiday home in Port Puerto. Make your way to the eastern end of Port Puerto’s Palace Way and lo and behold: Luciano is waiting for you like promised.
Besides expressing his eternal gratitude, Luciano offers you a once-in-a-liftetime chance to purchase the holiday home that you can see just ahead.

Of course we d– wait, how much!?
If you buy the holiday home, you will gain an additional place to rest, display furniture and, perhaps most importantly, to teleport to from your map. It would definitely make returning to Port Puerto a breeze.
Of course, you don’t get a holiday home for free: the total cost comes out to 50,000 Dosh .
Whether or not you can afford the holiday home, you’ll be given a Portrait of Olivia to cherish and perhaps place in your new home.
No Comments