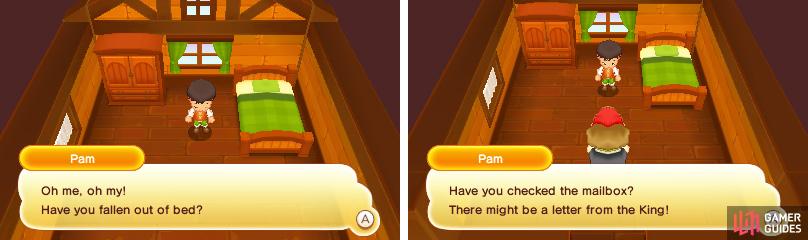
Falling out of bed: just your everyday occurrence.
Go outside
Your first day in Reveria begins in spectacular fashion, with your character lying face up on the floor, totally oblivious to the purpose of a bed.
As soon as you’re on your feet, you’ll be visited by Pam, your cheery landlady, who kindly informs you that you’ve received a potentially-very-important letter.
That letter isn’t going to read itself, so after all the talking is done, navigate yourself to the very south of your room. Then, when prompted, press the A button to “ Go outside “ as the objective on the bottom screen tells you to.
Likewise, if you’re standing in front of an entrance of a building or area (or an exit), you can enter (or exit) with the A button as well. This should be obvious to most people, but we’re just covering our bases!
Check the mailbox
Outside, you’ll emerge on the landing of a quaint medieval-style house, with Pam below directing you to the red mailbox just down the stairs to your left.
Making sure you don’t trip and fall, head down the stairs to the pavement and press the A button when next to the mailbox to inspect it.
Ta-da, it’s a tutorial–and for good reason too! Throughout the course of the game, people will send you letters and these obviously will end up in your mailbox. You can also view in-game tutorials (like this one) via the mailbox as well.
As such, it’s good practice to check your mailbox every now and again, in case you’ve got a letter. You’ll know there’s a letter if a red exclamation mark appears over the mailbox.
Plus the game will constantly display a hard-to-miss message if you enter your room or pass by your mailbox without checking it.
Inside your mailbox, there’s one unread letter–a Letter from the King inviting you to the royal court. But not before you’ve acquired a License.
You can’t very well decline an invitation from the king, so you’ll need to do something about that non-existent License…
Talk to Pam
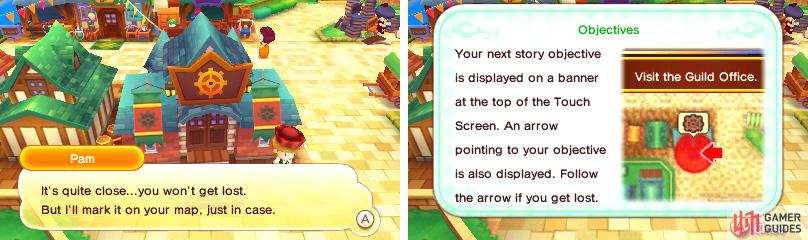
Fortunately Pam is a rather helpful landlady and points you to the direction of the Guild Office , where a Life License can be acquired.
Before letting you go, Pam will shove one of her candies in your face, which prompts the game to teach you about the Pouch feature.
Tap the Pouch icon on the bottom-right of the touch screen to use or assign consumable items (such as healing potions) for quick use. It’s quite handy in a pinch and you may want to test it out by using Pam’s Candy.
After that, the Prelude begins for real and you’ll be free to go on your merry way!
Visit the Guild Office
New places always seem so big and nobody wants to get lost.
The Guild Office is just a few paces away, but in case you get lost, you can simply follow the red arrow on the map on the bottom screen. In the future, if there’s a location you must visit, you can follow the red arrow as well. How handy!
From your initial position, go up past the steps, then turn left after you’ve passed the two Paladin guards. Before long, you should notice a building with a wheel symbol above its door and a lady standing patiently outside.
Head towards its door and the name of the establishment will appear along the top of the top screen: Castele Guild Office. The Guild Office is a very important location–one you’ll be visiting very often, so it helps if you know where it is.
There’s no need to be shy; just head on inside. You’ll be greeted by the affable Guild Master and receive your first License from him. Without a License, you can’t do anything, so good thing you’ve got one now.
Head to the square
At the moment, your License is a blank one, so you still can’t do anything yet… But you’ve got what the king wanted to see and that’s all that matters right now.
Except for the sudden commotion outside. What’s that about? Exit the Guild Office, then sprint to the right to see what exactly is going on. Don’t worry: we won’t call you “nosy”.
Save the butterfly!
Apparently a pair of punks are harassing a… talking butterfly!? Or are they the ones being harassed? Either way, the butterfly, “Flutter” needs your help.
Offer to help (as if you’ve got a choice…) and you’ll get robbed. Hang on, you’ve got no money though… No! Your precious candy! (By the way, this scene is fairly amusing if you eat Pam’s Candy beforehand.)
If it wasn’t apparent, money–or Dosh as it’s called here–is just as important as in real life. Right now, you’re a penniless pauper, but when you finally get a Life you can work and earn Dosh!
Head into the Royal Court
After your little show of heroism, it’s high time you visited the castle like you were supposed to. Conveniently, the castle is located directly ahead, so set a course for your legs north, up the stairs and past the water fountain.
At the very end, press on through the big door to enter the Castele Castle Reception Hall . Mind your manners!
Follow the red carpet north, then clamber up the stairs on either side. Attempt to enter the big door upstairs and you’ll be stopped by the Paladin guards. Their reason: your appearance isn’t up to scratch. How offensive!
Return back down the stairs and towards the castle entrance, wearing your best “angry” face to show them how angry you are.
As it happens, Flutter, the talking butterfly from earlier, is also having problems trying to get a royal visit. Life sure is harsh sometimes.
But wait! Flutter has an idea that will let both of you visit the King without anyone’s disapproval.
Just comply with her idea (again, you hardly have a choice), then return to the Paladin guards who tried to stop you earlier. Except this time they’ve got nothing to say to stop you.
Meet the King
How’d you like that? Equipment fit for a king!
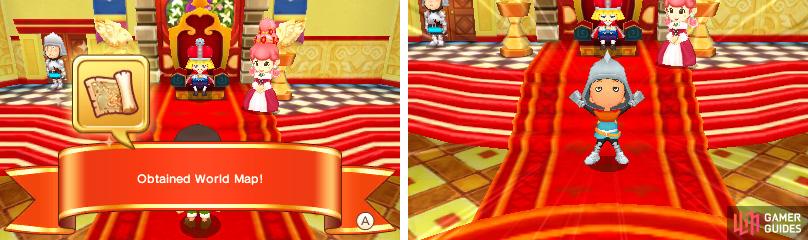
Inside the Royal Court itself, you will have a… rather interesting audience with the… rather interesting King. He will also kindly outfit you with 300 Dosh , a World Map and a set of Novice equipment.
Now that you’ve got some new equipment, if you ever want to change your equipment, simply open the Menu (tap “Menu” on the bottom screen or press the Y button) and navigating to the Gear section.
With the King’s speech over and your character enlightened to the concept of a Life, that’s the Prelude over and done with! It’s time to begin the actual, main game!
Leave the castle
But before that, you still need to leave the castle. Of course. Go back the way you came, down the stairs and back through the castle entrance.
Upon stepping foot in town again, your little butterfly companion will reappear and say her farewells.
Although doing that would make her incredibly lonely, so she asks to join you in your little adventure. You can’t say “No”, so you may as well get used to her.
Finally, the game will teach you about the Map and how to Save your game. Both are very important functions, especially the latter, so do pay attention!
Besides letting you study Reveria’s geography and locales, you can use the Map to “ Quick Travel “ (i.e. teleport instantly) to specific locations, such as your house or the Castele Guild Office. Useful if you’re far from civilisation.
Saving can be done by inspecting one of the blue winged crystals dotted around Revera. In Castele itself, there’s almost one Save crystal in every screen.
You can also Save by inspecting the bed in your room. You can even Quick Travel to your room to Save, so there’s no excuse to not saving!
Anyway, that’s the Prelude wrapped up and a half. We’ll see you again in the next chapter!
No Comments