
Walkthrough for The Conquest of Hevring, the Main Quest battle in Chapter 12: A Trick of the Goddess for the Azure Gleam (Blue Lions) route. Including details about how to complete the battle’s Main Missions and Side Missions, achieve an S-Rank and recruit Byleth.
Which Strategies to Choose for The Conquest of Hevring
| Strategy | Cost | Strategy Details |
|---|---|---|
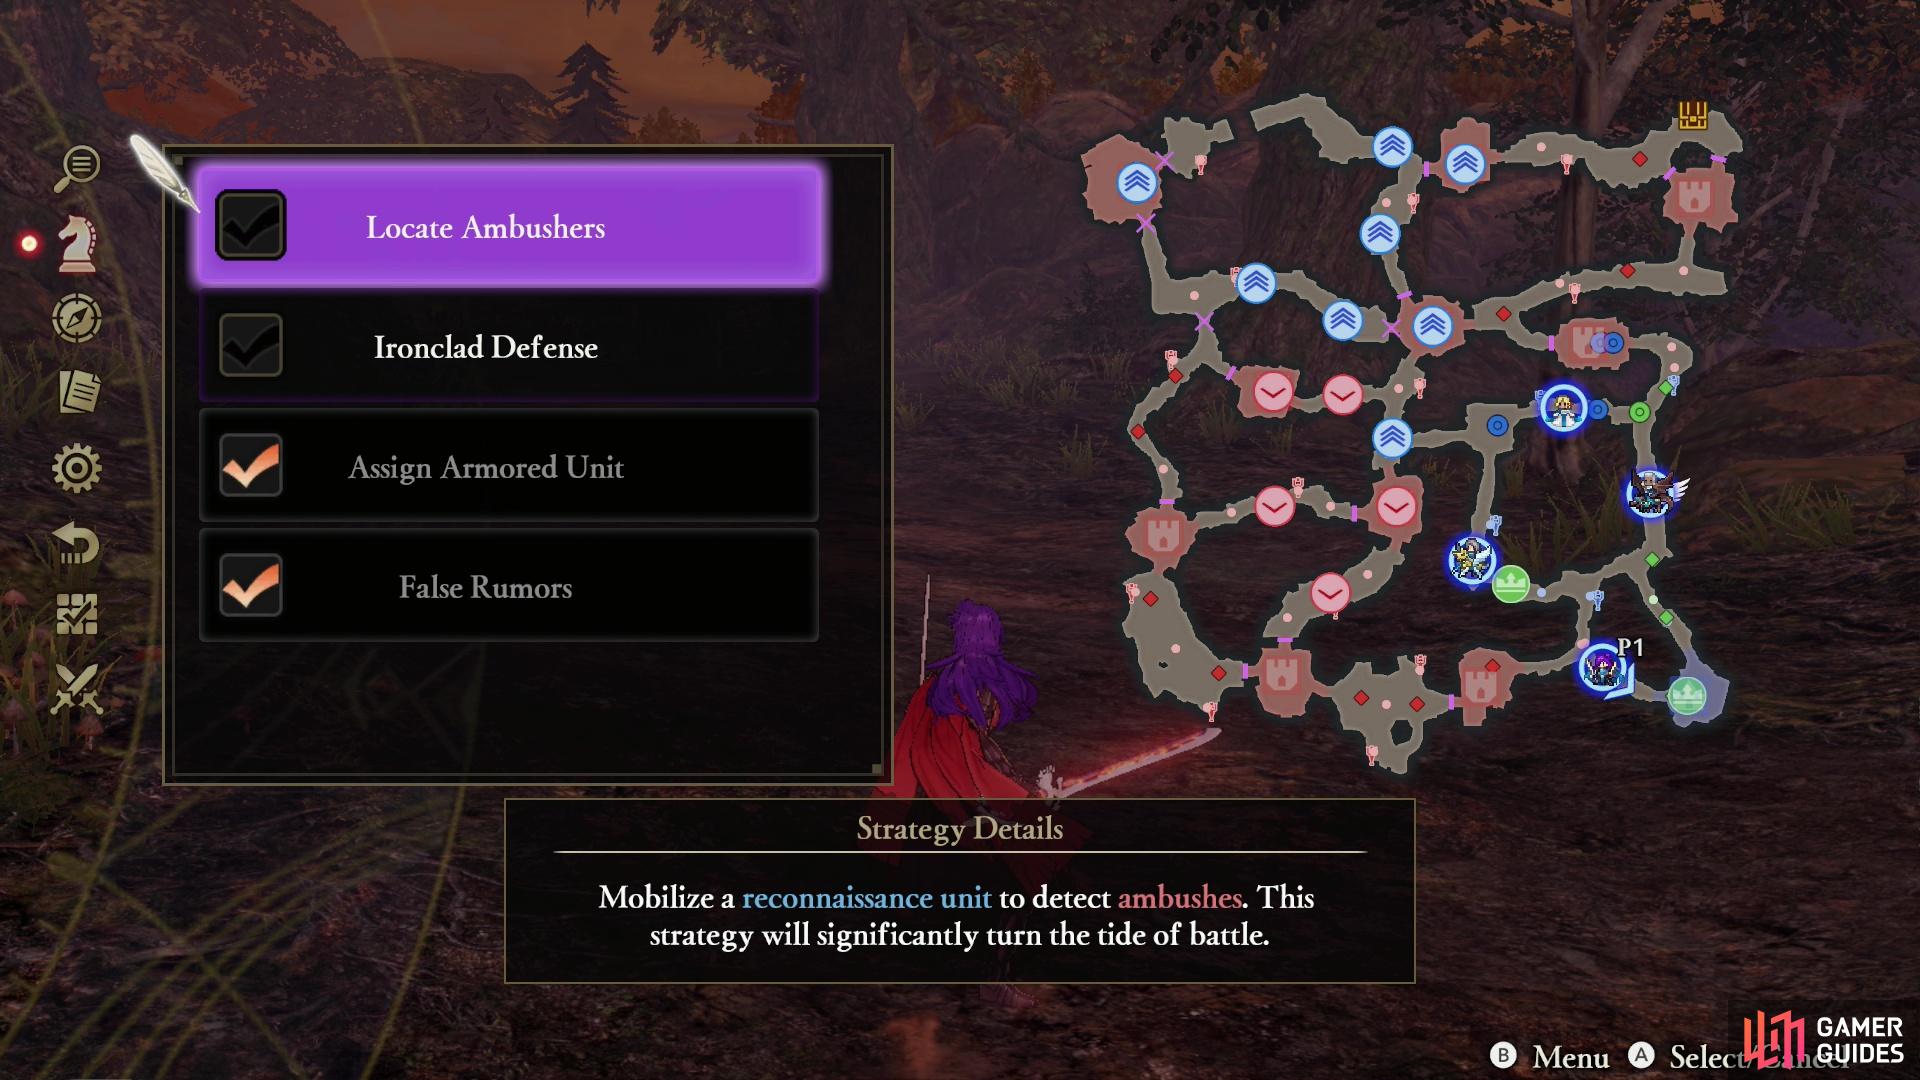
| Locate Ambushers | 30 | Mobilize a reconnaissance unit to detect ambushes. This strategy will significantly turn the tide of battle. |
| Ironclad Defense | 20 | Completely seal off the Allied Base to prevent enemy infiltration. |
| Assign Armored Unit | 10 | Assign an armored unit to protect a target. |
| Assign Staff Officers | 10 | Slightly strengthen allies for a period of time at the start of battle. |
| False rumors | 10 | Slightly weaken the enemy for a period of time by demoralizing them at the start of battle. |
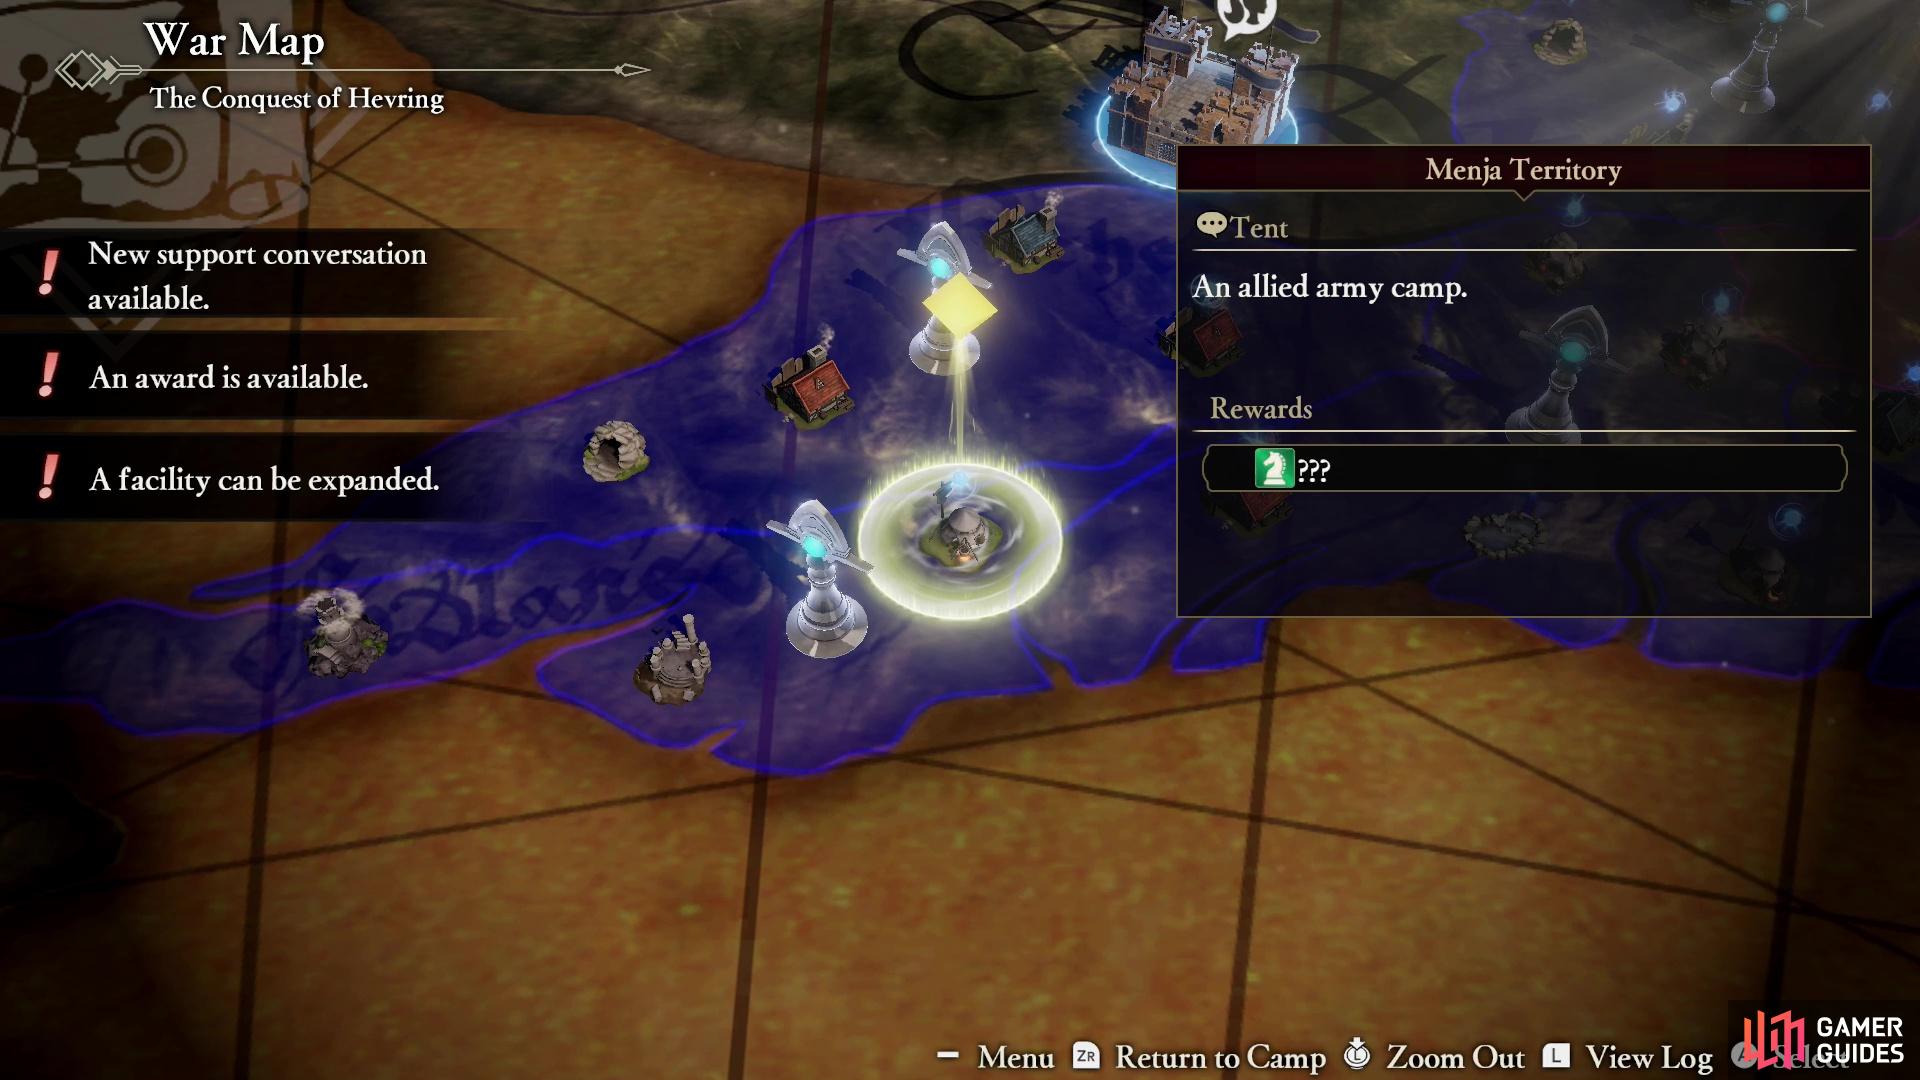
By far the most important Strategy here is Locate Ambushers, and it is essential for recruiting Byleth and progressing to this route’s true final chapters. You must unlock this Strategy by searching a tent Surveying Spot in Menja Territory, which means clearing the Side Quest Charge into Enemy Territory.
After that, the other Strategies aren’t really all that useful. Keeping enemies out of the Allied Base in the southeastern corner of the map is essential to completing the stratagem that will allow you to recruit Byleth, so the Ironclad Defense Strategy might seem useful, but in our experience it doesn’t do a great job of actually keeping enemies out of your base. Still, it and Assign Armored Unit aren’t temporary buffs like Assign Staff Officers and False Rumors, so we prefer the former pair over the latter.
How to S Rank The Conquest of Hevring
| Completion Time | Enemies Defeated | Damage Taken |
|---|---|---|
| 15:00 | 1500 | 50% |
The best way to S-Rank this mission is to simply replay it via the Record Keeper later. Recruiting Byleth is a relatively complicated affair that requires you to follow multiple steps throughout the course of the battle, many of which involve you neglecting enemy Strongholds and officers and running across the map as quickly as possible to secure specific objectives.
This is all conducive towards hitting the time requirement, not so much the KO requirement.
That being the case, ignore it for now, focus on getting Byleth. You can get your S-Rank later.
When you do attempt the S-Rank, throw the Byleth stratagem in the bin and play however you wish - stumble into ambushes, thrash Byleth, and take your sweet time clearing the map and claiming Strongholds… as long as you meet the 15:00 deadline and secure your 1500 KOs, you should be golden.
Clear the Imperial vanguard near your main camp,
and activate the “Locate Ambushers” Strategy when prompted.
Main Mission: Defeat the Imperial Army Vanguard
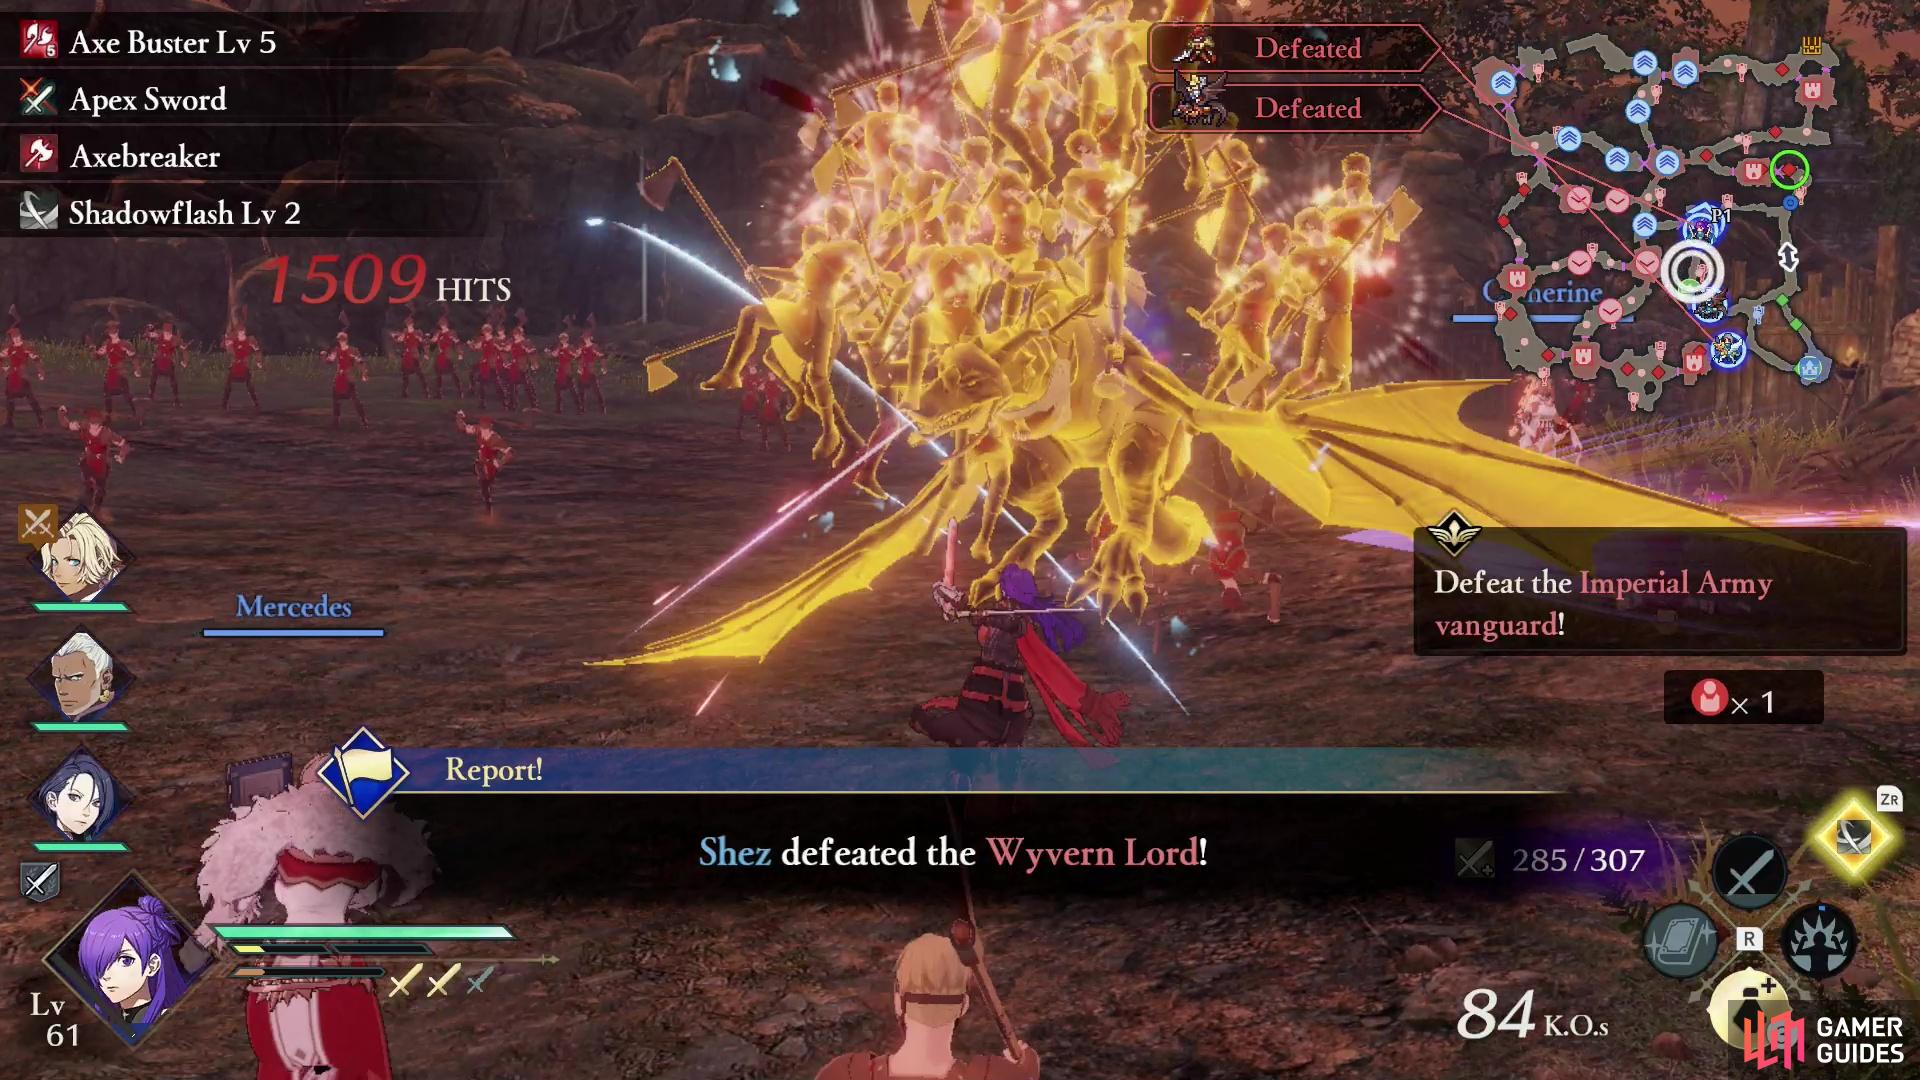
When the battle begins, your first task will be defeating the enemy vanguard just outside your main camp (Allied Base) in the southeastern corner of the map. This consists of a Trickster, Bow Knight and two Wyvern Lords. At this point you really can’t do much to mess up the battle, so just stick close to base and clean up.
Main Mission: Advance on Randolph and Watch Out for Mercenary Ambushes
This Main Mission will pop up and run concurrently with the former one, but you should really focus on the vanguard before you worry about anything else. Once the vanguard is defeated the Strongholds to the north (Forest Lake Path) and west (Forest Camp) will open their gates - claiming these Strongholds will make your life much, much easier, and you should sic a few units on seizing each. Tome-wielders can easily clear out the Bow Knights in the northern Stronghold, while the Tricksters to the west can be handled by lancers.
Once these Strongholds are yours, be sure to enter the Battle Map and command most of your allies to defend these two Strongholds; an enemy counterattack will pour through these Strongholds, and if they get through your chances of recruiting Byleth will be compromised. Also, if your allies get too feisty and pick fights with the wrong enemies, it could foil your plans. Setting units to guard these Strongholds kills two birds with one stone.
If the Locate Ambushers Strategy was activated, it should pop during these first two Main Missions - be sure to activate it when prompted, as it’ll highlight the Strongholds where enemy mercenaries lie in ambush and will provide a route (via a moving green arrow on your minimap) you can take to reach the enemy commander without triggering these ambushes. Only once you’ve claimed the two aforementioned Strongholds and set your units to guard them should you worry about this!
Reinforce the Strongholds near your main camp to keep your units from straying afield and prepare for an upcoming emergency.
Secure the two Strongholds adjacent to your main base and keep your allies out of trouble by making them guard your newly conquered Strongholds, then follow the green arrow between the two Strongholds to reach the center of the map. Here you’ll find another Stronghold - the Roadside Rest Stop - which you’ll need to conquer to open a gate to the west. This will lead to yet another Stronghold along the western end of the map, the Roadside Forest Trail. Clear this Stronghold, too, and you’ll open a gate to the north.
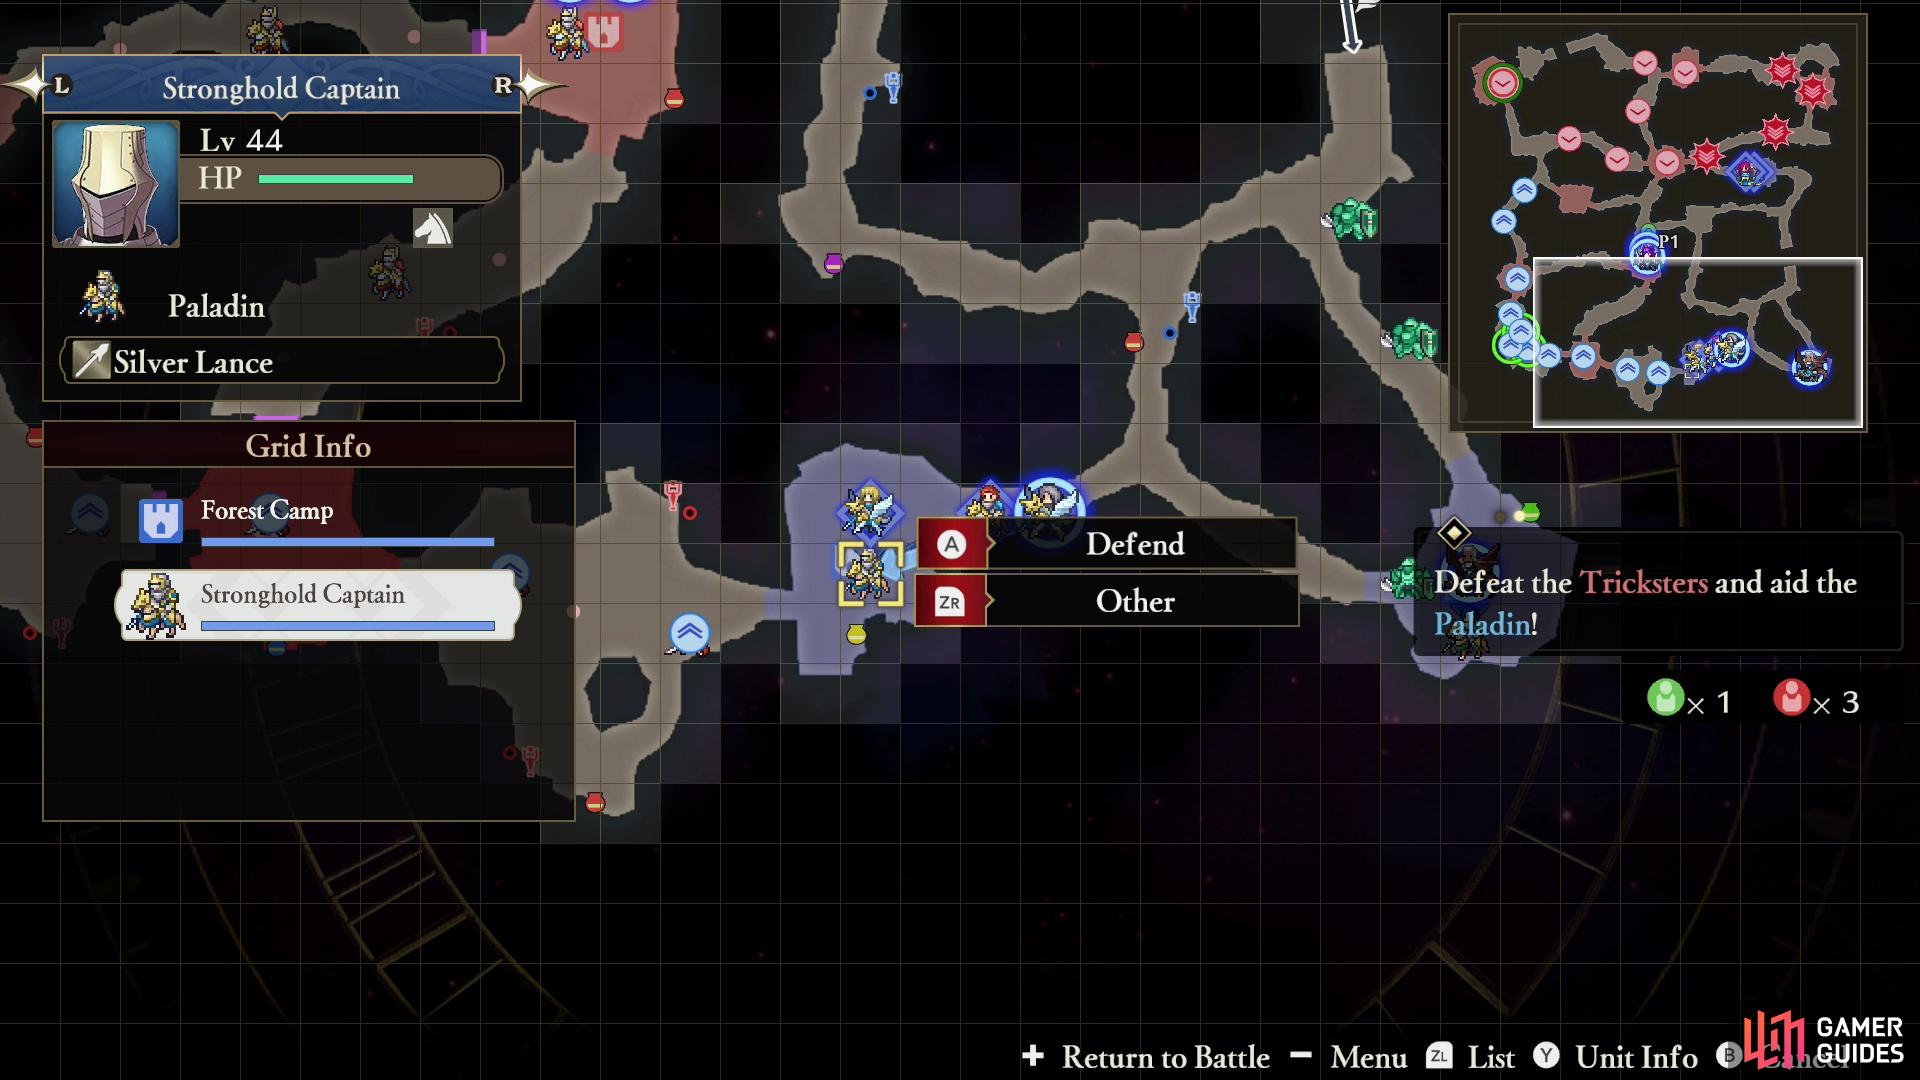
Side Mission: Defeat the Tricksters and Aid the Paladin
As you’re clearing the Roadside Rest Stop Stronghold in the center of the map you’ll likely see this Side Mission pop up, which will task you with defeating several Tricksters who are attacking an allied Paladin. You’ll find this ongoing scrum south of the Roadside Forest Trail, so it’s not very far out of your way, and shouldn’t take very long to resolve. This doesn’t help with the overall goal of recruiting Byleth, but it doesn’t hurt, either.
Approach the enemy main camp and defeat Fleche,
after which you’ll need to quickly return back west and defeat Alois and his raiders before they can breach your main camp.
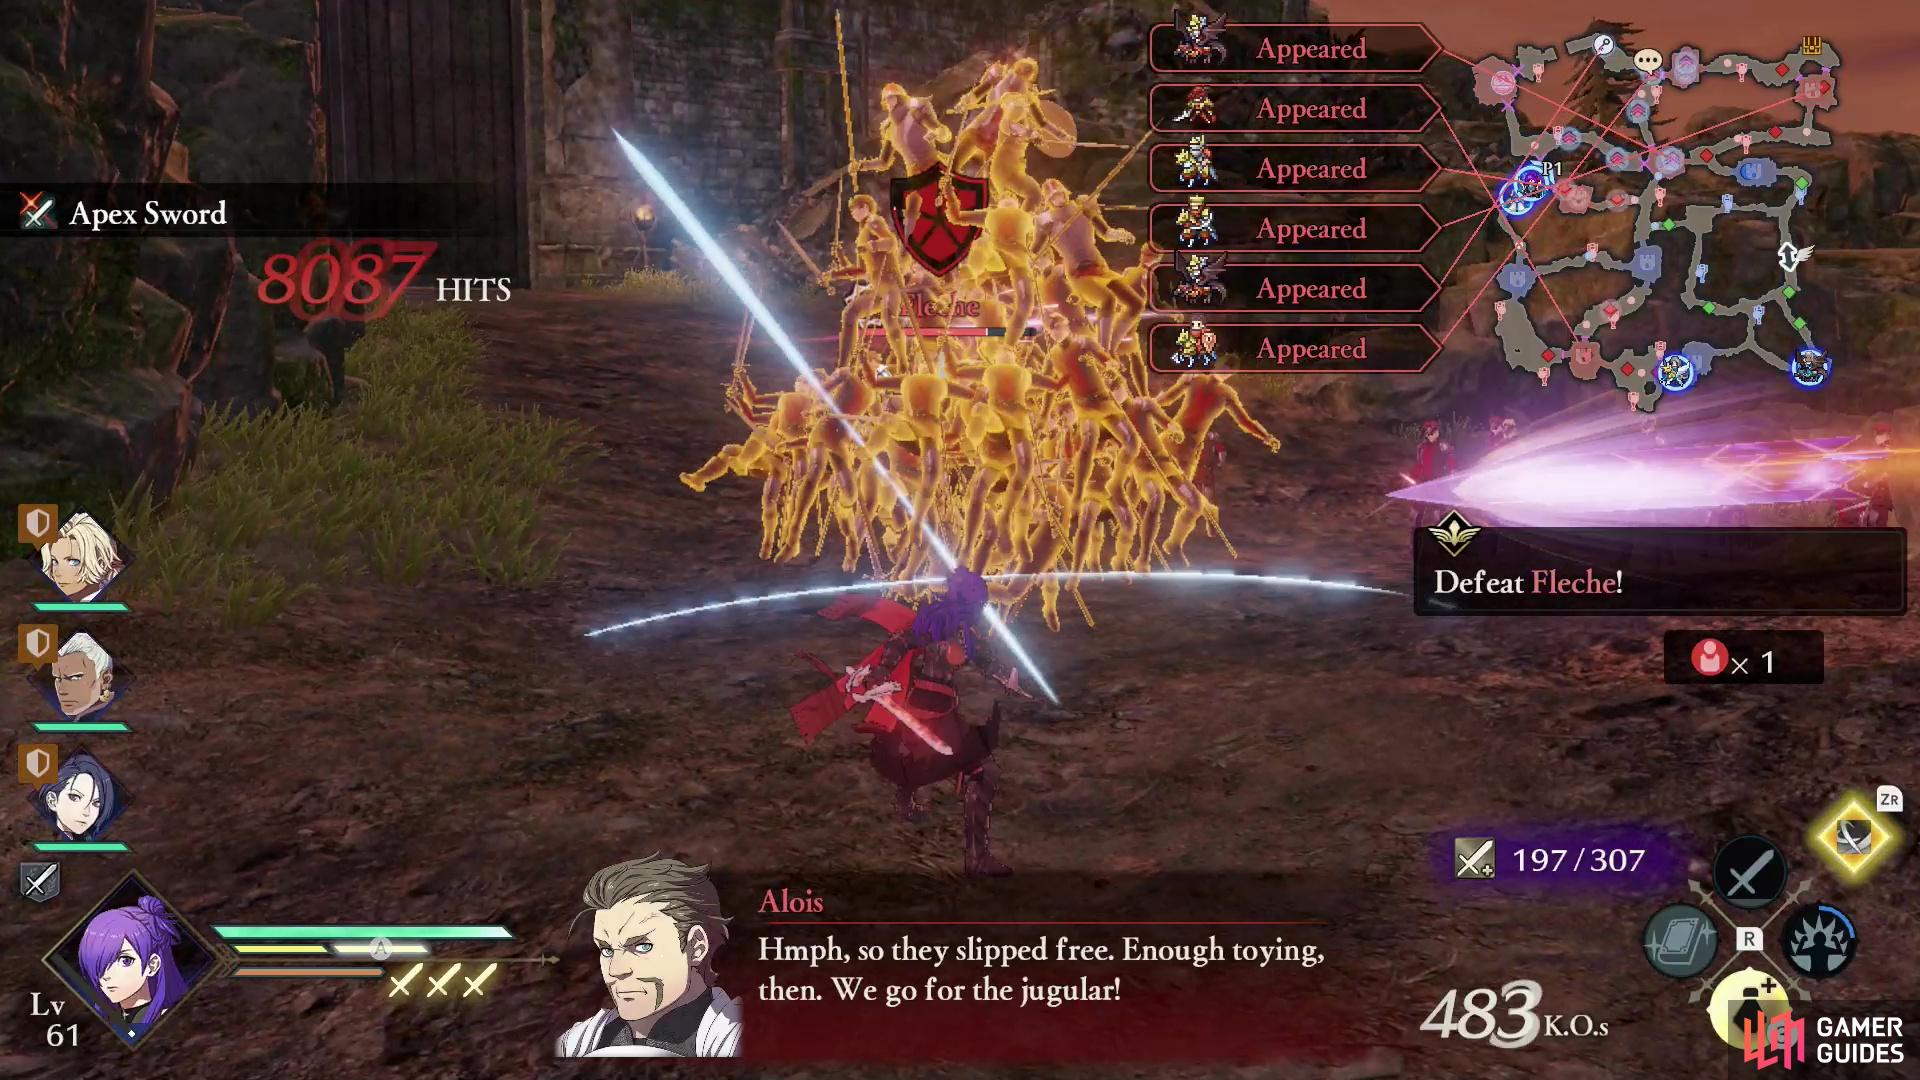
Main Mission: Defeat Fleche
When you approach the enemy main camp in the northwestern corner of the map (whether you saved the Paladin from the Tricksters or not) you’ll have to deal with a few enemy officers, including Fleche, who will appear to defend her brother, Randolph. Defeat her as quickly as possible, as another Main Mission, “Defeat the Mercenary Raiders” will begin, likely before you can resolve matters with Fleche.
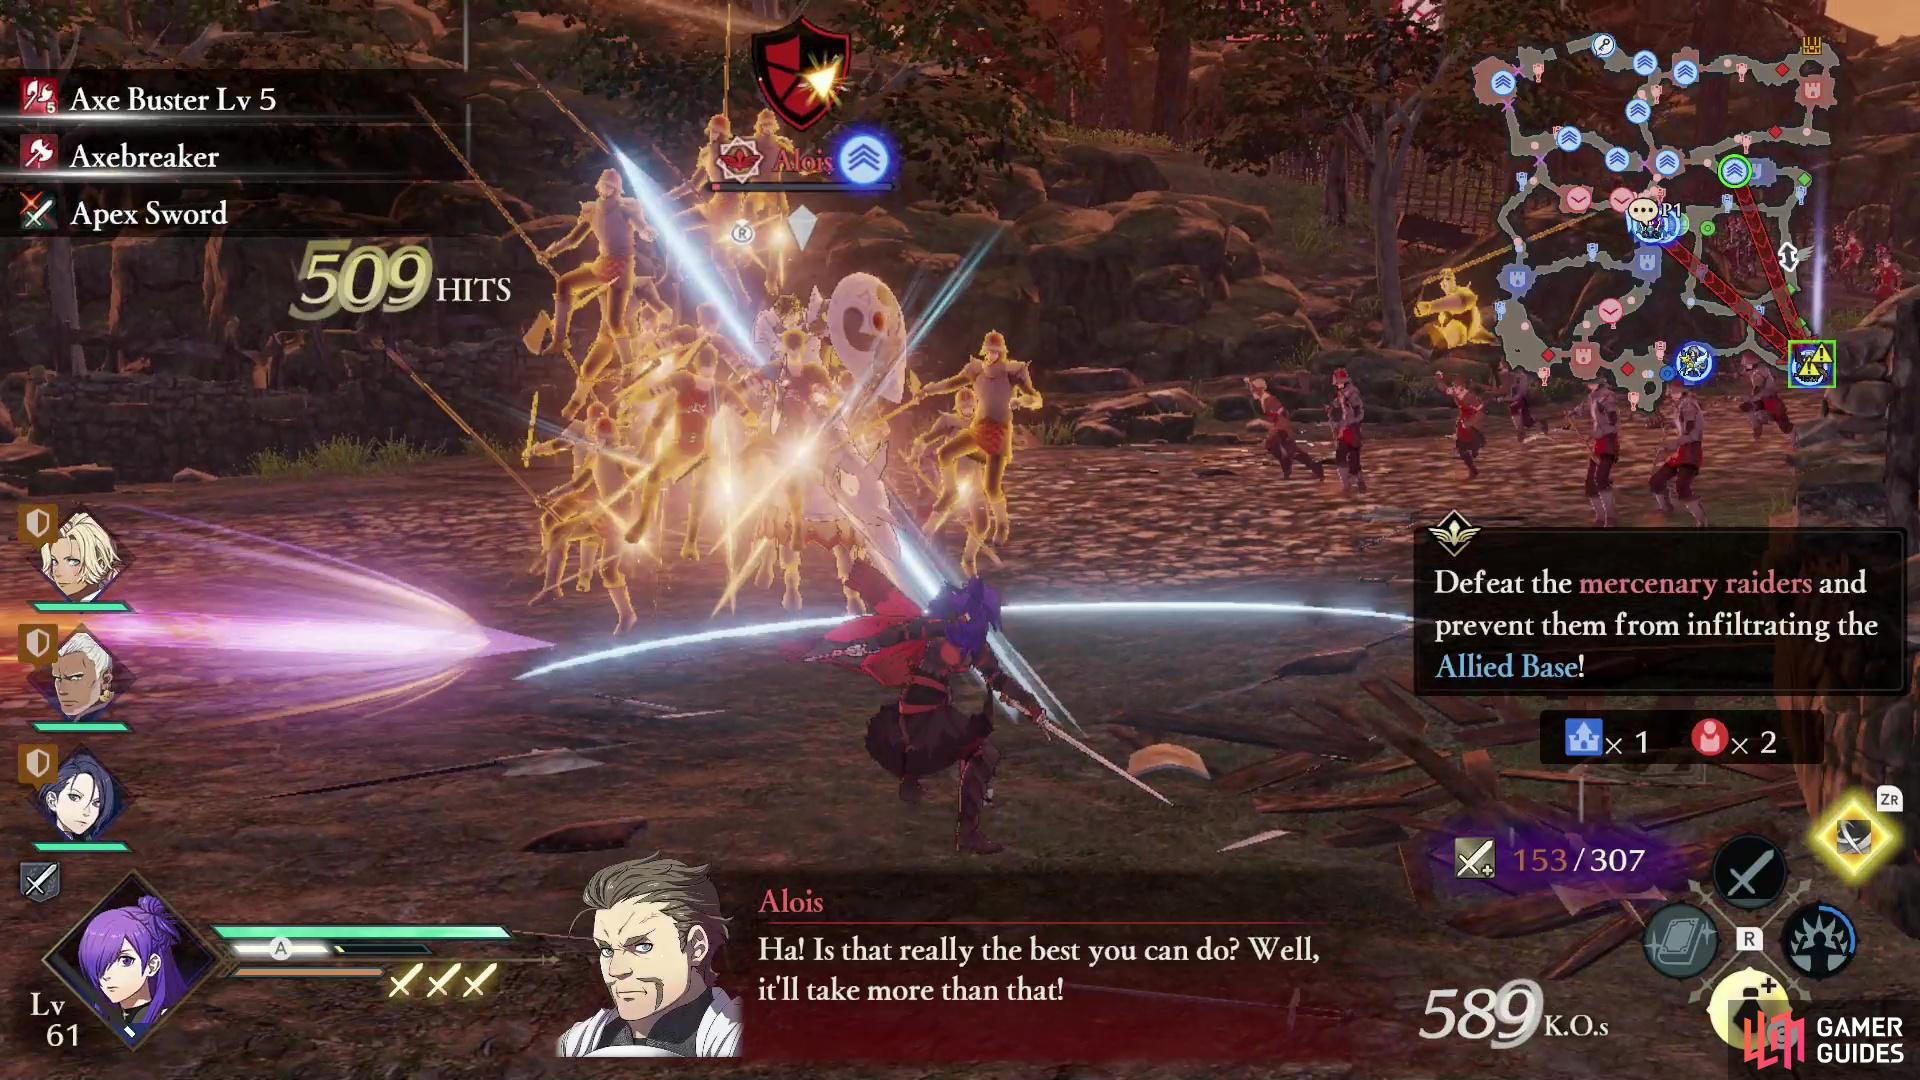
Main Mission: Defeat the Mercenary Raiders and Prevent Them From Infiltrating the Allied Base
While you’re fighting Fleche, Alois and around half a dozen units - presumably the would-be ambushers in the Strongholds you avoided earlier - will appear and engage in a headlong charge towards your main base.
If any of the enemy units make it into your main base, Byleth will decide the offensive is well in hand and will appear near the enemy main base, where she’ll defend the gates. You will have no choice but to defeat her to reach Randolph, the enemy commander, thus preventing you from recruiting her this playthrough. You must defeat Fleche quickly (this shouldn’t be difficult), then quickly stop Alois’ raid, which can be trickier.
If you claimed the Strongholds near your main camp (Forest Lake Path and Forest Camp) and assigned some officers to guard them, this should be much easier, as most of Alois’ raiders will end up in these two Strongholds. Assuming the guarding characters aren’t poorly matched or horribly underleveled, they should at least be able to hold the enemy raiders at bay long enough for you to deal with them. The tricky part involves Alois and an attendant Holy Knight, who will move down the center of the map, taking the path between the two Strongholds flanking your main camp. Alois is shameless here, and if left to his own devices he’ll run straight on into your main camp, spoiling your attempt to recruit Byleth. Remember, it does not matter if your main camp is in any way legitimately threatened by Alois - if he makes it there, Byleth will defend the gate to the enemy main camp and you won’t be able to win without defeating her.
You should get the prompt to enact the Strategy Ironclad Defense, if you enabled it before the battle began, but you shouldn’t rely on this to keep your base safe. Tthe best strategy is to make your way back east after defeating Fleche (ideally by using Shez’s Shadow Slip to return to your main camp), then head to intercept Alois and the Holy Knight. This is easily done by waiting at the fork in the road north of the south-central Stronghold (Roadside Rest Stop) you claimed en route to western end of the map. When Alois arrives he’ll opt to fight it out with you instead of running past - defeat him, and his Holy Knight, then mop up the other raiders occupied at the nearby Strongholds, if necessary. Once Fleche, Alois, and the mercenary raiders have all fallen/retreated, Byleth and Randolph will appear on the battlefield.
Time for the final stroke of your stratagem.
Defeat Alois’ raid without having your main camp compromised and Byleth will decide to reinforce Randolph.
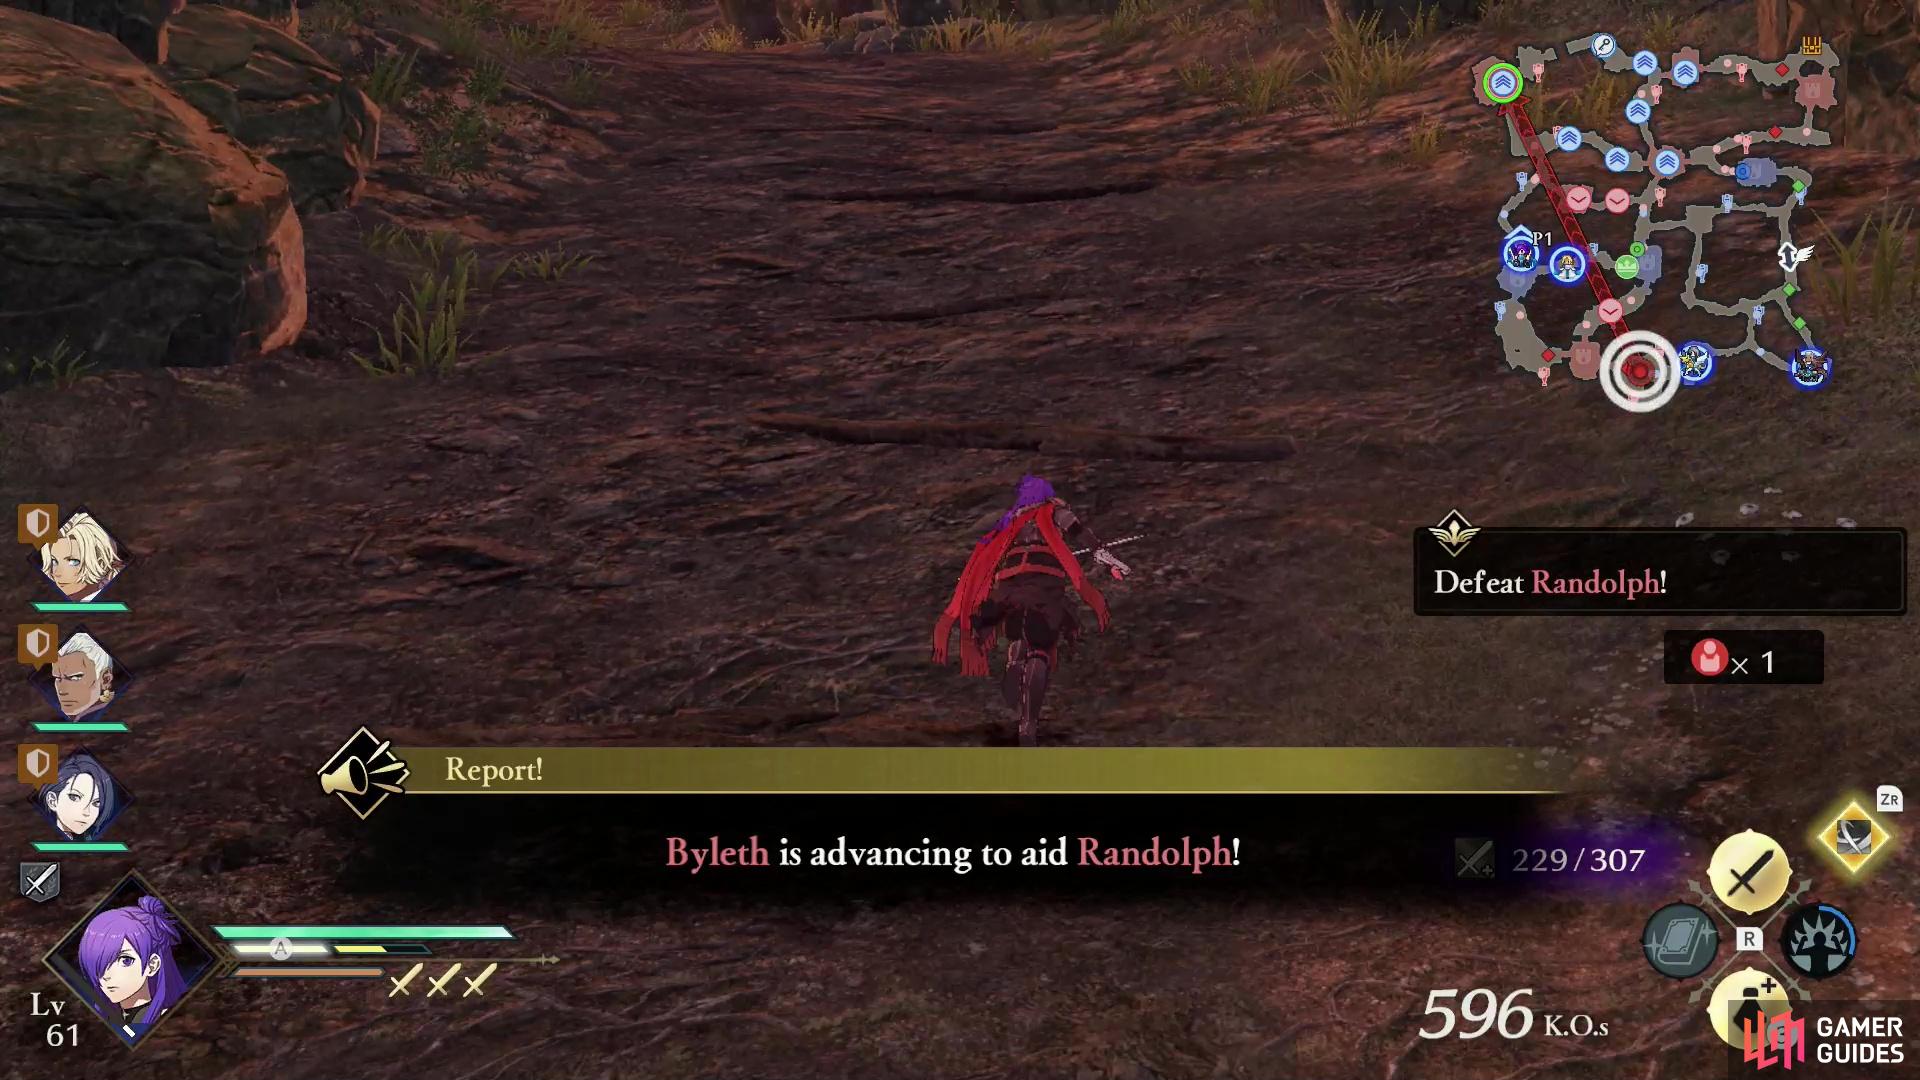
Reach Randolph first and defeat him before Byleth can arrive to secure victory.
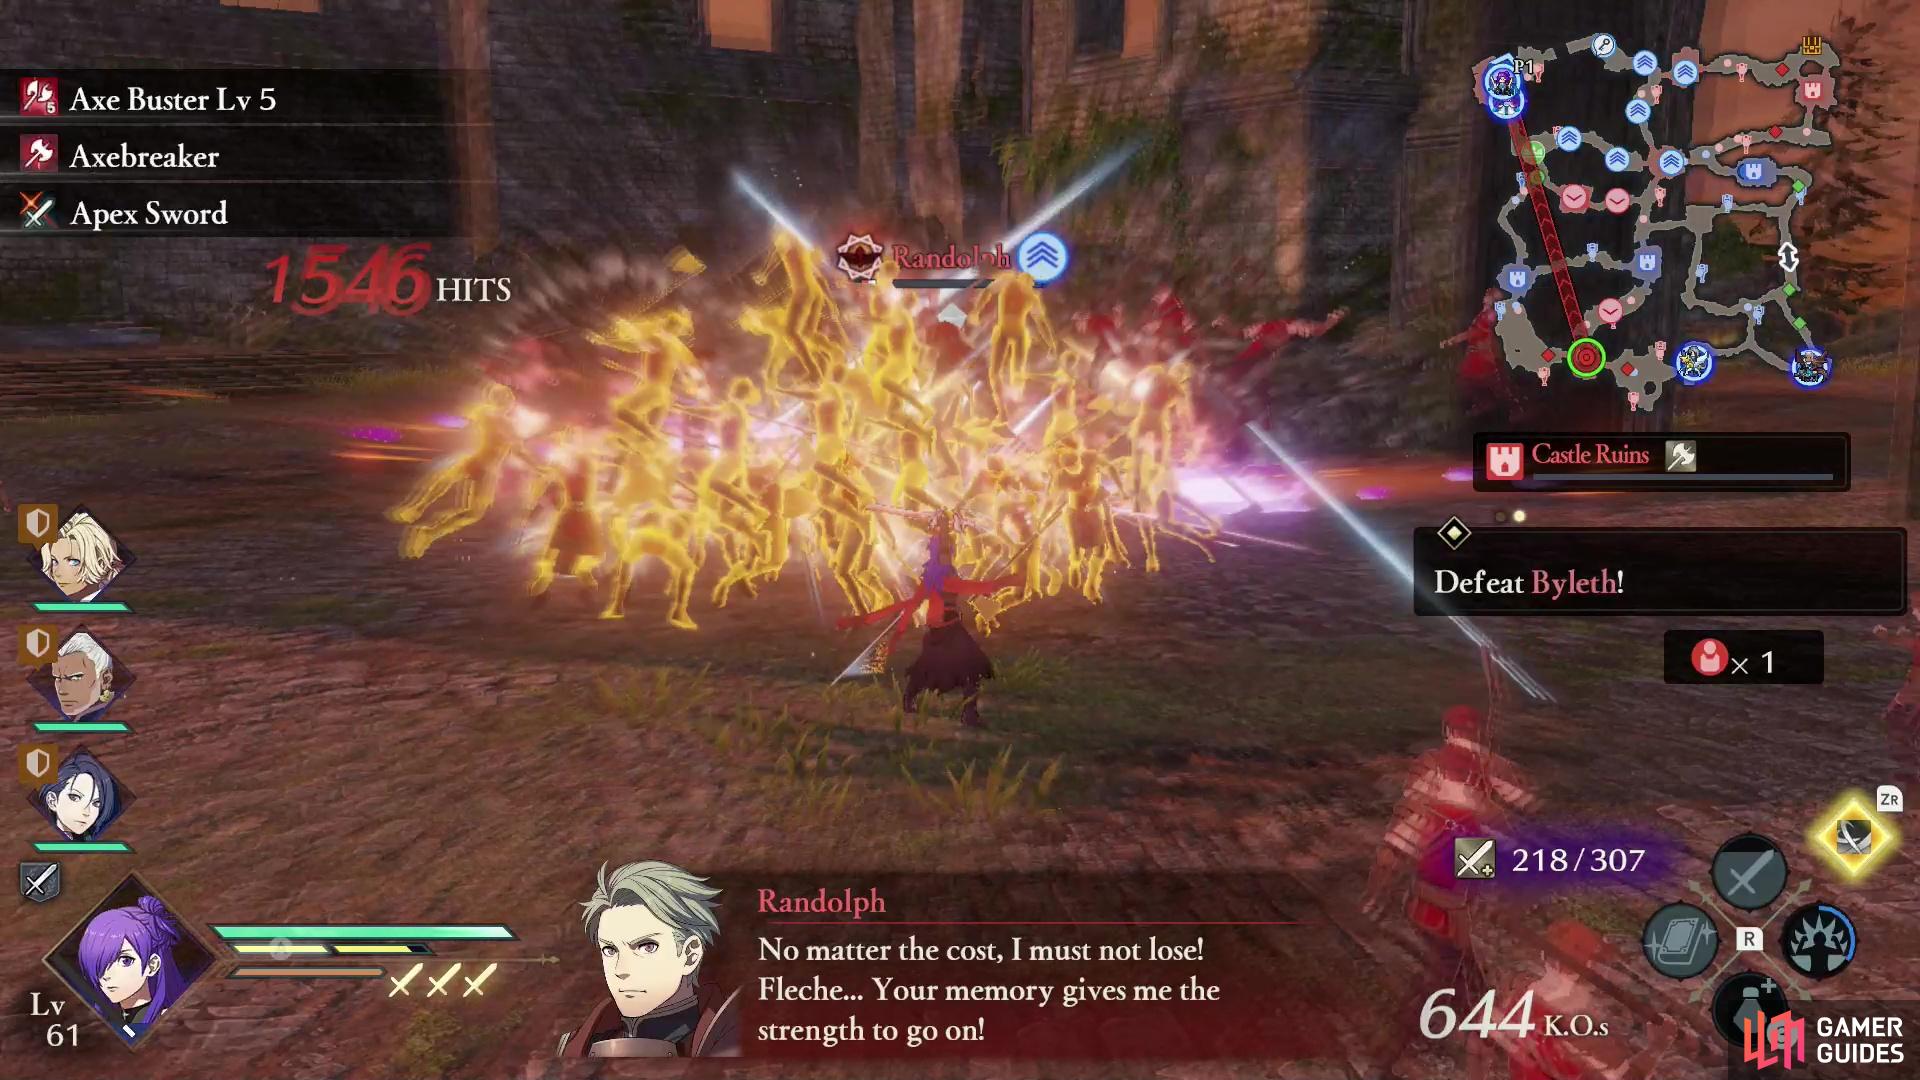
Main Mission: Defeat Randolph
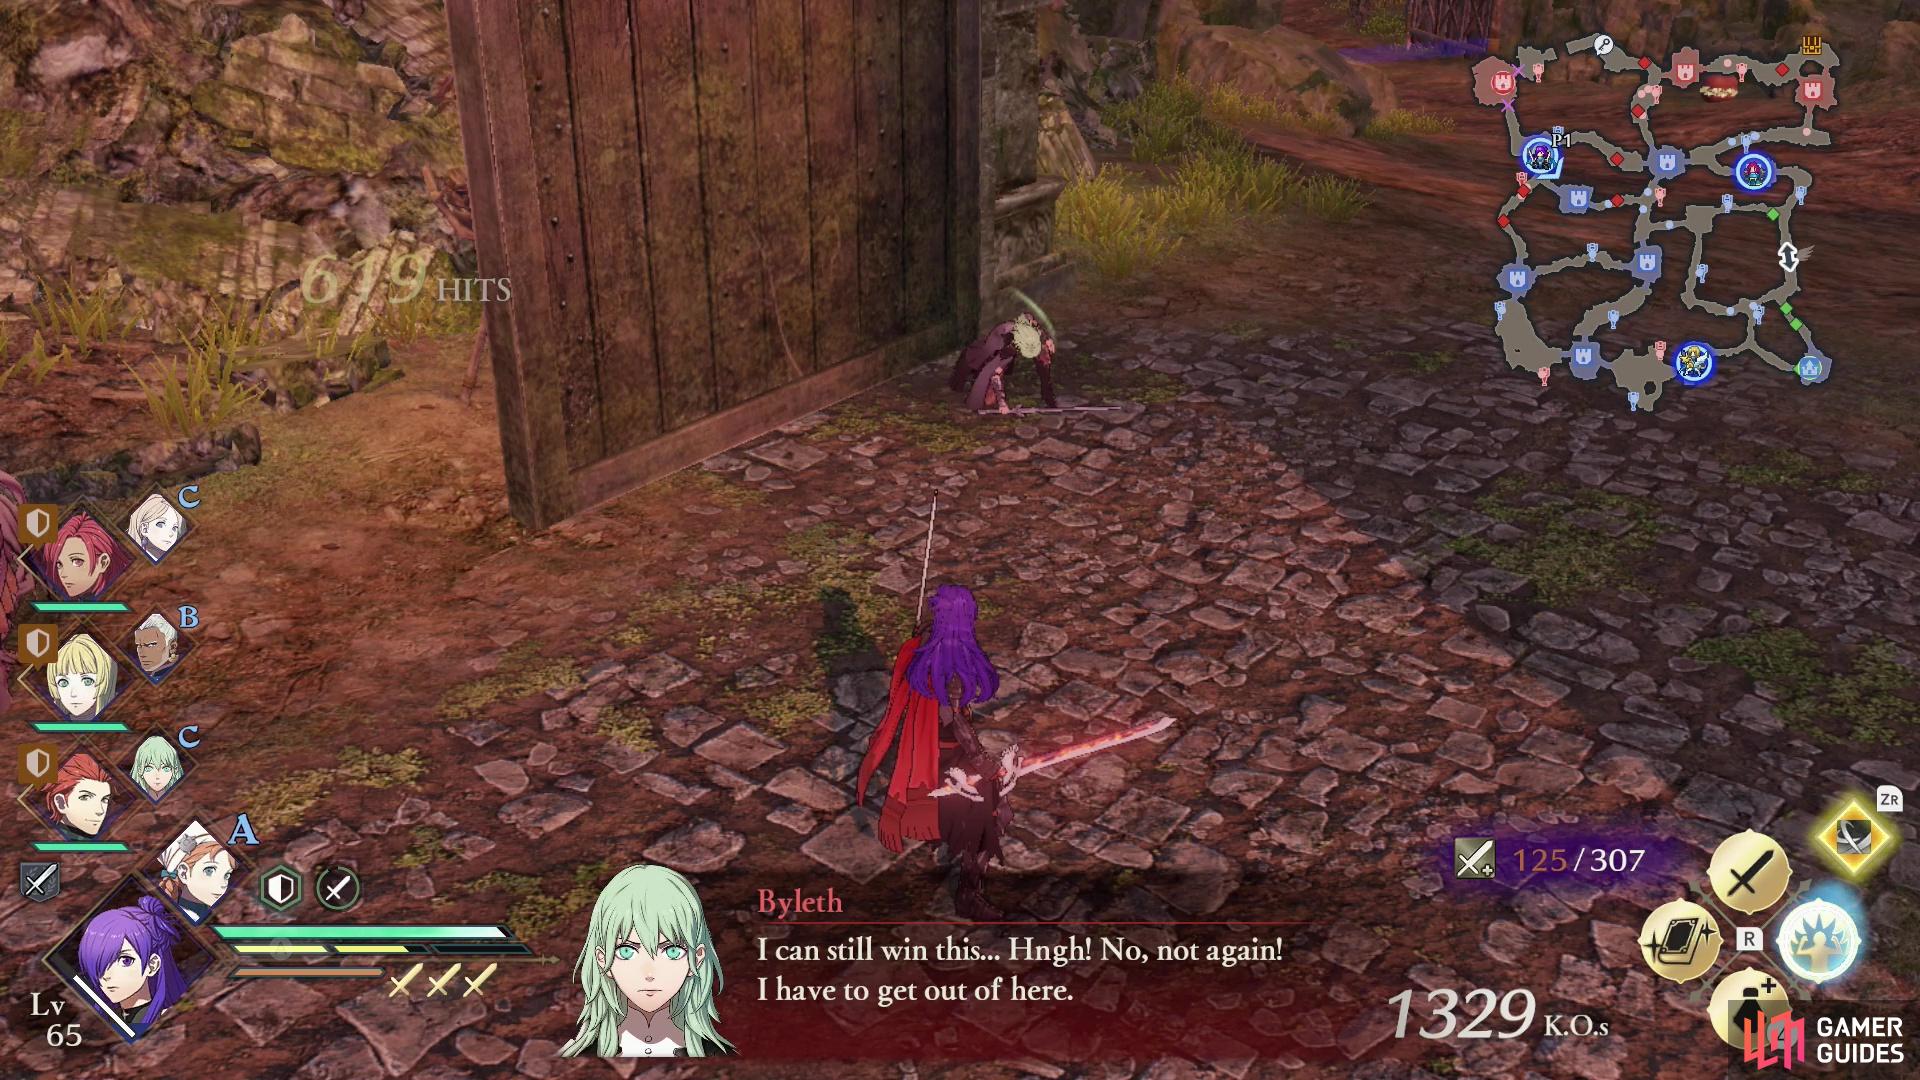
Byleth will appear west of the Stronghold west of your main base (Forest Camp), and given the failure of Alois’ ambush and Fleche’s defeat, she’ll decide that the best way to salvage the situation is to rendezvous with Randolph and protect him. To finish the battle and recruit Byleth you must now make it to Randolph first and defeat him before Byleth can arrive. If you’re playing Shez, once again Shadow Slip will prove invaluable, as you can zip to the western edge of the map (Roadside Forest Trail). Do not worry about padding your KO count or claiming the chest along the northeastern corner of the map - you can worry about S-Ranks and treasure when you replay via the Record Keeper. You can go back and get those later, but you cannot recruit Byleth if you miss her here.
Randolph is somewhat stronger than your average enemy officer, but he’s not overwhelmingly powerful. If you have Warrior Specials or you can trigger an Awakening, by all means, use them. Battle’s over after this anyways, and you’re on the clock. Spam Combat Arts, use Magic, throw the kitchen sink at him. If you bring Randolph down in time, Jeralt and Byleth will decide that they’ve been properly bested in such a way as to make further struggle pointless, and… well, if you can’t beat ’em, join ’em. Kingdom money is just as good as Imperial money.
If you defeated Randolph without fighting Byleth, she and Jeralt will join you.
If you completed all the steps above, you should end the battle victoriously with enough leverage to compel Byleth and Jeralt to join your faction. Congrats! If you fail, just read below.
Failing to Recruit Byleth
There are several ways to botch the stratagem that would otherwise result in your recruiting Byleth:
-
Claim one of the Strongholds that are part of the enemy ambush effort. This will cause the ambush units to appear along with Fleche, the latter of whom will lead a raid against your Base Camp. Byleth will also appear and take up position near the enemy base, where she’ll serve as a gatekeeper who must be defeated before you can gain entry. This will start the “Defeat Alois and Break Through the Enemy Line!” and “Defeat Fleche!” Main Missions.
-
Avoid the ambushes, but fail to prevent Alois or any of his raiders from entering your main base. Once this happens Byleth will appear and decide the battle is proceeding well, and that she’d best serve by defending Randolph. She’ll take up position near the enemy base, where she’ll serve as a gatekeeper who must be defeated before you can gain entry.
-
Avoid the ambushes, defeat Fleche, and thwart Alois’ raid by routing him and his raiders, but fail to prevent Byleth from rendezvousing with Randolph. Byleth will convince Randolph to retreat and the Main Mission “Defeat Byleth Blocking Your Way!” will begin.
Defeat Byleth,
and she’ll retreat.
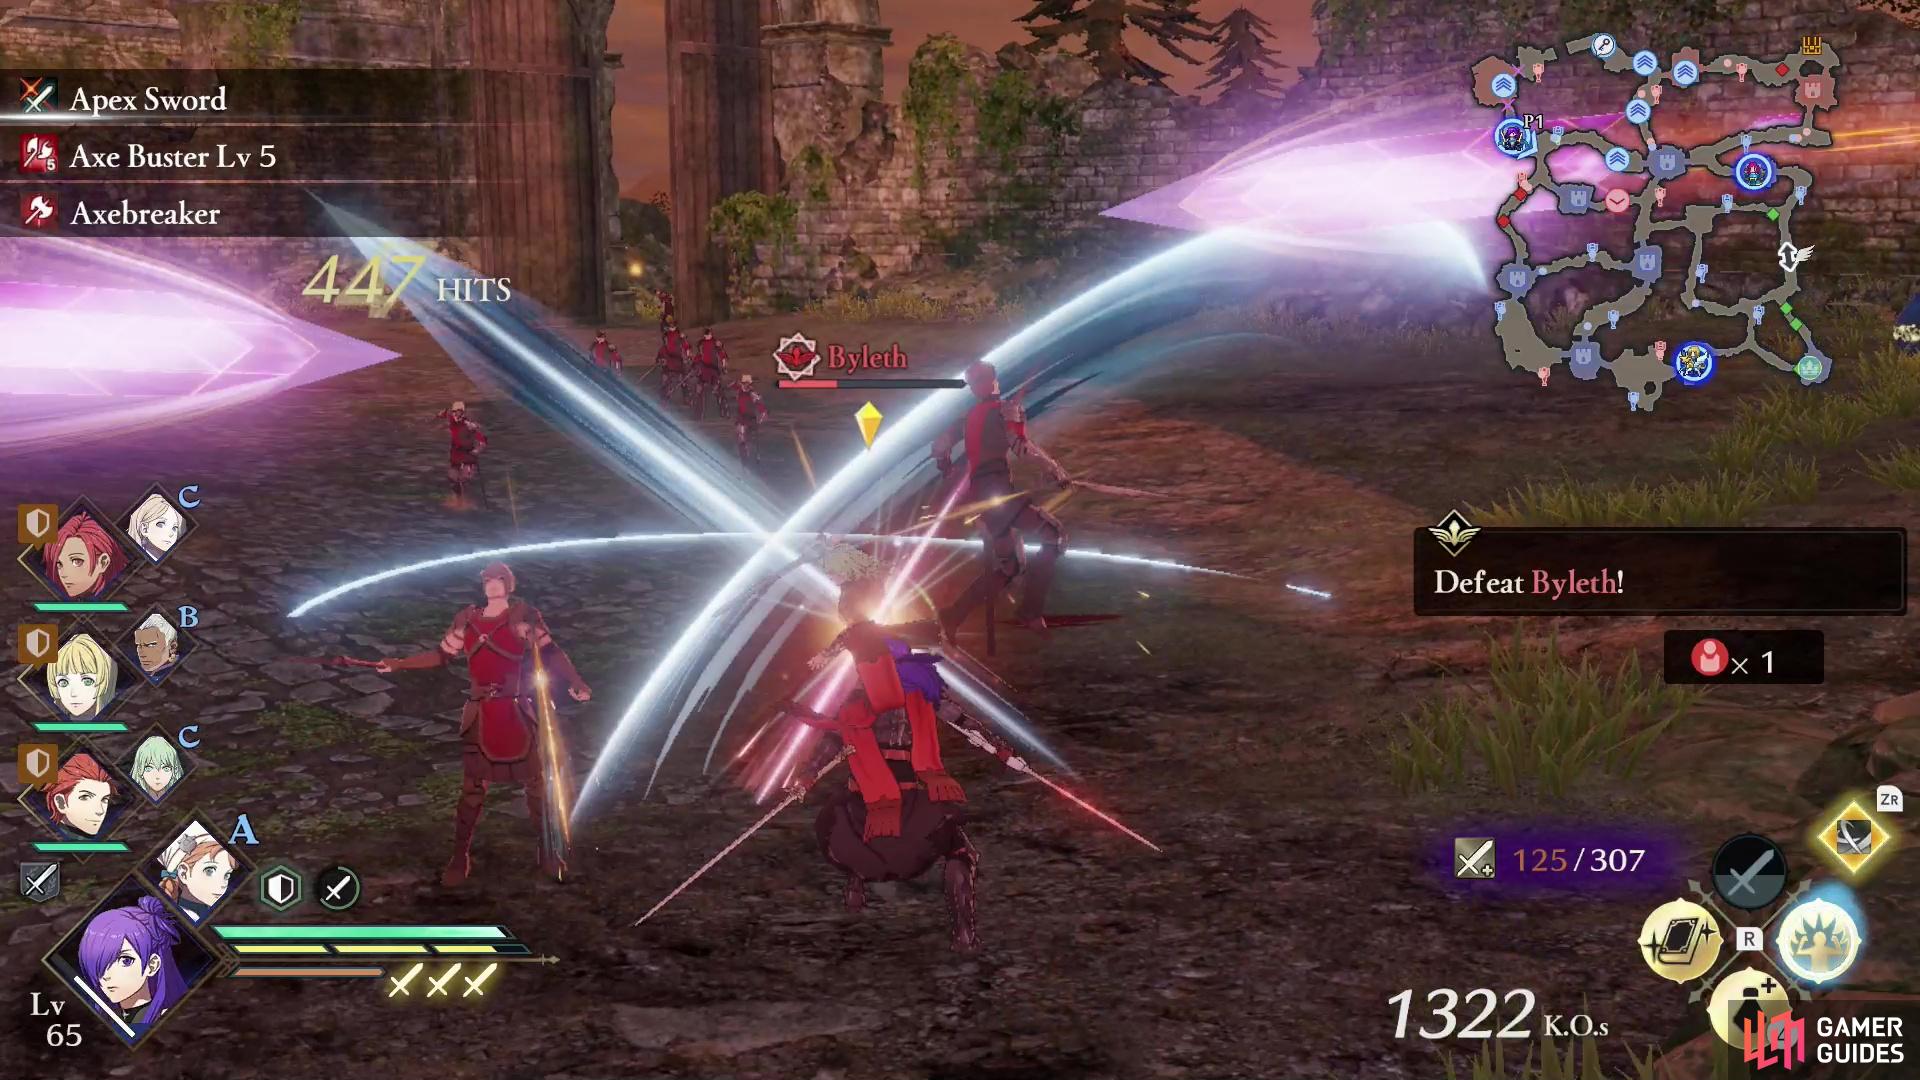
Main Mission: Defeat Byleth
One thing all these have in common is they force you to defeat Byleth before you can encounter Randolph, and ultimately that’s what determines the outcome of this battle. If you can kill Randolph without defeating Byleth, you recruit Byleth and Jeralt and continue on with the “good” route. If you have to defeat Byleth during this mission, you’ll be locked into the “bad” route and will not be able to recruit Byleth (or Jeralt, for that matter) this playthrough.
Byleth is still strong in this battle, but she’s not nearly as powerful in relation to other enemies this time around as she was during previous encounters. You’re also free to conquer the rest of the map before you converge on Byleth, so you’ll be able to claim the chest in the northeastern corner of the map (it just contains Bullion) by getting a key from a Wyvern Lord to the west if you care to bother. If you’re having trouble with Byleth, be sure to order the rest of your allies to assist you - they shouldn’t have anything better to do anymore.

After defeating Byleth you’ll have to fight Randolph as per the norm,
but if Byleth was defeated, Jeralt will show up and attack after Randolph has been dealt with.
Main Mission: Defeat Randolph
After you defeat Byleth you’ll be able to get at Randolph, who isn’t any stronger here than he would have been if you had managed to avoid Byleth earlier. He wields an axe, so he’ll be weak against swords, and if you’re playing Shez as an Asura, he shouldn’t be anything more than mere fodder.
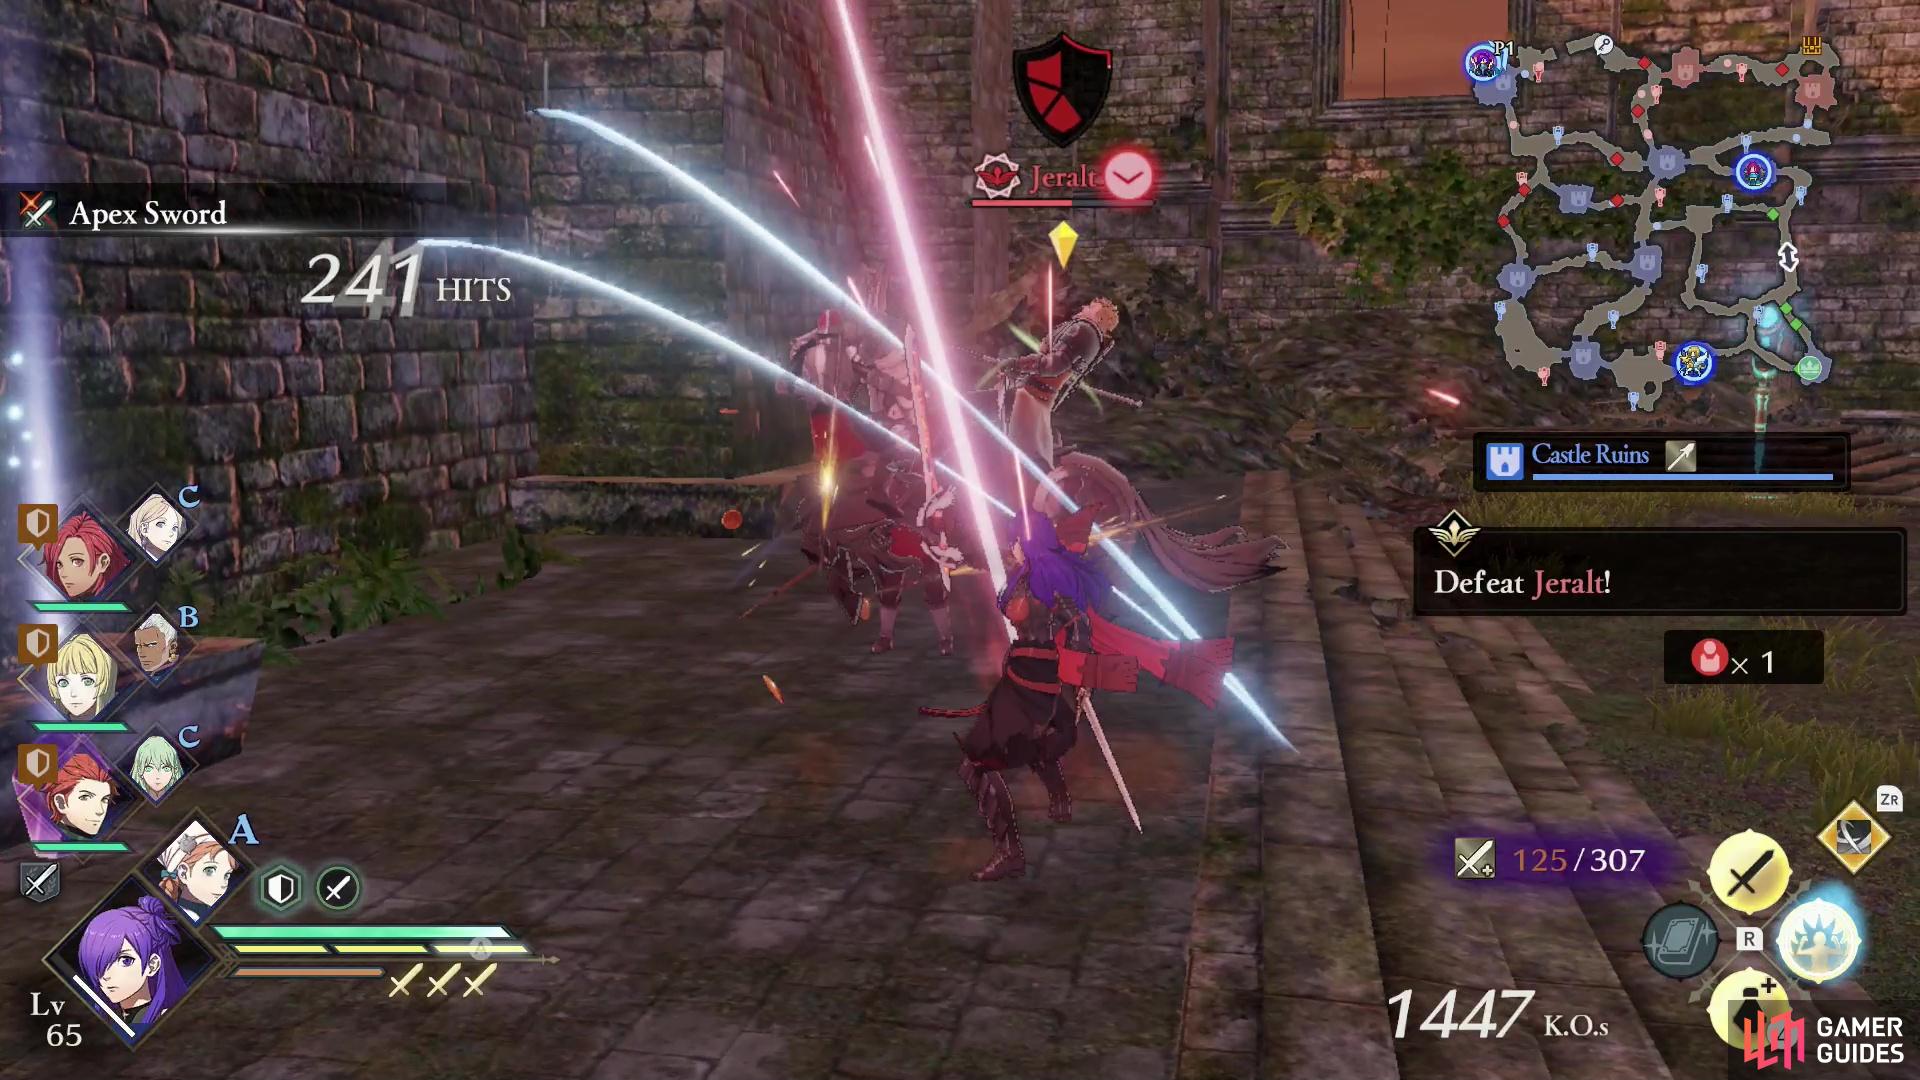
Main Mission: Defeat Jeralt
Crush Randolph and Jeralt will return - not fast enough to save his employer, but he still manages to make a nuisance of himself. Jeralt is the last obstacle you’ll need to fell in order to claim victory, and he doesn’t arrive with much in the way of reinforcements. He’s a Holy Knight, so he’ll wield a lance and will be strong against sword-users. He will, however, be weak versus axes. Defeat him and the battle will end, with deaths on both sides making reconciliation impossible.
If you fought the Ashen Demon, neither side will emerge without someone to mourn.
No Comments