
Information about how to issue orders on the Battle Map in Fire Emblem Three Hopes.
Fire Emblem Three Hopes is, at its core, a hack and slash musou game, and aside from managing the game’s ARPG elements (battles are often won before they actually begin - with high enough stats, powerful weapons and the right equipped Class Abilities it can be very difficult to lose) some competent gameplay will likely see you to victory. That said, it’s still a Fire Emblem game and bears some strategic DNA in its gameplay systems; stats and combo-spamming are almost always enough to win, but to dominate - and secure S-Rank accolades at the end of every mission, you’re going to have to learn how to command your units adroitly in battle.
Fortunately issuing orders is a pretty simple affair which can be done with a few button presses on the Battle Map.
Deploying Primary and Secondary Units in Fire Emblem Three Hopes
The first thing you’ll do in battle is deploy units, which must be placed in specific tiles on the Battle Map. During Main Quest battles you can deploy eight units, four primary units and four secondary units, while in Side Quest battles and Extra Quest battles you can only deploy four primary units. The difference between primary and secondary units is simple - primary units can be controlled directly by the player during combat, secondary units cannot. Otherwise the two types of units will function identically, both can serve as Adjutants and both can be given orders via the Battle Map.
Primary units are surrounded by a blue circle, while secondary characters are surrounded by a blue diamond.
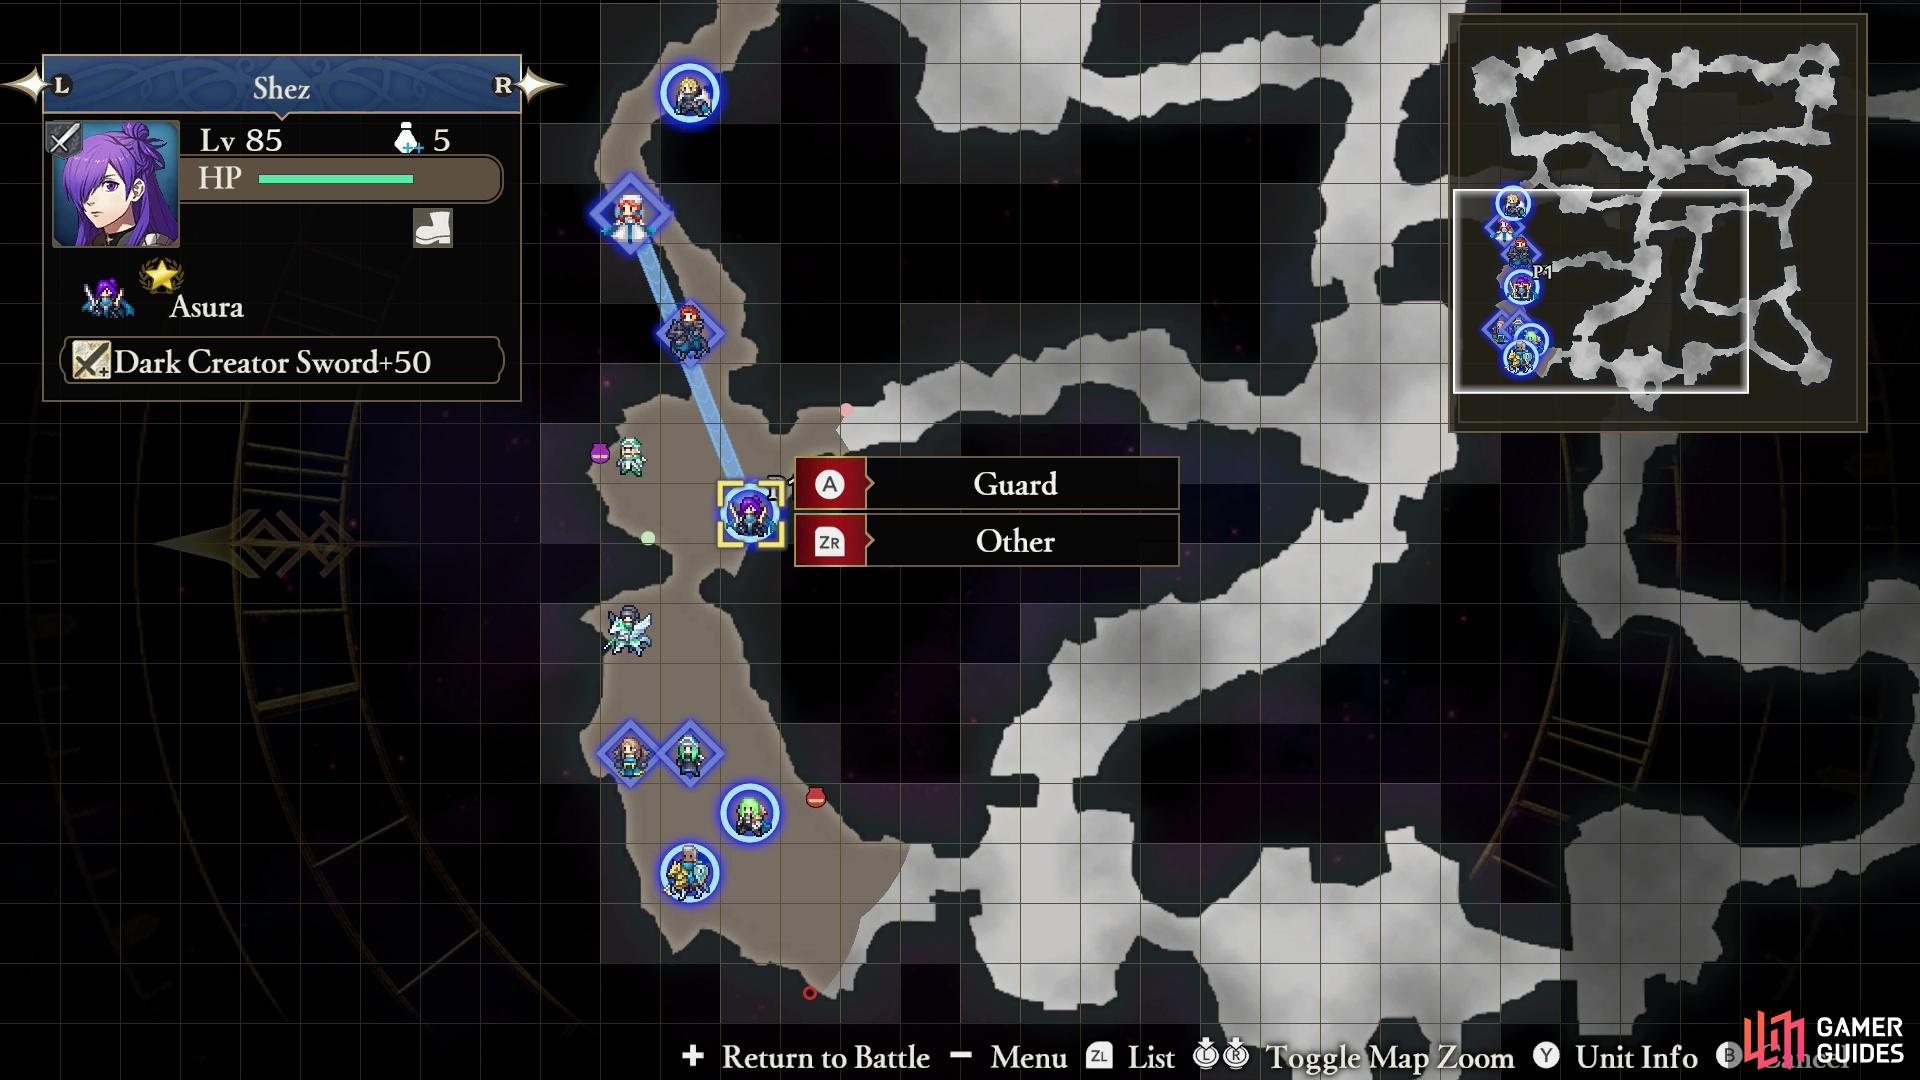
You can order a unit to guard another ally,
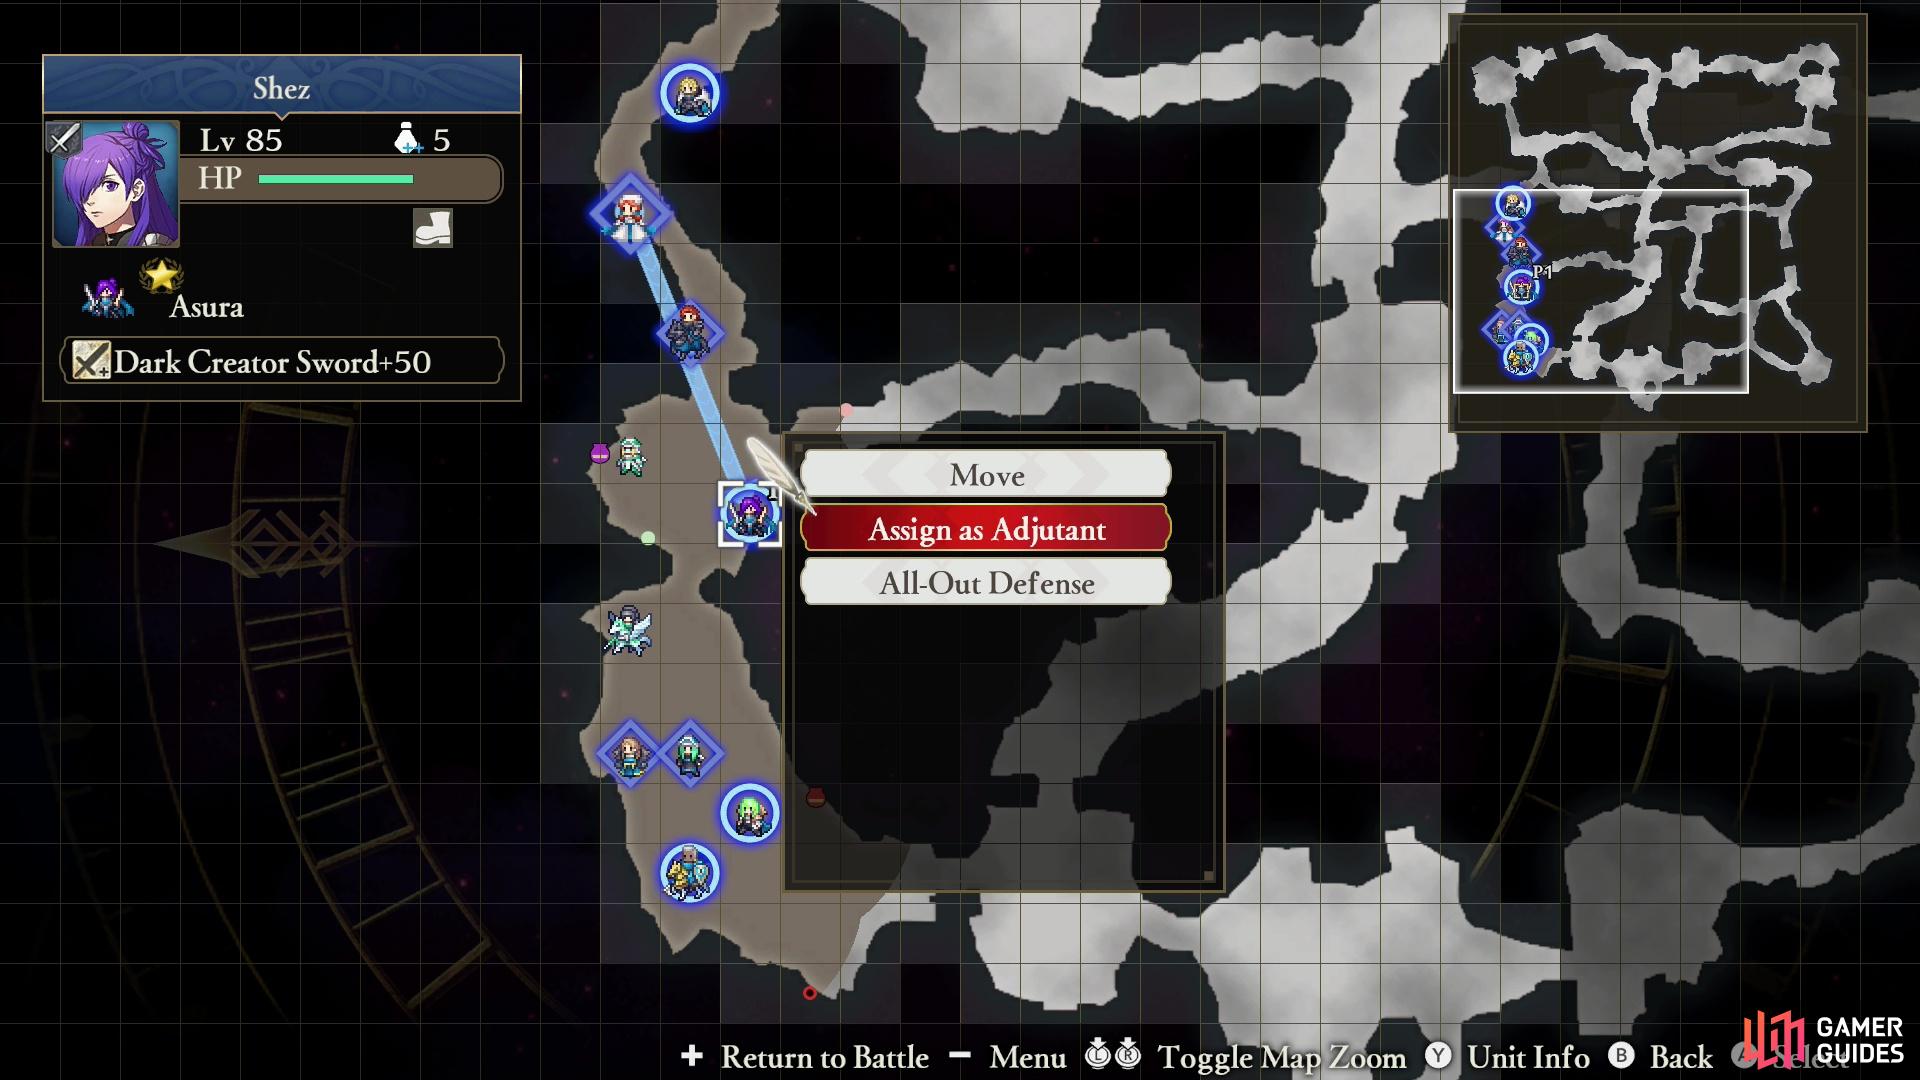
or assign units to serve as Adjutants.
Issuing Orders in Fire Emblem Three Hopes
Once a battle has started you can enter the Battle Map at any time by pressing the  button. On the Battle Map, select a unit by pressing the
  and you’ll be able to move your cursor, where you should now see an arrow being dragged from the selected unit to the cursor. This has different functions depending on what you select - if you select an empty map tile the selected unit will move there, if you select an ally, the selected unit will “Guard”, if you select an enemy, the selected unit will “Attack” or “Seize”, the latter being utilized when the opponent is a Stronghold Captain. Alternatively you can press the
  button when selecting a unit to bring up a list of actions, including “Control”, “Unassign Adjutant”, “Heal” and “Dismount”.
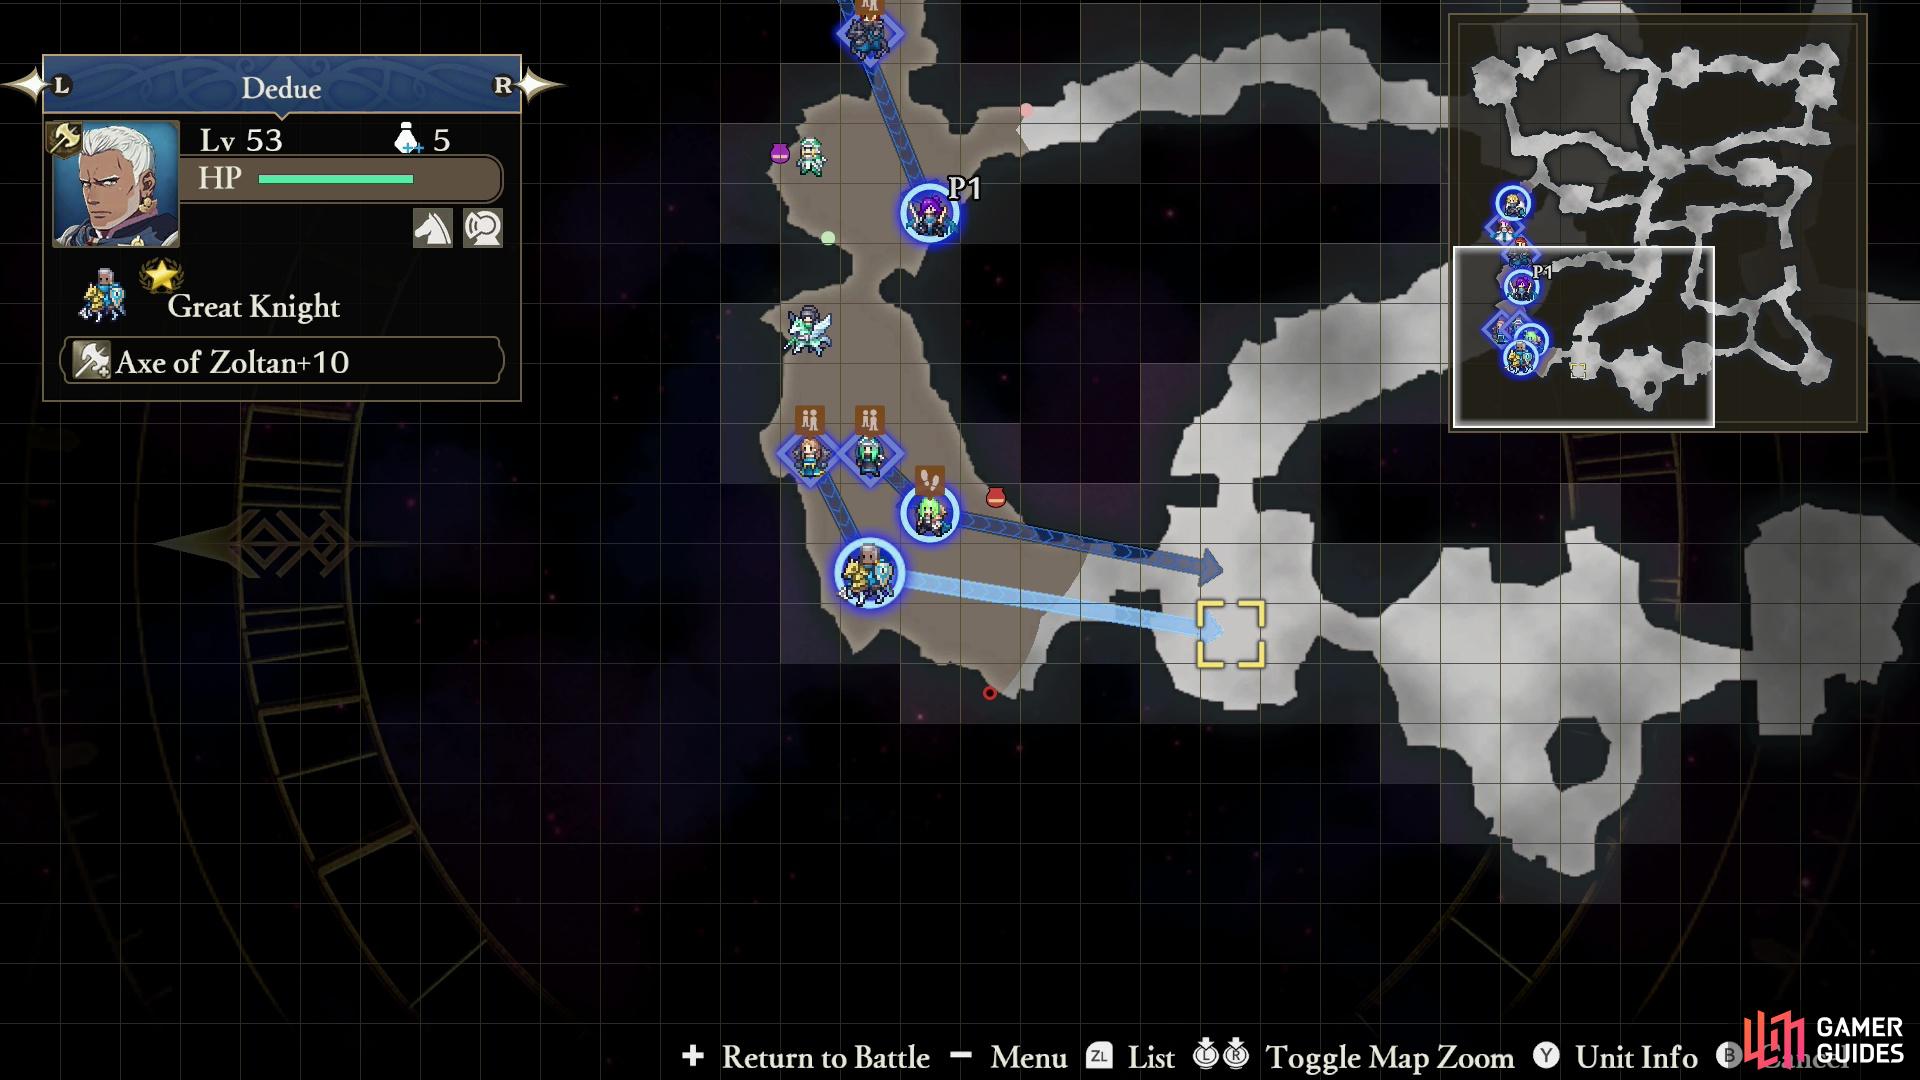
Most of the time you’ll just be using “Move”, “Guard” and “Attack”/”Seize” commands. “Guard” is good for protecting units and objectives, or to just get a sturdy mass of units moving as one across the battlefield. Use “Attack” to effectively split up your forces and knock out multiple objectives quickly (one unit assigned to “Attack” with a unit or two assigned to “Guard” said attacking unit is an effective force for most situations), while “Move” allows you to - what else? - get a unit into position in anticipation of some event or objective appearing. Generally it’s best to use “Guard” or “Attack” to get units to go where you and and stay there, but when there’s nothing to currently “Guard” or “Attack” where you need a unit to be, “Move” will have to suffice. Just keep in mind that “Move” does not mean “Stay” - once a unit has reached its location, they’re under no compulsion to remain there, and will wander off if there’s nothing to fight nearby.
Moving
If you select a unit on the Battle Map and drag the arrow icon to an empty spot on the map, the unit selected will move to that area, generally ignoring enemies along the way. Once there, the moved unit will return to whatever autobattle AI script they’re following. This will usually cause them to return to an active Main Mission objective or seek out nearby enemies to fight.
Guard
Select an allied unit, then drag the arrow icon to another allied unit button to assign the first unit to guard the second. This will cause the commanded unit to head to the second unit’s location and fight any enemies attacking the unit they’re assigned to guard. They’ll follow them the rest of the battle, or until they’re issued another order. This isn’t a bad way to get units to move around the map in groups, and is especially useful when there’s a mission-critical objective you need to protect/escort. If you assign a unit to guard a generic Stronghold Captain, the unit will remain in the Stronghold indefinitely and massively extend the garrison’s durability. As an offensive strategy, assigning units to guard an attacking unit is generally less effective than having several units assigned to attack a specific target.
Selecting an empty spot on the map will cause units to move there,
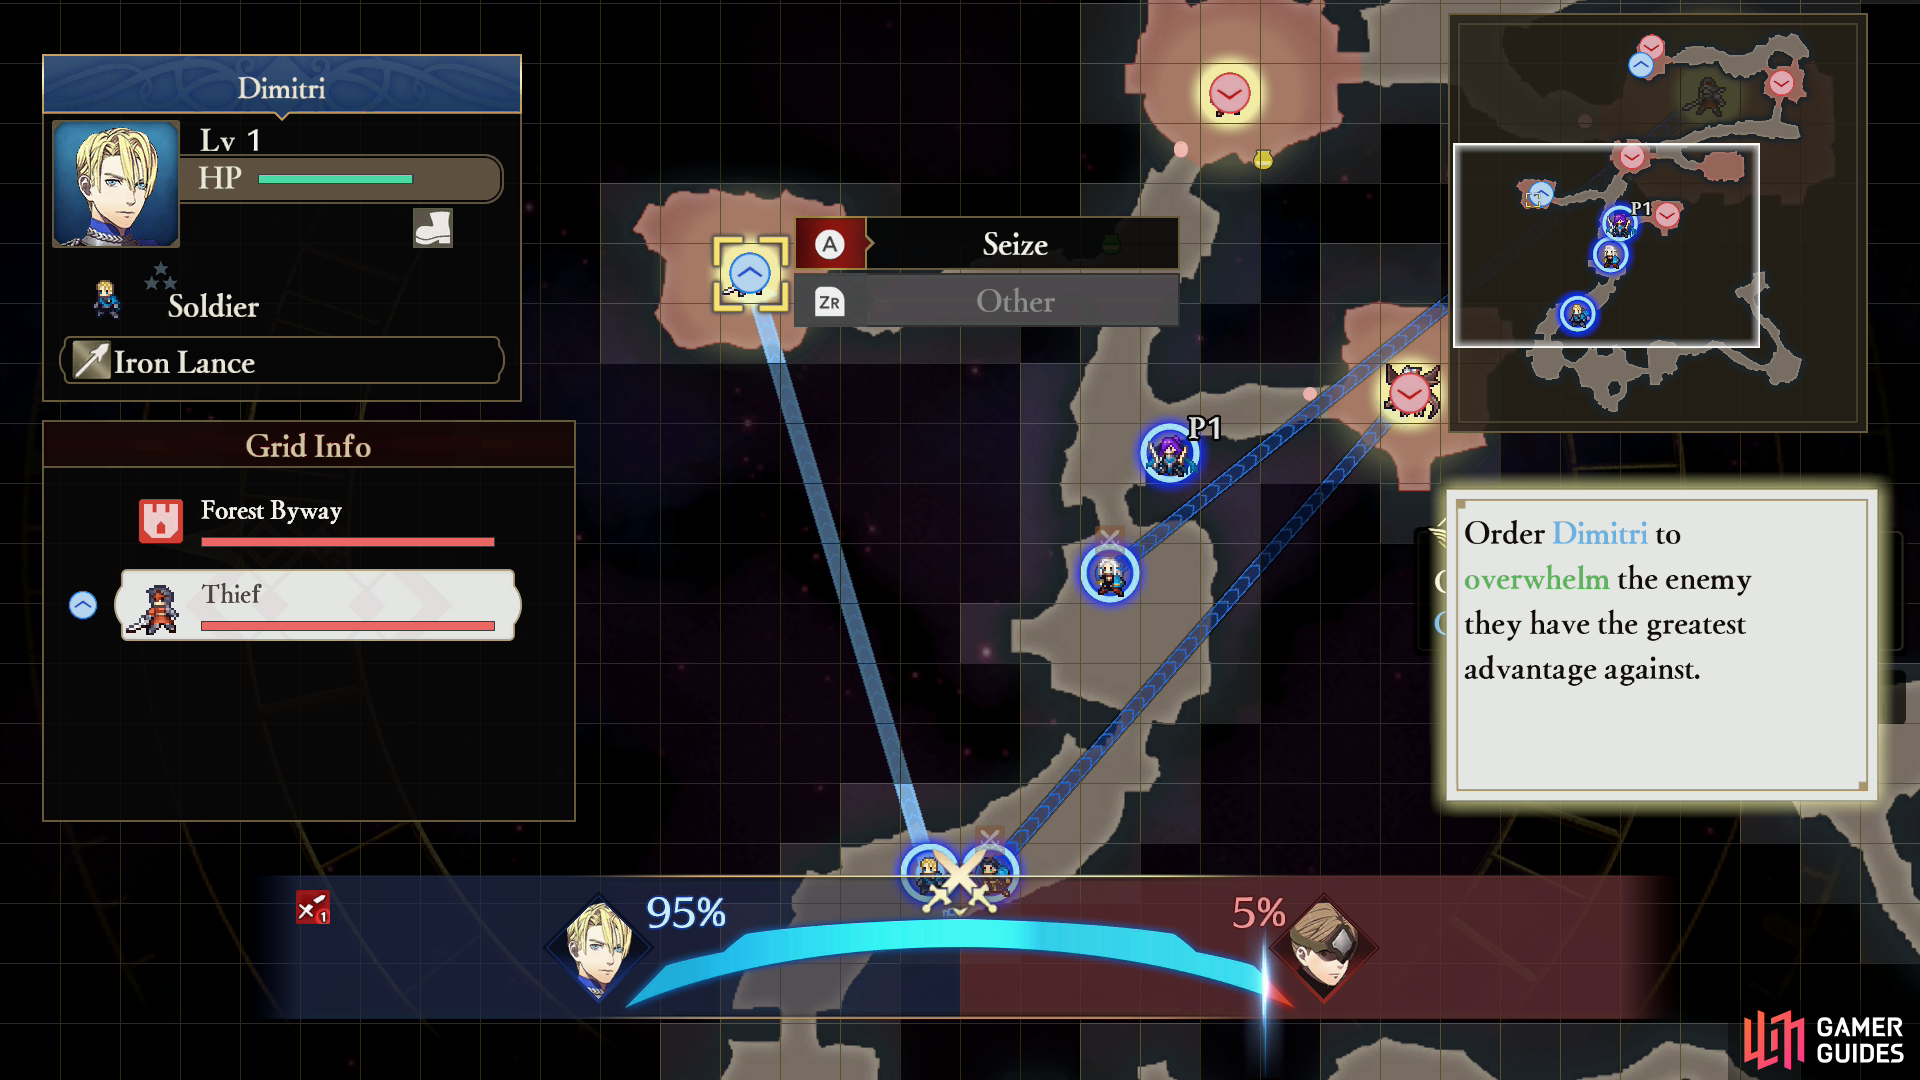
while selecting an enemy will cause them to attack or seize.
Attack or Seize
Select an allied unit, then drag the arrow icon to an enemy unit and press the button to assign the first unit to attack the second. The attacking unit will generally ignore other combatants in favor of their target. If you select an enemy Stronghold Captain, the order will be changed to “Seize” instead of “Attack” but otherwise functions the same. Once the target is defeated, the assigned unit(s) will return to their active Autobattle AI script. There’s usually no need to waste your time picking off generic enemy units with the “Attack” command - issuing orders for a unit to attack a Stronghold Captain or valuable target is usually the best course of action, even if they have to run past some other enemy generals to get there.
Control
Allows you to assume direct control of the selected unit. This only functions with primary units.
Assign and Unassign Adjutant
Select an allied unit, then drag the arrow icon to another allied unit and press the and you should see the “Assign as Adjutant” option. Select it and the first character will move to the second character’s location and become their Adjutant. Adjutants grant the other unit they’re joining a variety of boons, including stat boosts, the ability to perform Partner Specials, Adjutant Follow Ups and Adjutant Guards. For more information, check out the Best Adjutants in Three Hopes page.
If you press the button while selecting a unit who already has an Adjutant assigned, you can choose to unassign their current Adjutant.
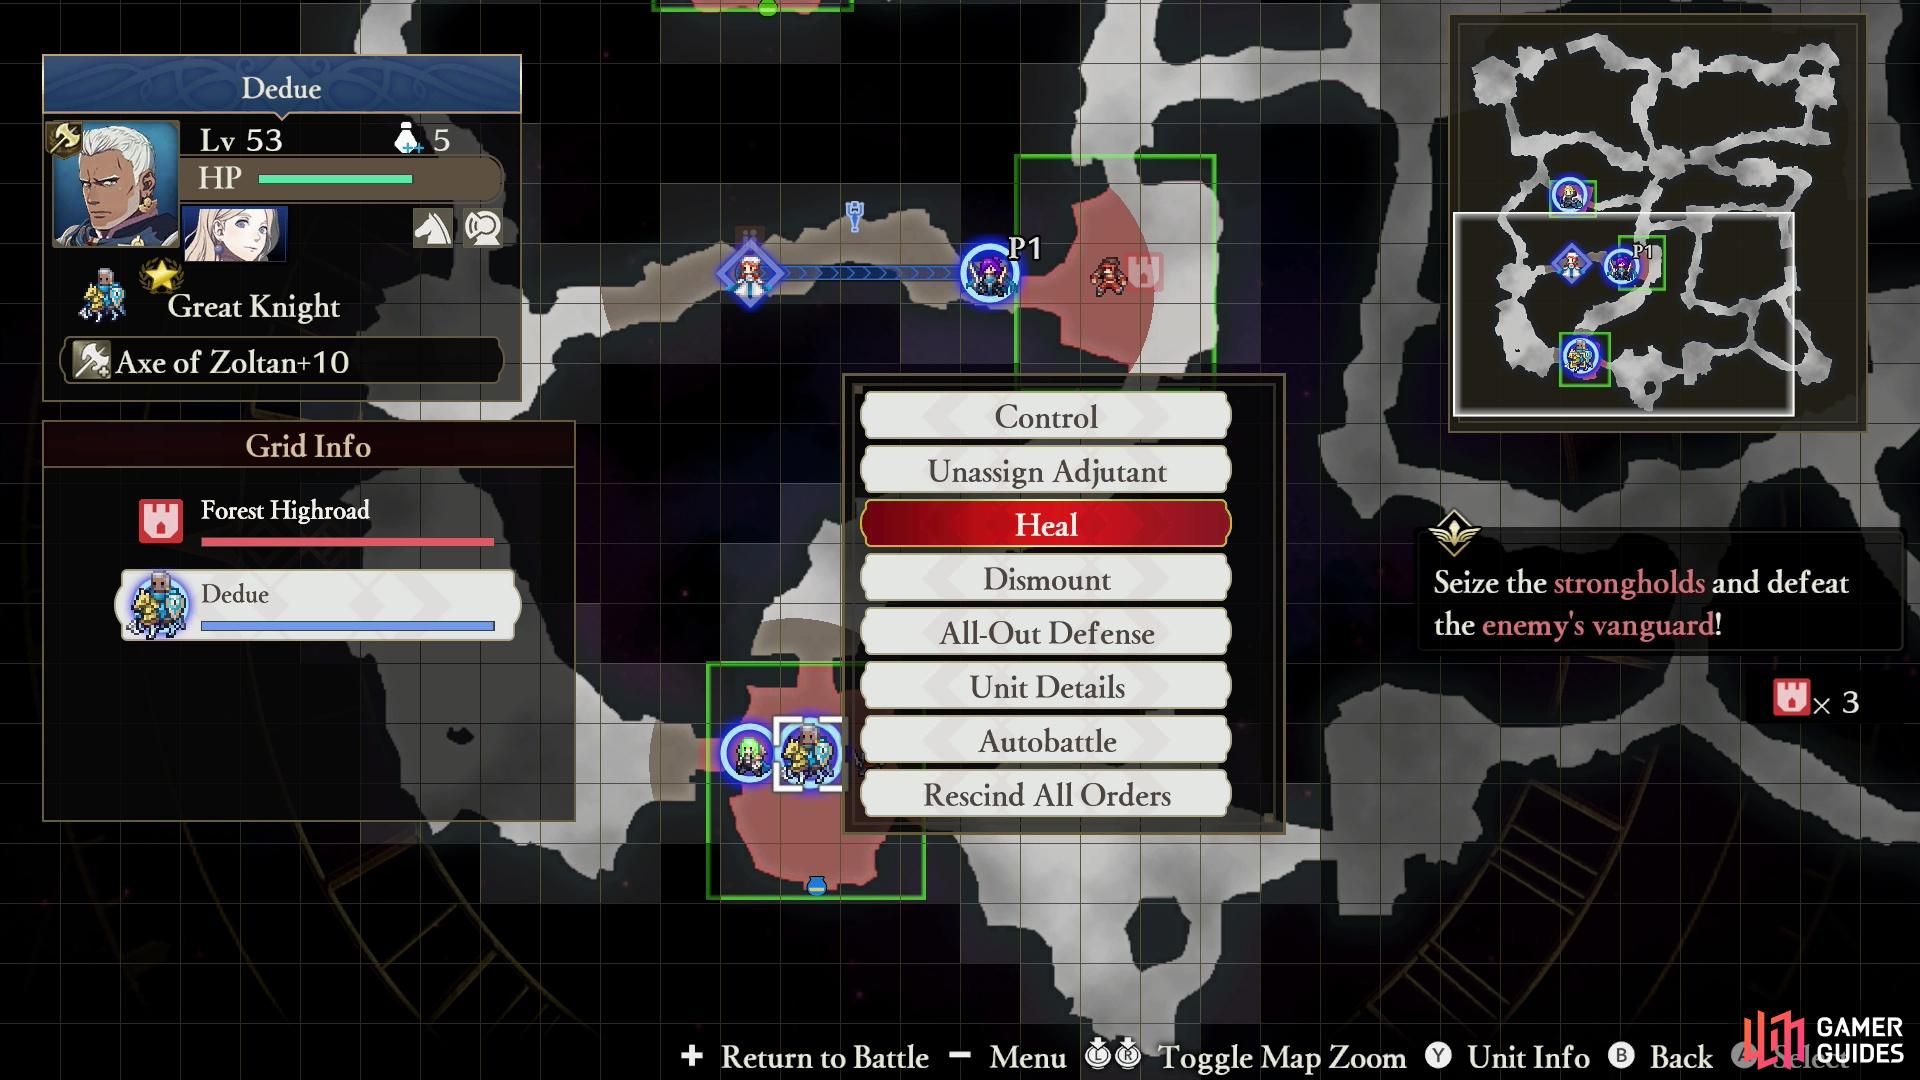
You can issue a variety of other commands by pressing the ZR button, ordering units to use healing items or dismount.
Heal
Select an allied unit, then drag the arrow icon to another allied unit and press the and you should see the “Heal” option. This will cause the selected unit to use one of their healing items (Vulnerary, etc.). Alas, it cannot be used to command the selected unit to heal another unit - you’ll have to take control of a unit with a healing spell and manually do that.
Dismount and Mount
Mounts can be unwieldy and vulnerable to certain enemy attacks. When you find a mount is hindering more than helping, select a mounted allied unit and press the and you should see the “Dismount” option. That until will dismount and stay dismounted until you issue a command to do otherwise.
No Comments