
Instead of the Spike Bridges simply tossing spikes up periodically, they instead are now triggered by the spotlights around the area. You need to use long jumps or a Cat Suit to easily navigate this area. Start by crossing the first spike trap to a ?-Block with a Lucky Bell inside. Follow the next spotlight as it moves ahead, then duck to either side to avoid the spikes being triggered, then take the Warp Box to the next area. You have a long path of triggered spikes here, with a Fire Bro waiting for you on the other side. If you have the Cat Suit, wait for the spotlight to move right, then get a running start to the left of the triggered spikes, and jump/climb the wall of the pillar with Green Star #1.
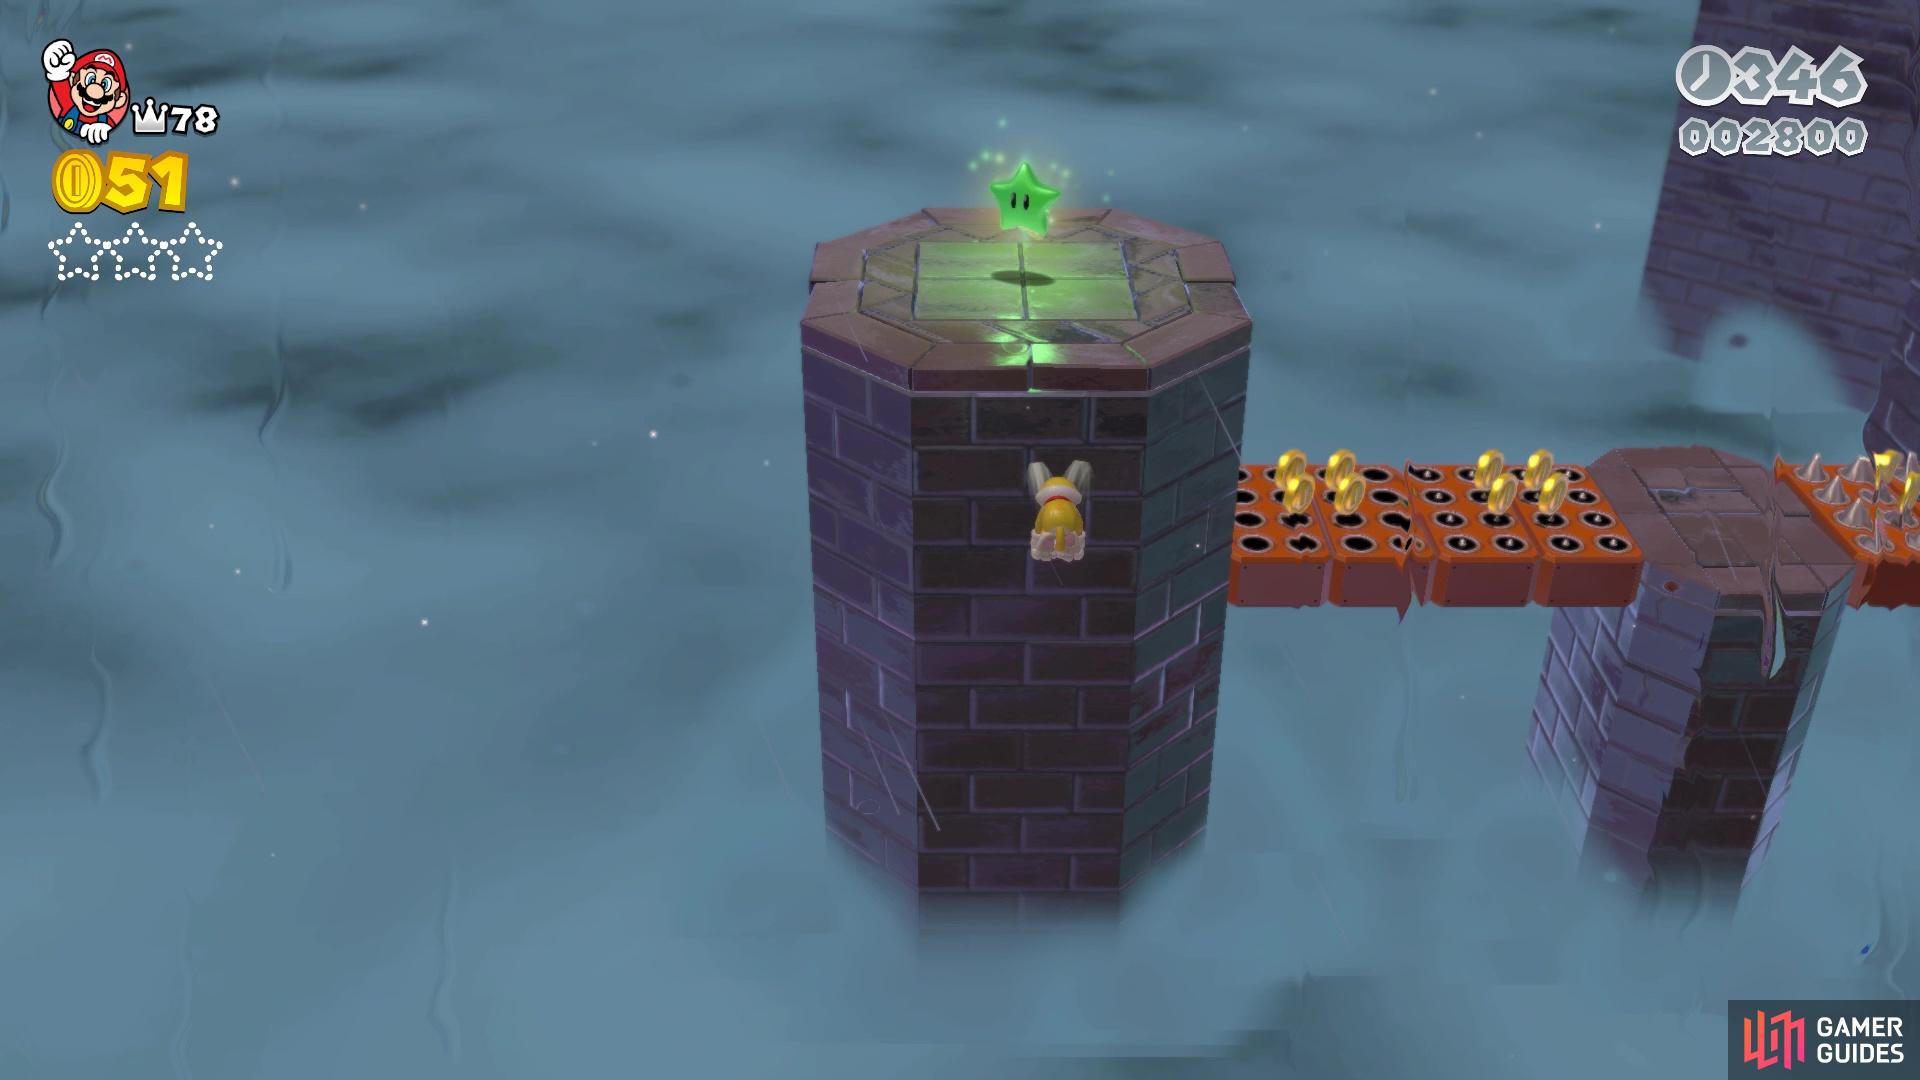
You can use the Cat Suit to jump over and climb the pillar with the first Green Star
If you don’t have a Cat Suit, then you have to go around while avoiding the spotlight, as well as the Fire Bro and spikes that come out on their own. Continue with the level, crossing the moving spikes when they aren’t passing underneath the spotlight. Take the Warp Box at the end and touch the Checkpoint Flag, then enter the next area. Here, the spikes are acting on their own, in a wave-like pattern. You will need to do small jumps over them, as bigger jumps might lead to you hitting the next spike as it comes your way. Stop at the safe section along the way, dispatching the Fire Bro and getting the Lucky Bell from the ?-Bell, which you will need to grab Green Star #2 on the side of the pillar.
The best way to do this is to climb to the top of the pillar, then drop down and grab the star, while you climb back up to the top in the process. Get back on the main path and go to the end, taking the clear pipe to a large section of spikes, most of which is covered with a spotlight. Thankfully, there are safe places in the middle and you will want to go to the far side, as Green Star #3 is located there. Again, the smaller pillar that the star is located on has some more spikes, and is fully lit by a spotlight.
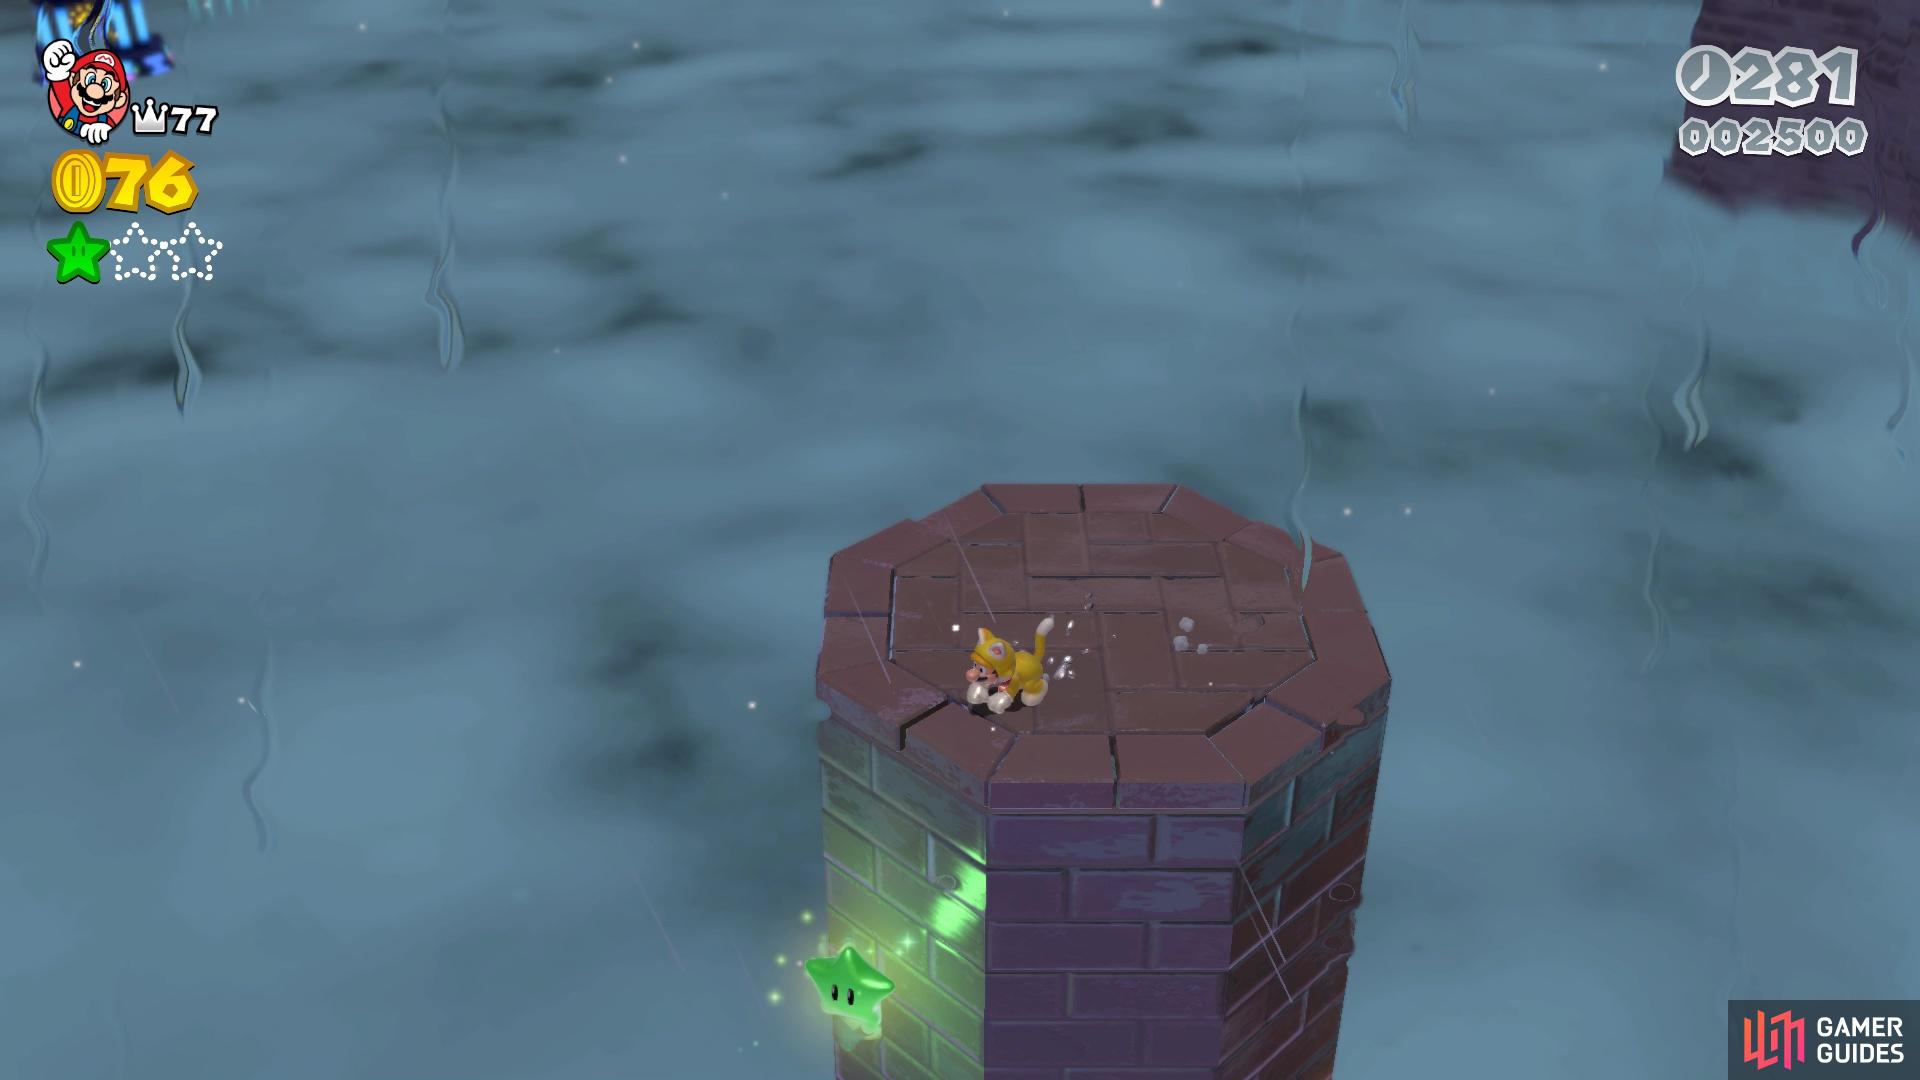

(1 of 2) Drop down from above to get the second Green Star
Drop down from above to get the second Green Star (left), The third Green Star is on this small platform just past all of the spikes (right)
Go back to the main platform and to its left side, where you need to wait for the moving platform with the spikes. Jump on it, avoid the spikes as best as you can, and transfer to the next one. When you get to the end of the second, jump to the platform with the Warp Box to teleport to the Goal Pole area. You only need to be quick here at the top, as the spotlight will make the spikes come out of the ground.

 Sign up
No Comments