

Slipskate Slope
Once you have beaten Fury Bowser the first time, you will unlock a second portion of the map. There will be four question marks on the map in this second area and Slipskate Slope will be the southernmost one in that region. Slipskate Slope is a fairly linear island, as there isn’t much to explore. Actually, there is a smaller area below it and you will need to use a cannon to reach the actual course. Simply look for the little stone structure, where you will find a clear pipe and the cannon that launches you to the main portion. The main focus of this island will actually be the Ice Skate power-up, which will be needed to do some of the Shines here.
Make the Lighthouse Shine Cat Shine
When you start the actual course, you will see three stacks of Goombas ahead of you, as well as an Ice Skate on the central platform. One of the Goomba stacks does have a Cat Shine Shard on top of it, but ignore it for now and just grab the Ice Skate power-up. If you run into any wall while using the Ice Skate, you will lose it, but it will respawn in its original place. While using the Ice Skate, slide across the spikes and you will be set on the main path that will eventually bring you to the end. The boost pads will help get you some speed, but that will fizzle out after a few seconds.
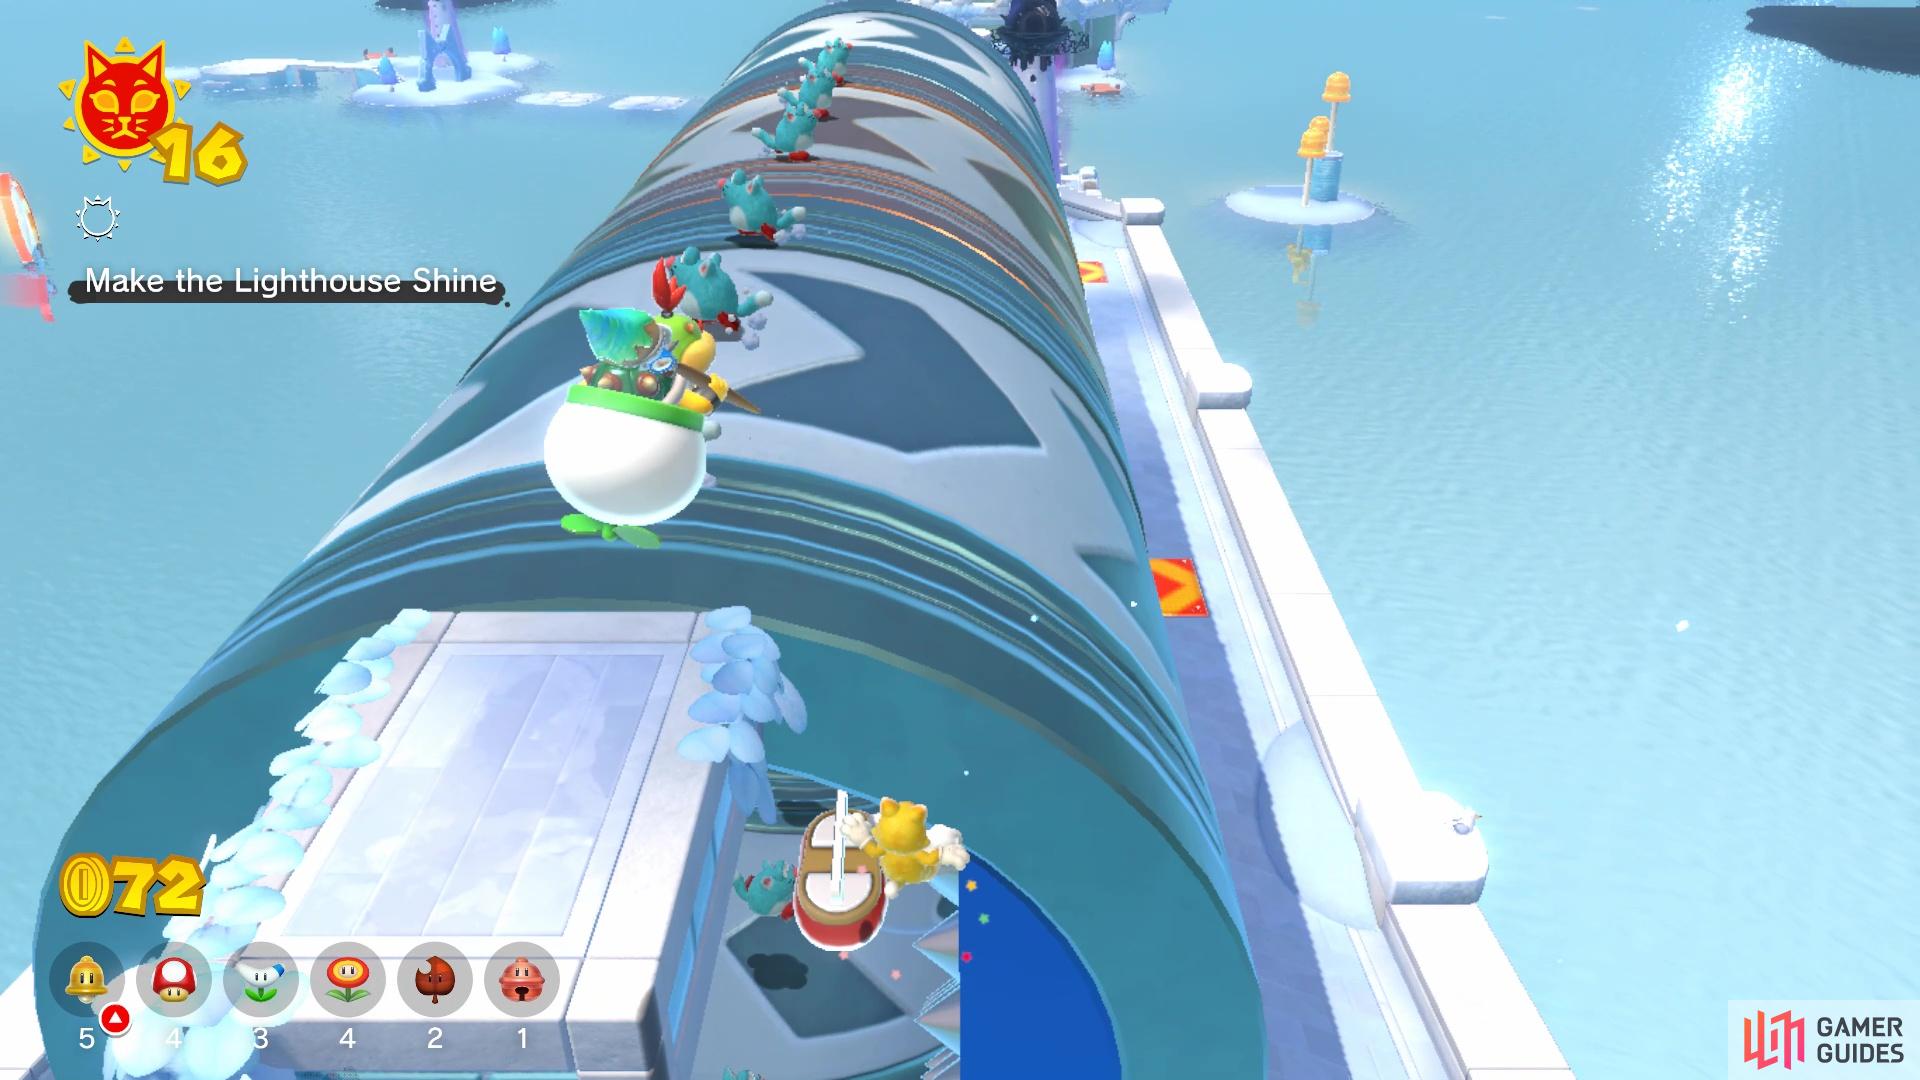
After passing by a few Stingbies, you will pass through a cylindrical structure that has spikes on the sides, with there also be directional conveyors inside. A nice trick to avoid hitting the spikes is to keep jumping while on the conveyors, which won’t push you much at all. Also, there should be an Ice Skate in every section, should you lose it after the first section. After the first cylinder, there is a ramp that can shoot you on top of the second cylinder, but if you don’t make it up there, you can either go through it or down the sides.
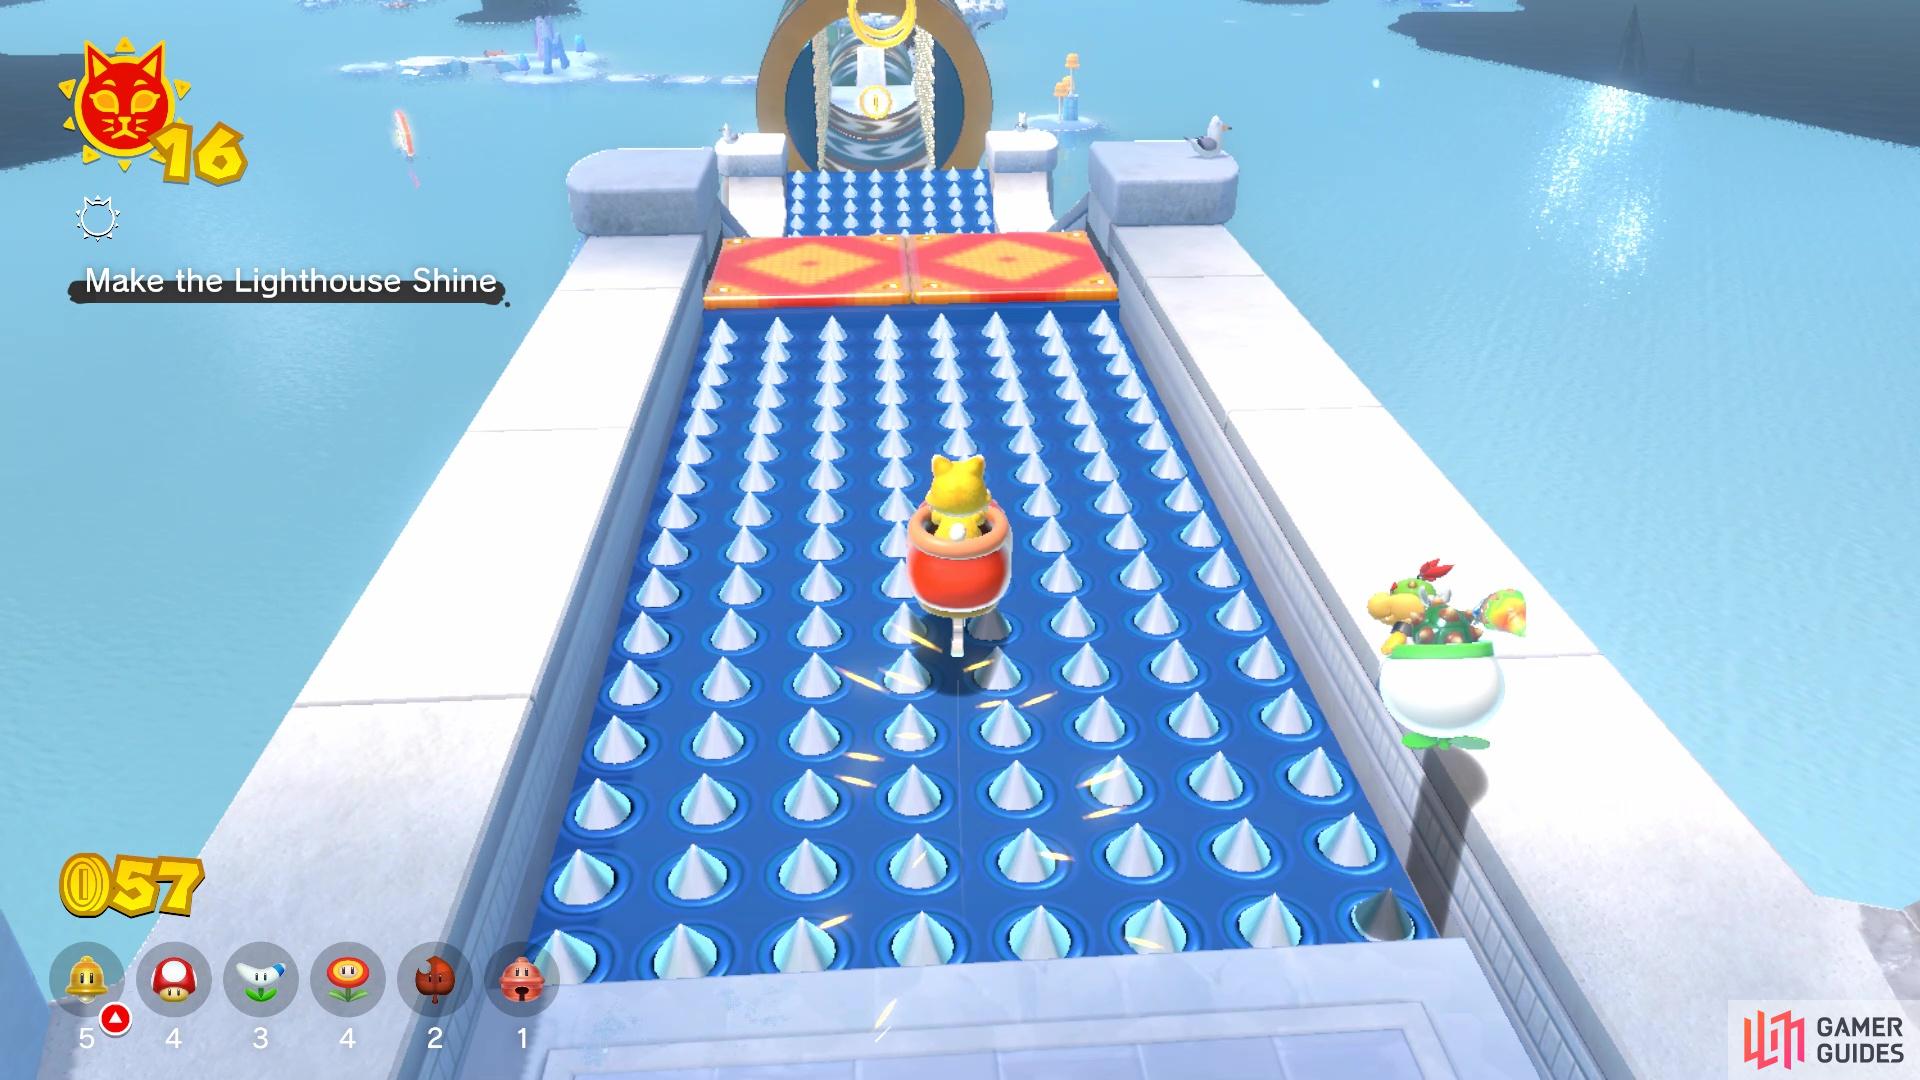
The Ice Skate will allow you to pass over the spikes unharmed
Hitting a wall straight on will cause you to lose the Ice Skate
Note that the second cylinder has the same spike walls, but the path will get narrower, so you will have less room for error. There will be one final ramp before the last area, where the Cat Shine is waiting for you.
Blue Coin Bustle Cat Shine
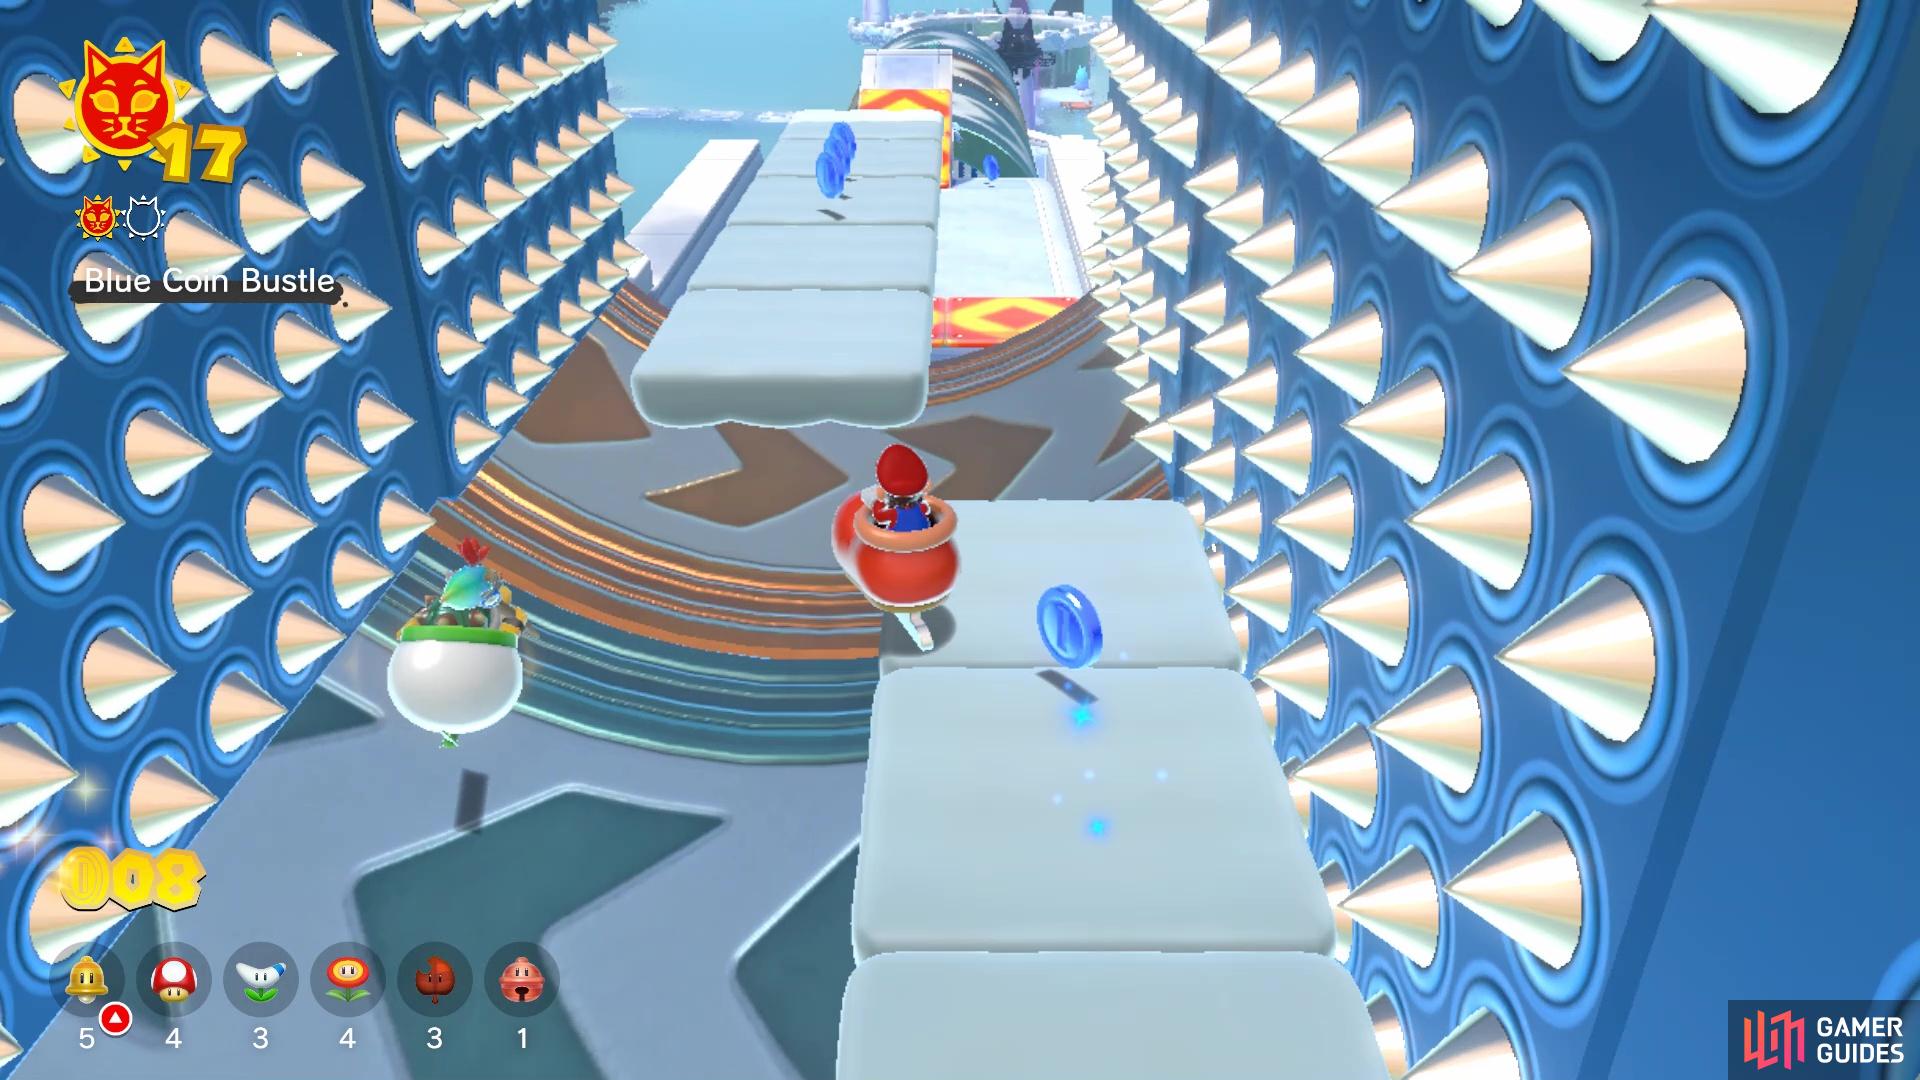
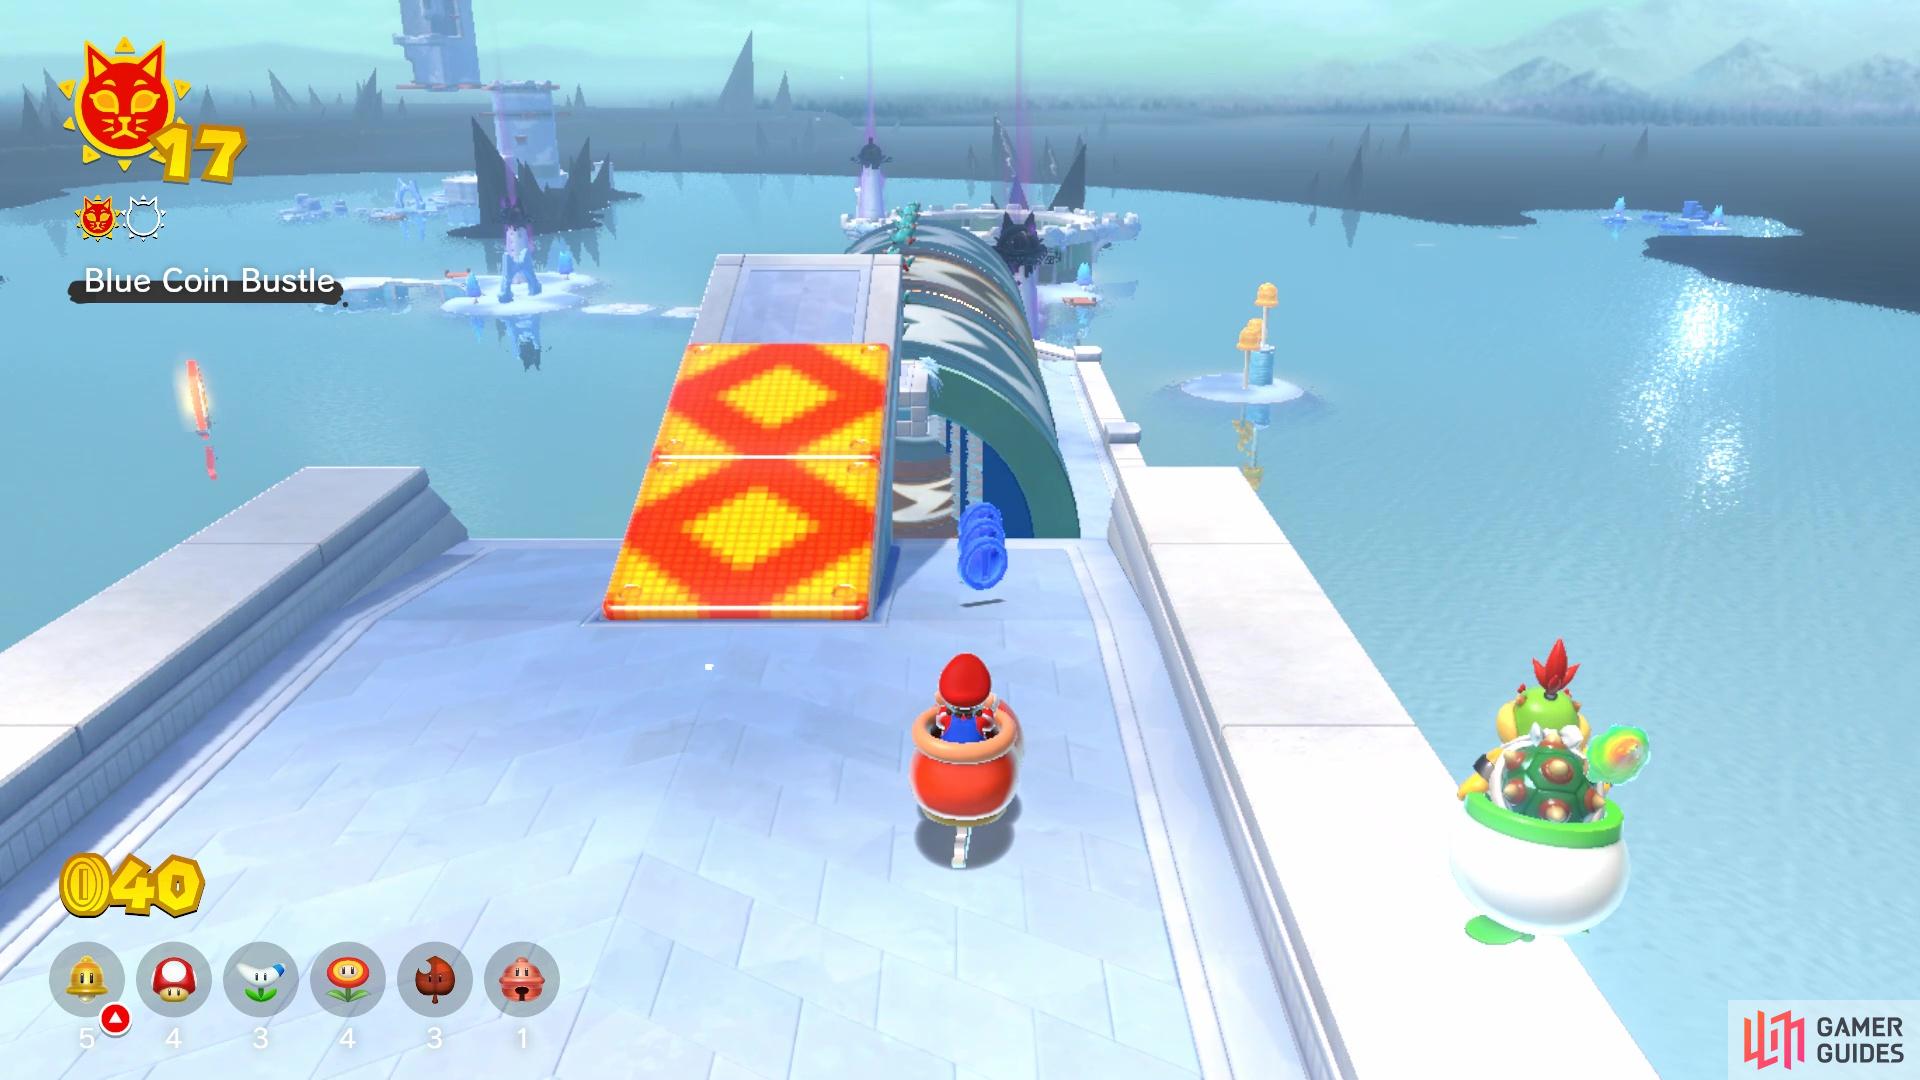
Upon reaching the main path, you will notice a P-Switch right past the gate. Hitting this will spawn blue coins and start a hidden timer, with the blue coins disappearing after a short while. Of course, due to the nature of the island, missing a blue coin and accidentally skipping to the next section will mean you can’t backtrack, so you will have to start over. Thankfully, there is a cannon at the final area that will launch you back to the start, meaning you don’t have to use the other cannon on the lower island.
The blue coins in the first area are easy enough to grab without any problems, so get them and head to the second area. The first coins will be to the right of the ramp, then you will head inside the first cylinder, where the blue coins are on some clouds. These can be a little annoying to grab, since you have to jump to each of the three sets of coins, so you may need to correct your movement. As soon as you exit the cylinder, you will find another set of blue coins to the right of the ramp. Drop down to the next section, where you will find the blue coins inside of the second cylinder.
It can be annoying getting the blue coins on the clouds
Don’t miss the blue coins to the right of the ramp after the clouds
Here, you will have to be a little more careful, since they are not on clouds and on the actual conveyors, kind of close to the spike walls. You should probably avoid jumping, though, as you don’t want to accidentally miss a blue coin. Once you exit the second cylinder, the last set here will be right before the ramp and is a straight shot. Jump off the final ramp and the actual final blue coins will be right before the pedestal that will hold the Cat Shine.
Key to the Cat Shine Cat Shine
You will see the cage with the Shine in it at the beginning of the course, so you only need to go and bring the key back. You will also notice that only one Goomba stack is there, with the other two riding Ice Skates. There are also some question mark boxes at the beginning (as well as throughout the course) that are Propeller Boxes. So, you can either defeat the Goombas to get an Ice Skate or use the Propeller Boxes to reach the end of the course, which is where the key is located. Of course, since you have to grab the key, you will automatically lose the Propeller Box.
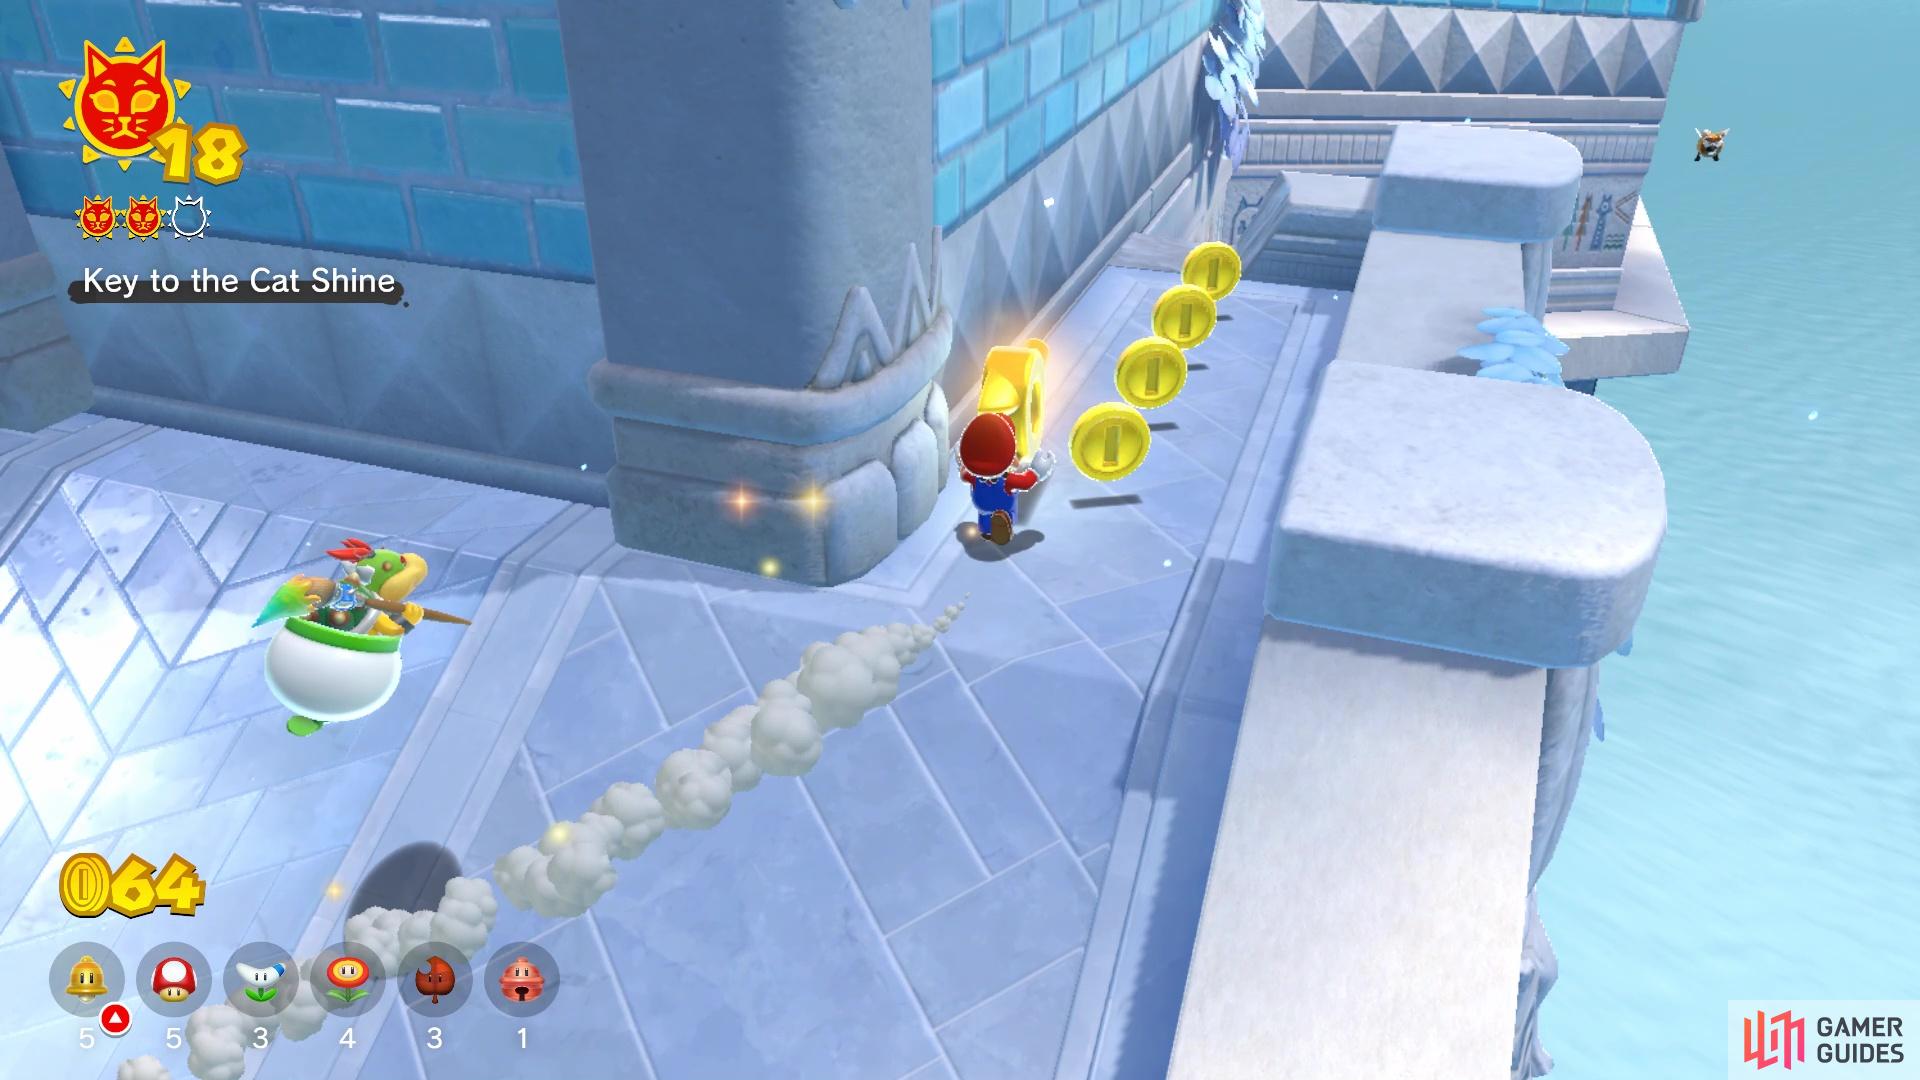
The path back after grabbing the key is marked by some coins
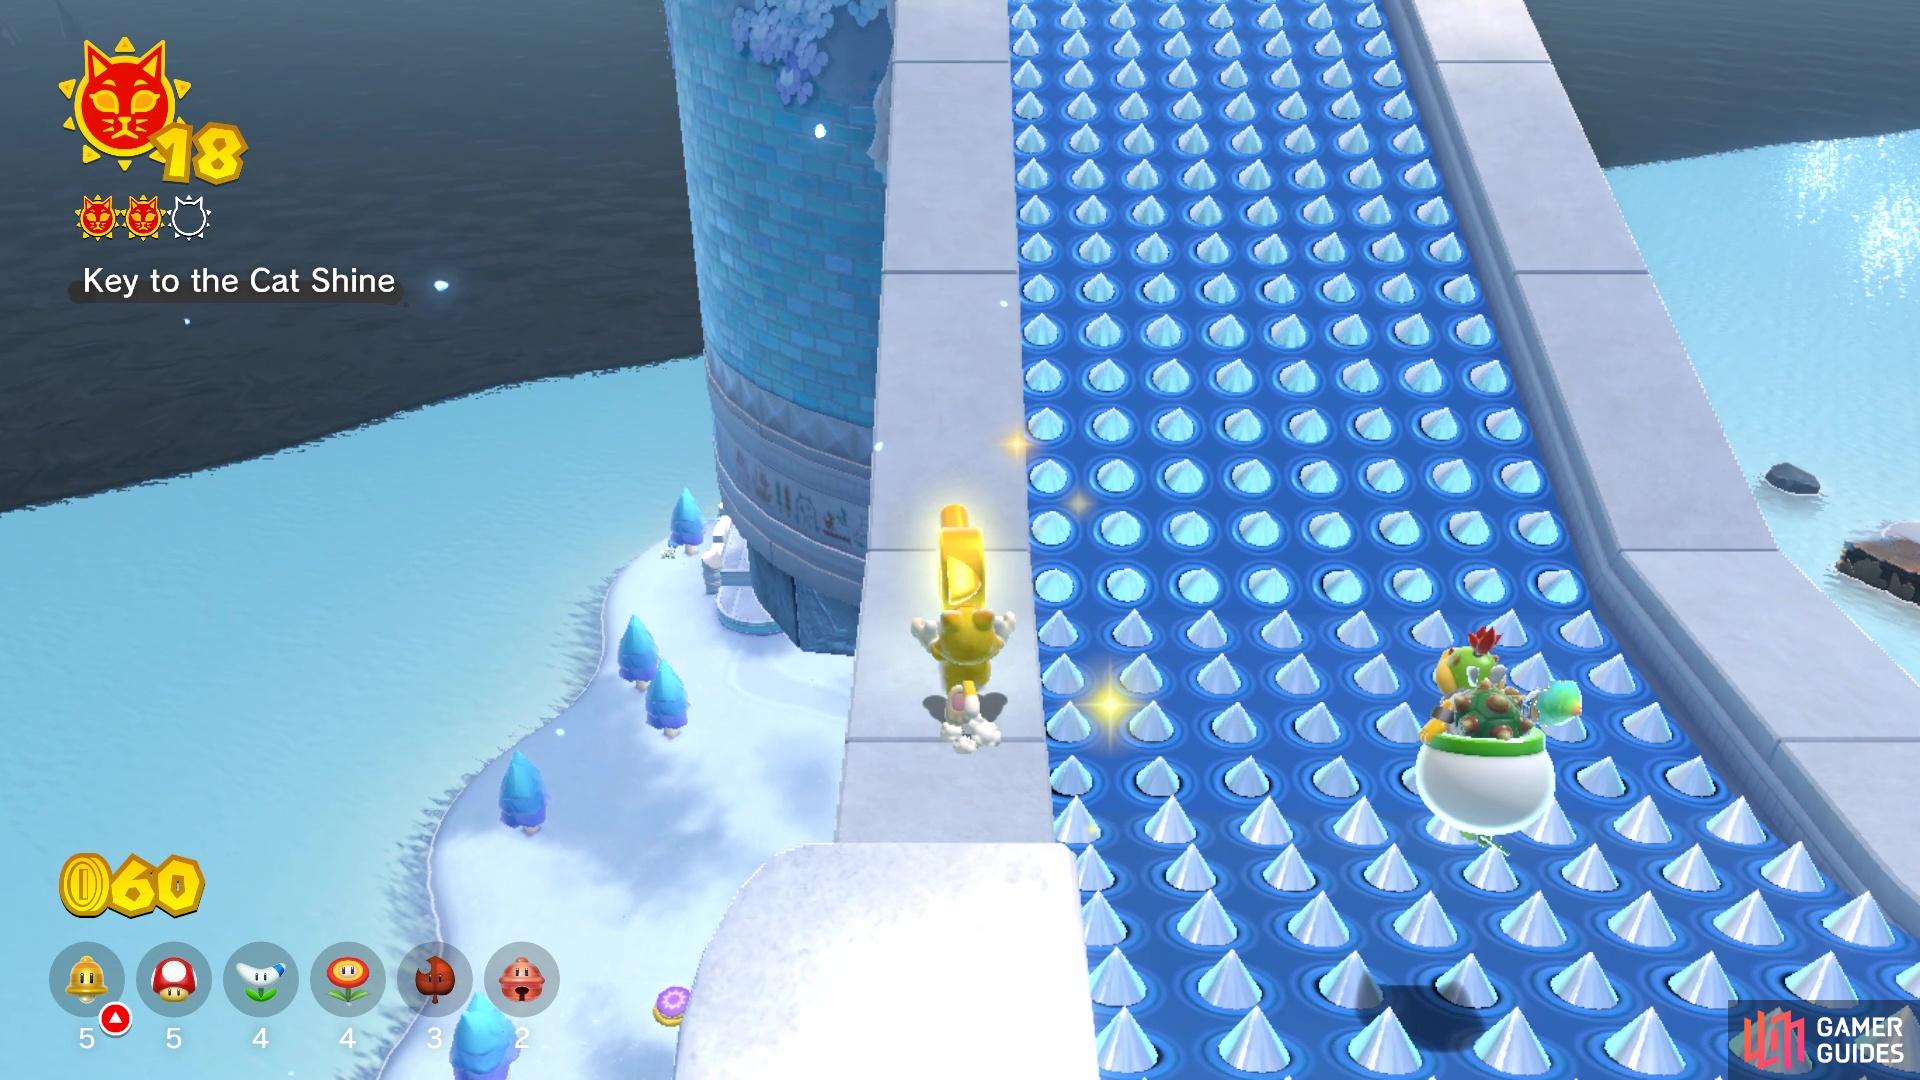
You’ll need to use the railing here because of the spikes
Now that you have the key, you have to find a way back to the beginning, but you can’t bring the key into the cannons. You probably never noticed, but there’s actually a side path that will take you back to the beginning in the final area. So, turn around and look for the trail of coins to find the path. The path is linear, so you’re not really going to deviate from it, but try not to fall off at all if you can help it. It will lead to some ledges you have to jump up, as well as more along the other walls. Once you reach the final wall you need to climb, you’ll have to use the railings to get to the beginning, as the main path has those spikes. It’s not far from there to the cage with the Cat Shine.
Five Cat Shine Shards Cat Shine
You likely saw the majority of the Cat Shine Shards while going for the rest of the Shines, as well as even got a few of them. The Propeller Blocks are back again and can help immensely in gathering the Shards, so you may opt for that instead of the Ice Skate. When you begin the course, you should see the first one sitting on top of a Goomba stack in the very first area. So, head there and defeat the Goomba stack to get Cat Shine Shard #1. Grab an Ice Skate and head down to the second section of the course, where you should see the second Shard in the air right past the ramp. Note that you will likely need to hit the boost pad while using the Ice Skate, then perform a jump at the end to get Cat Shine Shard #2.
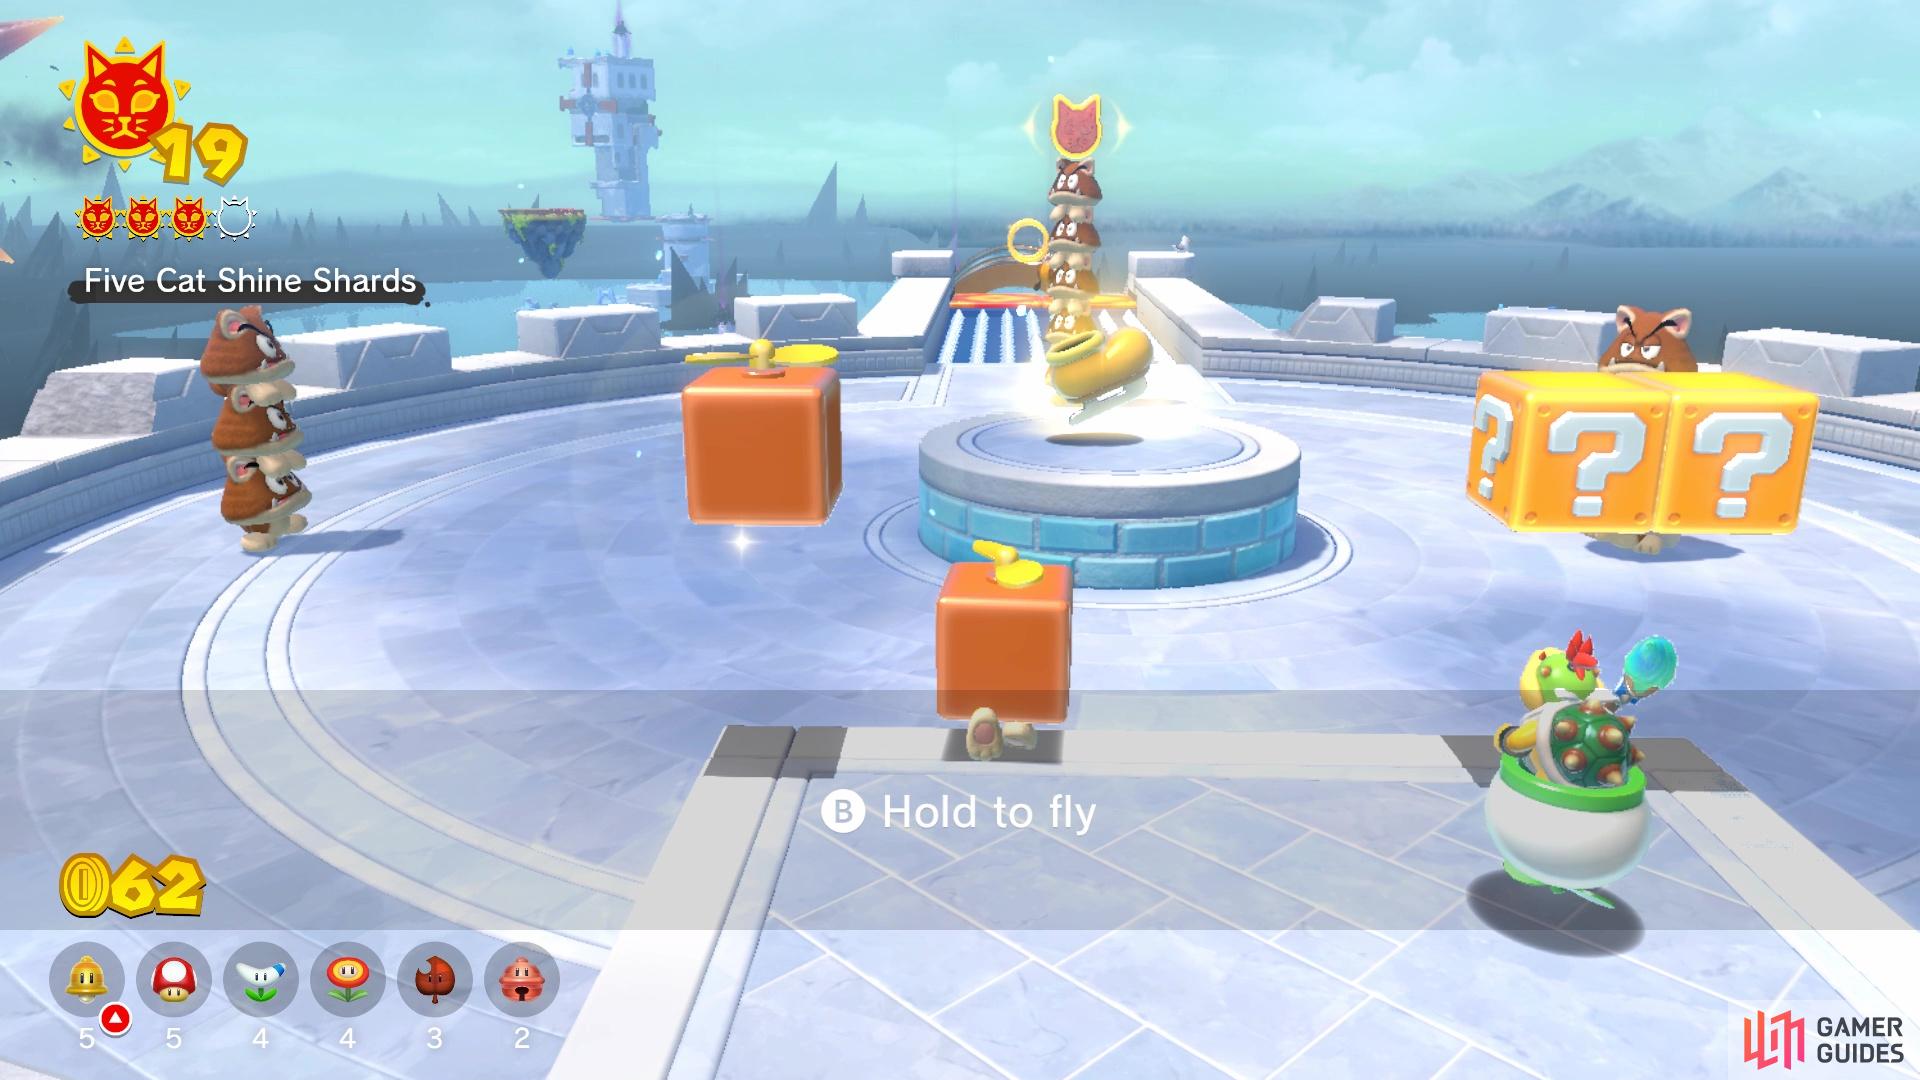
Right after the second Shard is the first cylinder with the spike walls and Cat Shine Shard #3 will be inside it. It’s close to the left wall of spikes, so be careful. Before hitting the other ramp, make sure you still have the Ice Skate, as you will need it to get on top of the second cylinder with the spike walls. The top of the second cylinder does have some conveyors on it, so you need to make sure you don’t fall off, with making it to the end netting you Cat Shine Shard #4. The final jump before the last area is next and in the air past the jump will be Cat Shine Shad #5, netting you the Cat Shard. If you missed any at all, you can use the cannon at the end to shoot yourself back to the beginning and try again.
Blast the Fury Blocks Cat Shine
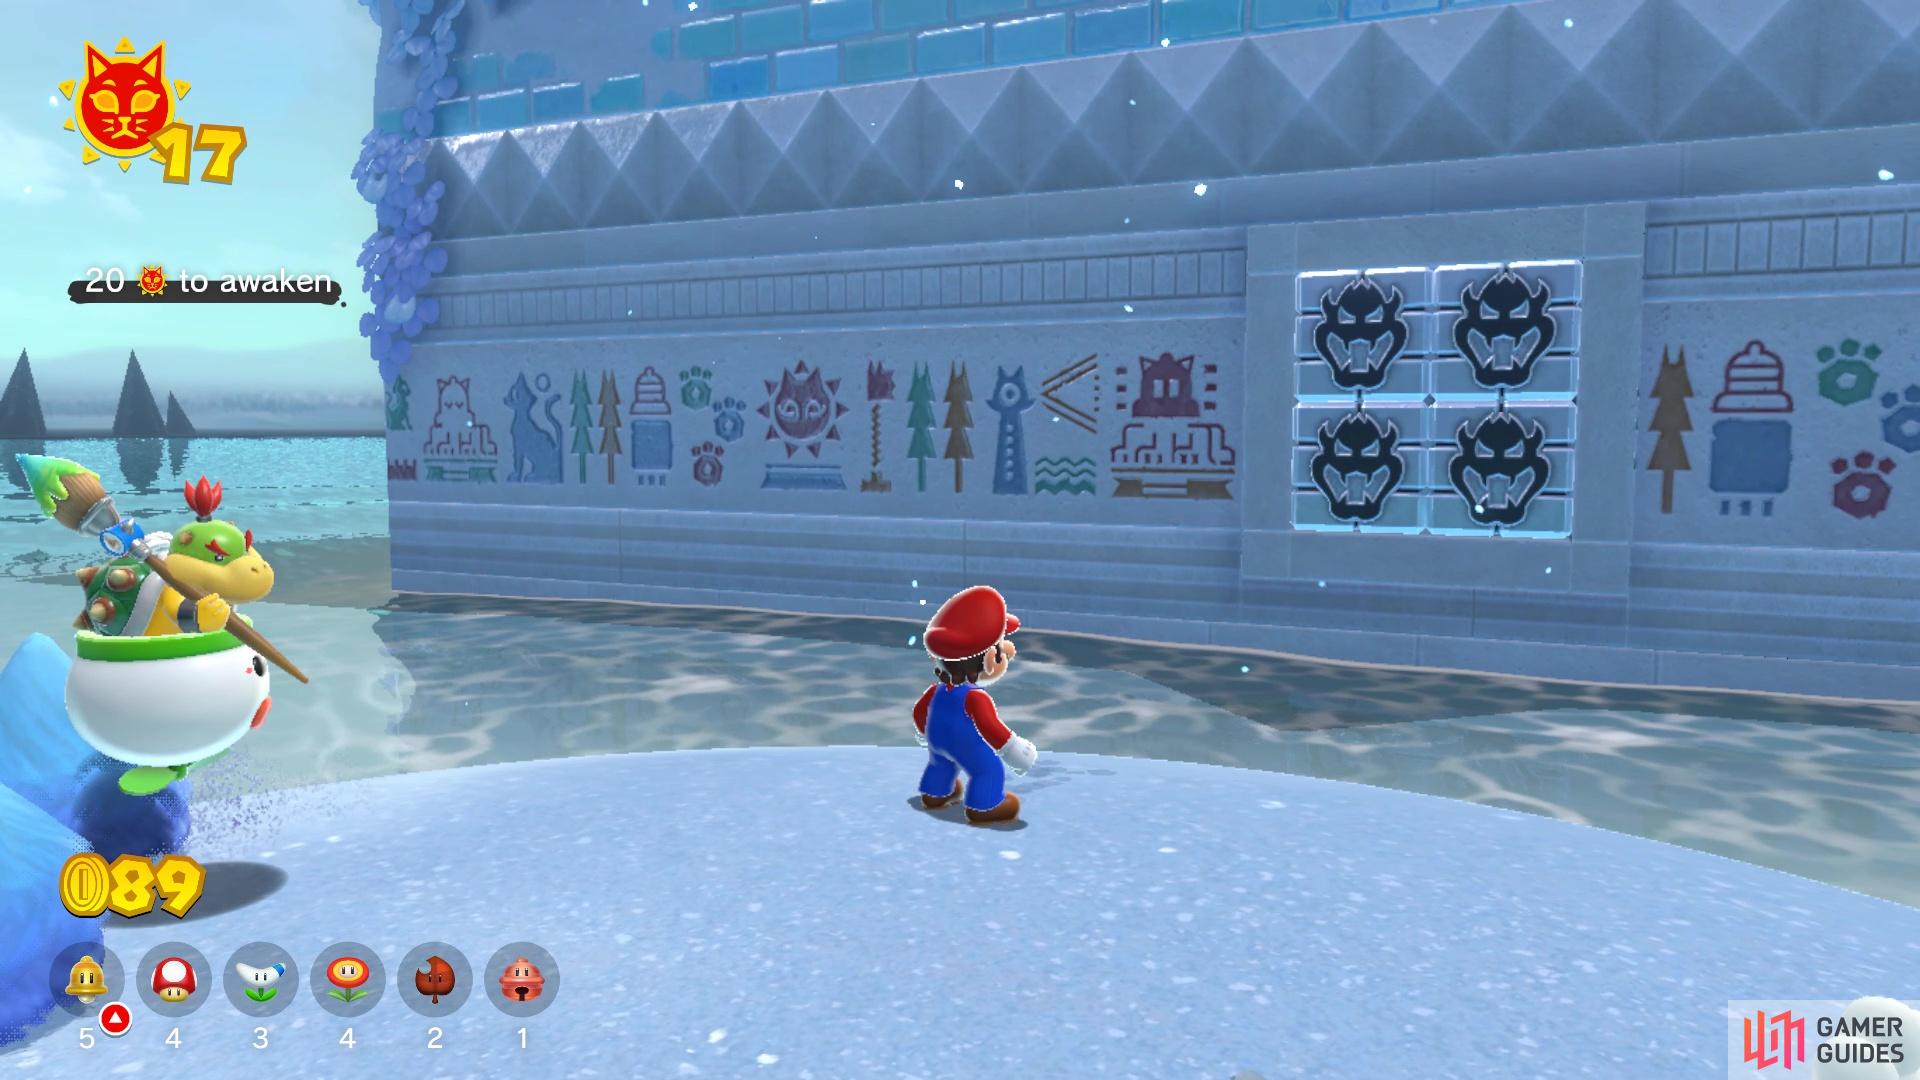
You can find the Fury Blocks on the wall of the course after jumping off the end
The Fury Blocks on Slipskate Slope are definitely hidden and you might be a little lost, confusing some other blocks for them. In fact, the Fury Blocks are not on the actual main course portion, but are on the wall just after the final section with the lighthouse. Basically, make it to the end of the course and jump off where the pedestal that held some of the Shines is located. As soon as you do, look back at the course and you should see the Fury Blocks on the wall. Note that the other Fury Blocks on the platform with the Giga Bell are for an extra Shine in the region. So, now you know the location, wait for Bowser to appear and do his thing to get your Cat Shine.
No Comments