
This page will reveal the location of every collectible in The Forbidden Sands, a region of Alfheim in God of War Ragnarok.
God of War Ragnarok - The Forbidden Sands Collectibles Locations in Alfheim
| Collectible | Quantity |
|---|---|
| Nornir Chests | 2 |
| Legendary Chests | 2 |
| Lore | 7 |
| Artifacts | 3 |
| Nine Realms in Bloom | 1 |
| Buried Treasure | 1 |
| Odin’s Ravens | 4 |
| Yggdrasil Rifts | 1 |
| Berserker Gravestones | 1 |
| Song of the Sands | 1 |
| The Elven Sanctum | 1 |
| Freyr’s Gift | 1 |
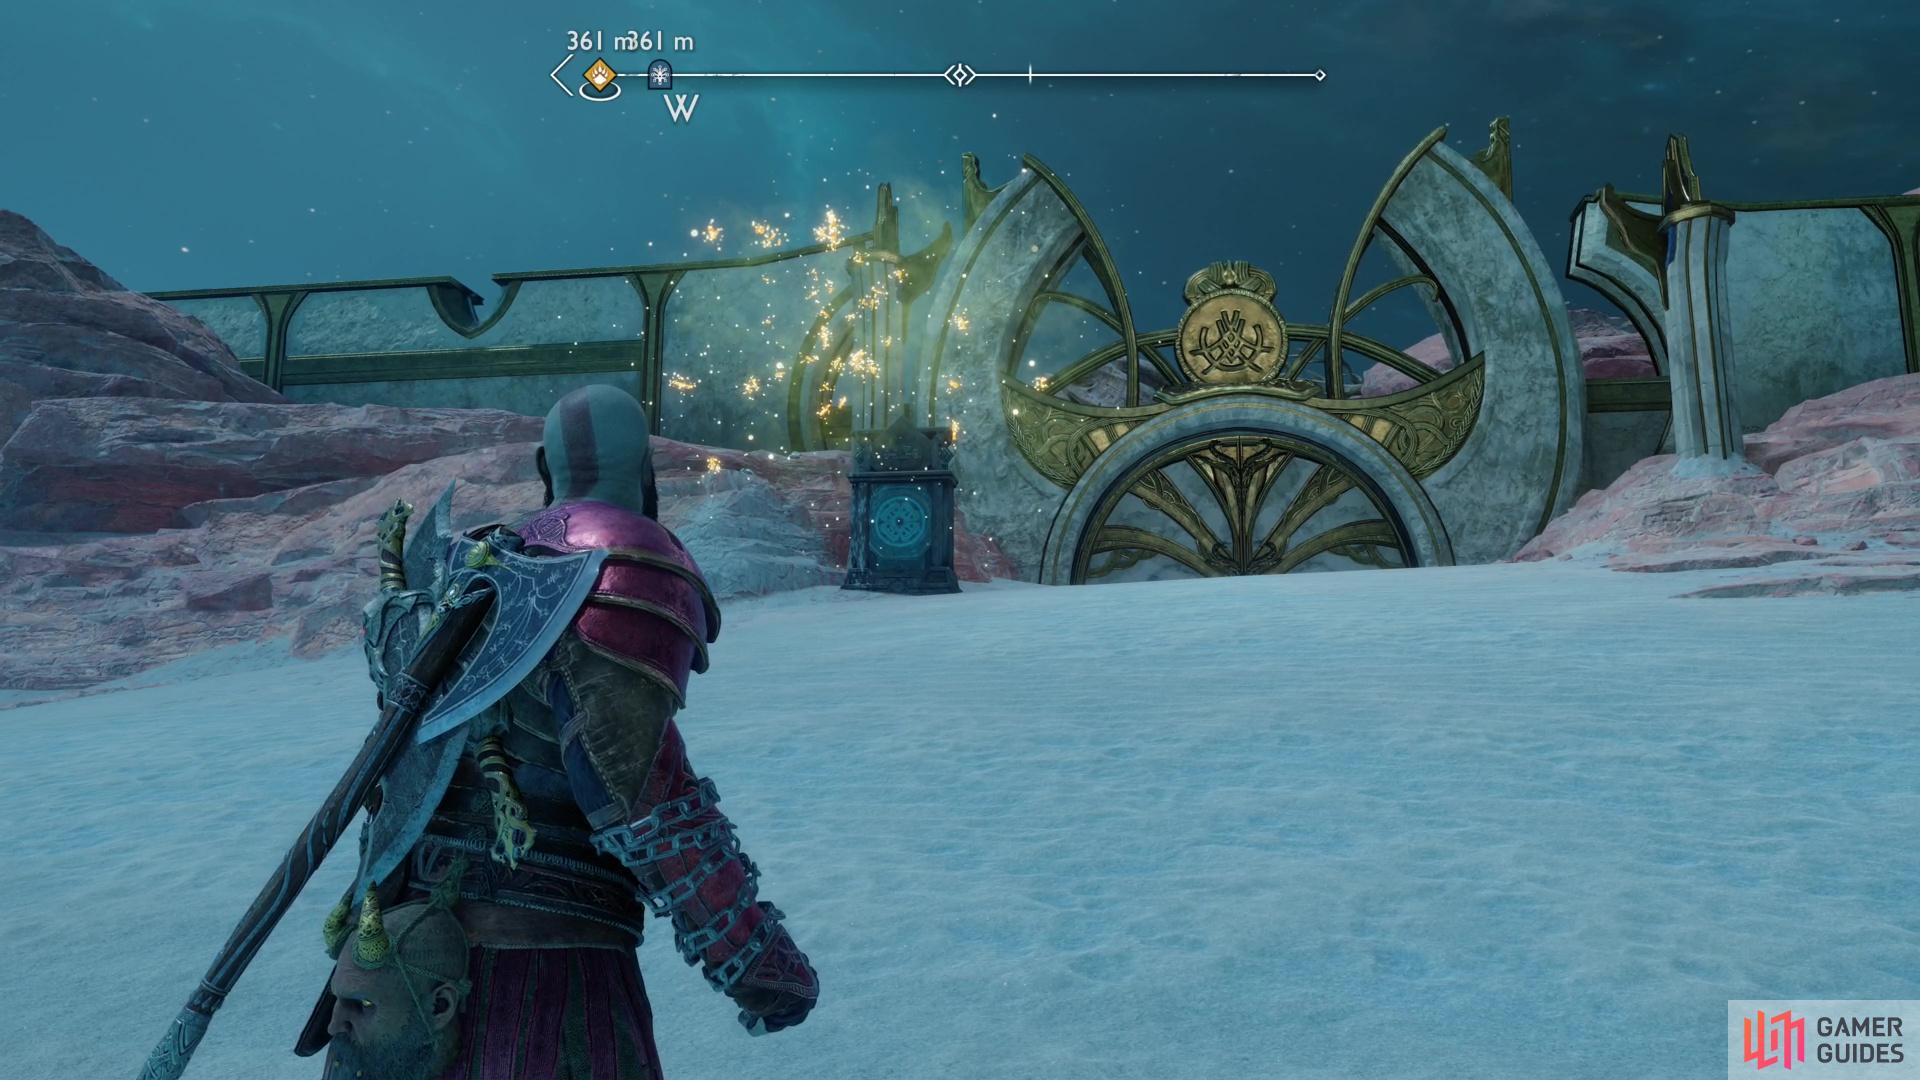
| The Desert Door | 1 |
After completing the main quest “The Reckoning” you can return to The Barrens and use your now-upgraded chisel to reach The Forbidden Sands.
How to Find The Forbidden Sands
You can reach The Forbidden Sands immediately following the main quest The Reckoning, during which you’ll obtain the upgraded chisel - a tool needed to break the seal that prevents you from reaching this region earlier. To reach The Forbidden Sands, just drive the Gulon sled to the northwestern edge of The Barrens, where the aforementioned seal can be found. Once broken, continue through some caverns and you’ll reach The Forbidden Sands, the second large desert area in Alfheim.
The Forbidden Sands may be smaller than The Barrens, but this region accounts for around a third of all the collectibles in Alfheim… in no small part due to the numerous Lore pickups in The Elven Sanctum (you can find a walkthrough for the favor of the same name here).
Speaking of favors, there are several of them in The Forbidden Sands. In fact, it’s likely that the aforementioned The Elven Sanctum favor is what lured you back here. Like in The Barrens you’ll find this area fouled by storms, which you can disperse by completing the favor Song of the Sands. We recommend doing this before attempting to explore The Forbidden Sands, as it’ll be much easier to find collectibles without a storm disrupting your view. You can also find four collectibles in the region where the aforementioned favor takes place - The Burrows.
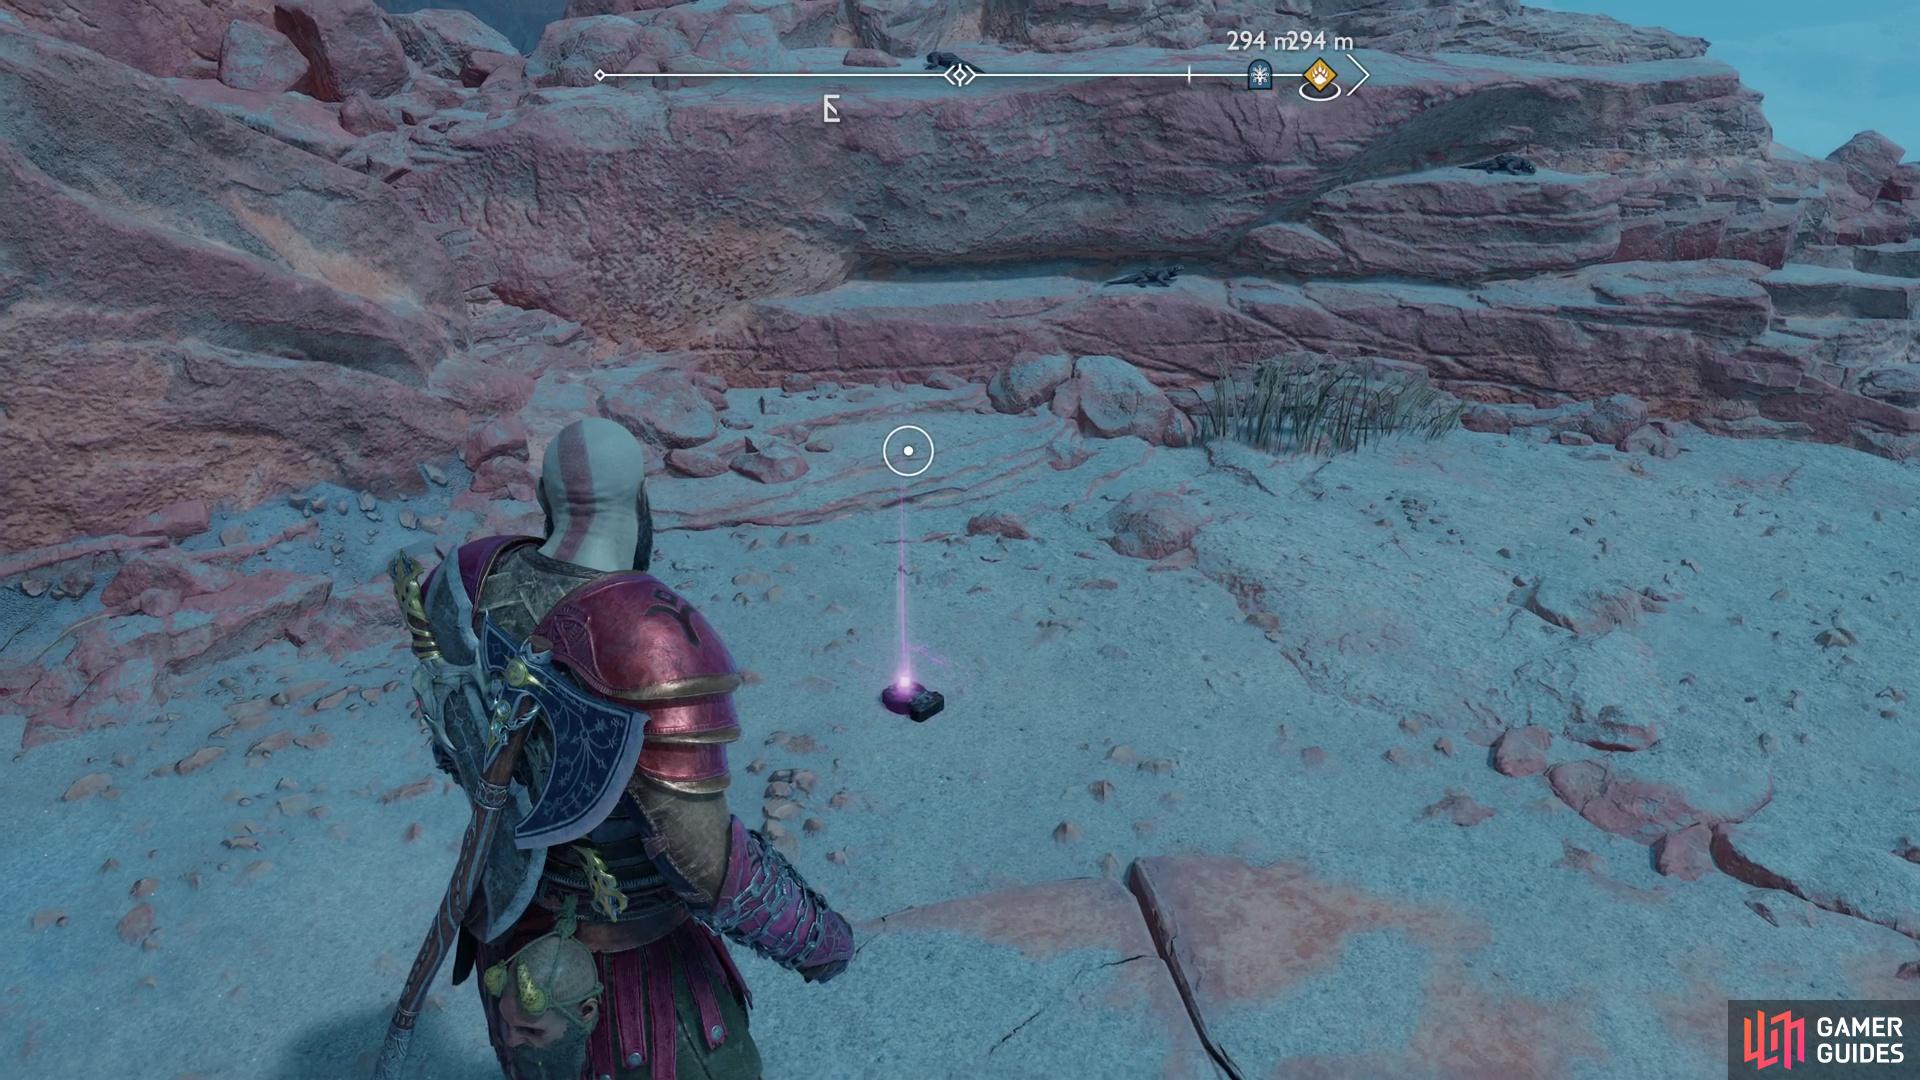
Complete the favor “Freyr’s Gift”,
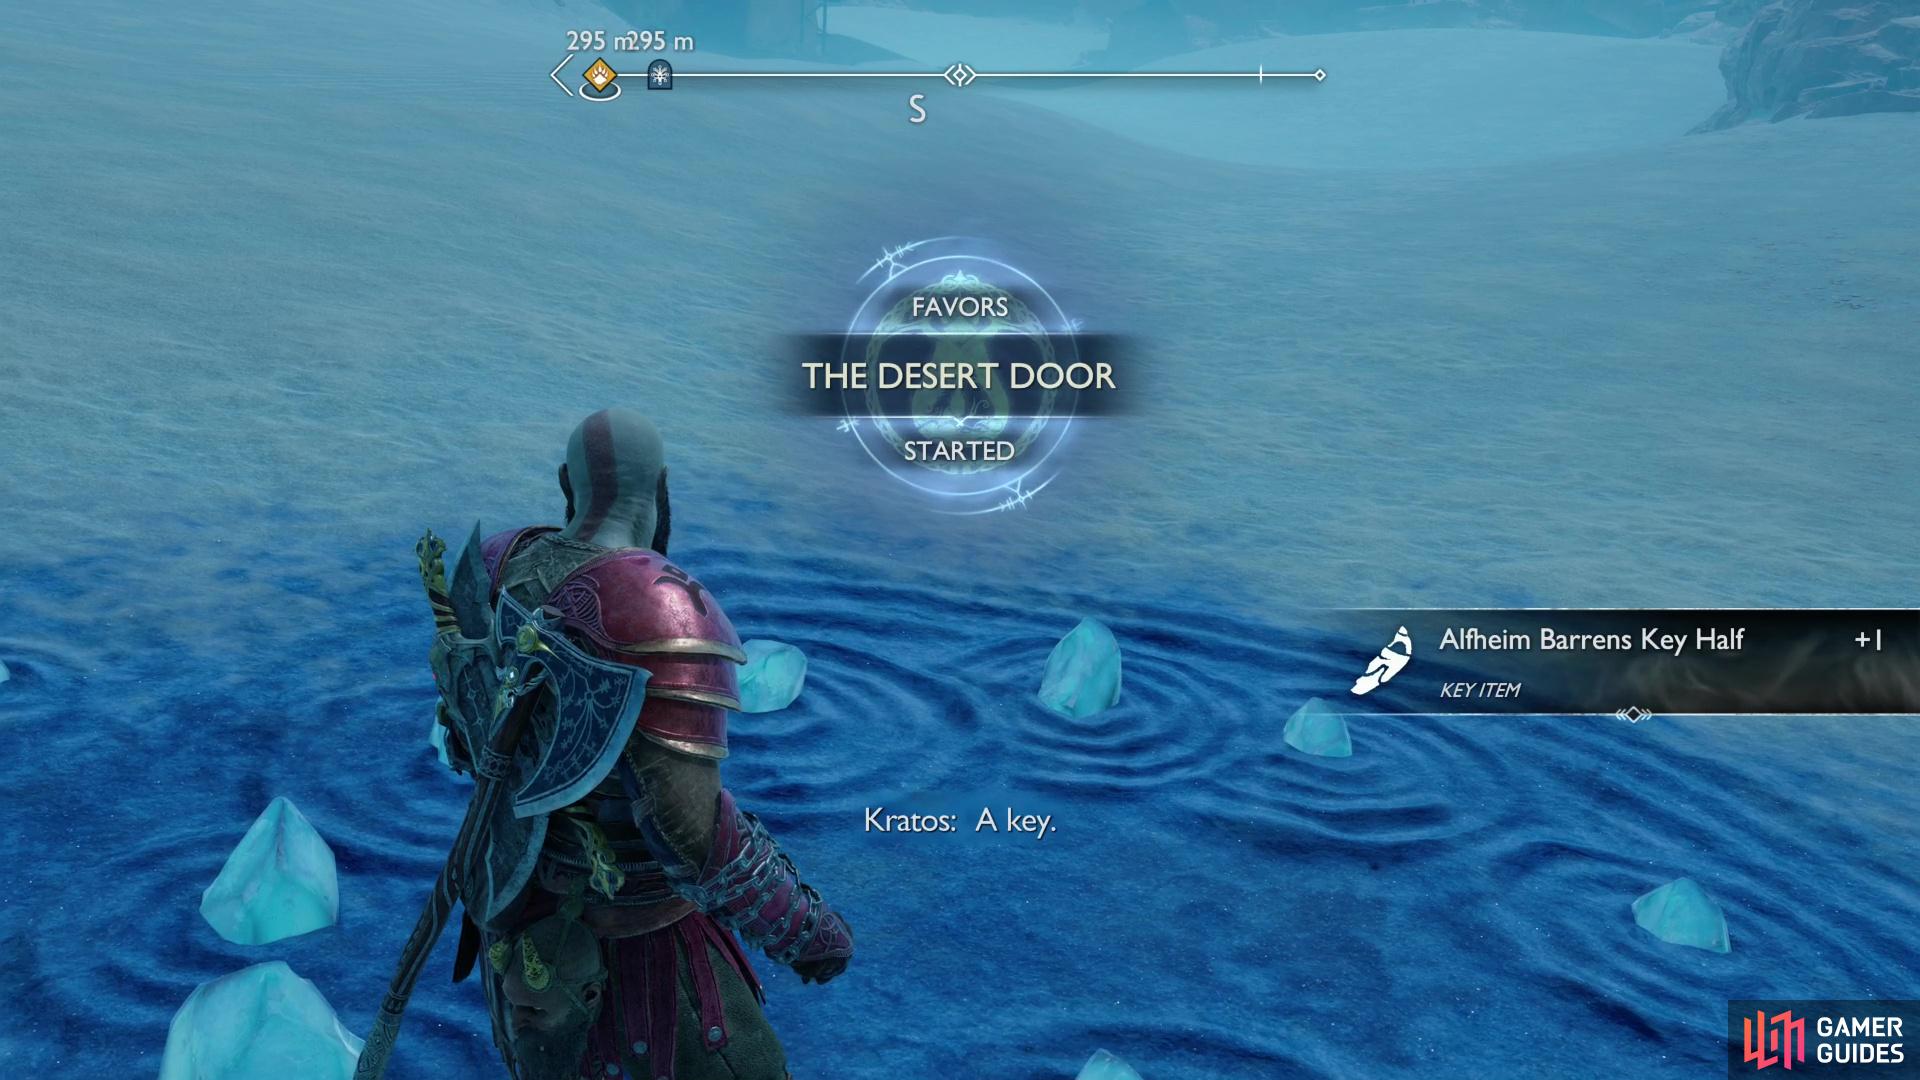
which will light up numerous rings of crystal shards, where you can find Alfheim Barrens Key Halves - these will allow you to finish the favor “The Desert Door”.
After that, consider finishing the favor Freyr’s Gift, which will provide a number of benefits, including:
- You can loot the rings of crystal shards throughout the desert (not collectibles, but still useful).
- Two of the rings of crystal shards will yield Alfheim Barrens Key Halves, which are needed for the favor The Desert Door.
- You’ll find an Odin’s Raven at the location of Freyr’s Gift.
- You’ll find a Lore Marker collectible at the location of Freyr’s Gift.
- Freyr’s Gift itself counts as a collectible.
Between the four favors mentioned above and a thorough scouring of The Forbidden Sands you can find most of the collectibles on your first visit. The Yggdrasil Rift and Berserker Gravestone, however, will likely require a return visit.
Where to Find All Nornir Chests in The Forbidden Sands
There are two Nornir Chests in The Forbidden Sands, one on the southwestern edge of the region, and another in a hidden cavern under The Elven Sanctum, along the eastern end of the region.
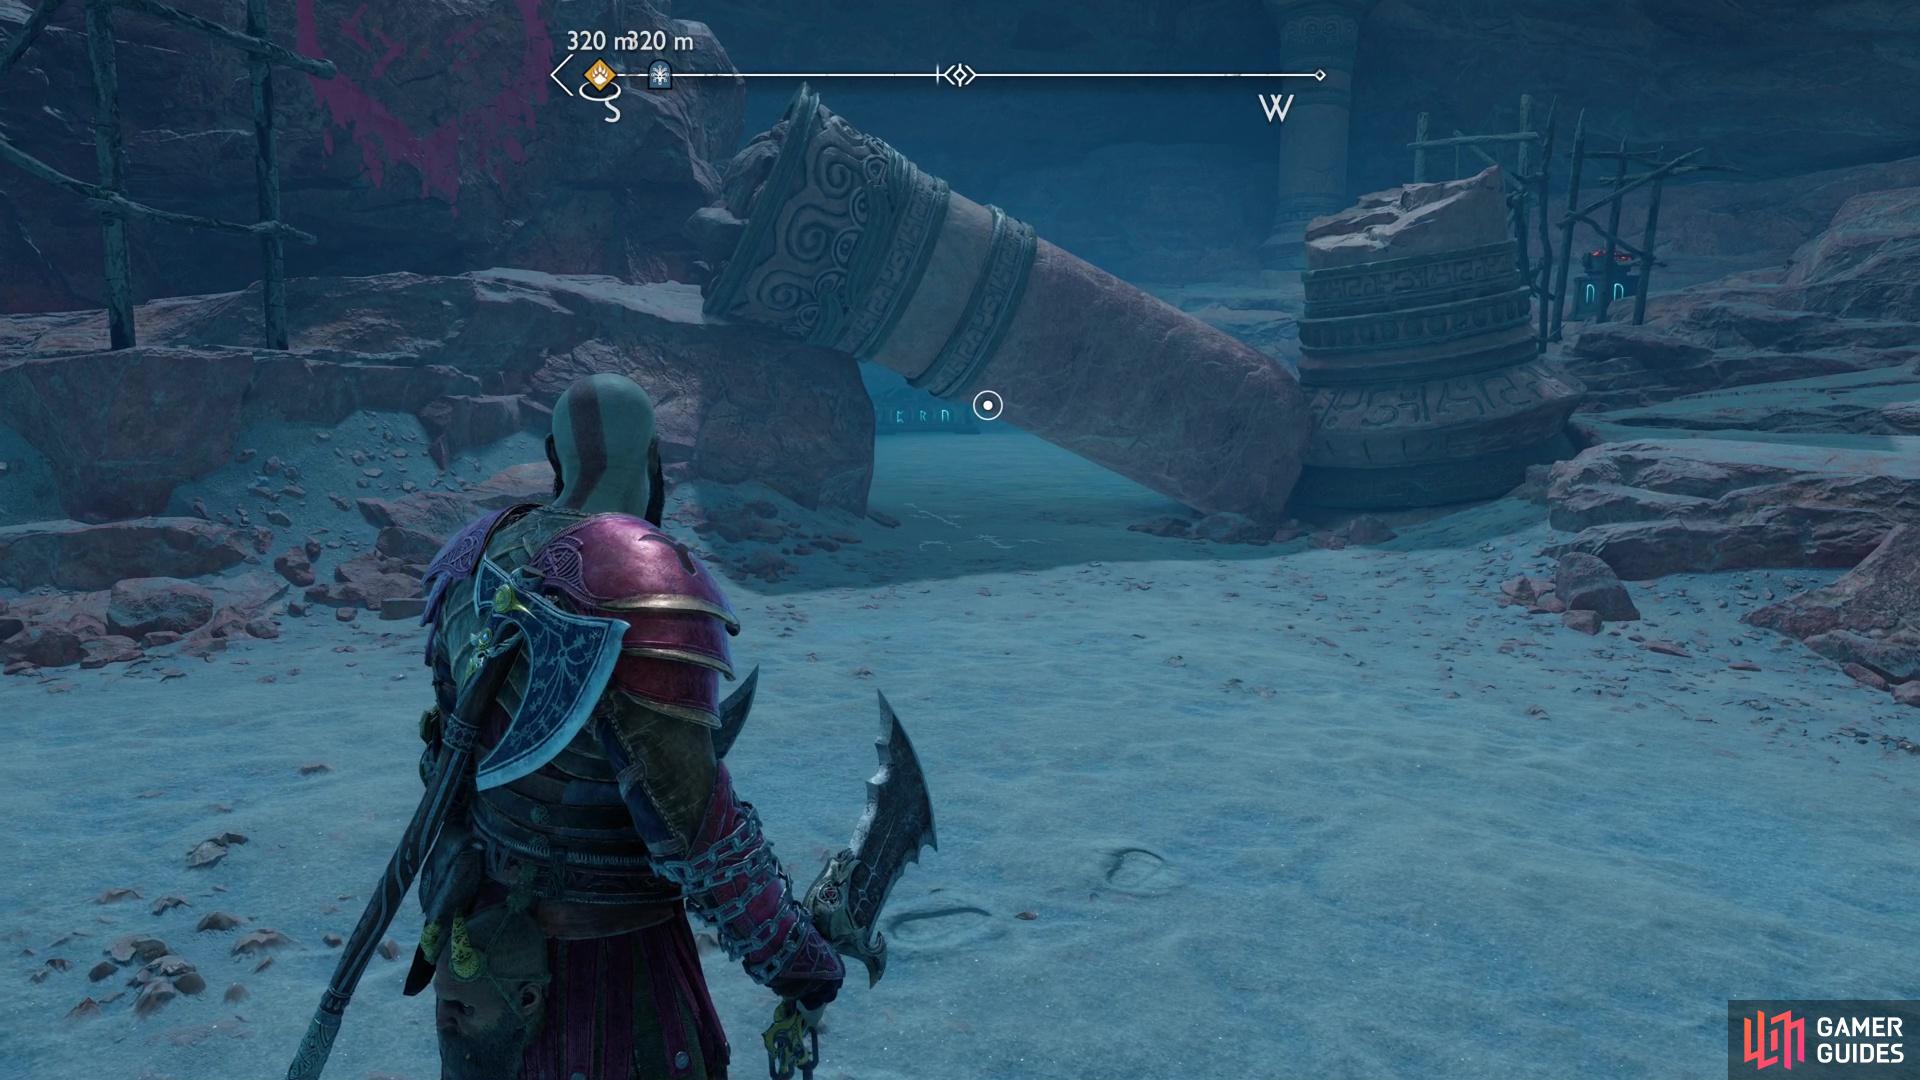
You can find a Nornir Chest in the Forbidden Sands behind a collapsed pillar.
Nornir Chest #1
Search the southwestern end of The Forbidden Sands to find a collapsed stone pillar, beyond which you can find a Nornir Chest. This is a runic brazier puzzle - you’ll need to use Runic Arrows and the Blades of Chaos to light various braziers. Once all three are lit, the Nornir Chest will unlock. Their locations are as follows:

You can find the first brazier in a rocky alcove.

String together runic spheres to ignite the brazier.
- Rune 1: From the stone pillar, head east to find a natural stone arch. Nestled in an elevated alcove along the northeastern pillar of this arch you’ll find this brazier. Two large (3x Runic Arrow) runes should suffice to bridge a gap from some lower stonework (which the Blades of Chaos can reach) to the rock alcove the brazier is located in.
The second brazier is atop a stone northwest of the first one,
and while you’ll still need to use Runic Arrows and the Blades of Chaos, the solution is far simpler.
- Rune 2: You can find this brazier on a stone pillar northwest of the first one, north of the collapsed stone pillar beyond which lies the Nornir Chest. You should only need one rune (perhaps using several Runic Arrows to expand its size) to encompass the brazier from a spot accessible to the Blades of Chaos.

The third brazier is sitting out in the open near the Nornir Chest - just ignite it directly with the Blades of Chaos.
- Rune 3: Crawl under the stone pillar, then turn right (northwest) to find this brazier out in the open, within easy reach of the Blades of Chaos. This is the obligatory freebie near the Nornir Chest.
Once all three braziers are lit, open the Nornir Chest to score an Idunn Apple or a Horn of Blood Mead.
Nornir Chest #2
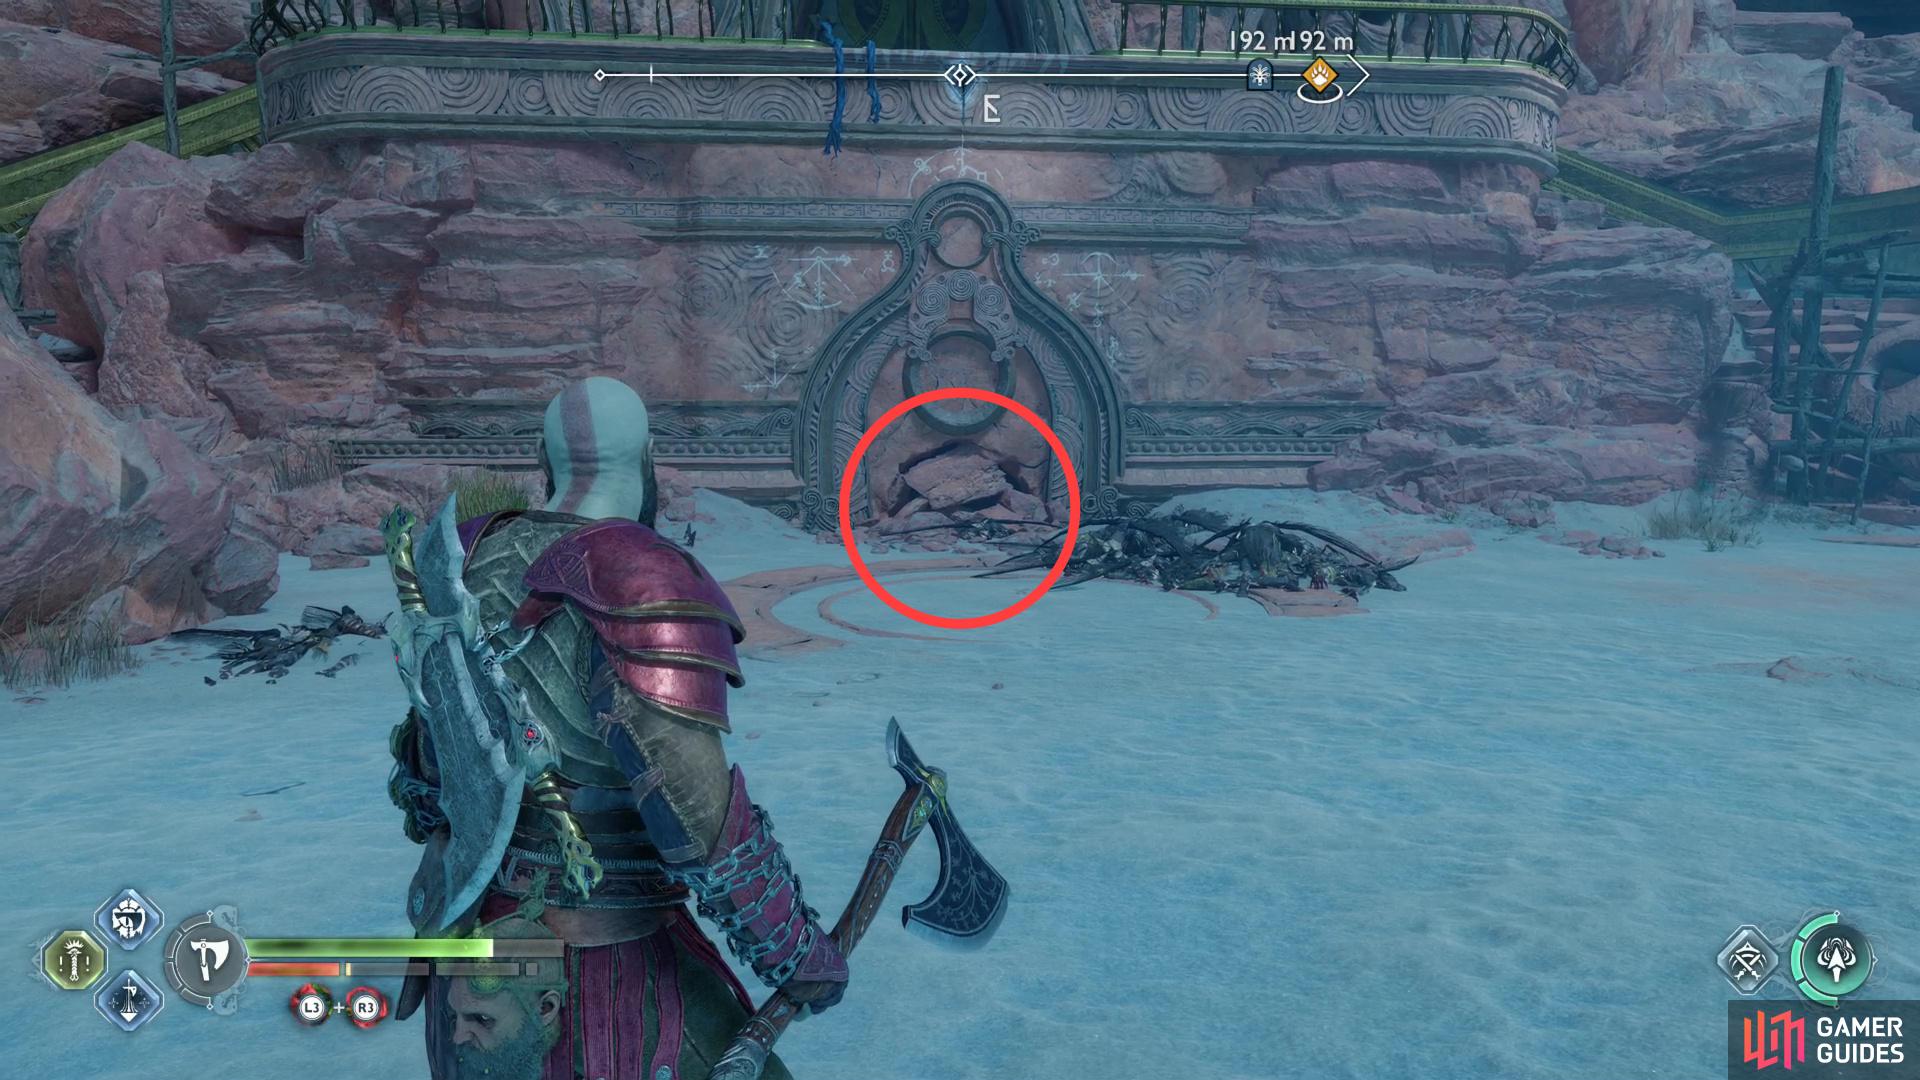
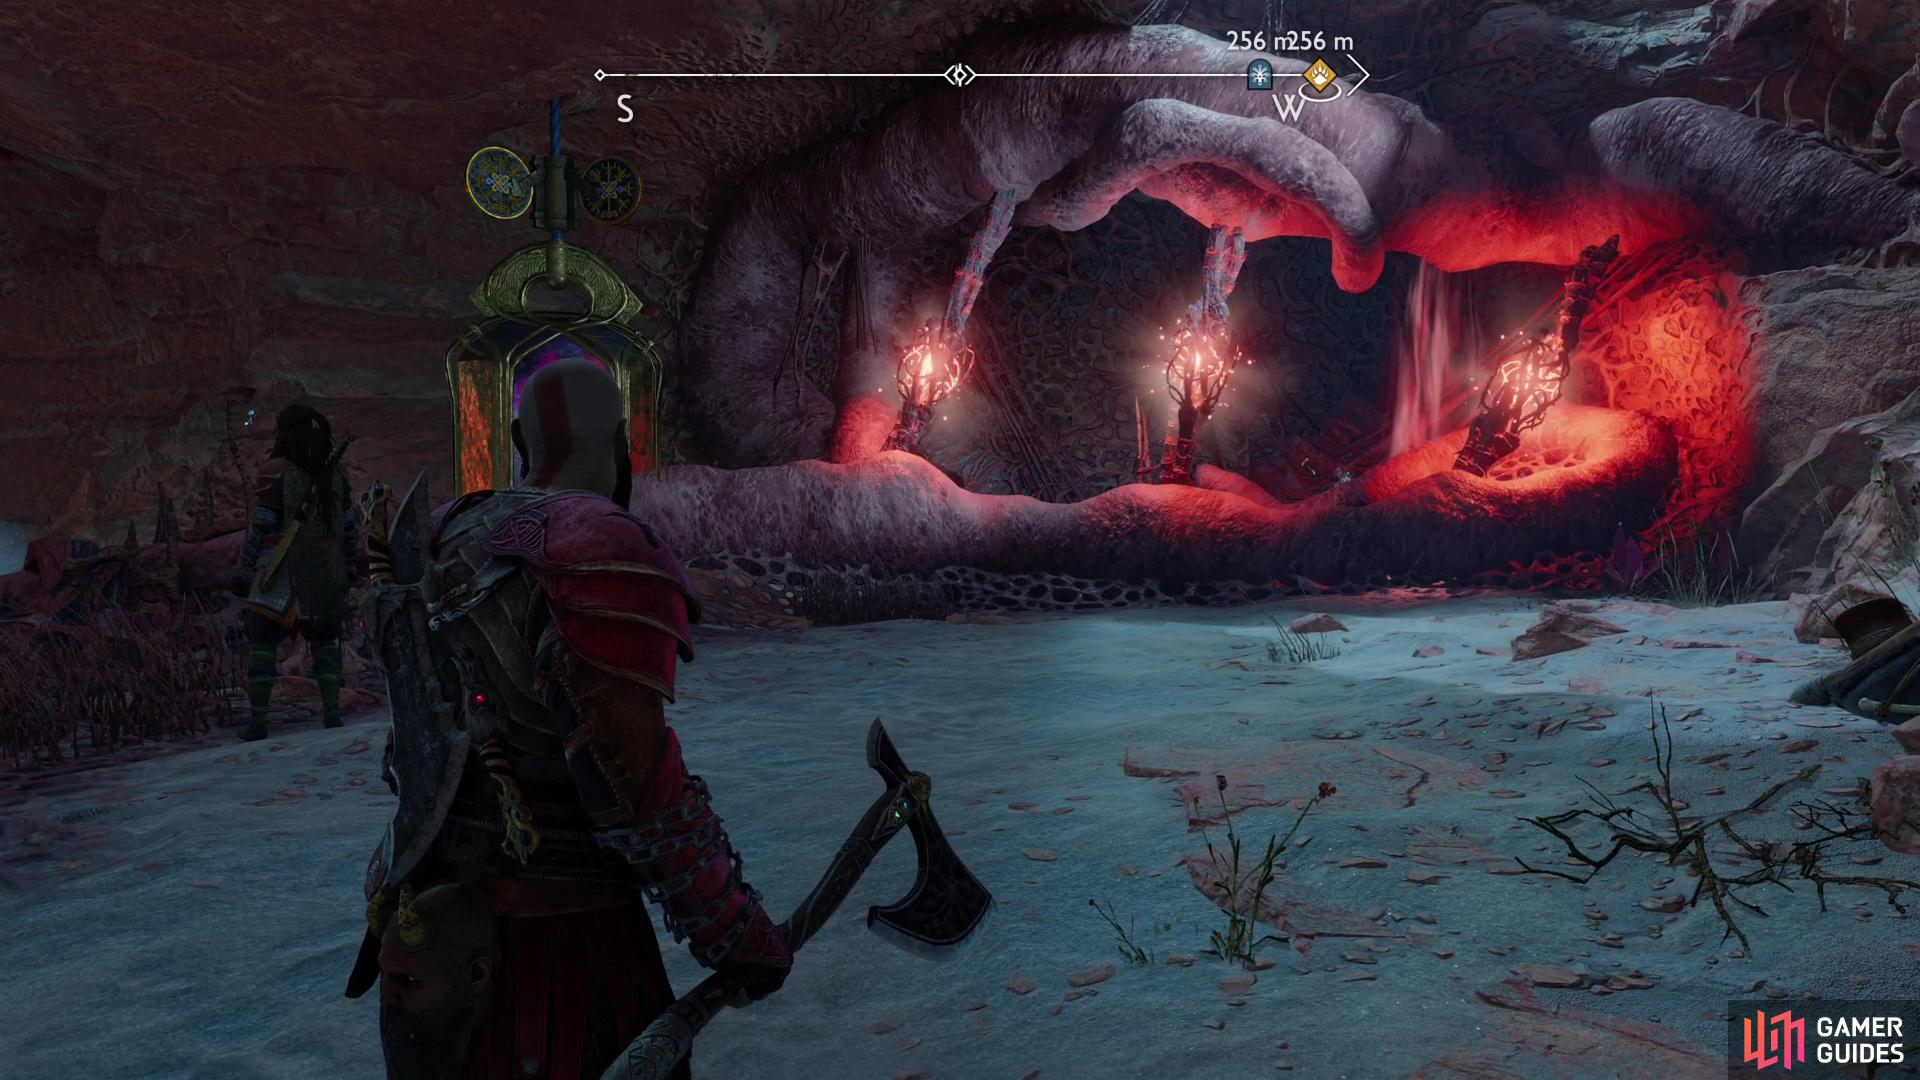
Along the eastern edge of The Forbidden Sands you’ll find The Elven Sanctum. Instead of grappling up to the ledge that’ll take you to the aforementioned Elven Sanctum, note an ornate door engraving on the cliff face, the bottom of which is crumbling. Help finish what time started and smash the fragile section of wall, then crawl through the hole and continue east to find a Nornir Chest.
Before you worry about the chest, look up to the northeast to spot a Twilight Stone on the wall behind some statues. Aim the Leviathan Axe at it and angle it to bounce through a hive tendril to your left (north) and if done properly it should ricochet through two other tendrils, deflected perpetually by more Twilight Stones. Once the hive is cleared, recall your axe, then get hunting for this puzzle’s braziers:
Search along the northern end of the chamber to find the first brazier and a campfire.

You can ignite the latter with the former with just one (large) runic sphere.
- Rune 1: Look out at the northern end of the chamber to find this brazier near a crumbling stone column - one of Odin’s Ravens flies in its typical figure-eight pattern nearby. Use Runic Arrows to create a runic sphere that encompasses both the brazier and the nearby campfire, then shoot the campfire with a Runic Arrows to ignite the brazier. This is the “easy” brazier for this puzzle.
To the south you’ll find another brazier and a more distant campfire.
Carefully place two runic spheres to bridge the gap and transfer the fire from the campfire to the brazier.
- Rune 2: Cast your gaze to the south to find another brazier, roughly opposite the first one. The brazier is sitting near a relatively intact column, while a campfire merrily burns a fair distance away. Same idea as the last one, use Runic Arrows to create two large runic spheres connecting the brazier to the campfire, then shoot the campfire with another Runic Arrow. If the runic spheres are overlapping each other, the campfire, and the brazier, the flame should transfer and ignite the brazier. Since you only have two runic spheres you can place to cover the distance, your placement has to be somewhat precise.
- Rune 3: From the column near the second brazier, follow the column up and you’ll see a sonic-sensitive section of wall. Hit it with a Sonic Arrow and the wall will open up, revealing the third brazier. To light it, you need to create two runic spheres connecting the lit second brazier to the third brazier, use a Sonic Arrow to open the wall, then switch back to Runic Arrows and shoot the second brazier before the wall closes. Again, the distance you need to transport the flames requires you to consider your placement of the runic spheres - one on the column, and one on the edge of the cliff under the sonic wall should suffice. Despite the added complexity of switching arrows, the timing isn’t all that tight.
Light all three braziers, then plunder the Nornir Chest to score an Idunn Apple or a Horn of Blood Mead.
Where to Find All Legendary Chests in The Forbidden Sands
Legendary Chest - Hardened War Handles
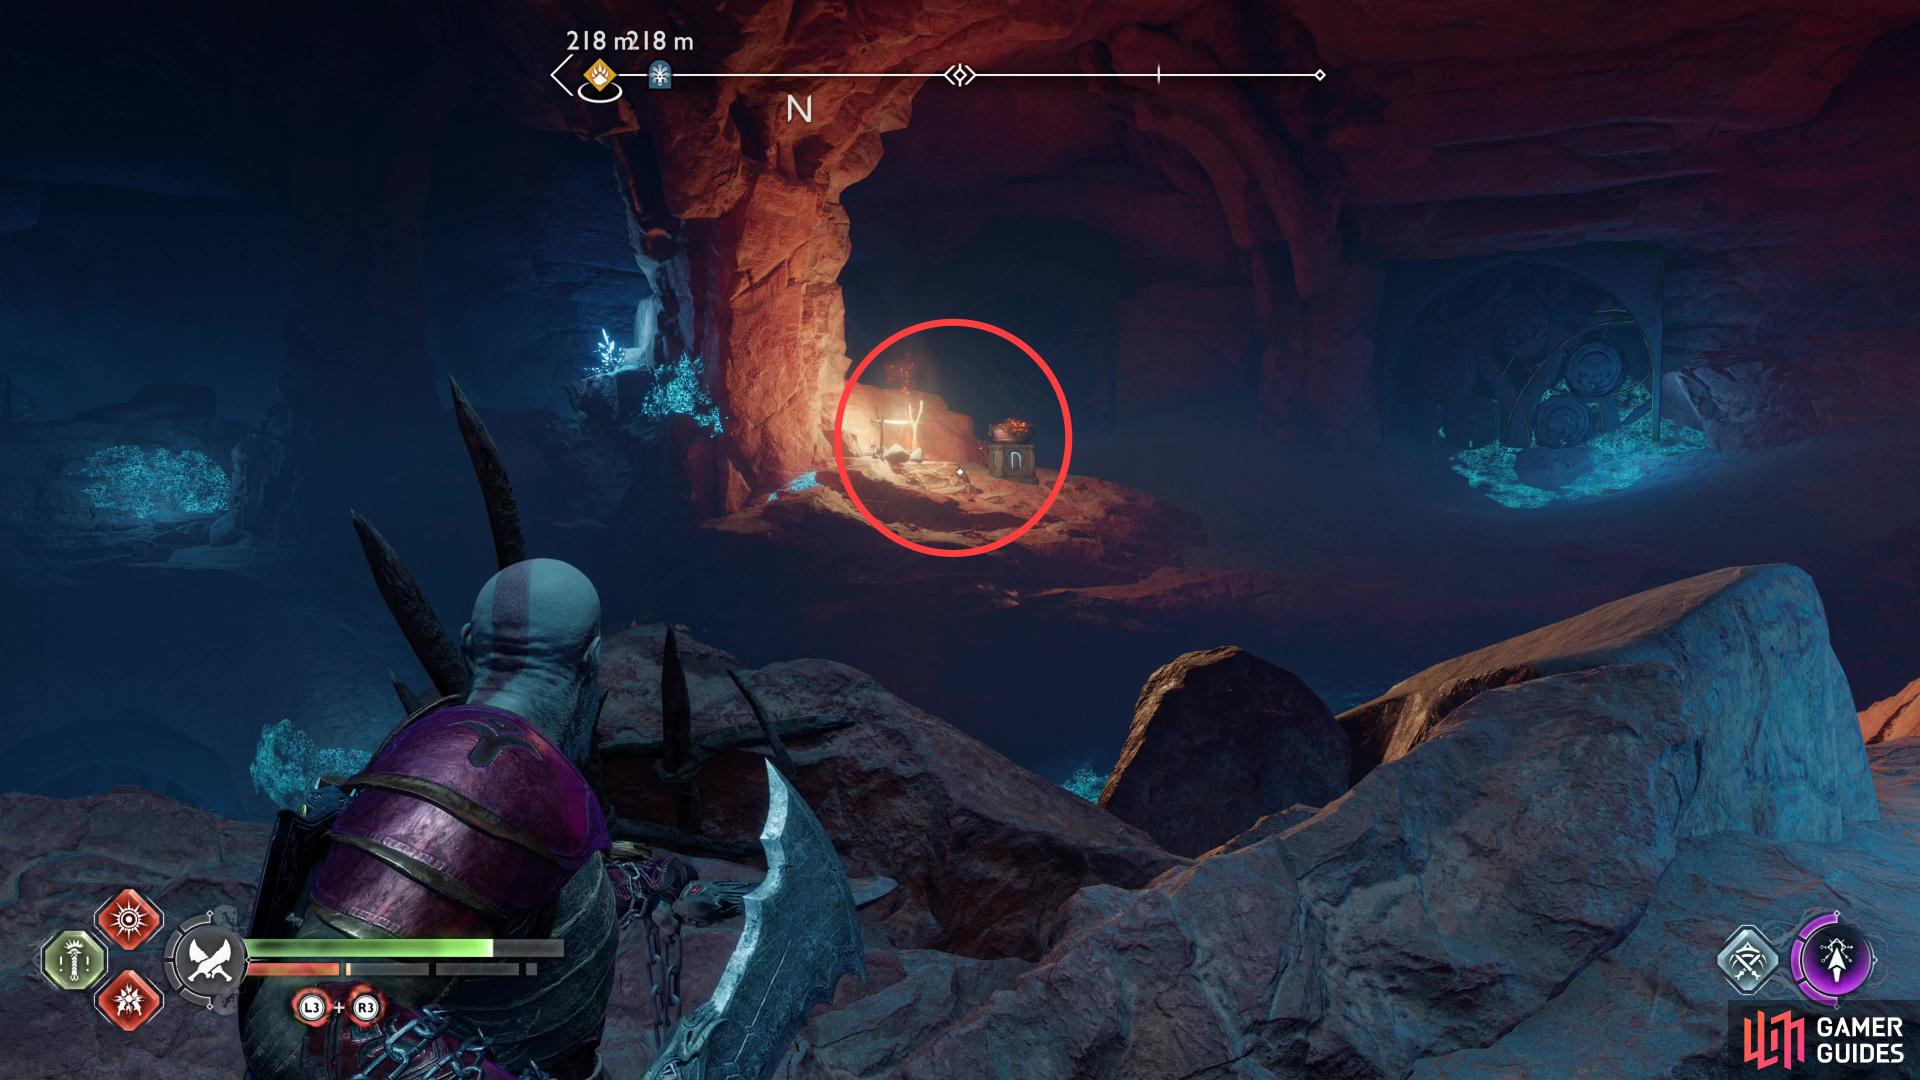
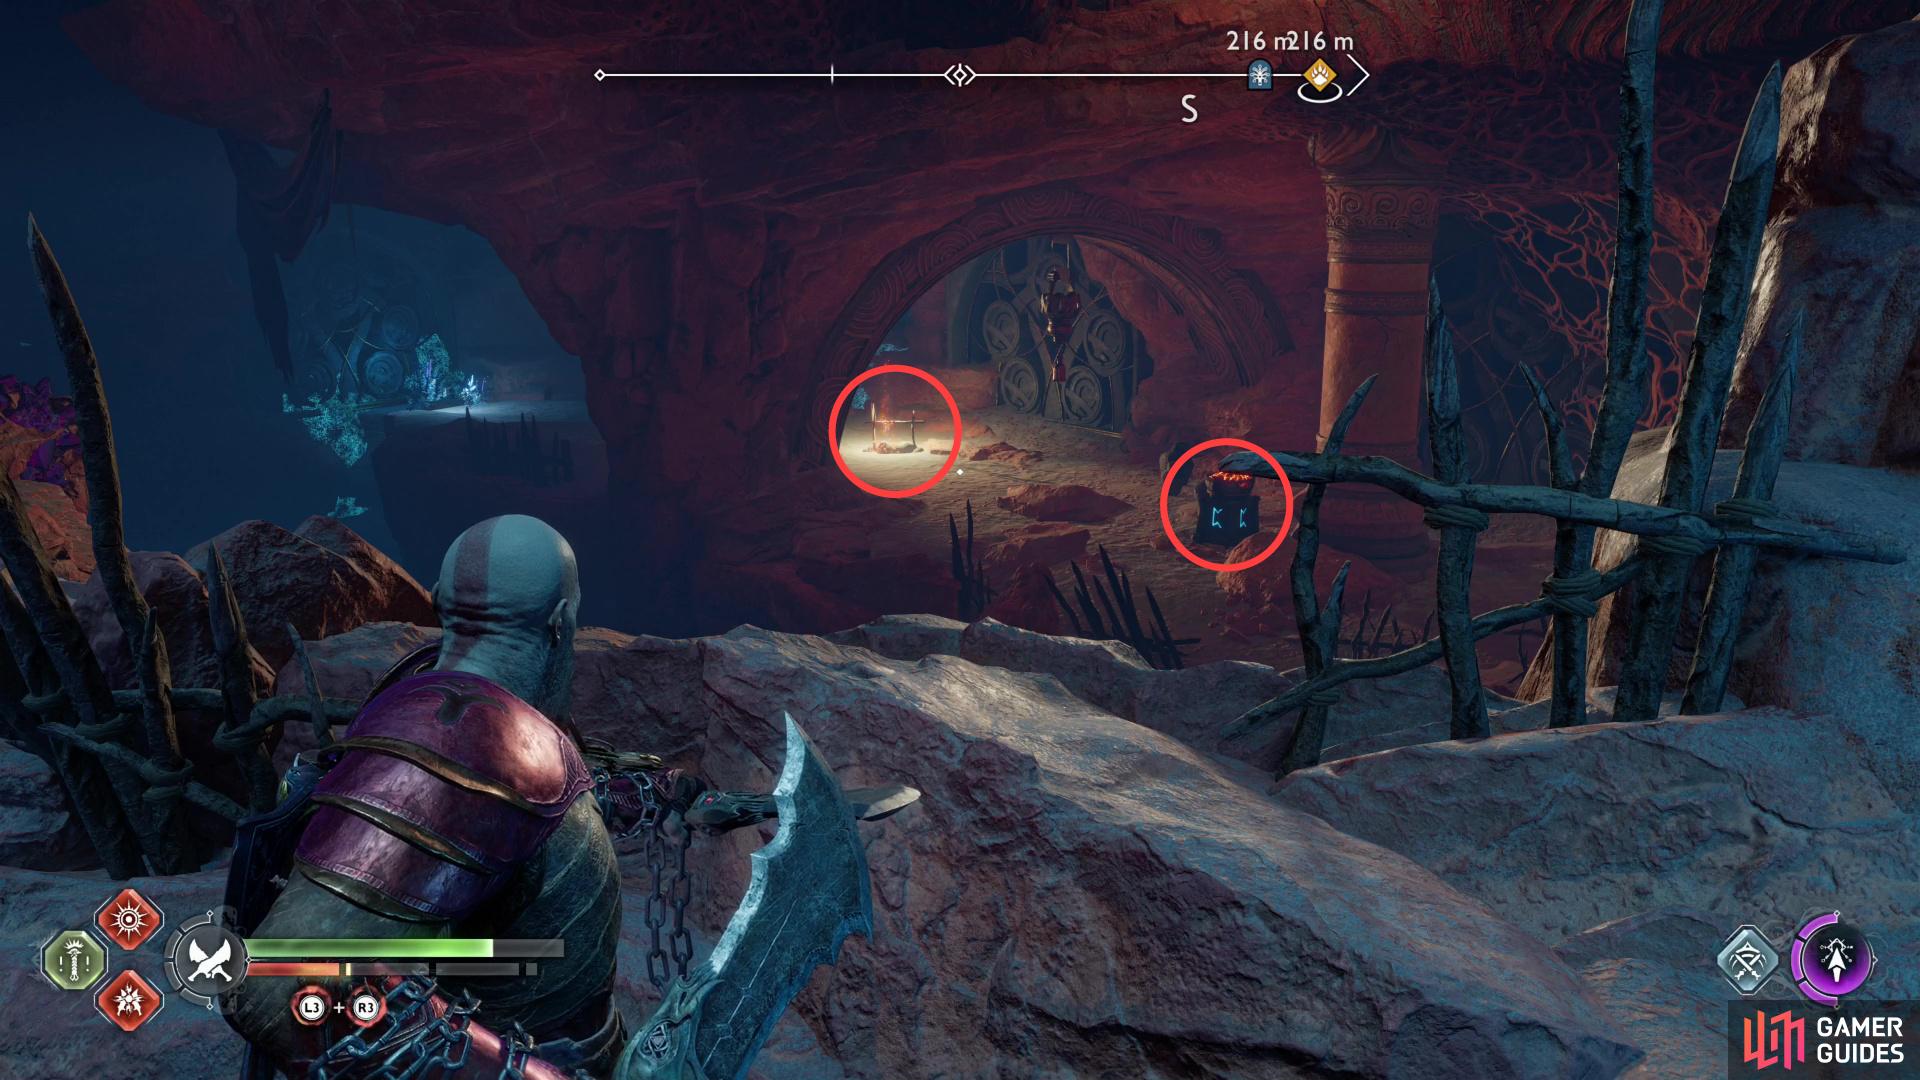
Search the southern end of The Forbidden Sands to find a cave, inside of which you’ll encounter a pair of Grims. Kill them, then look south, southwest to find a pair of Twilight Stones suspended from the ceiling, then look right (west) and left (south, southeast) to spot two trios of hive tendrils blocking your way in those directions.
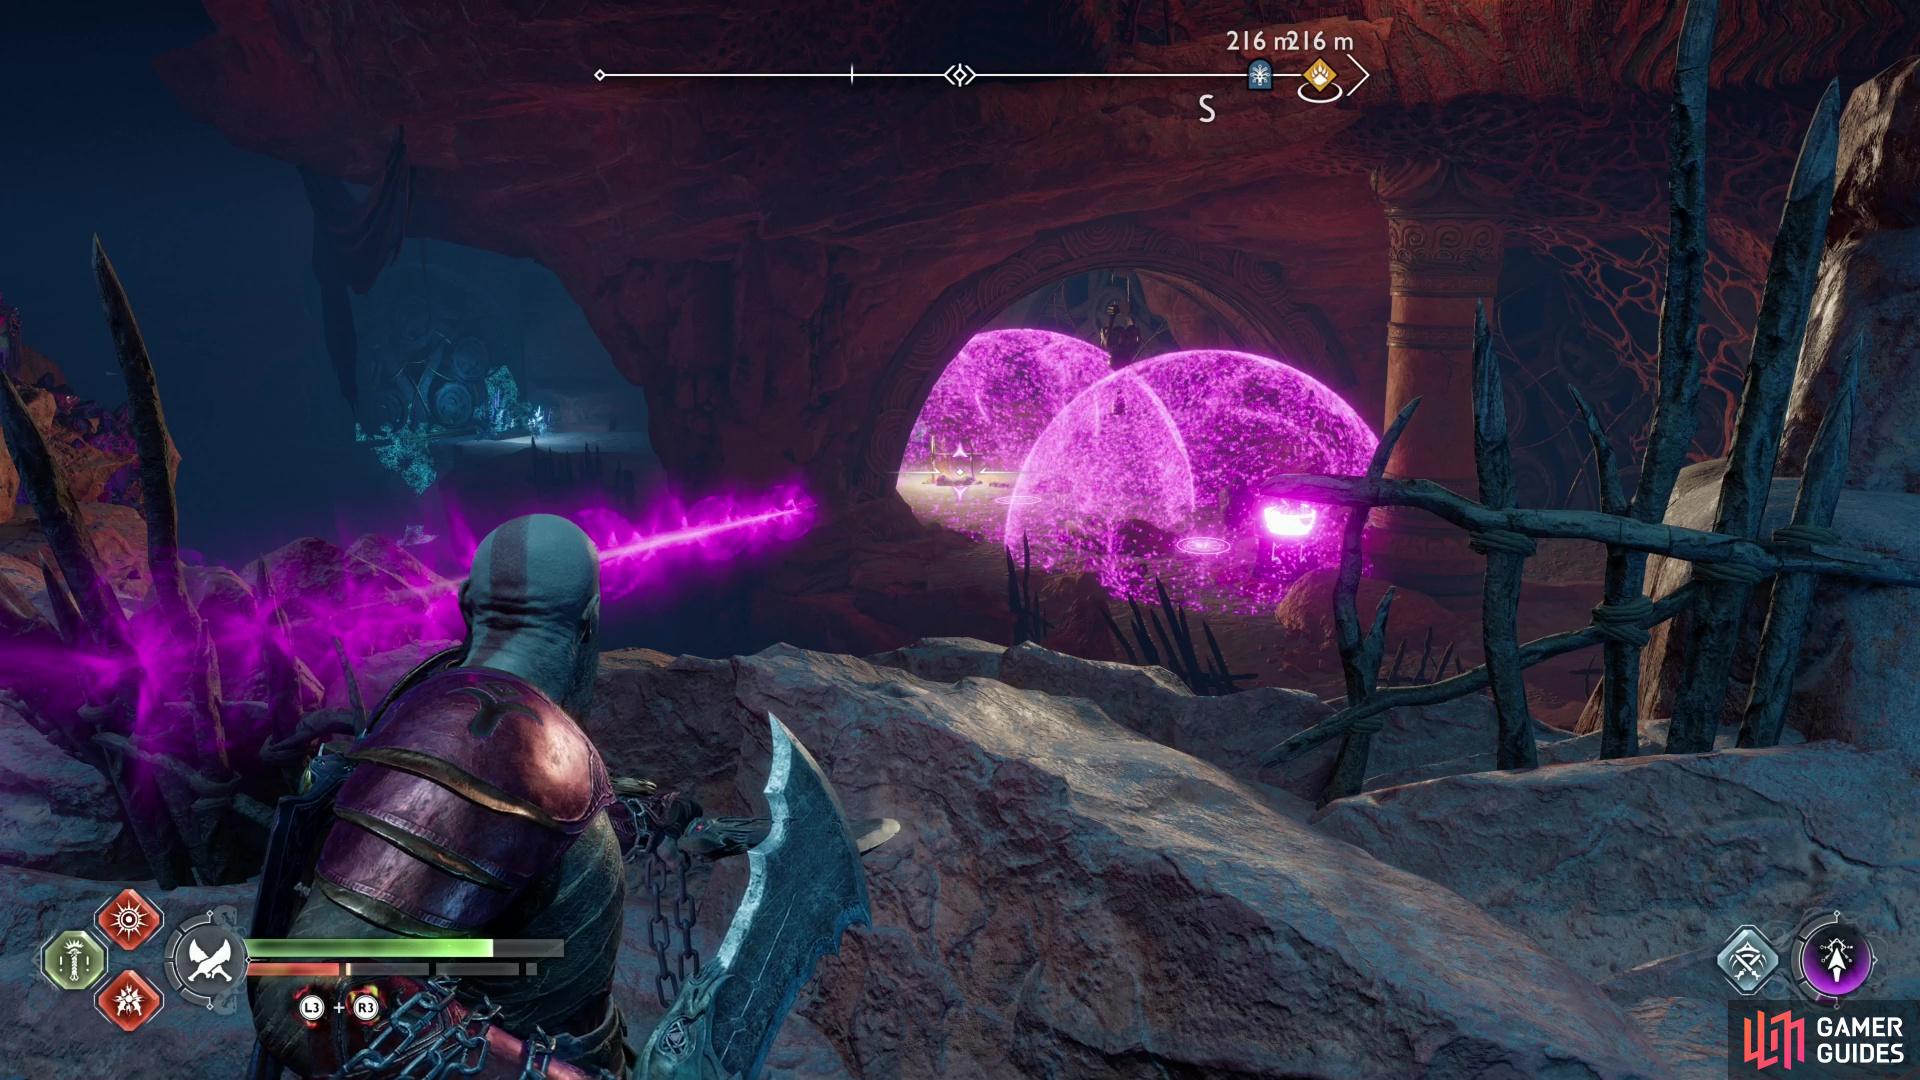
The Legendary Chest you seek is past the hive tendrils to the south, southeast, while a more mundane chest can be found to the west. Make your way towards the hive tendrils to the left, then look at the nearby Twilight Stone to note that it’s covered with brambles. Shoot the brambles with several Runic Arrows, then shoot the stone column nearby with more Runic Arrows to create two overlapping runic spheres, then hit the runic sphere on the stone column with the Blades of Chaos to ignite the brambles and free the Twilight Stone.
Use the Leviathan Axe to strike the left panels on this Twilight Stone to rotate it twice, then bounce the Leviathan Axe off the Twilight Stone and through some Hive Tendrils. Note that these Twilight Stones are incredibly fussy, so be prepared to move around and change where you’re aiming the Leviathan Axe before that go-ahead blue trajectory line appears… or use the provided screenshots to remove some of the trial and error. This will cut the hive tendrils to the right and allow you to loot the chest there.

Turn the right Twilight Stone and ricochet the Leviathan Axe off both Twilight Stones,
which will cut the hive tendrils to the left and allow you to grab the Hardened War Handles from a Legendary Chest.
While this won’t get you to that Legendary Chest, you needed to rotate the leftmost Twilight Stone anyways. When you’re ready to go after the Legendary Chest, hit one of the left panels on the right Twilight Stone to rotate it so it’s facing east, then bounce the Leviathan Axe off the leftmost Twilight Stone. Your goal here is to deflect the Leviathan Axe from one Twilight Stone to the other, cutting the hive tendrils to the left and opening the way to the Legendary Chest. Once done, loot said Legendary Chest to obtain the Hardened War Handles.
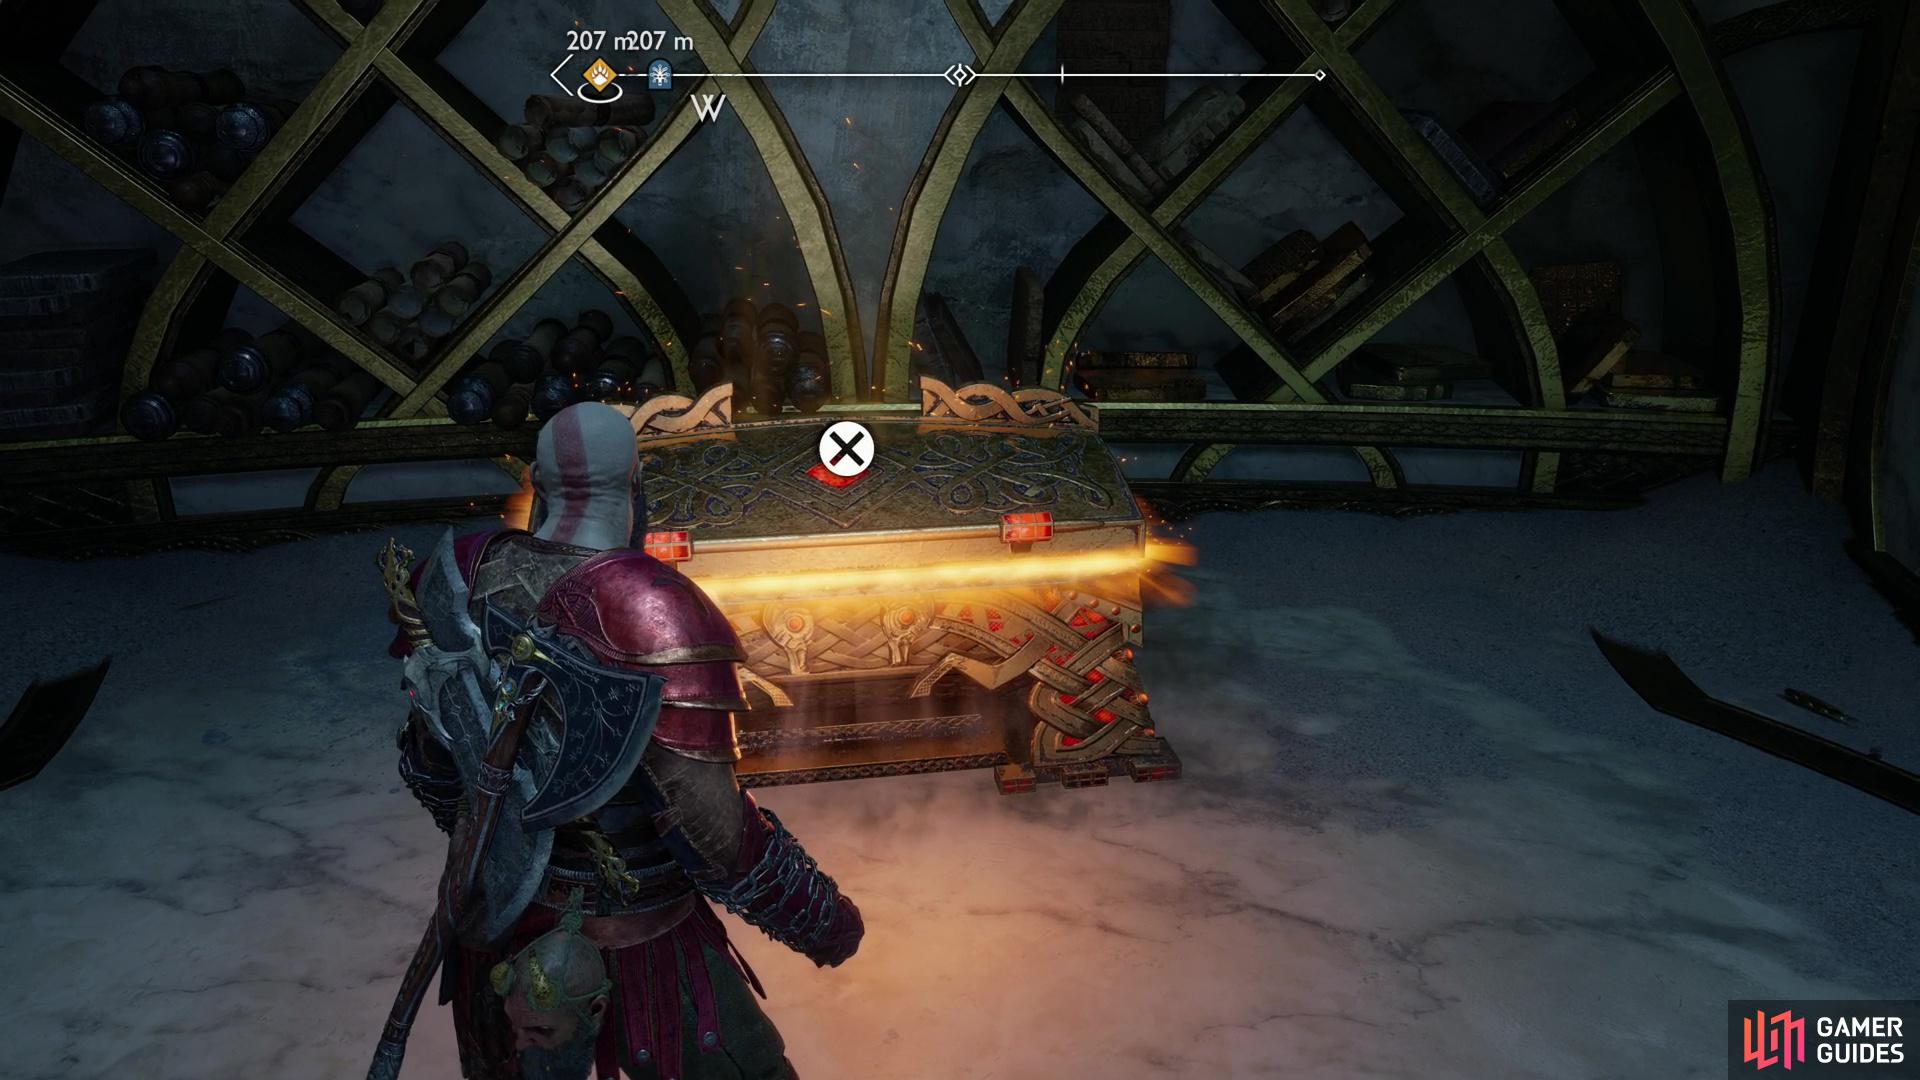
Climb up to the highest ledge in the library inside the Elven Sanctum, then plunder a Legendary Chest to score a Jewel of Yggdrasil.
Legendary Chest - Jewel of Yggdrasil
You’ll find this Legendary Chest in the Elven Sanctum, which can be found along the easternmost edge of The Forbidden Sands - you’ll come here during a favor of the same name. Enter the Elven Sanctum and proceed to the library. Climb some ledges to the west and you’ll find this Legendary Chest between two shelves. Loot it to score a Jewel of Yggdrasil.
Where to Find All Lore in The Forbidden Sands
Complete the favor “Freyr’s Gift” to read the Lore Marker - The Enlightened One.
Lore Marker - The Enlightened One
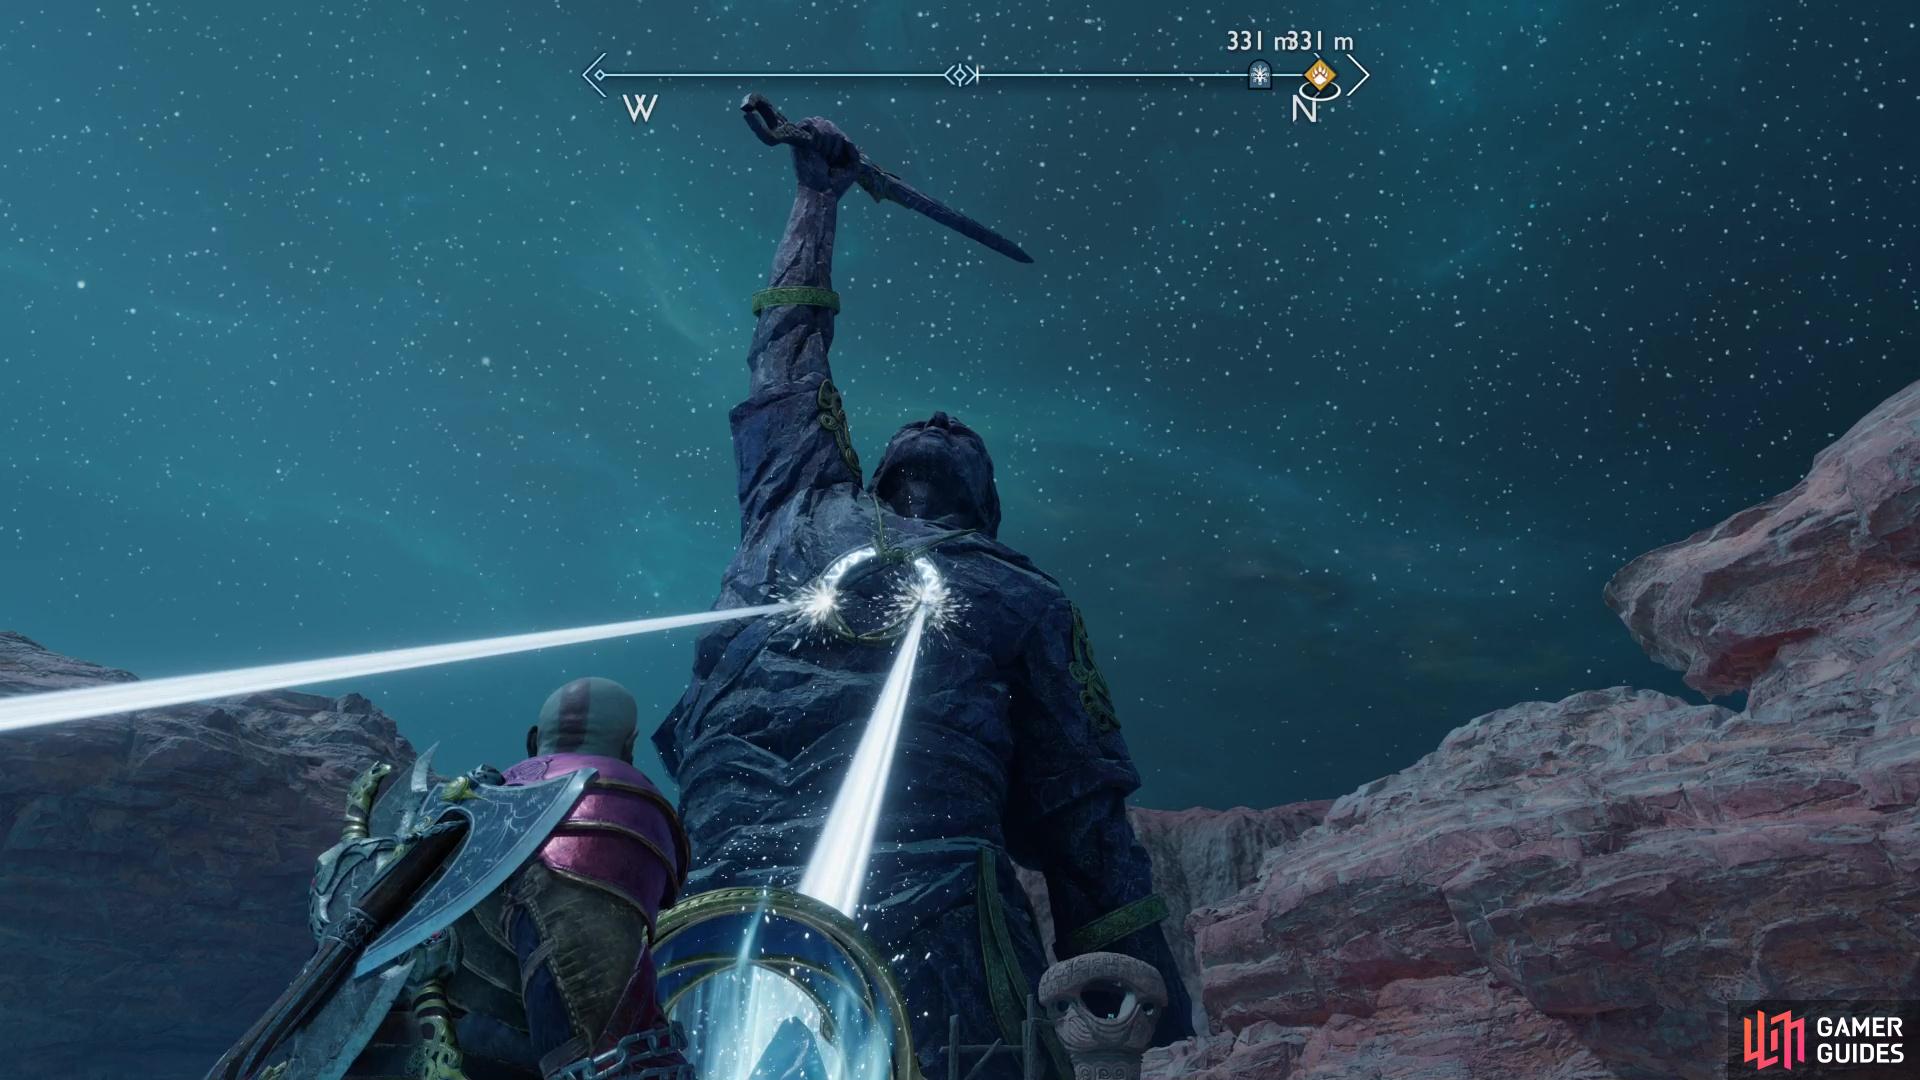
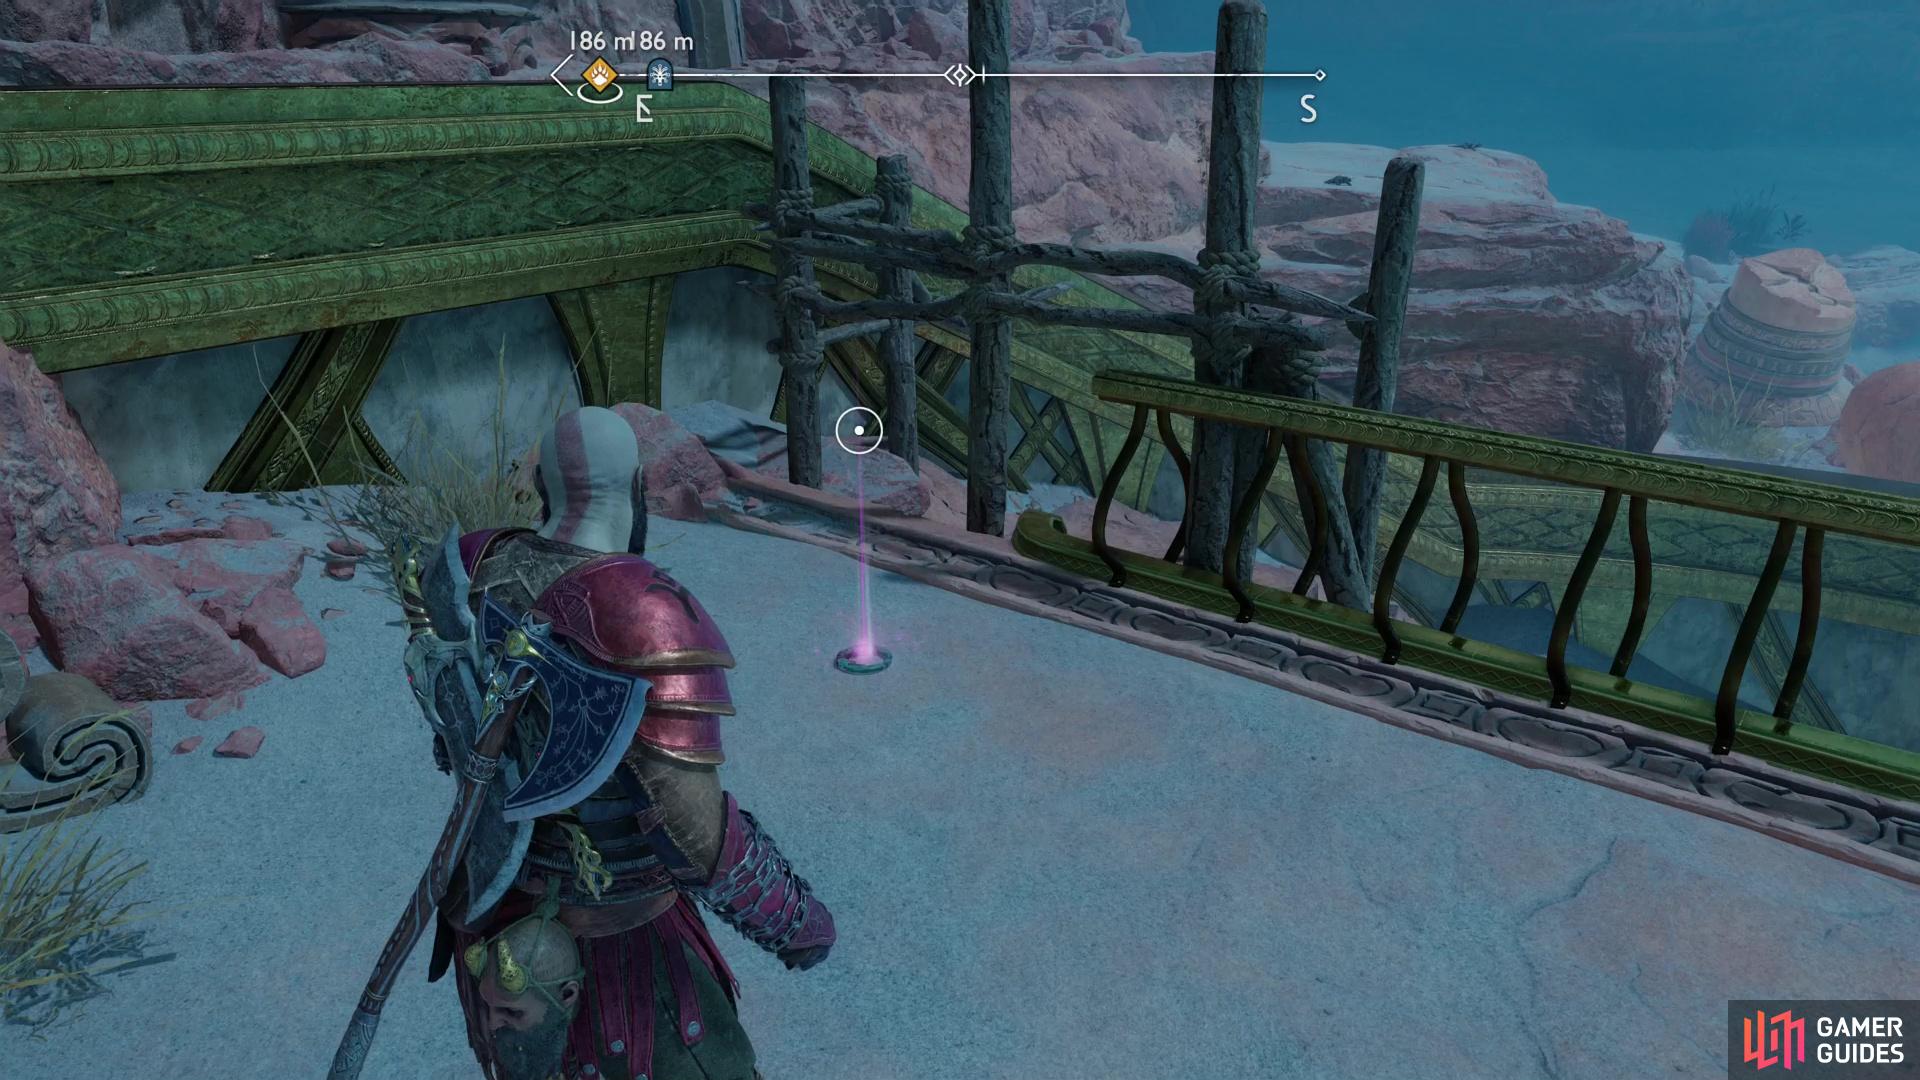
You can find this raven along the western end of The Forbidden Sands. As you approach the statue of Freyr (the site of the favor Freyr’s Gift) you’ll have to hop up a small ledge. Do so, then cross a light bridge and continue northwest past a ring of crystal shards to find this Lore Marker. Alas, whatever was written on it has faded, and to get the runes to light back up you’ll need to complete the favor Freyr’s Gift. Do so and you can read the Lore Marker - The Enlightened One.
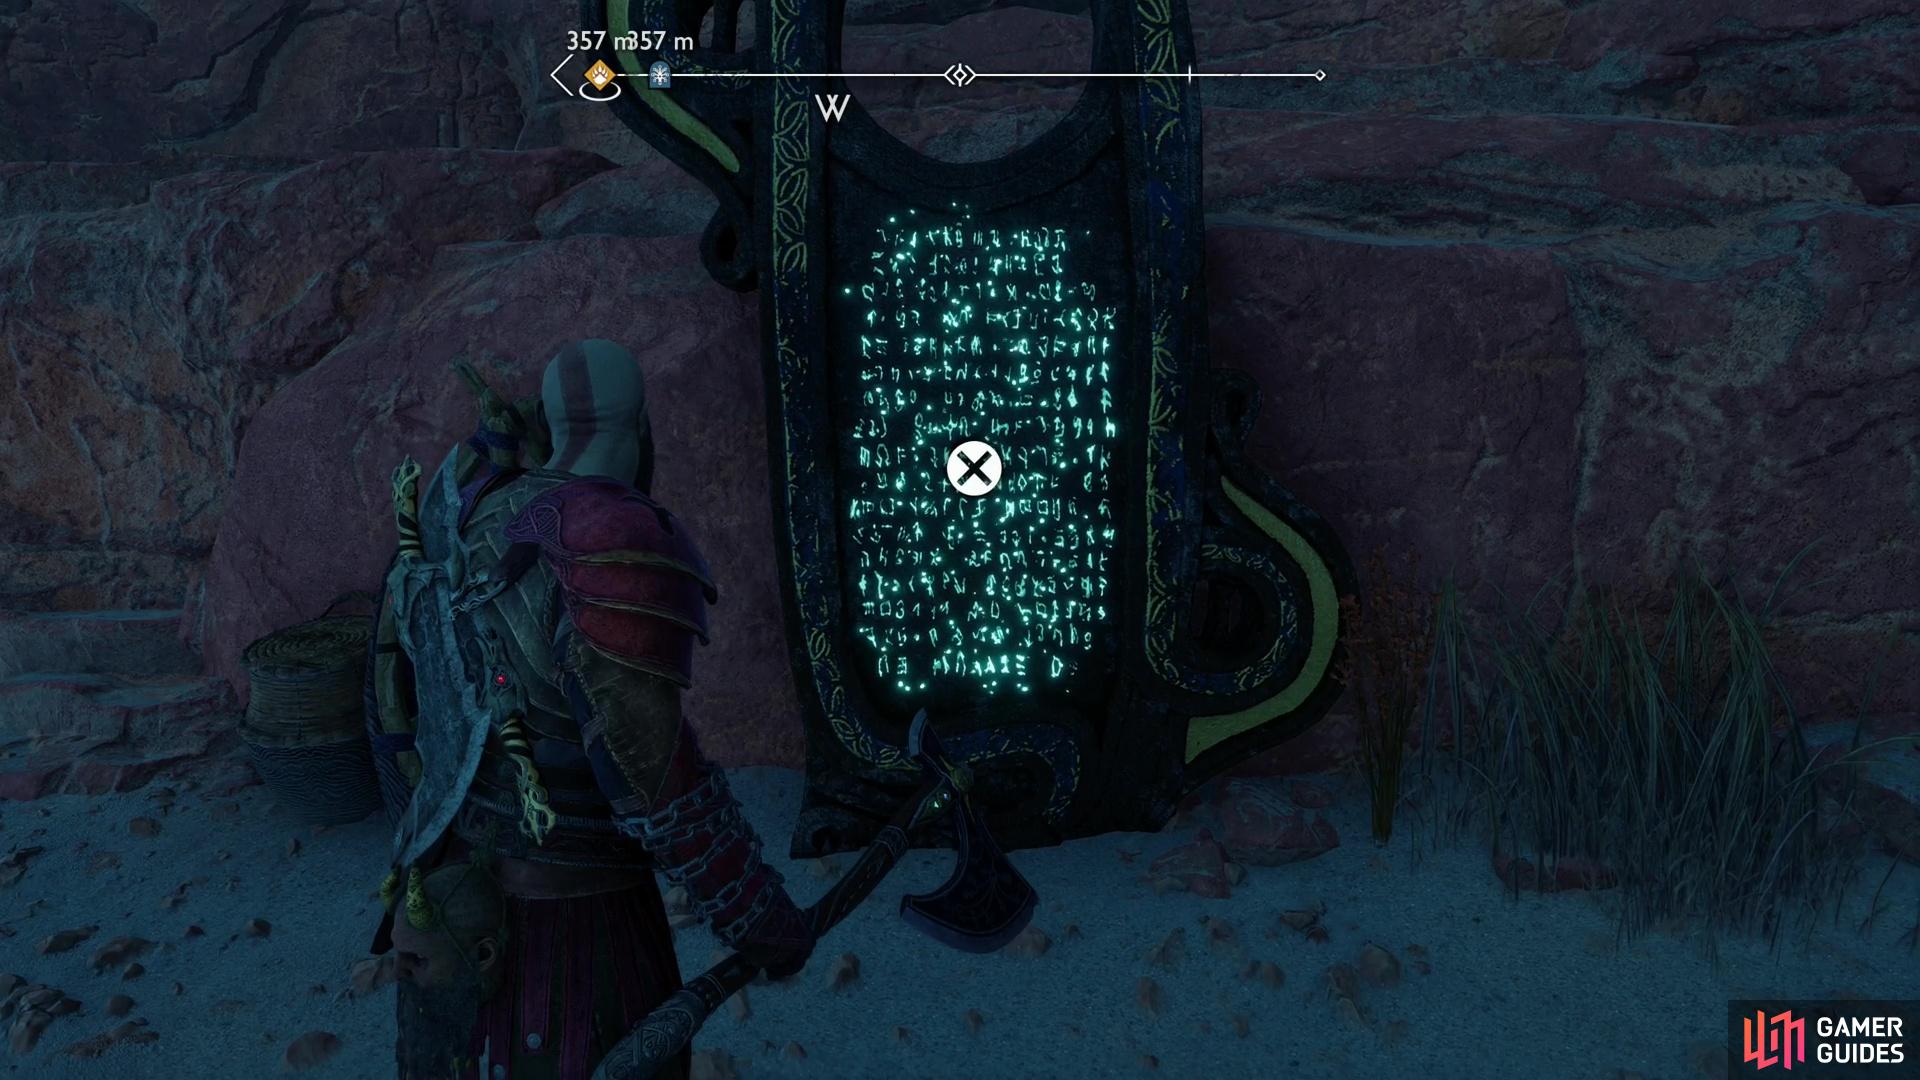
Search an elevated ledge on the southwestern corner of The Forbidden Sands to find the Lore Marker - Bjarg Stormr.
Lore Marker - Bjarg Stormr
From the ledge that leads to Freyr’s statue along the northwestern edge of The Forbidden Sands, follow the cliffs southwest until you find some more ruins to the right. Climb onto a ledge to reach these ruins, where you’ll find a stone troll. Search to the left of this statue to find the Lore Marker - Bjarg Stormr.
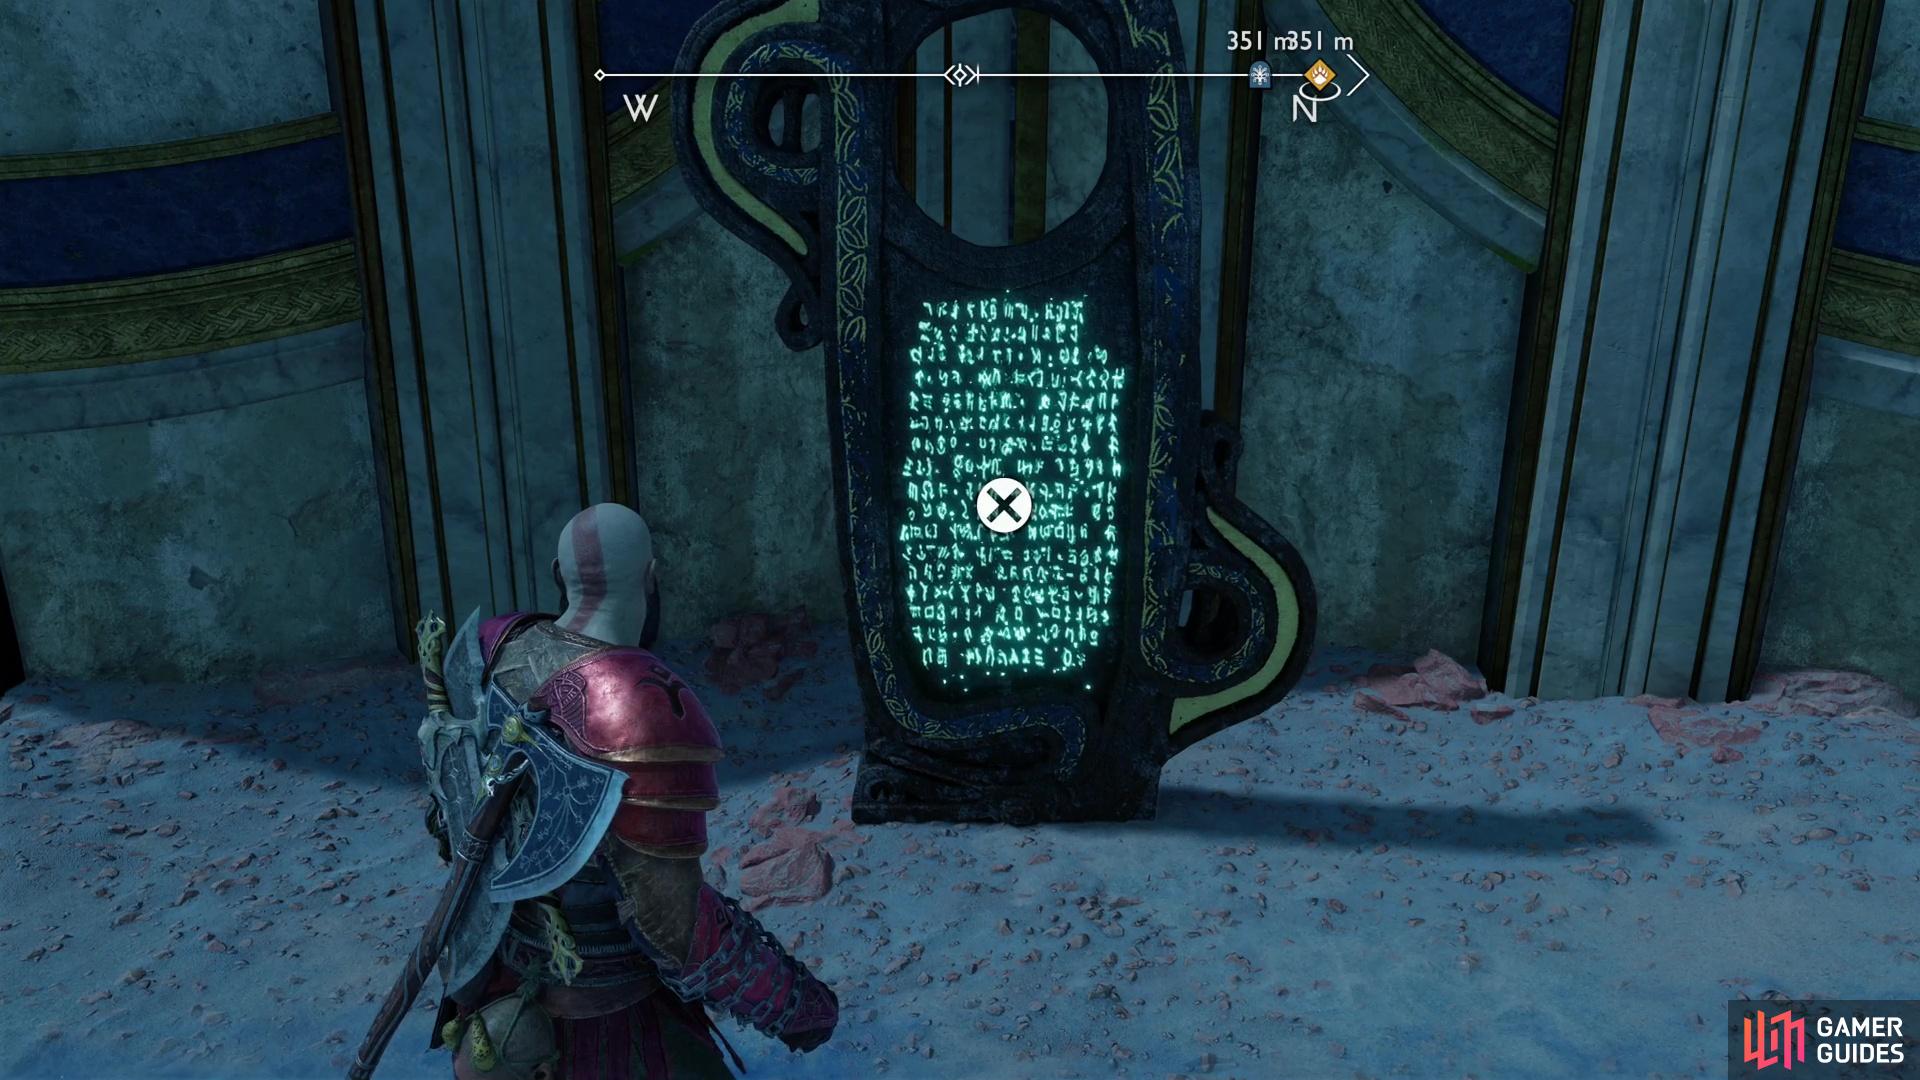
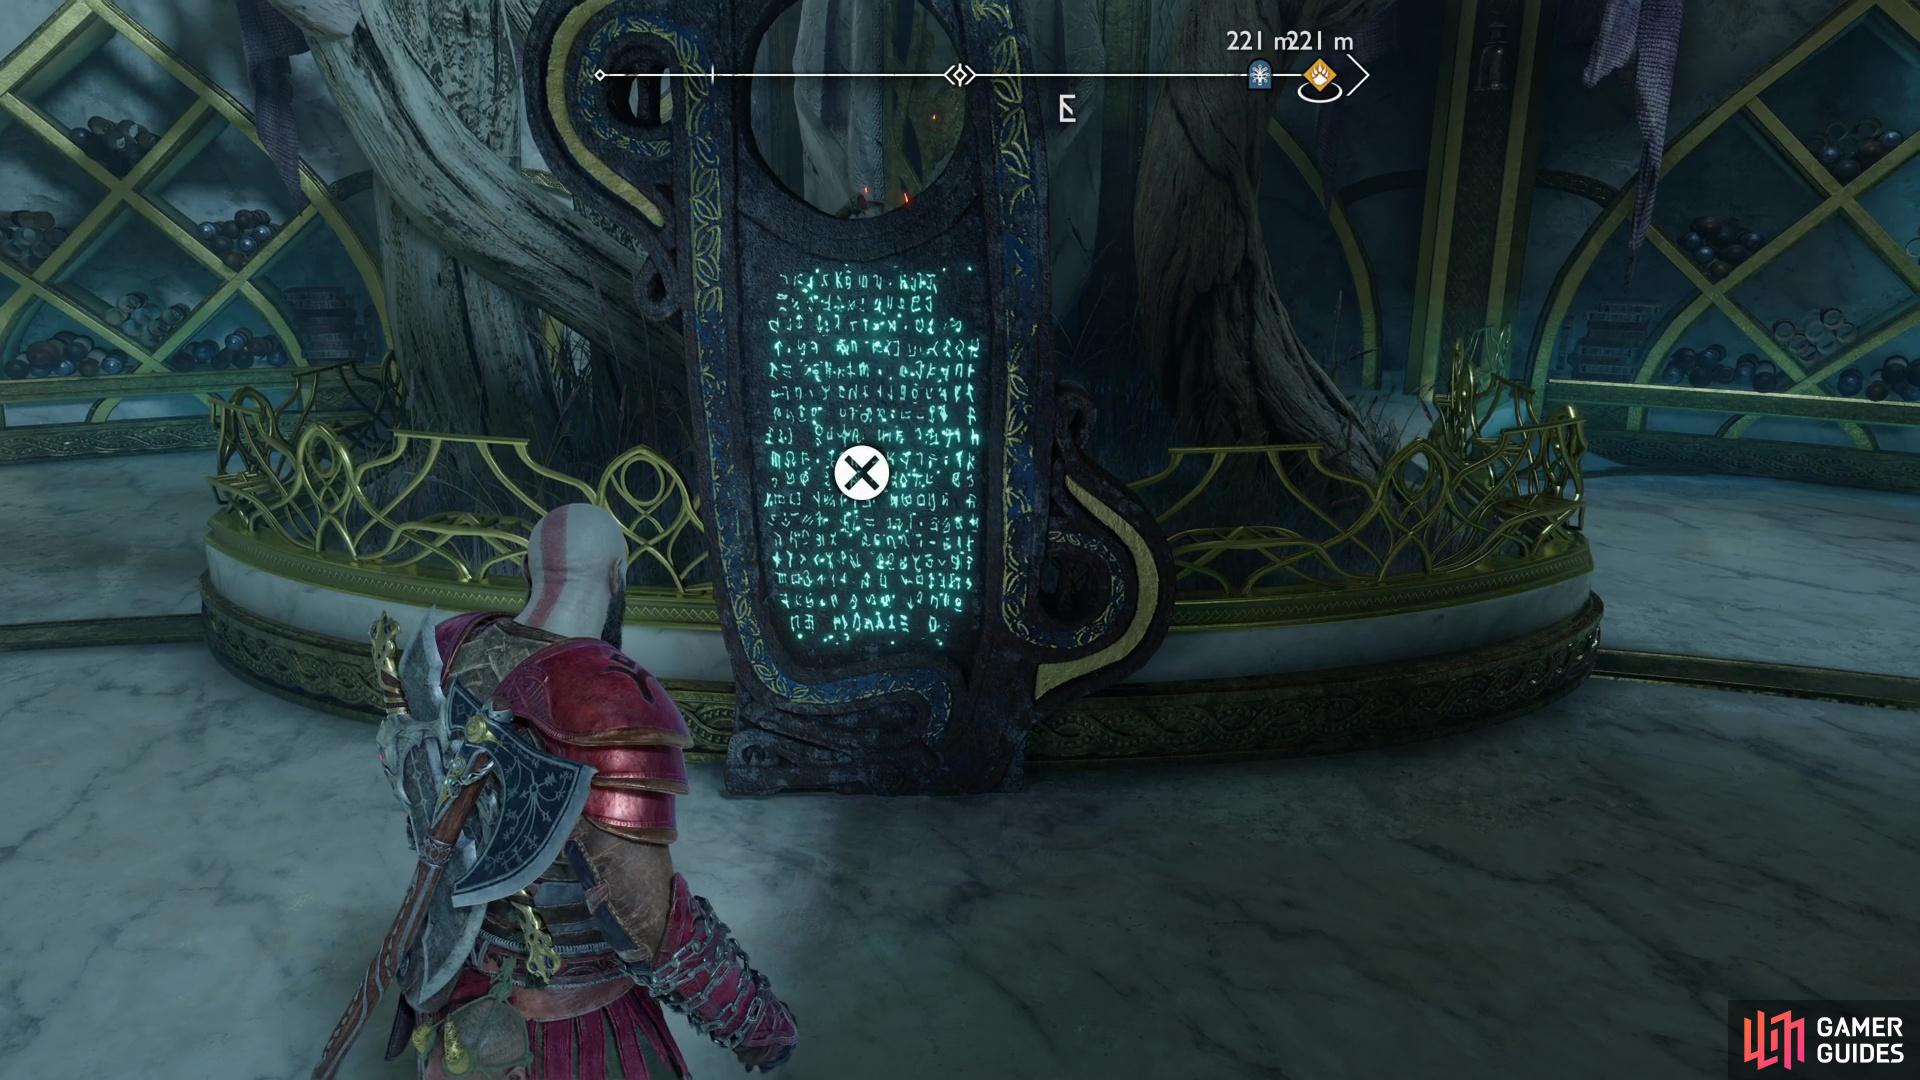
Enter the library in the Elven Sanctum and search the lower level to find the Lore Marker - Rules of the Sanctum,
Lore Marker - Rules of the Sanctum
You’ll find this Lore Marker in the Elven Sanctum, which can be found along the easternmost edge of The Forbidden Sands - you’ll come here during a favor of the same name. Enter the Elven Sanctum and proceed to the library, then search the eastern edge of the library to find the Lore Marker - Rules of the Sanctum.
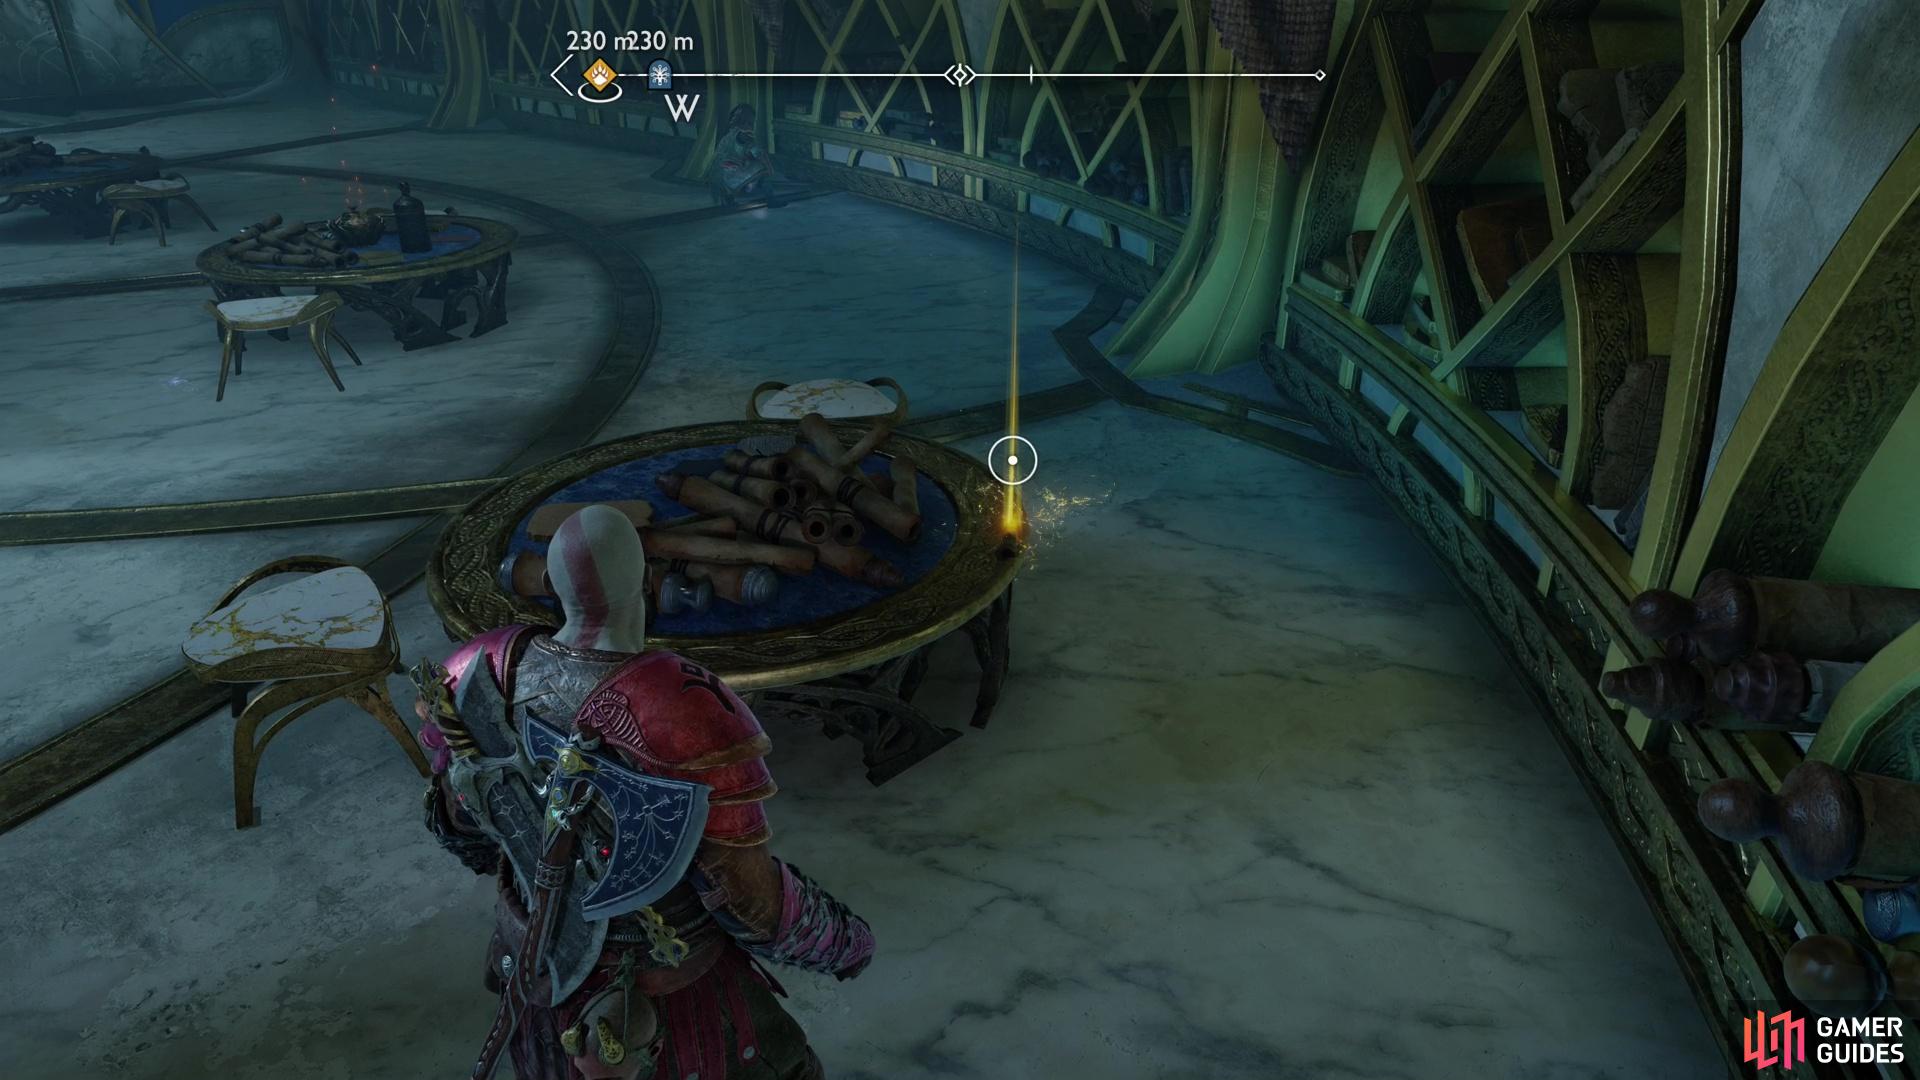
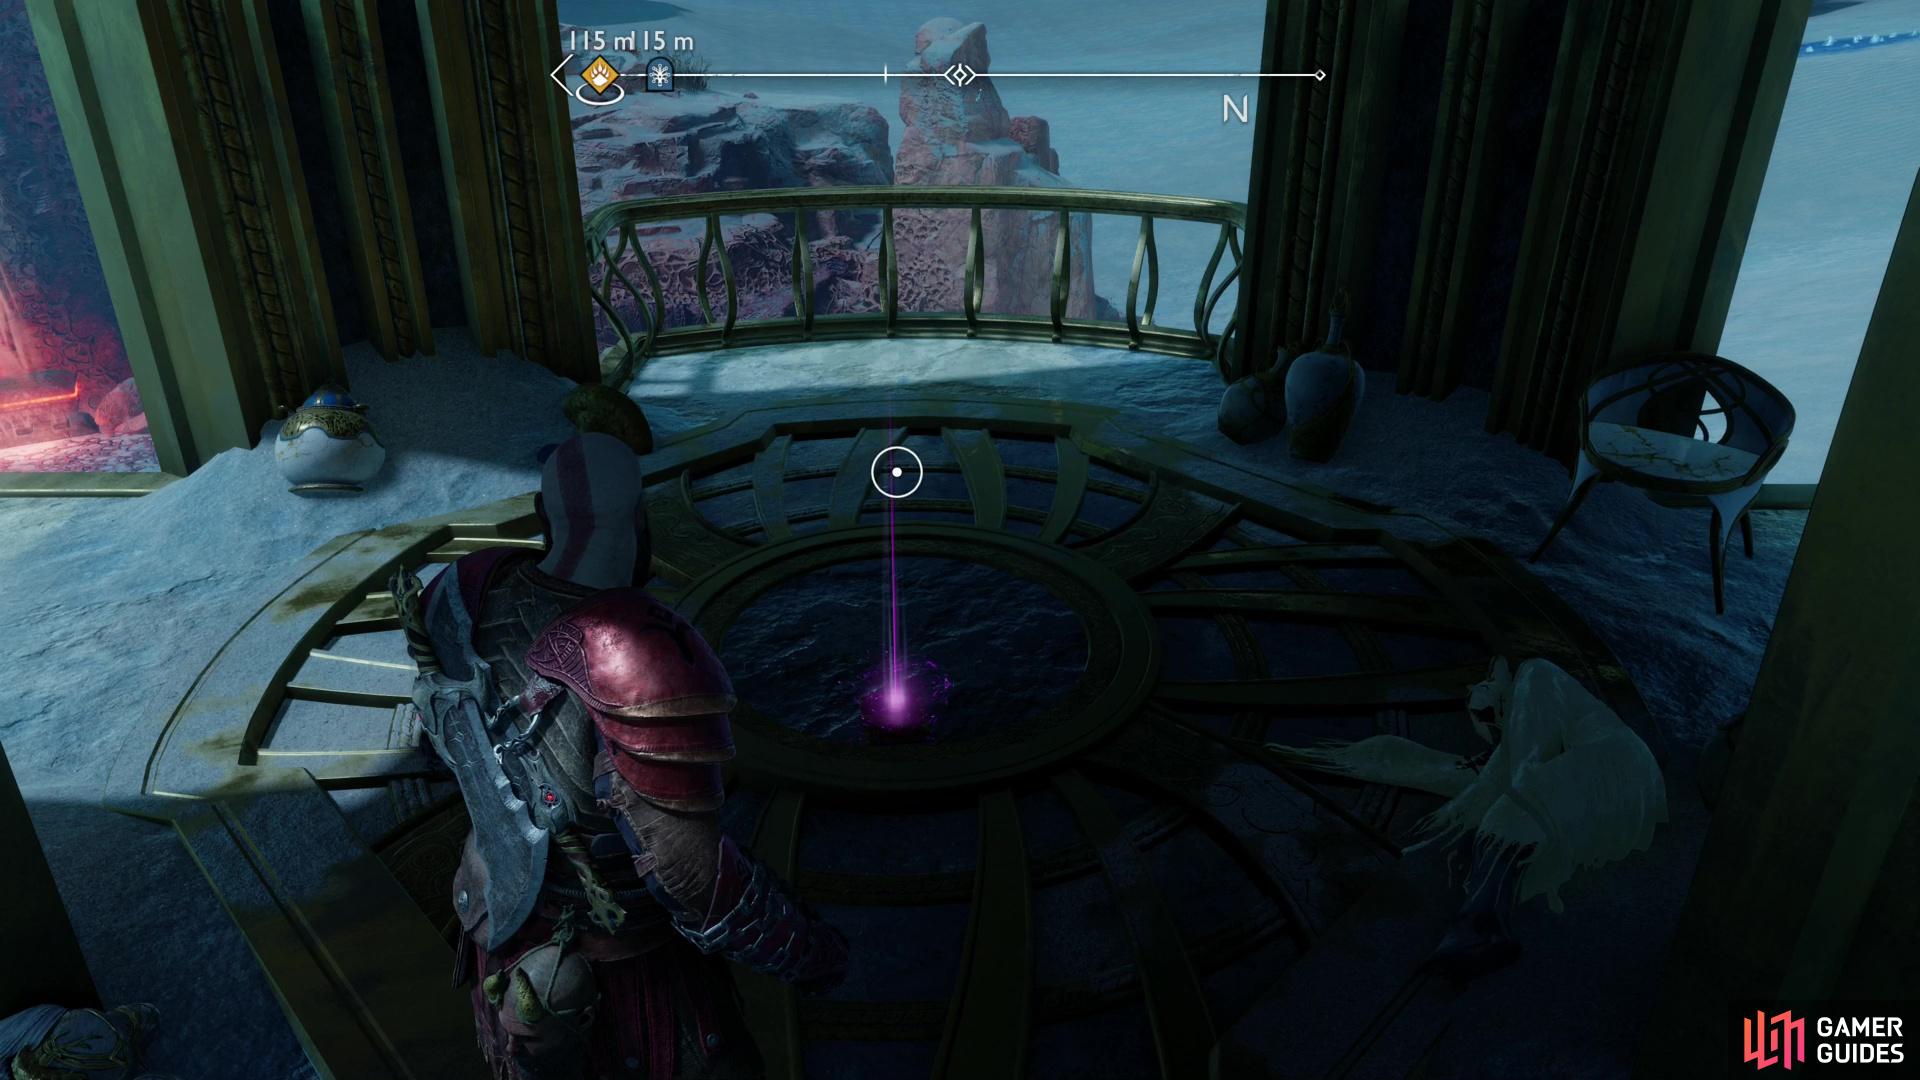
Search a small round table on the bottom floor of the library in The Elven Sanctum to find “The Lost Pages” Lore collectible.
Lore - The Lost Pages
You’ll find this Lore in the Elven Sanctum, which can be found along the easternmost edge of The Forbidden Sands - you’ll come here during a favor of the same name. Enter the Elven Sanctum and proceed to the library, then search a short round table on the northeastern edge of the bottom floor.
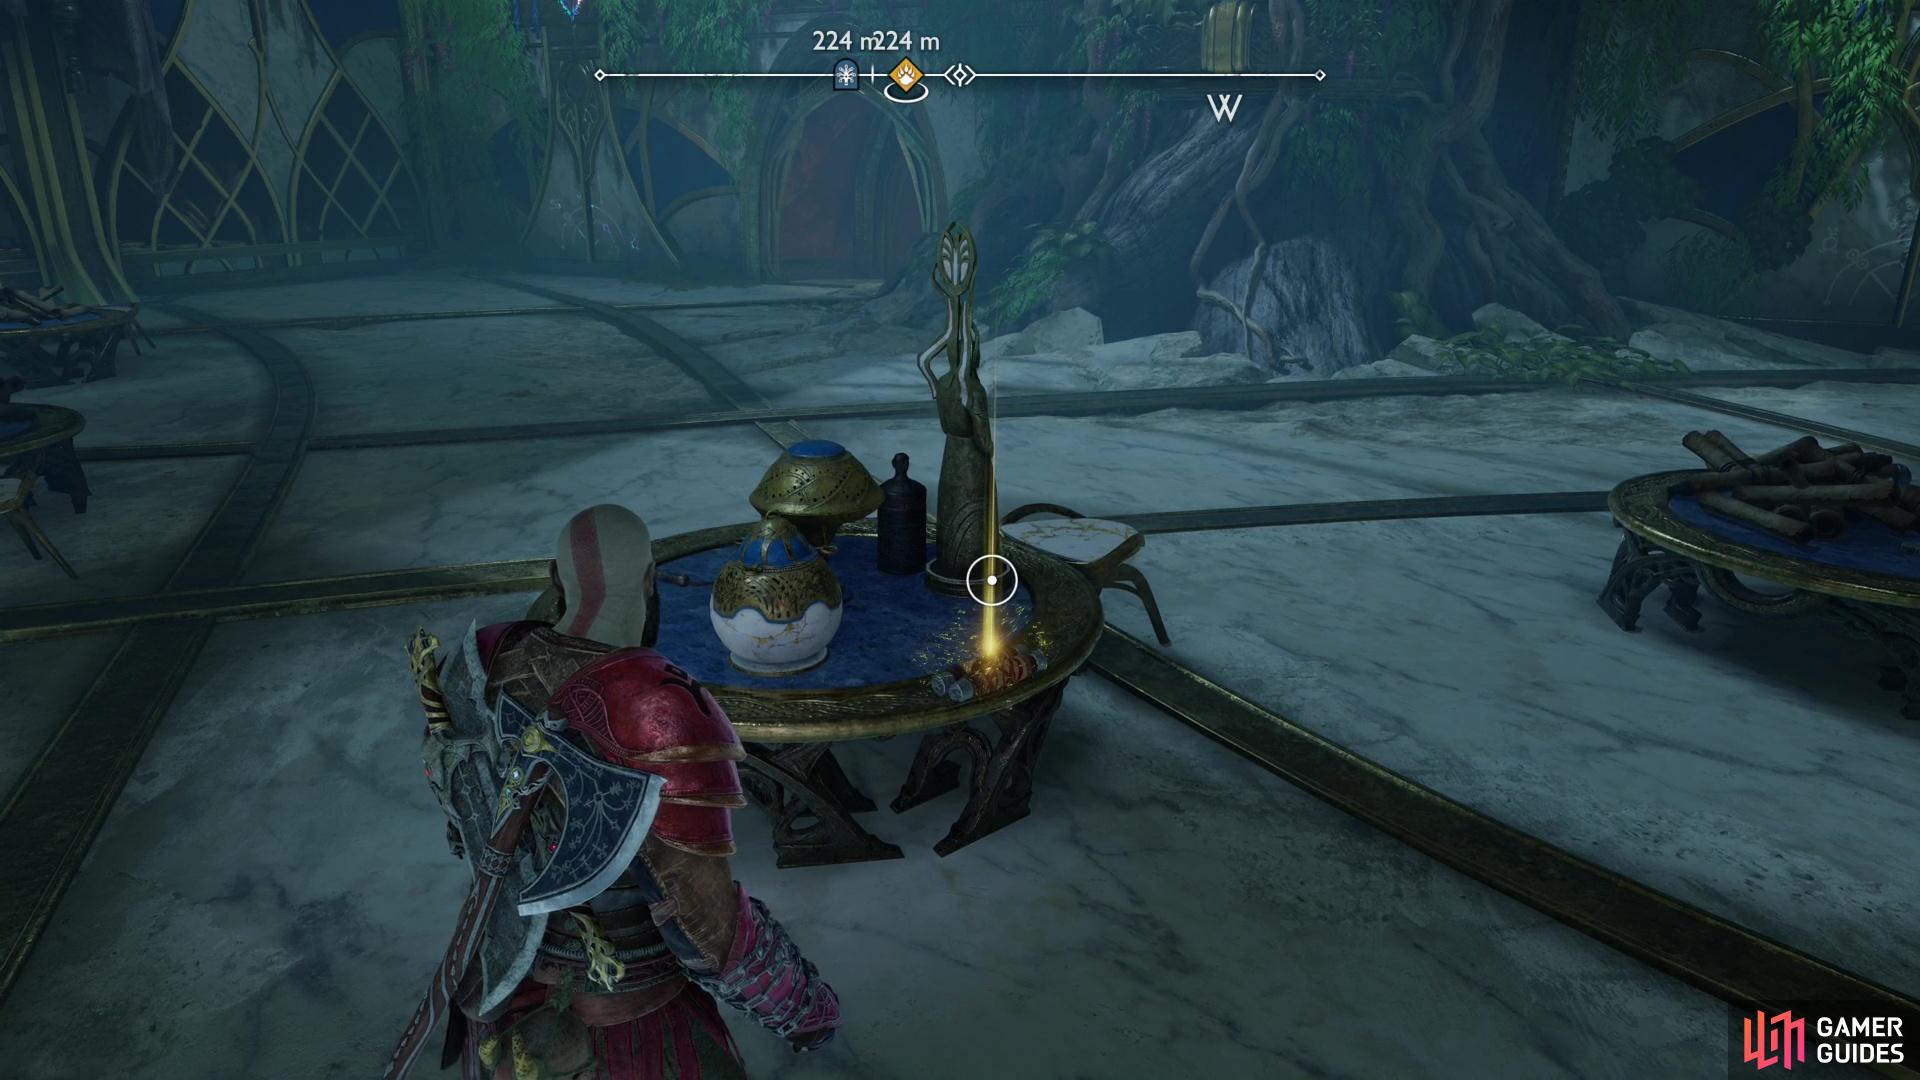
Search a small round table on the bottom floor of the library in The Elven Sanctum to find the “Scroll - An Examination of Temporal Significance”.
Scroll - An Examination of Temporal Significance
You’ll find this Scroll in the Elven Sanctum, which can be found along the easternmost edge of The Forbidden Sands - you’ll come here during a favor of the same name. Enter the Elven Sanctum and proceed to the library, then search a short round table just north of the center of the ground floor to find the Scroll - An Examination of Temporal Significance.
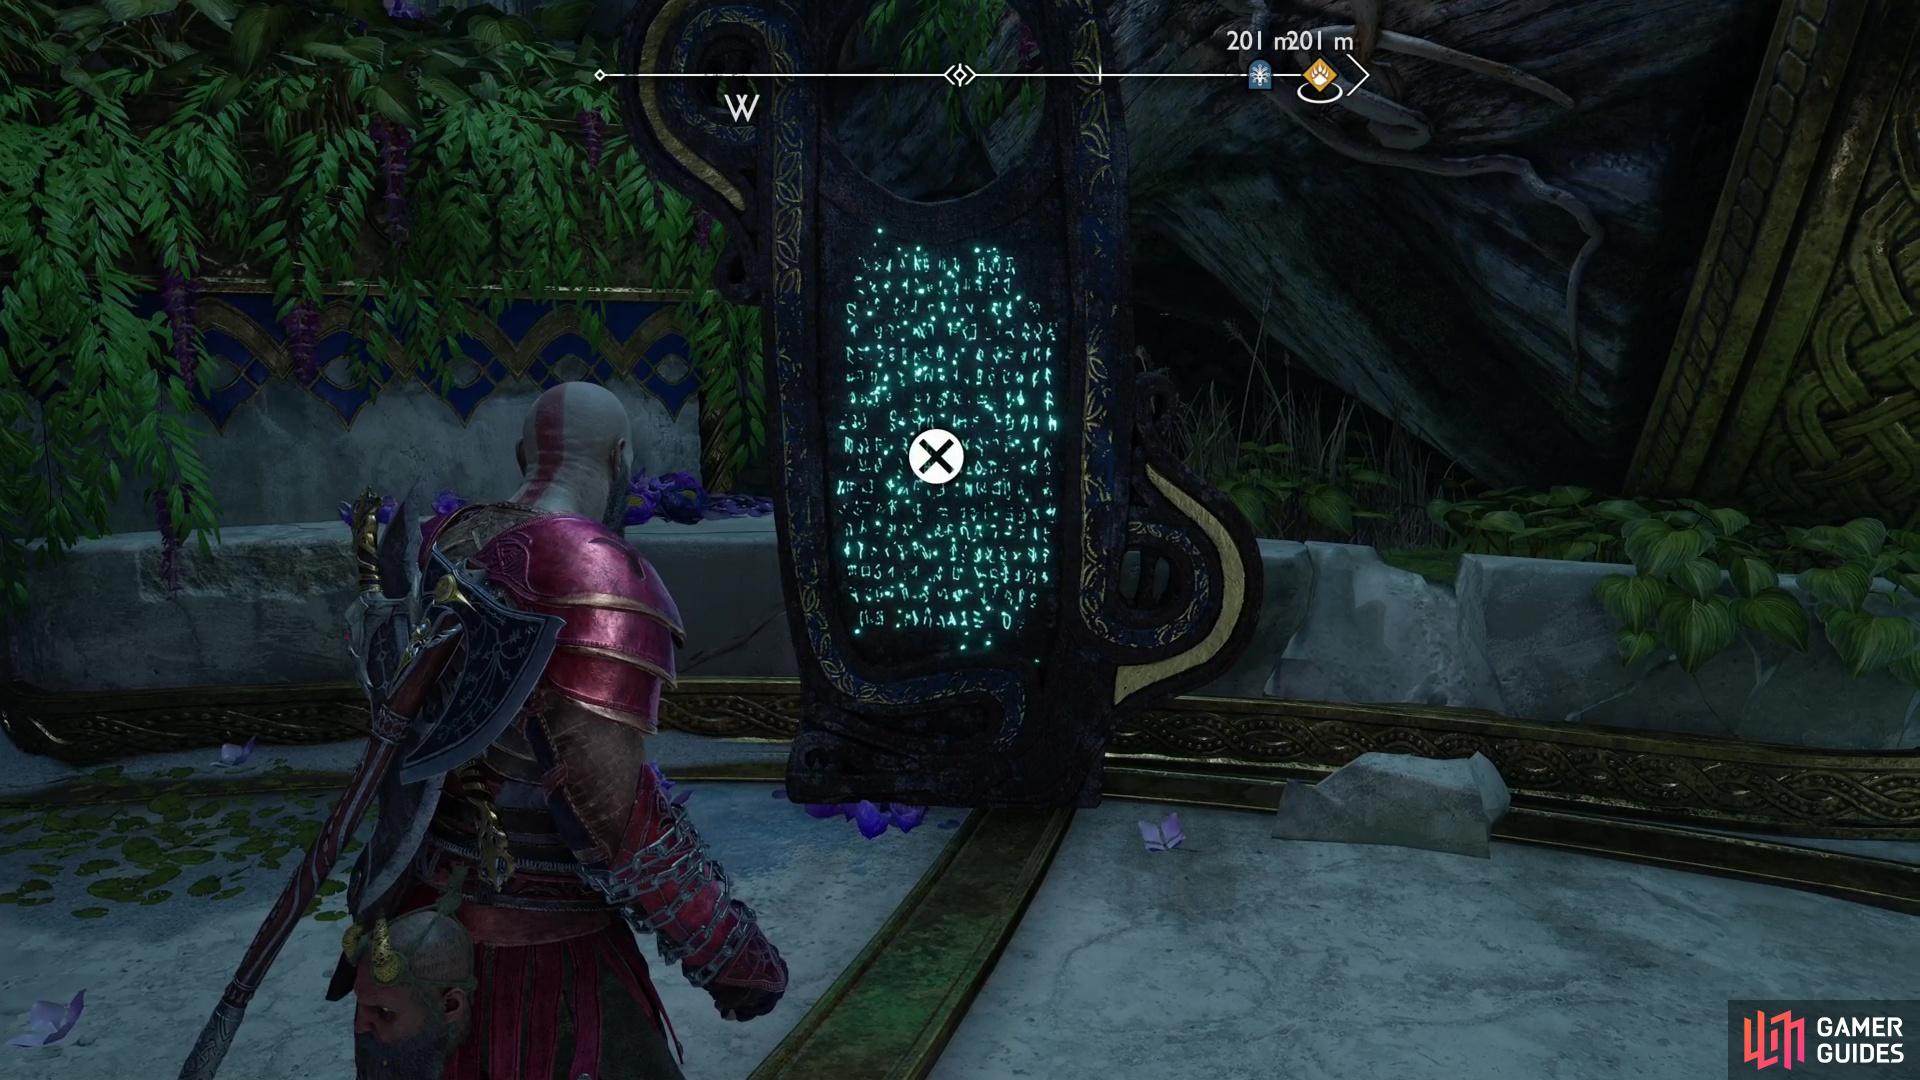
In the library of the Elven Sanctum, climb up a ledge to find the Lore Marker - The Arbiters of Knowledge,
Lore Marker - The Arbiters of Knowledge
You’ll find this Lore Marker in the Elven Sanctum, which can be found along the easternmost edge of The Forbidden Sands - you’ll come here during a favor of the same name. Enter the Elven Sanctum and proceed to the library, then climb the southernmost ledge to the west to find the Lore Marker - The Arbiters of Knowledge.
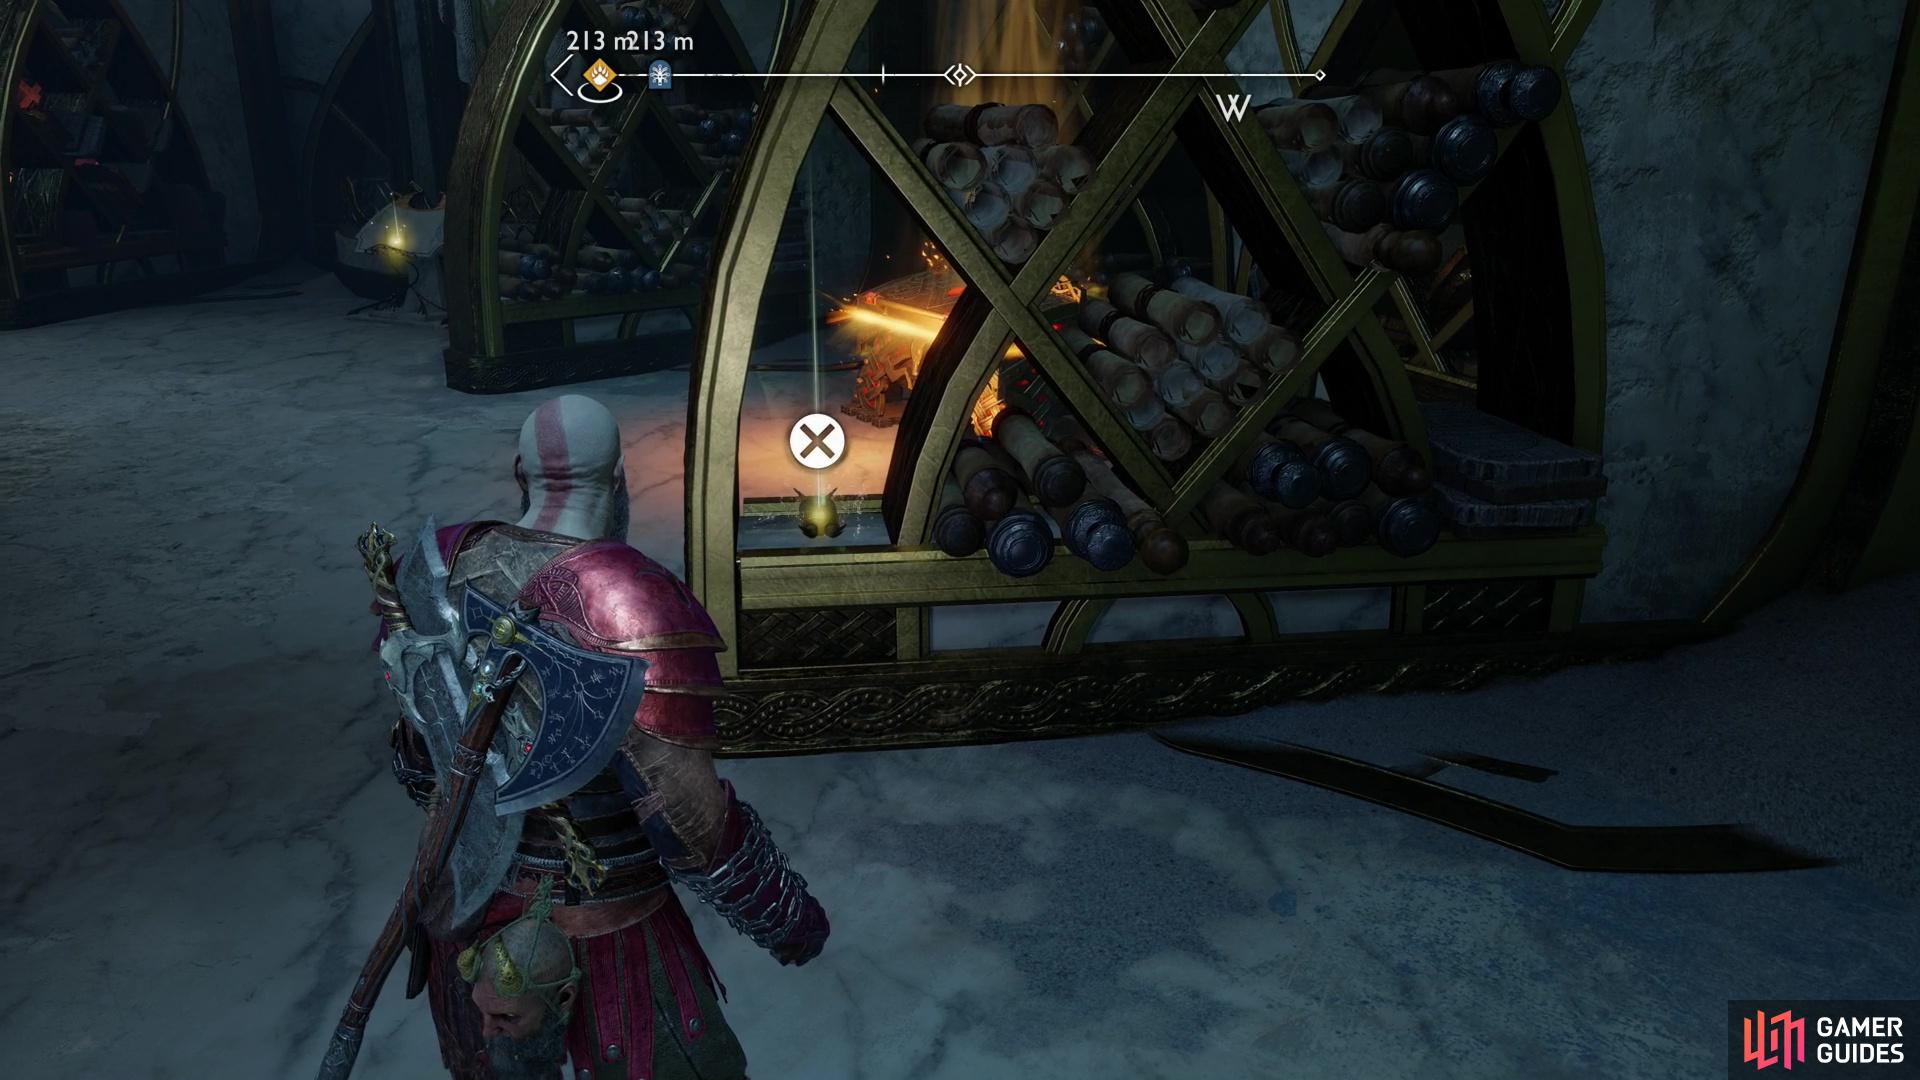
Climb up to the highest ledge in the library inside the Elven Sanctum, then search a shelf to snag the Treasure Map - Forgotten Tower,
Treasure Map - Forgotten Tower
You’ll find this Lore in the Elven Sanctum, which can be found along the easternmost edge of The Forbidden Sands - you’ll come here during a favor of the same name. Enter the Elven Sanctum and proceed to the library, then climb some ledges to reach the highest floor, where you’ll find several shelves. Search a shelf along the northern edge of the library to find the Treasure Map - Forgotten Tower. You’ll need this to complete the Buried Treasure collectible in The Forbidden Sands.
Where to Find All Artifacts in The Forbidden Sands
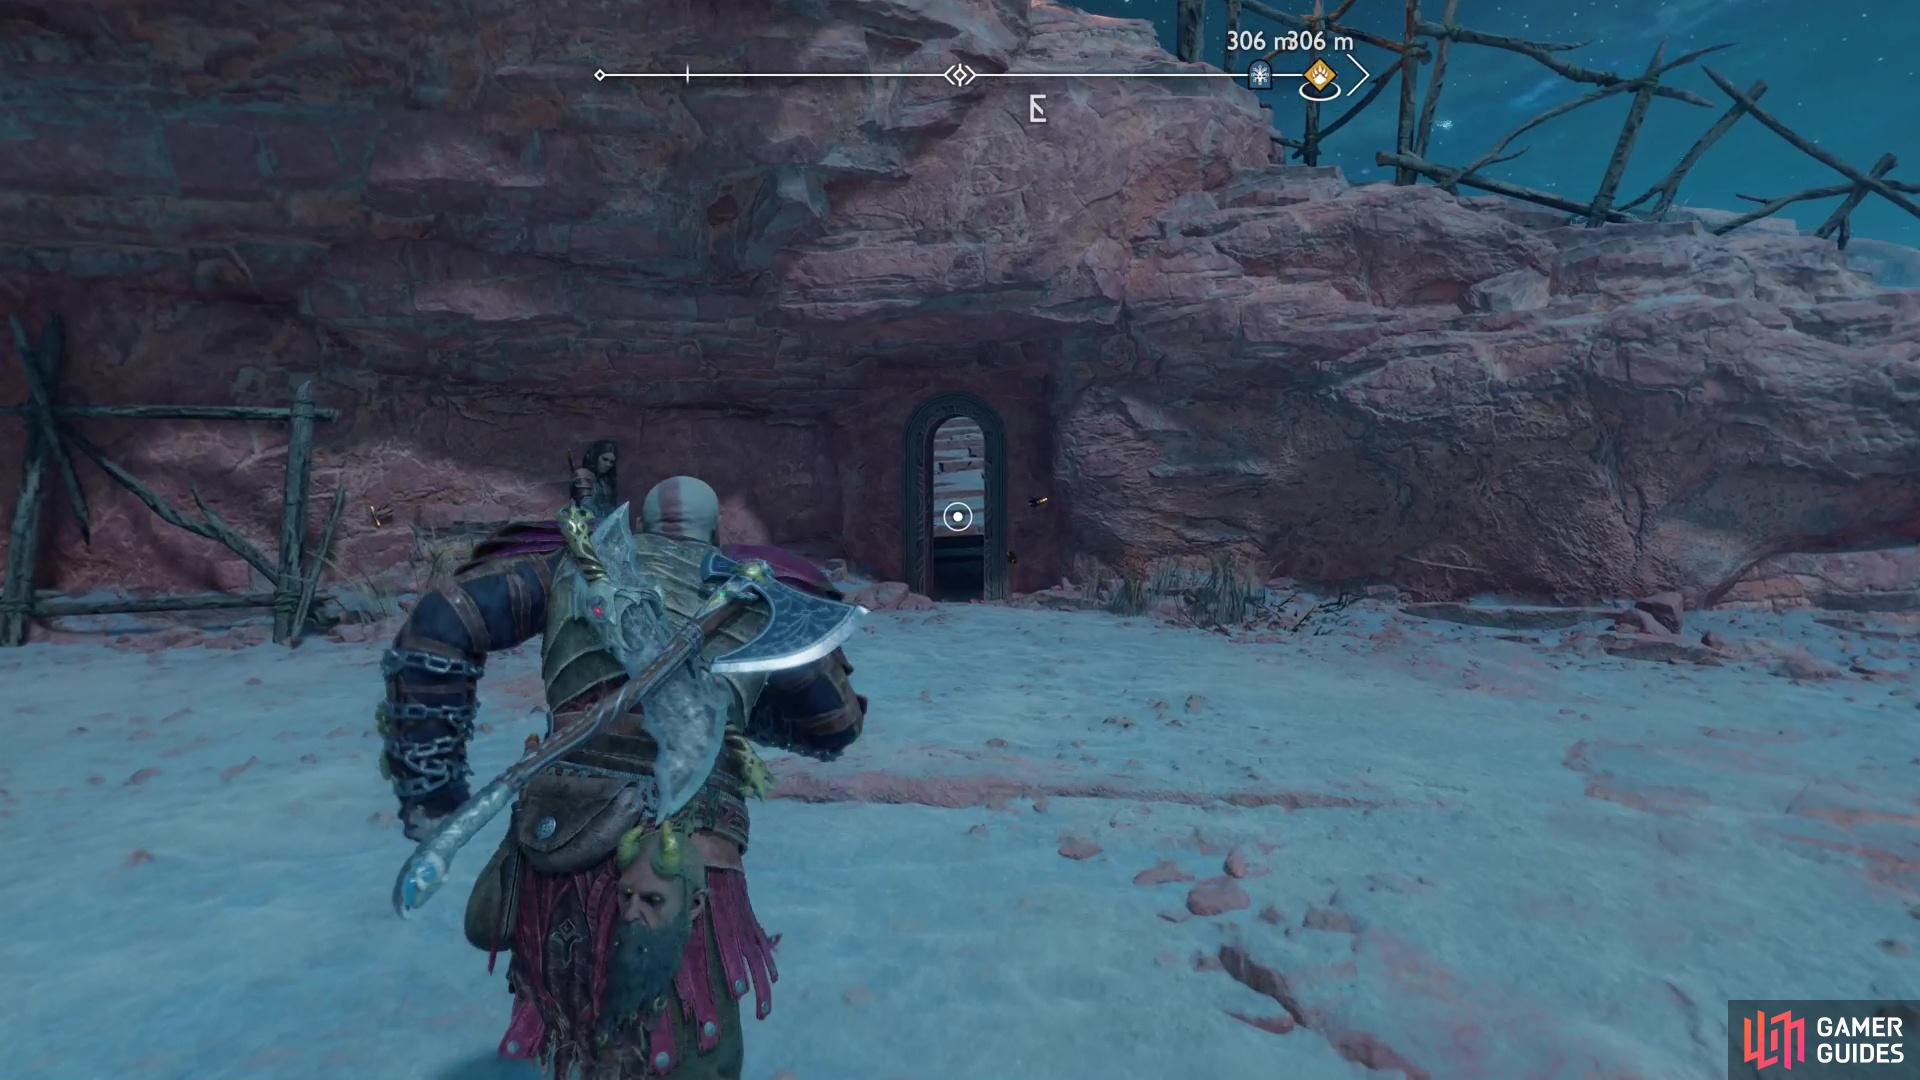
Find a tower along the northern end of The Forbidden Sands and climb up to an elevated ledge, where you can find a door.
Squeeze through the narrow door to reach the Tributes to Freyr - Token Artifact.
Artifact - Kvasir’s Poem - Trip
Along the eastern edge of The Forbidden Sands you’ll find an island of rock in the desert, just north of the passage that connects The Forbidden Sands and The Barrens. Make your way northeast under a stone arch and you’ll pass between this rock island and the cliffs that form this region’s eastern boundary. As you go, you should spot an elven tower sticking out of the sand. Climb up on a section of wall connected to the cliffs, then climb into the tower to find the Kvasir’s Poems Artifact.
Climb up to the ledge leading to The Elven Sanctum and search to the right (south) to find the Tribute to Freyr - Bracelet Artifact.
Artifact - Tributes to Freyr - Bracelet
At the eastern edge of The Forbidden Sands you’ll find an elevated ledge, beyond which is the Elven Sanctum - you’ll come here during a favor of the same name. Climb up onto the ledge outside the Elven Sanctum and turn right (south) to find this artifact lying on the ground. Pick it up to score the Tribute to Freyr - Bracelet Artifact.
Search an elven tower on the eastern edge of the map to find one of Kvasir’s Poems,
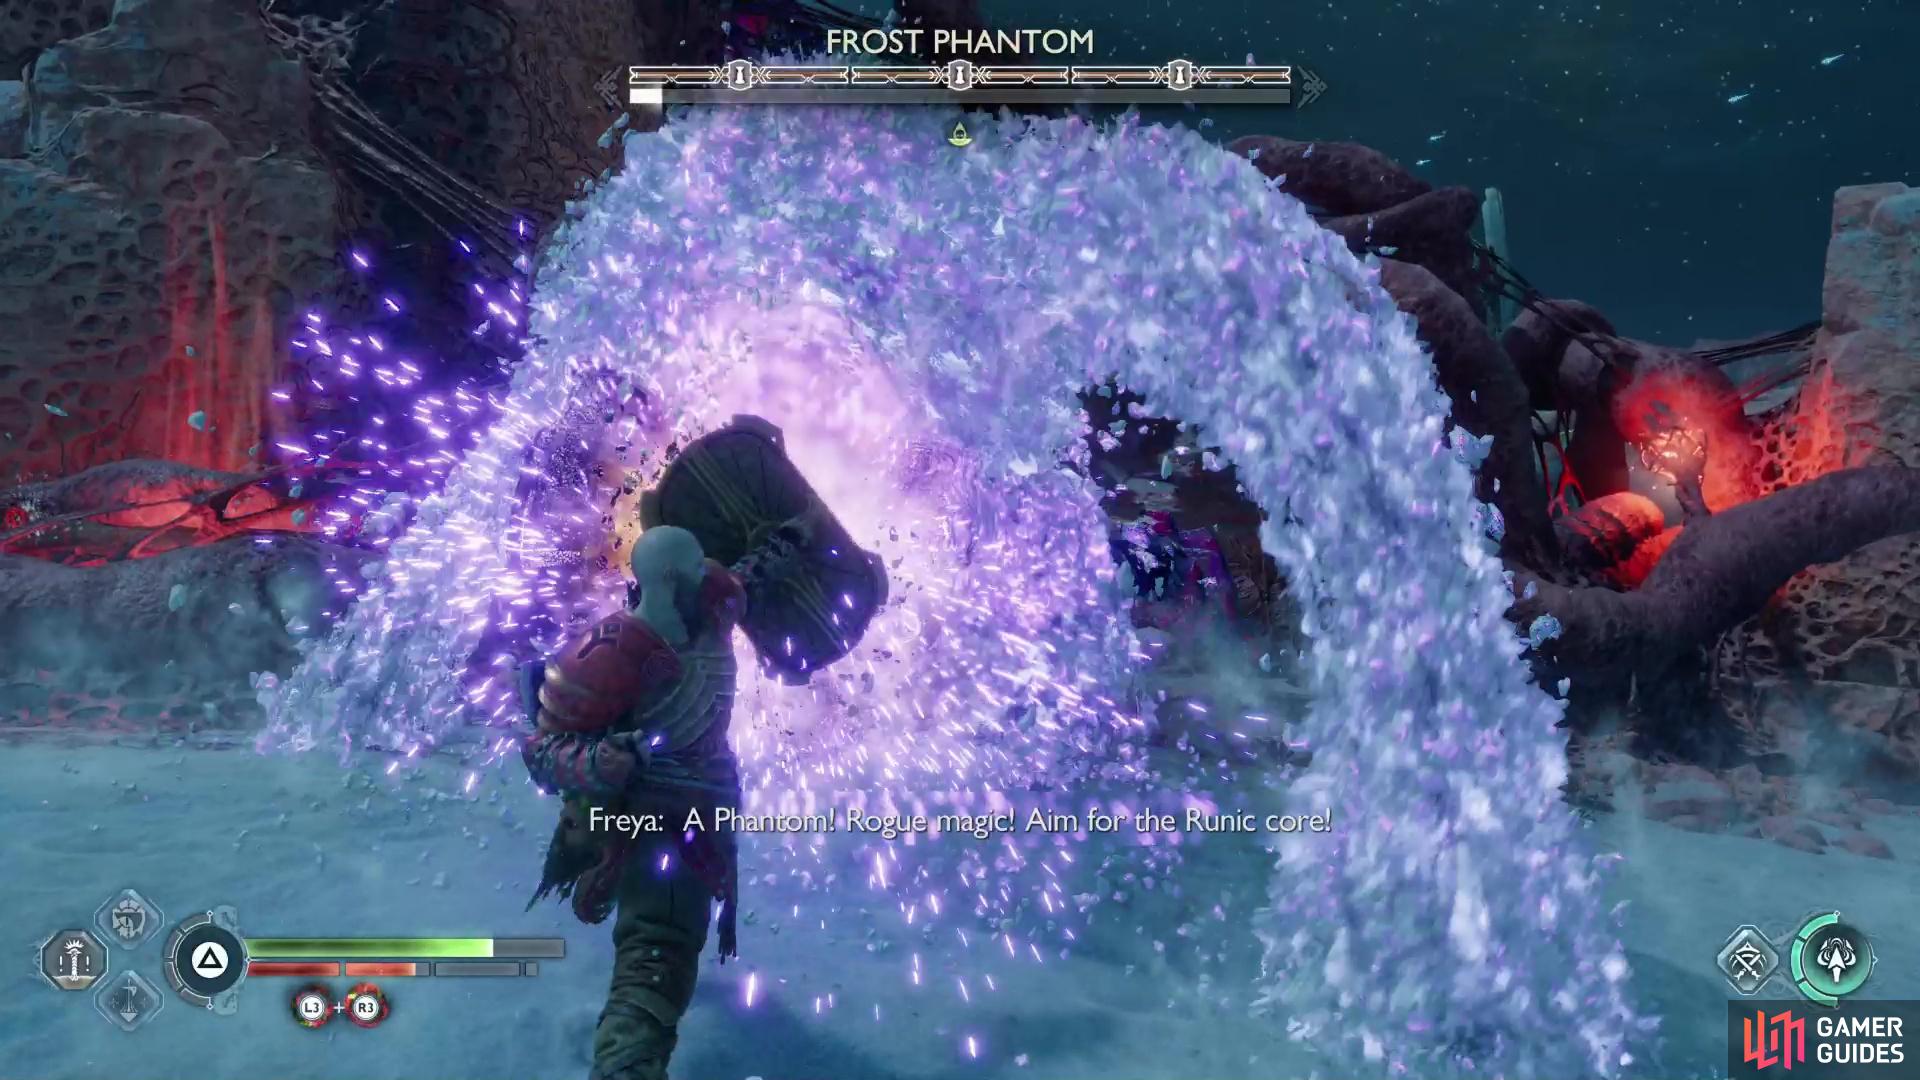
just be wary of a Frost Phantom that lurks around the elven tower.
Artifact - Tributes to Freyr - Token
Along the northern end of The Forbidden Sands you’ll find a ruined tower atop an elevated ledge. Note that this is where the eponymous door from the favor The Desert Door is located, but you don’t have to deal with it to get this collectible. Circle around to the western edge of this ledge and look southwest to find a stone pillar you can leap onto. From this stone pillar you can leap onto the elevated ledge, smashing through a fragile wall. Kill the Light Elves up here, then search the rock wall to the east, northeast to find an opening Kratos can just slip through. Go upstairs and you’ll find the Tribute to Freyr - Token Artifact lying on the ground, right out in the open. There’s also an Yggdrasil Rift nearby, but it houses some Lv6 foes, so you may want to leave it alone until you’re stronger.
Search atop a ledge along the northern end of The Forbidden Sands to find the Forgotten Tower Buried Treasure.
Where to Find All Buried Treasures in The Forbidden Sands
There’s only one Buried Treasure in The Forbidden Sands. To start it, you need to head into The Elven Sanctum, which can be found along the eastern edge of The Forbidden Sands - you’ll come here during a favor of the same name. Enter the Elven Sanctum and proceed to the library, then climb some ledges to reach the highest floor, where you’ll find several shelves. Search a shelf along the northern edge of the library to find the Treasure Map - Forgotten Tower. You’ll need this to complete the Buried Treasure collectible in The Forbidden Sands.
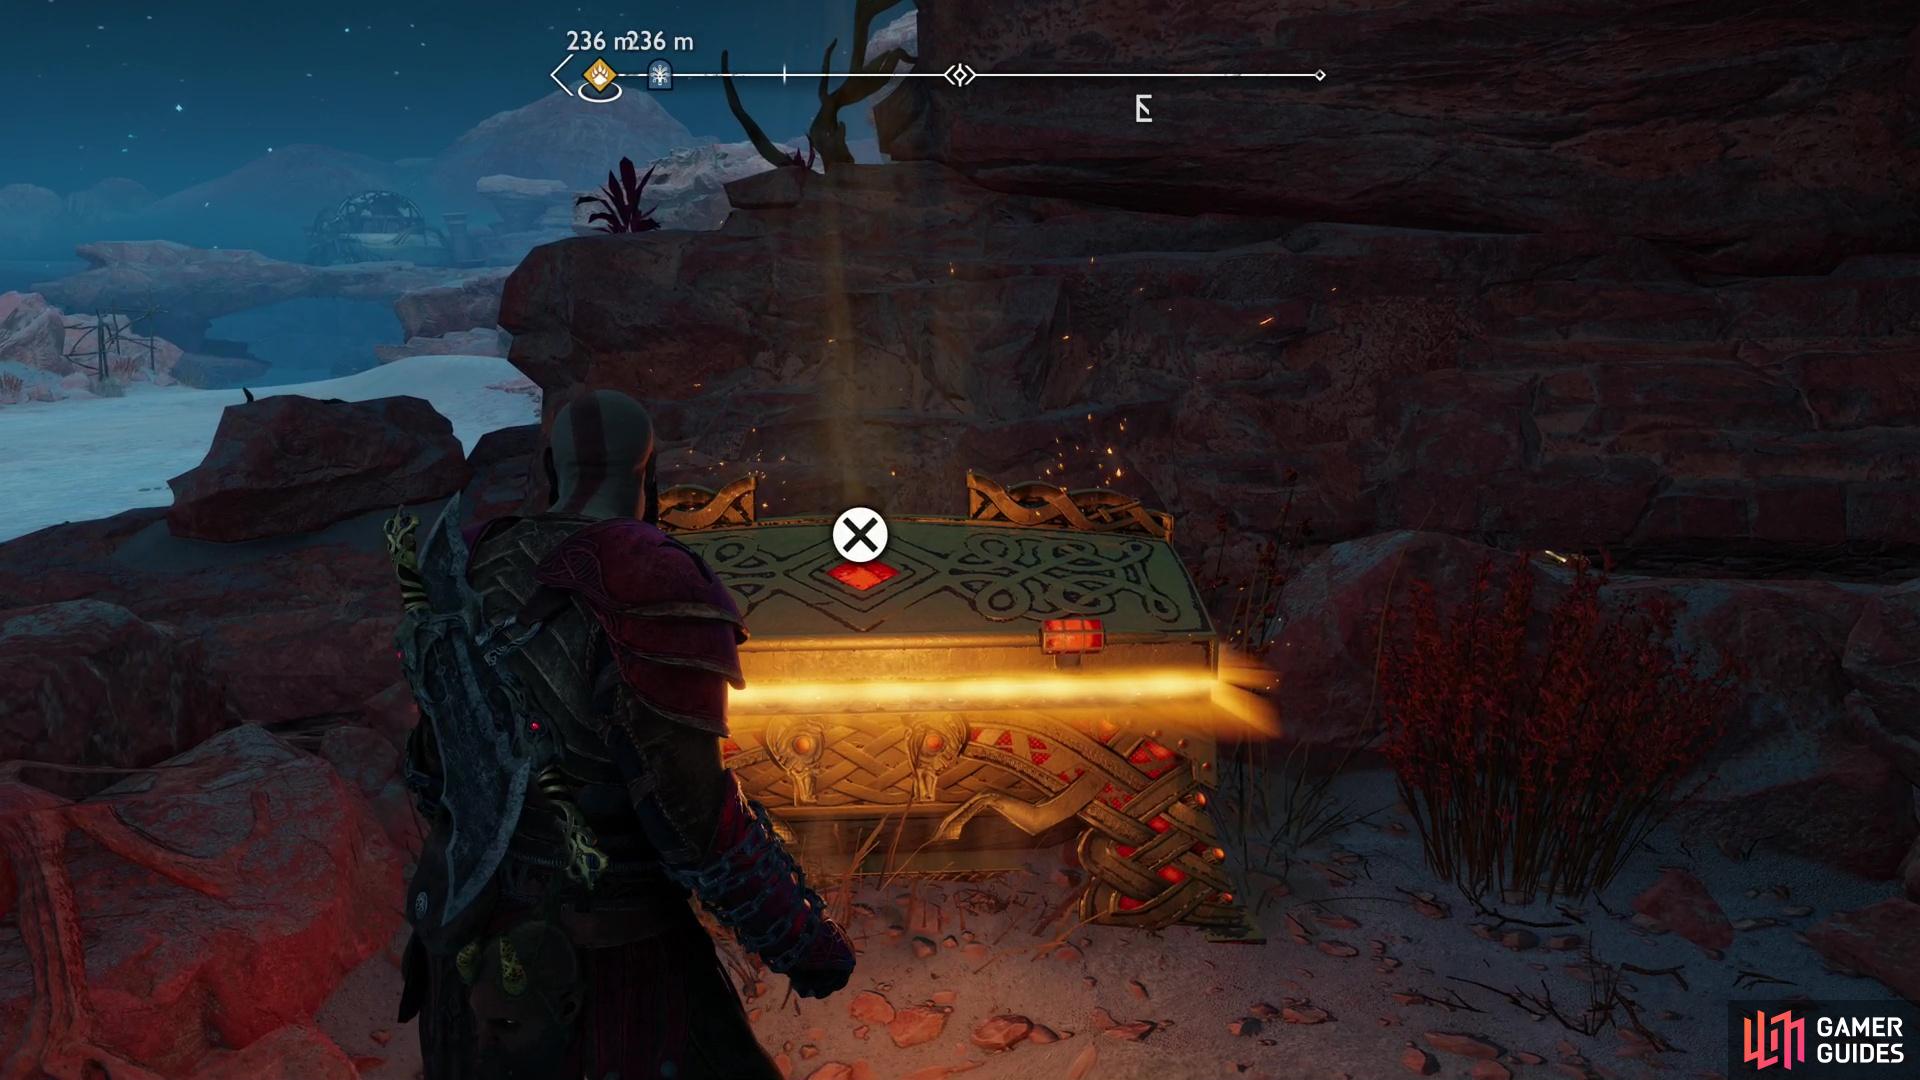
With that Treasure Map in hand, return to The Forbidden Sands and search for another ledge along the northern edge of the region. You’ll have to use the Blades of Chaos to climb up on a stone pillar, then jump through a fragile section of wall. Up on this ledge you’ll find some Light Elves and, if you completed the favor Freyr’s Gift and subsequently searched for two Alfheim Barrens Key Halves you can open the door up here and complete the favor The Desert Door.
When you reach this ledge, search the northwestern edge to find this Buried Treasure - Forgotten Tower.
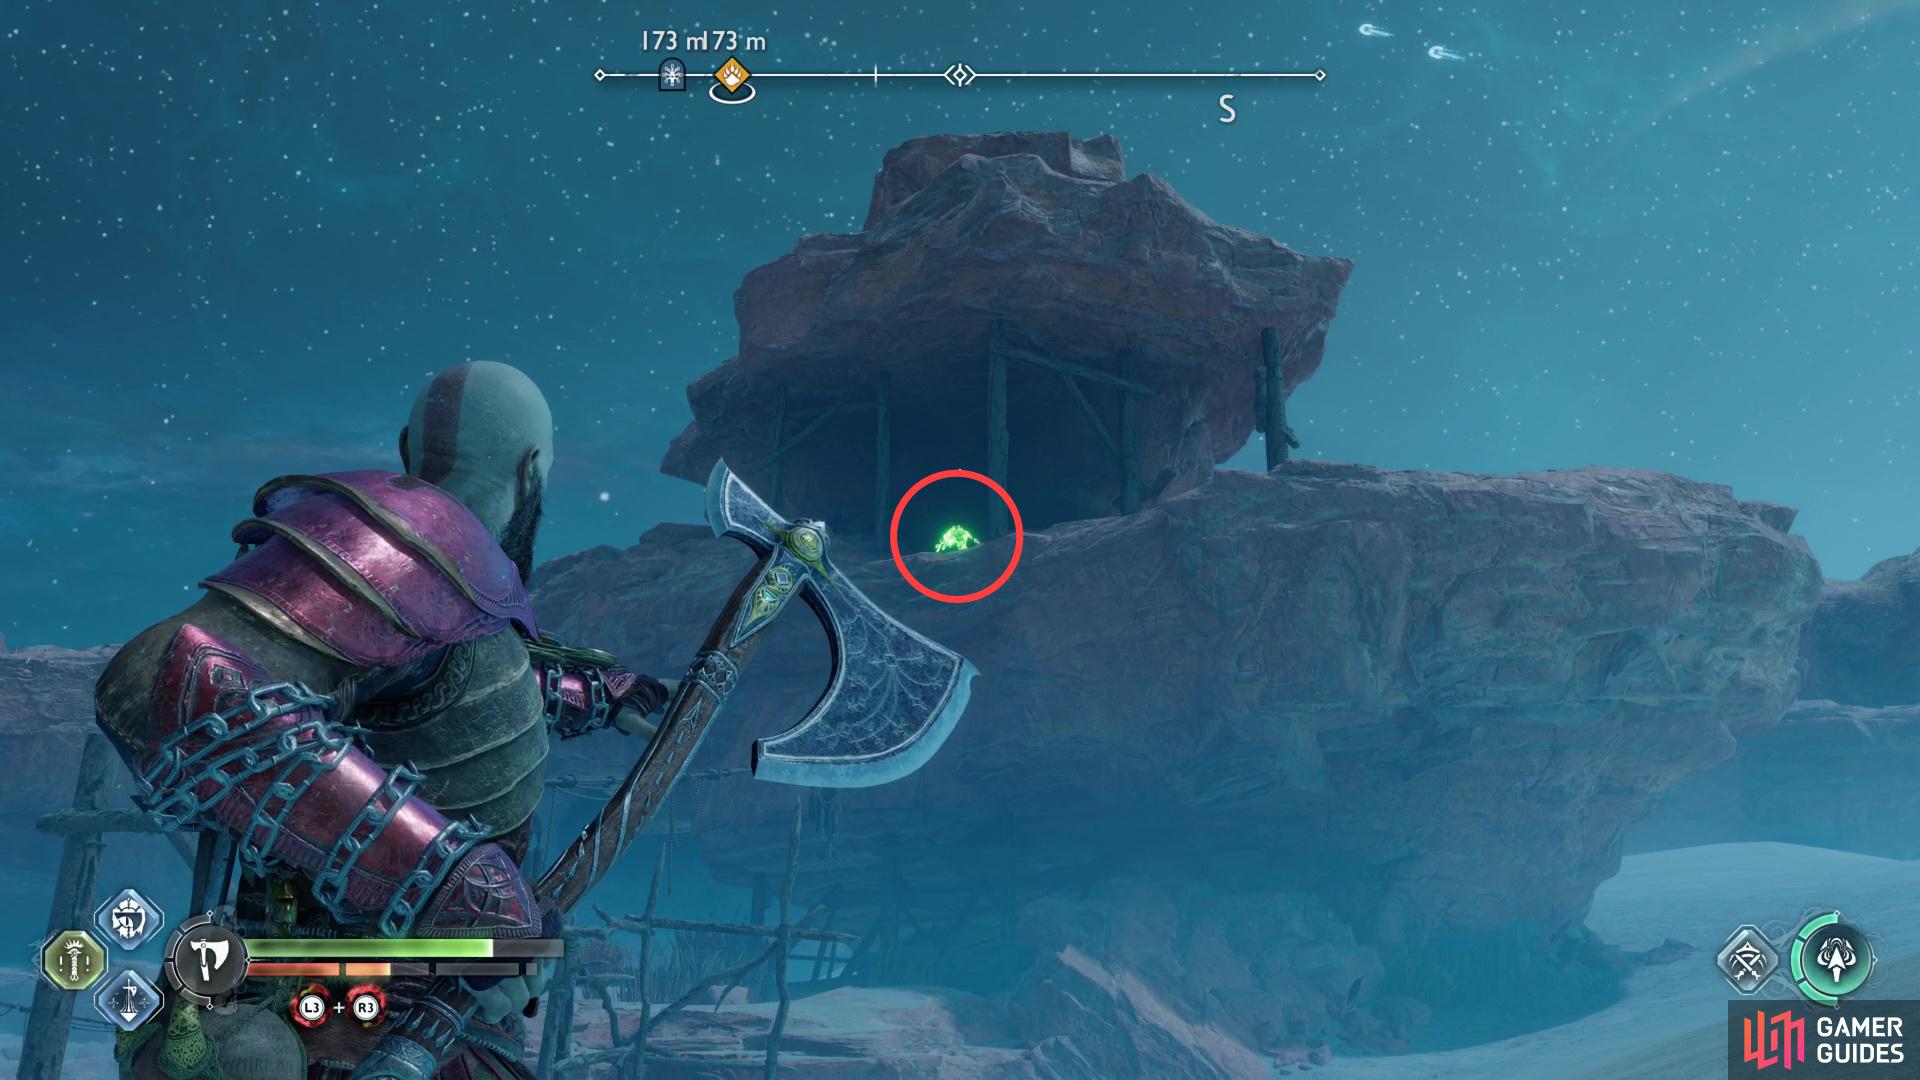
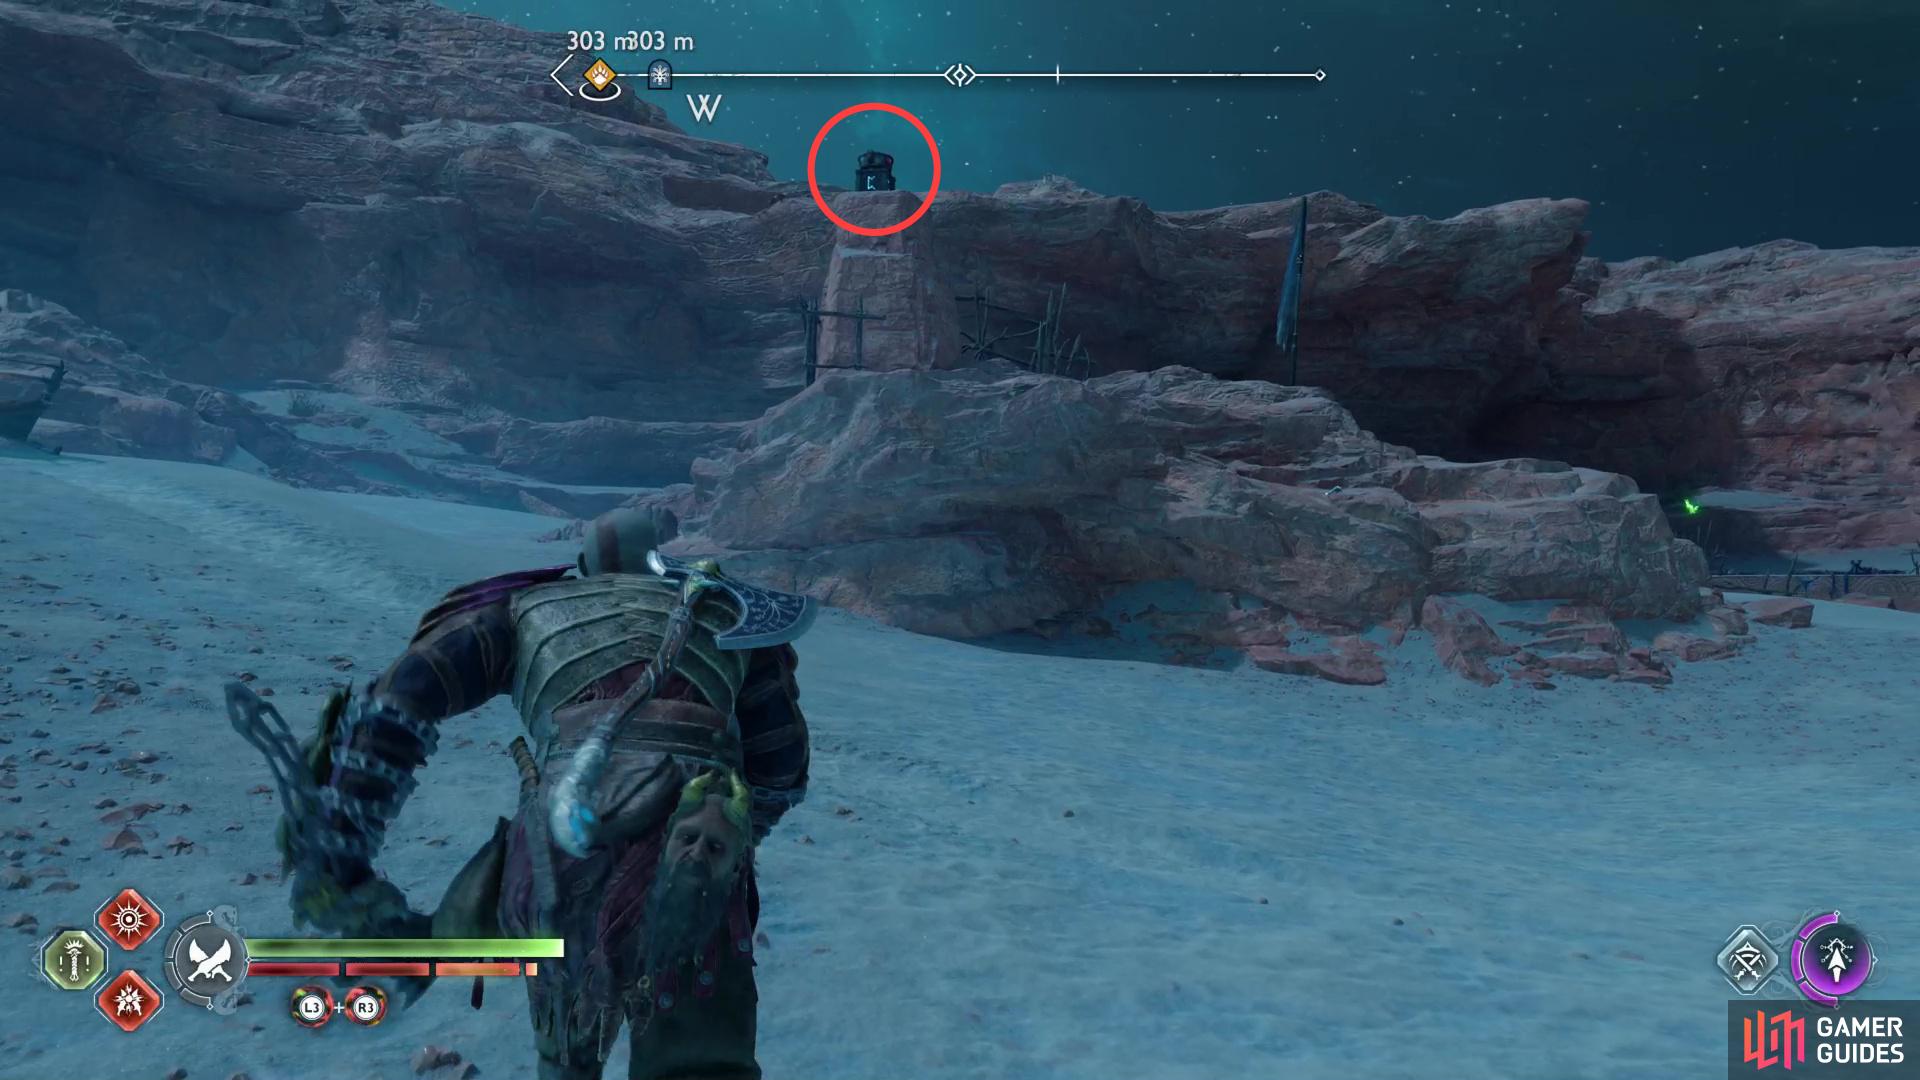
You can find one of Odin’s Ravens hiding in a shelter along the eastern edge of the region.
Where to Find All Odin’s Ravens in The Forbidden Sands
Odin’s Raven 1
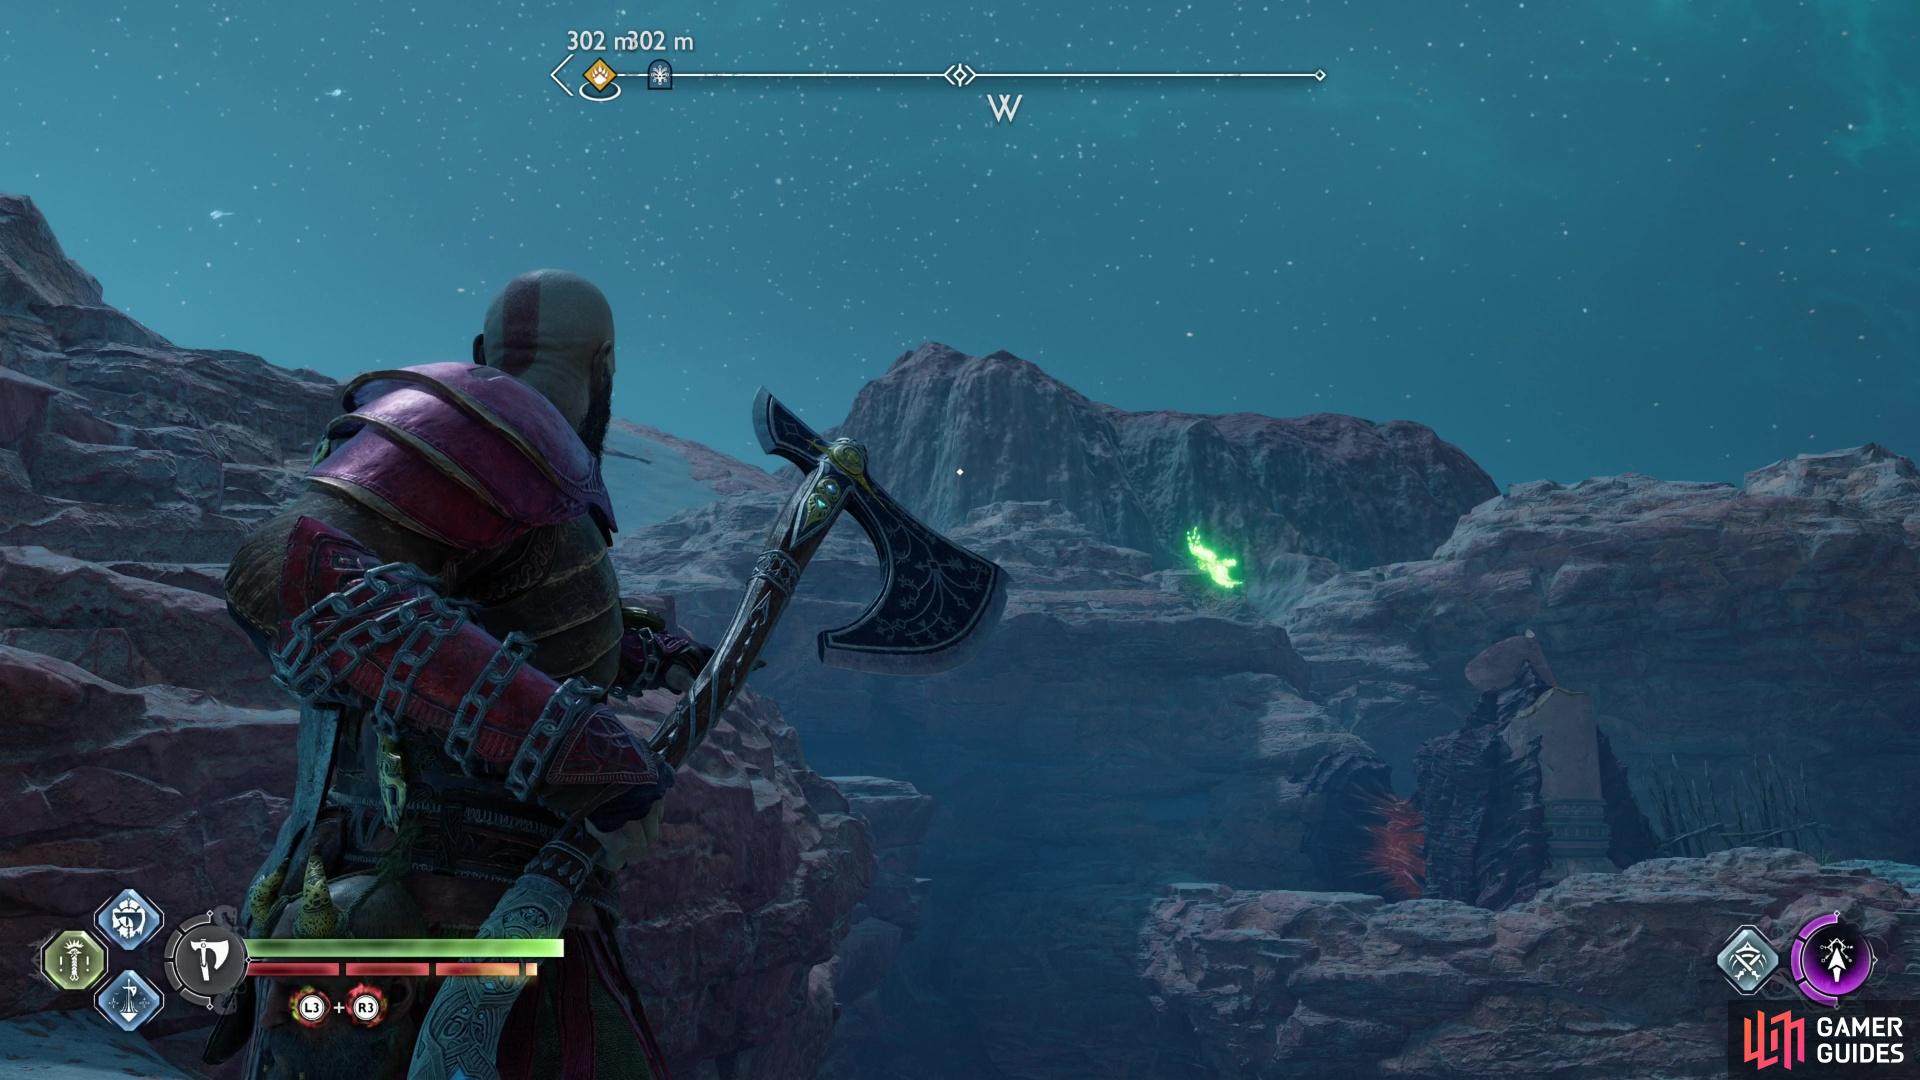
Along the eastern edge of The Forbidden Sands you’ll find an island of rock in the desert, just north of the passage that connects The Forbidden Sands and The Barrens. Search the southwestern edge of these rocks to find a shelter propped up by wooden supports. One of Odin’s Ravens roosts up in this shelter, and while it’s a far throw you can hit it with the Leviathan Axe, just aim above it a bit and if at first you don’t succeed…
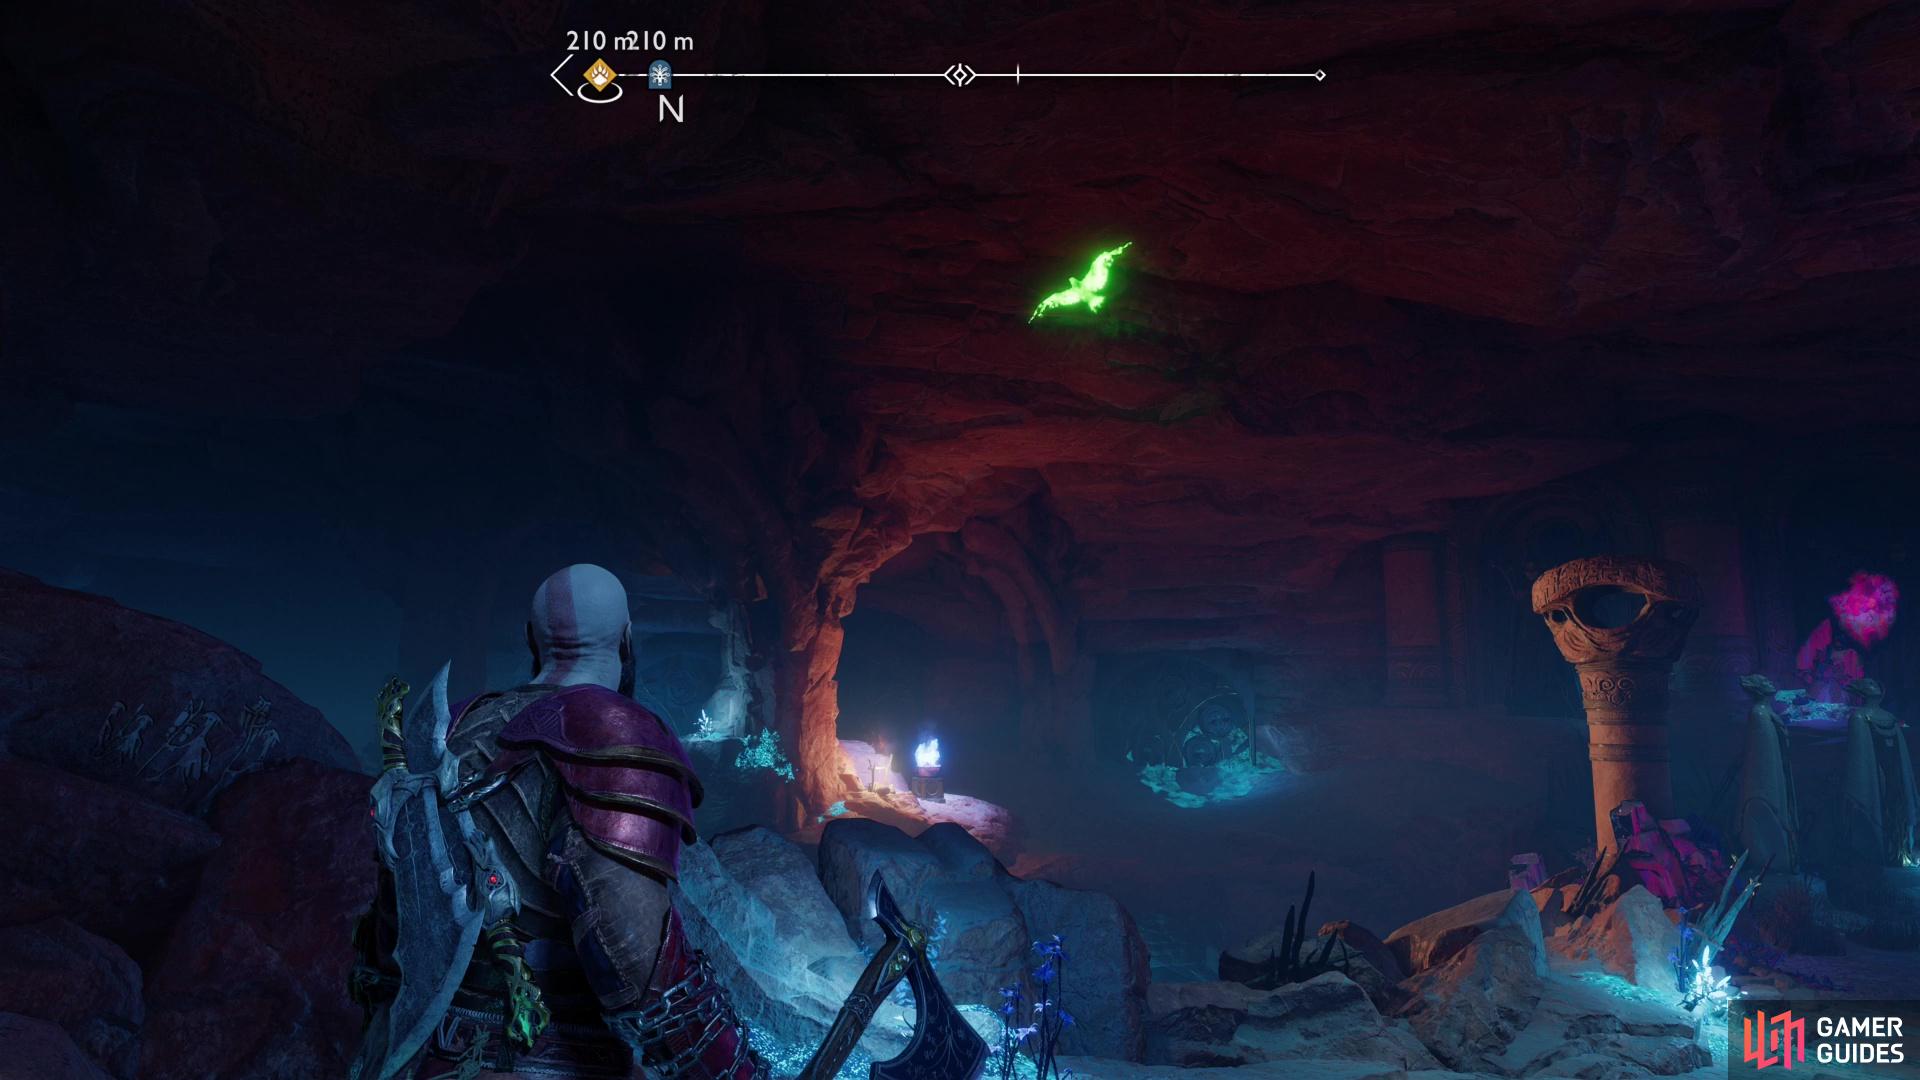
Enter a hidden chamber under The Elven Sanctum along the eastern end of The Forbidden Sands and look north to find one of Odin’s Ravens.
Odin’s Raven 2
Along the eastern edge of The Forbidden Sands you’ll find The Elven Sanctum. Instead of grappling up to the ledge that’ll take you to the aforementioned Elven Sanctum, note an ornate door engraving on the cliff face, the bottom of which is crumbling. Help finish what time started and smash the fragile section of wall, then crawl through the hole and continue east along a linear walkway until you reach a large cavern. Look north and you should spot one of Odin’s Ravens flying in a figure-eight pattern.
You can find one of Odin’s Ravens flying around near Freyr’s Statue along northwestern edge of the region.
Odin’s Raven 3
You can find this raven along the western end of The Forbidden Sands. As you approach the statue of Freyr (the site of the favor Freyr’s Gift) you’ll have to hop up a small ledge. Continue to the edge of a light bridge, then look west and you should spot one of Odin’s Ravens flying in a figure-eight pattern.
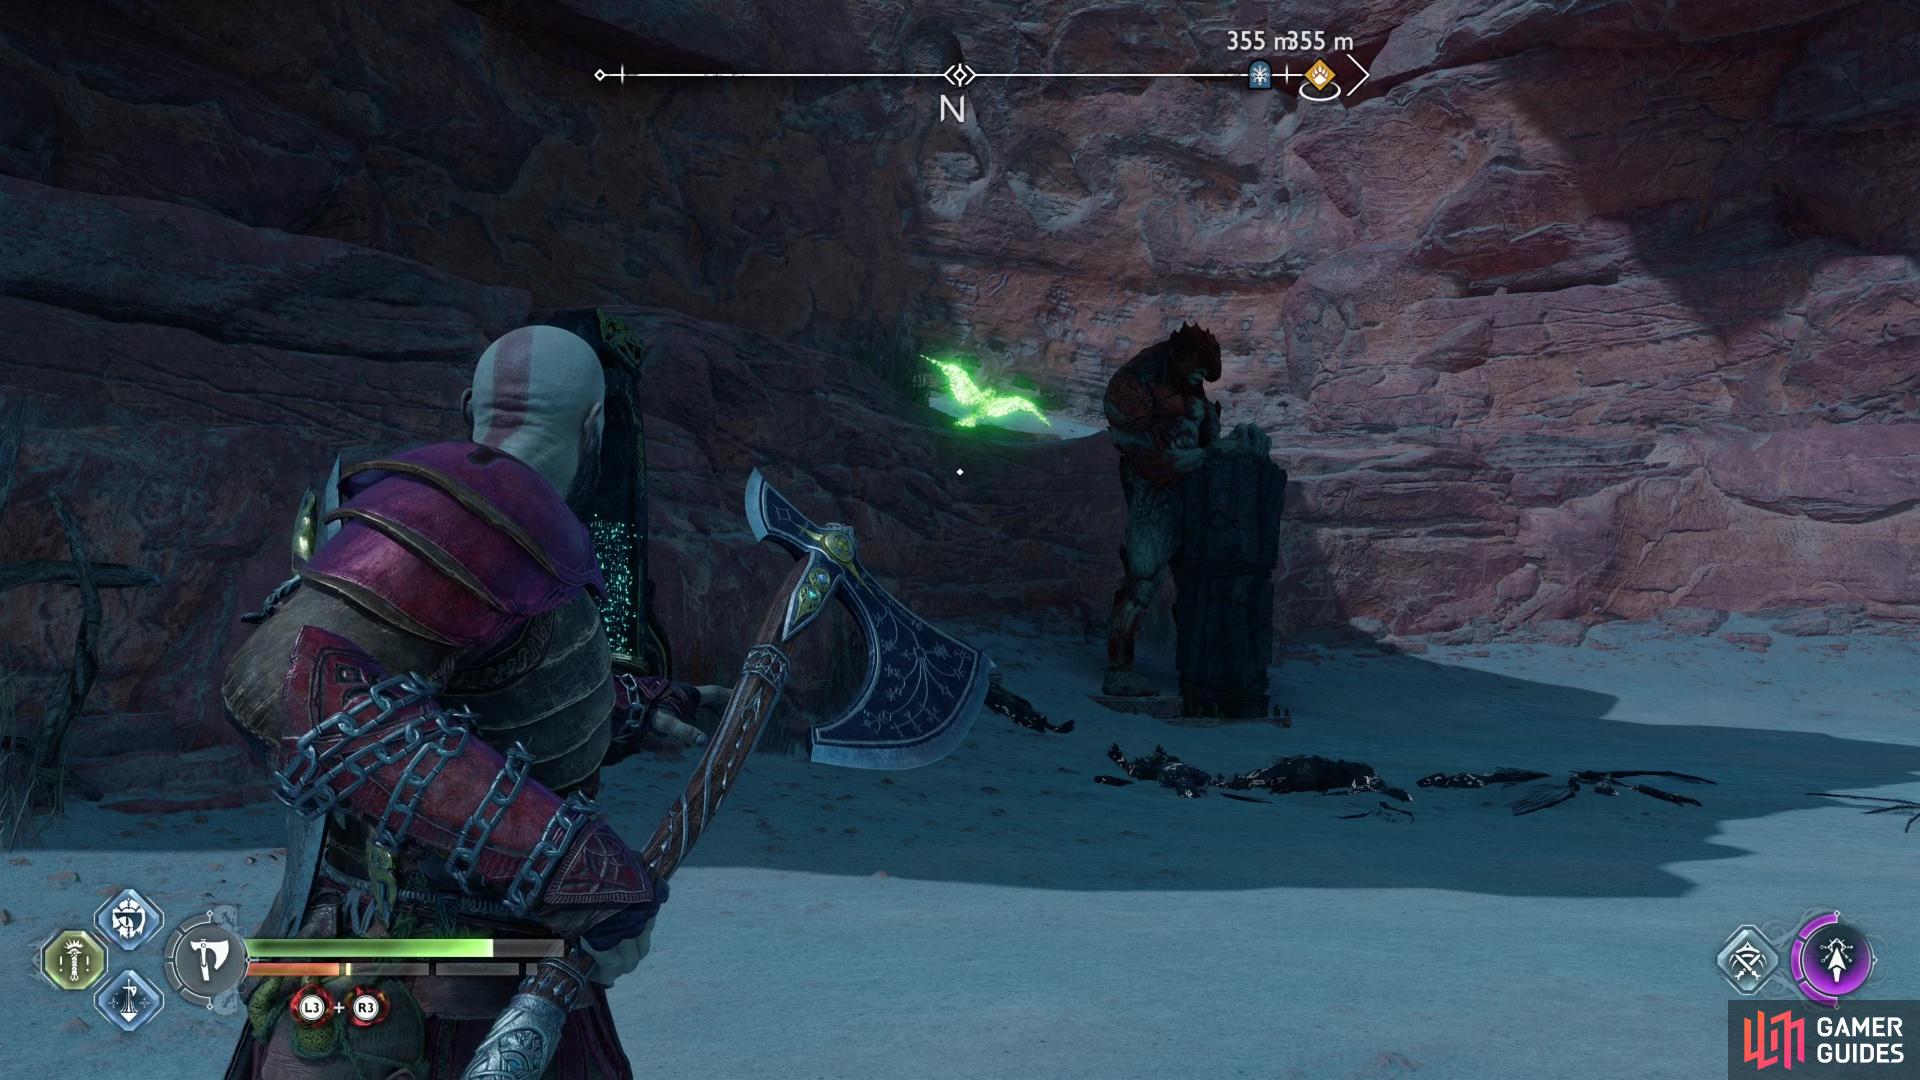
Search behind a troll statue along the western edge of the map to find another one of Odin’s Ravens.
Odin’s Raven 4
From the ledge that leads to Freyr’s statue along the northwestern edge of The Forbidden Sands, follow the cliffs southwest until you find some more ruins to the right. Climb onto a ledge to reach these ruins, where you’ll find a stone troll. Search behind the statue to find one of Odin’s Ravens.
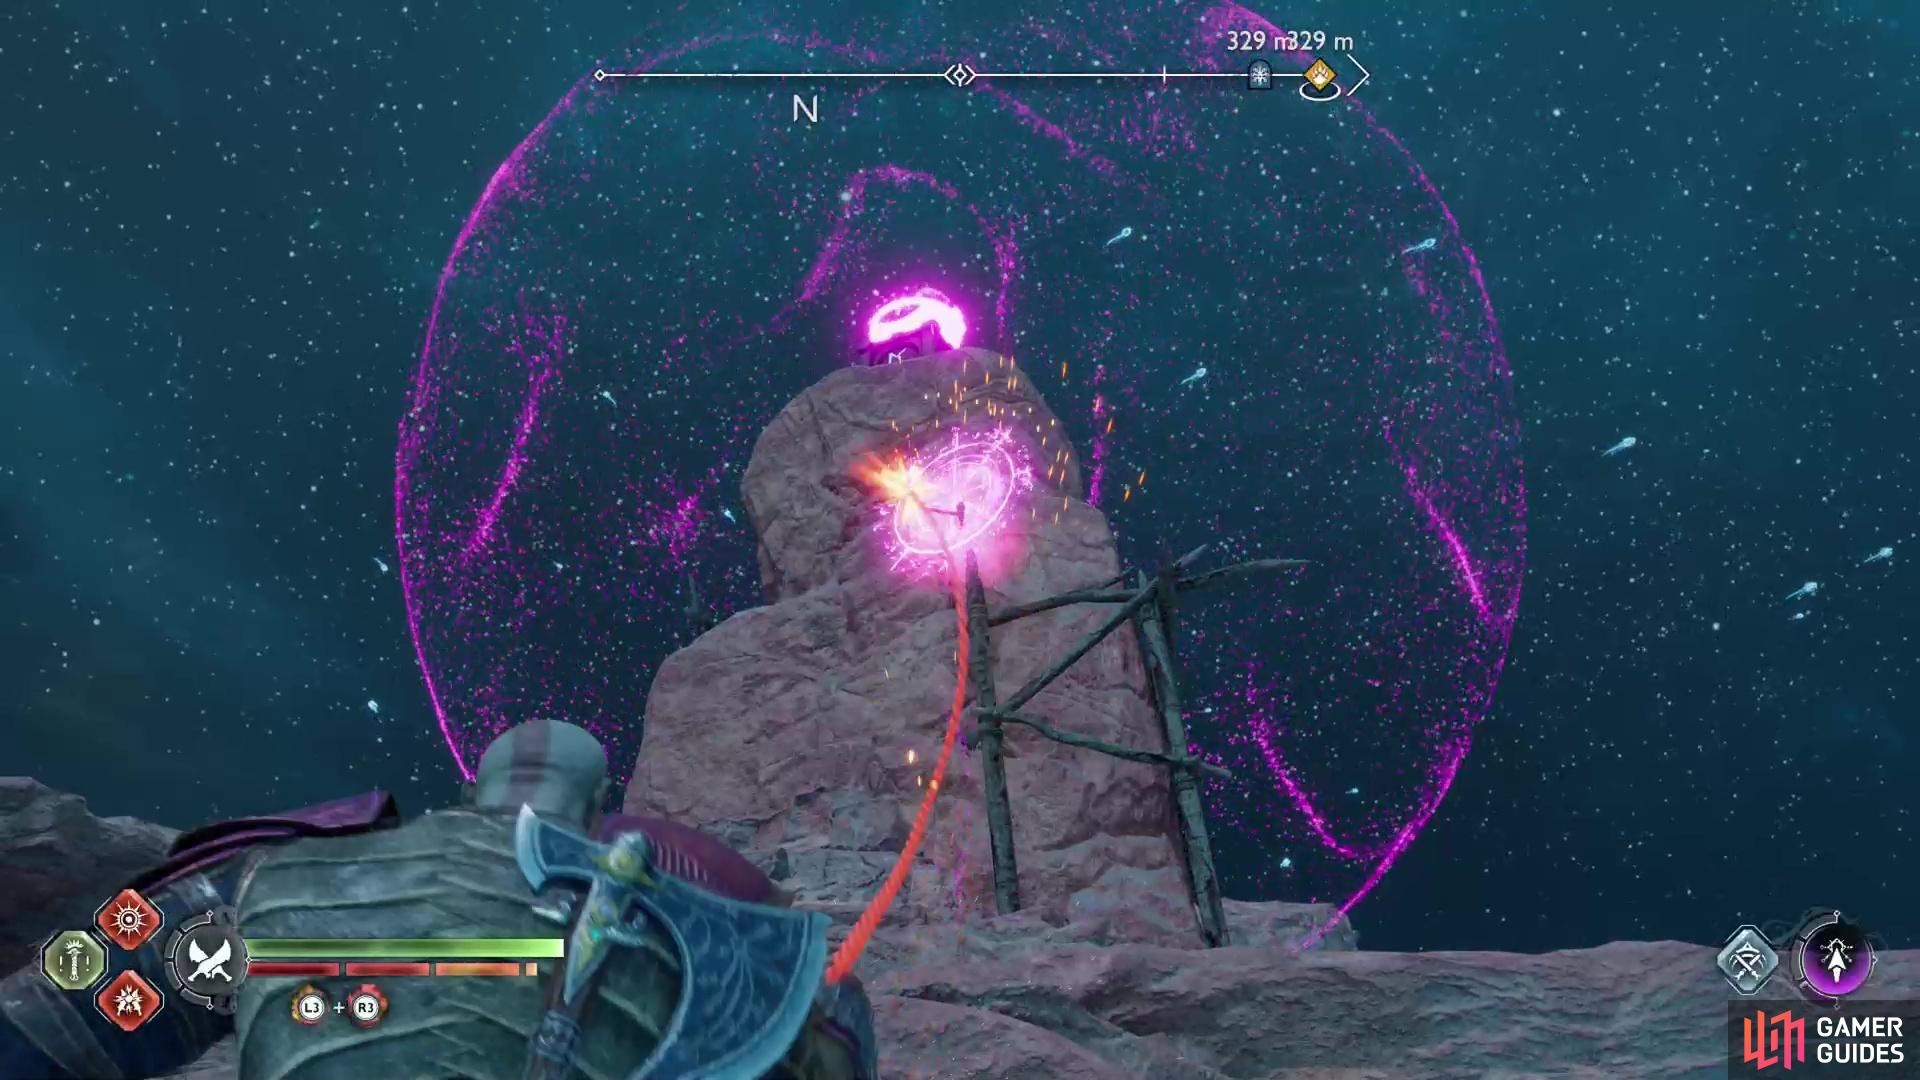
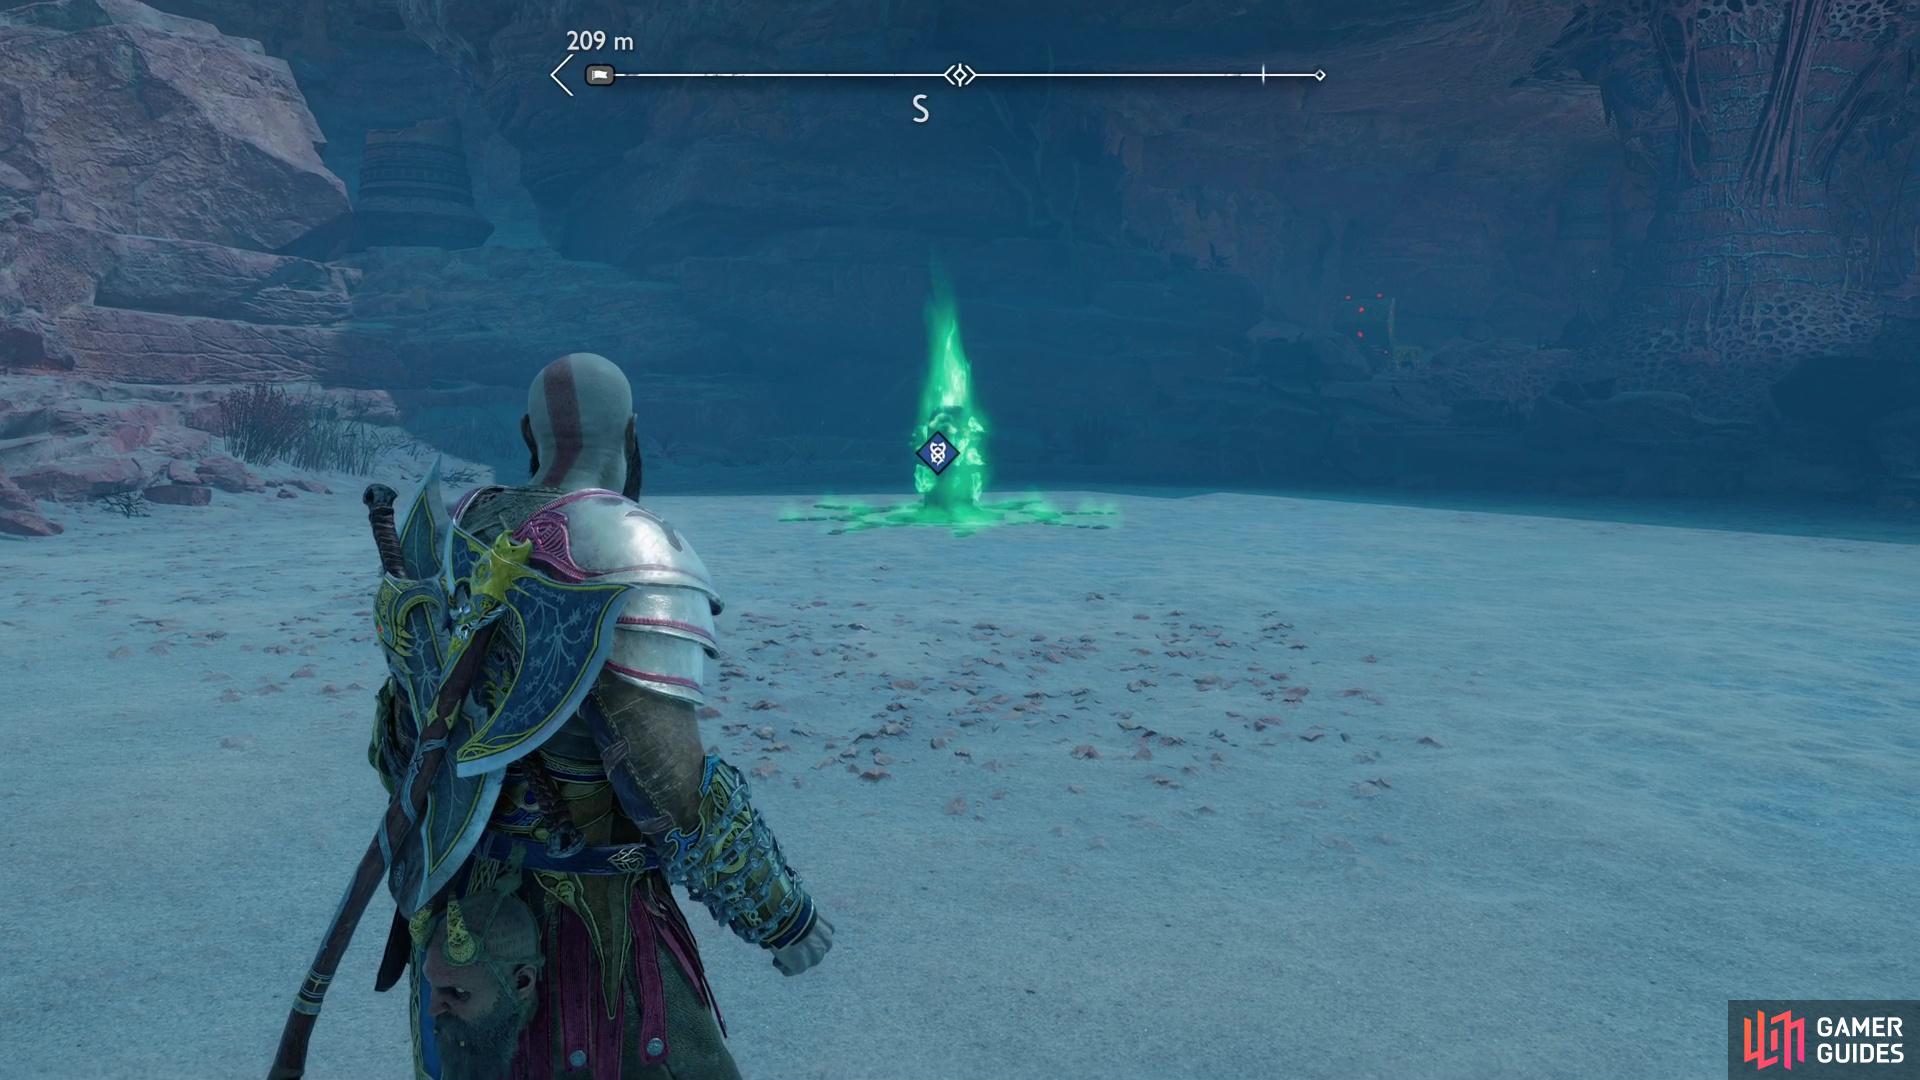
Search a ledge along the northern end of The Forbidden Sands to find a Yggdrasil Rift (near the Tribute to Freyr - Token Artifact),

once you tamper with the rift, you’ll need to defeat two Lv6 Raider Chiefs.
Where to Find All Yggdrasil Rifts in The Forbidden Sands
Along the northern end of The Forbidden Sands you’ll find a ruined tower atop an elevated ledge. Note that this is where the eponymous door from the favor The Desert Door is located, but you don’t have to deal with it to get this collectible. Circle around to the western edge of this ledge and look southwest to find a stone pillar you can leap onto. From this stone pillar you can leap onto the elevated ledge, smashing through a fragile wall. Kill the Light Elves up here, then search the rock wall to the east, northeast to find an opening Kratos can just slip through. Go upstairs and you’ll this Yggdrasil Rift overlooking the desert below.
While you can attempt this rift on your first visit to this area, interacting with the rift will cause two Raider Chiefs to spawn, both of which are Lv6. If you’re Lv4 (very likely at this point in the game), this could be a very difficult fight, and one that’ll be much easier if you return later. Should you manage to defeat the two, reach into the rift to close it and claim some treasure, completing this collectible in the process.
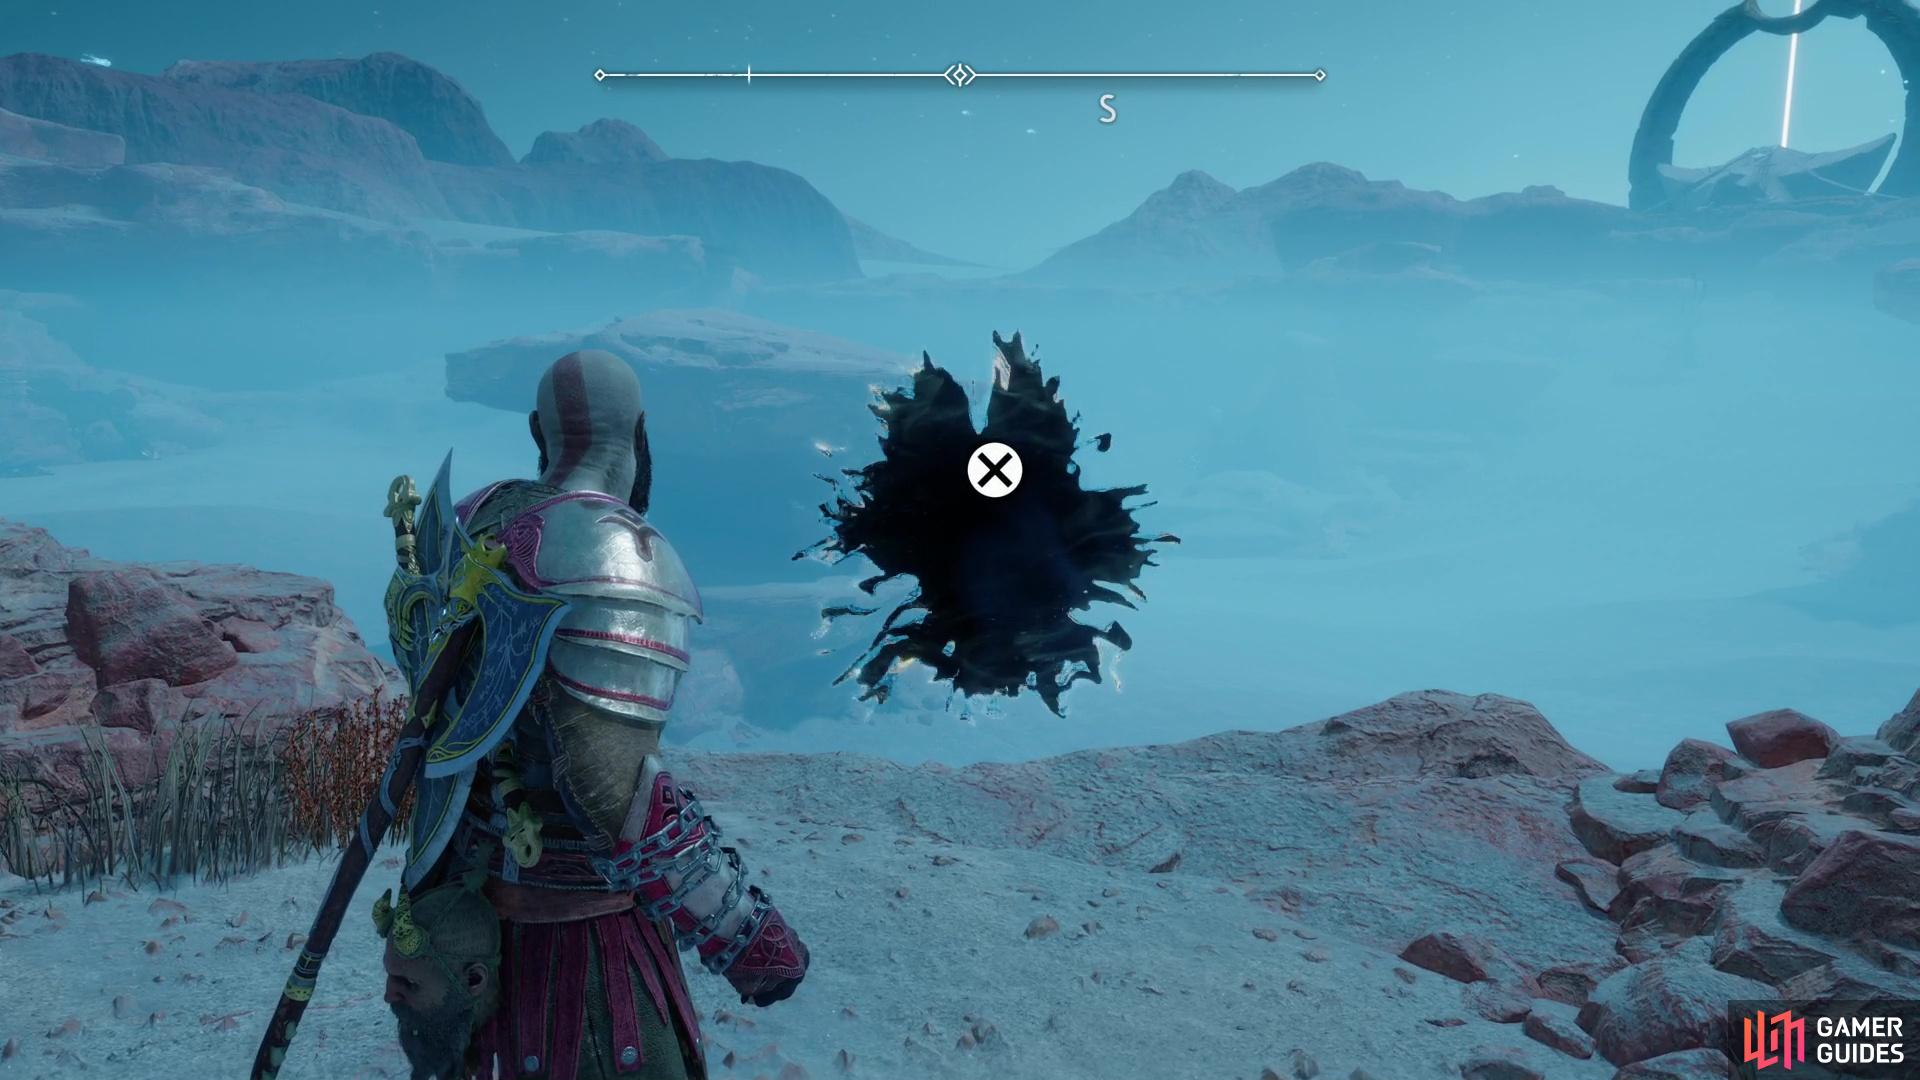
Search the southern edge of The Forbidden Sands to find the Berserker Gravestone of Hjalti the Stolid.
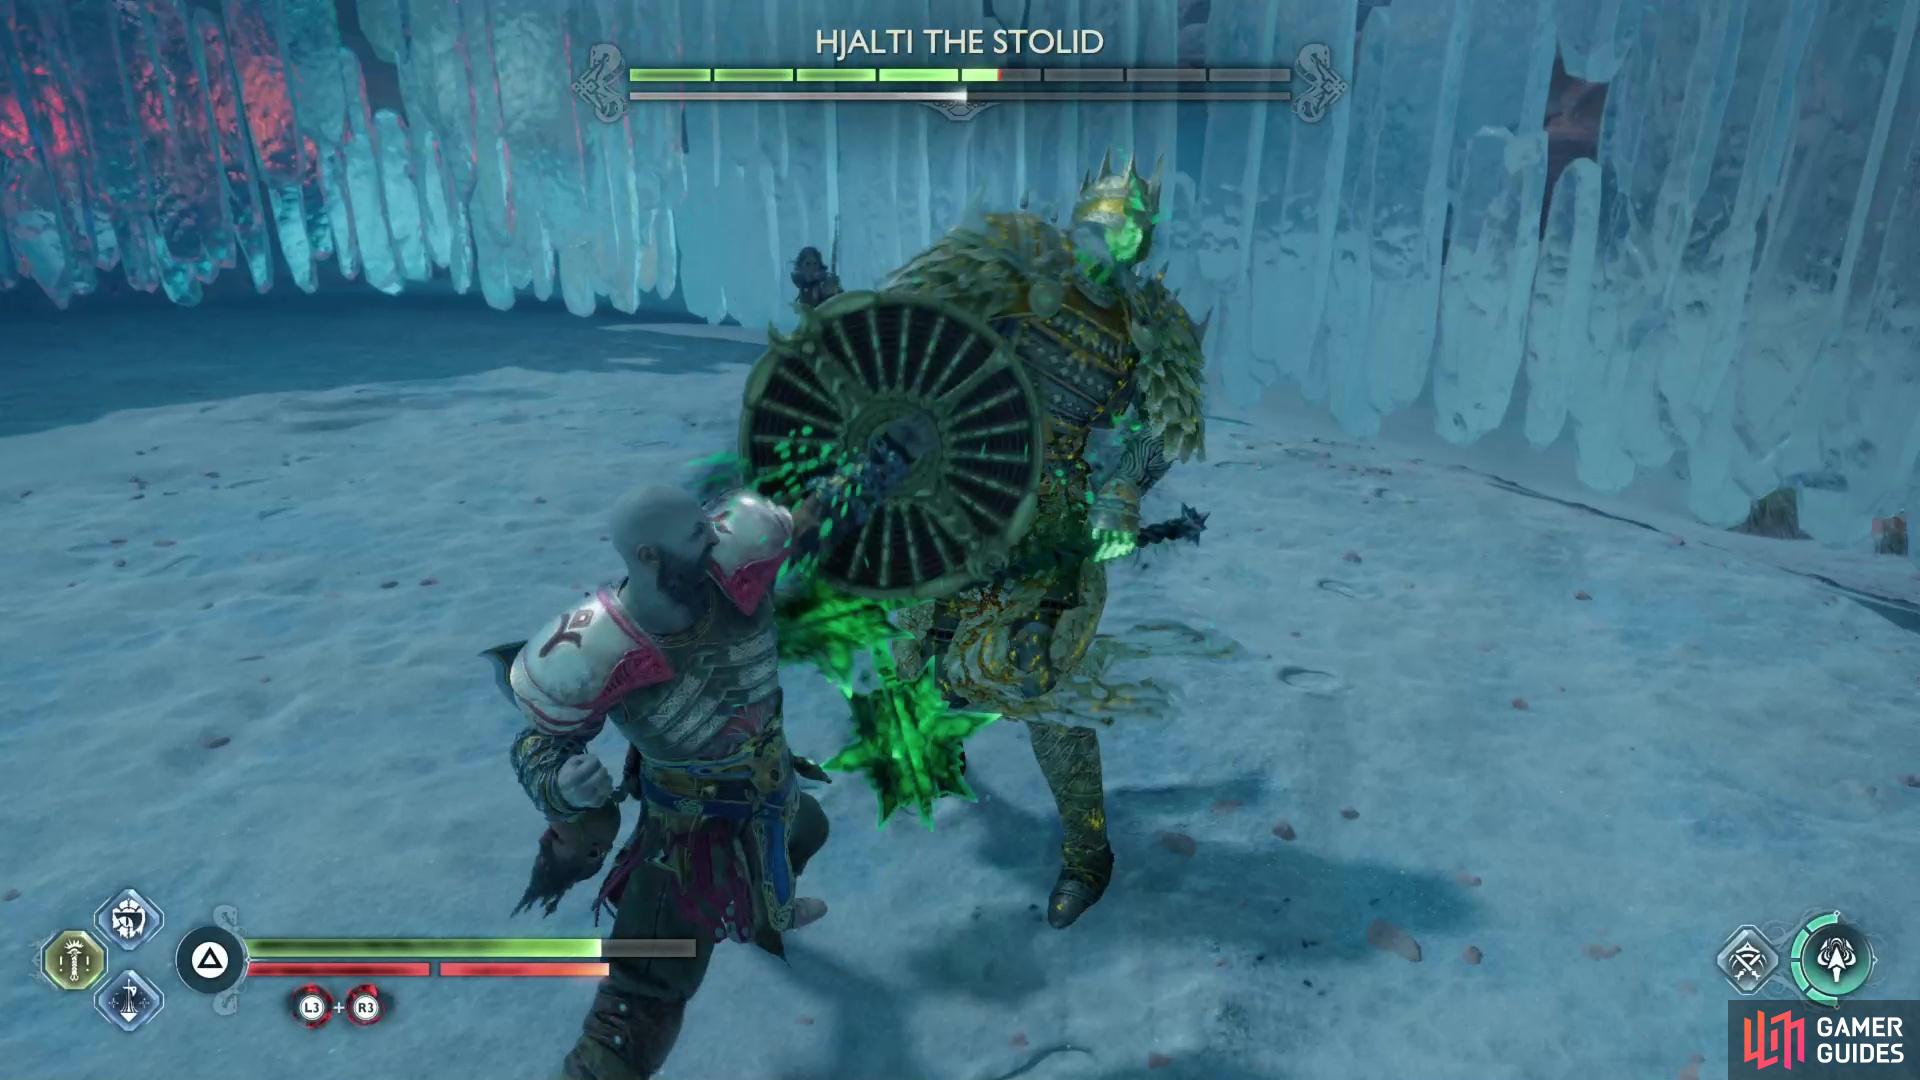
Be prepared to dodge or shield bash when this Berserker jumps away, and parry and punish whenever he comes in close.
Where to Find the Berserker Gravestone in The Forbidden Sands
Berserker Gravestone - Hjalti the Stolid
Search the southern edge of The Forbidden Sands to find a Berserker Gravestone lying out in the open. Before you can activate Berserker Gravestones, you must find the Inert Hilt of Skofnung, which you’ll acquire automatically during the main quest The Word of Fate. You can use the hilt to activate Berserker Gravestones any time you’re free to explore afterwards, although waiting to improve your gear might be a wiser course of action.
This Berserker, Hjalti the Stolid, fortunately, isn’t too tough, with a fairly predictable pattern - if you’re somewhat decent at parrying and prepared to quickly dodge his unblockable attacks or interrupt his charge up attack with a shield bash (both occur after Hjalti jumps away), you shouldn’t have much trouble whittling this Berserker down. When he falls you’ll cross off this collectible and earn the Grip of the Nine Realms.
No Comments