
As you explore the numerous areas in the world of God of War Ragnarok, you may have passed some gravestones sitting out in the open. These are called “Berserker” Gravestones, and when you interact with them, you’ll be placed in an arena where you’ll have to fight one (or more) of them. There are 13 Berserkers’ in total, but only 10 gravestones to beat them in. Defeating all Berserker’s is required for 100% completion as well as to unlock, and finish the Favor “Fit for a King”. This page will guide you through finding, and defeating the Berserker “Haklangr the Bearded”.
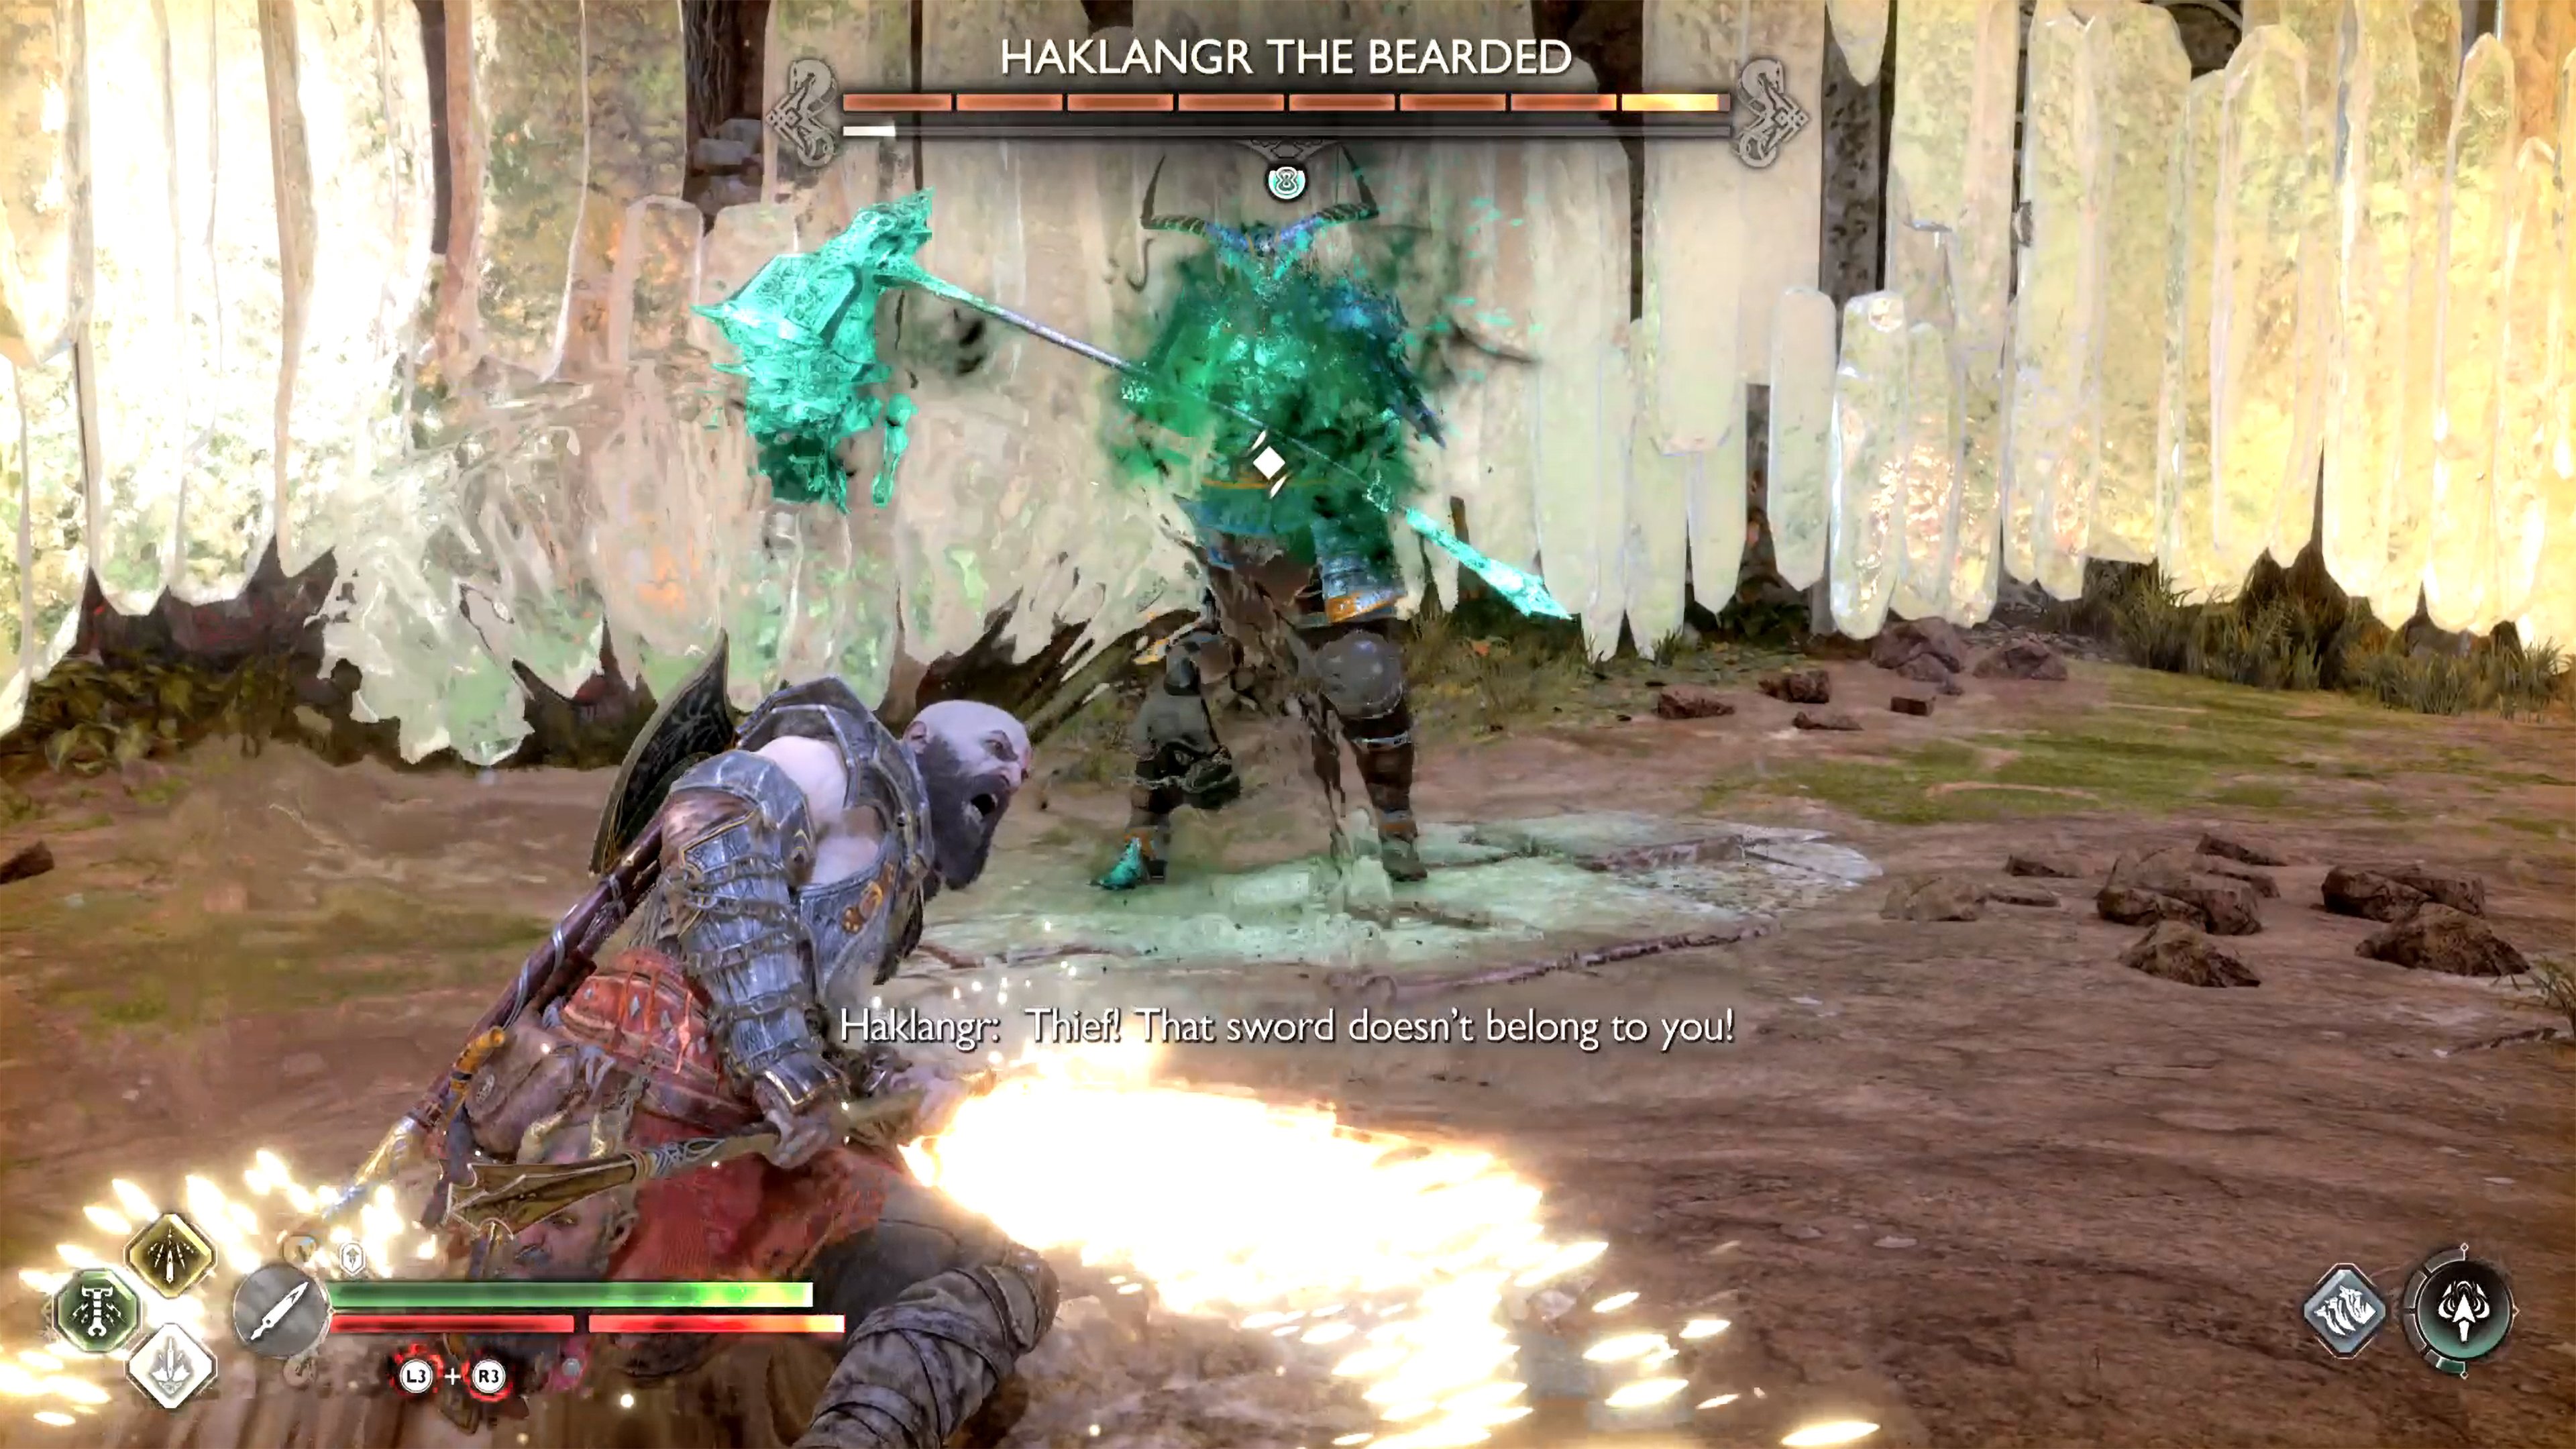
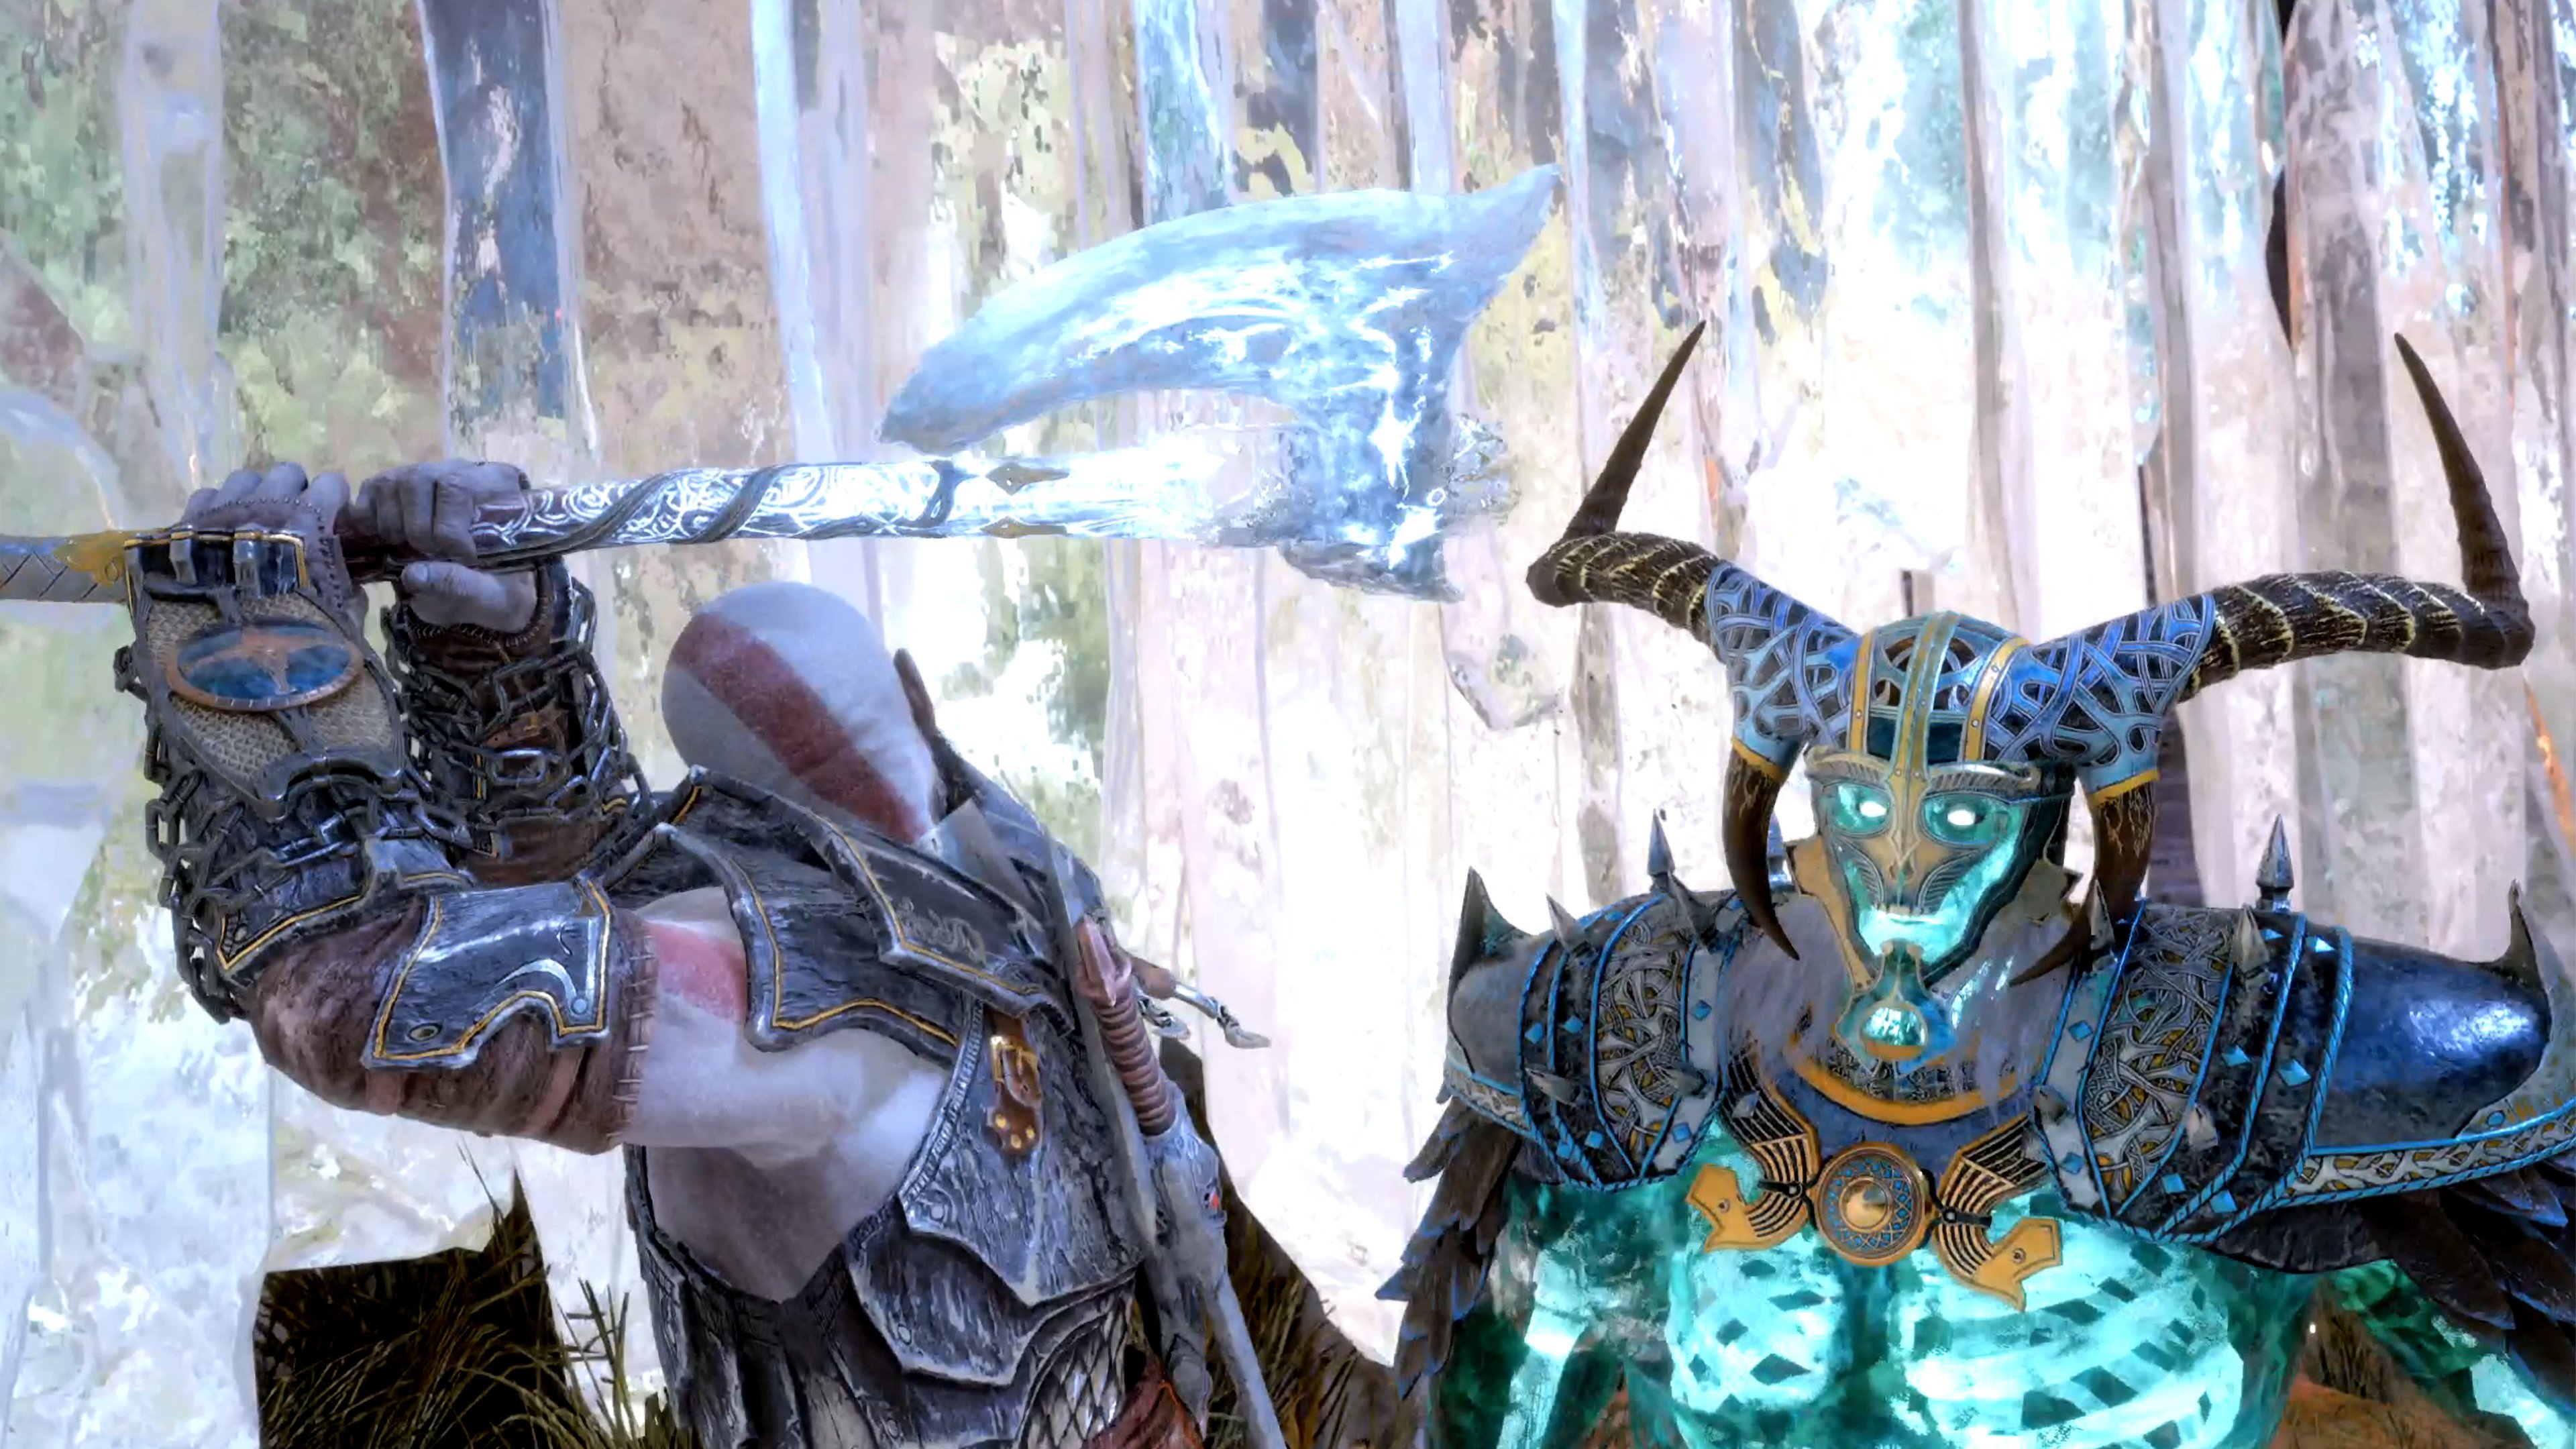
Meet Haklangr the Bearded, a fierce foe that wields a deadly Warhammer.
How to Activate the Berserker Gravestones
To activate the gravestones, you’ll need the key-item Hilt of Skofnung which you’ll acquire during the story mission “The Word of Fate”. With Hilt in hand, interact with the gravestone to place a circular arena around the gravestone, and one or more of the Berserker’s will spawn. If you die, and you most likely will, you will start near the gravestone, so there’s no reason not to try them whenever you see one.
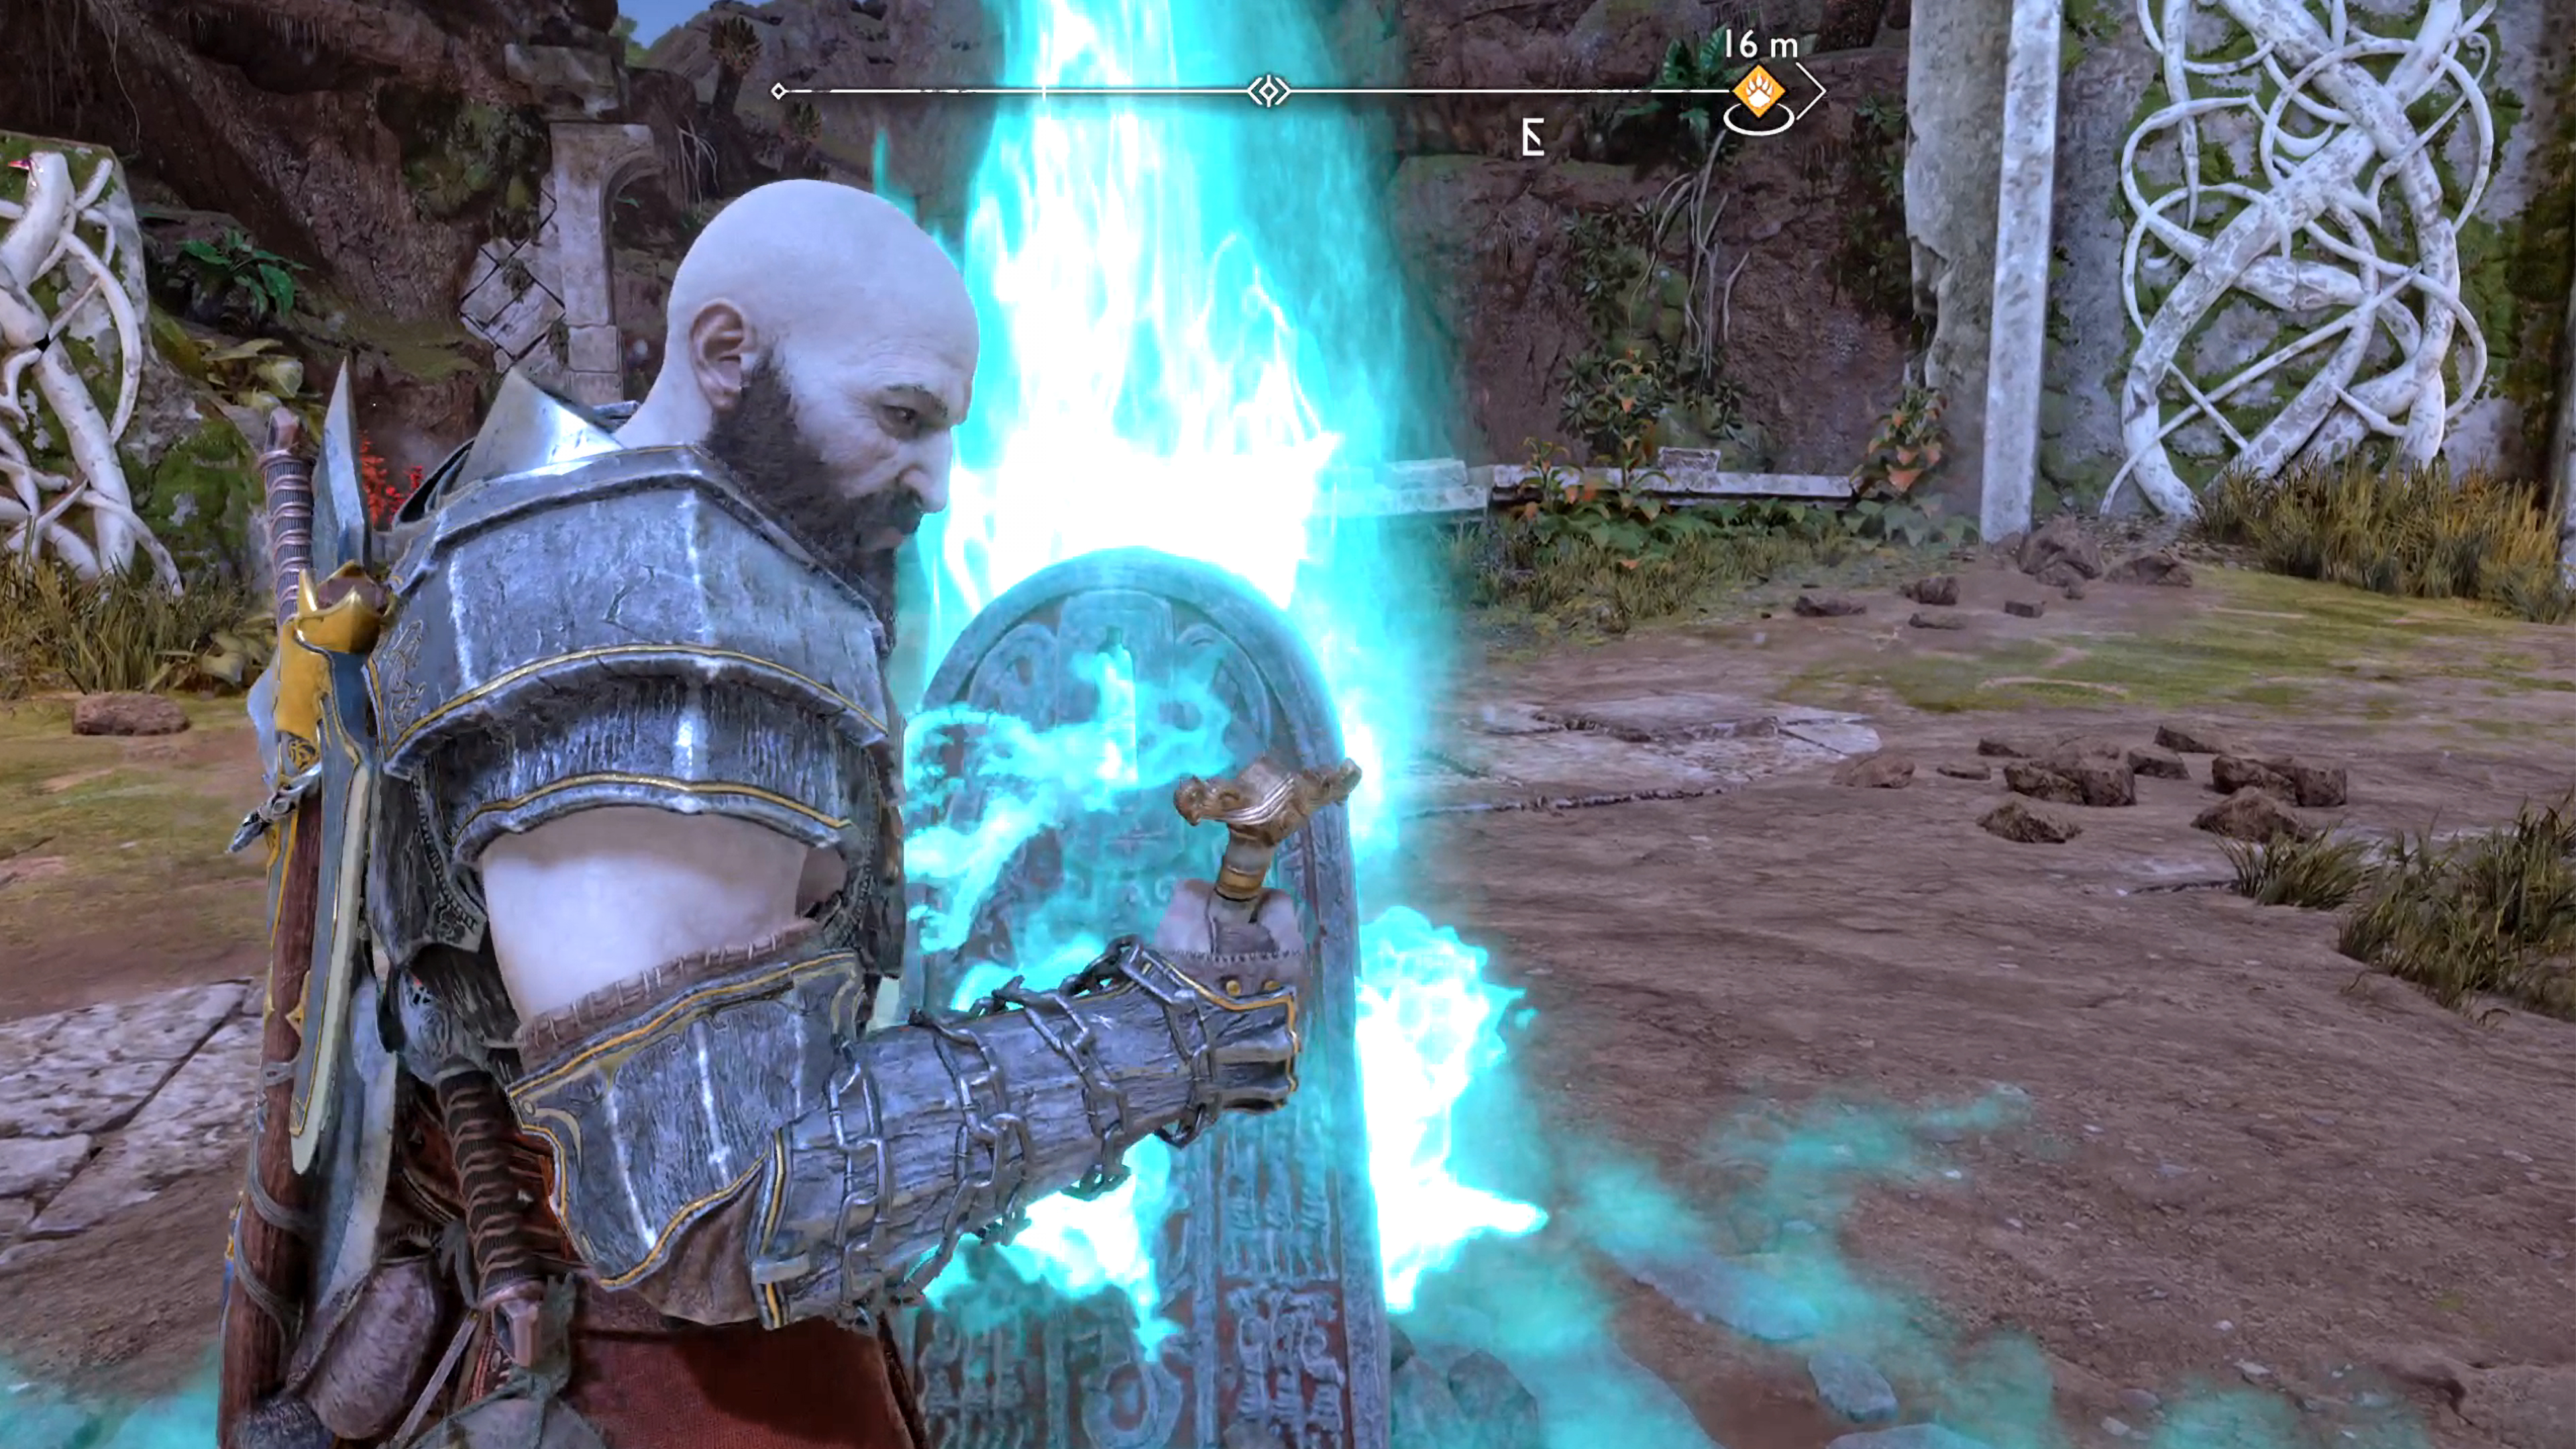
You’ll need to complete The Jungle Favor “Return of the River” before you can access the gravestone.
Where to Find Berserker Haklangr the Bearded
You can find Haklangr’s gravestone in The Sinkholes, east side of The Crater in Vanaheim. You won’t be able to access this area until you’ve completed the story mission “Creatures of Prophecy”. Once you gain access to the area, you’ll need to head to The Jungle to complete the Favor “Return of the River”. This will make the river flow again in the entire Crater region allowing you to take your boat to where the gravestone is. Park your boat up at the dock opposite of the gravestone, and jump over the gap to reach the central area where you destroyed the pillars with the dragon.
Haklangr the Bearded Attacks
Like all Berserker’s, Haklangr the Bearded is extremely aggressive, and has an arsenal of attacks to throw at you. He’ll have his normal melee attacks alongside his more unforgiving attacks listed below.
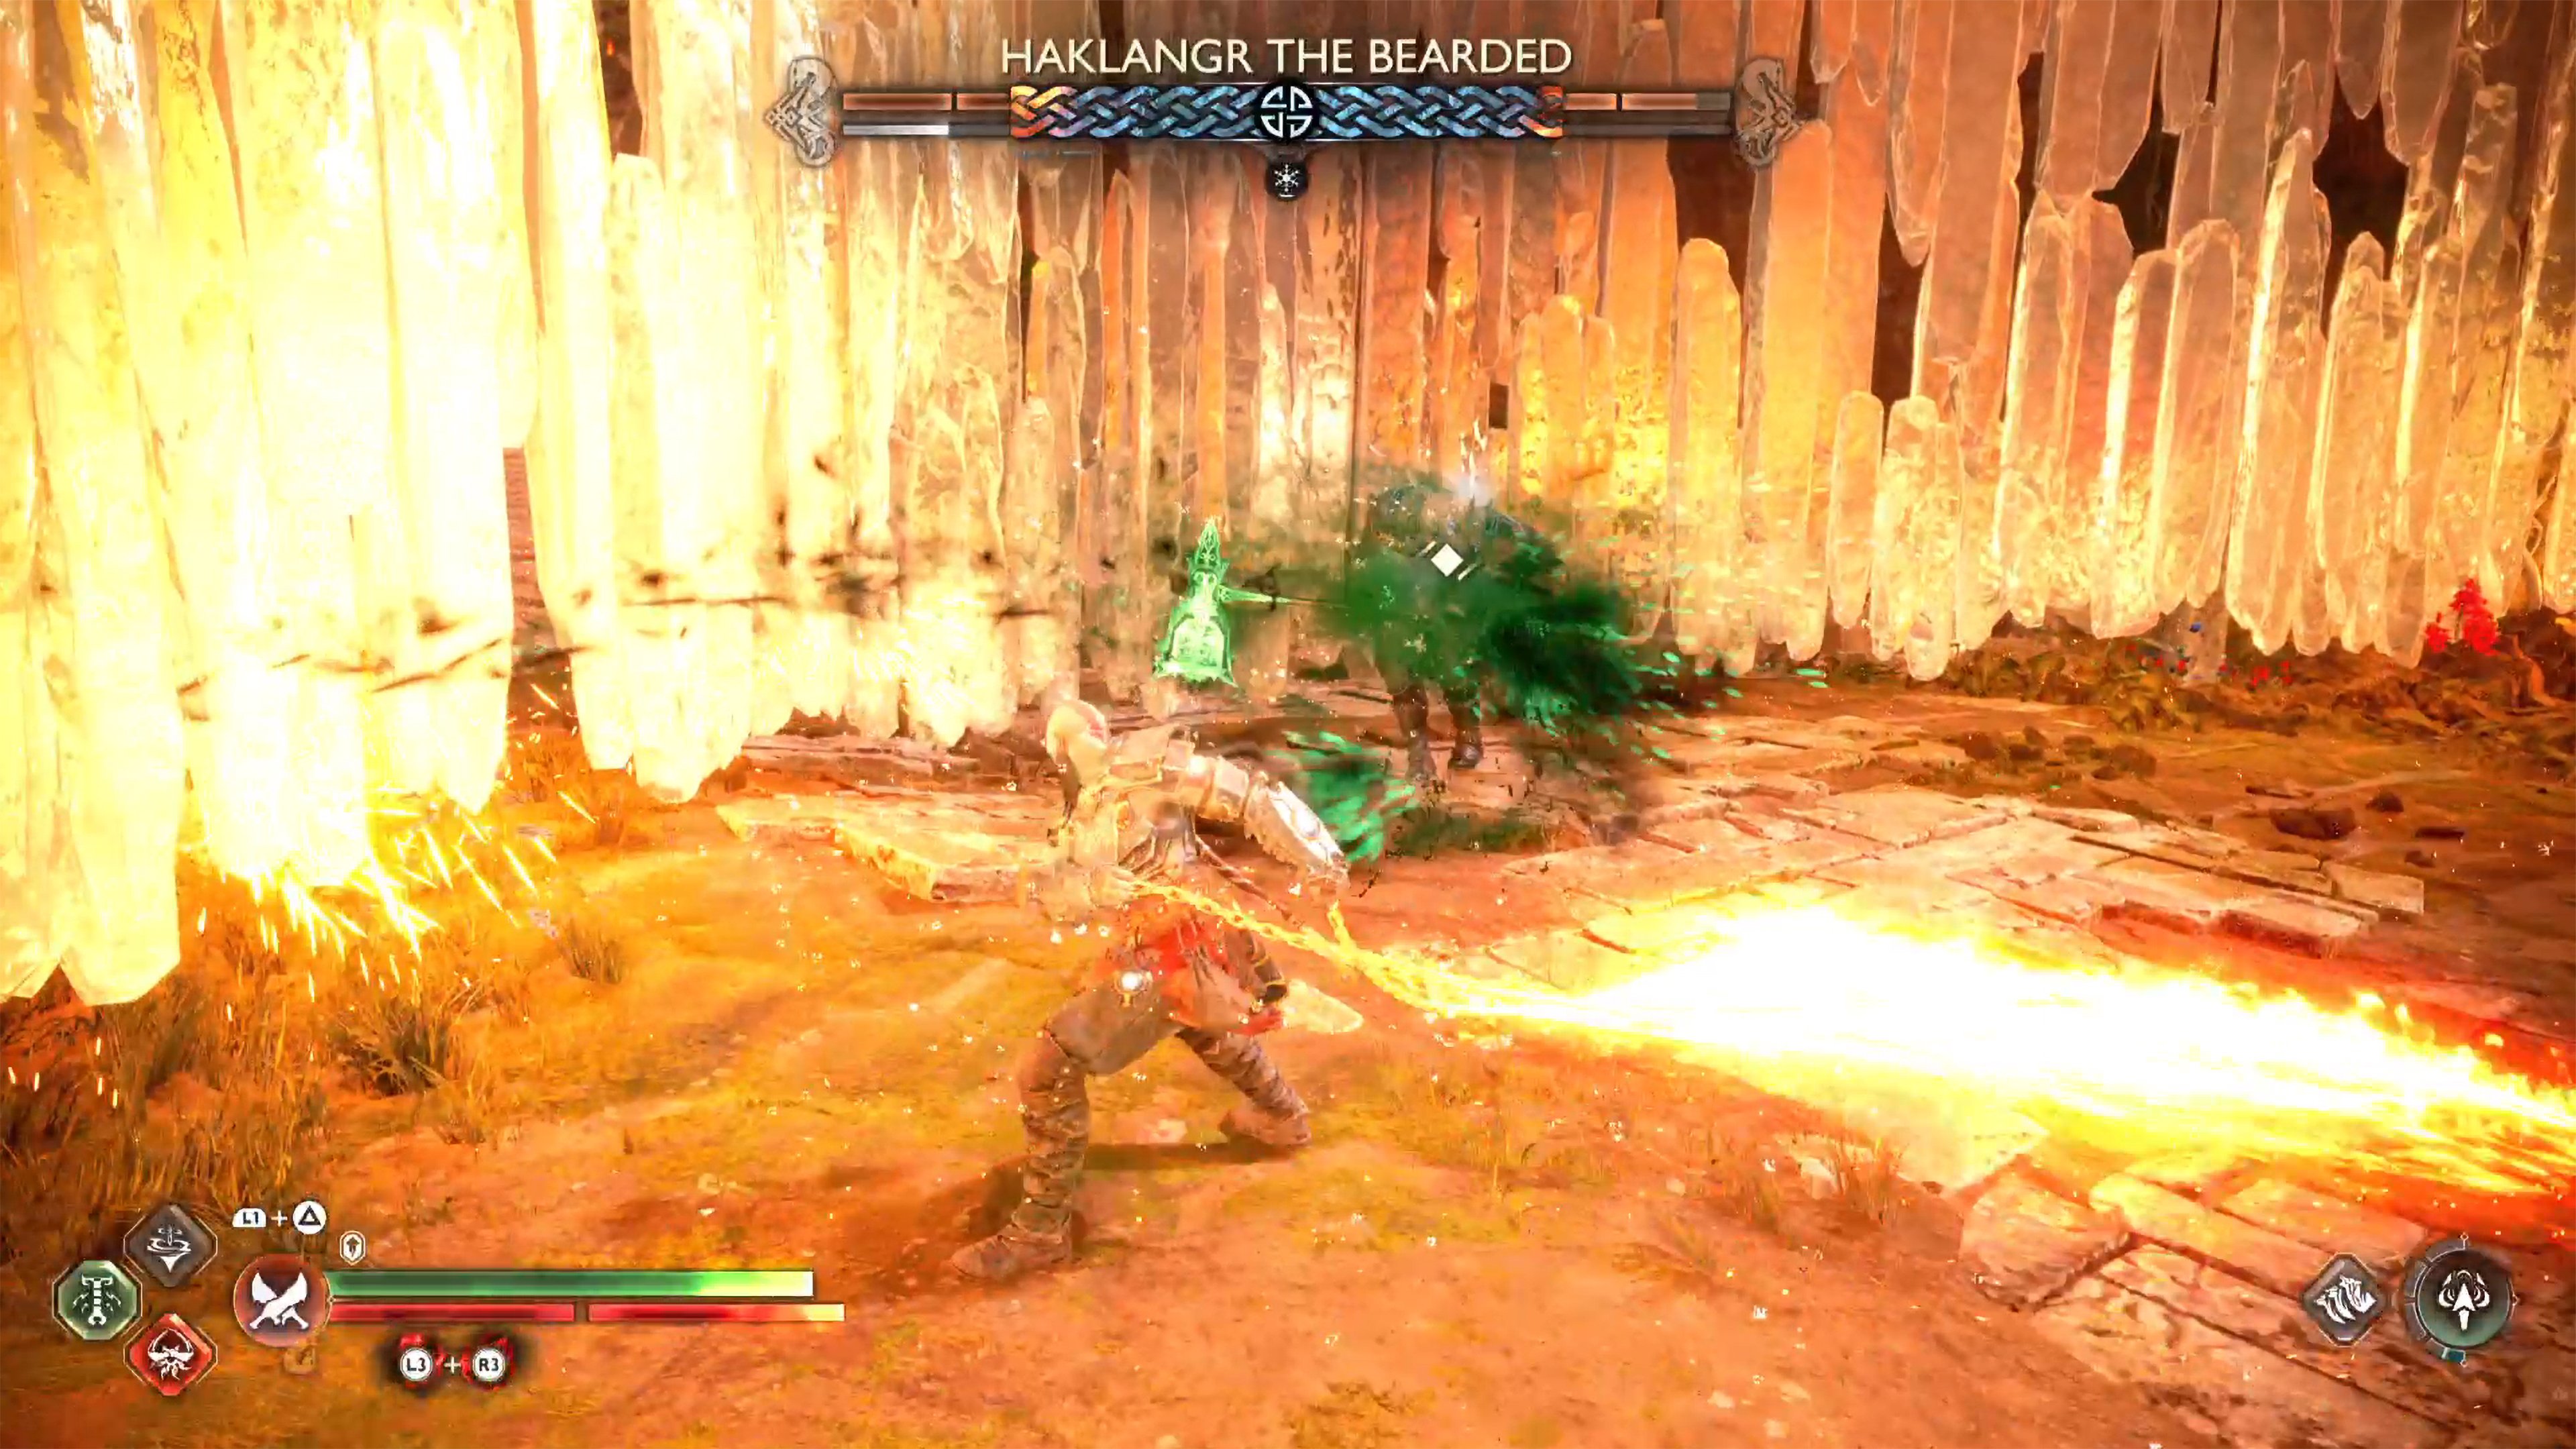
Poison Slam (Red-Ring – Roll out of it or Interrupt)
A large poison circle will appear around Haklangr, and then he’ll slam his Warhammer into the ground to make it explode. If you’re in the circle, you can double-roll backwards a couple of times to avoid it. You’ll have to be quick as he triggers it fairly quickly. You can interrupt this attack by using a heavy Runic or Relic attack.
Shield of Ice and Fire (Attack with opposite element)
Throughout the battle Haklangr has the ability to put a shield on himself which will negate any damage you do to him while the shield is up. This can either be a Frost or Fire shield. If it’s frost, switch over to your Blade of Chaos and use your Runic Attacks to deplete his shield. If it’s fire, switch to the Leviathan Axe and do the same. The best Runic attack for the Leviathan Axe is Breath of Thamur while the Blades of Chaos doesn’t really have one, but Tame the Beast does the trick. One thing to note about the shield is that he can’t be staggered while it’s up which means he will attack you through your attacks.
Jumping Slam (Red-Ring – Dodge)
Haklangr will jump towards you while slamming down with his Warhammer at your location. This is easier enough to avoid by dodging to the side.
Hammer Thrust (Yellow-Ring – Parry or Dodge)
A simple thrust with the hammer which is preceded with a yellow-ring. Dodging to the side is the safer way to deal with the attack, but you can parry it if you’re good at it. Time the parry just as the weapon is about to hit you.
Hammer Pound (Red-Ring – Dodge)
Similar to the Jumping Slam attack, but he won’t jump beforehand. Haklangr will slam down his hammer at your location, and can do this attack multiple times in quick succession. This attack is preceded with a red-ring, so dodge to the side to avoid it.
Leaping Hammer (Yellow-Ring – Parry or Dodge to the side)
Haklangr will jump in the air with his hammer behind his head, and he’ll leap in and swing at you. This attack is indicated with a yellow-ring, and somewhat tracks you. The best way to deal with this attack is to parry it or double roll to the side. Both of them can be tricky to pull off, but rolling is the safer method if you’re not great at parrying. If you go the parry route, wait until the last second before attempting to parry, but if you fail the parry, Haklangr will use his Hammer Thrust straight after as well as some other attacks.
Spin to Win
With Warhammer in hand, Haklangr will start off with a yellow-ring attack and swing it as he spins. This is then followed-up four more times with normal melee swings before he finishes it in a downwards red-ring attack. The safest way to deal with this attack is to keep rolling away, and wait for it to finish. You could parry the first attack, block the following normal attacks, and finally avoid the final attack, but there’s not much reward, and a lot of risk.
Haklangr the Bearded Strategy
This fight is a melee brawl. Haklangr won’t worry about any fancy ranged attacks and will take his chances defeating you up close. He doesn’t have too many attacks, but he will chain the few he has into various combos. The combo you’ll see most often is his Leaping Hammer > Hammer Thrust > Hammer Pound, although that isn’t set in stone. Throughout the fight, he’ll use a shield of frost or fire, and you’ll need to deplete it with the opposite element. The Spear can deal damage to both of them, but it’ll do less damage than the opposite element. So switch over to the Blades of Chaos for the frost shield, and the Leviathan Axe for the fire shield and use your Runic attacks to take the shield down as soon as possible.
At first, you’ll most likely take a lot of damage from his poison slam attack. This can be tricky to avoid because he’ll place the large green circle around you while you’re up close, and quickly slam down his hammer to cause it to explode. As soon as you see the green circle, perform two double rolls away from him to get out of the attack. If done correctly, you should have enough time to avoid it otherwise you’ll need to use a Heavy Runic attack to interrupt it. Most of his attacks are easy to avoid, providing that you’re not too aggressive as you’ll normally get caught out by a random Hammer Thrust attack. Instead, be aggressive, but more purposeful, so he can’t catch you out with a cheap attack.
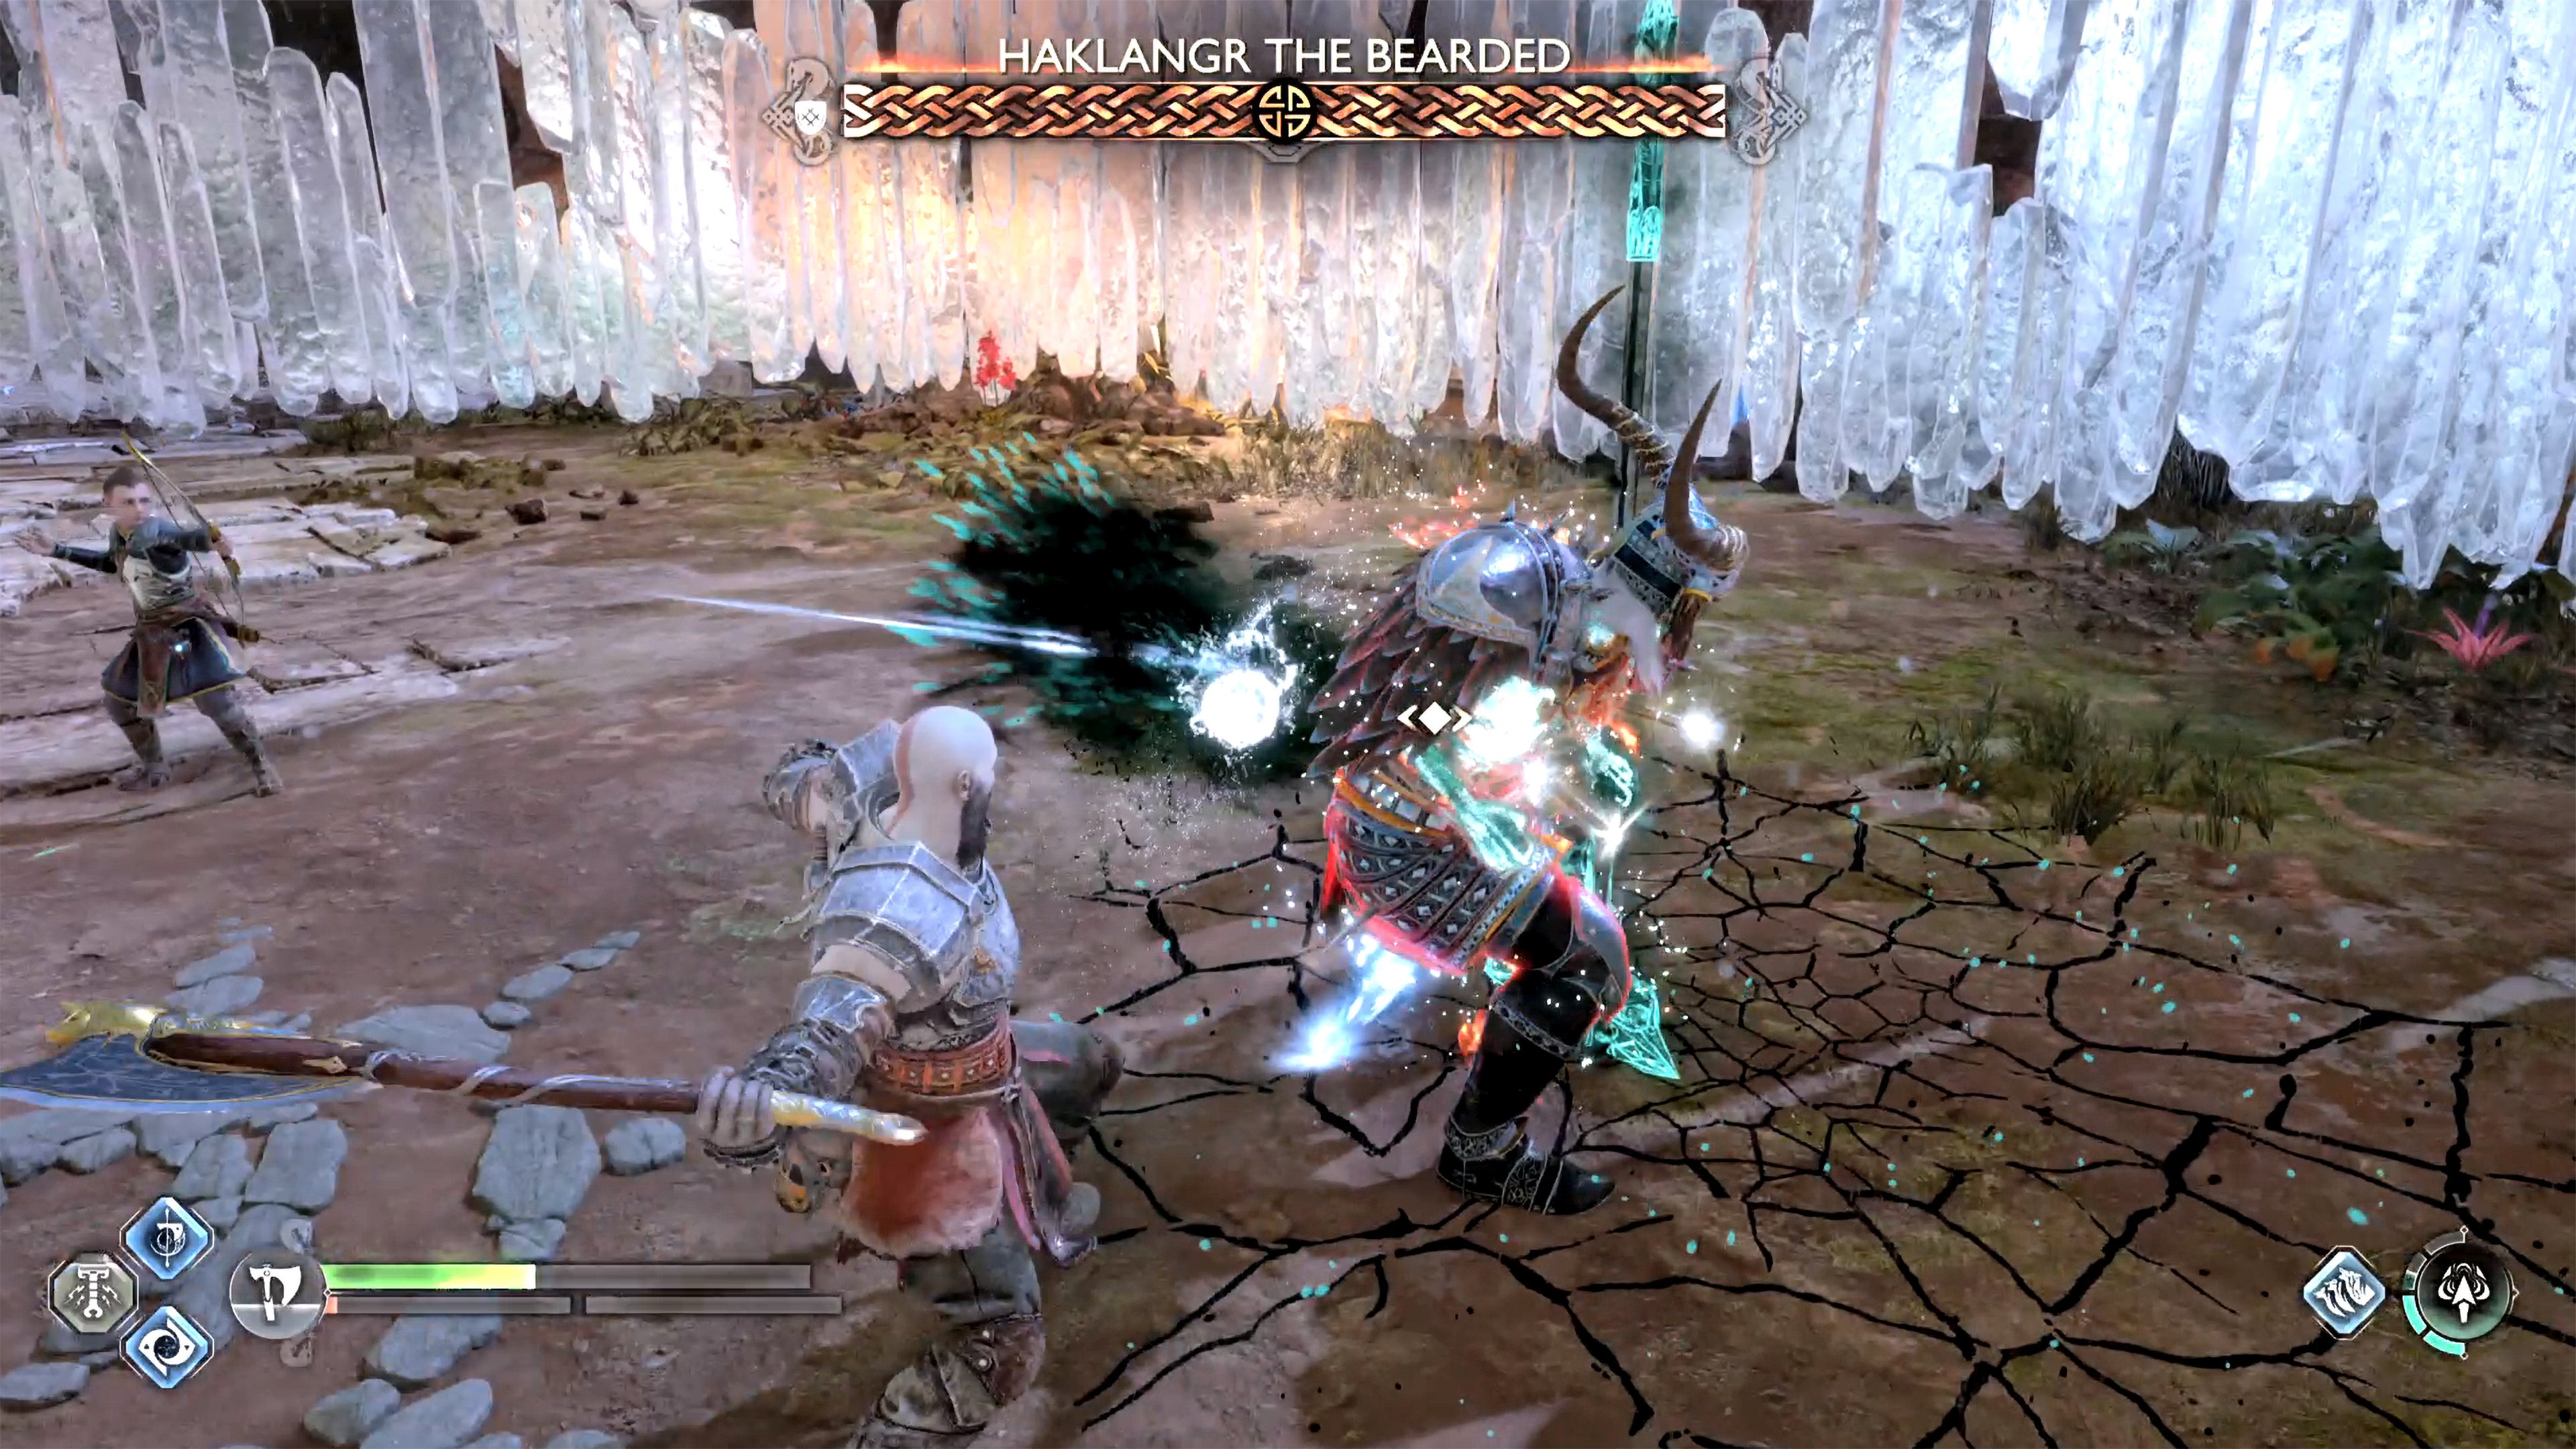
Haklangr has the ability to give himself either a fire or frost shield.
Depending on which one he chooses, use the weapon of the opposite element.
Now that we’ve covered how to avoid taking damage, let’s talk about dealing your own damage back to him. You can punish almost all of his attacks with a combo of your own. Poison Slam attack? Roll out of it, and run back in after it’s exploded. Hammer Pound? Wait a second to see if he does more than one, if it’s just the one, run in and get a few hits. Leaping Hammer attack? Dodge it to avoid the follow-up attacks, and get a quick combo in. Spin to Win? Run away as far as possible, you don’t want to attack him during this.
This fight may take a few tries to understand how the battle plays out, but once you recognize the patterns, you’ll take him down in no time. He isn’t a particularly tough battle, but he can be frustrating to fight as he’ll normally hit you out of nowhere. When you get him down to the last quarter of his health, he’ll become berserk, and use his attacks even more aggressively, and your attacks will be less likely to stagger him. Once you’ve depleted his health, head over to him, and press  to take his head, and end the battle.
Say goodbye to Haklangr!
Recommended Equipment For Haklangr the Bearded
Below you’ll find a list of gear that we recommend for tackling the tricky Hjalti The Stolid, this is just what we had great success with, and isn’t necessarily the best.
Weapon, Grip, and Relic
| Weapon | Stats (Max) | Grip | Relic |
|---|---|---|---|
| Draupnir Spear | Luck: +50 | Warrior’s Echo Sauroter: Spear attacks against Sonic-afflicted enemies deal bonus damage and build bonus Maelstrom skill charge. | Hilt of Angrvadall: Slash forward three waves of light that deal increased damage against enemies afflicted with Sonic. |
Shield and Attachment
| Shield | Stats (Max) | Description | Attachment |
|---|---|---|---|
| Onslaught Shield | Defense: +130 Luck: +26 | Shield Rush: Charge the enemy while blocking enemy attacks. | Rond of Restoration Restoring Shield: On taking damage, Kratos has a luck chance to gain Defense and for his next shield strike hit to restore health. The chance increases with lower health. |
Runic Attacks
| Name | Damage (Max) | Force (Max) | Stun (Max) | Description |
|---|---|---|---|---|
| Mountain Splitter (Light/Spear) | Repeated long-range wind slices that stagger enemies. Press  precisely while slashing to enhance each wave. precisely while slashing to enhance each wave. |
| Name | Damage (Max) | Force (Max) | Stun (Max) | Description |
|---|---|---|---|---|
| Honor The Fallen (Heavy/Spear) | A long-range, leaping dive that slams into enemies with overwhelming force. |
Armor
| Name | Piece | Stats (Max) | Perk |
|---|---|---|---|
| Steinbjorn Plackart | Chest | Defense: + 190 | Bloodthirsty Retaliation: After significant damage is taken, Kratos’ attacks will restore some lost health for a time. |
| Steinbjorn Gauntlets | Wrist | Defense: + 85 Strength: + 34 | Stunning Retaliation: Moderate Luck chance to stagger and inflict damage to nearby enemies when damage is taken. |
| Steinbjorn Waist Guard | Waist | Defense: + 119 | Stunning Retaliation: Moderate Luck chance to stagger and inflict damage to nearby enemies when damage is taken. |
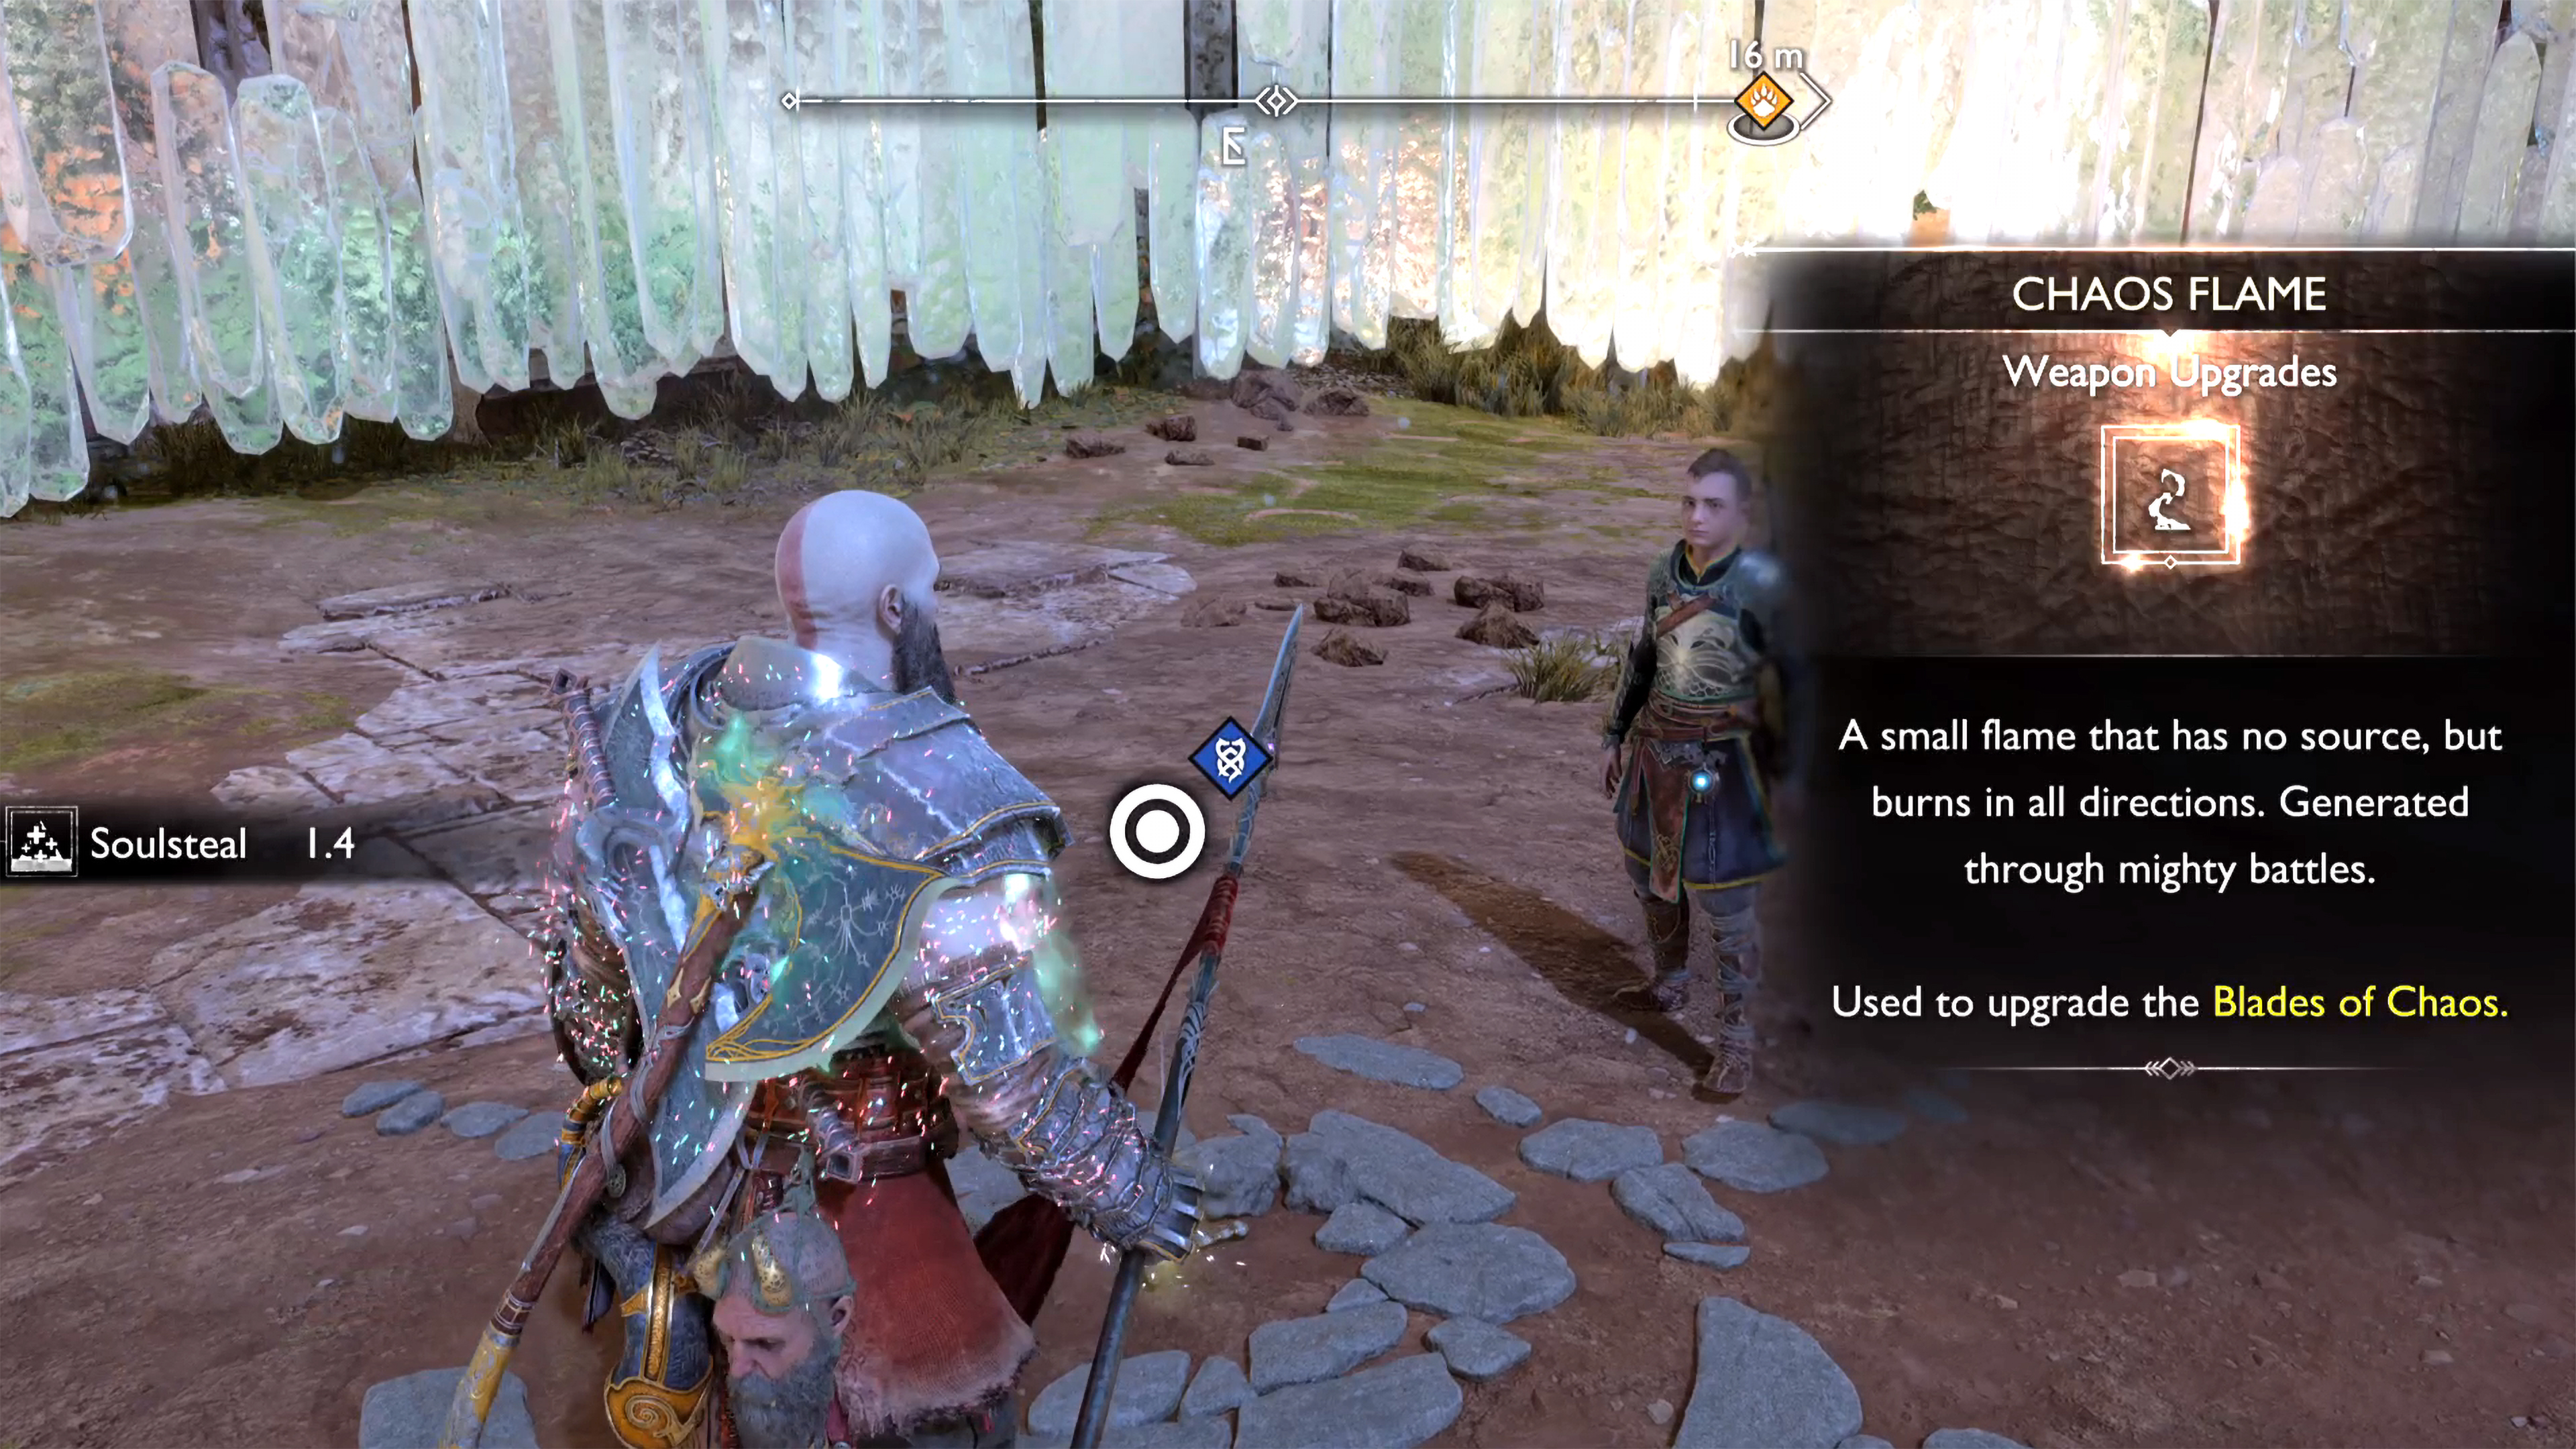
One of the rewards you will get from Haklang’r is the most coveted Chaos Flame.
Haklangr the Bearded Rewards
Defeating Haklangr will reward you with the following items:
| Icon | Name | Icon | Name |
|---|---|---|---|
| 1500 Kratos XP | Bonded Leather +60 | ||
| 375 Companion XP | Shattered Rune +75 | ||
| Tempered Remnants +5 | Chaos Flame |
No Comments