

This quest starts when Chapter 1 does, carrying over a feud with Tartuccio that started during the Prologue. Both of you are competing to defeat the Stag Lord, and whomever tames the Stolen Lands first will become its ruler, and Tartuccio has no intention of engaging in an honest, sporting competition while working towards the greater good.
While present at the start of the chapter, it’ll remain subordinate to another main quest, Stolen Land at the start of the chapter. See the linked page for more details on that quest.
After the events at Oleg’s Trading Post you’ll invariably end up leaving and exploring the Stolen Lands (in the walkthrough, we recommend going on an expedition to Fangberry Cave). Whatever your destination, after travelling a short distance you’ll encounter an odd old man named Remus, who informs you that your rival is looking for an artifact in an Ancient Tomb, which updates this quest and allows you to actively advance it.
Ancient Tomb
To reach the Ancient Tomb (from Oleg’s Trading Post) follow these directions:
- South
- Southeast
- West
- South
- Southwest
- Southwest
- Southwest
Once inside the tomb, save your game, consider spell-buffing (Bless and/or Bardsong work well), then venture northwest to find Tartuccio berating his minions. It seems he’s added some mercenaries to his roster since you last saw him, although where he got the coin and clout is a question worth pondering.
You can vent your anger at your deceitful rival and leap to the attack, or you can waste time calling him out on his apparent lack of interest in completing Jamandi’s task. Your words are better off being used to lure one of your former companions back to your side. The [Persuasion 10] check required for this is surprisingly manageable - undoubtedly a sign of their frustration with the Gnome’s abusive personality and lack of progress - and having an extra character on board will make everything you do going forward that much easier.

If you went to the Ancient Tomb before Thorn Ford, you’ll get a chance to lure back one of your former companions
Be sure to level up this new addition before starting the fight with Tartuccio’s mercenaries!
After luring one of your two former companions back to your side, Tartuccio decides to flee, taking the character you didn’t woo with him and siccing his mercenaries on you - potentially leaving the character you just recruited in a rather compromised situation. Consider having the character retreat towards you, as these mercenaries are rather strong.
The one to the north has a relatively high Armor Class that can keep him in a fight long enough to be bothersome, but the real threats are to the northwest. These two northwestern characters consist of a spellcaster (who will waste little time casting Enlarge Person on the allied warrior nearby) and a warrior armed with a Longsword +1 who can put up a fearsome fight. Send one character north to occupy the stranded, high Armor Class foe, while the rest of your characters focus on the other isolated mercenary to the west, hoping to remove him quickly.
Once those threats are removed, focus your archers on the caster, and have your warriors occupy the combatant who accompanied the spell-casting mercenary. Now is the time to make use of your spells, targeting the aforementioned warrior. Not only is he a troublesome foe on his own, but the longer he lives, the more likely his caster buddy is going to cause mischief. Hit him with any debilitating spells you may possess - Sleep, Color Spray and Hideous Laughter all work well - until he’s out of action, then quickly gank the caster to put her out of commission. After that, you should just need to clean up the rest of the mercenaries.
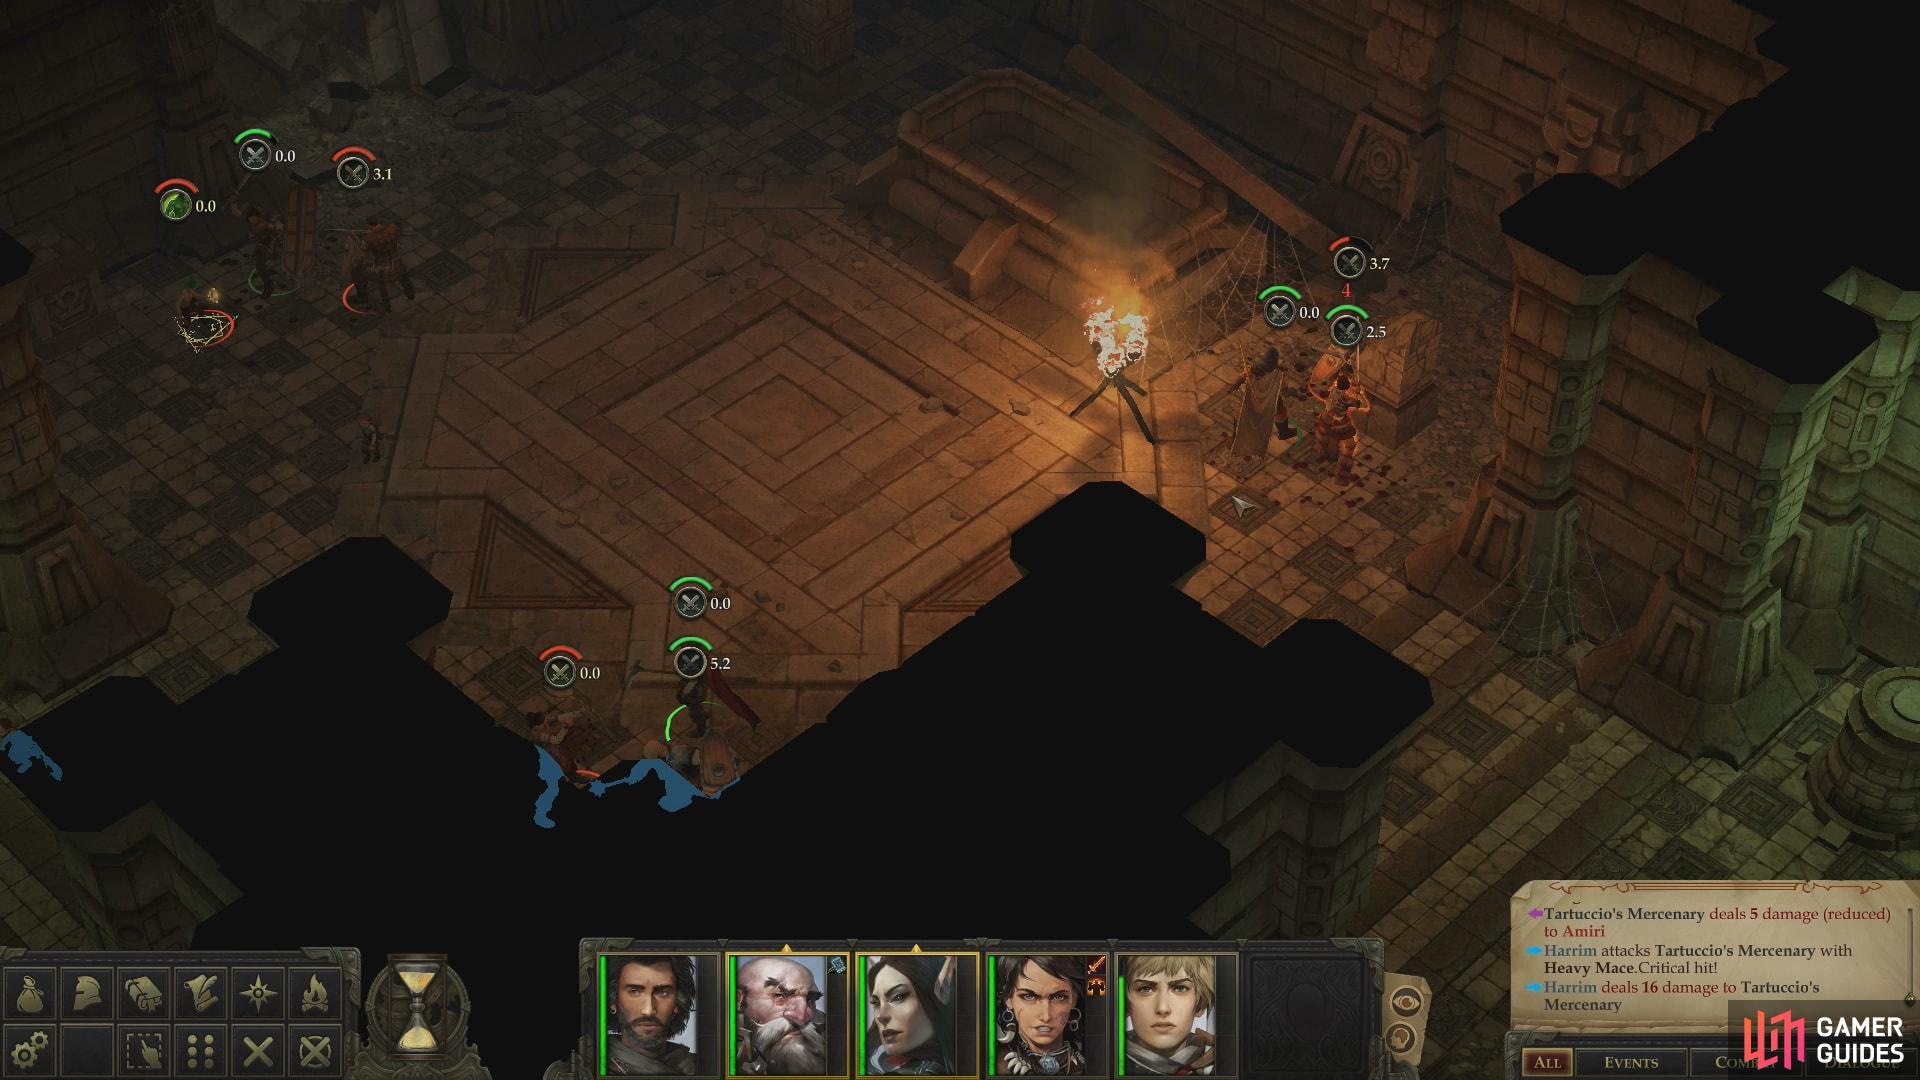
(1 of 3) Divide your party up to occupy the mercenary to the north, and kill the mercenary to the west
Emerge victorious, then loot your fallen foes to obtain a variety of arms, armor and some valuable treasure. The choicest bit of loot you’ll find here is the aforementioned Longsword +1, which is a fine replacement for Valerie’s Masterwork Bastard Sword. It might seem like more of a lateral change than anything else, but you’re going to want to be switching to enchanted weapons when the opportunity arises, as some creatures take significantly less damage from non-magical weapons. Other than that, be sure to pick up the Scorched Fragment of a Necklace which one of them drops.
Loot the rest of the Ancient Tomb as you desire, and when you’re ready to continue chasing Tartuccio, head to the southwestern corner of the tomb to find an area transition. Leaving the Ancient Tomb will trigger an Illustrated Book Episode:
Trailing Tartuccio
- “[Lore (Nature) 11] But we would not give up so easily. Whether the trail went cold or not, it was one we had to follow!“
The first option should be pretty self-explanatory, since picking “…we had more important things to do than to chase a flighty gnome“ abandons the pursuit - not that you lose out on too much by doing so, although it will necessitate a trip to Oleg’s Trading Post (which may not be a bad idea, anyway).
- “We stood a while in thought, then followed the single set of footprints, down into the gully.”
You’ve got a lot of options here, but most of them don’t matter much. Passing the [Lore (Nature 14)] check will just get you info on what beasts you’re tracking. Examining the trails will prove one set of tracks to be duplicitous (the ones leading down into the gully), while the tracks that lead along - but not down into - the gully show non-clawed tracks being escorted away - perhaps as captives? - by the clawed tracks. As alarming as the latter is, the former is more immediately interesting, and indeed, the latter will just lead you to a fruitless fight with some Kobolds. If you have casters in your party you’ll also get a [Detect Magic] option, which will allow you to sniff out illusion magic at play, hence point you in the right direction.
If you take the path along the gully, you’ll encounter some Kobolds
Be wary of the area-of-effect attack the Kobold Alchemists will employ
The fight includes two Kobold Alchemists, just to name the more interesting foes. The Kobold Alchemists will shamelessly pelt you with Breath Weapon Bombs after buffing up. They don’t do a great deal of damage at a time, but they can strike multiple characters, and if the two of them are allowed to harass you with these concoctions for a round or two, you’ll wish they hadn’t. It may be worth rushing one of them with your melee fighters (Mobility is a skill that will constantly come in handy for when charging vulnerable targets is necessary) while you try to debilitate the other with Sleep or Hideous Laughter, or perhaps disable the Kobold Sentinels with sleep so they can’t challenge you as you kill their alchemist friends.
However you go about it, if you end up fighting these Kobolds, you’ll effectively lose Tartuccio’s trail.
- “[Mobility 11] There was one brave hero among us, who decided to try her luck and climb the root.“
Nothing too surprising about this one. Depending on your party composition and equipment loadouts, you may need to unequip the armor from one of your characters to have a decent shot at this skill check. Once you pass it, however, you’ll have successfully tracked Tartuccio to the Pine Patch area.
| Reward: For tracking Tartuccio down |
|---|
| 144 XP |
Should you fail any stage of the Illustrated Book Episode above, or simply abandon it, you’ll need to wait until later for another lead to show up, in which case skip ahead to the Thorn Ford section of the guide and follow linearly from there. You miss surprisingly little of any long-term significance if you don’t find the Pine Patch area. If you manage to track Tartuccio down, however, continue on with the Pine Patch area, below.
Pine Patch
There are two ways to reach this area, and both require you to head to the Ancient Tomb, first. After exiting the Ancient Tomb you’ll get to partake in an Illustrated Book episode. If you succeed at all its stages (see the text under the text under the “Trailing Tartuccio” header above) you’ll arrive at the Pine Patch immediately. If not you’ll need to return to Oleg’s Trading Post after leaving the Ancient Tomb and talk to Kesten, who will tell you where the Pine Patch location is. If you have to go there, the directions are as follows:
- South
- Southeast
- West
- South
- South
- South to reach landmark: Ancient Tomb
- South
- South
- Southeast
Interrupt Tartuccio to send the manipulative Gnome fleeing

Unfortunately, he’ll secure his escape by throwing some Kobolds at you
However you get here, when you arrive head north to find a disguised Tartuccio doing what he does best: deceiving others. In this case, a group of Kobolds. Whatever you say, Tartuccio will flee with the majority of his reptilian rubes, leaving just enough behind to distract you. Kill the woefully outclassed foes, and since there’s no benefit to chasing directly after Tartuccio, stay and loot the area.
When you’re done with that, it’s time to leave, and if you wish to continue pursuing Tartuccio you’ll find him at the Old Sycamore area.
Old Sycamore
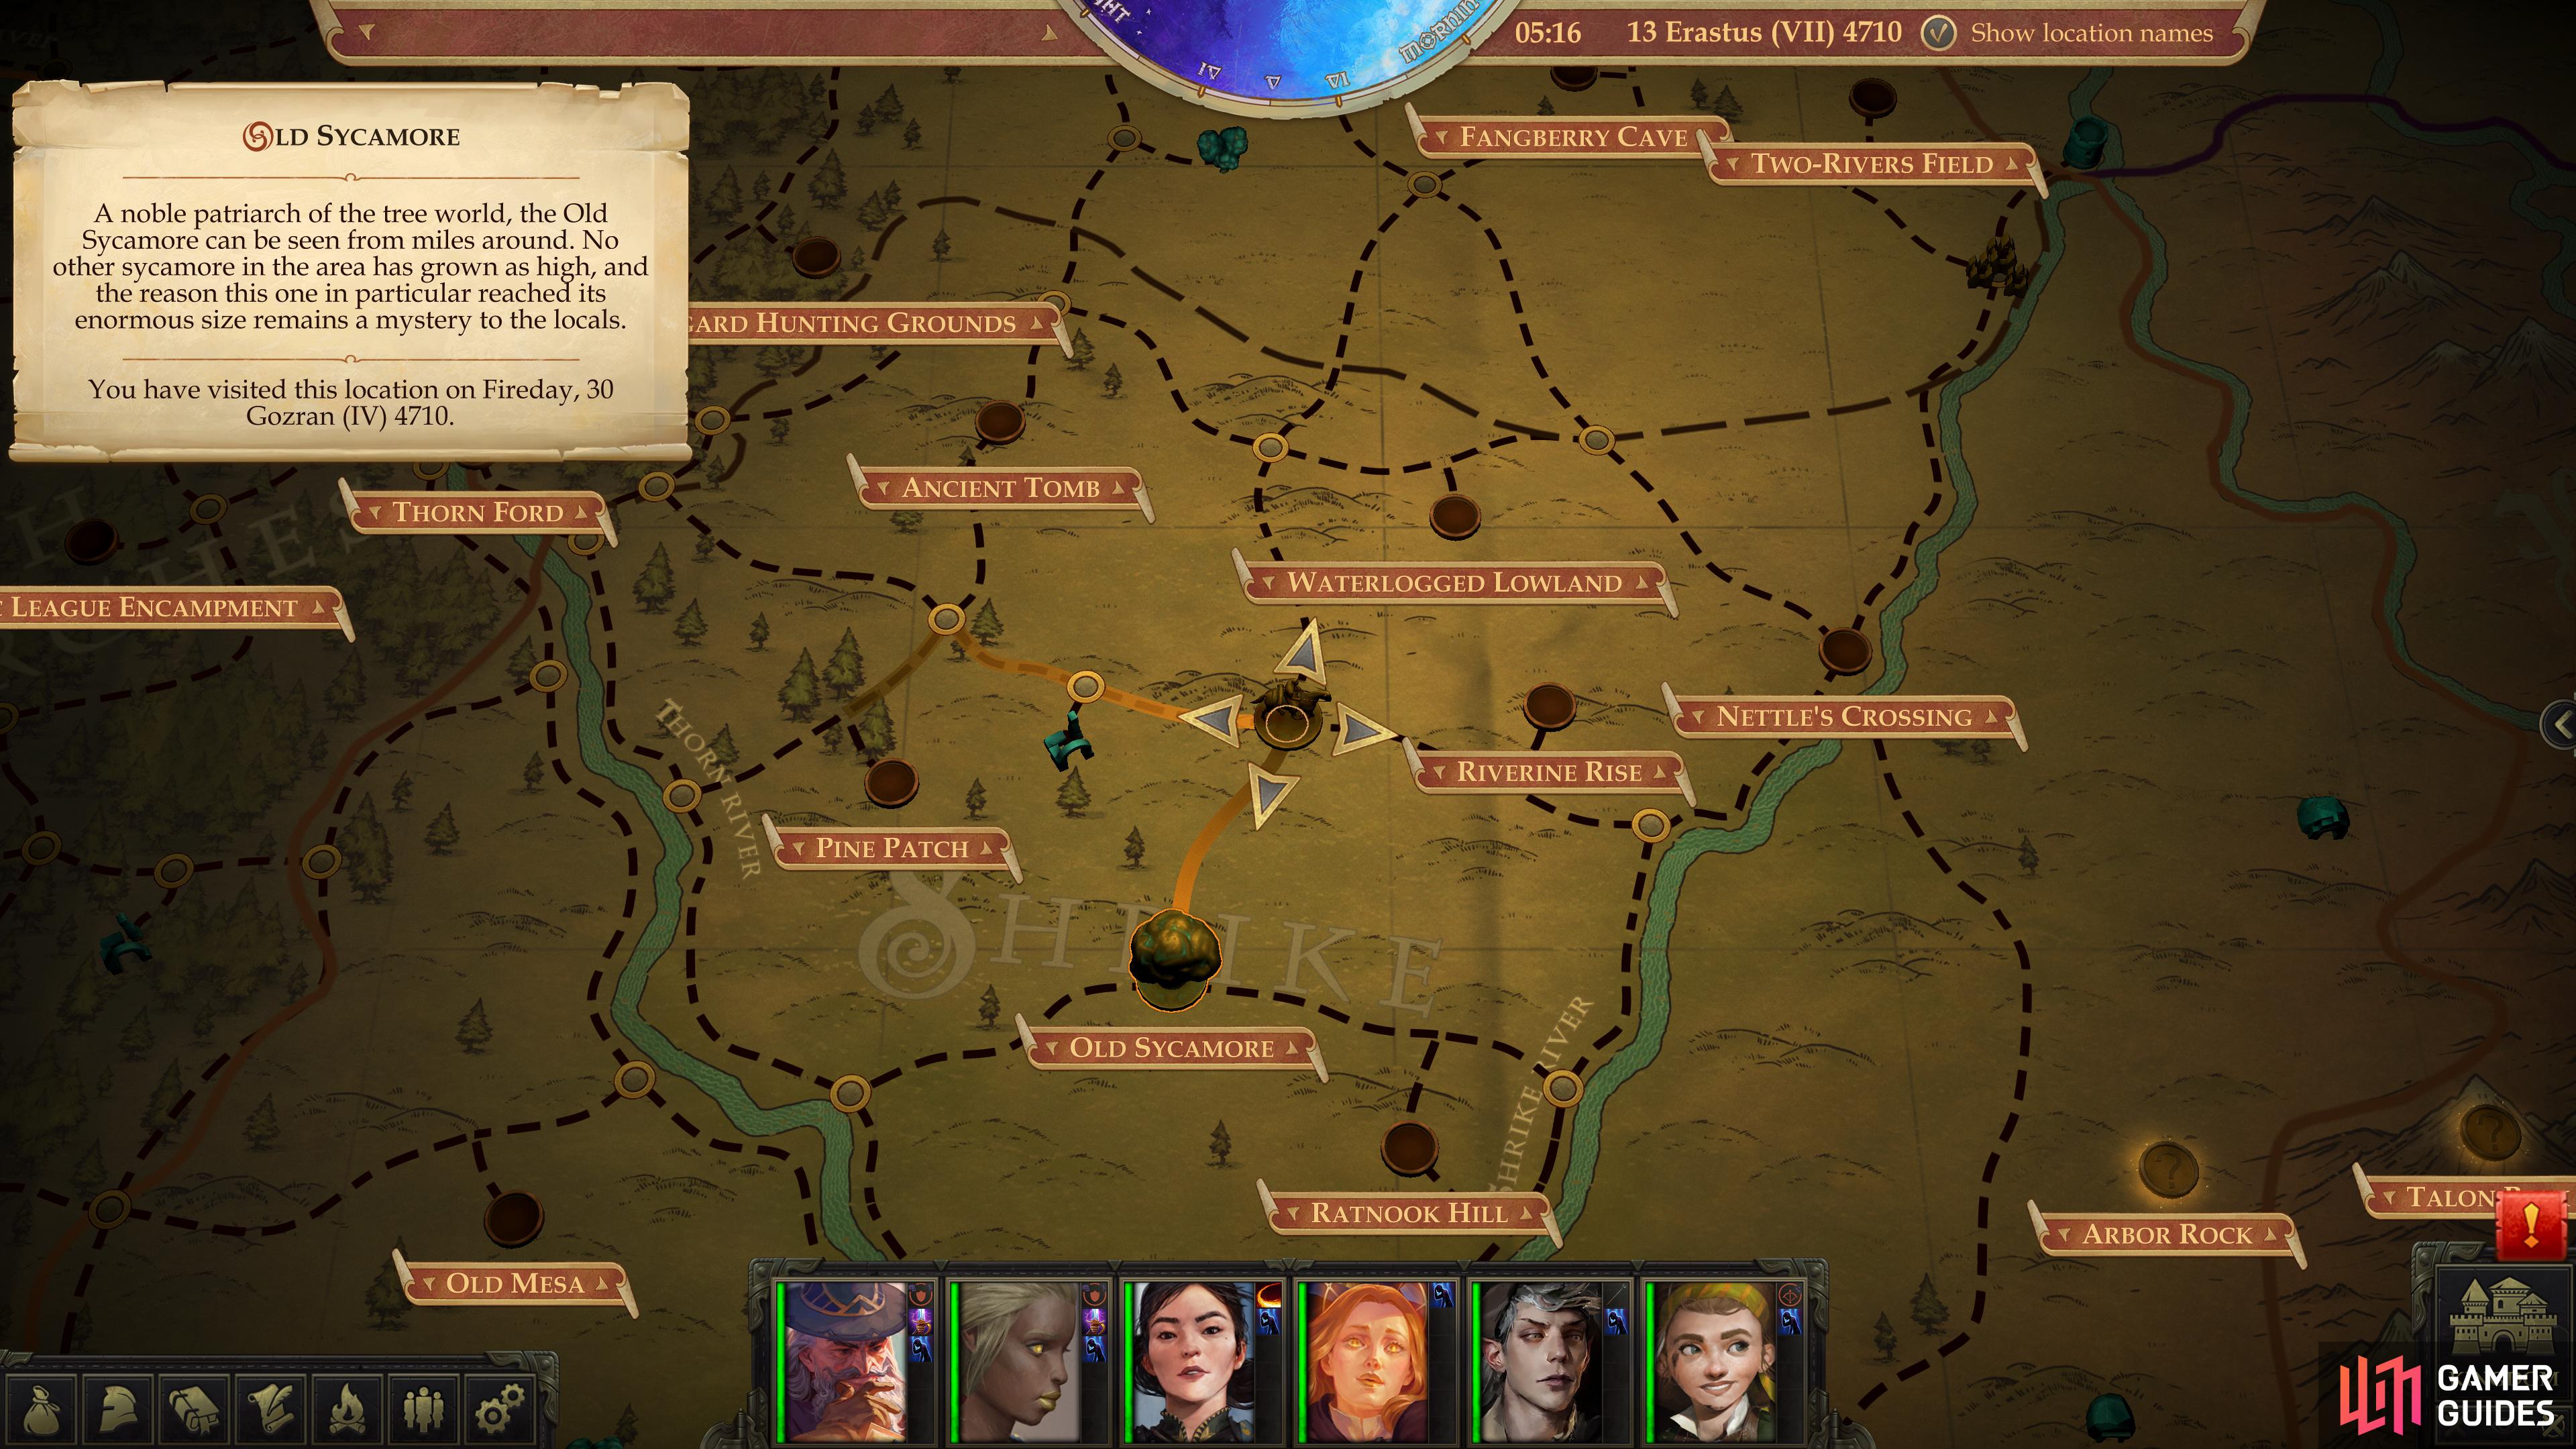
From Oleg’s Trading Post follow the following directions to reach the Old Sycamore area:
- South
- Southeast
- Southeast
- Southwest
- South
- Southwest
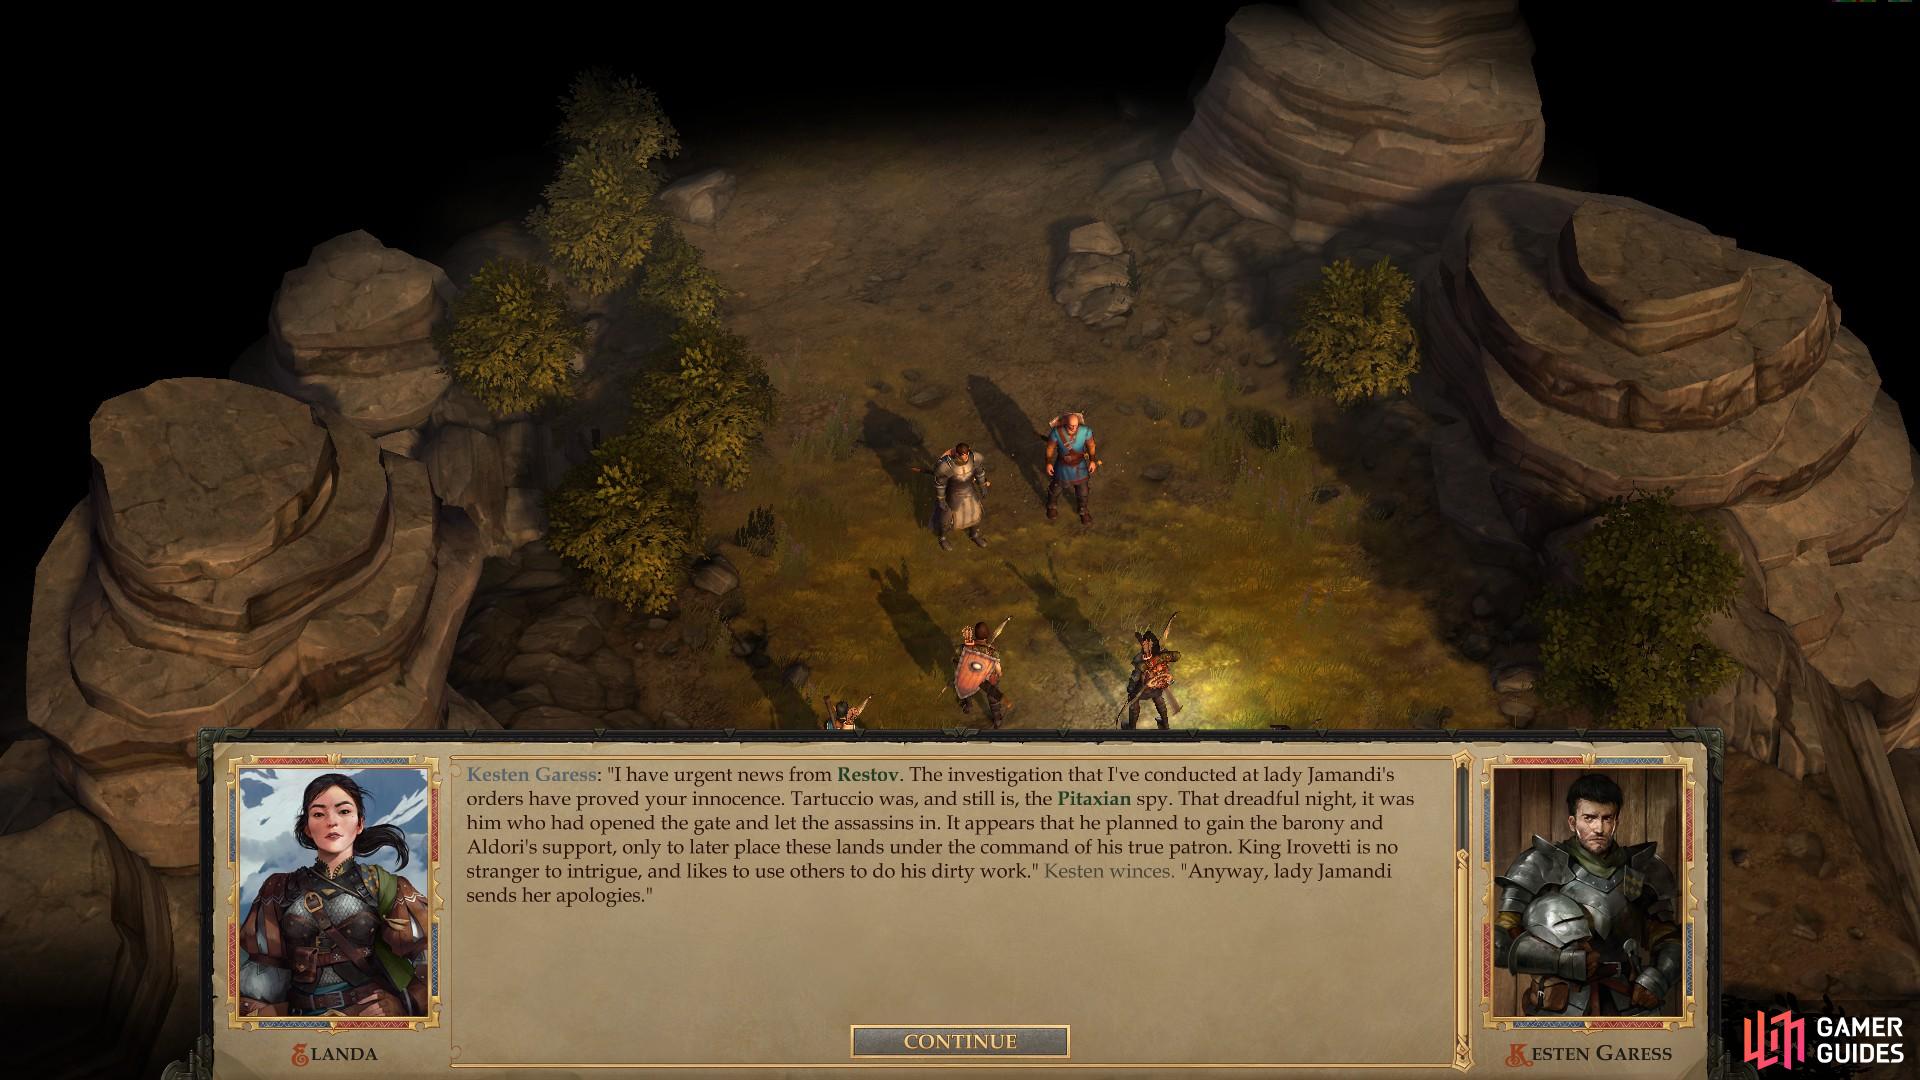
It’s a pretty simple route that shouldn’t take you through difficult terrain or really see you venturing far from areas you’re already familiar with. You’ll enter along the southwestern end of the area, and as soon as you enter you’ll meet your old friend Kesten Garess! Or rather, your one-time acquaintance you met under duress. Close enough. He’ll tell you that they discovered Tartuccio was everything he accused you of being, and once exposed he and his men set off in search of the duplicitous Gnome. Long story short, he failed, and now he’s passing the task of hunting Tartuccio down onto you, because you’re not busy enough already. Oh well, something to do while you wait for the fog to clear. Who wants to bet that fog’s not going anywhere until the very moment you deal with Tartuccio?
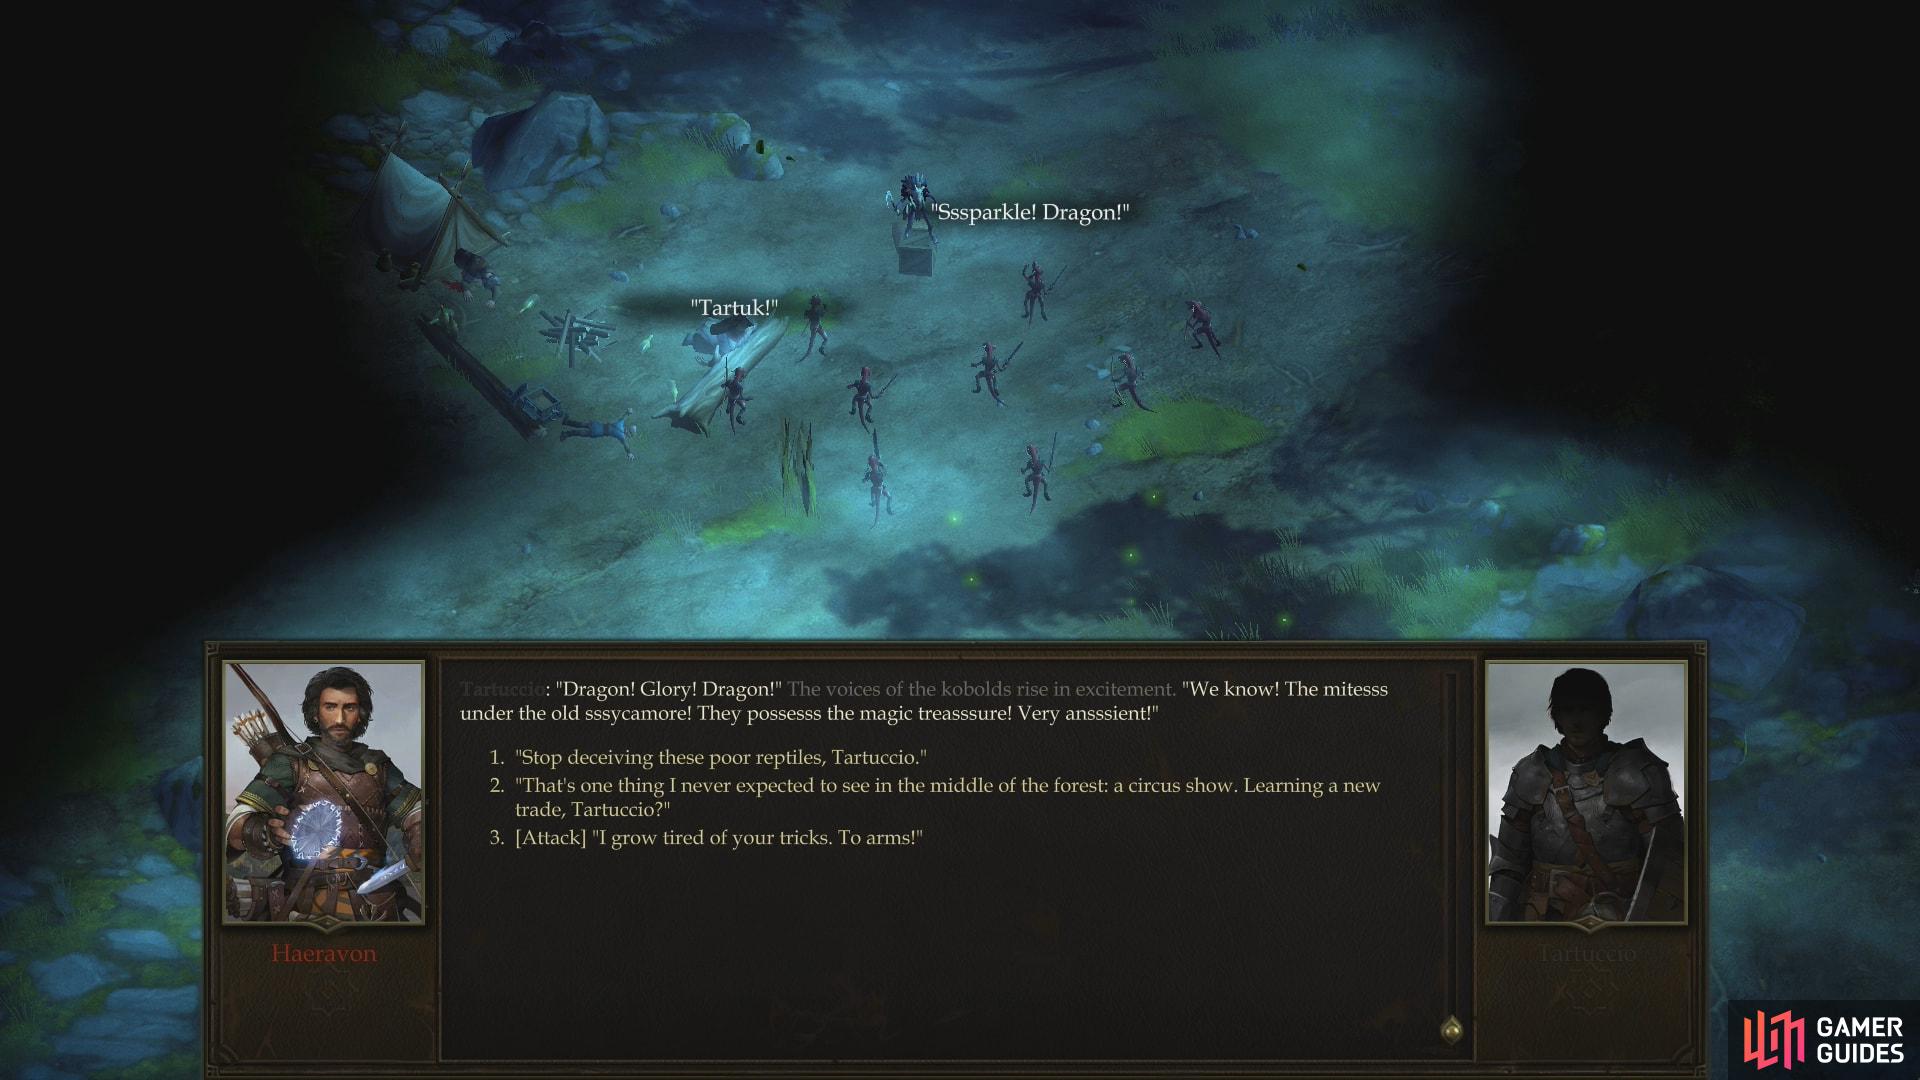
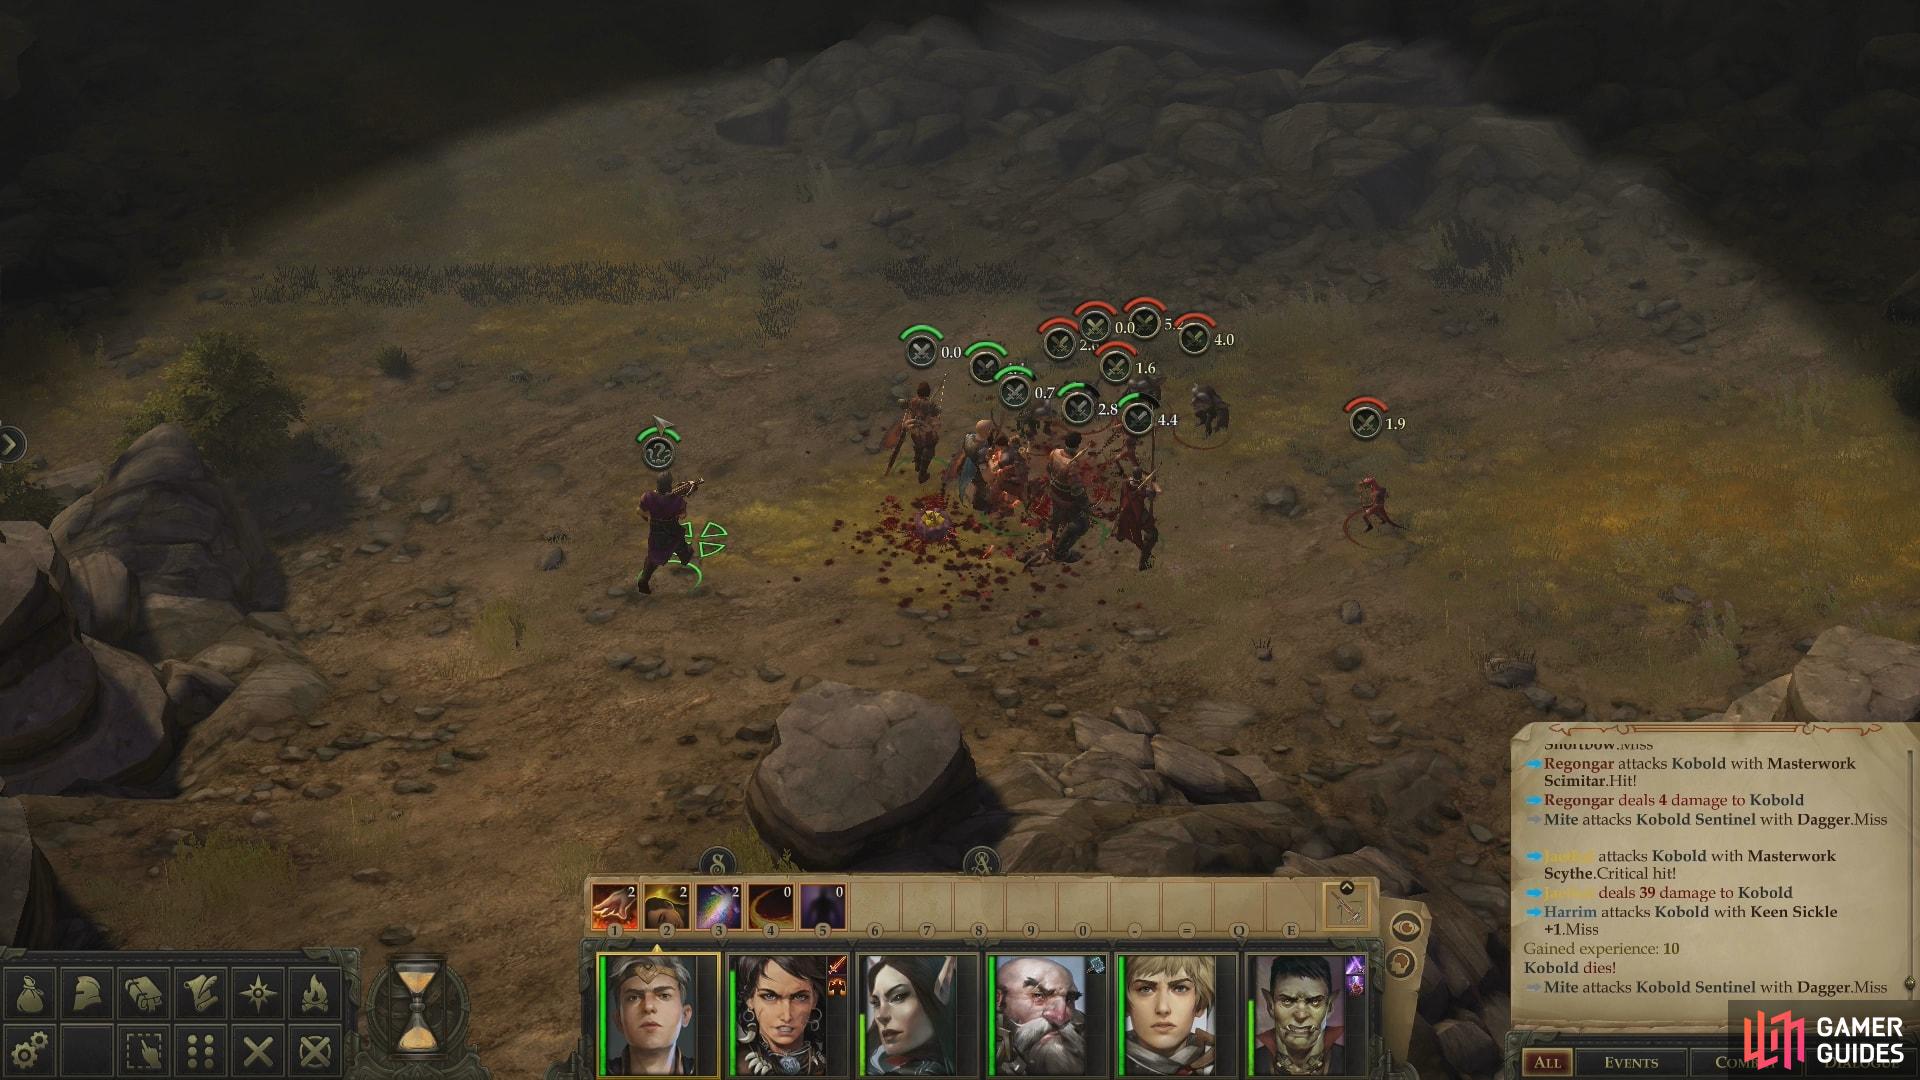
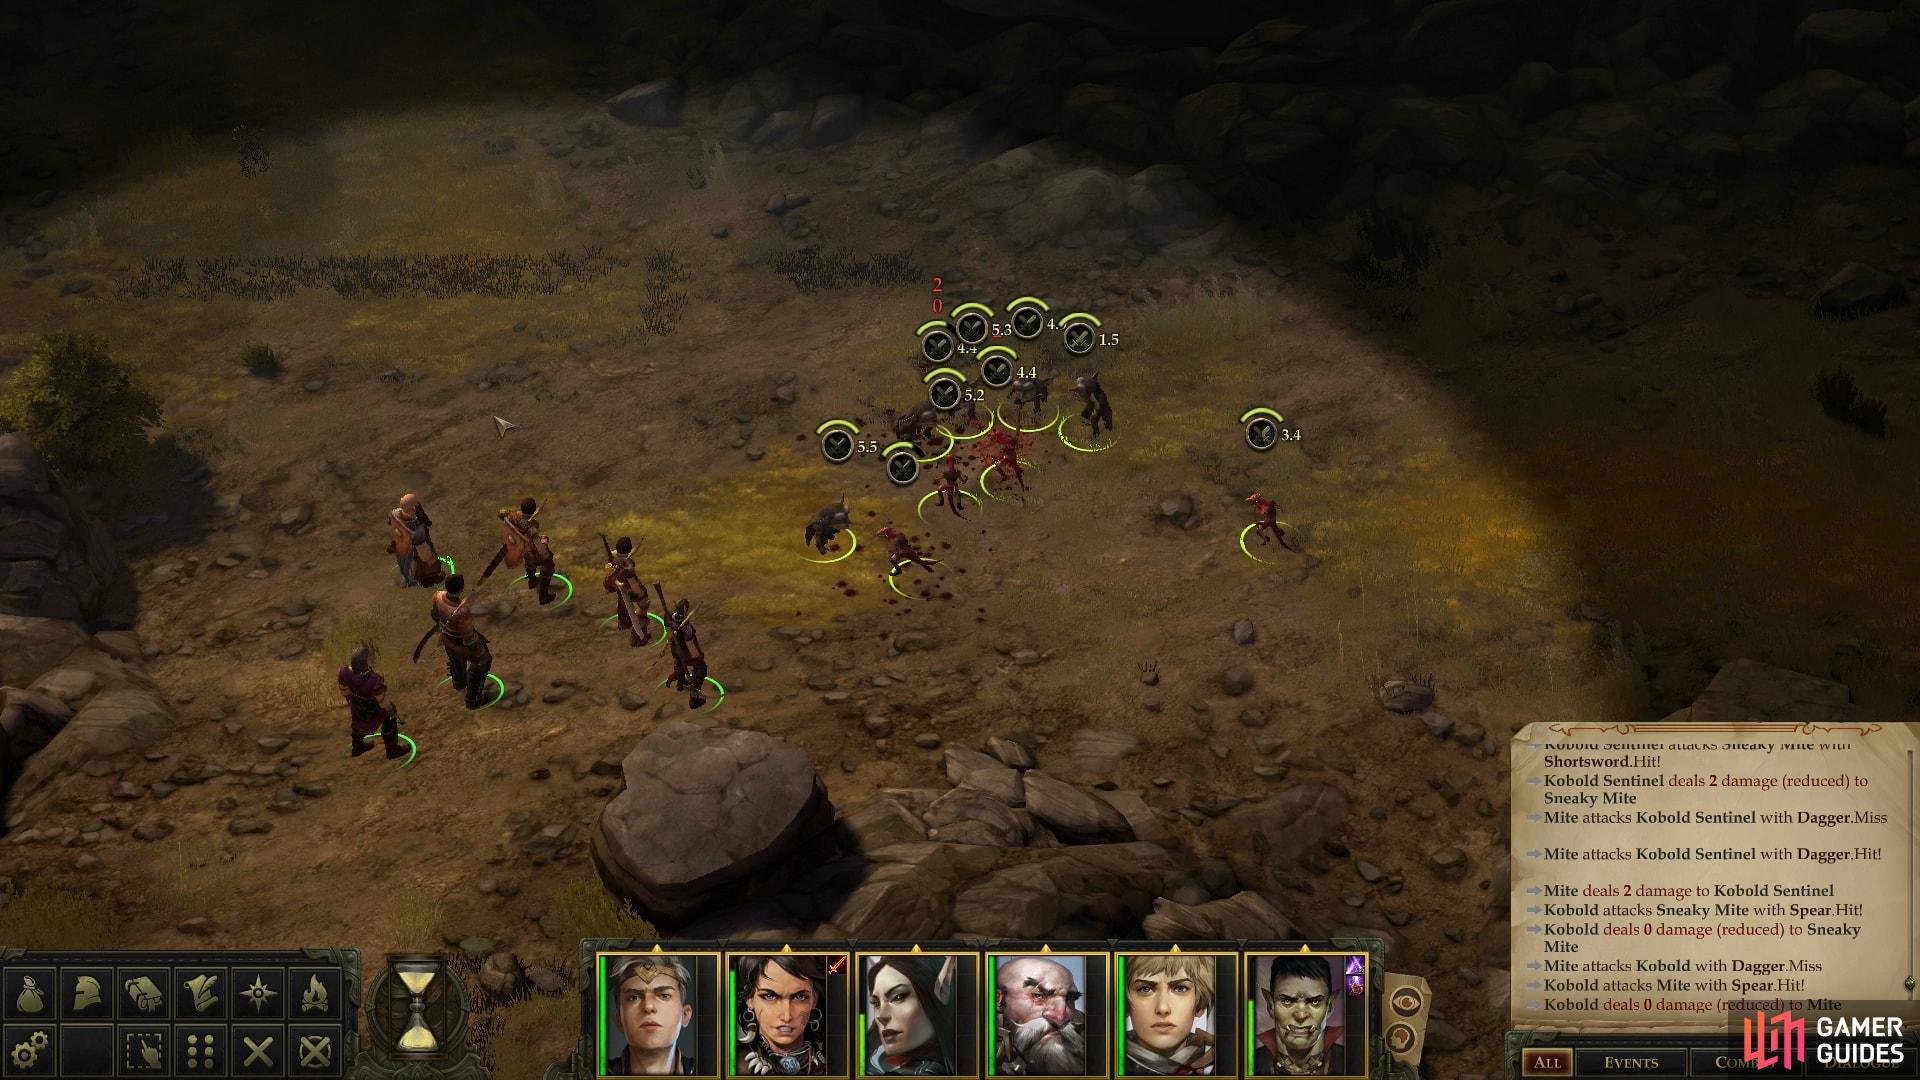
From where you enter the area, head north until you just so happen to intrude on a confrontation between the area’s local pests: Kobolds, led by Chief Sootscale to the east, and the Mites, represented by Seneschal Vaggik to the west. It seems the cause of their dispute is some relic the Kobolds misplaced… or that was stolen by the Mites. In retaliation the Kobolds attacked the Mites and stole their relic, urged on by a shaman named Tartuk - Tartuccio in disguise.
The truth of the matter is in doubt, and a cool-headed adventurer not set on genocide or ready to jump to conclusions may be able to make a [Neutral] dialogue choice (provided they don’t [Attack] outright) which will cause both sides to let you pass in peace and hopefully find out the truth. Of course, that doesn’t mean they’re calling a halt to the hostilities, merely that you won’t be physically involved as they murder each other. To qualify for this option your protagonist must have some form of Neutral alignment, be it Neutral Good, Neutral Evil, Lawful Neutral, Chaotic Neutral or True Neutral.
Failing that, you can pick a side, although the choice at this point is fairly arbitrary. Tartuccio is actively manipulating the Kobolds, and you’ve come into conflict with them before, if that influences your decision at all. Whichever group you side with will be neutral towards you in upcoming confrontations, while the other side will, obviously, be hostile. For the evil party, however, they can indulge in some senseless slaughter by picking a fight with both sides, which will earn them much experience and loot. Either way, on the surface the two groups will generally battle each other, ignoring you until one side or the other is eliminated. This makes for fairly easy pickings, on your part.
You could end up fighting both sides, one or the other
or neither.
Make whatever decision you wish; it’ll affect how you proceed later, but as for exploring the rest of this surface area it won’t greatly affect how things play out save for whether you end up fighting Kobolds, Mites, both, or neither. Speaking of which, react appropriately to this first group, which includes mostly melee varieties of Mites and Kobolds. Expect more diversity shortly.
While there’s a lot to see and do in this area, little of it has any direct influence on the quest A Bitter Rival. Explore and defeat whatever enemies present themselves, including Mites and/or Kobolds, depending on which side(s) you antagonized earlier. Once you’ve cleared the surface, it might be a good time to return to Oleg’s Trading Post, sell off the items you’ve accumulated, rest, and finish off any side quests you may have advanced in the Old Sycamore area (Moon Radishes for Bokken being an obvious example). You’re only just beginning with the Old Sycamore area, and there’s plenty more to loot and slay underground. Coming back fresh isn’t a bad idea.
You may expect the exploration of the subterranean areas - which include separate Kobold and Mite areas - to be somewhat more complicated, but that doesn’t necessarily have to be the case. If you sided with one faction or another, you’ll obviously want to talk to that faction’s leader and bring the war to the other faction, but you don’t have to do that in any specific order. If you didn’t side with either, or you chose the neutral option and are hence on good terms with both, it also stands to reason that you’d like to either massacre both groups, or hear them both out, respectively. In any possible political scenario, you’ll want to explore each area for the experience and loot you’ll get from doing so… although such matters are beyond the purview of this section.
For more detailed walkthroughs of these areas, check out the following links:
Once your goal is underground, your goal is to reach the leader of the Kobolds (Chief Sootscale) and the Mites (Queen Bdaah). In the case of the kobold caves you’ll have to bypass traps and fight through Giant Spiders (and perhaps Kobolds, if they’re hostile). As for the mite caves you’ll encounter Giant Centipedes and Mites, if they’re hostile. You’ll doubtlessly have to fight something whichever cavern complex you’re in, although there’s far less hostiles if you sided with one faction or another, or better yet, were able to remain neutral.
As may be expected, the actual encounter with Chief Sootscale/Queen Bdaah is potentially far more dangerous than whatever you end up fighting along the way, although violence is not a foregone conclusion. Violent and non-violent options for both Chief Sootscale and Queen Bdaah will be discussed below:
Chief Sootscale
Chief Sootscale’s lair is along the eastern edge of the map, just north of where you can enter the kobold caves (in the southeastern corner of the map). Sadly, from this entrance you’ve a rather circuitous journey ahead, as you’ll have to venture west, north, east, then north again to reach Chief Sootscale’s lair.
If you’re hostile to the Kobolds, this ensuing fight is an easy one, despite the opposition you face. An Alchemist, a Bone Shaman, several Archers on a ridge to the west, a pair of Sentinels and the Crier accompany Sootscale, and fortunately they’ll all too dumb to avoid making a severe tactical error.
Assemble your party outside the door to the south, so that they’re protected by the wall and not standing opposite the doorway. With one well-protected, sturdy character, head north to provoke the Kobolds, then lure them south through the door. Once they start coming through the door, attack with your entire party, effectively bottle-necking them in the doorway. Pelt them with Sleep spells, if you’ve got them and be wary of allowing their mages and archers to pelt you from afar. Simply repositioning to use the wall as cover should force them to come close, and all in all, the terrain here makes this fight much easier than it otherwise could be.
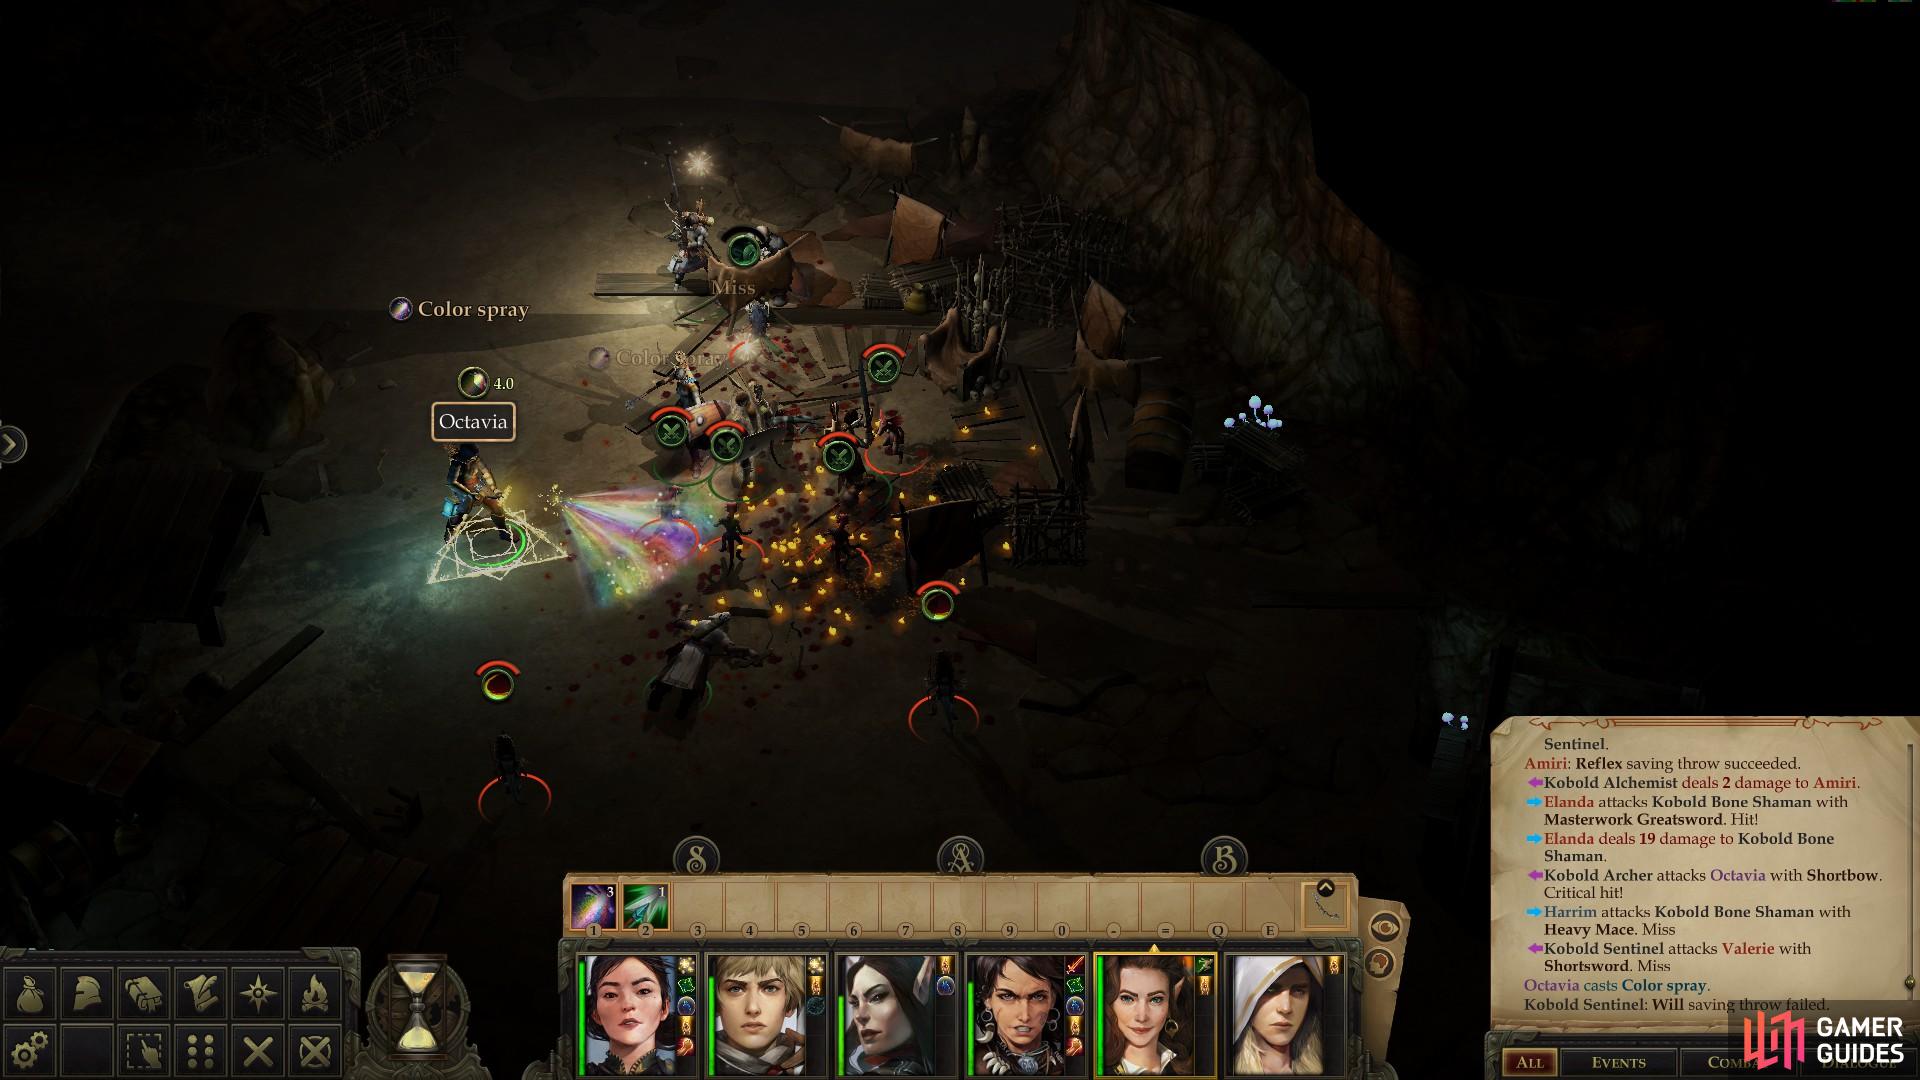
When fighting Chief Sootscale, be wary of reinforcements appearing behind you.
Chief Sootscale’s gear is well worth killing for.
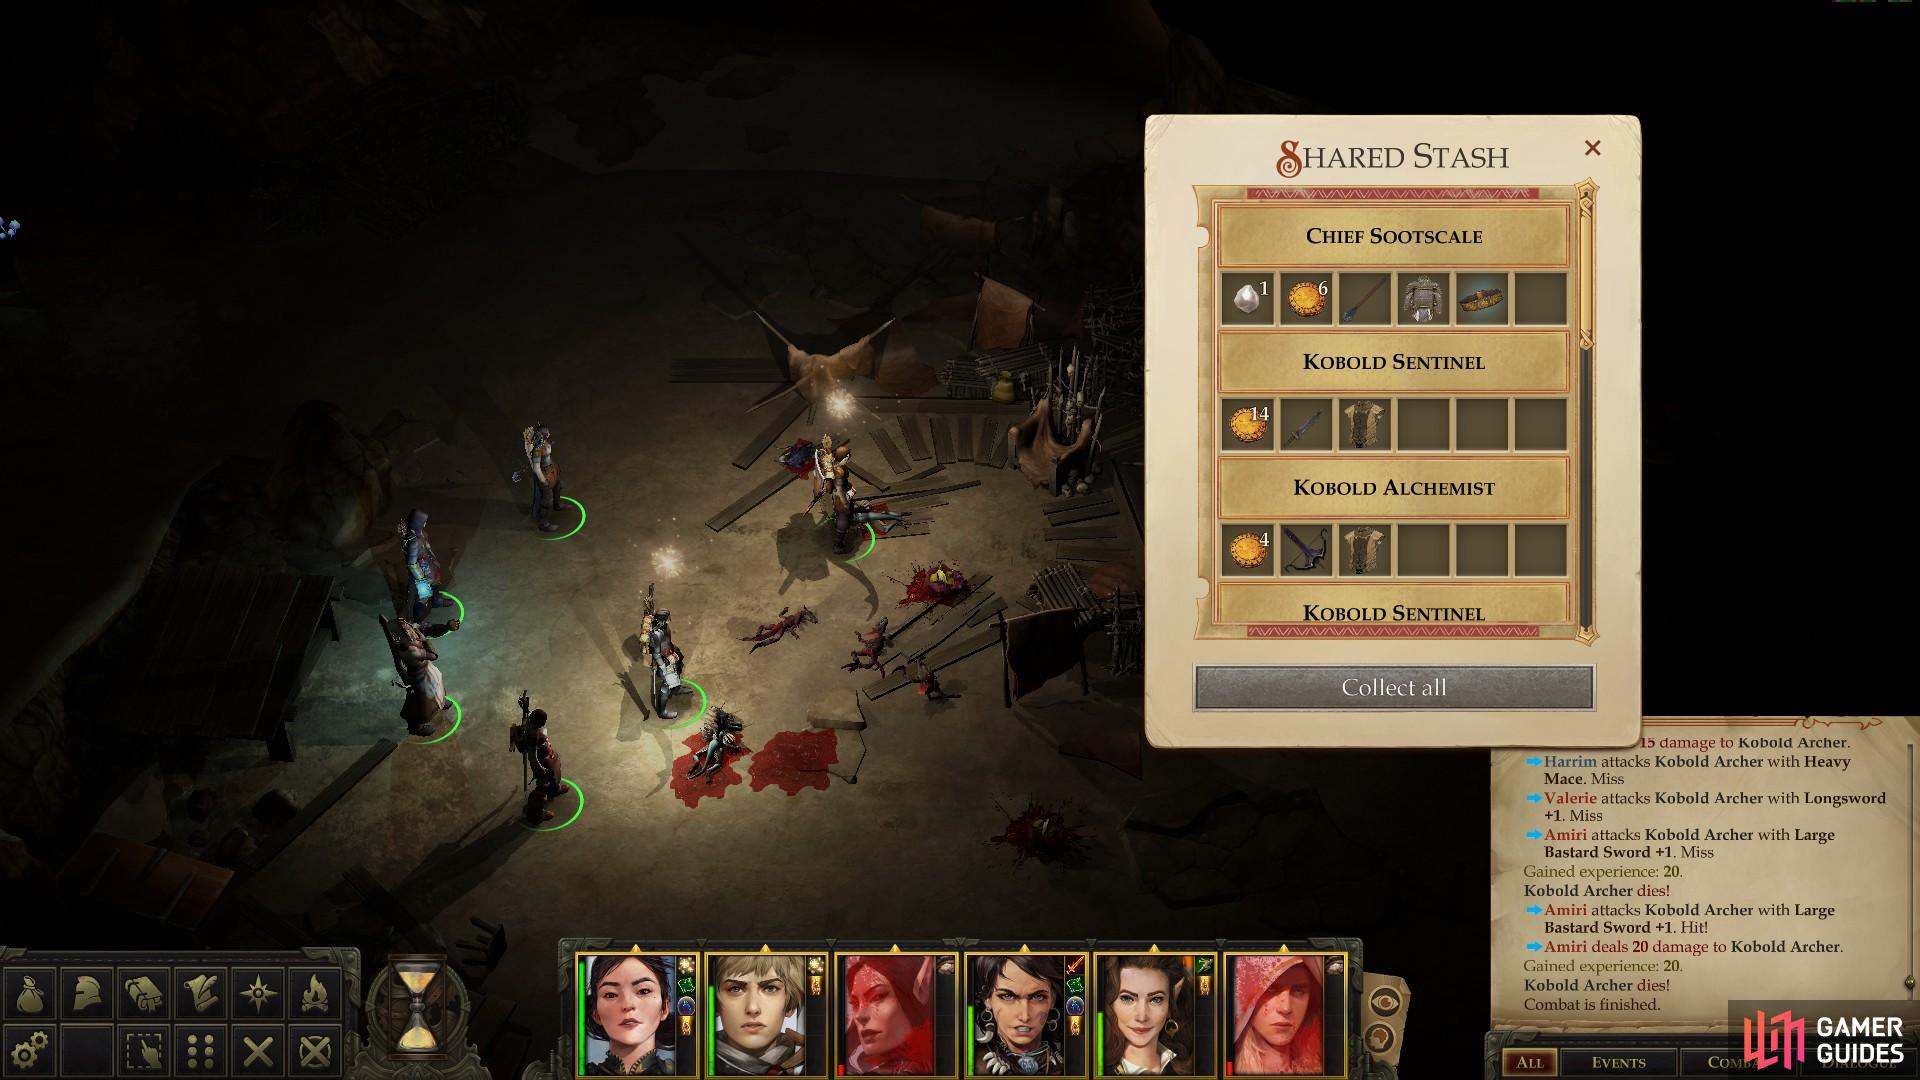
Strike down Chief Sootscale and you’ll get an opportunity to spare [Chaotic Good] or finish off your foe. You’re making a significant sacrifice for morality if you spare him, however, as it deprives you of his loot, which includes a Masterwork Light Mace and a Belt of Incredible Dexterity +2, the latter which will improve any character’s Dexterity score by two points. There’s no shortage of characters who can benefit from such a device, as most warriors will enjoy the Armor Class boost, archers will enjoy the Attack boost, and everybody will gain from the higher Reflex Save. You’ll also need to claim the Mites’ Relic from his corpse, which you’ll need to chase down Tartuccio. If you spare him, the fight will immediately end, and you’ll be given the Mites’ Relic.
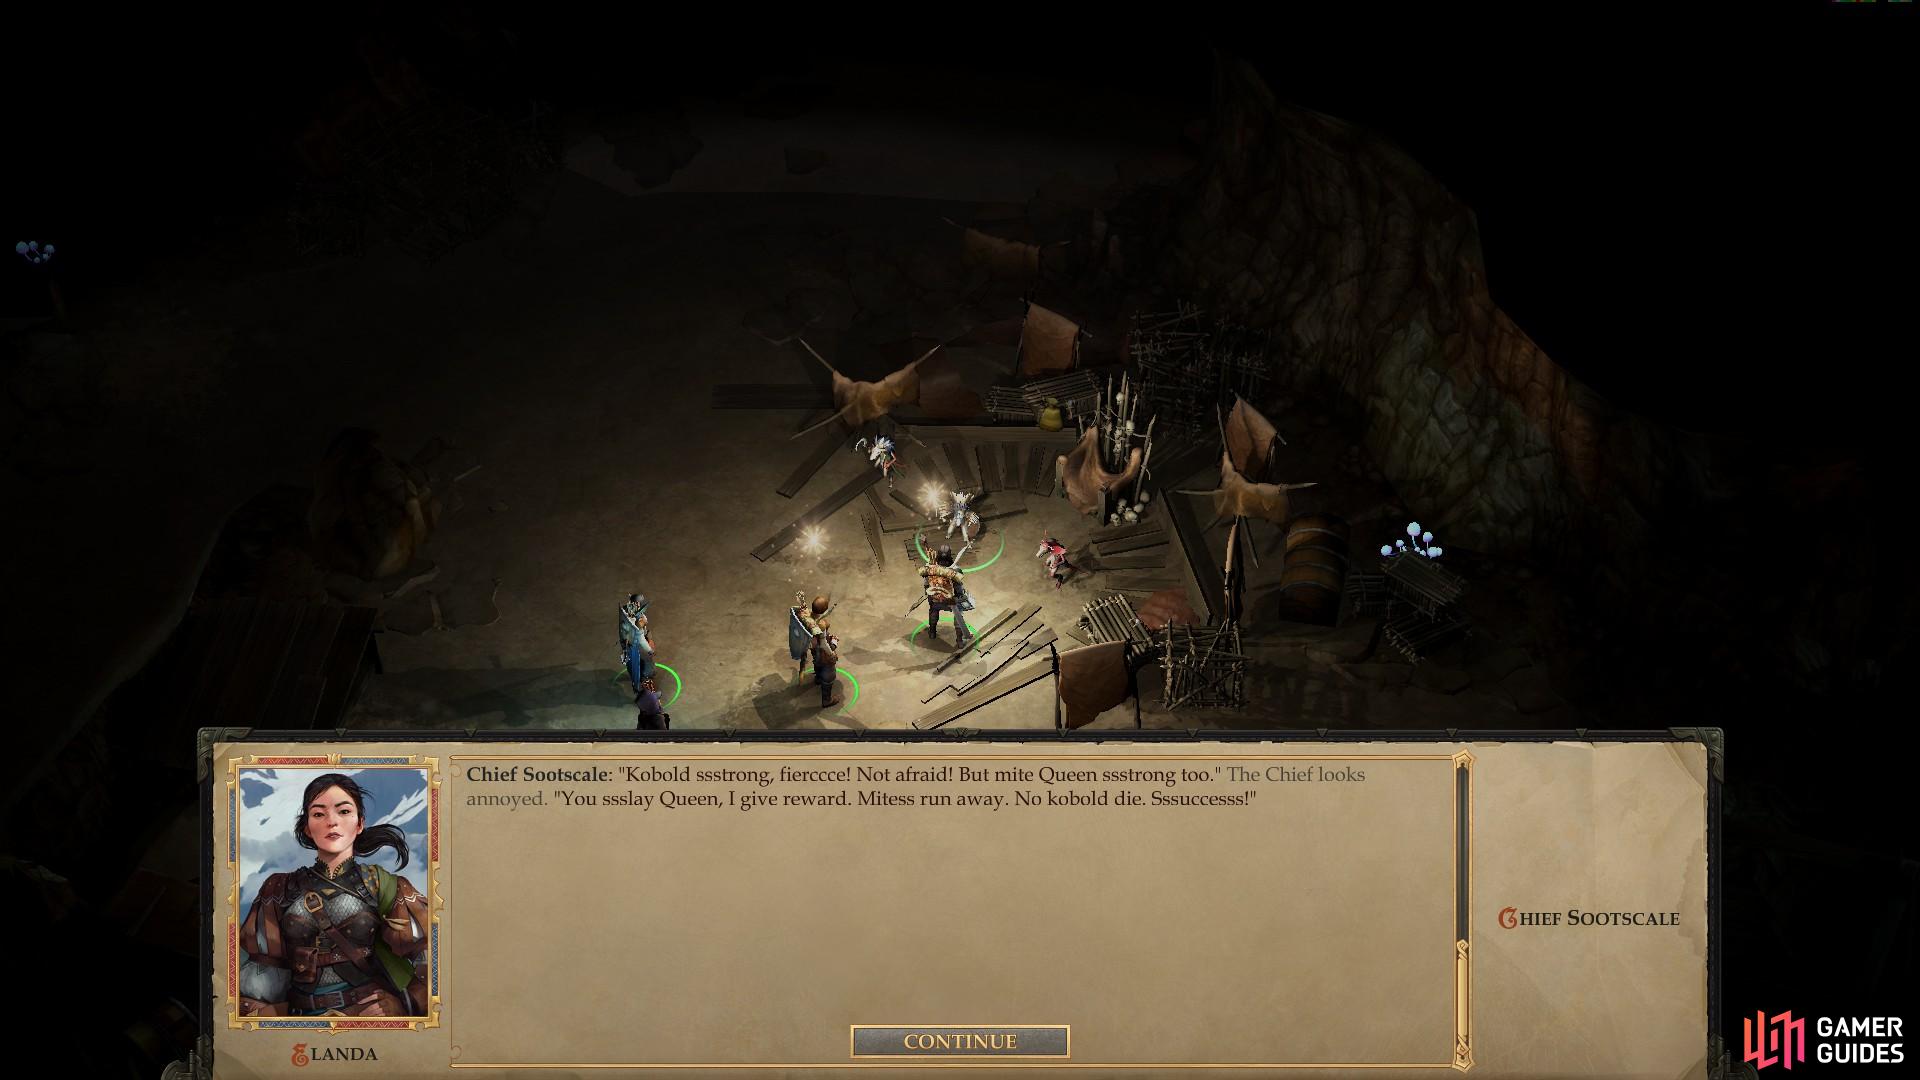
If you’re not at war with the Kobolds, you have more options for handling this encounter. Talk to Chief Sootscale and be sure to pick the dialogue option “I may need the relic to enter the hall, if Tartuk is already there.”, which will cause Sootscale to simply hand over the stolen Mites’ Relic. If you also ask “How can I help you in your war?”, he’ll ask you to kill the Mite Queen, promising a reward. Accepting will start the quest Death to Queen Bdaah!. Don’t worry, accepting this quest doesn’t lock you into an alliance with the Kobolds, nor does it provoke the Mites.
Next pick the option “There is someone in your dungeon I wish to discuss.” If you’re observant, you may have noticed that the companion(s) that accompanied Tartuccio can be found to the northwest, locked in a crude cage. Tartuccio rewards loyalty about as well as expected. Fortunately, in his absence his dim-witted Kobold associates are easily manipulated, and you can free your former companion(s) by picking the dialogue option “What need have you of this ‘dumbhead’, Chief? They’re just taking up space in your dungeon.” or “Release them, Chief. How does holding a ‘dumbhead’ prisoner serve you?”. Afterwards, talk to your companion and welcome them into your party - even if you don’t add them immediately, just bringing up the party select menu should suffice. If you didn’t add them, you can find them at Oleg’s Trading Post later.
You can conspire with Chief Sootscale to take down the Mite Queen
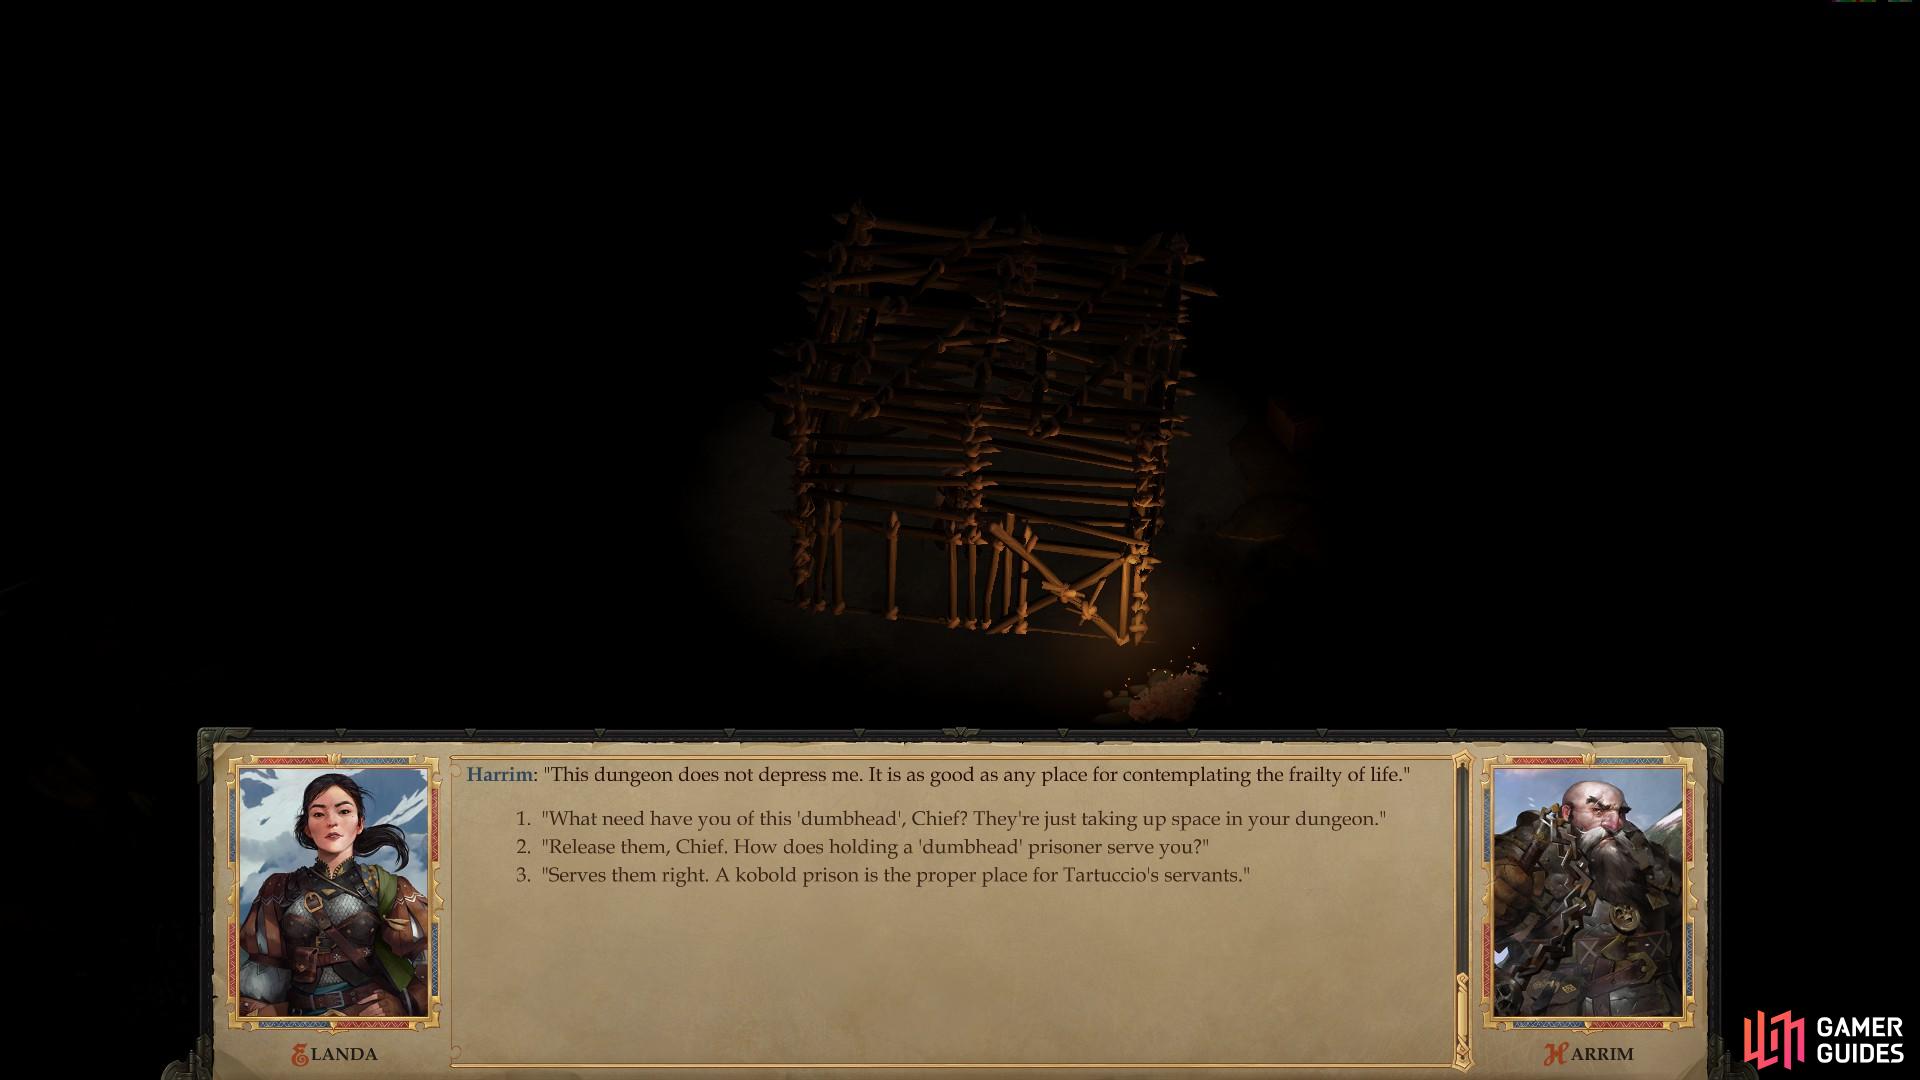
and also negotiate for the release of your final companion.
Finally, if you wish to use your neutrality with both factions as a means to safely reach one leader or another, you can do that, as well. Simply pick the dialogue option [Attack] “I need our alliance no more!” to open hostilities with Sootscale at your leisure. In this case, read the text under the header Battle: Chief Sootscale above, as events will play out identically.
Queen Bdaah
Queen Bdaah’s lair is in the northeastern corner of the map, just separated by a wall from Chief Sootscale’s lair, in fact. To get here from the entrance to the mite caves (northwestern corner of the map) you’ll need to head east, southeast, then northwest.
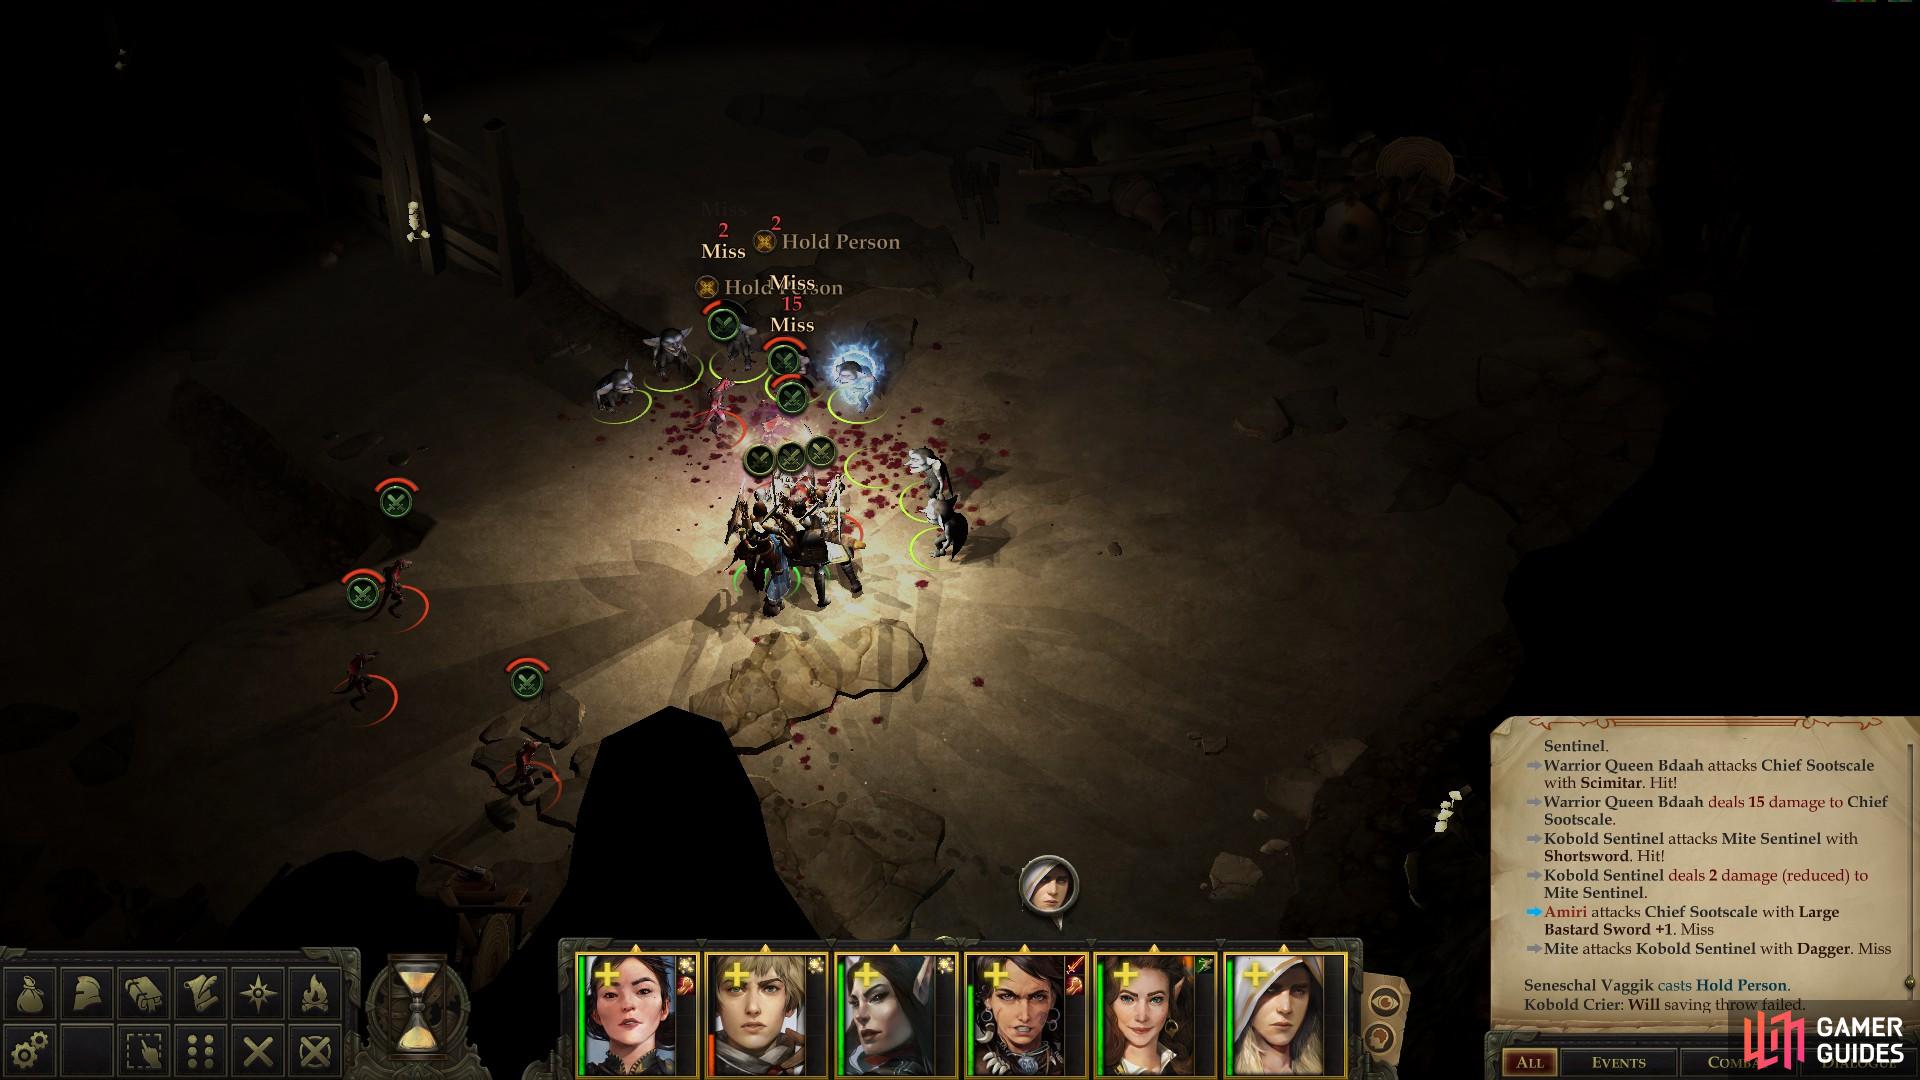
The entrance is guarded by a Mite to the east and a Mite Scout to the west, while a Mite Sentinel and Mite Priest guard a root-barrier to the east. At the northern end of the chamber, Queen Bdaah, a Mite Butcher and Seneschal Vaggik round out the opposition.
Warrior Queen Bdaah lives up to her reputation by being the sturdiest warrior on the Mite’s side, while Seneschal Vaggik is a Cleric, who will follow the traditional role of Mite Priests by starting fights out with Hold Person, followed by repeated bouts of Channel Negative Energy.

The Mites can prove to be unexpectedly tricky foes due to their casters and the terrain.
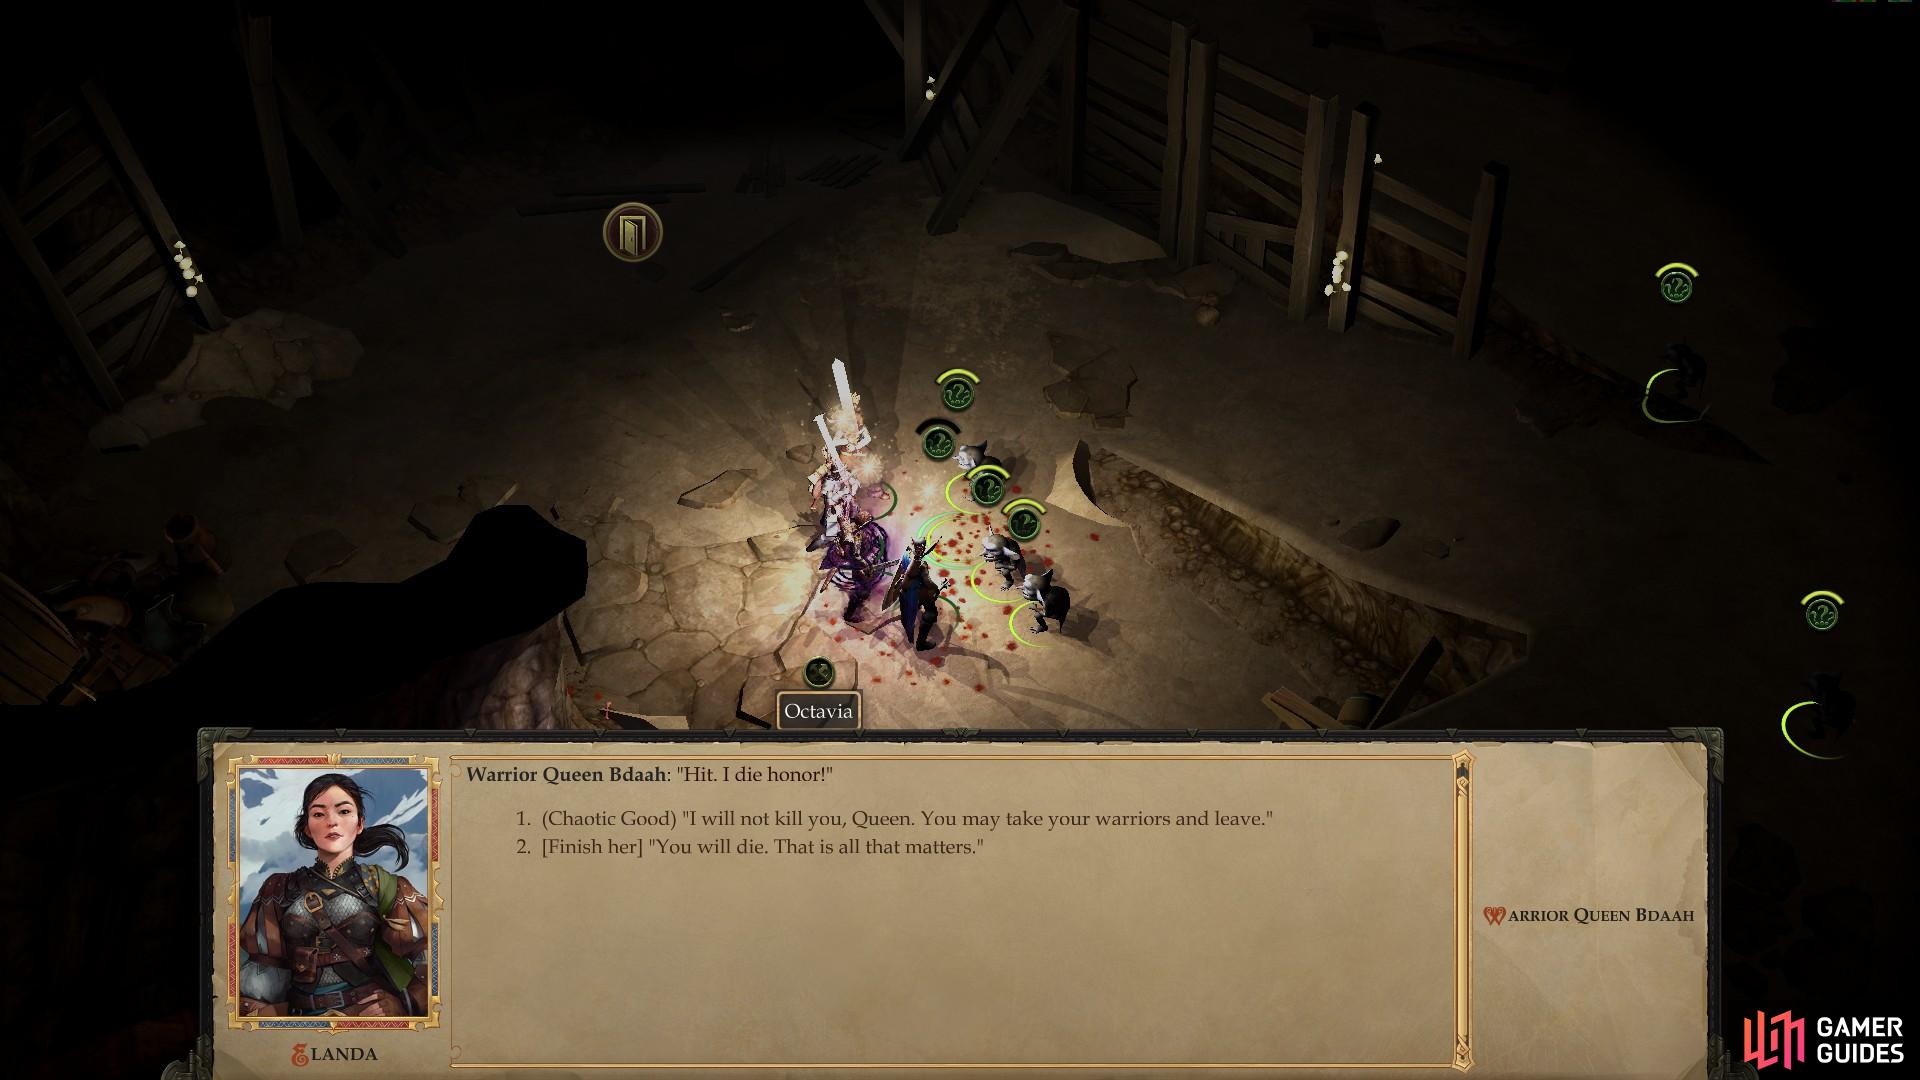
Focus on Queen Bdaah and cut her down quickly where you can let her surrender to end the fight.
Given that amount of spell power, and the winding route separating the southern end of the cavern (from which you presumably entered) from said spell-casters, a direct assault might not be the best option. If you’re resolved to risk saving throws against the inevitable Hold Person spells, you can just focus on Queen Bdaah when she comes within melee range, as you can spare her life [Chaotic Good] after defeating her, which will cause her and her minions to flee. On the other hand, if you defeat her you can loot her for a Scimitar +1 and a Headband of Alluring Charisma +2 - a boon for any character that benefits significantly from Charisma (Sorcerers, Bards, etc.)
If you have multiple characters armed with ranged weapons, you should be able to quickly pick off (or at least provoke and lure away) the Mite and the Mite Scout near the southern entrance, which - if they’re eliminated quickly enough or far enough away - shouldn’t provoke the rest of the Mites, or you can approach until they attack, retreat back up the ramp, and dispatch them away from their fellows. Either way, eliminate both of these Mites, then prepare an ambush.
Hide the majority of your party at the top of the ramp in the chamber to the southwest of Queen Bdaah’s chamber, hiding them behind the wall near the ramp to break line of sight from the ramp. With that done, send one character with a high Will Save into Queen Bdaah’s chamber to provoke the queen and her minions. Do not stand and fight, instead retreat back to the rest of your party while remaining in sight of the Mites at all times to keep their interest.
Queen Bdaah will probably lead, making it easy to gank her if necessary, and if she’s the only one that follows you all the way there, so much the better - the rest will be more easily smote without their strongest warrior. If the rest follow, that works, too, so long as you remain shielded by the wall, forcing Seneschal Vaggik and the Mite Priest to come close to cast their spells. If they do, ignore any melee combatants in your way (even if it provokes an Attack of Opportunity) and rush the casters, hopefully putting them down quickly.
If you’re not hostile with the Mites, you can pursue diplomacy instead; or at the very least get close to Bdaah and her minions before starting the fight. In the latter case, be sure to surround Seneschal Viggik so you can gank him early, after which you can cut down the Butcher and Queen Bdaah before cleaning up the rest of the Mites, starting with the priest. All you need to do is talk to Queen Bdaah and choose the dialogue option [Attack] “It’s time to put an end to this alliance.”
Sneak attacks aside, if you want to work with Queen Bdaah pick the dialogue option “How may I help in your war?” followed by “All right. I will try to reach the Chief” to start the quest Death to Chief Sootscale!. Again, you can start this quest without committing to anything, even if you already talked to Chief Sootscale and started the quest Death to Queen Bdaah!. Whether you seek to start this quest or not, be sure to talk to her and pick the option “How do I get to Sycamore Hall?”, which will cause the guards by the root barrier to move.
Confronting Tartuccio
After dealing with the Mites and Kobolds in whatever fashion you find the most suitable, you should have obtained the Mites’ Relic from Chief Sootscale, and have cleared the guards out from the root barrier south of Queen Bdaah either by talking to the queen or by killing them, it matters not. Once both of those conditions are met, you’ll be able to interact with and open the door.
Go down the tunnel that was blocked by the root barrier and you’ll witness Tartuccio - still in Kobold disguise - transporting the artifact he came here for via the contrivance of a magical portal. After he’s done he’ll turn his attention to you. You can question him about his disguise, reveal that you know he’s a Pitaxian spy, or ask about his mission; you can even try to avoid a fight. It doesn’t matter, Tartuccio is hell-bent on his own demise and will attack you regardless of what you say, not that you have terribly many options.
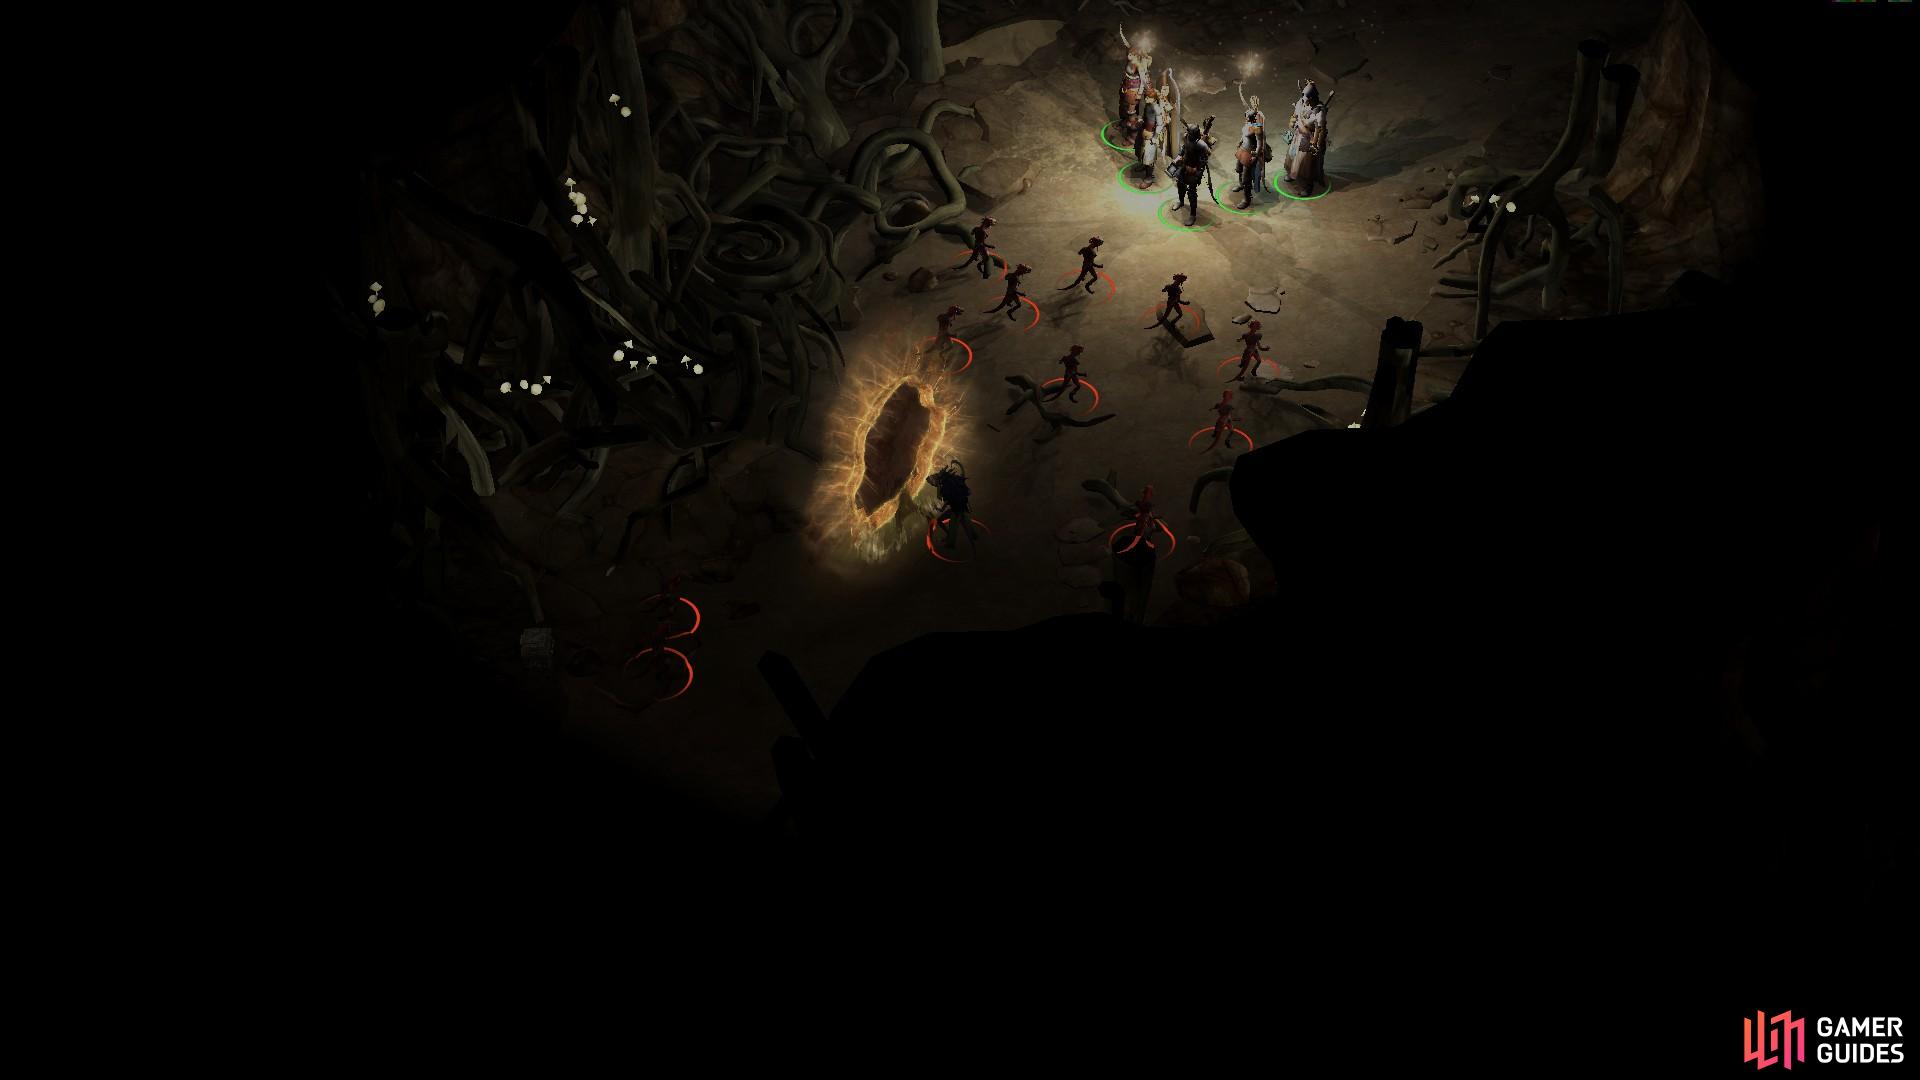
Tartuccio comes with quite a host of minions, including five Kobolds, four Kobold Sentinels and two Kobold Archers, but he’s really biting off more than he can chew. Tartuccio is the only challenging foe here, but being a sorcerer, he’s got more magical might than brains.
His strategy is to fix you in place by having his Kobold minions charge, while he launches a Fireball which will eradicate most of his allies, and deal significant damage to you. This is a painfully simple strategy to counter, although it will require one of your party members to take one for the team. As soon as combat begins, retreat with all your characters save the one targeted by Tartuccio (he chooses targets based on proximity, so it should be one of your front-liners), around whom the Kobolds should gather. After Tartuccio launches his attack, charge him with all your characters and cut him down to prevent him from unleashing a second Fireball, then mop up the surviving Kobolds, being wary of not leaving your archers and mages unattended, in case the Kobolds get smart and target them.
When you’re victorious, loot your vanquished foes for whatever appealing treasure they have. Tartuccio, unsurprisingly, has the only noteworthy gear, including a Ring of Protection +1, a Restovic Inquisitor’s Broken Crossbow and a Wand of Magic Missiles. Next loot a chest to the southwest, wherein you’ll find a Scroll of Mage Armor, a Scroll of Divine Favor and a Heavy Shield +1. Finally, and perhaps anti-climatically, loot a pile of rocks in the southwestern corner to score a Token of the Dryad.
When you leave the chamber where you fought Tartuccio, you may have the option to resolve the war - or lie.
You can use this opportunity to take out whichever faction you despise the most.
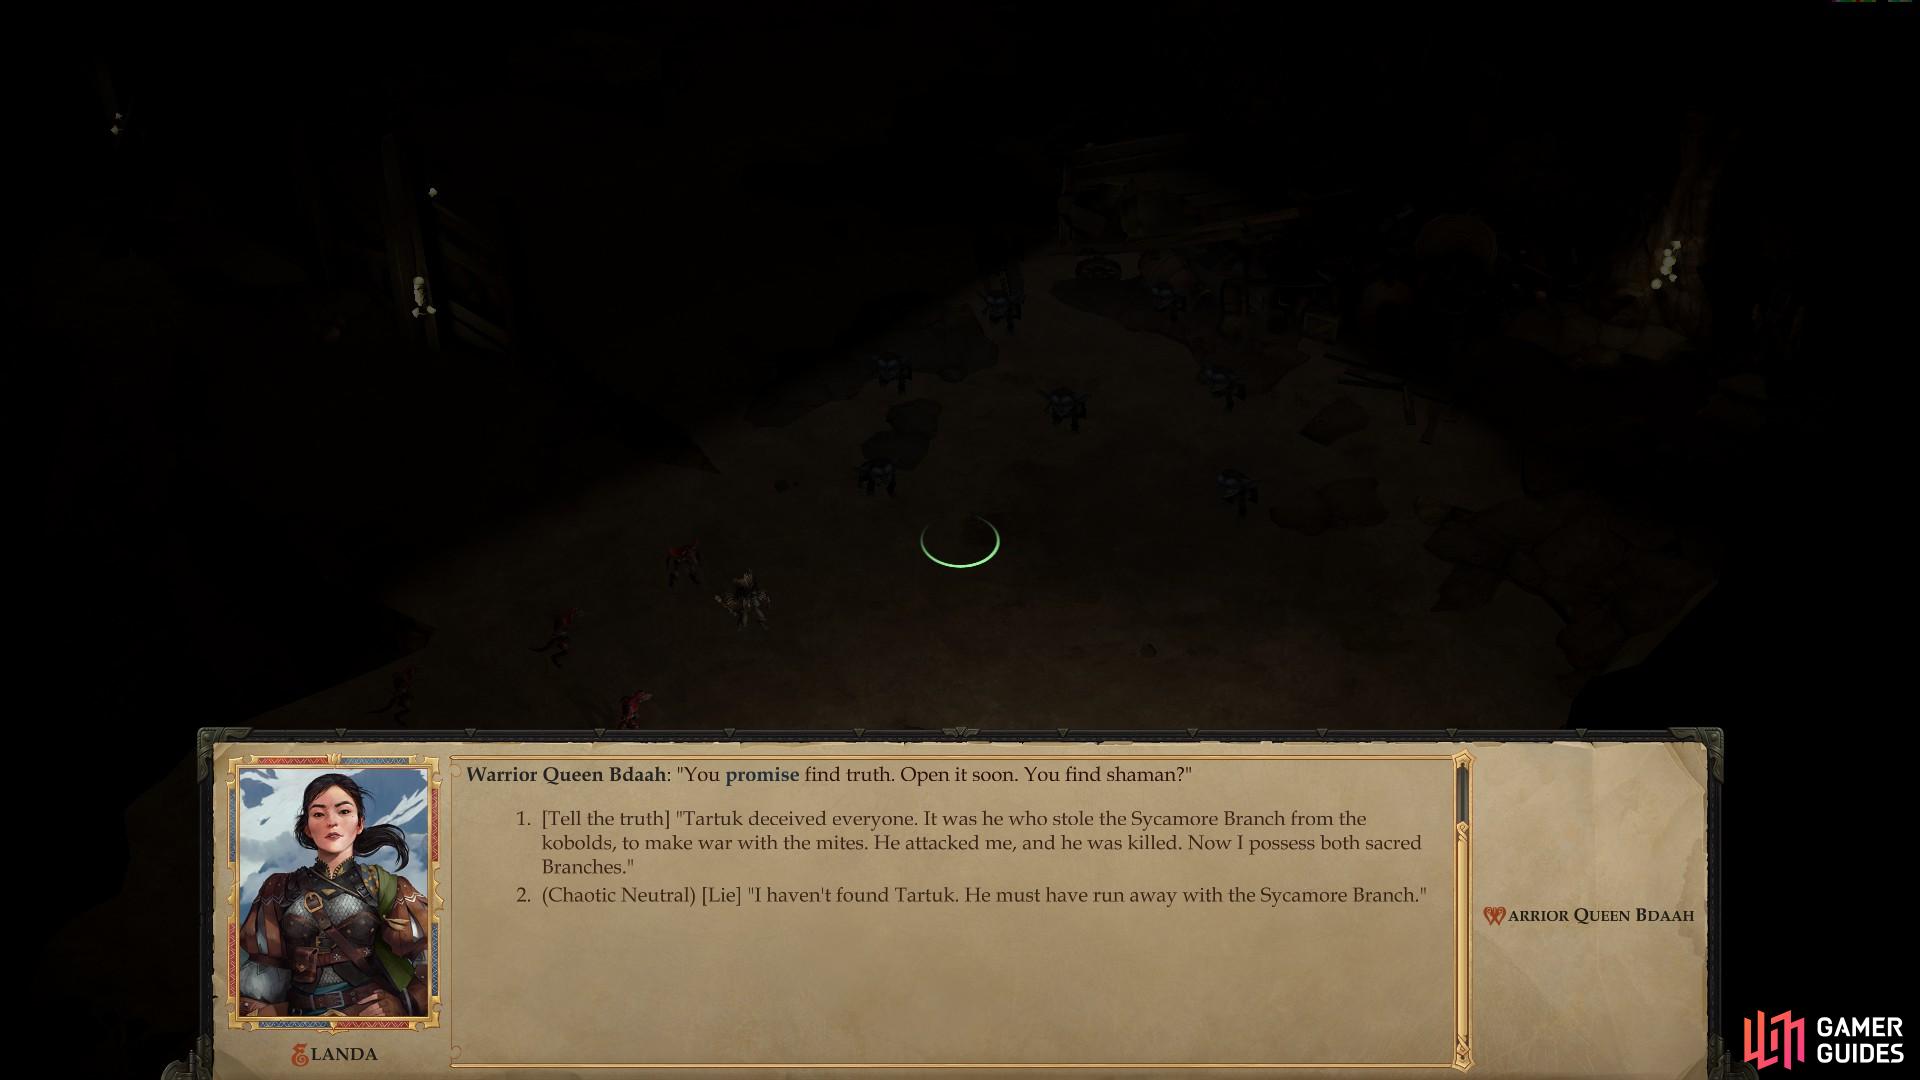
Leave the chamber and, if you spared both factions up until now, they’ll have gathered outside, simultaneously eager to fight, and to hear what you discovered. You’ll immediately be given the choice to [Tell the truth] or [Lie], and in the latter case you can keep one of the sacred branches and hand the other one off to the faction of your choice. Of course, the other faction won’t stand for this, and will attack. If you wanted to kill one of the leaders, however, it was arguably more lucrative to have done so earlier, as you can’t get the quest reward now, and the merit of keeping one of the relics (which can sell for around 125 GP) is dubious at best compared to simply dealing with the quest another way. Alternatively, if you’re Chaotic you can rubbish the old tradition and replace those “sacred branches” with a new relic for these critters to squabble over - your gloves.
Suffice to say, if you’ve come this far without fighting either of the leaders, you may as well tell the truth now, give back both relics, and watch as both sides agree to a truce. It’s certainly not the most lucrative way of resolving this conflict, but well, at least you avoided unnecessarily killing a bunch of evil little critters? A good deed is its own reward and all that rot. In any event, now that this matter with Tartuccio has been settled, it’s time to return to Oleg’s Trading Post and report the gnome’s demise to Kesten Garess although, as you leave the Old Sycamore Caves, you’ll witness a scene suggesting this rivalry may not be quite over.
(1 of 3) As you leave the Old Sycamore Caves, dark forces at work will set up the second stage of this rivalry.
Return to Oleg’s Trading Post and as you start to head into the palisade, you’ll be pestered once again by the Guardian of the Bloom, who will bestow the aptly named The Nymph’s Gift amulet to you. This little trinket gives its wearer a +2 Dodge bonus to Armor Class against ranged attacks, making it a fine trinket for both tanks that may be used to draw fire, or mages who might otherwise be threatened with such attacks.
Take care of any business around the trading post you need to attend to, then head inside the building and tell Kesten Garess about Tartuccio. He’ll whine about the outcome, but reward you nonetheless. Hey, not like he could do any better, right?
| Reward: For telling Kesten Garess about Tartuccio |
|---|
| 1,000 GP |
No Comments