

This quest will begin when there are 260 days left on [An Ancient Curse, Part 3], via the Monster Invasion event card. It is the next major main quest following An Amusement for the Nobles. The next time you enter your throne room after that date, quite a few quests will be set in motion:
- Your Councillor will tell you goblins who are celebrating the arrival of the monsters. This starts the quest [Mother of Monsters], and your Councillor will mark the location of the Goblin Village on your map. You’ll also get 600 XP just for chatting. Nice.
- Jhod will tell you that Kesten has left to investigate the cult of Lamashtu, giving you Kesten’s Letter, revealing the location of the Shrine of Lamashtu and starting the quest [Witch Hunt] in one fell swoop. If Kesten was assigned as an advisor, he’ll be absent from that role for a while, so be sure to plug that gap, if you can.
- Jhod will also tell you about a scheduled vivisection in order to learn about the nature of the threat you face. This will start [Seed of Sorrow], and is the immediate quest you’ll need to resolve.
To advance the main questline you must complete [Seed of Sorrow]. In fact, you won’t have a choice otherwise, so make sure you’re prepared before you advance time and trigger the Monster Invasion event - the mandatory encounter ahead might prove challenging for you, depending on how you’ve built your protagonist.
If your protagonist is fit to qualify as a tank (you can get your Armor Class over 35, but preferably over 40), you should be good to go - just apply whatever spellbuffs you need to make it happen. Likewise if you have a pet at your disposal, you’re also probably fine given how powerful those things get… assuming, of course, the pet is anywhere near your current level. If you’re a ranged warrior of acceptable competence or a caster with Glitterdust and Animate Dead at your disposal (pet or not), you should also be in good shape. If you don’t fit any of those descriptions - you lack potent pets or summons, debuffs, Armor Class, or a potent ranged option - you should seriously consider bringing potions along to help out. Potions of Blur, Barkskin, Mage Armor, Shield of Faith, Heroism… whatever it takes to get those personal buffs that’ll increase your survivability.
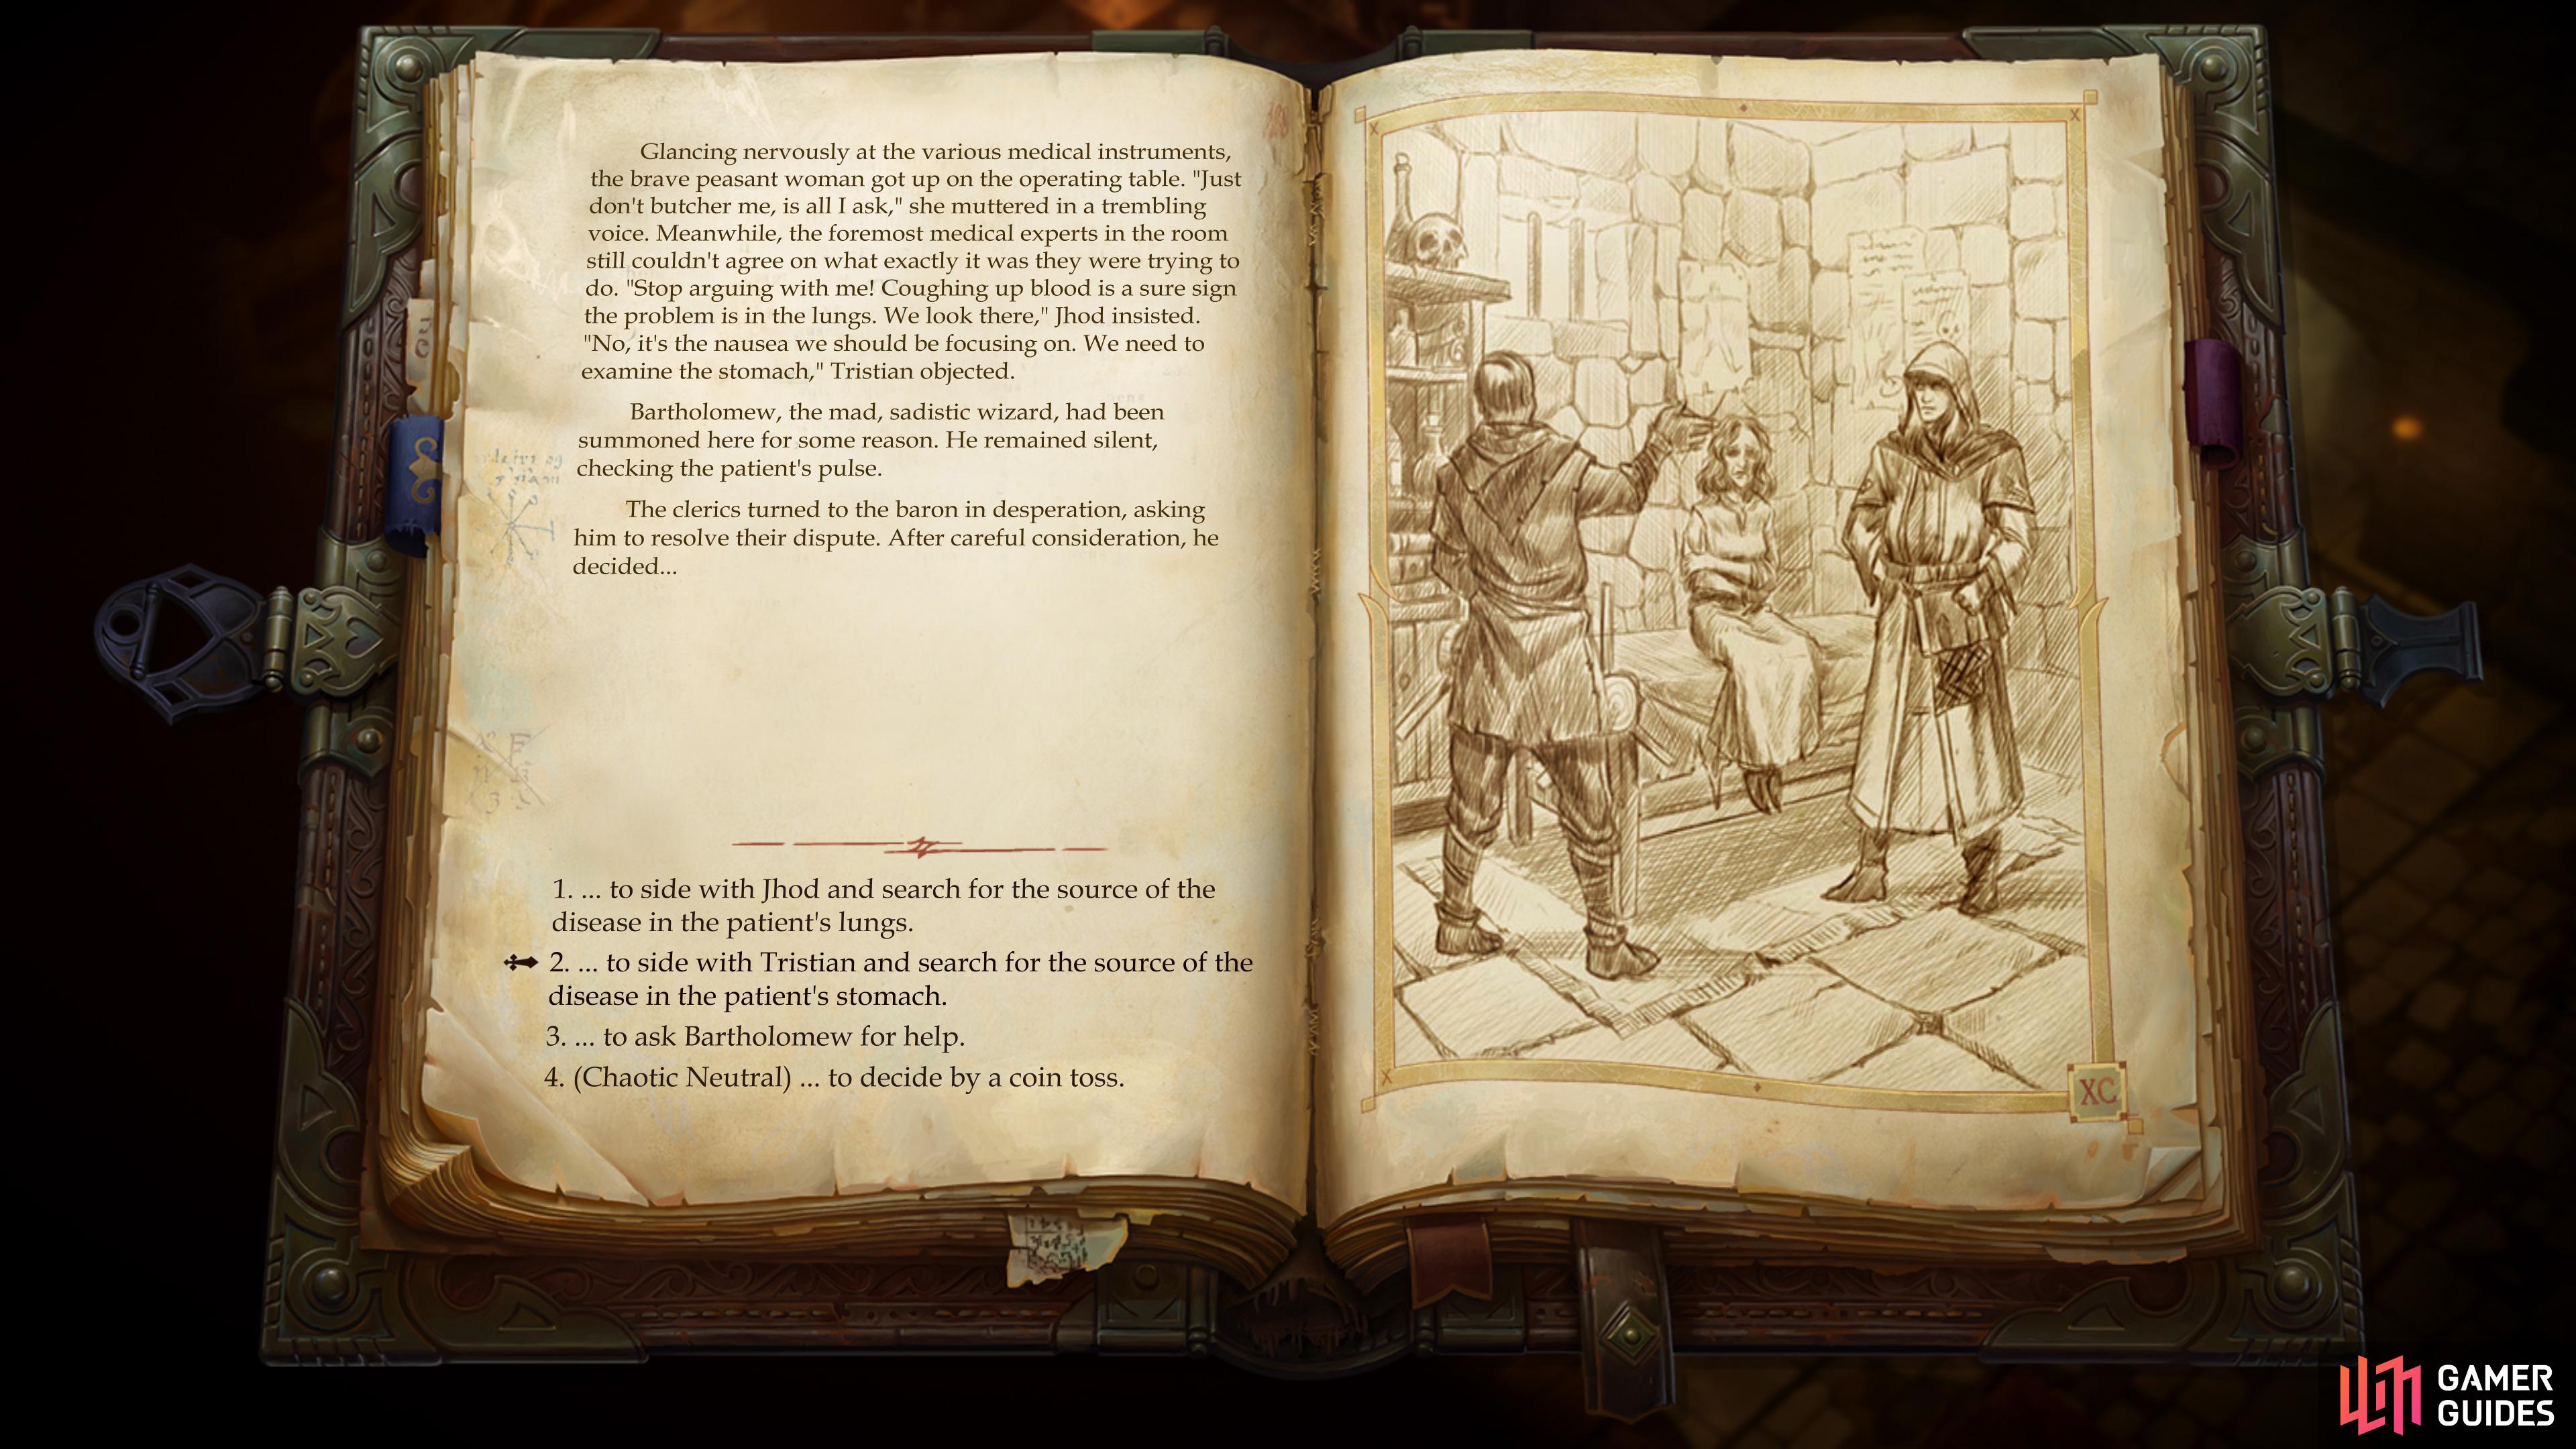
When you’re ready, go through with the Monster Invasion event (see above) and ultimately accept Jhod’s request to oversee the vivisection. After that you’ll find yourself in the prison-turned-field-hospital, where more dialogue will ensue. The take-aways here are Jhod and Tristian’s disagreement over the cause of the illness, or rather, whether it’s actually an illness, parasite, or curse. Exhaust their dialogue options, make a moral choice concerning the previous nature of their operation room, then follow them southwest through the prison. On the way you can talk to the patient, Madla Stasek, to learn about her humble life and selfless motives, but it’s not necessary.
When you’re ready to continue on, speak to Jhod (if you’ve got spells and potions to use, now is a fine time to use them!) and elect to start the surgery, which is played out as an Illustrated Book Episode.
During the vivisection, be sure to side with Tristian,
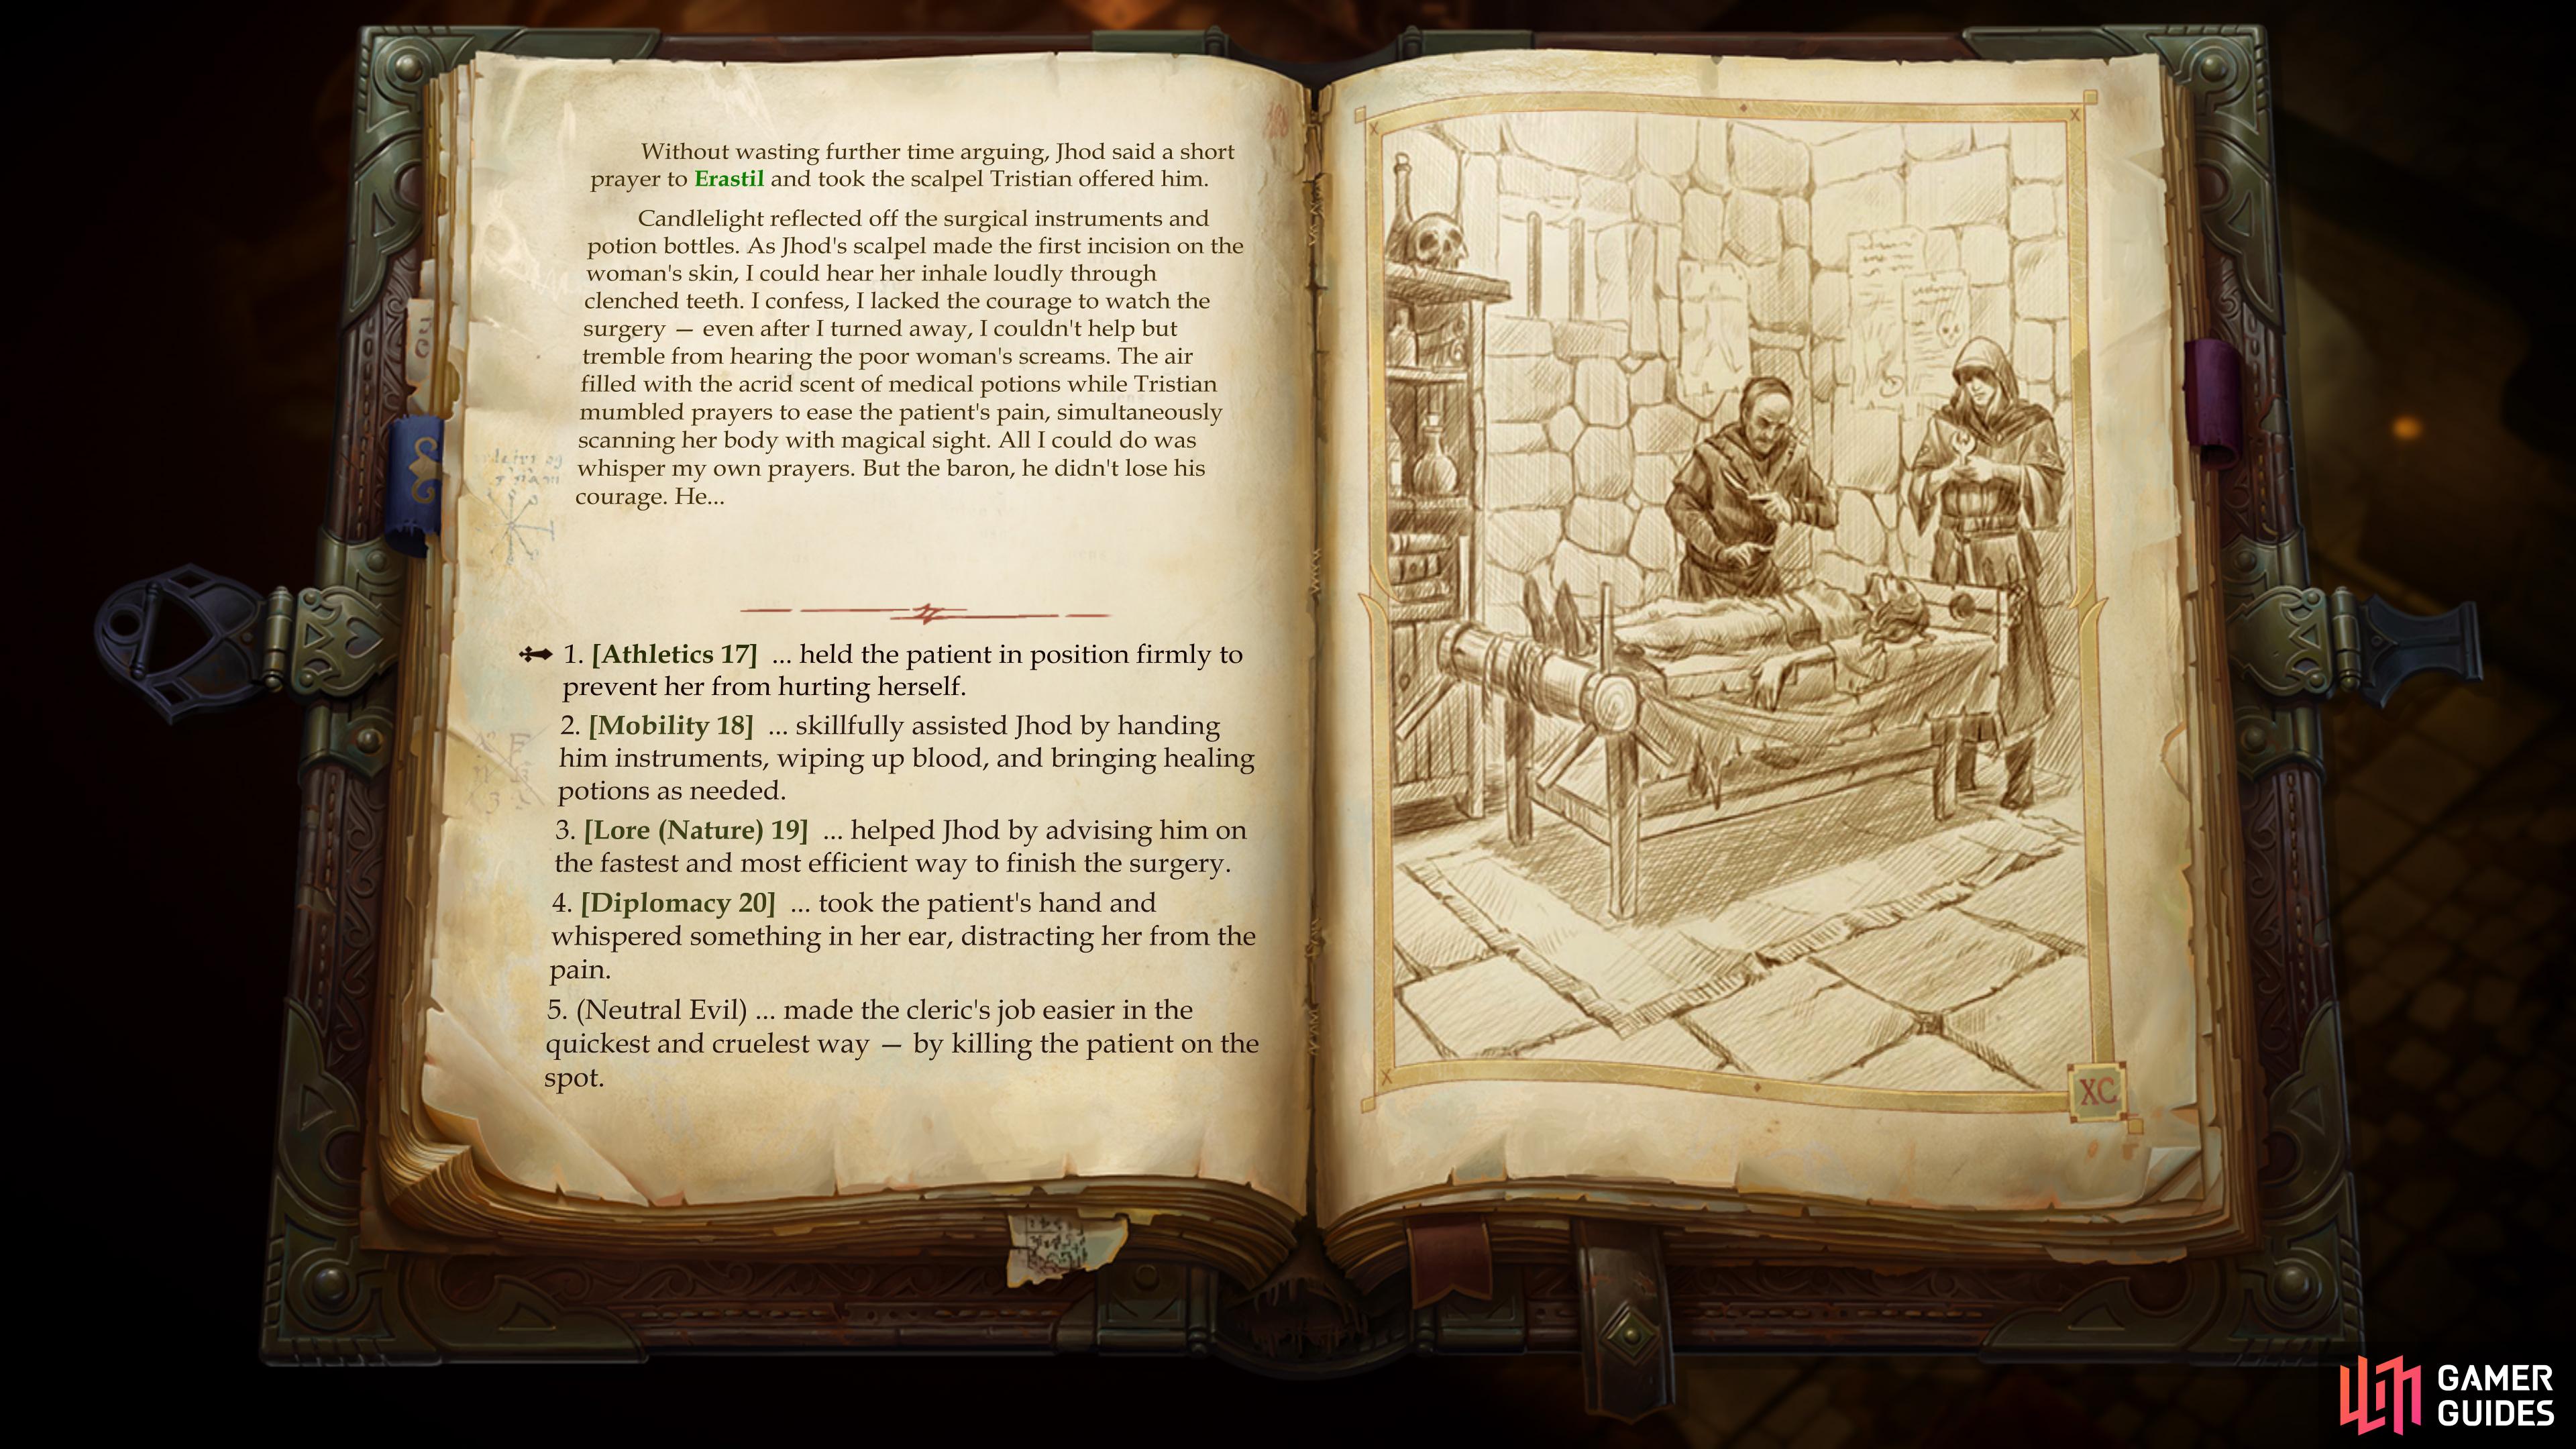
as it’ll lower the following skill checks.
The Surgery
As you saw in a previous interaction, Jhod and Tristian can’t agree on what the cause is. This is reiterated at the beginning of this episode, with Jhod wanting to look at the lungs and Tristian desiring to focus on the stomach. Both are basing their plans on the victim’s symptoms, and both seem to have merit, but only one, obviously, is right. If you want to finish this cleanly, efficiently, and with as little death and misery as possible, follow the instructions below:
- …to side with Tristian and search for the source of the disease in the patient’s stomach.
Sorry, Jhod. This doesn’t actually affect the outcome too much. Either way, the surgery proceeds much the same, as you’ll need to assist with an [Athletics], [Mobility], [Lore (Nature)] or [Persuasion] check. The difference is the difficulty. If you start cutting the wrong thing by siding with Jhod, these will require a check of 25-28 (depending on the check). Otherwise, if you side with Tristian (or consult Bartholomew) it’s a check of 17-20. You can also just kill the patient [Neutral Evil] and spare the moral conundrum entirely. The only downside to picking the easier checks is that you’ll get less XP for doing so (the XP gained for each check varies based on difficulty), but there is some incentive later on in the game if you manage to keep your patient alive.
Succeed at the check and the patient will survive; fail and the patient will die. Either way, you’ll find what you’re looking for… which may turn out to be more than you bargained for! A seed in the woman’s stomach seems to be the cause of her ailment, and your suspicions are confirmed entirely when the seed matures into a Ferocious Owlbear.
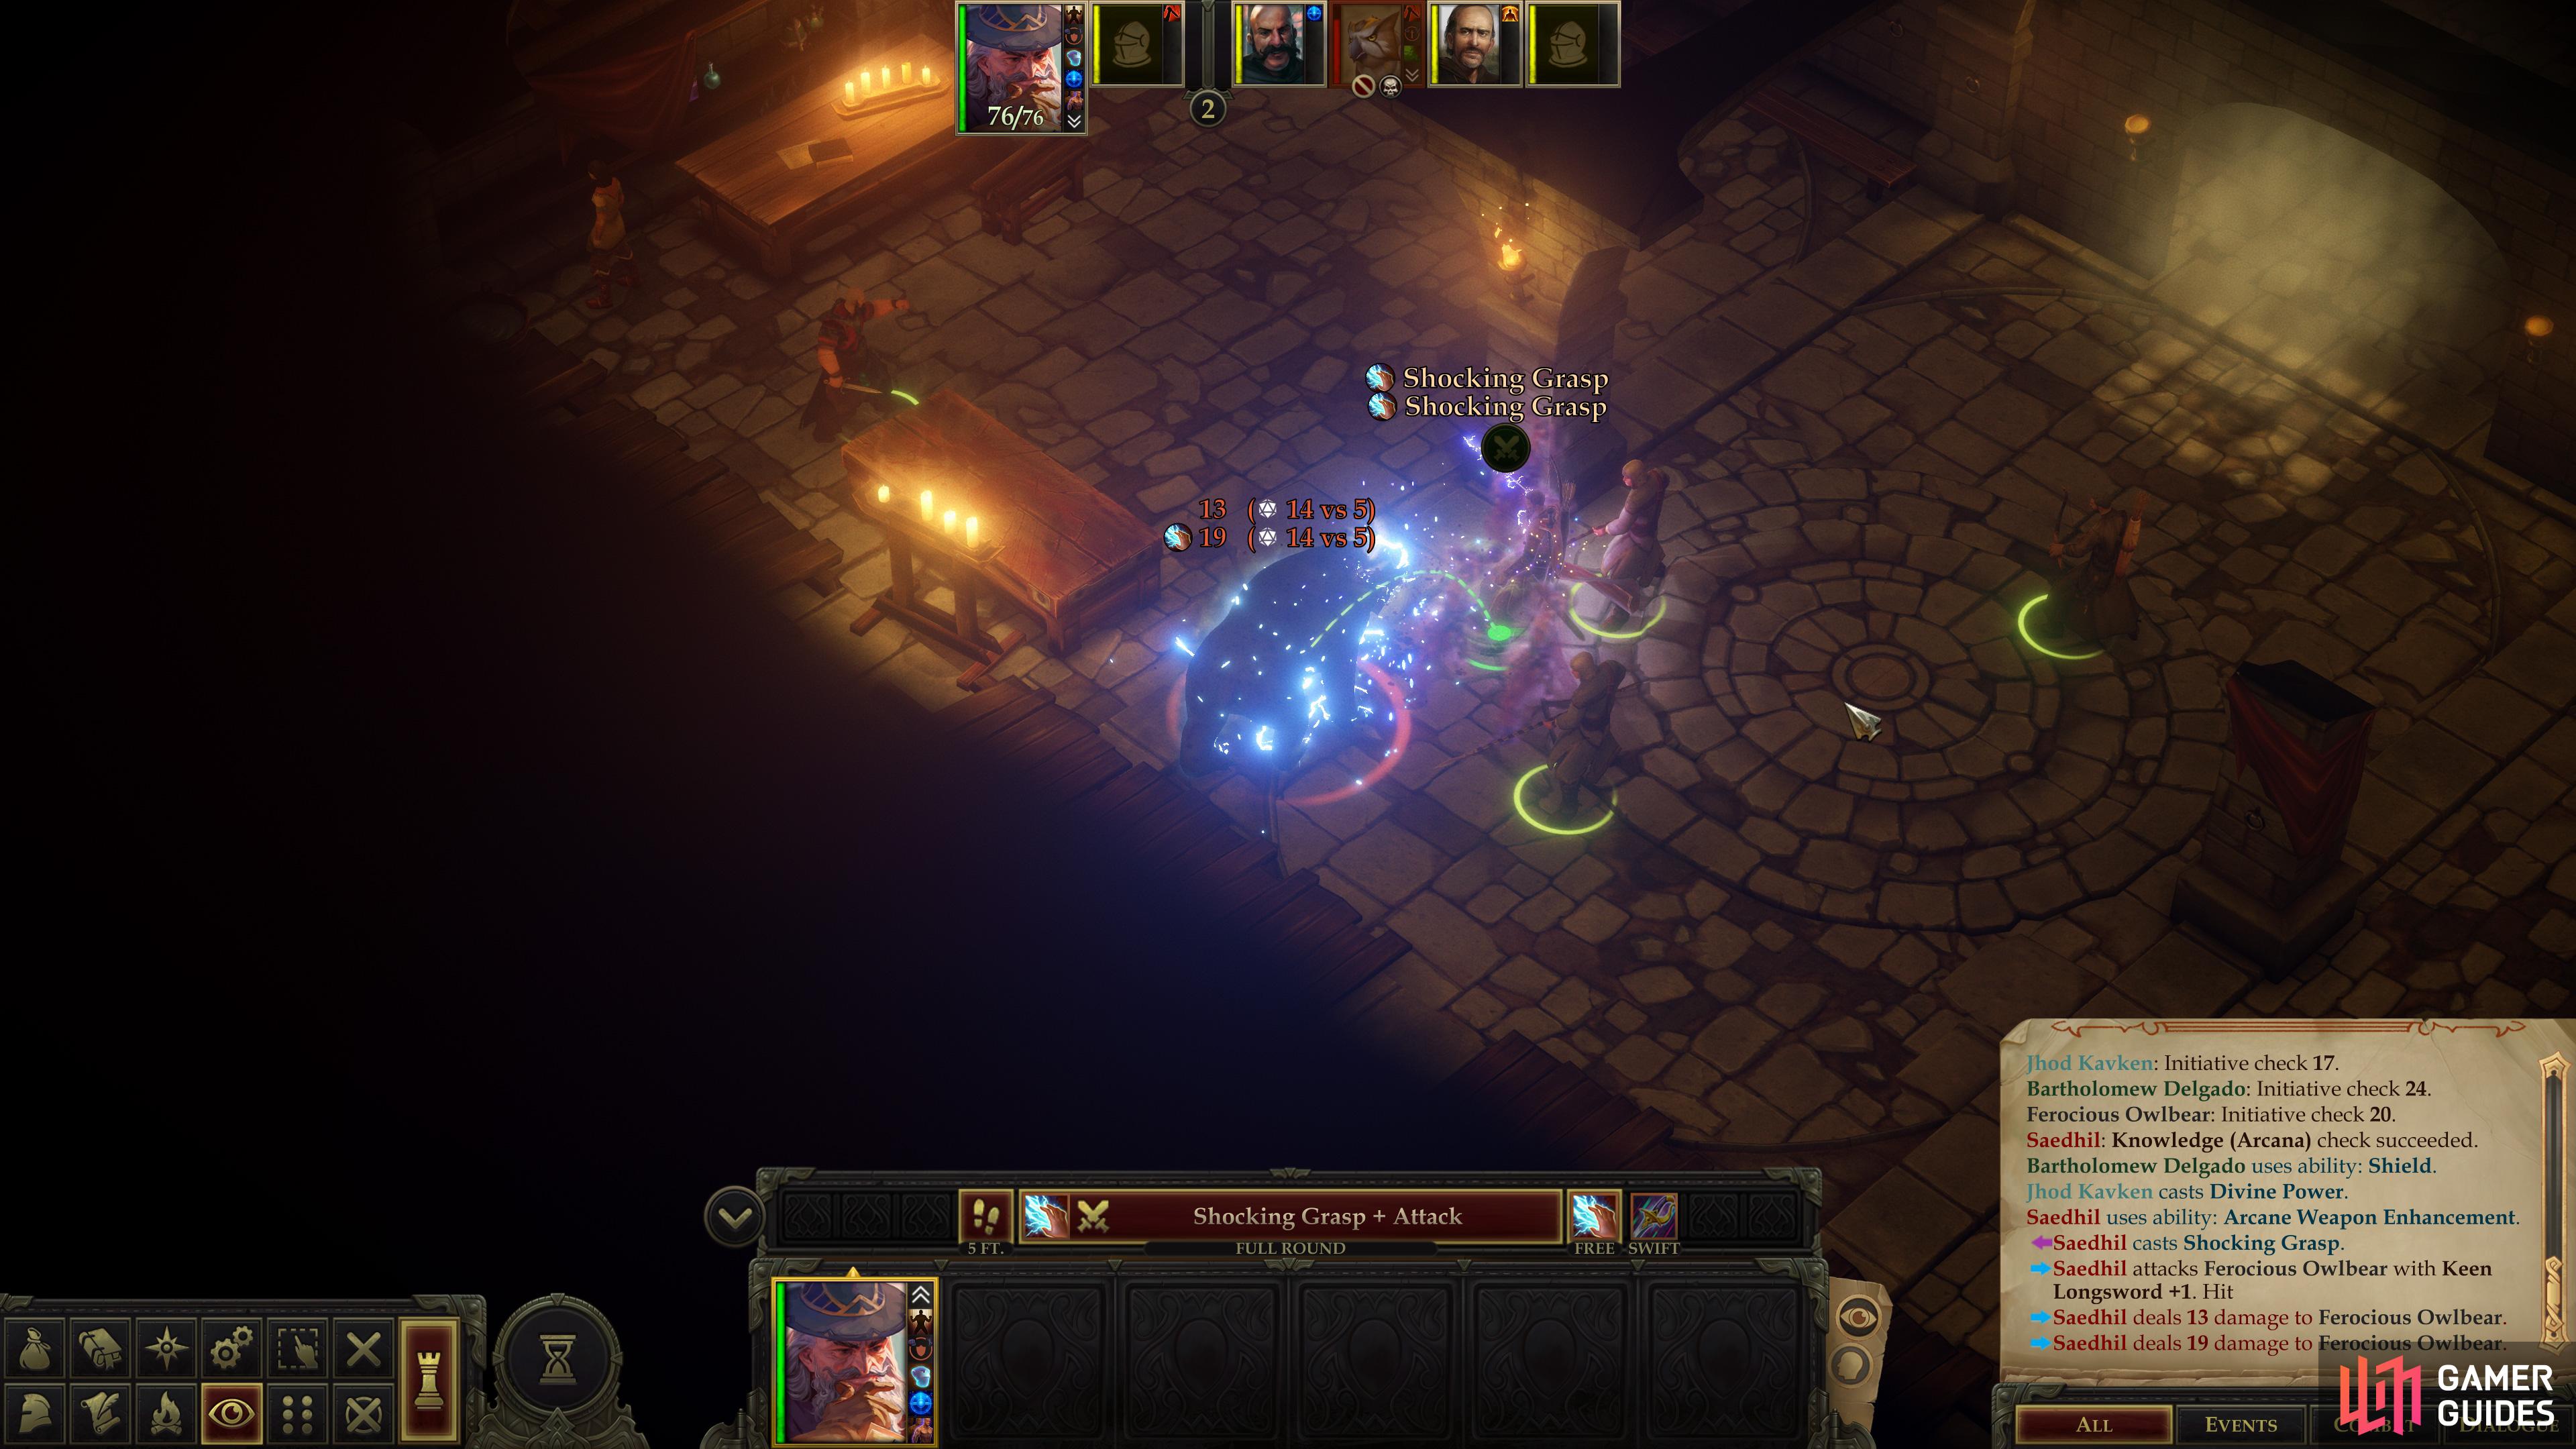
During the fight with the Ferocious Owlbear, your tactics will vary, by necessity. The guide’s suggested protagonist had no trouble dispatching the beast.
Battle: Ferocious Owlbear
This fight can be a bit tricky, as you only have control of your protagonist. Tristian, Jhod, the odd guard and Bartholomew (if you summoned him) will also help out, but expect to do a lot of the work yourself. The beast isn’t significantly different from the owlbears you fought during An Amusement for the Nobles… which means it has a hefty supply of Hit Points, a moderate Armor Class, a high Attack Bonus, three attacks per round and will deal 20+ damage per hit. If your Armor Class is less than 35, you’re in for a mauling if you remain close to the beast, and frankly, an Armor Class of 40 and some form of concealment might be called for if you want to feel safe. Duke it out with the beast if you can, use summons as fodder and ranged attacks if you can’t. If all else fails use potions, scrolls, wands… whatever you need to use to win.
| Reward: For discovering the cause of the monsters |
|---|
| 180 XP |
Put down the Ferocious Owlbear and Jhod will strike up conversation again, where he and Tristian will recap what happened. Tristian was right at nearly every step - it’s a parasite, not a disease or a curse, and of vegetative origin. Something that wants to destroy your barony, which is knowledgeable of - and capable and willing to use - monster-summoning seeds as the tool… This certainly sounds like the handiwork of your old friend, the Guardian of the Bloom. While it’s a promising lead, speculation, however plausible, doesn’t get you any closer to stopping this onslaught. Even if you can remove this parasite, you can’t possibly have enough surgeons and priests for the task. You’ll need to find the source of these seeds, and find out how they’re infesting their hosts.
To this end, you can continue with either the quest [Witch Hunt] or [Mother of Monsters]. Witch Hunt will be listed next, and is recommended first, if for no other reason than it’s the simplest of the two quests to complete.
| Reward: For surviving the Seed of Sorrow |
|---|
| 300 XP |
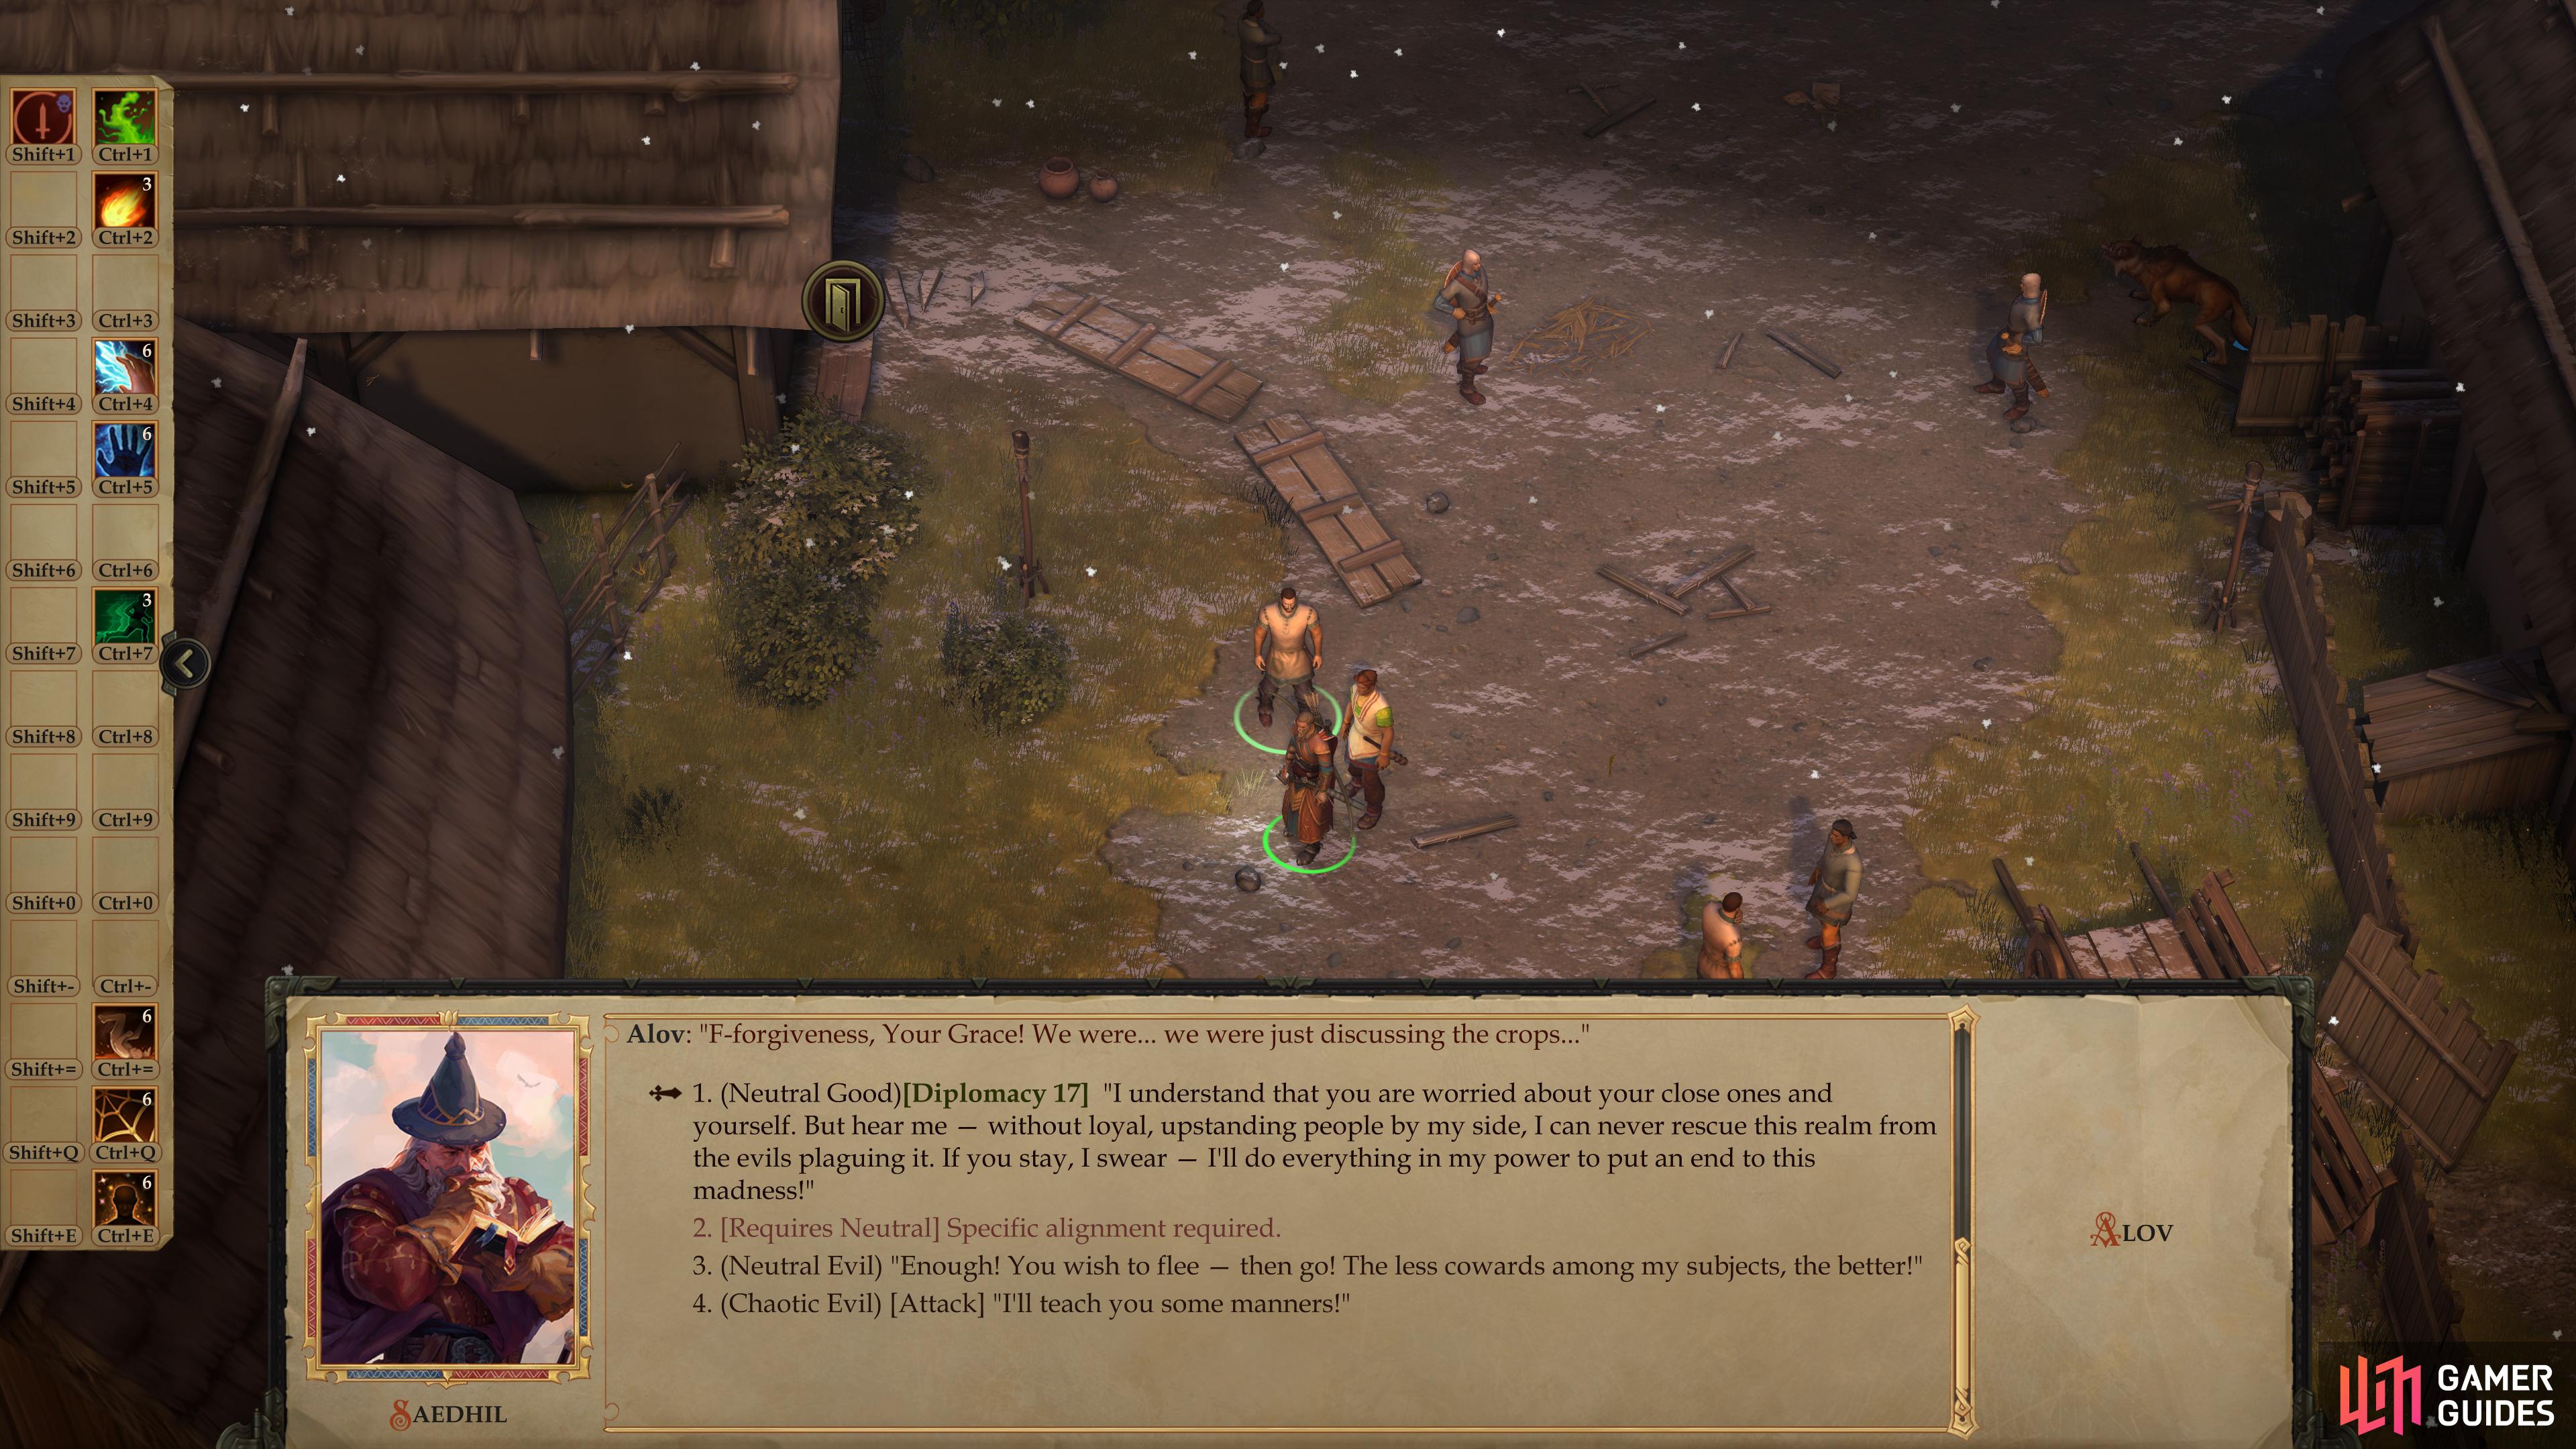
On the streets of your capital you’ll encounter two men arguing whether to abandon your accursed barony or try to weather the storm.
Signs of Unrest: Alov
Whichever you decide to pursue first, you’ll get to witness the effects of the plague on your citizenry the next time you exit your throne room, as you’ll bear witness to two peasants - Erick and Alov - arguing about whether they should abandon your lands or not. You’ll get to make an alignment choice here, either [Neutral Good], [Neutral], [Neutral Evil] or [Chaotic Evil]. The first of these requires a [Diplomacy 17] check to succeed. This encounter doesn’t have any immediate consequences, but convincing Alov to stay [Neutral Good] will prove useful to your cause later on.
:::Warning
Convincing Alov to stay will help you peacefully resolve some upcoming civil unrest.
:::
No Comments